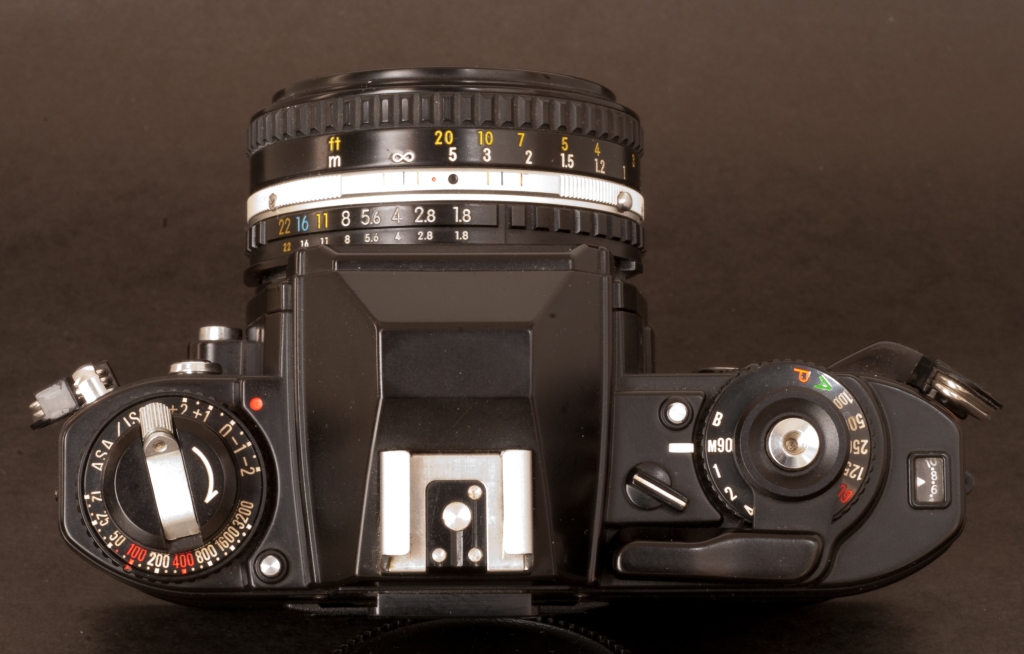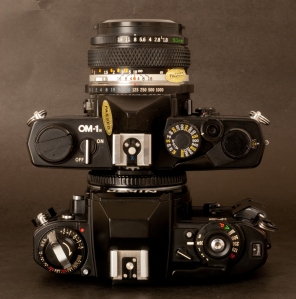
Viewfinders: coverage, magnification and eye relief

Eye Relief
Eye Relief

A large proportion of photographers wears prescription glasses – I know, I’m one of them – and almost everybody wears sun glasses occasionally. But surprisingly, until high eye point or high eye relief viewfinders appeared – on the Nikon F3 HP in the early eighties, photographers with glasses could not see the integrality of the scene – let alone the aperture or speed information on the LED displays surrounding the view of the scene- without having to move their eye balls up and down and left to right.

As far as viewfinders are concerned, some cameras are better than others, though. The quality of the viewfinder of a manual focus camera is influenced by three factors:

  • Coverage: It’s the percentage of the image captured through the lens which is going to be shown in the viewfinder. 100% coverage is desirable – but expensive to manufacture, and only top of the line cameras (the real “pro” models) show the integrality of the scene in the viewfinder. Most SLRs show between 85% and 95% of the scene. Point and shoot cameras, (more precisely the few P&S which still have an optical viewfinder) are much worse. The best of them, the Canon G11 only shows 77% of the scene that will be captured through the eye piece.
  • Magnification: If the magnification was equal to 1, an object seen through the viewfinder would appear to be the same size as seen with the naked eye (with a 50mm lens on a 35mm camera). The photographer could even shoot with both eyes open. If the magnification ratio is lower than 1, then the object will appear smaller in the viewfinder than seen with the naked eye.Magnification has an impact on composition and focusing. If the magnification ratio is very low (below 0.4) the image becomes so small that it’s difficult to compose the picture. Magnification is also a critical factor for picture sharpness on manual focus cameras: the accuracy of the focusing is directly related to what the photographer can see on the matte focusing screen, and the higher the magnification, the easier it’s going to be for him or her to focus accurately.On a 35mm single lens reflex camera, the magnification is measured with a 50mm lens, and varies between 75 and 95%. Full frame digital SLRs have viewfinders offering comparable magnification values. dSLRs with so-called APS-C sensors advertise very high magnification ratios, but after the crop factor of the small sensor is taken into consideration, the real magnification value lies between 0.46 and 0.62. Read Neocamera‘s article for more information about the real viewfinder magnification ratio of dSLRs.
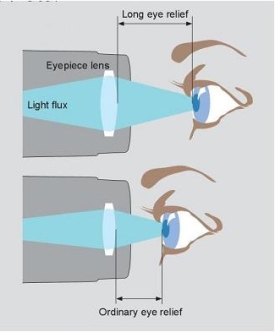
  • Eye relief: “The eye relief of a telescope, a microscope, or binoculars is the distance from the last surface of an eyepiece at which the eye can be placed to match the eyepiece exit pupil to the eye’s entrance pupil.” (Wikipedia, eye relief entry).The longer the eye relief, the more comfortable the camera is going to be for a photographer wearing glasses, but the smaller the focusing screen is going to look.A photographer wearing glasses will need an eye point of approximately 20mm (depending on the dimensions of the frames and the thickness of the lenses of the glasses) to be able to see entire the viewfinder image, plus the exposure information without having to move his eye balls left to right and up and down. Camera manufacturers describe them as “High eye Point” or HP viewfinders.

A comparison between a few 35mm cameras

As is often the case with engineering, a good design is the result of a successful compromise between conflicting requirements. Most photographers desire a long eye relief, but at the same time want a magnification ratio high enough, so that they can compose their image with precision and focus accurately. With the F3, Nikon offered 2 versions of its standard viewfinder. The DE-2 of the original F3 had an eye relief of approximately 20mm, and a magnification of 80%; the DE-3 viewfinder of the F3 HP had a much longer eye relief (25mm) but a smaller magnification ratio of 75%. The market decided in favor of the longer eye relief and the DE-3 became the standard viewfinder of all subsequent versions of the F3. The advent of autofocus SLRs accelerated the trend towards longer eye relief and lower magnification ratios.

Subjective results
The experience confirms the figures. The Nikon F3 has by far the best viewfinder, followed by the tiny Olympus OM-1. The Nikon FM-FE-FA are far behind.

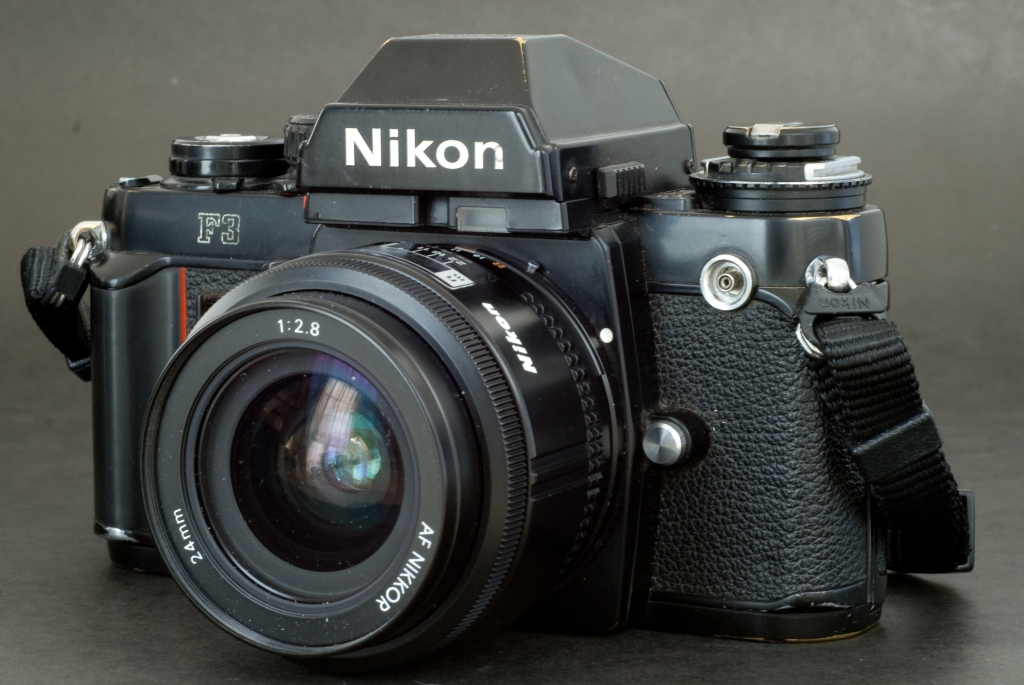
  • Nikon launched the F3 with a standard viewfinder (model DE-2) which offered 100% coverage and already had a relatively long eye point. The standard F3 can comfortably be used by photographers wearing glasses. A few years later, Nikon introduced another version of its flagship camera, the F3 HP, which was the first to offer a viewfinder with the very long eye point of 25mm (one inch). The long eye point came at the cost of a lower magnification (down to 75%) and an higher weight. The F3 HP was a sales success, and all subsequent F3 cameras would come from Nikon with the HP viewfinder (the DE-3).
  • The Olympus OM-1 has an incredible viewfinder, with a very high coverage and a very high magnification. The viewfinder does not offer any exposure information besides the match-needle arrangement at the right of the image, and even if the eye point is rather short, the photographer has the impression he’s watching all of the scene. Subsequent OM models offered a little more information at the periphery of the viewfinder and a little less magnification, and in a world where hi-point viewfinders were becoming the norm, they were far less remarkable than the OM-1.
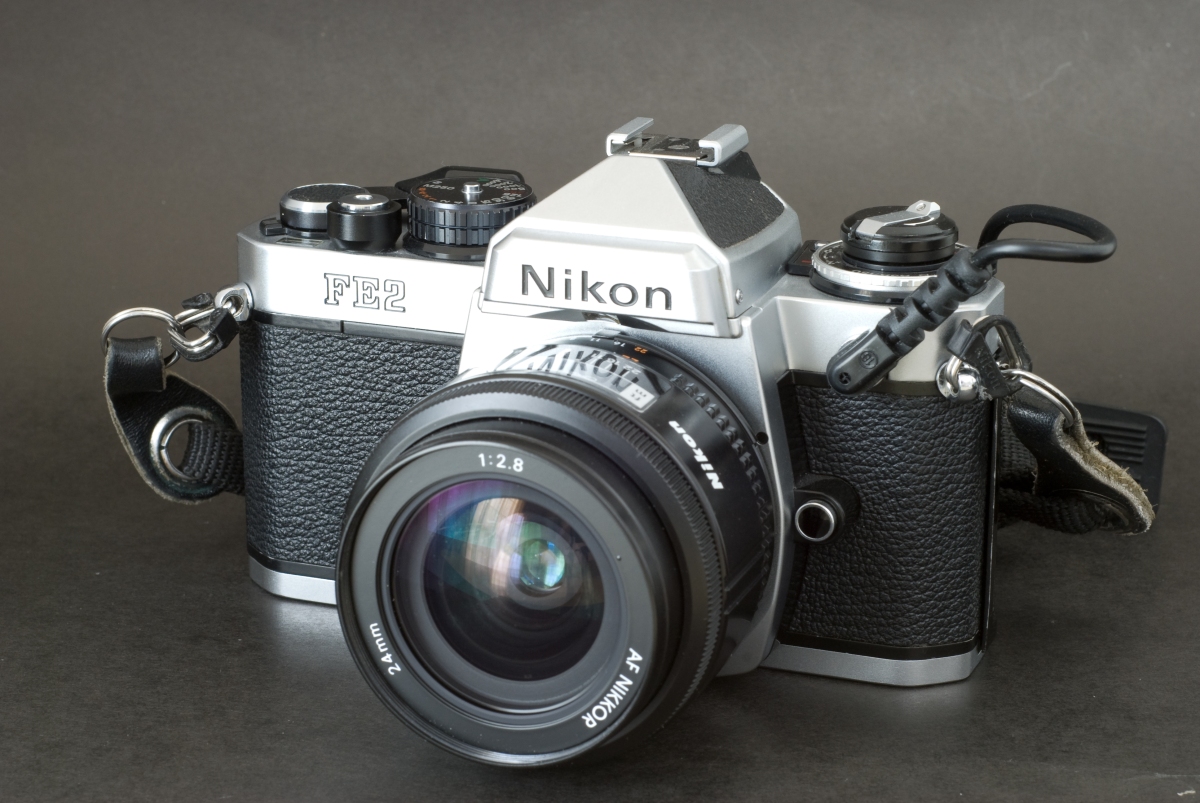
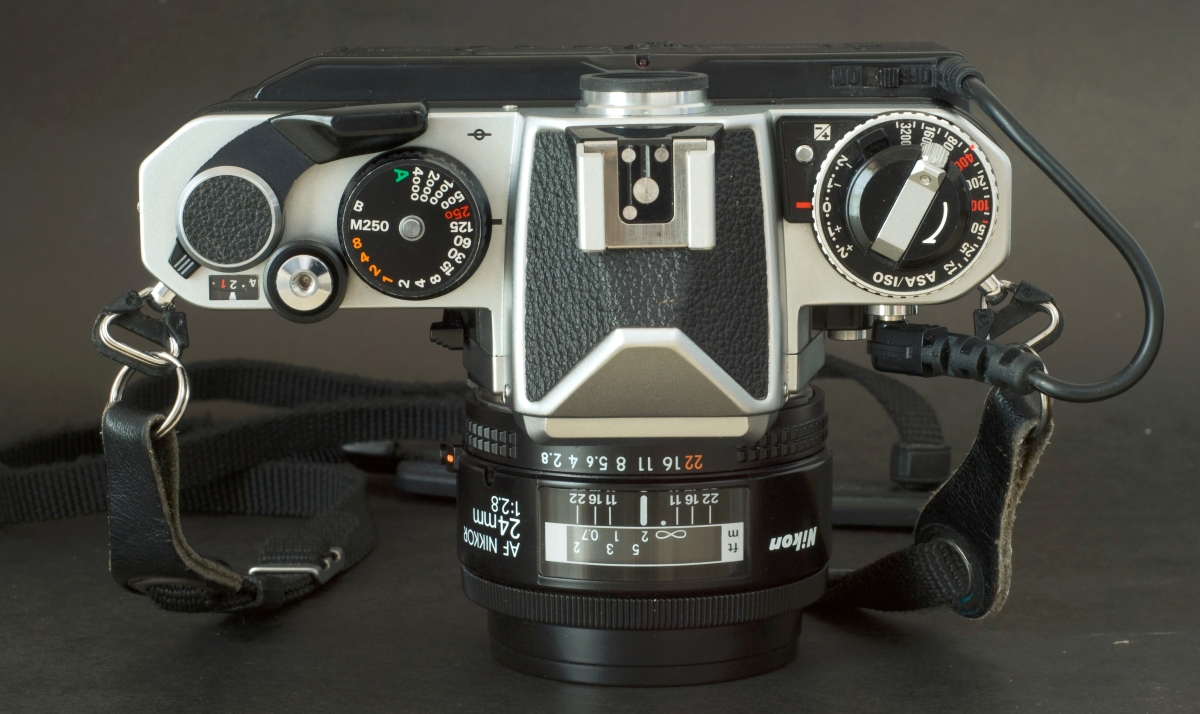
  • The Nikon FM, FE and FA provide more exposure information than the Olympus cameras (the selected aperture, in particular). Compounded with the very short eye relief (14mm), it makes it impossible for a photographer wearing glasses to see the whole scene and the exposure information at the periphery without some eye movements. While similar on paper to the other compact Nikon SLRs, the viewfinder of the Nikon FG fares worse than its stablemates in real life.

Rangefinder cameras work by different rules. Their viewfinder covers far more than what will be captured on the film, and very little exposure information is displayed in the viewfinder. Even if the Leica M offers an eye relief of only 15mm, a photographer wearing glasses will not have any problem visualizing the image in the viewfinder.

With a few exceptions such as the Canon G11, Point and Shoot digital cameras don’t offer optical viewfinders anymore. The G11’s may be used as a last resort in a very bright environment, (when using the LCD is not an option), but it’s very small and very unpleasant to use. Low end digital SLRs with small sensors (Four Thirds or APS-C) are equipped with very low magnification viewfinders, and have a very pronounced tunnel effect. Manual focusing is not an option, and composing an image with precision can be challenging. Mid-level dSLRS (like the Canon 7D or Nikon’s D90 and D300) have much better viewfinders, with relatively long eye relief (22 and 19.5mm respectively) and real magnification ratios of approximately 0.625.

More about it

Luminous Landscape – Mike Johnson’s “Understanding SLR viewfinders”

Neocamera: Viewfinder of digital cameras
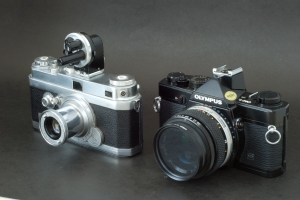
Foca *** with a Foca turret viewfinder / Olympus OM-1n. The Foca is a French rangefinder camera from the late forties, and its viewfinder is unusable if you wear glasses. And hardly usable even without them.
Model Coverage Magnification Eye Point Comment
Nikon F3 HP (DE-3 finder) 100 % 75% 25mm The camera that introduced Hight Point viewfinders to the public.
Nikon F3 with the standard DE-2 viewfinder 100 % 80% Not known. Probably 20mm The original pre-HP viewfinder. Even with glasses one can easily see all of the scene and the little LCD display.
Olympus OM-1 97% 92% Not known. Probably 15mm Incredible. How can such a small camera deliver such a large image? Short eye point, but since the viewfinder does not provide any exposure information at the periphery of the frame, not much of a problem.
Nikon FM, FE, FE2, FA 93% 86% Not known. Probably 14mm Short eye point, plenty of information at the periphery of the viewfinder. Not the best recipe for photographers wearing glasses.


Innovative Metering – World Class Shutter – Conventional Ergonomics – the Nikon FA

The Nikon FA is the last major manual focus SLR launched by Nikon. An evolution of the FM2 and FE2 cameras, it shares with the latter most of its body shell, a very fast shutter (up to 1/4000sec., 1/250sec. flash sync speed) and a on the film (OTF) flash metering mechanism. It finally catches up with Canon’s A1 and offers the same four automatic exposure modes (aperture and shutter priority, program and semi-auto).

Its “Automatic Multipoint Metering” (AMP) – a world premiere – is its real claim to fame. Better known under names such as “matrix”, “evaluative” or “multi-segmented” metering, it is now the default metering system of every dSLR in production.

Launched in 1983, this conservatively styled camera with very conventional ergonomics had a relatively short sales career. It was made obsolete in 1985 when Minolta took the market by storm with its first autofocus SLR, the 7000 (Maxxum 7000 in the US). Minolta’s competitors, Nikon included, spent the best part of the following three years trying to catch up. The FA stayed on Nikon’s catalog until 1988, and was not replaced. Its semi-automatic sibling, the FM2n would be sold until 2001, when the FM3a, a sort of combination of the best characteristics of the FM2 and the FE2, was launched.

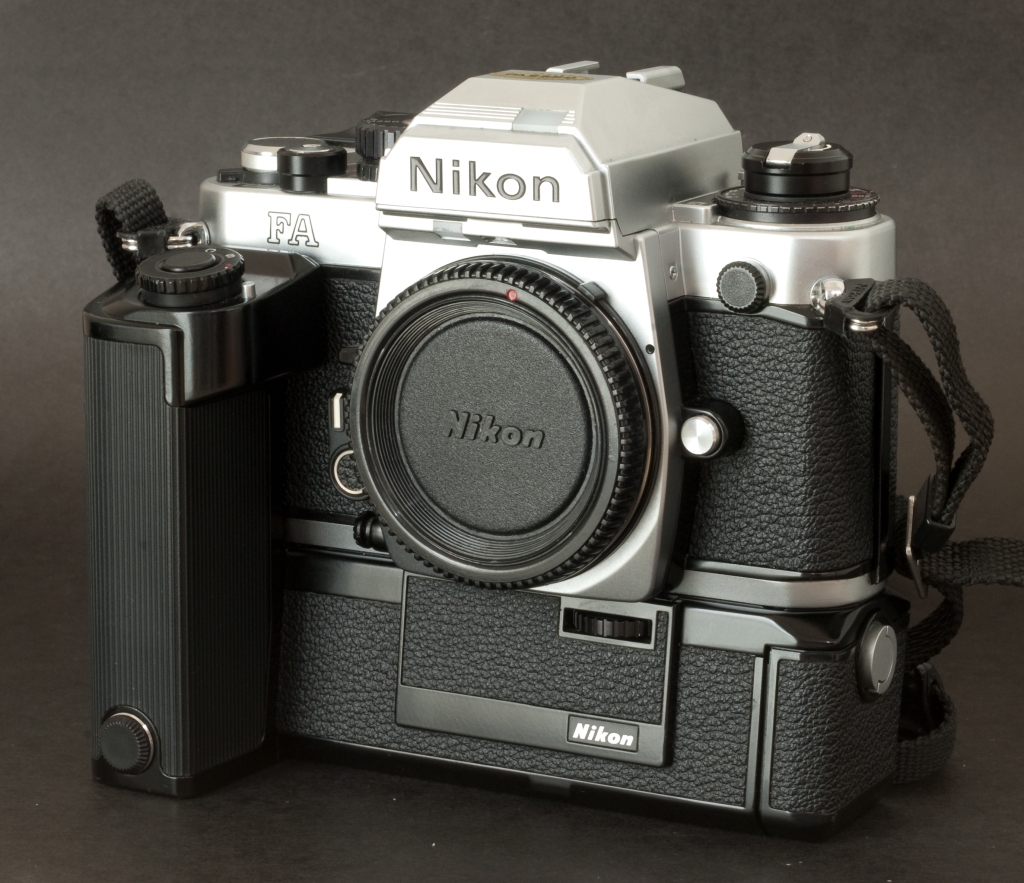
Nikon FA with the MD-15 motor
An impressive (and heavy) camera: the Nikon FA with the MD-15 motor drive.

The metering system

Until the FA was launched, most of the cameras only offered some form of center weighted metering: the exposure sensor evaluated the luminosity of the whole scene, and because the sky is typically in the upper third of the frame, and the main subject of the picture in the center, it was designed to give more importance to the portion of the picture located at the center of the lower part of the frame.

It worked for most of the cases. If the subject was back-lit and not centered, the photographer had to determine the exposure with the subject at the center of the frame, memorize the exposure settings, and move the camera to compose the desired picture.

Some high end cameras also had a second exposure metering system, which evaluated the luminosity of a much narrower portion of the scene, almost a spot in the middle of the viewfinder. But spot metering and exposure memorization are not always easy to use,  and are far from being idiot proof. The engineers at Nikon were pretty sure that with the newly unleashed power of integrated circuits, they could develop a new approach.

It was introduced with the FA, as the Automatic Multi Pattern (AMP) exposure system. The camera was equipped with a database containing the mathematical description of thousands of real world pictures taken by Nikon technicians, with the exposure value that had given the best results in each situation. The light meter was divided in five zones (a large central zone, two zones at the bottom left and right, two zones at the top, left and right also), and the electronic circuit would correlate the exposure value of each zone with other elements such as the focal length of the lens to define the characteristics of the scene, and associate it with one of the many typical pictures described in the database of the camera.

Nikon FA (knob controlling the exposure mode: matrix or center weighted)
Nikon FA: the small and unmarked knob controlling the exposure mode (matrix or center weighted) is on the side of the lens mount housing, at the top of this picture

The Nikon engineers were so sure of the superiority of their AMP that they did not even equip the FA with an exposure memorization button – which so far had been a standard feature on high end automatic cameras. They just installed a little unmarked on-off switch on the right side of the lens mount housing, that conservative photographers could use to set the camera in the conventional “average center weighted metering” of yesteryear.

More about Matrix Metering and the alternatives developed by other manufacturers in this article of CamerAgX.

The ergonomics

The beauty of most manual SLRs resides in part in the simplicity of their commands. Each knob, switch, lever has only one function. If you turn the aperture ring on a semi-auto camera, the pre-selected aperture will change. Similarly, if you turn the shutter speed knob , the selected shutter speed will change.

The introduction of a automatic exposure did not really change the ergonomics. On a camera with aperture priority automatic exposure, you just had to select the “A” position of the shutter speed knob to let the camera determine the shutter speed automatically, and similarly on a camera with shutter speed priority, positioning the aperture ring on “A” indicated that you were willing to let the automatism manage the aperture for you.

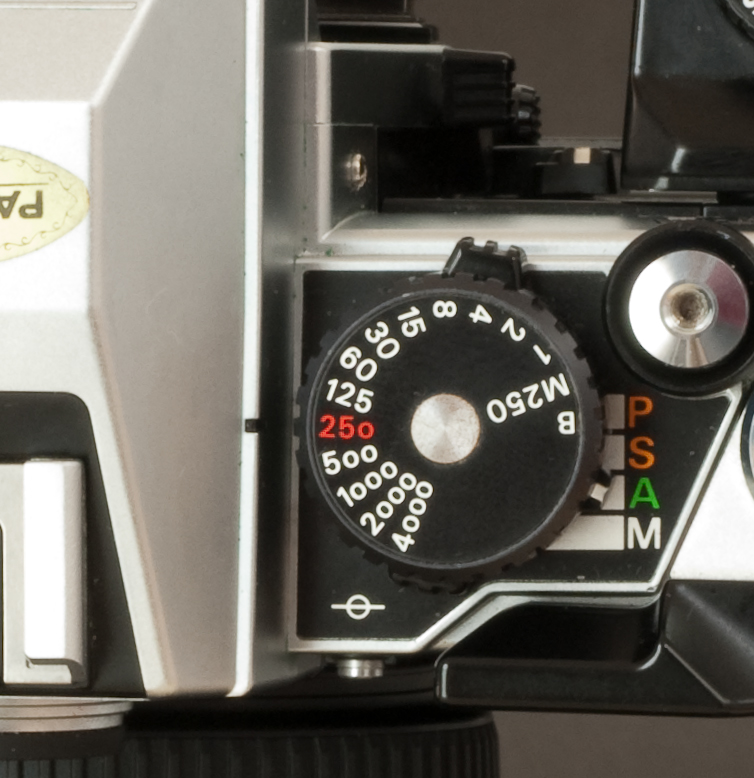
Developing simple ergonomics became more difficult with cameras that could alternatively operate in semi-auto, aperture priority, shutter priority and program auto exposure modes. Most manufacturers added a big four way switch on the top panel, which could be set in Program, Shutter, Aperture or Manual. But when the PSAM switch was set on P or A, the shutter value did not match what was shown on the shutter speed knob, as shown in the example below.

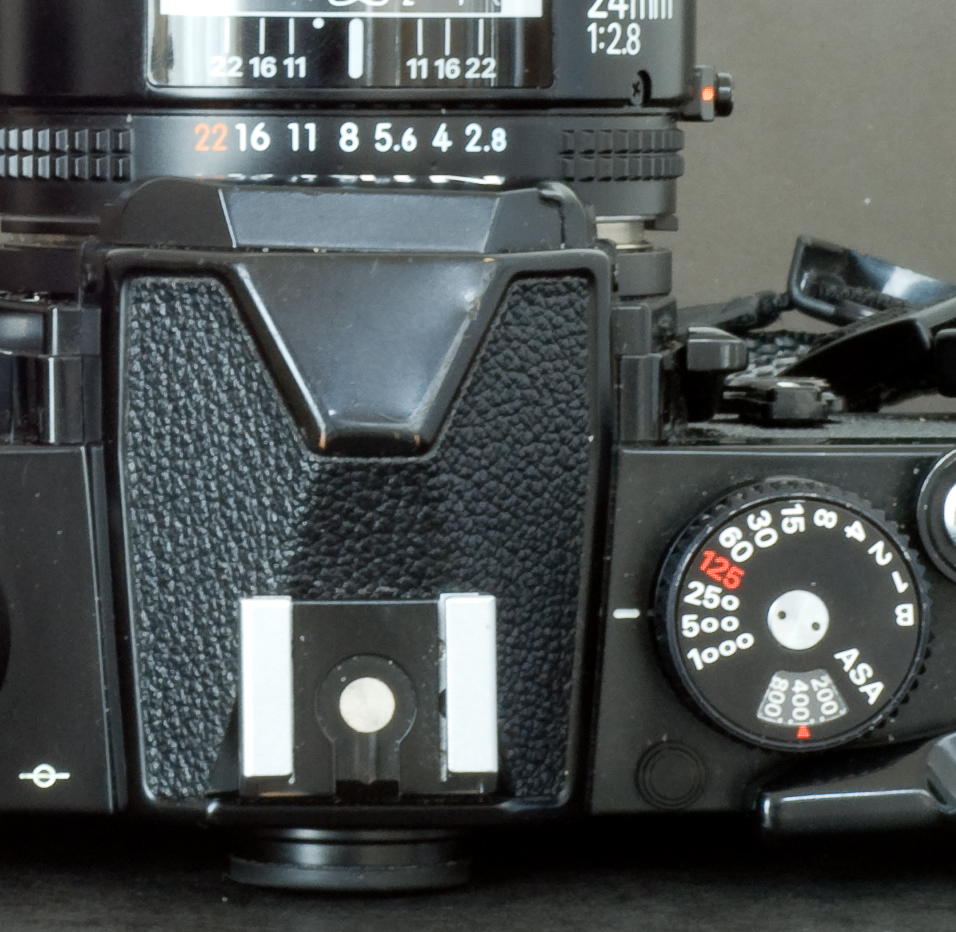
Nikon FM detail of the shutter speed knob
On a semi-auto camera (like this Nikon FM) the shutter speed knob and the aperture ring of the lens show the shutter and aperture settings that will be used to take the picture.
Nikon FA detail of the shutter speed knob and PSAM selector
On the Nikon FA, the value displayed on the shutter speed will not necessarily be used to take the picture. The camera is set in “A” (aperture priority) mode and the shutter speed will be determined by the electronics of the camera.

On the Nikon implementation, the photographer also had to remember to set the aperture ring to the smallest aperture, and the indications in the viewfinder (a very small LCD display showing alternatively the speed or the aperture selected) did not really help.

The ergonomics of modern “all-electric” cameras are totally different. The aperture ring and the speed knob are gone, leaving room to an “electronic input dial” and to a large LCD. Not as intuitive and immediate as the knobs and rings or yesteryear, but far simpler than the complex combinations of knobs and switches of the Nikon FA.

Using a Nikon FA as an everyday camera

When it was launched, the FA was nicknamed the “techno-camera”. Positioned at the top of the FM-FE family of cameras, it came with an impressive specs sheet: matrix metering, multi-mode exposure automatism, very fast shutter, on-the-film (OTF) flash metering. Its detachable motor drive was reasonably fast (3.2 frames per second) and could power the camera (and save the precious LR44 batteries).
With the exception of the prism housing (in poly-carbonate), the camera is still built in metal, and is very nicely finished. If the complex electronics from the early eighties survived, the FA is still perfectly usable, and will take great pictures.

Should you buy a Nikon FA? That’s a matter of taste. More recent cameras (film or digital) provide the same technical features, but with their large LCDs and their electronic dials, they’re easier to use and less conducive to set up errors than the FA. The AMP metering of the FA is still relatively primitive – it did not reach the level of performance of today’s matrix metering, and it deprives the photographer of his control over the exposure. Switching to the center weighted mode does not really offer more control, unless the semi-auto exposure mode is used, because no exposure memorization mechanism has been provided.

The Nikon FE2 or the FM3a share some of the technical advances of the FA (the titanium shutter and the flash metering in particular), but their simpler ergonomics (match needle in the viewfinder, shutter speed knob and aperture ring always showing the actual settings) as well as their more predictable exposure metering make them a better fit for photographers who want to be in immediate control of the basic settings of the camera.

The value of the camera on the used market reflects this. In spite of its impressive list of specs, the FA sells for approximately the same price as the Nikon FE2 ($125 to $200 on eBay depending on the condition of the camera), below the FM2n (approx. $250) and far below the FM3a ($500 and above).

Nikon FA with handgrip

The hand grip (on the left) has to be removed to leave room for the MD-15 motor. As a consequence, this tiny accessory has often been lost and most surviving FAs don’t have it.


More about the Nikon FA

The Usual Suspects…

Nikon’s own words: Imaging Products-Nikon Family- Nikon FA and FE2

Photography in Malaysia (MIR) The Nikon FA
Ken Rockwell: The Nikon FA


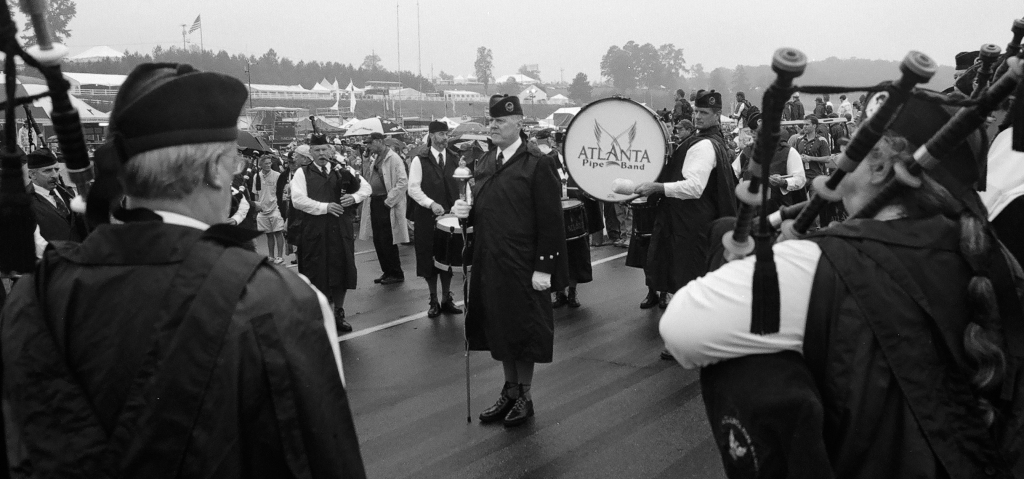
American Petit LeMans - the Atlanta Pipe Band. Nikon FA - Kodak CN400
American Petit LeMans – the Atlanta Pipe Band. Nikon FA – Kodak CN400

Nikons’s most advanced manual focus “ultra-compact” SLR: the Nikon FG


In 1972, Olympus launched the OM-1. Much smaller and lighter than any other single lens reflex (SLR), it opened the path for a new generation of more compact cameras. Nikon’s own FM (launched in 1977) was remarkably smaller than the Nikkormat cameras it was replacing, but still a tad bigger than the Olympus OM-1n. Built like a tank, it was not light, either.


It would take another model, deliberately designed for the beginners, the Nikon EM (1979), to finally beat the OM-1 at its own game (weight: 460g against 510g, width: 135mm instead of 136mm). Small and light, the EM had a plastic (polycarbonate) body over an aluminum chassis, an aperture-priority exposure control system, and very few ways to over-ride the automatism. A magic -2EV button could be used for back-lit scenes, and that was about it: there was no semi-automatic exposure mode. It could use all Nikon’s previous AI (auto-indexing) lenses, as well as a new series of cheaper lenses (the E-Series) launched for the occasion. The E-series lenses were smaller and less elaborate than the other Nikkor lenses, but some of them (like the 50mm f:1.8) gained a very good reputation over time. It has to be noted that the E-Series lenses were the first to use the AI-S version of the F mount. Geeks can learn more about the evolution of the lens mounts of SLRs in the pages published a few months ago in this blog. 50 years of lens mount evolution.


Nikon FG
Nikon FG


In 1982, Nikon extended their “ultra-compact SLR” range with the FG. It retained the platform, the dimensions and the shutter of the EM, but its electronics had been revised to incorporate two exposure modes, a semi-auto and fully automated program adjusting the aperture and the shutter speed. It also adopted the On the Film (OTF) flash metering system of the FE2. Not a pro camera yet, but not a beginner’s camera anymore.


To this day, the FG remains the smallest of the manual Nikon SLRs targeting the “advanced-amateur” market. A few “all-plastic” autofocus SLRs tipped the scales at 350g in the subsequent years, but Nikon’s digital reflex cameras are all bigger and heavier.


Shooting with the FG


The FG was available in two versions: “chrome” or black. Both had a small removable grip at the right of the body, and looked like smaller copies of the F3. After all these years, the FG is still a very nice little camera. Like the EM, it’s built around an aluminum chassis, and the body itself is in polycarbonate. The commands are simple and well organized. A single selector controls the shutter speed (for semi-automatic operation) and the type of exposure automatism (aperture priority or program). When the program mode is selected (after pressing a safety lock), the aperture ring of the lens has to be set at the smallest aperture. If the photographer forgets to set the aperture, the “overexposure” LED will flash in the viewfinder. The shutter is taken over from the EM and can not offer anything better than 1/1000 sec, with a flash synchro speed of 1/90. Incidentally the shutter still works at 1/90sec when the batteries are dead.


There are few other controls on the FG. A switch disables the warning beeps that the camera emits in multiple occasions, and a push button on the left side of the body can be used to open-up the exposure by 2 stops, to prevent under-exposure in back-lit scenes. There is no way to switch off the camera, and the best way to prevent battery drain is to leave the shutter speed selector on the manual 1/90sec setting when the camera is not in use.


Nikon FG - The commands
Nikon FG – The commands


The viewfinder is one of the places where savings were made. With 0.84x magnification and 92% coverage, its performances are similar to the FM or the FE’s, but remarkably inferior to the exceptional OM-1, which in spite of being so compact, still combines a magnification of 0.92x with 97% coverage. At the right of the viewfinder, the photographer will find a scale representing the shutter speeds, with one or many (up to three) red LEDs showing the actual shutter speed and/or the ones recommended by the metering system. Red LEDs, as usual, happen to be invisible when the camera is used in a bright environment.


Derived from the EM and largely built in plastic, the FG is obviously not in the same league as the FE2 or the F3 when it comes to build quality. The articulated winding lever is not as smooth as the F3’s (which is mounted on roller bearings) or the FE2’s, which gives the impression of being mounted on a bronze bearing. The camera has the reputation of being prone to a scary shutter lock (nothing dramatic – set the shutter dial to Manual 1/90sec , and everything goes back in order). To me, it looks more like a “bug” than anything else.

Olympus OM-1 and Nikon FG


In a few words, the FG is a strange combination of relatively advanced features (multi-mode exposure automatism, on the film flash metering) with a base which is derived from an entry-level camera. In particular in its black version, it looks very competent and professional, which could lead to some disappointment. Because of its small size and its serious looks, it’s easy to believe that it’s a pro camera, comparable to its FM2 and FE2 stablemates, or to the Olympus OM-2.


Nothing could be more wrong. The Nikon FM2 and FE2 are equipped with an exceptional titanium or aluminum shutter, with flash sync speeds up to 1/250sec and a maximum speed of 1/4000 sec. The shutter of the FG is much more limited, and its top speed of 1/1000 sec is a serious limitation on a bright sunny day now than 400 ISO seems to be the universal film sensitivity, in black and white as in color.


The FM2, FE2, OM-1 or OM-2 were cameras built for demanding amateurs or professionals; a small size was one of the design objectives of their manufacturers, but it came second to build quality.


The second hand market recognizes those facts: a nice FE2 costs at least $ 125, with the FM2 and some late Olympus models crossing the $250 barrier. Well received on the market when it was launched, the FG is still abundant on the second hand market and a very nice one can be found for approx. $50.00. A nice compact SLR for casual photography.


More about the Nikon FG


Nikon’s own words about the FG
Photography in Malaysia: the “bible” for the amateurs of Nikon cameras. Check the Nikon FG pages.


The Nikon FG - a light SLR for mountain hikes
The Nikon FG – a light SLR for mountain hikes

The world through a plastic lens? A few pictures in Rome with the Holga 120 CFN


When your good friends learn that you still shoot film, and write about it, they understand they have a unique opportunity to get rid of all the – let’s be polite – worthless photo equipment they don’t use anymore and you end up with Kodak Brownies or Instamatics by the bucketload. And if your brother in law is really facetious, he brings you a brand new Holga from one of his trips in China, and since it’s a Christmas present and everybody in the family is intrigued, you buy film and start using it.

Holga 120 CNF
Holga 120 CNF


That particular camera comes in a big orange box with the rest of the “Starter Kit”. Reading the user manual, you get confirmation that the camera is “extremely low tech, and will eventually wear out”. Major design flaws are presented as unique features – the dreaded manual mentions “leaks of light, unvoluntary multiple exposures, loose connection between the film and the take up spool” among the desirable characteristics of the product. Looking for some comfort, you check a little square format book at the bottom of the box. It’s a nice paperback of 192 pages, showing 300 images taken with Holga cameras. Not something Leica or Nikon would be proud of, but interesting pictures nonetheless.


The camera’s design is very basic. It accepts 120 format roll film, has a plastic wide angle lens (60mm, F:8 or F:11) with 4 possible focus settings, and a shutter which offers a unique and unspecified speed. The camera comes with 2 user interchangeable back plates, one will give you 6×6 cm negatives with some vignetting, the other one 6×4.5cm negatives, probably with less vignetting (I don’t know, I only shot with the 6×6 plate). The “CFN” Holgas also come with an electronic flash, equipped with a turret of 4 filters (Red, Blue, Yellow and transparent) for special effects.


Using the Holga


The Holga 120 CFN needs 120 film – of course – and since Holgas are supposed to be enjoyed for their shortcomings, color film should be preferred (the plastic lens is prone to chromatic aberrations which would not be visible with black and white film).


Finding color film in 120 rolls proved very difficult. If 35mm film is still easy to find (even in supermarkets or in the little stores attached to many hotels), the same can not be said for 120 roll film. Only stores dedicated to professional photographers still have a few references. I bought a few rolls of Kodak’s Portra 400 NC film. Loading the camera is a difficult task, but in all honesty I’m not used to roll film and I would also have suffered with a more high end camera.


Holga 120 CNF - a view from the shutter (120 film adapter removed)
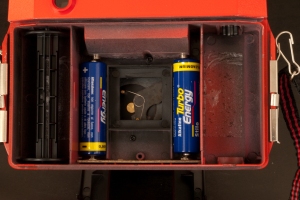
Holga 120 CNF - a view from the shutter (the 6x6 back plate has been removed - the two AA batteries power the electronic flash ).


In the street, the camera attracts lost of attention. People notice the bright red color (Holgas are also available in black, kaki and in a unique blue and yellow combination), and are intrigued by the cheap aspect of the camera. It looks like a toy, and people are surprised to see an adult using it.


The camera has very few controls and is easy to use, with a decent viewfinder and relatively smooth commands, and provides a user experience very similar the “boxes” that Kodak used to sell before the launch of the Instamatic cameras.


The results
Having the rolls processed proved as difficult as buying the film in the first place. Costco and the proximity drugstores don’t process anything larger than 35mm film, and the rolls had be sent to a professional lab (some of them charge up to $20.00 per roll). When you receive the pictures, you discover the “Holga paradox”: you’re not attracted to the almost “normal” images, but by the most severely flawed. The pictures with the fewer technical faults are just bad (with vignetting and all sorts of aberrations), while some of the images plagued with the worst of the problems (involuntary multiple exposures, light leaks) have a surrealist quality that the most creative of the photographers would struggle to get from a digital picture processed in Photoshop.


Holga, what for?


“Normal” photographers are supposed to spend thousands of dollars in the equipment which will help them produce pictures as perfect as possible from a technical point of view – in focus, sharp, with the right exposure, no vignetting, no distortion, and no chromatic aberration.

Rome-Coliseum-Holga 120 CFN
Rome-Coliseum-Holga 120 CFN - This is one of the pictures with the fewest defects.
Straight from the Holga - at least the bright red camera attracts smiles


Deviations from the norm of the technically perfect picture are supposed to be voluntary, in order to convey an emotion or a message. They’re not supposed to have been brought randomly by a poorly designed camera.


Holgas don’t follow the rule. They’re not “normal”, and they’re not what “normal” photographers would be looking for. Their results are totally unpredictable. When nothing went really wrong, the results are dull. It’s only when they are massively flawed that the pictures start being surprising and interesting.


Using a Holga reminded me of the “Exquisite Corpse” creativity method used by the Surrealist movement at the beginning of the XXth century. With a Holga you will rely on chance to create something new and different. Using the bright red Holga, I started believing that chance could be an artist on its own right. And you end up loving that little camera for that very reason.


More about Holga cameras


Holga 120 CFN and photographer - digital pictures can also be flawed...


A few decades ago, photographers in Austria discovered the “Lomos” (copies of Cosina point and shoot cameras made in the USSR), and liked the – flawed – pictures made by those very imperfect little cameras so much that they launched the “lomography” movement. They started distributing the “Lomos” in Austria and Germany, and progressively added other cameras from Eastern Europe and China to their catalog. Lomos and Holgas are now widely distributed, and can also be purchased directly from the Lomography web site, where a red Holga 120 CFN can be found for $75. That’s a lot of money for such a low tech object. Bargain hunters can also find Holgas on eBay, for far less.


Cynics will say that the initiators of the Lomography movement found a way to get rich selling Soviet surplus to the rich photographers of the West, and philosophers that they showed that chance and chromatic aberrations could be more creative than would be artists obsessed with technical perfection.


Holga links


The Holga blog: a blog about film photography, Holgas, Toy Cameras, 6×6 TLRs, Polaroid – “LO-FI” photography at its best.
The Holga group on Flickr
Cameras from (formerly) communist countries: does not include Holgas, but the original Lomos, Dianas & Lubitel cameras, among other things.


Rome - View of the Curia from the Campidoglio - Holga 120 CFN

Exposure Metering: Multi-Spot or Matrix


All film cameras have to live with the same design constraint: their shutter and their diaphragm are built in such a way that, for a given picture, the shutter speed and the aperture are the same for each square millimeter of the film. There is no way for the shutter of a film camera to block the light in excess in a particular zone of the scene, or to stay open longer only for the portion of the scene located in the shade. At some point the researchers of Canon were rumored to be working on an LCD based shutter, which could to exactly that, but the research never materialized.


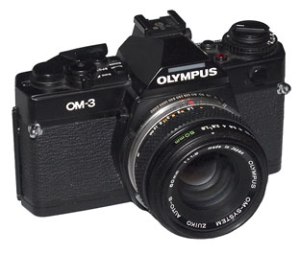
Olympus OM-3
Olympus OM-3. Picture: Wikipedia


Since the shutter only works in an all or nothing, one-duration-fits-all mode, some zones of the film will receive more light than the optimum, and others will receive less. Films have the ability to give acceptable results when portions of the scene are a few f: stops brighter and a few stops darker than the optimum (that’s the exposure latitude of the film). As a consequence, the exposure metering systems of the cameras are calibrated to determine the correct exposure for the portion of the subject located in the mid-tones, with the expectation that the film will have enough exposure latitude to render the highlights and the shadows correctly.


Unfortunately, in some cases, the brightness range of the scene greatly exceeds the exposure latitude of the film (think of the backlit portrait at sunset with the sun in the frame); supposing the photographer can not reduce the brightness range of the scene – using a flash or a reflector to bring more light to the subject, for instance, the exposure parameters will only be optimal for a subset of the scene, the highlights or the shadows, and the rest of the picture will be burned or left in the dark.


When cameras started being equipped with Through the Lens (TTL) metering systems in the sixties, most of the manufacturers opted for Average or Center Weighed Average Metering. Those metering systems were not adapted to high contrast scenes, and the photographers had to put their experience to good use and take control manually of the exposure metering process. If they had automatic cameras, they had to use exposure lock or exposure compensation systems. The alternative – measuring the brightness of a very narrow section of the scene with a spot meter, was not easy to master for the average photographer. Elaborate exposure determination procedures such as the “zone system” were adapted to small format cameras using roll film, but their complexity put them out of reach from the majority of photographers.


The Olympus OM-4 and the Nikon FA


In 1983, two cameras manufacturers tried to address the problem of high contrast/high brightness range scenes, and they chose two very different approaches.


Olympus tried to make the principles of the zone system accessible to more photographers, and developed a multi-spot system for the new OM-3 and OM-4 cameras. With the new OMs, the photographer could make up to eight successive spot measurements, whose result were presented in the viewfinder on an analog bar scale showing each individual result and the average. The cameras also had a “shadow” and a “highlight” push button, letting the photographer compose his picture following the principles of the zone system.


The photographer Ken Norton described the process in his blog:


Olympus OM-3 and OM-4: exposure metering controls
Olympus OM-3 and OM-4: exposure metering controls. Picture: Wikipedia


“for example, I can take a spot reading of a highlight, a midtone and a shadow. Three dots will appear on the display. If I’m using a film with six stop exposure range, I’ll make sure that all three dots appear within the +/- 3 stop marks. Of course, I can bias my exposure to place a highlight or shadow anywhere I want on the scale. Digital cameras are capable of producing a histogram of an image. The multi-spot scale, with the “dots” is a poor-man’s variation of the histogram where we are able to define our bright areas and dark areas of a scene and like a histogram we are able to move these points around to place them within the acceptance range of the film.


You can read more about the subject, and see actual pictures of the viewfinder on Ken’s pages.


Nikon chose a totally different approach. In the first iteration – the Automatic Multi Pattern (AMP) of the Nikon FA – the camera was equipped with a database containing the mathematical description of thousands of potential pictures, with the exposure value to be used in each situation. The light meter was divided in five zones (a large central zone, two zones at the bottom left and right, two zones at the top, left and right also), and the electronic circuit would correlate the exposure value of each zone with other elements such as the focal length of the lens to define the characteristics of the scene, and associate it with one of the many typical pictures described in the database of the camera.


Nikon FA (the round knob controlling the exposure mode ( matrix or center weighted) is on the right side of the lens mount, at the top on this picture


The FA could also be operated in a more conventional Center Weighted Metering mode, and in all honesty, the results of the AMP system were not that different from the center weighted mode. But the system required no intervention and no expertise of the user, and was rapidly made more efficient with the addition of more metering zones and the capture of more parameters (focusing distance, color of the subject, for instance). Current Nikon cameras have a color sensor dedicating to metering, with more than 1,000 metering points. Equivalent systems have been developed by Canon, Minolta and the other manufacturers, under different names: Canon’s system is “evaluative”, and Nikon’s AMP is better known now as “Matrix metering”.


Modern digital cameras all use elaborate variants of matrix or evaluative metering as their default exposure mode, and give good results in a huge majority of cases. They use so many parameters that it’s sometimes very difficult to understand how the camera chose a particular exposure value; in doubt, photographers can visualize the picture they’ve just taken on high definition displays, and use histograms to analyze the exposure of their pictures. Olympus’ Multi-Spot system happened to be too complex for the huge majority of photographers, and left no legacy.


More about Exposure and Metering


Cambridge in Colour. A good (and free) on-line tutorial about digital photography.
A good book about exposure: “Exposure“, by Chris Weston.


Destin- The beach (Nikon FA- Nikkor 24mm AF - Kodak Ultramax) Sept.09

The Nikon FE2: one of the very best manual focus SLRs ever.

Launched in 1983, the successor of the FE had a relatively short sales career, but a long legacy. It can be argued that the Nikon FM3a, sold from 2001 to 2006, is much more a descendant of the FE2 than of the FM2.

Nikon FE2 - Shutter
Nikon FE2 – The titanium blade shutter was the most advanced at the time of the camera’s launch, with a top speed of 1/4000 sec and a flash sync speed of 1/250 sec.

In 1977, a few years after Olympus initiated the compact SLR revolution, Nikon presented the FM. Like the Olympus OM-1, the FM was a compact semi automatic camera with a mechanical shutter, which could be equipped with a motor drive. But contrarily to the OM-1, which still relied on a CdS light metering system and on mercury batteries, the FM used modern gallium photo diodes and silver oxide batteries. It also benefited from a vertical blade metallic shutter, and the exposure metering was relying on 3 LEDs instead of the more conventional match needle arrangement of the OM-1. Solidly built and reliable, the FM was very successful commercially, and the ancestor of a large family of models whose production only stopped in 2006.

Nikon FE2
Nikon FE2 with the MF-12 data back – the data back connects to the PC Sync of the camera

The FE from 1978 is the automatic exposure version of the FM. It looks very similar to the FM, but instead of LEDs, it uses two needles to show the shutter speed selected by the photographer (semi-auto mode) and by the automatic exposure system (aperture priority auto mode). In 1982, the FM became the FM2, receiving a new mechanic shutter with titanium blades, which could reach 1/4000 sec and had a flash synch speed of 1/200 sec.

IMG_1099
Nikon FE2 – Auto Exposure Mode – the thin black needle shows the shutter speed selected by the metering system of the camera. Note the aperture value at the top of the viewfinder.

One year later, the FE2 was launched. Its titanium shutter is an improved and electronic version of the FM2’s, with a X synch speed now reaching to 1/250 sec. The FE2 also benefits from a modern on the film (OTF) flash metering system (that the FM2 never got). The FM/FE range of products was extended the following year with the presentation of the Nikon FA, which added matrix metering (a world premiere), a programmed exposure mode and trade the brass prism cover of the FM/FE models for a polycarbonate one. Both FE2 and FA were discontinued in 1988. The FM2 lived longer, and was ultimately replaced by the FM3a, which merged the mechanical shutter of the FM2 with the electronics of the FE2.

Using the FE2 as an every day camera

Reasonably light and compact, the Nikon FE2 is very solidly built, and very nicely finished. Compared to a previous generation model like the FM, the FE2 has smoother commands. The viewfinder is typical from a pre-high eye point construction – the enlargement factor is high (0.86) for a good focusing precision, but the frame coverage is limited (93%), and the eye point is very short (14mm), which could be an issue for photographers wearing glasses. Even with thin glasses, it’s impossible to see 100% of the image projected on the focusing screen without having to move one’s eye ball right to left and left to right: you only perceive 90% of the focusing screen when you look straight into the viewfinder, which compounded with the rather limited frame coverage, ensures that you’ll have a wide safety margin on both sides of your prints.

Nikon FE2 / Olympus OM-1n
Nikon FE2 / Olympus OM-1n – The FE2 is a bit larger, but not significantly.

The determination of the exposure is very conventional for a camera of its generation, with a center weighted measurement provided by two silicon photodiodes. In automatic mode, a needle indicates the speed selected by the exposure system of the camera on a large scale at the left of the viewfinder. The photographer has multiple ways to override the automatism: he can memorize the exposure (pushing the self timer lever towards the lens), apply a correction factor on the film speed selector (from -2 up to +2EV), or switch to semi-auto mode. In this case, a second needle – larger and transparent – appears in the viewfinder, showing the shutter speed selected by the photographer.

IMG_1100
Nikon FE2 – Semi auto exposure mode. The fat blue needle shows the selected shutter speed, the thin black needle shows the shutter speed recommended by the metering system.

In a very simple matching needle arrangement, the photographer just has to align the meter needle with shutter speed needle. The shutter speed knob is much smoother than on the FM (in the FE2 the shutter is controlled electronically), and surprisingly the camera is more pleasant to use in semi-auto mode than the FM. No wonder that Nikon derived the exposure control system of the FM3a from the FE2’s and not from FM’s.


Nikon FE2 with MF-12 back
A very clean Nikon FE2 with the MF-12 data back – All the commands are grouped on the top plate – with the exception of the depth of field preview and the exposure lock levers, located at the right of the lens mount. A very simple and efficient layout.

Conclusion

Powered by two easy to find LR44 silver oxyde batteries, the camera also operates without battery at a speed of 1/250sec. Compatible with any AI, AIs and AF lenses, it’s still perfectly usable today.

Less rugged than its FM and FM2 cousins (it has an electronic shutter and a potentially more fragile match needle metering system), it is more pleasant to use and can respond efficiently to a larger variety of photography opportunities. Like the FA and the FM3a, but unlike the FM2, the FE2 benefits from a modern through the lens (on the film or OTF) flash metering system, compatible with the flash units currently sold by Nikon.

Nikon FE2 with MF-12 back
Nikon FE2 with the MF-12 back. The MF-12 back was designed for the FM/FE cameras, which did not have internal synchronization contacts for a data back inside the film chamber. Hence the need for an external synchronization cord. The FE2 could also use the MF-16 data back, which did not need the external sync cord.

Its automatic exposure system is very easy to override, and does not get in the way. The matching needle system in the viewfinder is very informative, easier to read in the sun light than the LEDs of the FG, and than the small LCD display of the FA.

With the F3, the FE2 is probably the most usable Nikon camera of the early eighties.

How much for a Nikon FE2?

The Nikon FE2 is a very good automatic exposure film camera, and its reputation has obviously an impact on its price. Specialized retailers like KEH sell it between $130 (Bargain) and $270 (Top Condition).

As usual, prices are a bit lower on eBay, but the FE2 does not seem to sell for less than $100, with peaks up to $180 for very nice items.

There are few alternatives to the FE2: the more recent FM3a is much more expensive (typically from $400 up to $700) and the FE, with its modest shutter and no OTF flash metering, is far more primitive and more difficult to recommend.


Eight years later…

I wrote this blog entry in 2009. Eight years later, after having tested and used many other SLRs from Canon, Fuji, Nikon, Olympus and Pentax, the FE2 is still one of my preferred cameras:

  • it’s simple – very few options and commands. You read directly on the rings and knobs how it’s set up (pretty easy – aperture, shutter speed, ISO – that’s all). Controlling it rapidly becomes instinctive – an extension of your eyes and hands .
  • with average metering weighted towards the center/lower half of the scene, and an easy to find exposure memorization lever – it’s easy to get the exposure right.
  • the focusing screen is very clear – almost as clear as the viewfinder of a rangefinder camera, but not at the detriment of precision – you can get the focus right, even with very luminous lenses. It’s a relatively short eye point viewfinder – if you wear glasses, you won’t see the borders of the focusing screen unless you really pay attention to it.  You just see the scene – you’re in the middle of it – it’s an immersive experience.

More about the FE2


Photography in Malaysia


Tree trunk
Tree trunk – Along the Nickajack Creek – Smyrna, GA (Nikon FE2, Nikon 50mm lens, Kodak CN400 film.

Nikon F3


Nikon’s F3 was the “pro” camera of the early eighties, but it kept on selling until 2001. A dwarf compared to current mid-level digital SLRs, not to mention monsters like an EOS 1DS or a D3. Incredibly simple to use compared to anything digital sold these days. Aperture Priority Automatic or Semi-Auto exposure. Center weighted metering. That’s all. It worked. And it still works today.


Nikon F3 - cosmetically not perfect - it simply works
This Nikon F3 is far from perfect cosmetically – but it works

Consider all the changes that took place in the SLR design between 1980 and 2001. Multi mode exposure, spot and matrix metering, integrated motors, autofocus, DX coding, the F3 had none of that, but it outlived two or three generations of newer-better-faster pro bodies from Nikon or Canon. The F3 had the elegance to hide its real technical advances under a classical skin, and to let the photographer communicate his instructions through smooth and oversized controls. Of all the pre-autofocus SLRs of Nikon, the F3 is the most pleasant to use, and probably the one which will yield the best results.

The F3 is an exception in the Nikon F lineup. It’s compact, smaller than its predecessors, and way smaller than its successors, the F4 and F5. In fact, its size is very comparable to that of the FM, itself hardly bigger than the yard stick of compact SLRs, the Olympus OM-1. The F3 is also easy to use, without the idiosyncrasies of the F and F2s with their Photomic finders and manual aperture indexing, and without the myriads of commands of an F4 or the menus and submenus of an F5.


Olympus OM-1n / Nikon F3
Olympus OM-1n / Nikon F3 – The F3 is larger, of course, but not that much. Compact and not very loud, it can be used for street photography, among other things.

The F3 is much more modern and usable in everyday life than a semi auto camera like the FM: its commands are larger and smoother, and the automatic exposure system is faster to operate; thanks to the center-weighted metering and a memory lock button, it does not deprive the photograph of his control on the exposure . When a flash is needed, the FM still requires the user to concern himself with Guide Numbers. The F3’s flash system is modern: following the path opened by the Olympus OM2, the SPD (silicon) cell is housed under the main mirror, and provides On The Film flash metering. But the Nikon engineers avoided loading the F3 with complications like multi-mode auto-exposure or multiple metering patterns. The F3 has few commands, and they’re so easy to understand that no manual is needed.


Nikon F3 (above)
Nikon F3 – a view of the commands – add the exposure memory lock and the backup shutter release on the front, you have them all.

All the commands are generously sized, and very smooth to operate (the film advance mechanism is mounted on ball bearings). The view finder is wide, bright and clear, making focusing easy. After a few years of production, Nikon replaced the viewfinder with a high eyepoint (HP) model, which could be used more easily byglass wearers. The viewfinder is the only part of the camera which is really larger than what you would find on contemporary advance-amateur SLRs.


Of course, the F3 is not perfect. It may be compact, but it’s heavy (approx. 750g). Its OTF flash system may have been advanced for its time, but the shutter only syncs at 1/60sec, and none of the viewfinders of the F3 system has a standard flash hot shoe: the F3 requires a specific flash adapter, to be inserted at the top of the rewind lever. But if I had to own and use only one film camera, that would be the F3, without any hesitation.

viseur Nikon F3
Nikon F3 and its DE02 viewfinder at the front – Note that the exposure metering system and the LCD showing the selected shutter speed are on the body, not on the removable viewfinder (the little windows at the front of the viewfinder are aligned with the LCD and the aperture see through when it is in position on the body)


How much for a Nikon F3?


The price of an F3 is extremely variable. The F3s were produced over 21 years, and some of them could be fairly recent, when others could have been used and abused since the early eighties. F3s were built like tanks, but they were used as their everyday work horse by legions of professional photographers, and they may have had a rough life.


Old and scruffy models in perfect working condition – like the 1983 model represented on those pictures – can be had for a little more than $70.00. Nicer and more recent models with the HP viewfinder and a motor drive will cost you at least $300.00. Beyond the standard F3 and F3 HP, Nikon also produced many derivatives of its flagship camera, for specialized applications or to test new technologies like the autofocus system they showed in 1983. Some of them are relatively rare collector items and will command a much higher price.


Nikon F3 in CF-22 case
Nikon F3 in its CF-22 case. Designed by Giorgetto Giugiaro, the F3 had to show some italian bravado. The body design is classical, but the leather everready case is bright red.


More about the Nikon F3


Photography in Malaysia – the Nikon F3
Shutterbug: the Nikon F3 (2007)


Lunch Break - Quais de la Seine. Paris. April 2009
Lunch Break along the Seine. Paris-April 2009. Nikon F3 – Nikkor 24mm AF

Buying photo equipment on eBay


I bought most of my cameras and lenses on ebay.com, sometimes through auctions, sometimes at  “buy it now” prices. I never had a bad experience so far.


If you buy on eBay, you will face three types of sellers:

  • on-line stores specialized in photographic equipment, new or second hand.


That’s the low risk option. Some stores limit their inventory to a few brands, and only carry high quality, very nice to pristine cameras. Others are less restrictive, and also have cameras which have lived a more difficult life. If your intention is to really use the camera you’re purchasing, buying a comestically challenged camera may be a good option, as long as it’s in good mechanical condition. Specialized stores are supposed to know what they sell, and will not plead ignorance if the product does not work or is not completely similar to the published description. They will arrange for a free return, and a refund.


A word of caution, though: the products are evaluated before being listed, and the obvious lemons don’t pass, but the tests are not always as thorough as one would wish: a lens may have looked OK when tested on a particular type of body, but will fail to operate on another one, which is in theory 100% compatible but is interacting with the lens differently. Always test the equipment you purchased as soon as you receive it, and contact the seller if there is any issue. Reputable stores will listen to you, and they have a good return policy.


Over the years, I bought cameras or lenses from Adorwin (the eBay store of Adorama), Betteroffblu, Cameta and Shutterblade and could appreciate their professionalism.

  • Stores not specialized in photography


That’s the riskiest option, in my opinion. The store could be anything, from a pawn shop to an antique dealer, the worst being a dollar store or a shady repair shops buying broken electronic equipment in bulk and making one sellable camera out of 3 broken ones. Even if they know a few things about the products they’re selling, they will generally plead ignorance, and will offer little or no support if there is an issue with the equipment. I never had a really bad experience on eBay, but it’s with this type of seller that I came the closest to being seriously disapointed. Buyer beware.

  • Low volume and non professional sellers


Low volume sellers belong to multiple sub categories. You will see items sold by a person who pretends he got the equipment he’s selling from a friend but that he knows nothing about it, and  you will find the passionate amateur photographer who bought his equipment new 20 years ago, used it day in day out and took great care of it; he will take pride in providing a honest and accurate description of his equipment, and that’s the person you want to be buying from.


Because of the way the auctions work, the prices tend to be highly variable and very unpredictable. Professional sellers tend to protect themselves with a “buy-it-now” price, and if the item does not sell this time, they just list it again. Non professional sellers tend to use the auction system more than professionals. With the number of people watching eBay listings every day, it’s difficult to find a real bargain, but some sellers (lazy or inexperienced) still publish unappealing listings (blurry pictures, ambiguous descriptions) that a trained bargain hunter will be able to interpret to his advantage: I bought my Nikon F3 this way, at 30% of what the action would have reached if the listing had been professionally layed out.


As always, do your homework and try and understand the market first (ads in magazines, completed items list on eBay). Set a limit for the price of the equipment you want to buy second hand. In any case, read the ads very carefully, ask questions, and only place a bid if you feel confident enough.


Other reputable sources

  • keh.com


    I never had the opportunity to buy second hand equipment from keh, but good friends did. keh has the reputation of being very conservative in the way they describe the equipment they’re selling (if they say it’s in good condition, then it’s very very good). They only sell over the phone or on the Internet – no walk-ins.

  • bhphotovideo.com


    B&H is a big photo video mail to order company, with a huge brick and mortar store in New York. I bought new equipment from them on multiple occasions. A very pleasant experience. I never had the opportunity to buy second hand equipment from them, though.


Feel free to share your comments and experiences. Thank you.


Nikon FE2
Nikon FE2

Why are manual exposure cameras worth more than automatics ? (Intro)


The facts


Let’s take three lines of manual focus cameras which still have a very active second hand market today: the Leica R series, the Nikons FM & FE and their derivatives, and the Olympus OM-1 & OM-2 and their “single digit” descendants. Each line contains automatic exposure cameras (Leica R4, R5, R7; Nikon FE, FE2, FA; Olympus OM-2, OM2s, OM4, OM4t), and manual exposure cameras (Leica R6, R6.2; Nikon FM and FM2; Olympus OM-1 and OM-3).


For a given generation of camera, manual exposure models are almost always worth more than their automatic exposure siblings.


Average retail price of a camera in Excellent Condition (source: a reputable specialist of used photographic equipment)

Brand Manual Camera Auto exposure Camera
Leica R6.2: $ 999 R7: $ 550
Nikon FM: $ 190 FE: $ 170
Nikon FM2: $ 245 FE2: $ 199
Olympus OM-1: $ 150 OM-2: $ 190
Olympus OM-3: much more than $500 * OM-4: $ 235
Olympus OM-3T: much more than $1,000 * OM-4T or TI: $ 450


More after the jump

Nikon FM: compact and rock solid, a good risk-all backup camera for Nikon users


In the mid seventies, a new generation of SLRs hit the market. They were following the example set by the Olympus OM-1 and were much more compact than their predecessors. They also used less mechanical components and more electronics.


The FM was Nikon’s response to the OM-1, and to similarly compact cameras from their main competitors. The FM outlived them all. The FM and its derivatives, the FM2 and the FM3a,  were sold for more than 30 years, and when the production of the FM3a was finally stopped, they were still in such demand that for a while used FM3a’s were selling for more than when their price when new.


Compact, reasonably light and rock solid, the FMs were often used as backup cameras by professional photographers until they stopped using film a few years ago.


Nikon FM
Nikon FM – it accepts pre-AI lenses, AI, AIS, AF and AF-D lenses.

 The FM is a mechanical, manual focus, semi-auto camera. It leaves you total control over your images, and does not change the aperture/speed combination you selected on its own. No need to memorize the settings in backlit pictures. But total control comes at a cost: speed of operations in a rapidly changing environment. It’s a nice camera for landscapes, travel, street photography, but more recent autofocus cameras will deliver better results for sports and action photography.

 
The flash control system is also old school – the camera exchanges very little information with the flash unit, and the photographer has to set the shutter speed and the aperture by himself, using guide number tables: there are obviously better cameras to shoot indoors.


The FM as a photographic tool


By modern standards, the FM is a bit of a disappointment. On the one hand, it feels very well built and solid, and it can be carried around everywhere because of its (relative) small size. The Olympus OM1 or the Pentax M series are still smaller, but don’t feel as robust.  Like the other semi automatic cameras with mechanical shutters, the FM also works without batteries. The light meter does not use a galvanometer (no needle) but a series of bright red LEDs are the right of the viewfinder screen: there are very few parts that can break on a FM.


On the minus side, the mechanical commands are firm, and the advance film lever doubles as a shutter release lock: you can only use the light meter and press the shutter release if the advance film lever is pulled out of the body (by an angle of approximately 45°). It’s not very practical, and slows down the operations. I missed more than a few snapshots because the lever was pushed flush with the camera body, in the off position. I guess you can get used to it, but it’s not ideal. (the Nikon F3 does not have this issue; the film advance lever does just that).

Nikon FM / Olympus OM1n
Nikon FM / Olympus OM1n – the smaller prism cover make the OM-1 look smaller.


The Olympus OM1 was the forerunner of a new generation of very compact but still very capable SLRs. Coming a few years later, the FM is not as compact as the OM1, but not that much larger. It’s heavier, though. Its electronics (the light meter, the rest of the camera is mechanical) aged very well, the batteries it needs are still easy to find, its mechanical components are solid and it’s compatible with any Nikkor lens built between the early sixties and the last few years.


Nikon FM - Shutter
Nikon FM – Metallic shutter. Clearly a camera from the seventies.


The FM has a mechanical metallic shutter. Its fastest speed is 1/1000sec, with a  maximum flash synchronization speed of 1/125 sec. The different versions of the FM2 and the FM3a have much faster shutters, built in aluminum or titanium, with a maximum speed of 1/4000s and a flash synchronization. speed of 1/200 (early models) or 1/250.

Nikon FM
Nikon FM –  depth of field preview lever and self-timer at the right of the lens.


The FM holds a special place in the Nikon product range: it’s one of the few Nikon cameras (the only other compact SLR to share this characteristics is the FE) which is compatible with the pre-AI lenses as well as the modern AI, AIS and AF lenses. The other members of the family – FM2, FE2, FA, F3A – are only compatible with the AI, AIS and AF lenses; trying to mount an older pre-AI lens can damage the camera.

That’s the reason why the FM is sometimes referred as the Rosetta Stone of Nikon cameras


Summary


The Nikon FM is a simple, compact, rock solid and reliable camera, with a decent viewfinder and an accurate light meter. It’s not very fast to operate and not always pleasant to use because of firm commands and of the protruding film advance lever, but it can take advantage of a huge variety of lenses, built by Nikon over a period of almost 50 years. The FM2/FE2 are a bit smoother, the automatic FE and FE2 are also faster to operate, but the F3 beats them all, with its very soft commands, its good ergonomics and its large viewfinder.


The last FMs were produced in the early eighties, and good ones are still easy to find. They command lower prices than the much more sought after FM2’s and FM3a’s. A very nice one from a reputable seller will not cost you more than $150, and not so nice ones can be bought for less than $70 on eBay.


Charleston - July 09 - Nikon FM - Nikkor 24mm
Charleston – July 09 – Nikon FM – Nikkor 24mm


More about the Nikon FM


The best site of reference about the Nikon FM: Photography in Malaysia


The site has not been updated recently, but it contains very detailed information about the Nikon cameras and lenses manufactured until the F5.