The Ultimate film cameras

Ultimate: “last in a progression or series : final” (Source: Merriam-Webster)

Film cameras stopped selling in any significant quantity in the first years of this century – and the production of film cameras had almost completely ceased by 2008. But almost until the end, Canon, Minolta and Nikon kept on launching new models.

Most of those cameras were forgettable entry level models (their main justification was to occupy a lower price point than digital cameras), but a few high end models were nonetheless introduced.

The Canon EOS 3 (launched in 1998), the Minolta Maxxum 9 and the Nikon F100 (1999), the EOS-1v and the Maxxum 7 (2000), and last but not least the Nikon F6 (2004), were all at the pinnacle of film camera technology, and there will probably never be any new film camera as elaborate as they were.

Minolta+Maxxum+7+_+Dynax+7+_+Alpha+7+-+Meta35
Minolta Maxxum (alpha) 7 – Source: Meta35

They did not sell in large numbers. But they kept their value remarkably well, much better than the autofocus SLRs of the previous generation, and than the first mass market digital SLRs that replaced them in the bags of photographers.

Today, if you exclude the limited editions models that Minolta and Nikon had sometimes added to their product lines, it seems that for each of the big three Japanese camera manufacturers, the most expensive film camera on the second hand market is always their most recent high-end autofocus model.

Let’s look first at models launched at the very end of the film era, between the end of 1998 and 2004:

(source: eBay “sold” listings, body only, for a used camera in working order – I did not include “new old stock”, “Limited Editions”, “as-is”, “please read” and “for parts” listings.)

Canon

  • EOS1-V                   $350 to $800         launched: March 2000
  • EOS-3                      $150 to $700         launched: November 1998

Minolta (excluding “Limited  Series”)

  • Maxxum 9             $200 to $470         launched 1999
  • Maxxum 7             $150 to $230         launched 2000

Nikon

  • F100:                        $200 to $400         launched 1999
  • F6 (second hand): $600 to $1,300      launched 2004

Canon_eos_1_v

And let’s compare them with cameras of the generation that came just before

  • EOS 1n                     $100 to $300        launched November 1994
  • EOS Elan II              $40 to $100          launched September 1995
  • Minolta 800si         $45 to $60             launched 1997
  • Nikon F5                 $150 to $300         launched 1996
  • N90S/F90x              $40 to $150           launched 1994
cameragx-6593
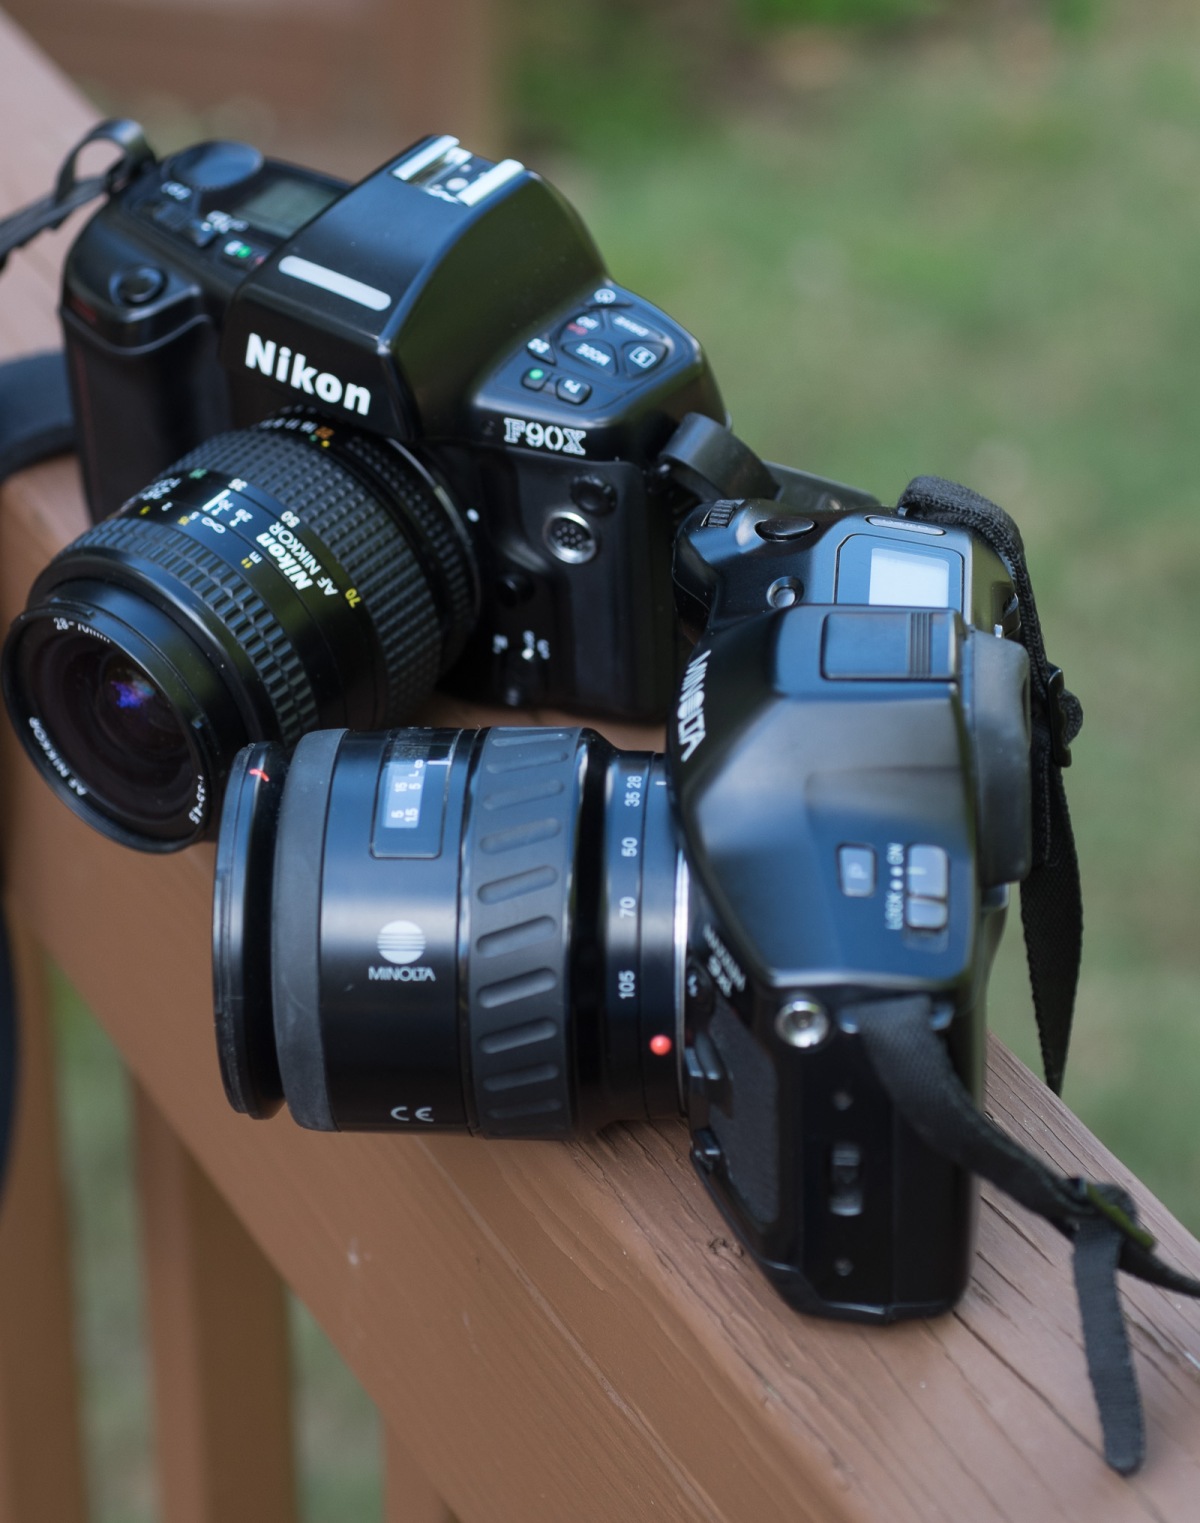
Nikon N90s (aka F90x) and Minolta 9xi – the unloved auto-focus cameras of the early to mid-eighties

The “ultimate” models sell for 3 to 5 times more than models that used to occupy the same place in the brand’s line-up, one generation before. Clearly for autofocus cameras, the most recent is also the most sought after, and the most expensive. A few reasons:

  • They have the highest usage value
    • Better performance – cameras of the ultimate generation are better machines – they focus faster and more accurately, the exposure is on the spot in more situations, under natural light and with a flash
    • Better compatibility with the current line of products of the brand (for example the Maxxum 7 accepts current Sony A lenses with ultrasonic motorization (Sony SSM lenses), and  the Nikon F100 can work with lenses deprived of an aperture ring (Nikon AF-S lenses). Older models can’t.
    • There is an expectation that the cameras will be more reliable (they’re more recent,  probably have been through fewer cycles, and their electronics components are most certainly better designed than they were in cameras of the previous decade).
  • Highest potential in collection
    • For bragging rights: “the most advanced film camera – ever”
    • For nostalgia: “the last film camera made by … Minolta”
    • Rarity: cameras launched in 1999 or in 2000 had a very narrow window of opportunity on the market – Nikon D1 launched mid 1999, the Fujifilm S1 Pro and the Canon D30 in the first months of year 2000 – and from there on the writing was on the wall. When the Maxxum 7 or the EOS-1V were launched in 2000, most enthusiast and pro photographers were already saving money for a future (and inevitable) Maxxum 7d or Canon EOS-1d. The last high end film cameras must not have sold in huge quantities.

How are the “ultimate” film cameras doing compared to the first digital models? 

The ultimate film cameras are more expensive than corresponding digital cameras sold in the first years of the 21  century – remember, those were dSLRs with 6 MPixel APS-C sensors at best, with mediocre low light capabilities and a narrow dynamic range. They  have a relatively limited usage value today (a smartphone does much better in many situations).

canon_d30
Canon EOS d-30 from Year 2000 – a dSLR with a 3.25 million pixel CMOS sensor. Working copies can be found for $40 on eBay. (source: “Canon Museum”)

Are buyers of manual focus cameras also looking for the “ultimate”?
No. Not really.

Canon

  • T90                           $60 to $250             launched 1986
  • A-1                            $60 to $250             launched 1978
  • EF                             $90 to $140             launched 1973
Canon-T90-6226
Canon T90 from 1986 – far superior technically to the Canon A-1 from 1978 – but sells for the same price on the second hand market.

Nikon

  • FA                              $50 to $350            launched 1983
  • FE2                            $70 to $400            launched 1983
  • F3                              $120 to $1,000       launched in 1980
  • Nikon EL2                $60 to $275            launched 1977
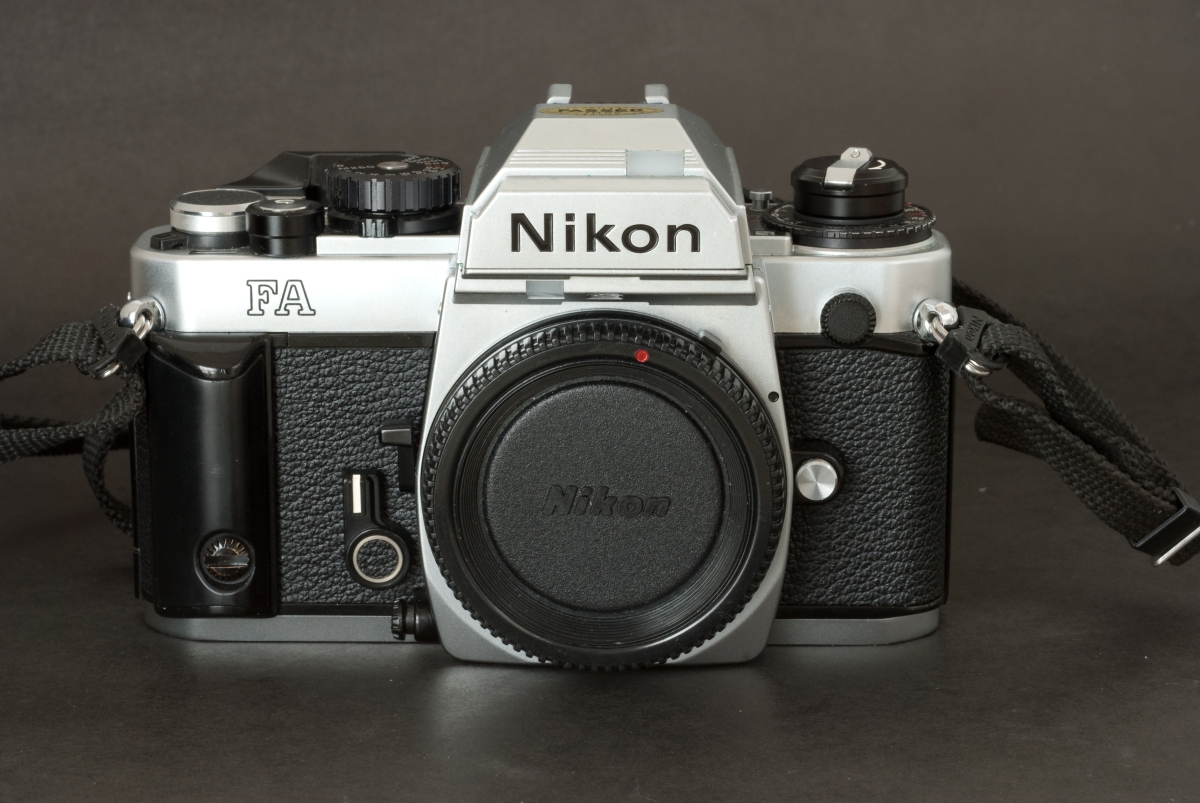
Nikon FA with handgrip
The “ultimate” multi-automatic manual focus SLR from Nikon – it does not sell for more than a simpler aperture priority FE2

To my taste (and for many lovers of film cameras), manual focus film SLRs reached their peak sometime between 1977 and 1983 – before the massive introduction of electronics, motors and poly-carbonate led to the monstrosities such as the Canon T50. What contributes to the value of manual focus SLRs today?

  • Usage value
    • Models produced around the turn of the eighties still have a real usage value.
    • Buyers of manual focus cameras tend to value simplicity and direct control of exposure parameters over complexity and automatism – semi auto exposure cameras often sell for more than auto-exposure cameras.
    • They also value the beauty of machines built out of brass and steel, using cogs and springs rather than integrated circuits and solenoids.
    • The reliability of the electronics integrated in the final manual focus cameras is a concern – the electronic components did not always age well, and engineers made bad decisions (like soldering capacitors or batteries on printed circuits or using magnets instead of springs to control the shutter or the aperture).
    • Therefore, the very last manual focus cameras are often not as well regarded as the generation just before. In spite of being massively superior technically and much more pleasant to use, the T90 is not valued more than its predecessor the A-1 because of concerns over its excessive complexity and questionable reliability. Similarly, Nikon’s FA does not extract any premium over the simpler FM2 and FE2, because its embryo of matrix metering is perplexing. And I won’t mention the Canon T50 or the Pentax a3000, which can not stand the comparison with the AE-1 or the ME Super, if only for esthetical reasons.
canon_A-1
Canon A-1 (1978) – Source:  “Canon Museum” –
  • Potential in collection
    • Manual focus cameras from the big camera brands were often produced by the millions (Canon AE-1, for instance). Other models sold in smaller numbers but over a very long production run (Olympus OM-4t, Nikon F3, for example). The usual law of supply and demand applies, but generally speaking, rarity is not a significant factor in the value of most of those cameras.
    • Only special edition models in pristine condition can be expected to be worth more than a few hundreds dollars – for the foreseeable future.


cherokee--24
Cherokee – Nikon N90s (aka F90x). Fujicolor 400

SaveSaveSaveSave

SaveSave

SaveSave

Mounting a Pentax 42mm screw mount lens or a Nikon F lens on a Canon T90

Mirrorless cameras have made us familiar with the concept of mounting old manual focus lenses manufactured many decades ago on a modern camera. A little known fact is that Canon’s T90 (their top of the line manual focus SLR in the eighties) can work in a full featured semi-automatic mode with Pentax screw mount AND Nikon F lenses, thanks to adapters which were at some point sold by Canon themselves.

Canon-T90-6566
Canon T90 with Asahi Pentax Super Takumar (35mm f/2)

How is it even possible?

The Canon FD mount has one of the shortest flange to film distances of all 35mm SLRs at 42mm. On the other hand, the Nikon F flange distance is one of the longest, at 46.5mm (source:  Wikipedia – Flange focal distance). The “universal” 42mm screw mount (used by Asahi Pentax and the East German offspring of Zeiss until the mid seventies) is close to the Nikon’s flange distance at 45.6mm. Therefore, if a lens mount adapter can be made less than 4.5 mm thick, it will be possible to mount a Nikon lens on a Canon camera without losing the ability to focus to the infinite (and 3.6mm is the right thickness for a 42mm screw mount adapter).

The difficult part of course is to transmit aperture information to and from the lens – but if the camera is designed to work – at least in one specific mode –  without having to exchange information with the lens (semi-automatic exposure with stopped down metering and no aperture pre-selection, for instance), a very simple lens mount converter will be able to do the job.

Such adapters can be found on eBay for less than $10.00 (recent Chinese manufacturing). More surprisingly, it appears that Canon used to sell Canon branded, made in Japan adapters in the sixties (source: Cameraquest, Pacificrim).

canon_sales_catalog_1969_lens_adapters
Canon Lens Mount Converters – from Canon’s 1969 System Equipment catalog (courtesy: Pacificrim.com)

42mm screw mount lenses

I recently found one of those 42mm screw mount to FD adapters, (it does not look like the genuine Canon item shown in the picture below, but it’s made in Japan) and decided to test it with a Pentax Super Takumar 35mm F/2 on a Canon T90.

The T90 is an interesting camera – while it does not offer a true semi-automatic metering mode at full aperture with Canon’s native FD lenses, it simply has to be set to stopped down metering to gain a fully functional semi-automatic exposure mode, non only with Canon FD and FL lenses, but also with “adapted” screw mount lenses.

canon_lens_mount_Converter_P_box
Canon Lens Mounter Converter P (Credit: origin of photography unknown)


The main mission of a lens mount adapter is to position the guest lens (the Pentax 35 mm f/2 in our case) so that its flange will sit at precisely 45.6mm from the film plane – as if it was mounted on an Asahi Pentax camera.

The converter does not provides any mechanical linkage between the adapted lens and the camera, and it has no mechanism to force the lens to stop down to the pre-selected aperture when the photographer presses the shutter release. Therefore, it can only work with lenses with no automatic aperture pre-selection, or lenses where the aperture pre-selection can be switched off to force the lens to always keep the iris at the value shown on the aperture ring.

Not all 42mm screw mount lenses are created equal

Lenses deprived of such a switch can only be operated at their maximum aperture – which makes them mostly unusable. Lenses (such as the Fujinon screw mount lenses) designed to support full aperture metering add another constraint – they typically use a non-standard derivative of the 42mm lens mount (with a protruding pin in the case of the Fujinon) and can not be physically mounted on this adapter (I tried).

Nikon lenses

Nikon has been using the same F bayonet layout for 60 years, but had to go through many iterations of its lens mount to stay current (support of through the lens metering (TTL), introduction of program modes, of matrix metering, and many variants of autofocus).

Canon-T90-6586
Pixco Nikon AI to FD adapter (bought on eBay)

Genuine and Canon-branded Nikon AI to FD adapters are rare and very expensive (I saw one selling for $150.00 on eBay under the name “MC-N Lens Mount Converter”). I bought  a Chinese one, for a fraction of the cost.

Being devoid of any aperture transmission mechanism, the converter is compatible with any Nikon lens AI, AIS, AF, AF-D lens, and I don’t see why it could not also accept pre-AI lenses.

Does it work? 

Yes. With the right adapter, a 42mm Screw Mount lens set in “manual” (no aperture pre-selection) will work on the T90 the same way a Canon FL lens (set in “manual”) would.

  • screw the adapter on the lens
Canon-T90-6585
The screw mount to FD adapter.
  • Mount the lens on the Canon T90
  • Set the lens to “M”
Canon-T90-6571
Asahi Pentax Super Takumar lens – it has to be set to “manual”
  • push the stopped down metering lever
Canon-T90-6574
The stopped down metering / depth of field preview lever has to be pushed towards the lens.
  • turn the camera ON
  • set the Exposure Mode to “T” (for shutter priority exposure)
Canon-T90-6570
Canon T90 – the settings for shooting stopped down in semi-auto exposure mode
  • turn the aperture ring or the control wheel (controlling the shutter speed) to adjust the exposure as if it was a Canon FL lens used stopped down (the “OP” message on the viewfinder’s LED panel means “Open the iris”, “CL” stands for “close the iris” and “oo”  for “you nailed it”.
untitled shoot-0519
T90 – semi-auto mode – stopped down. Correct exposure – (cursor and triangle aligned on bar graph, “oo” message)
  • Of course, you operate stopped down – but it’s not so much of an issue:
    • the viewfinder of the T90 is very bright and the matt screen very fine, you can focus accurately up to f/8 if you shoot outside on a sunny day,
    • photographers are unlikely to mount slow lenses on the camera, or to shoot at F/16. They will most probably use the converters to mount old and ultra-luminous lenses on the T90, for the bokeh, and for the way the pictures shot with old lenses look.

With screw mount lenses, the T90 is as easy to use as any other semi auto camera, and exposure seems accurate (I obtained the same recommended aperture with the Pentax lens, the FL and the FD lenses, and on a Nikon camera I used as a benchmark).

Canon-T90-6576
Canon T90 with a Nikon 50mm AF lens. It can be physically mounted but the exposure is off by at least 1 stop (compared to FL or FD lenses)

With Nikon lenses, I observed multiple issues: with some lenses, the aperture ring of the lens does not seem to control the aperture, and with some lenses, the exposure is off (1 to 1 1/2 stop) compared with FD, FL or Pentax screw mount lenses. I suspect it’s because the lever controlling the aperture on a Nikon lens is normally pushed to the preselected aperture by a spring loaded lever on a Nikon camera’s body. With this adapter, the spring loaded lever is missing.

Does it make sense?

Owners of 42 mm screw mount lens with manual preselection don’t have many options if they want to use their lens “natively” on modern cameras: Pentax stopped selling screw mount cameras in 1975, Fujica at the end of the seventies, and Cosina briefly sold a Voigtlander Bessaflex SLR in small volumes at the beginning of this century. Nothing recent or widely available. The best they can do is use adapters, to mount their lens on Pentax K SLRs and dSLRs, or of course on many mirrorless cameras. In that perspective, if you’re a T90 enthusiast and still own a few very good 42mm lenses it could  make sense to look for a 42mm to FD adapter.

I’m less convinced it makes sense for owners of old Nikon lenses to mount them on a T90.  Nikon lenses don’t like to be mounted on an adapter that does not control their aperture lever. And if you have old Nikkor lenses that you love, there is no shortage of good film and digital Nikon cameras which still accept them, and will offer full aperture metering and more auto exposure options than an adapted lens on the T90 .

Canon-T90-6591
Canon FT with Nikkor AI lens – it’s not because it’s possible that you should do it.

Other Canon bodies

Any Canon body which can operate stopped down with Canon FL lenses can in theory work with the 42mm screw mount or the Nikon F adapter.

  • Canon AV-1: being an “aperture priority” auto-exposure camera,  it works stopped down with Canon FL lenses and adapted screw mount lenses.
  • Canon FT: a semi-automatic camera operating natively with FL lenses, it also works with adapted screw mount lenses.

summer2017-10
Plancy l’Abbaye – France – Canon T90 – Canon FD 24mm lens – Kodak Ektar 100. I was surprised by the way the Ektar film rendered the colors – pretty different from the reality.


SaveSave

The Canon T90 – first impressions

The Postal Service just delivered a Canon T90 at my door step. I opened the box, inserted batteries, mounted a lens, and swiched it on. The T90 is a disconcerting camera, and I was in for a few surprises.

Why a T90? 

Recently I’ve been looking for a manual focus camera with a larger viewfinder than my Nikon FE2, and a bit more feature rich than the austere Nikon F3. I wanted to play with more metering options (spot, multi-spot, highlight, shadows) than what the FE2 and the F3 have to offer. And at the same time, I did not want to spend money on a new family of lenses, which excluded Contax, Leica, Minolta and Pentax, and limited my choice to Canon, Nikon and Olympus. I could have splurged on an Olympus OM-4T, but $200.00 is a minimum for a working copy in so-so condition sourced in Japan, and the beautiful ones are many times more expensive. Nikon had no manual focus SLR that interested me (I have used the Nikon FA and the Nikon FG in the past and did not like them, and the N2000 and N6000 are just mid level autofocus cameras deprived of autofocus).  That left us with Canon, and the T90.

The T90 is a very interesting piece of hardware. It’s at the same time a formidable precursor of all the Canon high-end EOS film and digital cameras to come, a shameless copy of the Olympus OM-4 (metering system, OTF flash), the most elaborate of the Canon manual focus reflex cameras, and an evolutionary dead end. It was launched in February 1986, one year after the Minolta Maxxum 7000, and was only manufactured for a few months, leaving the spotlights in favor of the new EOS autofocus product line, presented in March 1987. It is often seen as a test bed for the ideas successfully implemented in the EOS cameras. It’s a way for Canon to finish a long chapter of its history on a bright note, and for its faithful customers, one last opportunity to spend a lot of money on a high-end camera supporting the FL and FD lenses.

A lot has been written about the T90, its genesis and its legacy. There are countless descriptions and reviews of the T90  on the Internets. I listed a few links at the end of this post. I won’t write the nth review here. Today, I’ll share my first impressions, trying to understand how the camera can fit with the way I take pictures. And later, after my  summer vacation, I’ll come back with more definitive conclusions.

LCD display on the right side of top plate, control wheel, shutter release and spot metering buttons at the top of the grip. The ergonomics of a modern camera.

The first impression: it looks and feels like an EOS camera…

The T90 is a camera full of paradoxes. It looks and feels like a modern EOS camera (polycarbonate body and rubber covered grip, LCD display on the right of the top plate, control wheel), and when you bring the camera to your eye, you see the same very bright and smooth focusing screen that you would see through the same long eye-point viewfinder in a more recent autofocus SLR. But press the shutter release lightly, and …

  1. The image in the viewfinder stays blurry. Of course, it’s a manual focus camera…But intuitively, for a fraction of a second, because the camera looks and feels like an EOS, I had expected it would find the focus for me (*)
  2. You press the shutter. It’s LOUD. Really LOUD. More than a non-motorized film SLR of the previous generation, more than a modern dSLR, and of course, much much more than a mirrorless camera. In all fairness, it should be compared to the few motorized SLRs of the same period capable of shooting  4 frames/ second. I remember the racket when I was shooting with a motorized Nikon FA. It was screaming much louder than the T90.(**)
  3. And it’s heavy. Almost 900g with the batteries. You don’t expect that much weight from a camera with a plastic body.

It’s also very large (in the modern dSLR world only the EOS-1d and the Nikon D5 are larger), but because the FD lenses are much smaller than the huge f/2.8 autofocus zooms that the pros mount in their EOS-1d and D5 today, it does not look as big and intimidating.

…but it’s not an EOS-like camera

It’s a manual focus camera. With no matrix metering. In that sense, it’s a camera of the past, already outdated when it was launched. Like the Olympus OM-4, it’s an attempt to put the photographer at the center of the exposure determination process, when the market was rapidly going in the opposite direction and adopting “evaluative multizone” and “matrix” metering.

The default metering mode – center-weighted average – does not permit you to lock the exposure, and unless you’re willing to operate in full manual exposure mode, you need to switch to the  “partial” (large spot) or “spot” (the really tiny spot at the center of the viewfinder) modes as soon as you want to gain a modicum of control over the exposure of your image.

The “partial” setting lets you lock the exposure values as long as the shutter release button is half pressed, and the elaborate multi-spot, highlight/shadow and exposure memorization functions are only paired with “spot” metering. It should give you enough control over the exposure without ever having to switch to the manual exposure mode.

The manual and semi auto modes are weird, but stopped down aperture is surprisingly useful

The other reason to use the T90 in auto exposure mode is that the manual mode is weird. It’s really a manual mode (not semi-automatic), unless you operate with stopped down metering.

  • If you operate the camera at  full aperture (with a Canon FD lens unlocked from the “A” position), the LED display in the viewfinder only shows the recommended aperture value. But it does not give you any indication about the current aperture value, and there is no + or – sign in the viewfinder to tell you whether your image is currently over exposed, under exposed, or just right. The meter of the camera operates as a hand held light meter would, and it looks as if the meter is not coupled to the shutter and aperture commands of the camera. It may work in a studio, but it’s far too slow in the street.
  • However, if you press the “stopped down” lever at the left of the T90, a full featured semi-automatic mode becomes available. Which is fine if you shoot with FL or FD lenses at a wide aperture, but unusable at F/11 and beyond – the viewfinder becomes too dark. It’s frustrating to have to operate FD lenses stopped down, but using FL lenses is surprisingly pleasant. One last gift of Canon to its faithful customers.

Not everything is perfect though: the manual and stopped down modes come with all sorts of limitations, and the camera displays weird error messages if the aperture ring and the depth of field lever are not set as the camera would expect. I don’t know if the limitations are related to programming of the CPU of the camera, or whether they are flaws inherent to the FD mount, or a combination of both. Obviously the all-electric EF mount of the EOS series is a more flexible design.(***)

Canon T90 with a Canon FD 50mm f/3.5 macro lens. Thirty years later an EOS 1d does not look that different.

The Canon FL and FD lenses: they used to be cheap…

When Canon launched the EOS system in 1987, the FL and FD lenses – which are absolutely non-compatible with the EOS cameras, immediately lost most of their resale value. After the T90, Canon only launched one camera using FD lenses: the T60, in 1990. But it’s a rebadged Cosina semi-auto camera (a precursor of the Olympus OM-2000), not a true Canon. So for a very long time, FL and FD lenses – that could only be used on cameras last manufactured in the mid eighties – remained in the “orphan equipment” category, and were cheap, much cheaper than manual focus Nikon lenses, that could (and still can) be used on many current Nikon dSLRs.

The rise of mirrorless system cameras (Olympus, Panasonic, Sony and Fuji), and in particular of the full frame A7 series from Sony has given a new lease of life to manual focus lenses, and to Canon FL and FD lenses in particular. As a result, fast (wide aperture) Canon FL and FD pro and high end lenses have become seriously expensive (as usual, sliding aperture trans-standard zooms remain on the cheap side).

Canon used to propose a very large selection of FD lenses, with different maximal aperture and different qualities of glass in each category (from the ultra-wide angle to the super-tele), but they seem to have neglected the trans-standard zoom segment:  they never offered a constant wide aperture or pro-quality “L” lenses in that focal range, and  the T90 was never bundled with a zoom, but simply with the conventional 50mm f/1.4 prime lens.

Interestingly, the T90 is a good bearer of FL lenses (the semi-automatic exposure mode only works with the lens stopped down, there is no benefit  using FD lenses if you only want to shoot in this mode), and thanks to an adapter (and to the short flange distance of the FL/FD family), it also supports 42mm screw mount lenses.

More to come in a few weeks…Canon T90 – After a few rolls of film… and Mounting a Pentax 42mm screw mount lens or a Nikon F lens on a Canon T90


(*): and it happened repeatedly this week. I never had experienced such a thing before (my Nikon FE2 also has a very bright focusing screen, and I often use it with Nikon autofocus lenses, but I never found myself waiting for the camera to focus on its own).

(**): it’s not as loud when operated in stopped down mode. The iris command mechanism is probably the loudest sub system in the camera.

(***): there has been a lot of speculation on why Canon decided to ditch the FD lens mount in favor of a totally new EF mount in 1987. Some  say that the FD mount was too expensive to manufacture, that it was too small and could not be made solidly enough out of plastic, some say it was too small (diameter) and did not leave enough room for the electrical contacts needed for future evolutions, some say it was too small and made the design of ultra-luminous (or ultra-wide angle) lenses too difficult. Some say that the aperture control mechanism of the FD mount was too kludgy and made basic features offered by competitors, such as depth of field preview and semi-automatic exposure too difficult to implement on multi-automatic cameras such as the A-1 or the T90.


Links:

User reviews of Canon bodies and lenses: Canon Classics http://www.canonclassics.com

An interesting take on the design of the T90: http://www.massmadesoul.com/canont90 (and good links too)

The Canon T90 Performance Book. It was sold for $9.99 by Canon dealers: http://satnam.ca/cameras/Canon%20t90_performance_book.pdf

Easy to read reviews of the T-90 and other T-series cameras by Lewis Collard: http://lewiscollard.com/cameras/canon-t90/

In depth description of Canon’s R, FL and FD lens mounts: http://tinkeringwithcameras.blogspot.com/2008/03/canon-lens-mounts-from-r-to-fdn.html

And as usual, MIR’s exhaustive analysis: http://www.mir.com.my/rb/photography/hardwares/classics/canont90/index.htm


Canon T90 on a tripod and black dog.

SaveSave

Canon A-1 or Fujica AX-5?

cameras-2-19

Launched in 1978, the  A-1 – the top of Canon’s  A line of cameras, (also composed of the AE-1, AE-1 Program, AV-1, AT-1 and AL-1), was the first single lens reflex camera to offer  three auto exposure modes (Shutter Priority, Aperture Priority and Program) in addition to the Manual mode. The A-1 accepts all Canon FD lenses and (stopped down) can also work with older FL  lenses. A feature loaded and intimidating camera with a very “muscular” design,  it was in fact well thought and easy to use. It sold in the millions.

The AX-5 was the top of Fujica’s new line of bayonet mount 35mm film cameras, launched in 1979 to replace the ST605, ST705 and AZ-1 screw mount cameras. Coming one year after the Canon A-1, the AX-5 offers almost the same feature set, but in a smaller and much more restrained package.

cameragx--5898
Fujica AX-5 (with Tamron 28mm f/2.5 lens).

The AX-5 accepted all Fujica’s newly launched “X-Fujinon” bayonet lenses but could only access the Shutter Priority and Program auto exposure modes when paired with  X-Fujinon “DM” lenses (which have the “A” position on the aperture ring). Lesser camera models (the AX-3 and the STX-1) were usually bundled with “FM” lenses, deprived of the “A” setting.

Back then: how did the two cameras compare?

  • cost and availability
    • the  “A” line of SLRs from Canon was a best seller (probably more than 10 million units were sold), the A-1 representing approximately 1/4th of the total volume. The cameras were widely distributed and competition between retailers played its role: the prices were very similar from one store to the other one, and moderate when compared to the AX-5.
    • Fuji’s retailer network was narrower than  Canon’s, and the AX-5 was the least successful model of Fujica’s “X” line. Retailers did not seem particularly interested in stocking or promoting it, and as a result it was significantly more expensive than the Canon A-1.
Canon A-1 vs Fujica AX-5 – the Canon is bulky and looks “professional”. The Fujica’s design is a bit toned down.
  •  size, weight, features and ergonomics
    • The AX-5 was available with a black or a silver finish, and is smaller and lighter than the A-1. It looks almost “feminine” next to the black-only and larger A-1, with its removable hand grip and its multitude of switches and levers.
    • The feature set of the two cameras is largely identical, with the Fujica only missing access to low shutter speeds (slowest is 2 sec, as opposed to 30 sec for A-1)
    • But the Fujica has far fewer switches and buttons and seems simpler to use. The implementation of the Fujica’s shutter speed and auto mode selection is inspired by the Canon’s, but marginally different:
      • in both cameras, the shutter speed knob has been replaced with a control wheel and the selected shutter speed is shown on a disk, visible through a small window on the top plate.
      • With the A-1, the aperture ring of the lens has to be set on the “A” position to operate in any of the automatic exposure modes (Shutter Priority, Aperture Priority and Program). There is a toggle switch on the front plate of the camera to chose between the Aperture Priority or the Shutter Priority and Program modes. When the photographer switches to Aperture Priority, the desired aperture is selected by rotating the control wheel, and displayed through the same small window on the top plate.
      • To operate in Aperture Priority mode with the AX-5, one has to set the aperture ring of the lens on the desired value, and select the Auto Exposure position with the control wheel. To operate with Shutter Priority or Program modes, one has to set the lens on the  “A” position, select the shutter speed (Shutter Priority) or a full Auto Exposure mode (understand Program) with the control wheel. .
    • On the AX-5, there are two positions on the control wheel for the Auto Exposure command: AE – the camera adjusts the exposure until to the last second, and AEL (auto-exposure lock): the camera will keep the exposure setting determined by the photographer as long as the shutter release button stays half pressed. Very convenient. The Canon A-1 has an exposure lock button on the left of the lens mount to the same effect.
    • The commands of the AX-5 don’t feel as solid as the Canon’s (and the Fujica’s control wheel is too small and protected by a tiny push button lock – not  pleasant to use).
a battle scared Canon A-1 in program mode (lens aperture ring on “A”, mode selector on “Tv”, control wheel on “P”
  • Viewfinder
    • Canon: numeric LEDs – easy to read even in the dark
    • Fujica – strange barrel distortion when wearing glasses – noticeable but not really penalizing when shooting pictures. speed and aperture scales and LEDs intertwined on the left of viewfinder – legible but a bit confusing at the beginning.
viewfinder
Canon A-1 – viewfinder (source MIR)
Fujica viewfinder (source: the Fujica brochure – 1979)
  • Shutter and metering system
    • horizontal cloth – comparable – 1/1000 sec synchro at 1/60e. A-1 goes to 30sec, Fujica up to 2sec only.
  • Lens selection:
    • Canon – uses Canon FD lenses (or FL stopped down). Canon’s catalog of FD lenses was very wide and had something for all types of photographers – from amateurs looking for zooms, up to pros looking for the lens that will make “the” picture that will differentiate them from their competitors. Naturally, compatible lenses of all levels of quality were also available.
    • Fujica X – Fuji’s catalog of lenses included 20 different models, primarily primes lenses from 17mm to 400 mm, and three zooms. The AX-5 could also use screw mount “universal” lenses with an adapter; most of the big vendors of third party lenses (Tamron, Makinon, Soligor, TOU, Komine…) manufactured lenses for the “X” mount, but if the scarcity of lenses today is any indication, anything other than the standard 50mm and the 135mm tele-objective sold in extremely low volumes.
cameragx--5900
Fujica AX-5 – here in Program mode (AE set on the aperture ring of the lens, AE set on the shutter speed control wheel). Note the little shiny button on the left of the control wheel. It has to be pressed to leave the automatic modes.)

Now

  • reliability
    • Canon: built more solidly than the rest of the “A” series, – not only on the outside, but also inside (people who have opened both can testify that the A-1 contains more metallic components than its lesser brothers). The textile shutter may require some TLC (the cameras are almost 40 years old now)
    • Fujica : reliability was questionable back then, with an electro-mecanic shutter release that did not age well at all  (capacitor issues after a few years). Today, unless you’re only looking for a paper weight, only buy a camera tested by the seller, with fresh batteries. The batteries are of a very common type, and “not having a battery to test” is not a valid excuse.
  •  scarcity
    • Canon A-1 – relatively easy to find – they were produced in huge numbers and have been reliable – there are still plenty of them waiting for you.
    • Fujica AX-5 – difficult to find in good condition, in particular in the US. More abundant in Germany and central Europe, sometimes under a retailer’s label such as Porst (the AX-5 is the same camera as Porst’s CR-7). Because the market is so small,  prices for models tested and in working order can go up to  $150.
  • battery
    • Both cameras use the same 6v battery- still widely available today in alkaline, silver oxide and lithium variants. Silver Oxide is probably the best compromise.
    • None of the cameras works without a battery – no shutter release, no film advance – lots of people must have believed that their camera was broken when it was just asking for a new battery.
  • Lens selection
    • Canon: Abundant offer of great lenses at reasonable prices (Canon FD). Equally abundant offer of third party lenses, including in very exclusive brands like Angenieux.
    • Fujica: The AX-5 was launched in parallel to a new line of lenses, and none were really successful on the marketplace. Today, it is difficult to find anything which is not a 50mm or a 135mm lens. When you can find them, original Fujica X-Fujinon lenses with the renown EBC coating are expensive. Wide angle lenses or fast zooms are even more scarce and reach Leica R or Contax price levels.

Conclusion:

  • For an active film  photographer, it’s a no brainer – Canon A-1 cameras are abundant, lenses are easy to find and relatively cheap, and the A-1 is not inferior to the AX-5 in any significant way. The A-1 is the most satisfying pick in Canon’s “A” line, and the best choice in today’s comparison.
  • Fuji is a respected brand in the photography business (their medium format cameras and their current digital offerings have a cult like following). But Fuji’s aura does not extend to the Fujica AX cameras, who have lived an obscure life. For the collector of anything Fuji, the AX-5 is an interesting challenge: finding one that works is not super easy, and buying lenses is outright difficult. For an active photographer, the Fujica AX-5 has good sides: the camera is perfectly usable, it is light and compact, and presents simple and logical commands – but it does not feel as solid as the A-1, and looks more like a souped-up mid level SLR than a true enthusiast or pro camera. And in any case, because of the scarcity of X-Fujinon lenses,  – the real good ones have even become an object of speculation – none of the Fujica “X” cameras can be considered a reasonable choice for an active film photographer.

The Canon A-1 has a serious fan club, photographers who consider it the best film camera ever built. A few examples:

http://lewiscollard.com/cameras/canon-a-1/

https://www.casualphotophile.com/2015/04/20/canon-a-1-camera-review/


Rooftop terrace – Atlanta skyline – Fujica AX-5 – Tamron 28mm f/2.5 – Kodak Ektar

Stopped down or full aperture metering – why it still matters for users of mirrorless cameras today

For a single lens reflex camera or a lens manufactured after 1975, full aperture vs stopped down metering is a non issue. But it was a key differentiator between 1965 and 1975. And if you’re considering mounting an old lens (manufactured before 1975) on a mirrorless camera, it may still impact you.

On a single lens reflex camera (SLR), the photographer composes the picture on a mat focusing screen, where the image formed in the lens is projected. This layout has all sorts of advantages, but the viewfinder tends to get too dark for focusing when the lens aperture exceeds F/8, and at smaller apertures (F/11, F/16), even composition becomes impossible.

Therefore, the best practice in the 50’s was to open the lens at the widest aperture, focus carefully, and then rotate the aperture ring to stop down the lens at the aperture needed to expose the picture optimally. It worked, but it was slow.  The process was easy to automate, and that’s what aperture pre-selection systems do.

Aperture pre-selection mechanism

Their goal : let the photographer compose and focus at full aperture, and then stop down at the last fraction of a second, when he/she presses the shutter release. Practically, the diaphragm stays wide open, until the shutter release mechanism  (through various cogs, springs and levers) activates a rod in the lens which closes the diaphragm to the aperture pre-selected by the user.

Two implementations

  • manual pre-selection : the lens stays stopped down after the picture has been taken. The pre-selection mechanism has to be re-armed by the photographer if he/she wants to return to full aperture; it’s a slow process (shoot, rearm the shutter, rearm the lens).

    This big lever on this Nikkorex lens has to be pushed down to re-arm the pre-selection system after each shot
    This big lever on this Nikkorex lens has to be pushed down to re-arm the pre-selection system after each shot
  • auto pre-selection: the pre-selection mechanism does not need to be re-armed after each shot. The lens returns automatically to full aperture after each shot (that’s why lenses from the 1960-1975 period are often labeled “Auto”). It’s transparent for the user, who can operate faster and with a better chance of catching the decisive moment.

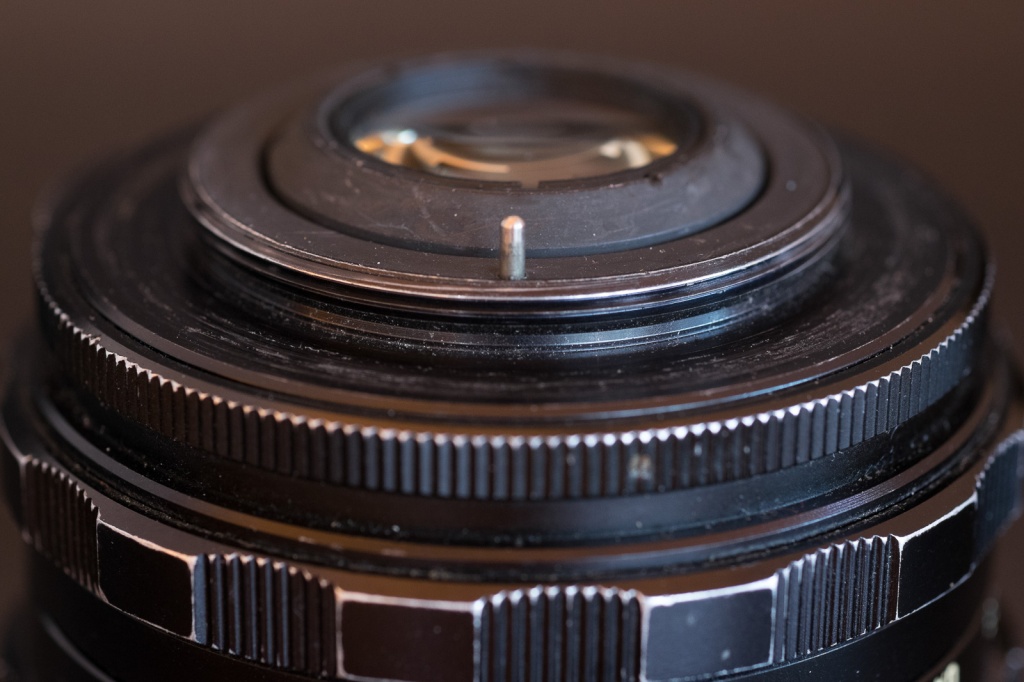
    M42 Lens mount - this lens is designed for "auto" preselection. It stays at full aperture until the pin is pushed to stop down position.
    M42 Lens mount – this lens is designed for “auto” preselection. It stays at full aperture until the pin is pushed to force the lens to a stop down position.

Through the Lens (TTL) metering

Aperture preselection solved the problem of composing and focusing at slow apertures, but the introduction of CdS cell meters to evaluate the illumination of a scene Through The Lens (TTL) brought a new set of challenges: the camera needed to know how open the diaphragm was going to be when the picture is finally taken. There were two ways to do it:

  • after the photographer had set the aperture, he had to press a dedicated lever to stop down the lens, and only then would the camera evaluate the illumination of the scene. It’s stopped down metering.
    Technically, it’s the quick and dirty answer:  the metering system of the camera does not need to know the value of the aperture pre-selected on the lens. It just measures the light going through the lens when stopped down. The pre-selection lenses don’t need to be modified – they simply work. But it’s cumbersome for the user:

    • it’s a step back – aperture preselection had removed the need for the photographer to stop down the aperture before pressing the shutter release. Now it needs to be done again.
    • the viewfinder is darker during metering (the photographer loses contact with the action, he can’t adjust the focus, and it’s difficult to see needle of the meter) – you cannot compose or focus and adjust the exposure at the same time.
    • it’s a disaster from an ergonomics point of view. Even in the best implementations, the photographer has to maintain the lens stopped down by pressing or lifting a dedicated lever on the camera’s body, while trying to turn the aperture ring or the shutter speed knob to adjust the exposure. You need three hands for this type of gymnastics.

      The Canon FT/QL and the Pentaxx Spotmatic SP both offer Stopped Down Metering. To determine the exposure, the photographer has to push the big switch to the left (Canon) or to lift the switch in the red circle (Pentax) - which is not a very natural movement. You wish you had three hands.
      The Canon FT/QL and the Pentaxx Spotmatic SP both offer Stopped Down Metering. To determine the exposure, the photographer has to push the big switch to the left (Canon) or to lift the switch in the red circle (Pentax) – which is not a very natural movement. You wish you had three hands.
  • full aperture metering is transparent for the user. The diaphragm is stopped down a fraction of a second before the shutter curtains open and the picture is actually taken. The lens stays at full aperture all the time, including during the exposure determination.
    But for full aperture metering to be possible, the lens has to communicate the aperture pre-selected by the user to the metering system in the camera body, so that it can determine the right shutter speed/aperture combination.
    Most vendors chose to add a new dedicated lever inside the lens mount (this solution was chosen by Canon, Minolta, Olympus and Pentax).

    Pentax K mount: Aperture control lever (i); Aperture simulator (ii): Source:pentaxforums.com
    Pentax K mount: Aperture control lever (i);
    Aperture simulator (ii):
    Source:pentaxforums.com

    A few other vendors chose to simply modify the design of the aperture ring of the lens, and use it to transmit the aperture value to the camera’s metering system. At the beginning, Nikon used an external fork (the “rabbit ears”) screwed at the periphery of the aperture ring to communicate the pre-selected aperture to a pin connected to the metering system in the body.

    Before the adoption of Auto-Indexing, Nikon lenses used a metallic fork ("the rabbit ears") to transmit the preselected aperture to the metering system of the camera.
    Before the adoption of Auto-Indexing, Nikon lenses used a metallic fork (“the rabbit ears”) to transmit the preselected aperture to the metering system of the camera.

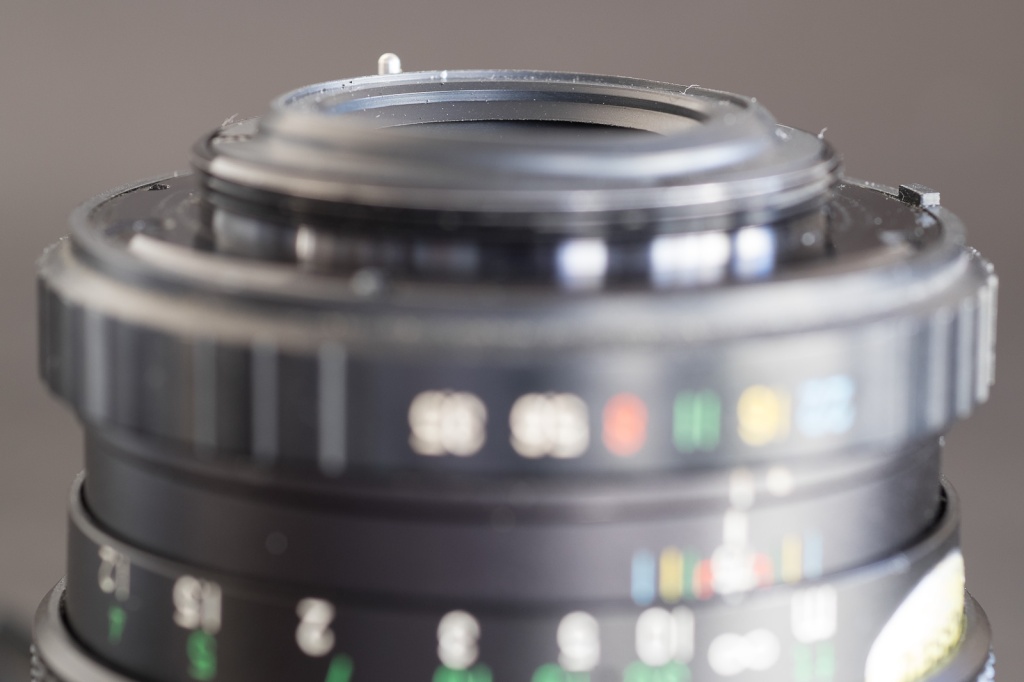
    Later, Nikon redesigned the aperture ring to add  a small protruding tab at its back, and this tab moved a sensor on the circumference of the body’s lens mount (Nikon Auto Indexing or “AI” lenses). Nikon’s system is similar (in its principle) to Fuji’s implementation of full aperture metering on the m42 universal mount of the ST801 (pictures below).

Fujinon lens - the aperture ring is designed with a small tab which transmits the aperture pre-selected by the photographer to a rotating ring on the camera's body.
Fujinon lens – the aperture ring is designed with a small tab which transmits the aperture pre-selected by the photographer to a rotating ring on the camera’s body.
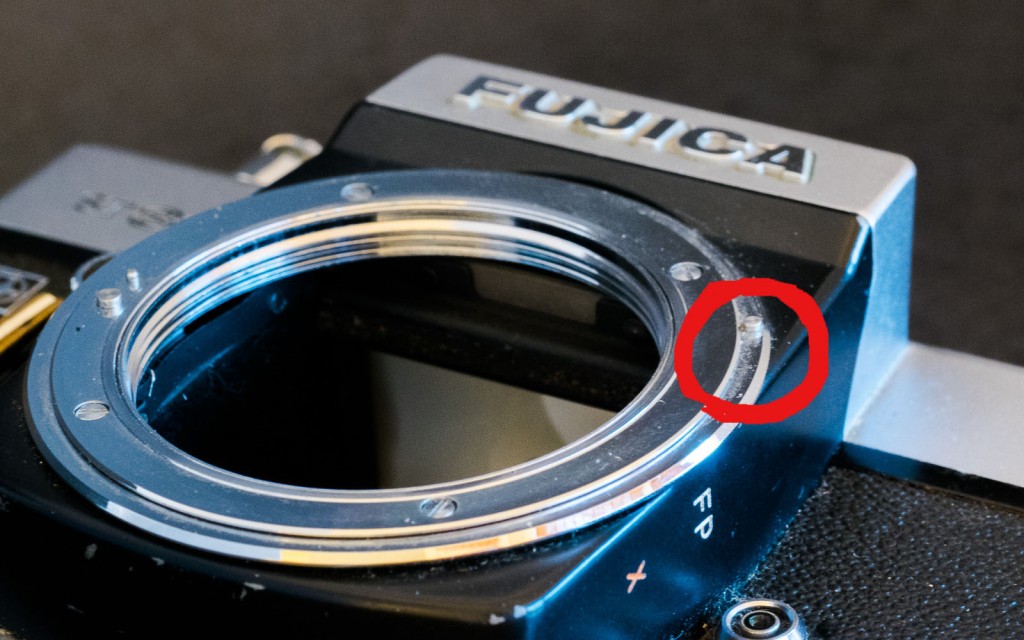
Fujica ST 801: Fuji's version of the m42 lens mount has a ring at the periphery - the little pin in the red circle is pushed by the tab protruding from the aperture ring of the lens. That's how the preselected aperture is transmitted.
Fujica ST 801: Fuji’s version of the m42 lens mount has a recessed, spring loaded rotating ring at the periphery – the little pin in the red circle is pushed by the tab protruding from the aperture ring of the lens. Any change to the pre-selected aperture on the lens will be transmitted to the camera.

Mounting an old lens on a mirrorless camera

When the photographer is using an old lens through a lens mount adapter, the cameras  needs to work with the lens stopped down (only semi-auto and  aperture priority automatic exposure modes are supported). There are none of the inconveniences associated with stopped down aperture on a reflex camera: on a mirrorless camera, the viewfinder always shows the image as it will be exposed, and if the exposure parameters (aperture, shutter speed and ISO) are correctly set, the image will be perfectly legible in the viewfinder, even if the lens is set a f/11.

But the challenge is to force an old lens to operate stopped down:

  • lenses designed for full aperture operations and stopped down metering (typically the m42 lenses with auto-pre-selection and the Canon FL) have a slider to switch off auto-preselection and operate permanently at stopped down aperture, in a manual mode. When mounted on a mirrorless camera through a lens mount adapter, they need to be switched to “manual”.
     Lenses of the 1965-1975 era often had an auto/manual switch - by default the operated at full aperture but could revert to manual if mounted on an older reflex camera.
    Lenses of the 1965-1975 era often had an auto/manual switch – by default they operated at full aperture but could revert to manual if mounted on an older reflex camera.

    The "manual" mode has to be switched on when used on a mirrorless camera.
    The “manual” mode has to be switched on when used on a mirrorless camera.
  • Nikon lenses  – the diaphragm of the Nikon lenses is opened at full aperture when the camera is mounted on a Nikon camera (the camera side of the mount has a lever which forces the lens open), but is stopped down when the lens is removed from the camera, or  mounted on an adapter deprived of the full aperture lever.  Which is perfect if you’re mounting the lens on a mirrorless camera.
  • Canon FD – when the lens is removed from a Canon camera, the diaphragm command is decoupled (the lens stays at whatever aperture it was pre-set the last time it was on a Canon FD camera). The adapter needs to be designed with a pin that will force the lens to stop down  when mounted on the adaptor.
Lens mount adapter for Canon FL/FD lens - the pin in the red circle pushes a lever on the lens and will force it to stop down.
Lens mount adapter for Canon FL/FD lens – the pin in the red circle pushes a lever on the lens and will force it to stop down.
  • Fuji’s EBC-Fujinon lenses are highly regarded, but the brand’s implementation of full aperture metering on the m42 mount presents two problems for modern mirrorless camera users:
    • most of the lens mount adapters receiving m42 lenses do not leave room for the aperture ring’s protruding tab of Fuji’s lenses. The lenses cannot be fully screwed down on the adapter and as a consequence may not focus to the infinite,
    • Fuji’s lenses don’t have a “manual” position and cannot be forced to operate stopped down on their own (that function was provided by the Fujica camera itself, not by the lens). There are work arounds to both issues, some nice, some ugly, but a lens mount adapter designed specifically for Fujica m42 lenses still has to be developed.

New-York City - Central Park - Fuji XT-1 - Canon 35-105 f/3.5 lens with Fotasy adapter
New-York City – Central Park – Fuji XT-1 – Canon 35-105 f/3.5 lens with Fotasy adapter

How much did SLR cameras cost in 1985?

1985 is an interesting year, a turning point for the market of single lens reflex cameras: Minolta launched the first technically and commercially  successful auto-focus SLR, the Maxxum 7000. In a few years, manual focus SLRs would be relegated to the status of entry level models manufactured by subcontractors such as Cosina. Brands like Olympus or Contax would fail to impose their autofocus cameras on the marketplace and would become largely irrelevant, while vendors like Fuji would not even try to launch an autofocus line of bodies and lenses, and would leave the market altogether.

Old issues of Popular Photography have been scanned and indexed by Google, editorial content and ads. I compiled the table below from Adorama’s and Cambridge Photo’s ads.

Price of Cameras - 1985
Price of Cameras – 1985

A few interesting points….

Minolta Maxxum 7000 - source Wikipedia
Minolta Maxxum 7000 – source Wikipedia
  • the models most popular with enthusiasts  (Canon AE-1P and Minolta X-700) were in the $150 price range (body only).
  • Beginners could buy “a learner’s cameras” – with semi-auto-exposure – or a spec’d down aperture priority automatic cameras for less than $100.00.
  • Very few models were competing in the $300 price bracket: serious or wealthy enthusiasts and pros could buy the Nikon FA, splurge on an OM-4, or spend even more on modular cameras with interchangeable viewfinders  (like the Nikon F3, the Canon F1 or the Pentax LX).

The Minolta Maxxum 7000, priced at $300 (when you could find it), completely changed the equilibrium of the market. Targeted at the enthusiast photographer crowd (there was a more expensive Maxxum 9000 for the aspiring pros), it moved the average price of a camera a few notches upwards.

In a few years, the major vendors had converted their product line to autofocus, and relegated what was left of their manual focus SLR lines to the status of  low margin items targeted at impecunious customers. Minolta and Pentax moved the production line of their  manual focus SLRs to China, while Canon, Nikon and Olympus  commissioned companies  like Cosina to design and manufacture entry level manual focus cameras for them (Canon T60, Nikon FM10 and Olympus OM-2000 respectively).

On a side note, the Maxxum product line was so successful that Minolta leapfrogged Canon to become the #1 vendor on the market. It took Canon a few years (and the EOS series) to take their crown back.


Charleston, SC - Shot in 2009 - Nikon FM - Kodak CN400
Charleston, SC – Shot in 2009 – Nikon FM – Kodak CN400

A new 90mm lens from Voigtlander. Nikon and Pentax compatible

voigtlander 90mm f:3.5 SL II announced
The Voigtlander 90mm f:3.5 SL II, as presented on CameraQuest's Web site.


Voigtlander is an old brand of German origin, now belonging to Cosina.


Cosina is a Japanese contract manufacturer – their 35mm cameras were adopted and sold successively by Canon, Olympus, Nikon, Contax and Zeiss, and they are one of the few companies still producing 35mm film cameras today. A few years ago, they started manufacturing manual focus prime lenses, available in the Canon EF, Pentax K and Nikon F (AI-S) mounts under the Voigtlander brand.


The lenses made for Nikon cameras had one limitation, though. While perfectly compatible with manual focus SLRs, they did not have the electronic chip and the electrical contacts needed to communicate with recent autofocus bodies. Like Nikon’s own AI-S lenses, they could be mounted on mid-level dSLRs like the Nikon D80 or D90, but they were not recognized by the camera, which disabled its exposure metering circuit and forced the photographer to use a hand-held exposure meter, or to rely on the analysis of the histogram, after the picture was taken. The lens mount of higher end Nikon models such as the D300 or the D700 still has the pins, levers and springs needed to be fully AI-S compatible.


The new generation of Voigtlander SL II lenses has the right chip and the right electrical contacts, and is now compatible with any Nikon autofocus SLR or dSLR (the photographer still has to focus manually, of course).


A few days before the PMA, Cosina presented the APO-Lanthar 90mm f:3.5 SL II Close Focus lens (yes, that’s its name), a compact close focus lens. It targets a small niche of photographers who still want to buy new manual focus equipment. With a maximum aperture of F:3.5, it’s pretty slow compared to Nikon’s 85mm f:1.4 prime, and will not compete in the “portrait lens” category. With a magnification ratio of 1/3.5, it’s not a macro lens either. It’s available in Nikon and Pentax mounts, but non in Canon’s EF.


A product for a niche within a niche, obviously.


More about the Voigtlander APO-Lanthar 90mm f:3.5 SL II Close Focus


Cameraquest: the distributor of Voigtlander SLII lenses


Viewfinders: coverage, magnification and eye relief

Eye Relief
Eye Relief

A large proportion of photographers wears prescription glasses – I know, I’m one of them – and almost everybody wears sun glasses occasionally. But surprisingly, until high eye point or high eye relief viewfinders appeared – on the Nikon F3 HP in the early eighties, photographers with glasses could not see the integrality of the scene – let alone the aperture or speed information on the LED displays surrounding the view of the scene- without having to move their eye balls up and down and left to right.

As far as viewfinders are concerned, some cameras are better than others, though. The quality of the viewfinder of a manual focus camera is influenced by three factors:

  • Coverage: It’s the percentage of the image captured through the lens which is going to be shown in the viewfinder. 100% coverage is desirable – but expensive to manufacture, and only top of the line cameras (the real “pro” models) show the integrality of the scene in the viewfinder. Most SLRs show between 85% and 95% of the scene. Point and shoot cameras, (more precisely the few P&S which still have an optical viewfinder) are much worse. The best of them, the Canon G11 only shows 77% of the scene that will be captured through the eye piece.
  • Magnification: If the magnification was equal to 1, an object seen through the viewfinder would appear to be the same size as seen with the naked eye (with a 50mm lens on a 35mm camera). The photographer could even shoot with both eyes open. If the magnification ratio is lower than 1, then the object will appear smaller in the viewfinder than seen with the naked eye.Magnification has an impact on composition and focusing. If the magnification ratio is very low (below 0.4) the image becomes so small that it’s difficult to compose the picture. Magnification is also a critical factor for picture sharpness on manual focus cameras: the accuracy of the focusing is directly related to what the photographer can see on the matte focusing screen, and the higher the magnification, the easier it’s going to be for him or her to focus accurately.On a 35mm single lens reflex camera, the magnification is measured with a 50mm lens, and varies between 75 and 95%. Full frame digital SLRs have viewfinders offering comparable magnification values. dSLRs with so-called APS-C sensors advertise very high magnification ratios, but after the crop factor of the small sensor is taken into consideration, the real magnification value lies between 0.46 and 0.62. Read Neocamera‘s article for more information about the real viewfinder magnification ratio of dSLRs.
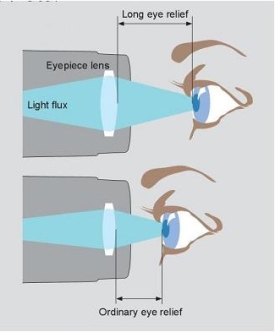
  • Eye relief: “The eye relief of a telescope, a microscope, or binoculars is the distance from the last surface of an eyepiece at which the eye can be placed to match the eyepiece exit pupil to the eye’s entrance pupil.” (Wikipedia, eye relief entry).The longer the eye relief, the more comfortable the camera is going to be for a photographer wearing glasses, but the smaller the focusing screen is going to look.A photographer wearing glasses will need an eye point of approximately 20mm (depending on the dimensions of the frames and the thickness of the lenses of the glasses) to be able to see entire the viewfinder image, plus the exposure information without having to move his eye balls left to right and up and down. Camera manufacturers describe them as “High eye Point” or HP viewfinders.

A comparison between a few 35mm cameras

As is often the case with engineering, a good design is the result of a successful compromise between conflicting requirements. Most photographers desire a long eye relief, but at the same time want a magnification ratio high enough, so that they can compose their image with precision and focus accurately. With the F3, Nikon offered 2 versions of its standard viewfinder. The DE-2 of the original F3 had an eye relief of approximately 20mm, and a magnification of 80%; the DE-3 viewfinder of the F3 HP had a much longer eye relief (25mm) but a smaller magnification ratio of 75%. The market decided in favor of the longer eye relief and the DE-3 became the standard viewfinder of all subsequent versions of the F3. The advent of autofocus SLRs accelerated the trend towards longer eye relief and lower magnification ratios.

Subjective results
The experience confirms the figures. The Nikon F3 has by far the best viewfinder, followed by the tiny Olympus OM-1. The Nikon FM-FE-FA are far behind.

  • Nikon launched the F3 with a standard viewfinder (model DE-2) which offered 100% coverage and already had a relatively long eye point. The standard F3 can comfortably be used by photographers wearing glasses. A few years later, Nikon introduced another version of its flagship camera, the F3 HP, which was the first to offer a viewfinder with the very long eye point of 25mm (one inch). The long eye point came at the cost of a lower magnification (down to 75%) and an higher weight. The F3 HP was a sales success, and all subsequent F3 cameras would come from Nikon with the HP viewfinder (the DE-3).
  • The Olympus OM-1 has an incredible viewfinder, with a very high coverage and a very high magnification. The viewfinder does not offer any exposure information besides the match-needle arrangement at the right of the image, and even if the eye point is rather short, the photographer has the impression he’s watching all of the scene. Subsequent OM models offered a little more information at the periphery of the viewfinder and a little less magnification, and in a world where hi-point viewfinders were becoming the norm, they were far less remarkable than the OM-1.
  • The Nikon FM, FE and FA provide more exposure information than the Olympus cameras (the selected aperture, in particular). Compounded with the very short eye relief (14mm), it makes it impossible for a photographer wearing glasses to see the whole scene and the exposure information at the periphery without some eye movements. While similar on paper to the other compact Nikon SLRs, the viewfinder of the Nikon FG fares worse than its stablemates in real life.

Rangefinder cameras work by different rules. Their viewfinder covers far more than what will be captured on the film, and very little exposure information is displayed in the viewfinder. Even if the Leica M offers an eye relief of only 15mm, a photographer wearing glasses will not have any problem visualizing the image in the viewfinder.

With a few exceptions such as the Canon G11, Point and Shoot digital cameras don’t offer optical viewfinders anymore. The G11’s may be used as a last resort in a very bright environment, (when using the LCD is not an option), but it’s very small and very unpleasant to use. Low end digital SLRs with small sensors (Four Thirds or APS-C) are equipped with very low magnification viewfinders, and have a very pronounced tunnel effect. Manual focusing is not an option, and composing an image with precision can be challenging. Mid-level dSLRS (like the Canon 7D or Nikon’s D90 and D300) have much better viewfinders, with relatively long eye relief (22 and 19.5mm respectively) and real magnification ratios of approximately 0.625.

More about it

Luminous Landscape – Mike Johnson’s “Understanding SLR viewfinders”

Neocamera: Viewfinder of digital cameras

Foca *** with a Foca turret viewfinder / Olympus OM-1n. The Foca is a French rangefinder camera from the late forties, and its viewfinder is unusable if you wear glasses. And hardly usable even without them.
Model Coverage Magnification Eye Point Comment
Nikon F3 HP (DE-3 finder) 100 % 75% 25mm The camera that introduced Hight Point viewfinders to the public.
Nikon F3 with the standard DE-2 viewfinder 100 % 80% Not known. Probably 20mm The original pre-HP viewfinder. Even with glasses one can easily see all of the scene and the little LCD display.
Olympus OM-1 97% 92% Not known. Probably 15mm Incredible. How can such a small camera deliver such a large image? Short eye point, but since the viewfinder does not provide any exposure information at the periphery of the frame, not much of a problem.
Nikon FM, FE, FE2, FA 93% 86% Not known. Probably 14mm Short eye point, plenty of information at the periphery of the viewfinder. Not the best recipe for photographers wearing glasses.


50 Years of Lens Mount Evolution – Part IV of VI


Programmed exposure


The automatic bodies of the early seventies still required some input from their users: they could only determine the shutter speed (or the aperture in the case of Canon cameras) after the photographer had set an aperture (or a shutter speed) compatible with the film speed, the intensity of the light and the characteristics of the scene (portrait, action shots, macro, and so on).
If the aperture set by the user was too low or too high, a matching shutter speed could not be selected by the camera and the picture was hopelessly under or over exposed.
Similarly, if the photographer let the camera select a very slow shutter speed with a long tele-lens, the picture would be blurry and unusable. Trained photographers knew that. But a better automatic exposure solution had to be found for the photographers who did not want to be bothered with technical details.

Nikon FA - the commands for the multi-mode exposure automatism (PSAM)
Nikon FA (1984) – the command for the multi-mode exposure automatism (PSAM) is in front of the shutter speed knob


Inspired by the program modes already available in point and shoot cameras, Canon launched the A-1, a new SLR with programmed exposure modes in 1978. Practically, it meant that the auto exposure system of the body had to simultaneously command the shutter speed and the aperture of the diaphragm.


Canon did not have to change anything on the FD mount, which had been created for full aperture shutter priority exposure. 


Nikon introduced the “AI-S” generation in 1979 when the mount was modified to support a linear command of the diaphragm. The first Nikon cameras to take advantage of the AI-S lenses and to offer a program mode and shutter priority were launched in 1982 and 1984 respectively. Because the camera body was informed of the focal length of the objective, it could choose automatically between two aperture-speed combinations when configured in program mode, one for wide angle and normal lenses, and one for lenses of 135mm and longer .

Nikon F mount - AIS on the Nikon FA
The AI-S variant of Nikon F mount, shown here on the Nikon FA. Compared to the lens mount of the FE2, the FA’s is using three more sensors: a small pin above the lens lock – which informs the body that the lens is of the AI-S type, a larger sensor inside the reflex chamber (right of the picture, in the middle) which is used to transmit the focal length of the lens to the body, and a slider at the bottom of the reflex chamber, used to transmit the maximum aperture of the lens to the body. The use of mechanical sensor had reached its limits. It was time to adopt electrical contacts instead.
Nikon F mount - AI on the Nikon FE2
For reference, the much simpler design of the AI mount (Nikon FE2). The stop down lever controlling the diaphragm is on the left side on the picture. You can still find it on current Nikon digital cameras.


Still trying to catch up with Nicanolta, Pentax adopted a brand new bayonet mount, the K mount, in 1975. The first K mount, however, did not support shutter priority or program modes. Electric contacts would have to be added with the KA declination of the K mount in 1983 to make it possible. Its close derivatives are still used today on Pentax DSLRs.


The state of the art between 1971 and 1985


Pentax: Aperture priority automatic cameras launched in 1971 with modified 42mm screw mount lenses supporting full aperture metering.
Change from the 42mm screw mount to a new Pentax K bayonet in 1975 (automatic pre-selection, full aperture metering, transmission of the pre-selected aperture value from the lens to the body);
Shutter priority and program mode introduced in 1983 with the KA version of the K mount.


Canon: The FD breech mount introduced in 1971 was ready for the Shutter priority cameras launched in 1973 (Canon EF) and for the program mode (Canon A1, 1978).


Minolta: MD declination of the SR Mount (one pin added for the support of the Shutter priority mode) to support the Shutter priority mode in 1977.


Nikon: Aperture priority cameras available since 1971 (Nikon EL) with the manual indexing F mount. Launch of the AI version of the F mount in 1977 to improve the ease of use. Progressive adoption of the AI-S declination of the F mount in 1979 to prepare for the arrival of cameras offering a program mode (Nikon FG, 1982) and a shutter priority automatic exposure (Nikon FA, 1984).


Olympus: the OM mount was introduced in 1971, and was ready to support programmed exposure from the beginning.


More about the lens mounts


Photography in Malaysia: information related to the F lens mount


American Petit LeMans - the Atlanta Pipe Band. Nikon FA - Kodak CN400
American Petit LeMans – the Atlanta Pipe Band. Nikon FA – Kodak CN400 – Processed by Costo. Cropping and minor adjustments in Lightroom 2

Viewfinders: coverage, magnification and eye relief (Intro)

Eye Relief
Eye Relief


A large proportion of photographers wears prescription glasses – I know, I’m one of them – and almost everybody wears sun glasses occasionally. But surprisingly, until high eye point or high eye relief viewfinders appeared – on the Nikon F3 HP in the early eighties, photographers with glasses could not see the integrality of the scene – let alone the aperture or speed information on the LED displays surrounding the view of the scene- without having to move their eye balls up and down and left to right.


As far as viewfinders are concerned, some cameras are better than others, though. The quality of the viewfinder of a manual focus camera is influenced by three factors:

  • Coverage: It’s the percentage of the image captured through the lens which is going to be shown in the viewfinder. 100% coverage is desirable – but expensive to manufacture, and only top of the line cameras (the real “pro” models) show the integrality of the scene in the viewfinder. Most SLRs show between 85% and 95% of the scene. Point and shoot cameras, (more precisely the few P&S which still have an optical viewfinder) are much worse. The best of them, the Canon G11 only shows 77% of the scene that will be captured through the eye piece.

  • Magnification: If the magnification was equal to 1, an object seen through the viewfinder would appear to be the same size as seen with the naked eye (with a 50mm lens on a 35mm camera). The photographer could even shoot with both eyes open. If the magnification ratio is lower than 1, then the object will appear smaller in the viewfinder than seen with the naked eye.


    Magnification has an impact on composition and focusing. If the magnification ratio is very low (below 0.4) the image becomes so small that it’s difficult to compose the picture. Magnification is also a critical factor for picture sharpness on manual focus cameras: the accuracy of the focusing is directly related to what the photographer can see on the matte focusing screen, and the higher the magnification, the easier it’s going to be for him or her to focus accurately.


    More after the jump