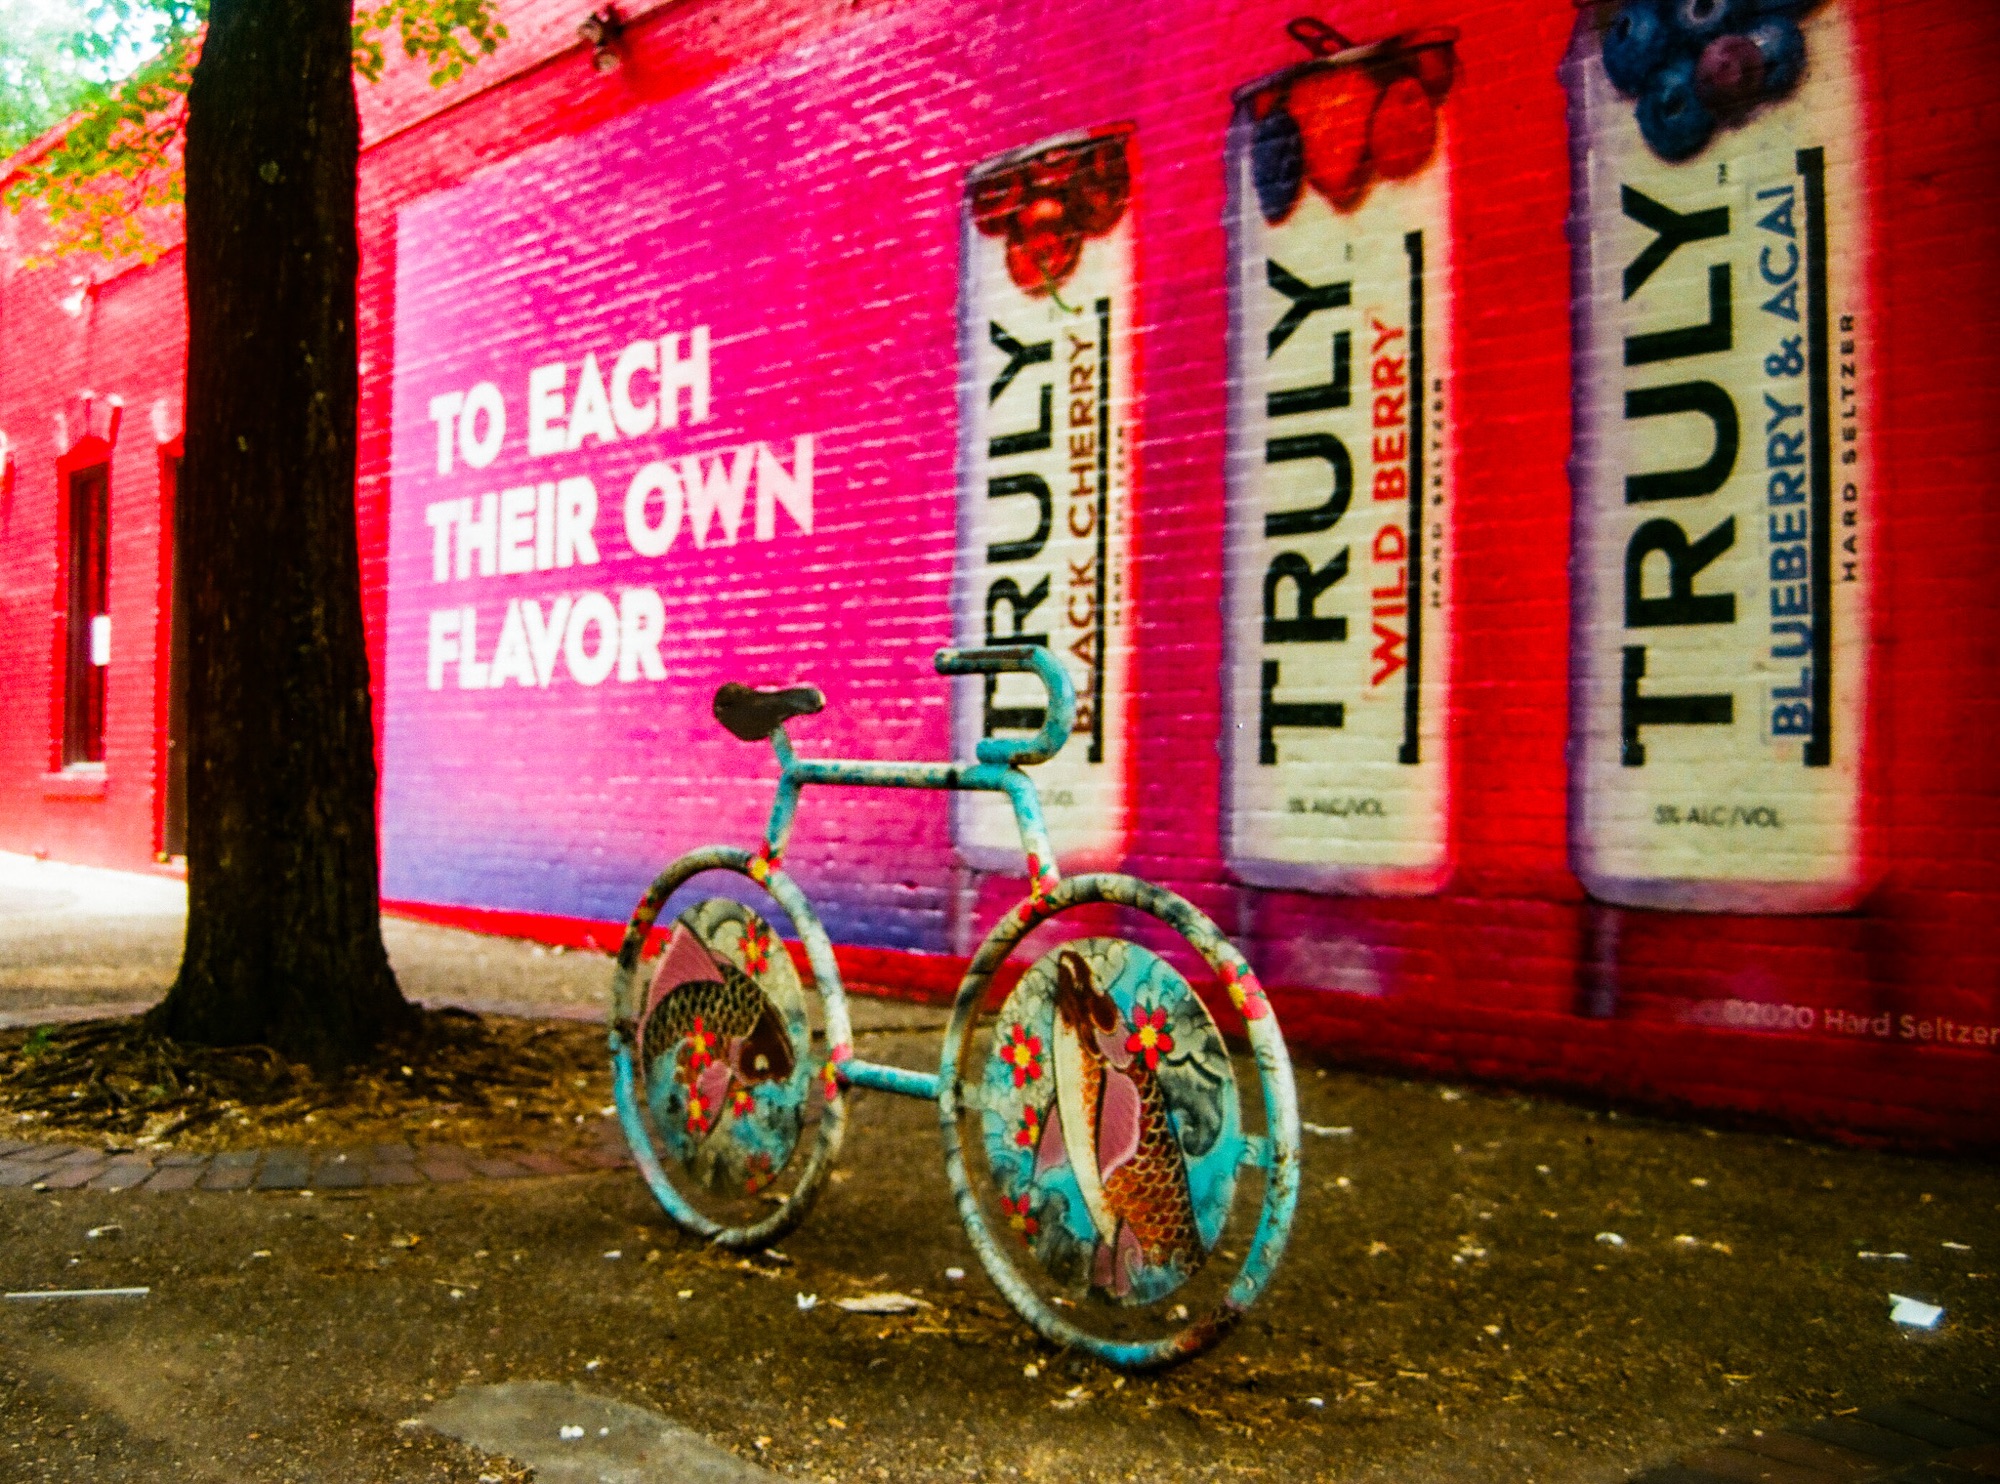
Just before Thanksgiving, I posted a picture taken a few years ago in Atlanta’s Little Five Points neighborhood with a Pentax P3, a film camera that suffered a terminal failure a few rolls of film later (an issue with the film advance mechanism like most of the P3s, of course). The lens – the Pentax A 35-70 f/3.5-4.5 – was so bad I got rid of it (my copy was faulty – the lens has a decent reputation otherwise). The image was not that great either but was made more interesting in post-processing with Lightroom, and in a few weeks, it has become my most appreciated image of the year in Flickr.
I even received a request to use it from a pro-bicycle user group…. Go figure.
I’ve been traveling recently, and will be on the road again during the holiday season. I’m not forgetting this blog, in fact I’m harvesting more images for later use, but it’s very likely that this post will be the last one before Christmas.
Happy Holidays to you and to your families.
Atlanta Little Five Points. Pentax P3/P30 – Pentax A 35-70mm f/3.5-4.5 – the wall has been repainted since, and is far less interesting…
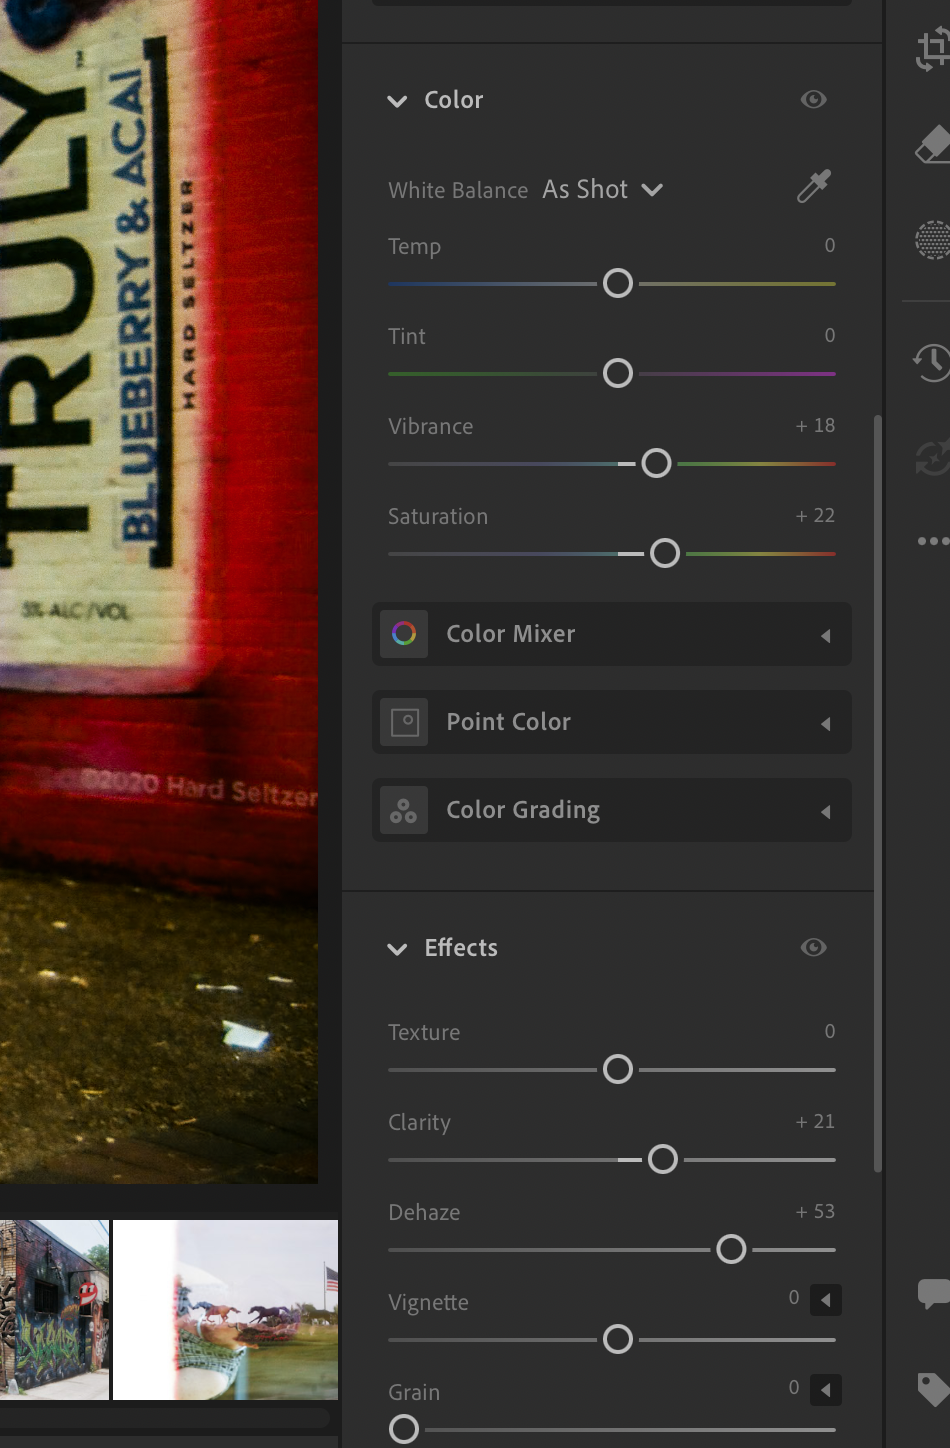
Trying to save a compromised image in Lightroom.
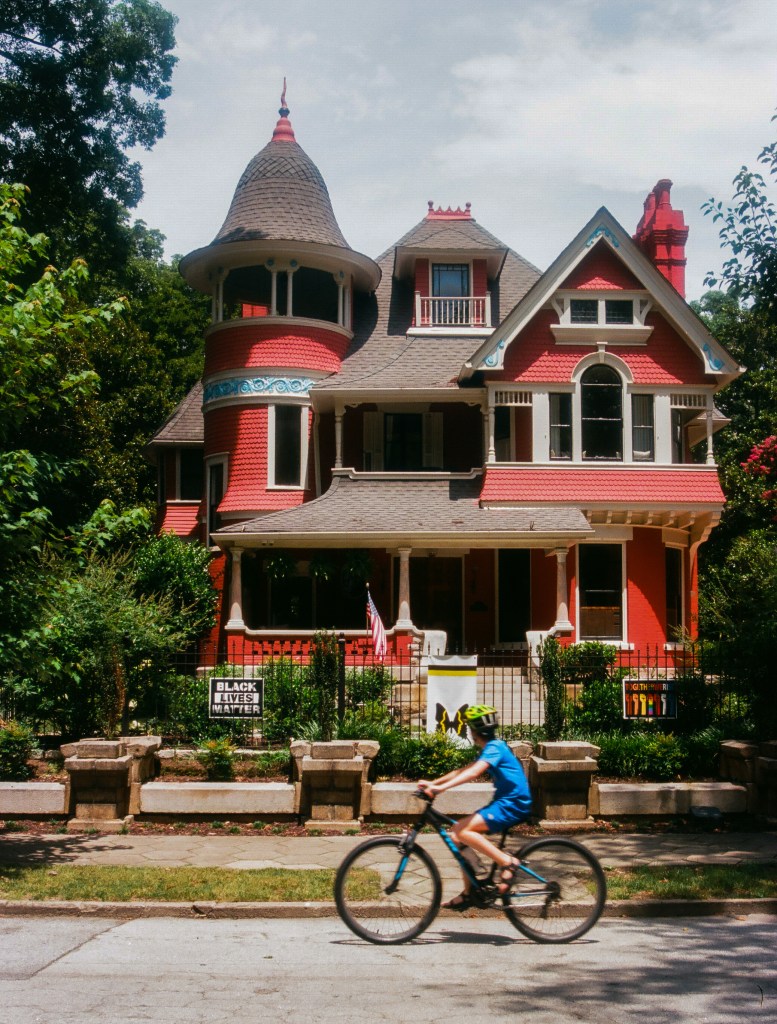
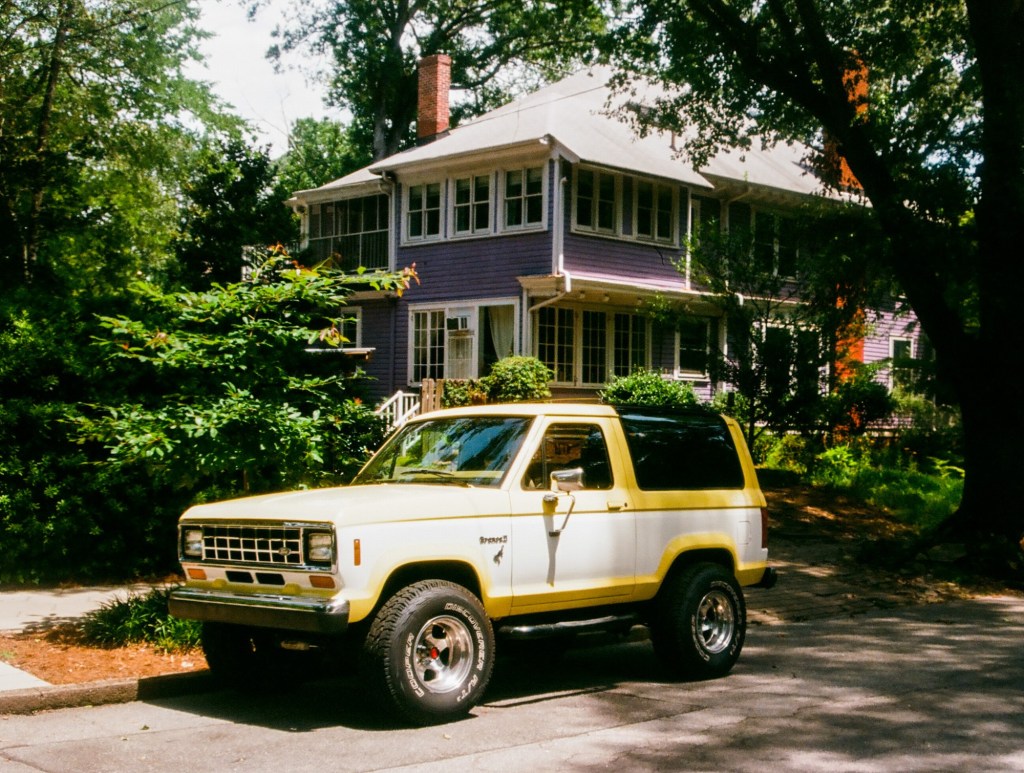
More of the same series….Same camera, same lens, same roll of film.
Another image from the same roll of film – Atlanta, Inman Park.
Ford Bronco II – Inman Park Neighborhood, Atlanta.
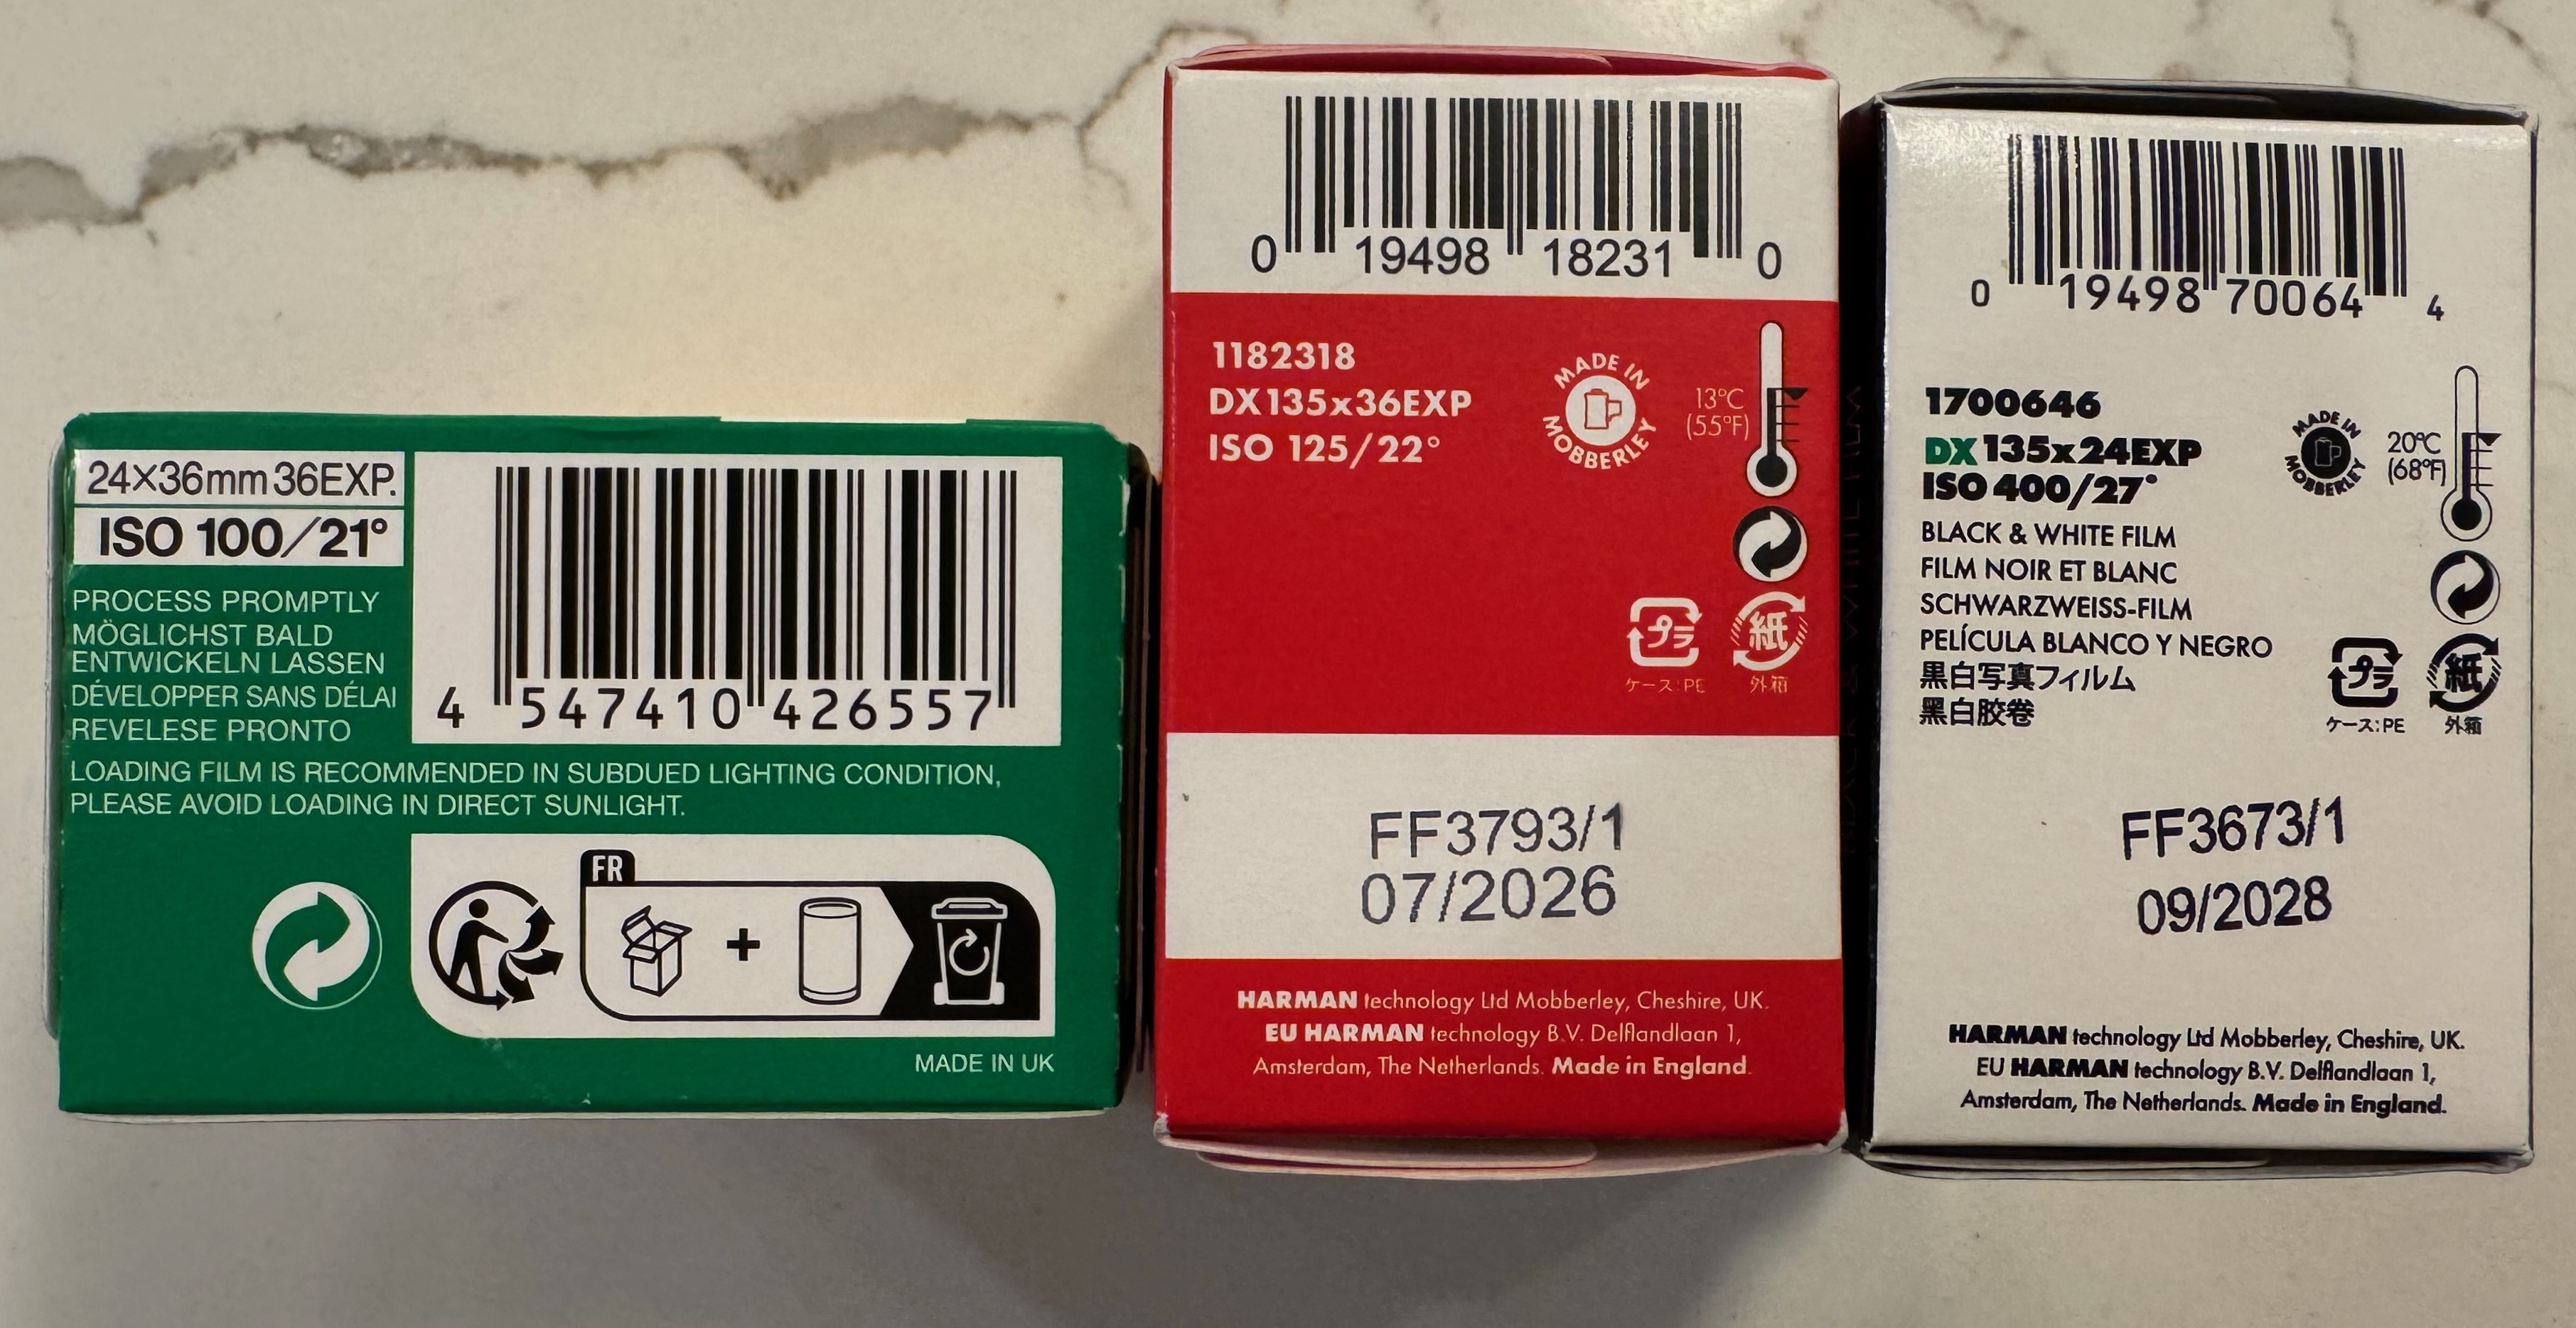
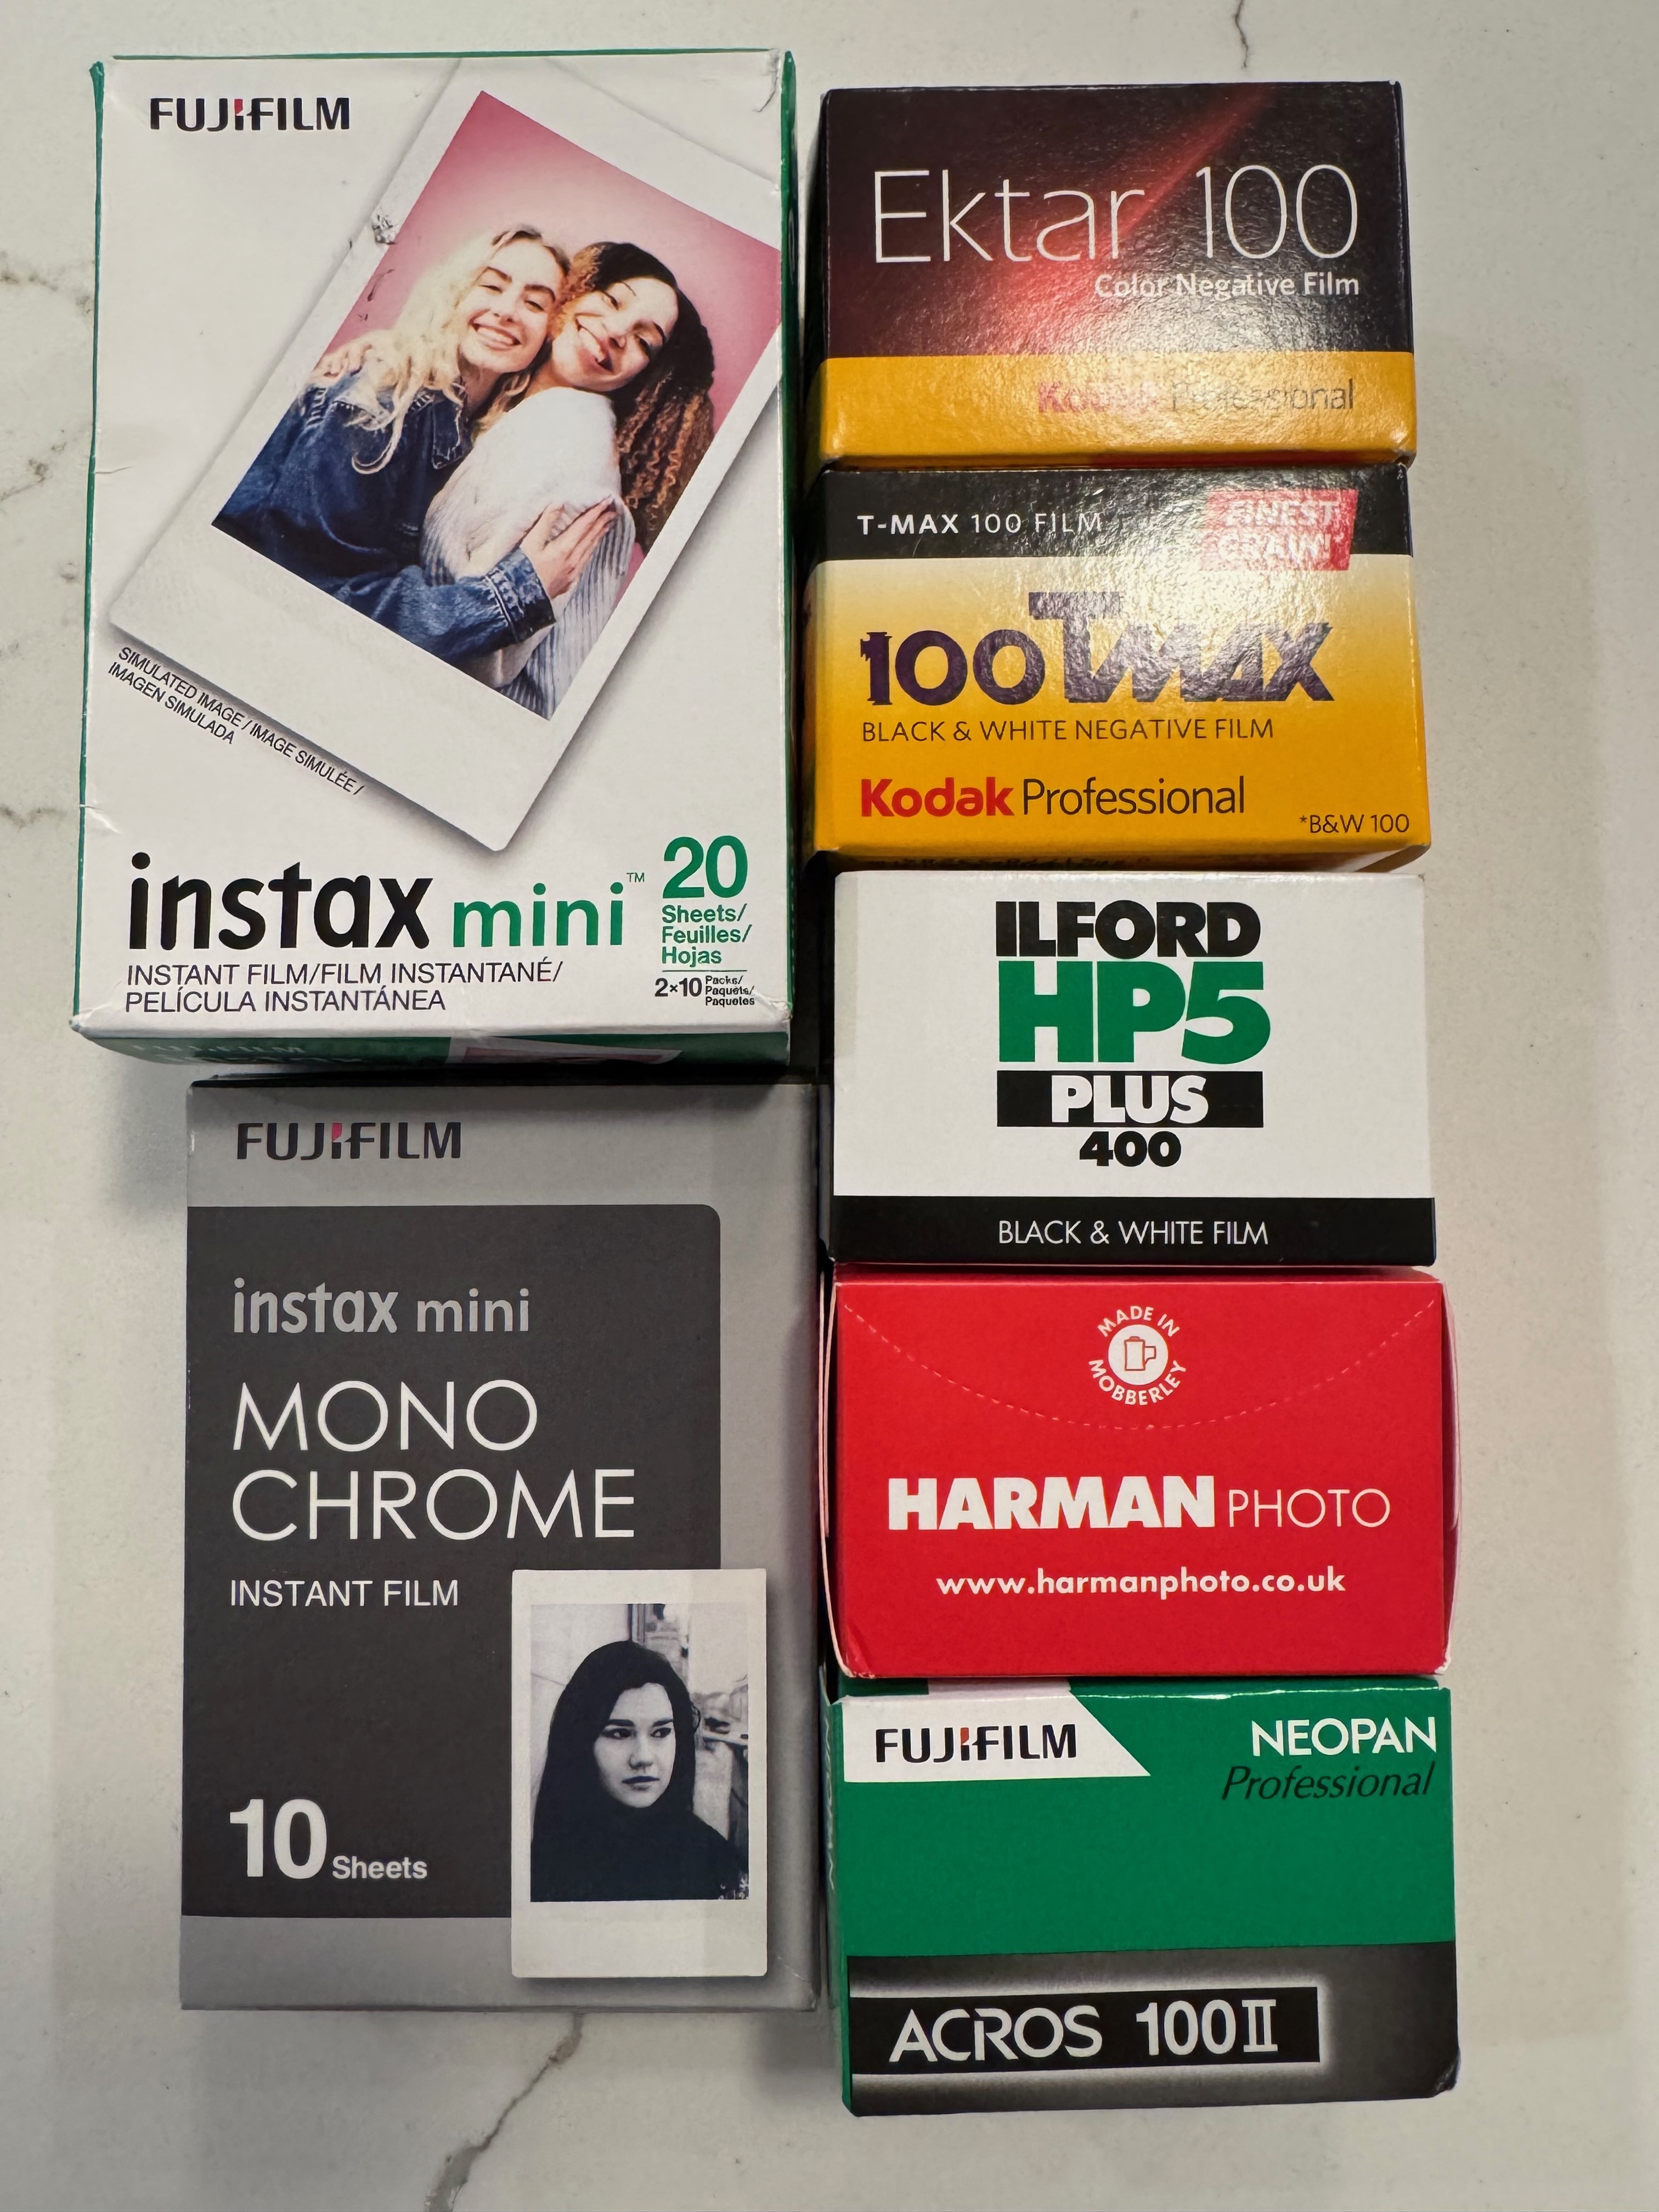
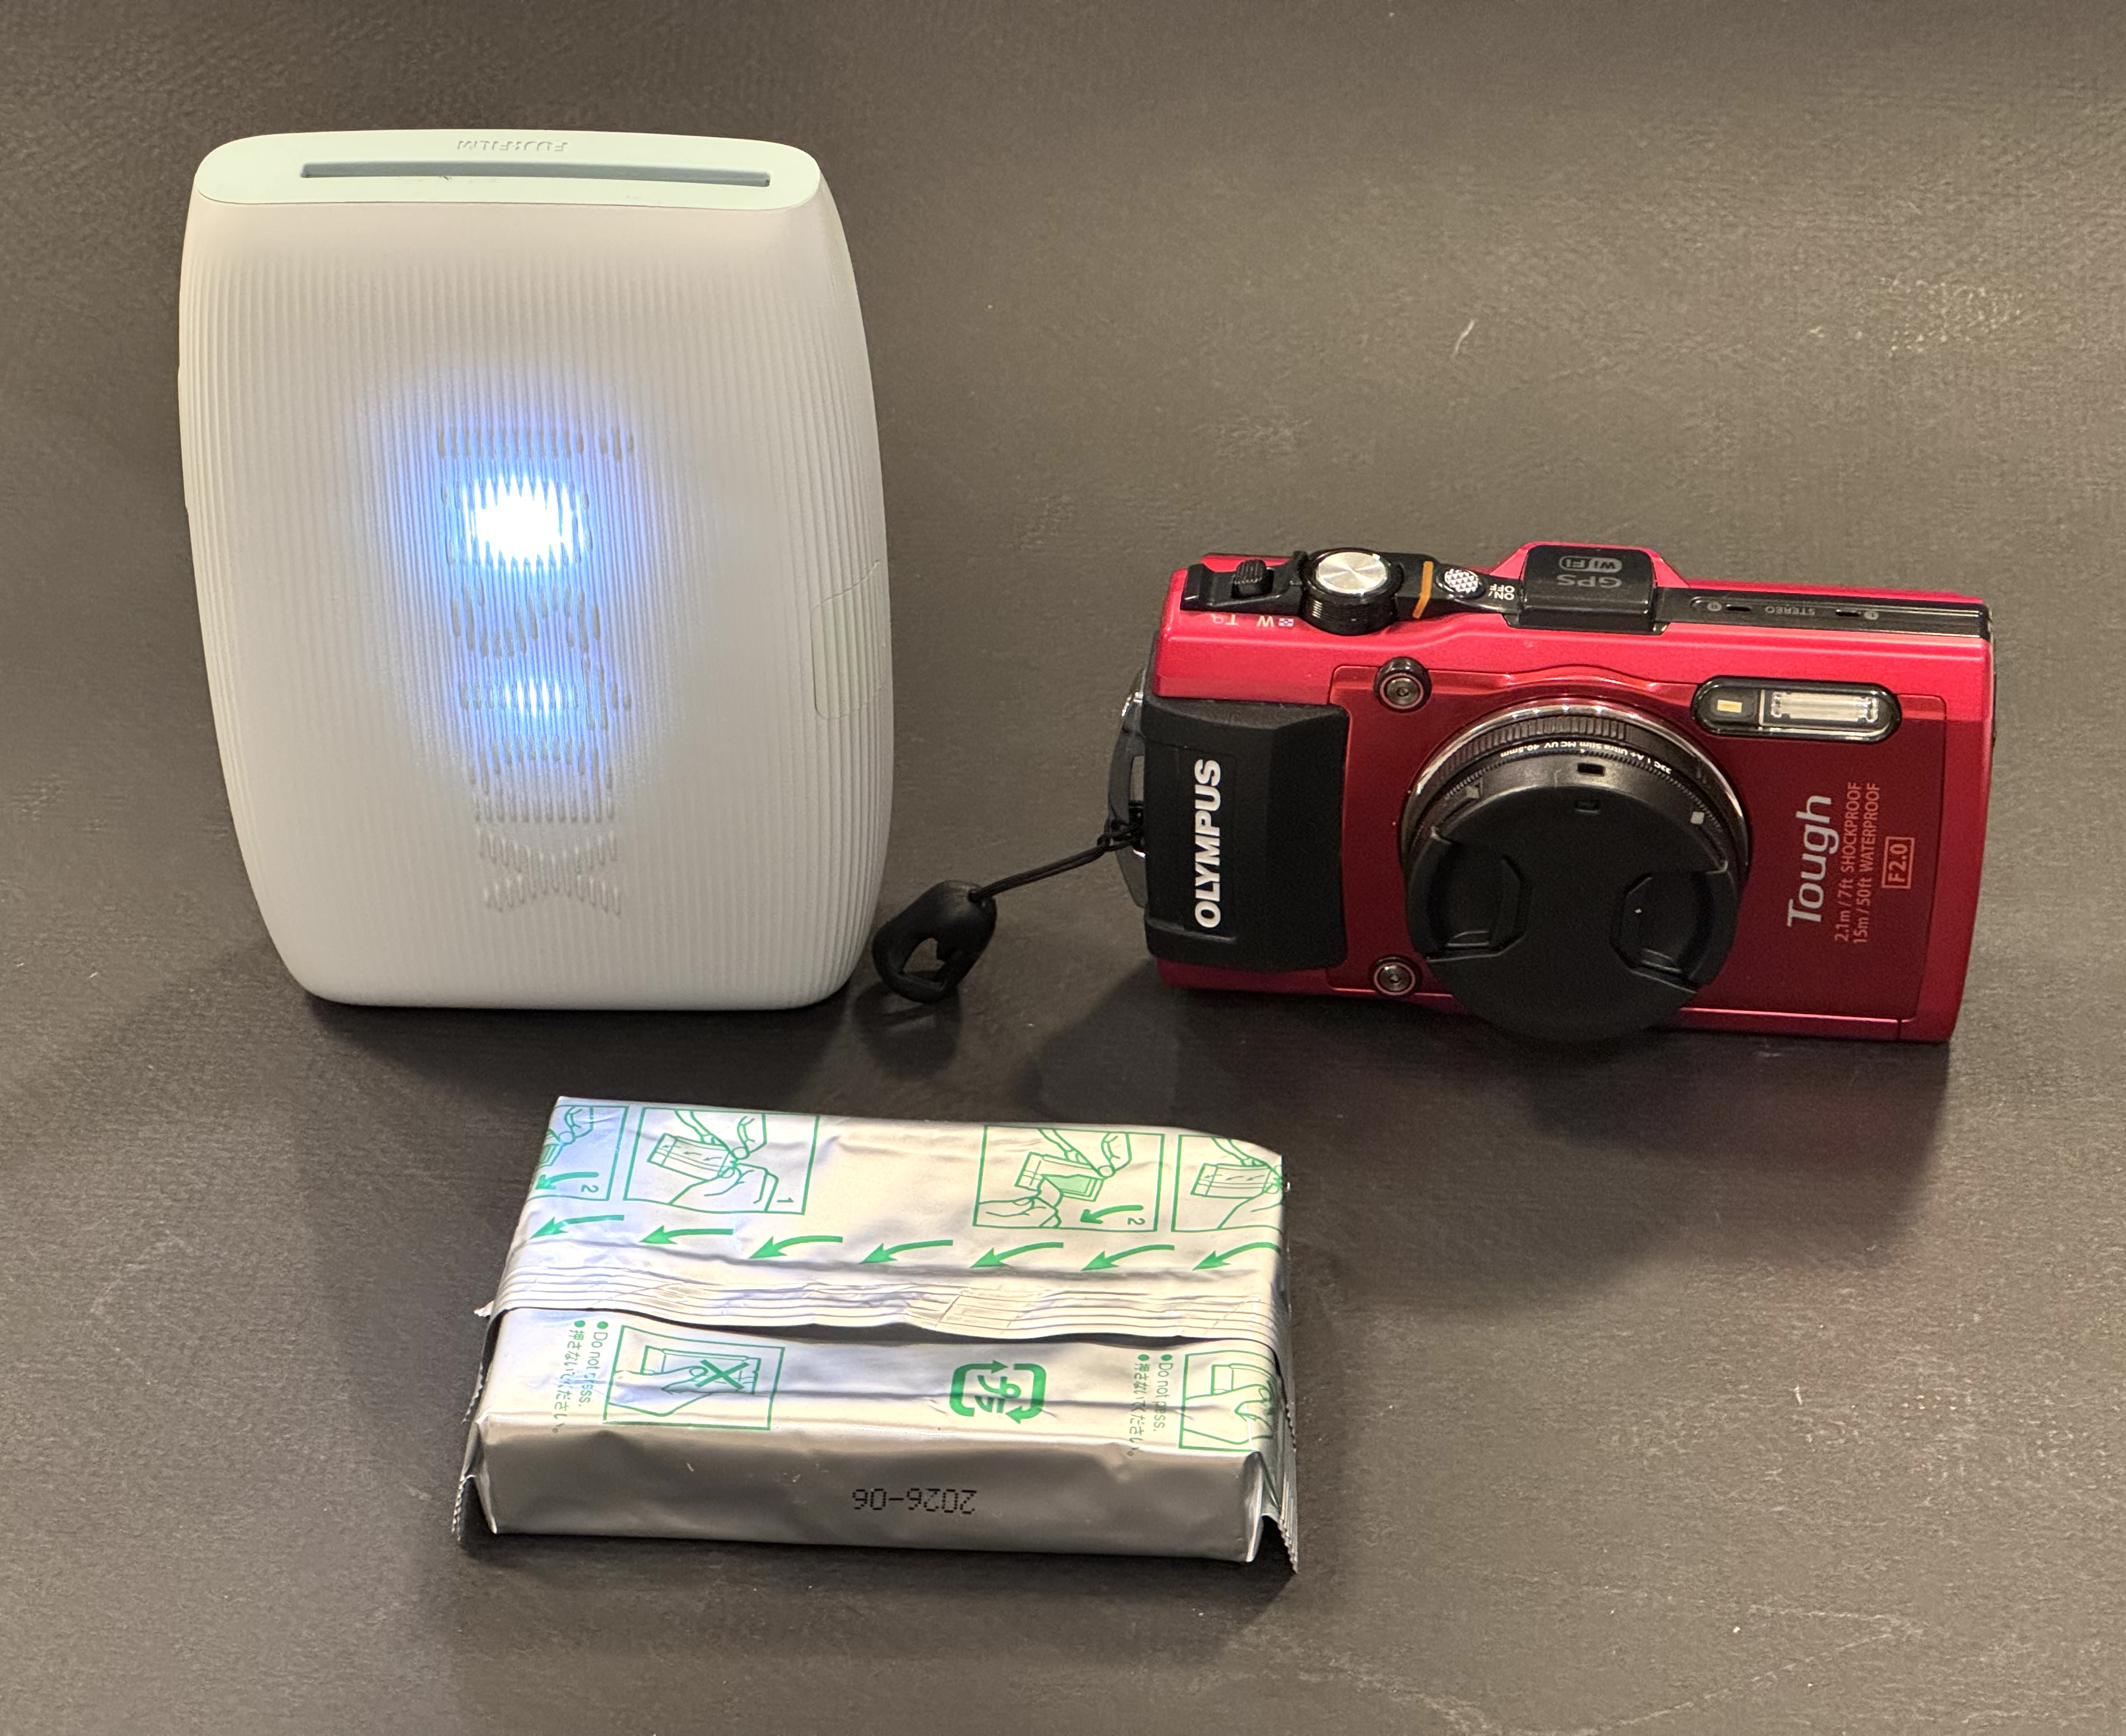
There is a store named Bellows in Little Five Points (a neighborhood in Atlanta) where they still sell a wide selection of 35mm and 120 film. I stopped by yesterday and bought film from Kodak, Harman and Fujifilm.
Back home, I looked at the box of Fujifilm Acros 100 II that I had just bought. It clearly mentions it’s made in the United Kingdom. Fujifilm? In England? A quick research confirms it: the Acros 100 II film is made by Harman Technologies Ltd, the British company that manufactures its own Ilford and Kentmere Black & White film, and also supplies B&W film for brands such as Agfa, Rollei, Oriental Seagull and … now Fujifilm. No wonder that Harman can boast of a 80% market share in the segment of B&W photo film.
Made in Mobberley (UK) with pride.
The company currently known as Harman Technologies Ltd is the result of a management buy out of Ilford Imaging UK Ltd, after it went under in 2004. Founded in 1879 by a Mr Harman, the manufacturer of photographic material we know as “Ilford” still operate from their historical facilities in Mobberley, near Manchester, and have added color film to the well known range of B&W film stock (Ilford FP4 Plus, HP5 Plus, XP2, Kentmere) they produce in their plant.
Over its 146 years of operations, Ilford went through an incredible number of acquisitions, mergers, rebrands, splits, receiverships and buy-outs, and as a result Harman Technologies does not even own the “Ilford” brand.
Eastman Kodak, Fujifilm, Harman Technologies – the volume leaders of what remains of the photographic film industry. But who manufactures what, and for whom?
The “Ilford” brand currently belongs to Ilford Imaging Europe GmbH, which inherited it along with the Swiss side of the old Ilford business (which used to manufacture Cibachrome and later Ilfochrome photographic papers). That side of the Ilford historical business went through its own series of plant closures, acquisitions and bankruptcies, and does not produce film or photographic paper anymore. It licenses the use of the “Ilford” brand to Harman Technologies for its B&W products, and simply distributes a range of color photographic products under the Ilford brand.
As a consequence, the current Ilford Ilfocolor film and the Ilford Ilfocolor single use cameras have nothing to do with Harman Technologies or the Mobberley plant (Harman’s own color film is sold as the “Harman Phoenix”), and are probably made by one of the companies that picked up the pieces after the East German (ORWO) and West German (Agfa) film manufacturing giants went under.
I can’t describe how this whole constellation of remote descendants of Agfa and ORWO is organized, as the situation still seems very murky, with insolvencies and lawsuits left and right. The German side of Agfa is long gone, and I don’t know if the current reincarnation of ORWO is still in operation. If they are, it (probably) makes them one of the only four companies in the world still in the color film manufacturing business, alongside Eastman Kodak and Fujifim – the heavyweights, and Harman – the new entrant (*)
At least one small (and reputable) company, ADOX, could salvage some of the industrial assets of the fallen giants (as well as some of the machines of the Swiss side of Ilford), and operates a B&W film plant in Germany.
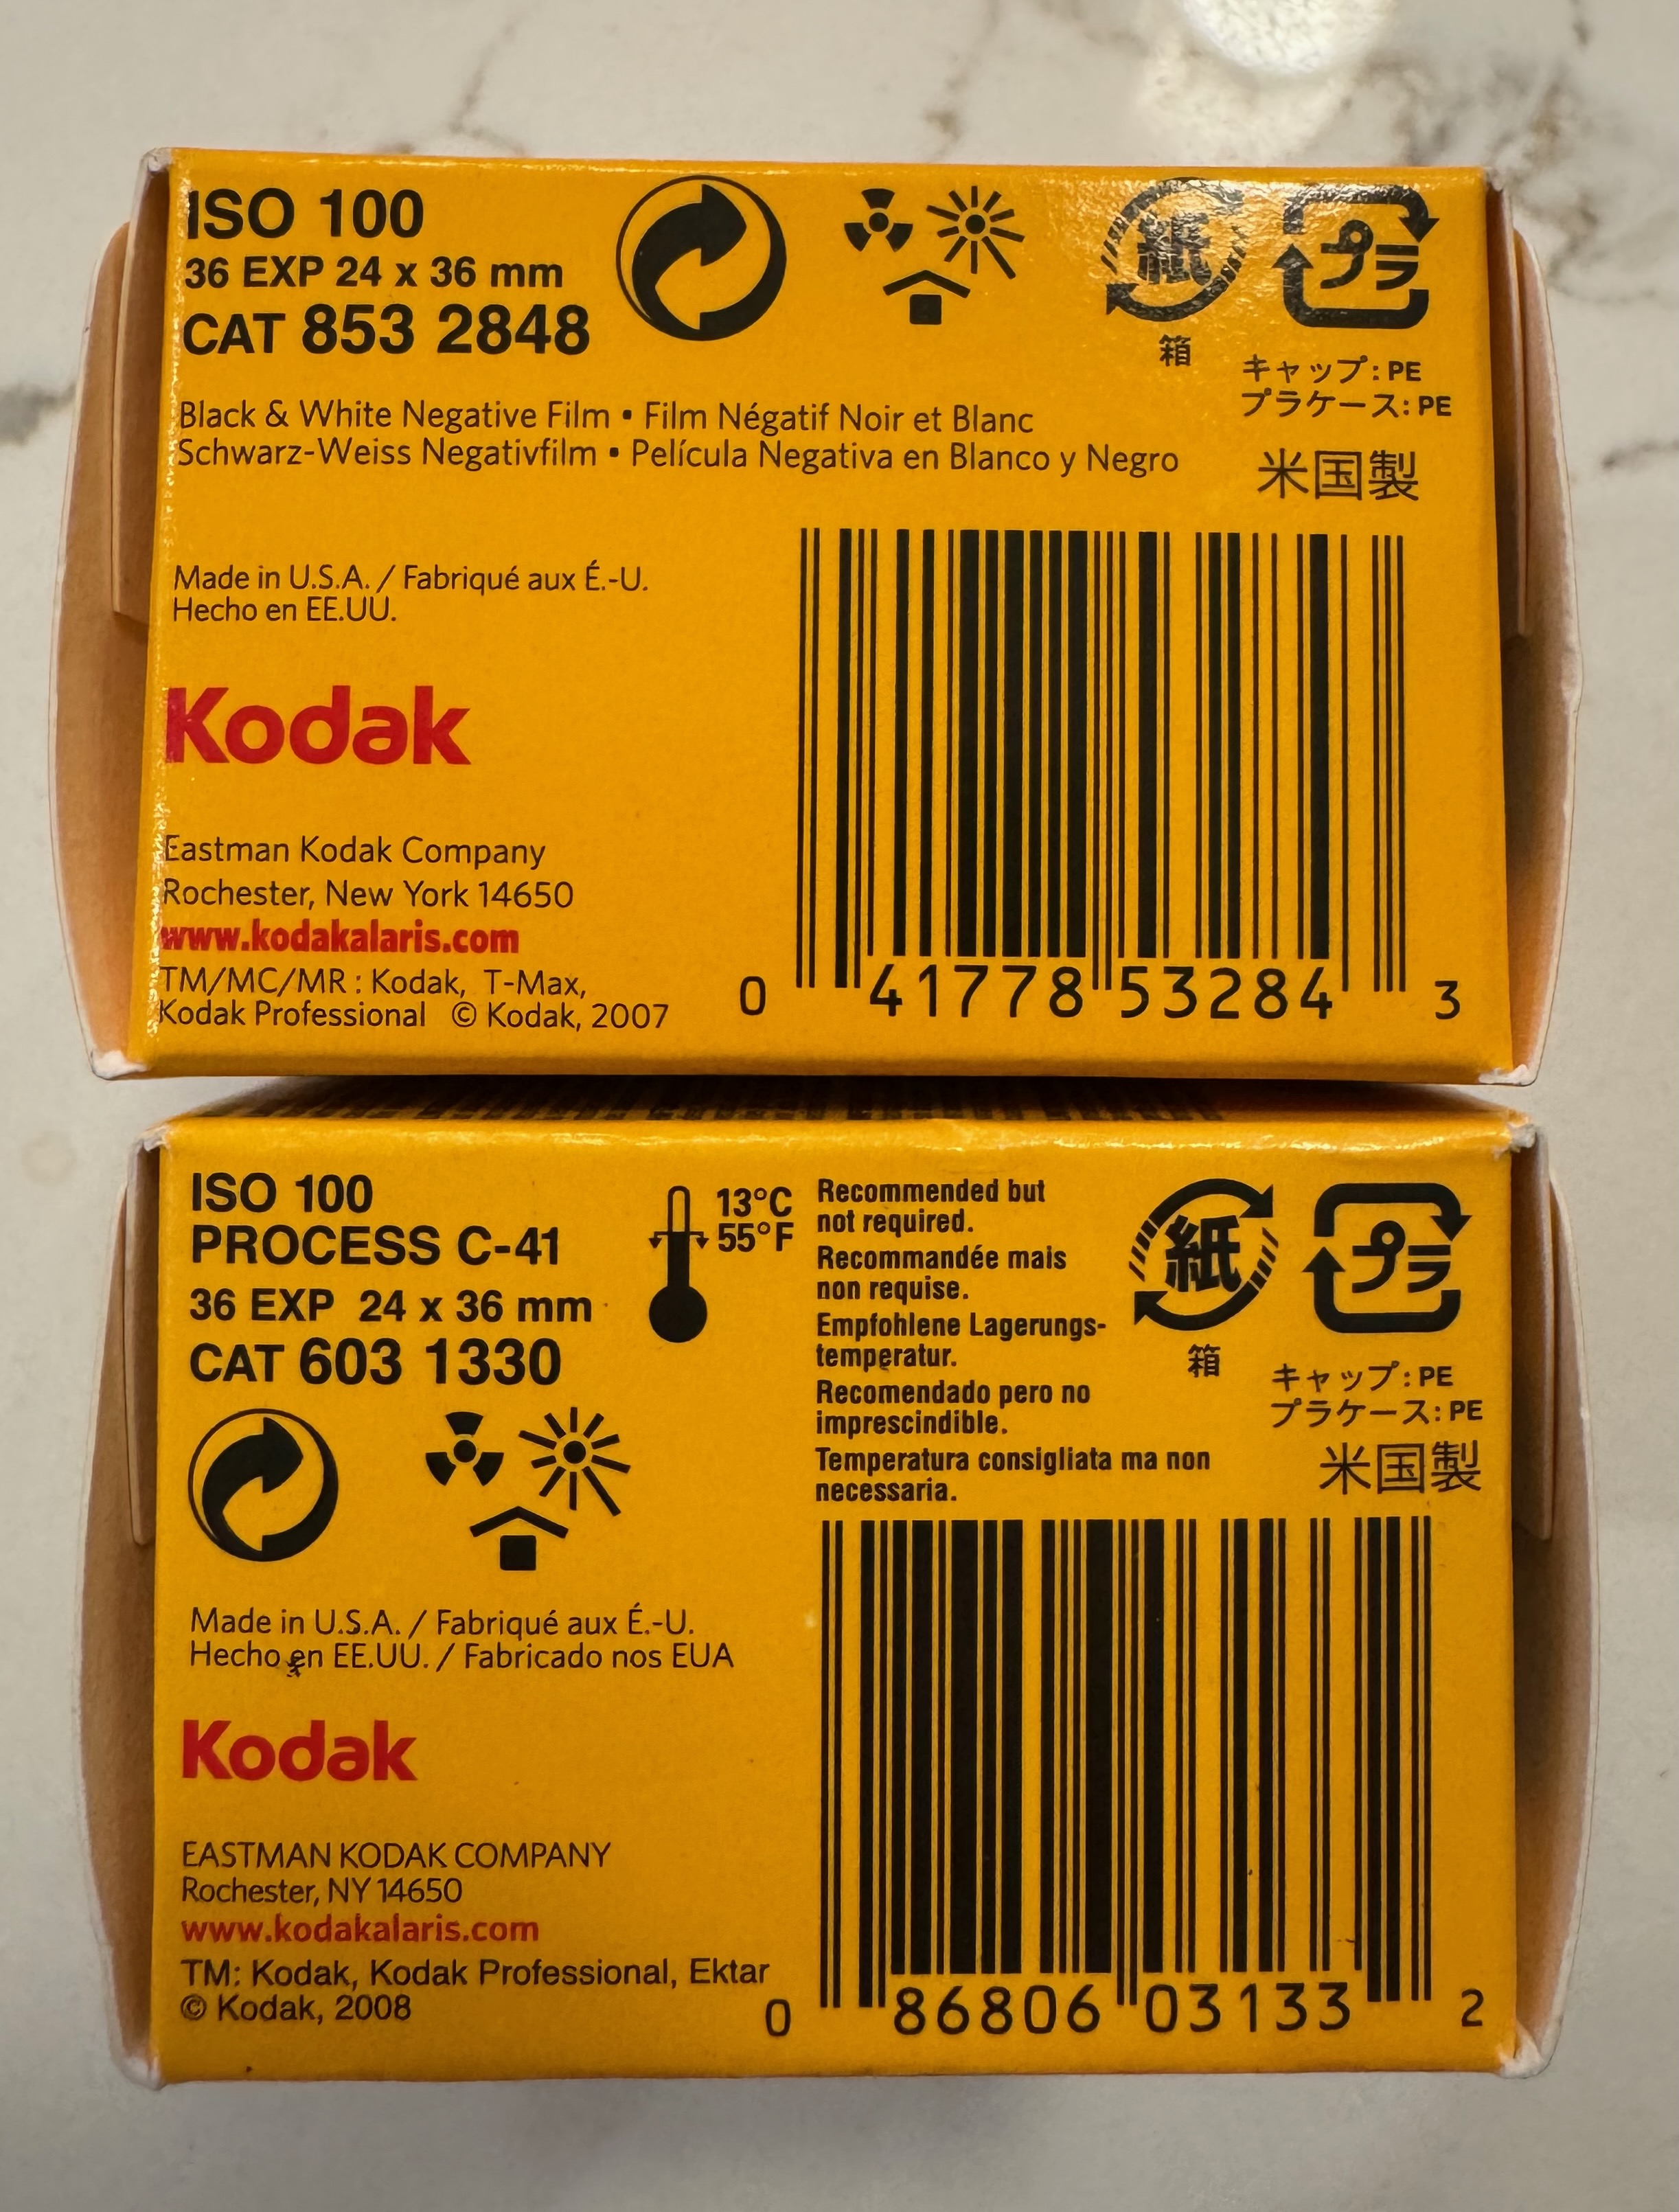
After this detour through Switzerland and Germany, let’s go back to Fujifilm. Do you know that the Fujicolor 200 film sold over here in the US is manufactured by… Eastman Kodak. Which may not be the case in other parts of the world – Fujicolor 200 film is also packaged in China through a partnership with a local company, presumably to serve the Asian markets.
Made in the US by Eastman Kodak, distributed by Kodak Alaris.
In addition to Eastman Kodak, Harman, Fujifilm and the remnants of the German photographic film industry, a few players still manufacture film: in Belgium, Agfa-Gevaert produce specialty B&W film for aerial photography, Foma Bohemia make B&W film in the Czech Republic, and Ferrania are trying to restart a B&W film factory in Italy.
Photographic film is definitely manufactured in China and possibly in the Ukraine (by China Lucky and Svema respectively) but those brands are not distributed in the US and I have no precise information about them.
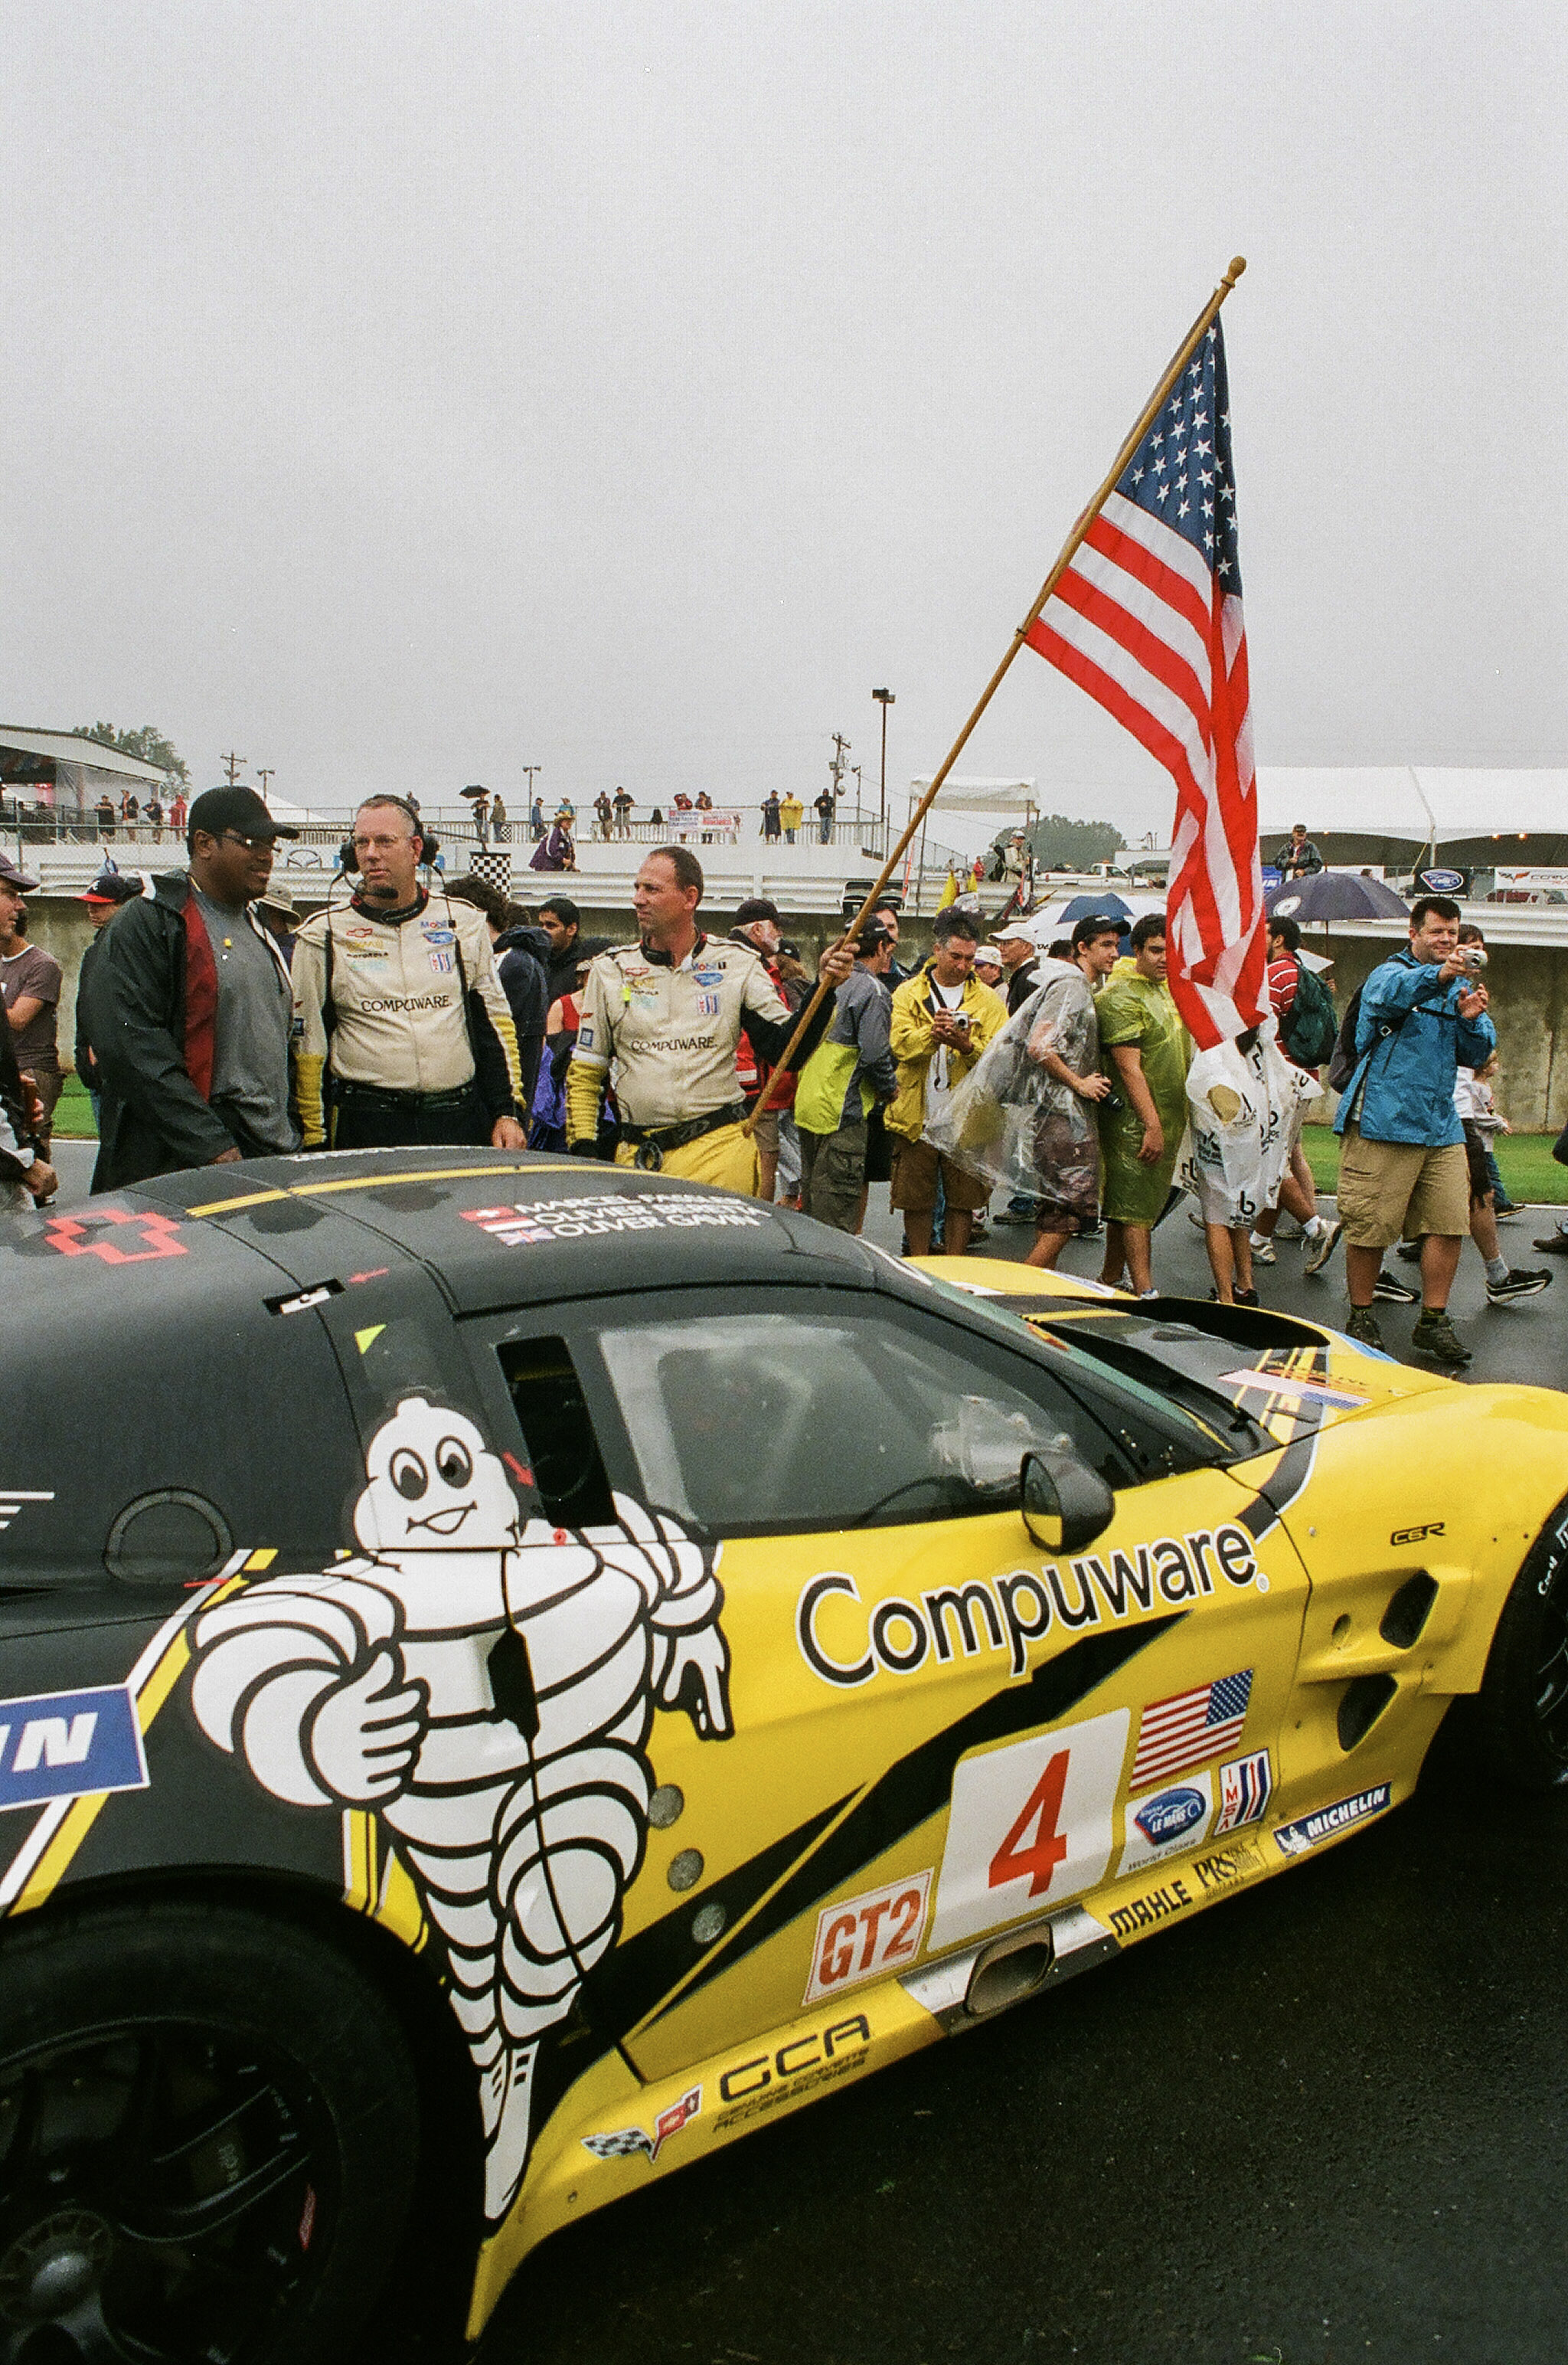
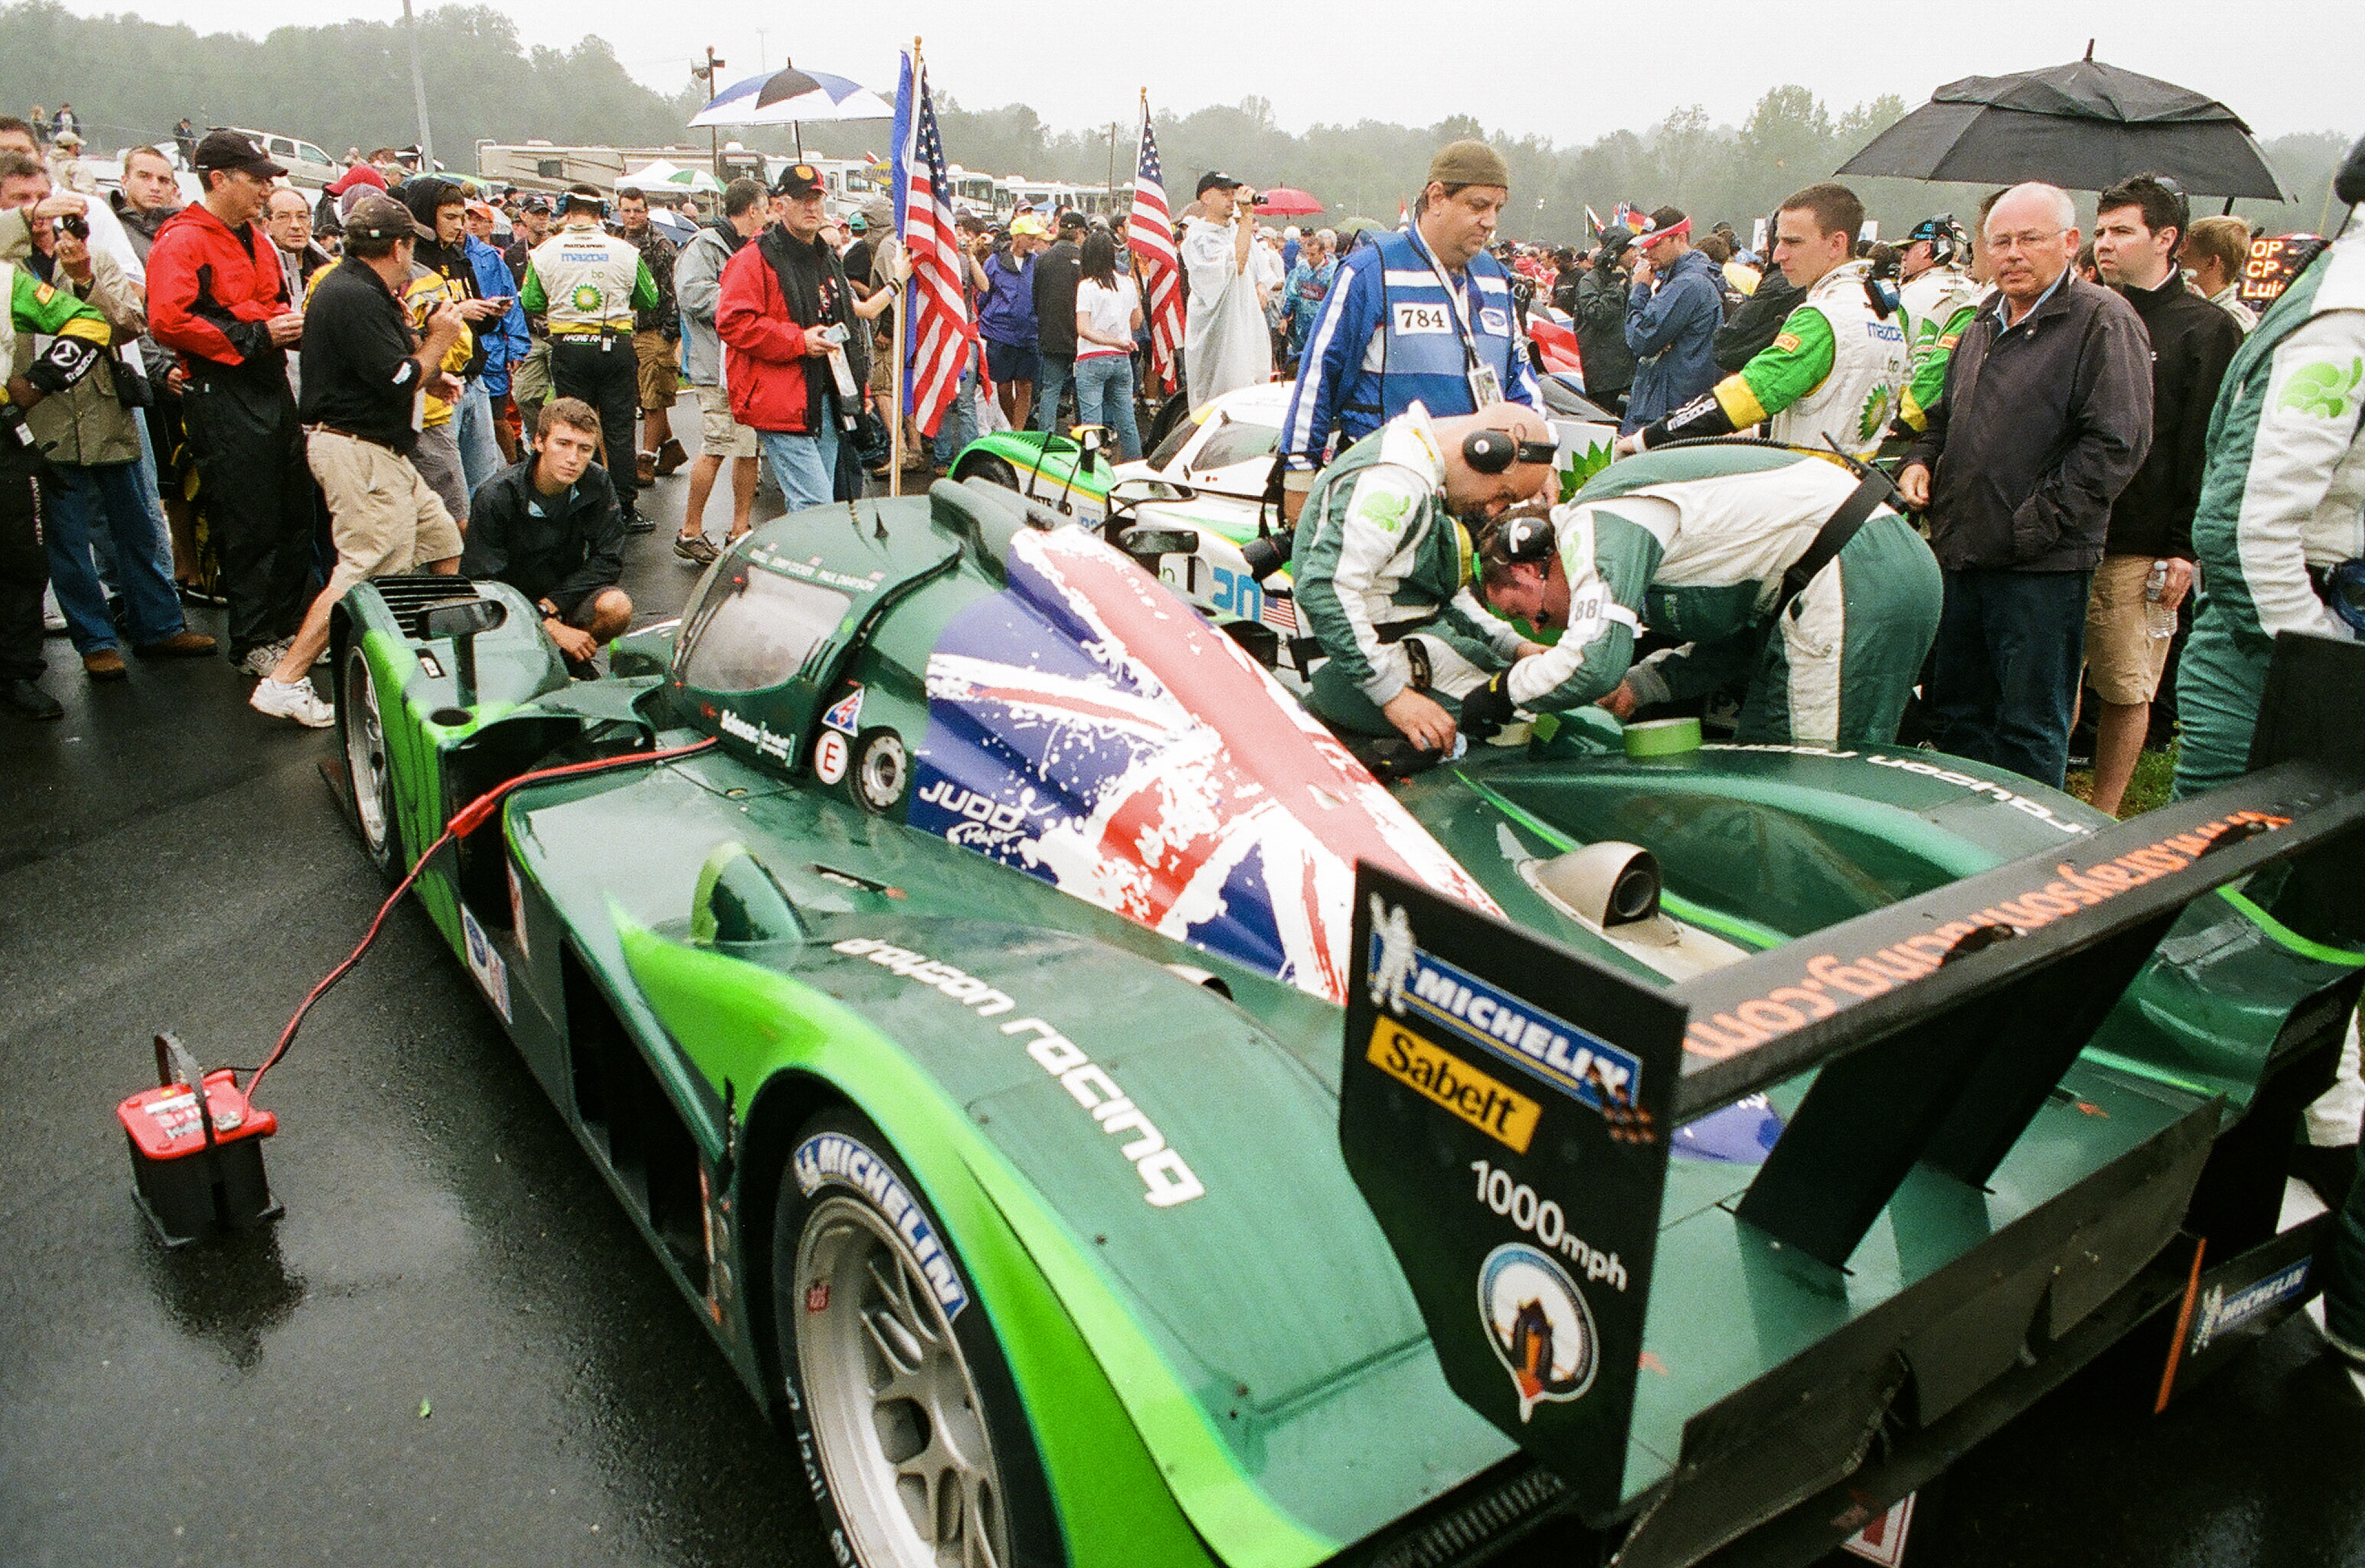
American Petit LeMans (2009 edition). Yellow and American. Like Kodak. Shot on film in 2009 with a Nikon camera.
The rest of the brands (Arista, Cinestill, KONO Manufactur, Leica, Lomography, Rollei, …) may commission the manufacturing of limited batches of their own proprietary film from one of the player listed above, or create their own “experimental” film by altering cinematographic film they buy mainly from Kodak, or simply re-label film produced by Harman, Foma, Adox and a few others.
As for the Instax instant film (one of the fattest cash cows of Fujifilm – $1Billion revenue with a 20% margin in 2024), it’s still made in Japan. Polaroid’s manufacturing operations are split between a main plant in the Netherlands and a smaller unit in Germany (one of the Agfa offshoots) which supplies the negative layer of the instant film. An exception in this industry, Polaroid has reunited under the same owner the brand and the plants, and manufactures and distributes its own products.
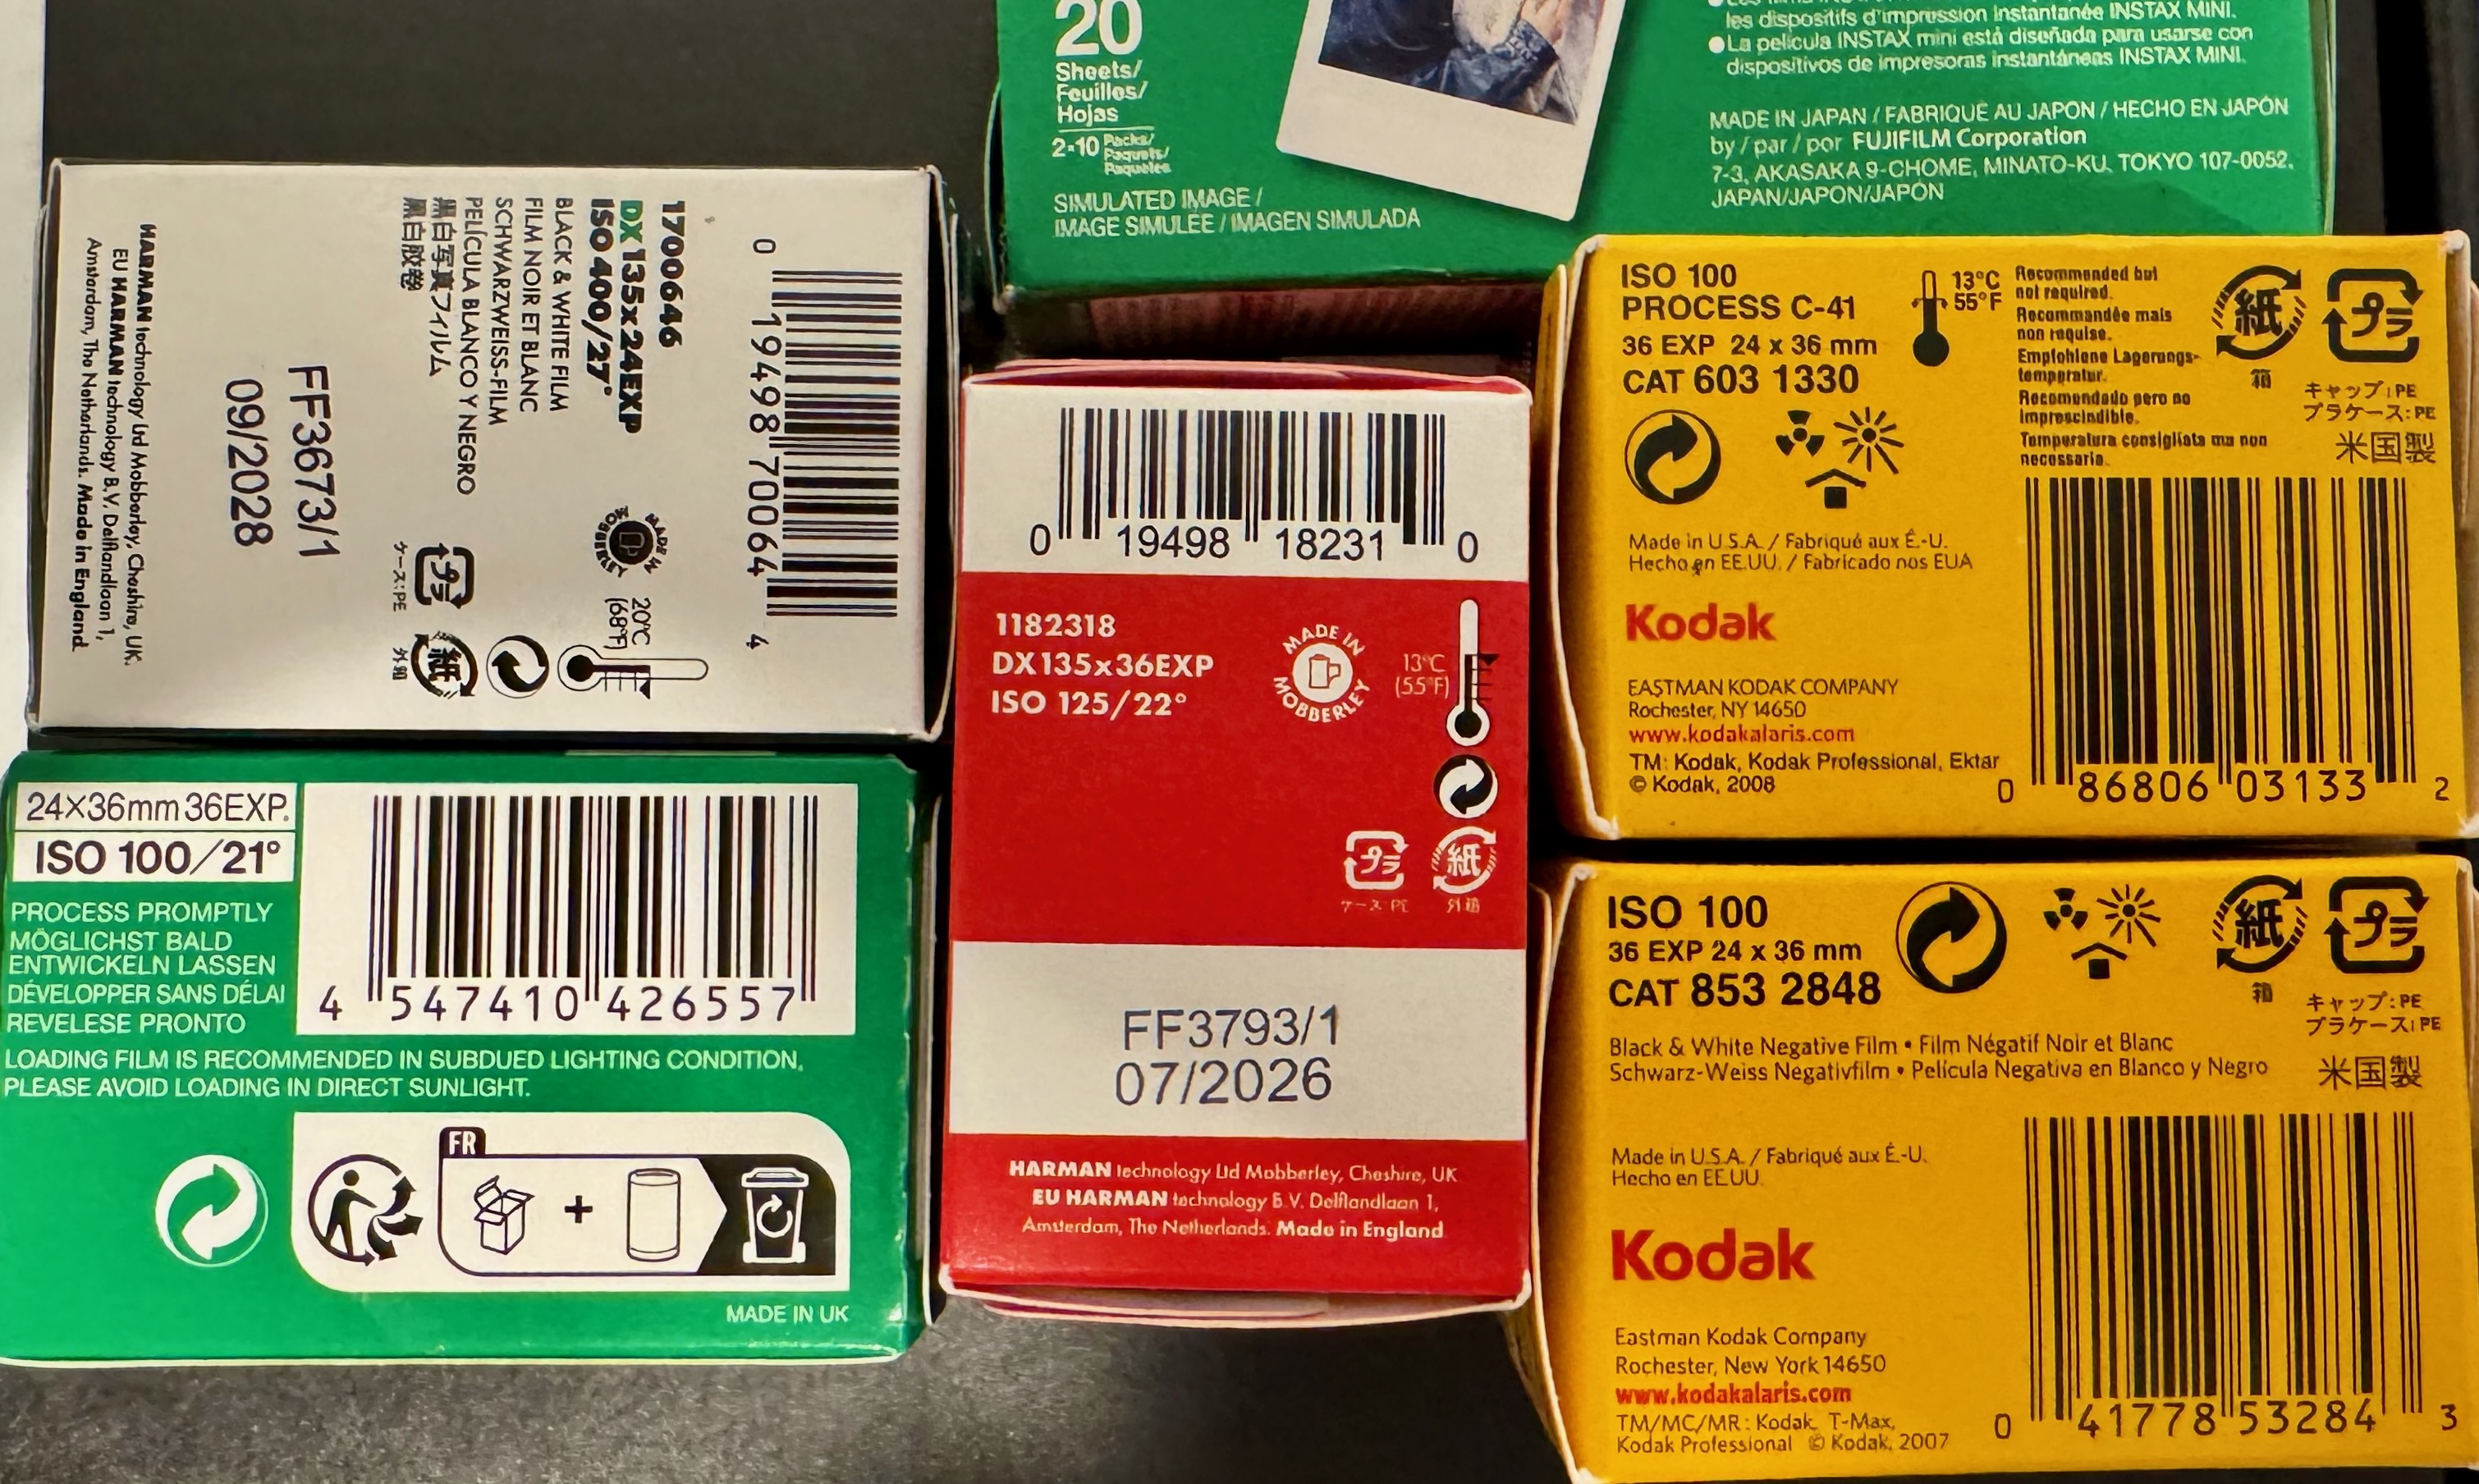
Green boxes do not necessarily come from Japan anymore.
There are no reliable statistics about the total value of the photography film market in the world – I’m reading anything between $500 million to $2.5 Billion a year – a fraction of what the market was as its peak in 1999 (Kodak’s revenue alone that year was $17Billion, which would equate to $32Billion in today’s US dollar).
American Petit LeMans – Braselton (GA) – another Japan-England cooperation: the Mazda-Judd – Shot on film with a Nikon Camera in 2009
With the exception of Fujifilm, all the big players of the twentieth century (Kodak, Ilford, Agfa, Orwo, Polaroid) have been dismantled, with the ownership of the brands often decoupled from the ownership of the remnants of the manufacturing assets, and the actual manufacturing and distribution activities under the responsibility of new actors. It explains the proliferation of new or resuscitated brands such as ADOX, Harman, Harman Phoenix, Kentmere, Original Wolfen or Rollei.
Does it matter? Not to me – as long as I can find good film to feed my cameras.
(*) Why is Harman entering the color film business, by the way ? They see a strategic opportunity in color film, obviously, and they’re also uniquely placed to take advantage of it because of their experience with chromogenic film.
Harman (as the successor of the pre-receivership British side of Ilford) has been manufacturing monochrome chromogenic film since 1981 (the XP, XP2 and now the XP2 Plus). The XP2 Plus (like the defunct Kodak BW400CN) is conceptually a simplified version of the typical chromogenic negative color film (think Kodacolor or Fujicolor), with only one layer of neutral color dyes as opposed to three layers of colored dyes in the negative color films.
In the heydays of film photography, the benefit of chromogenic monochrome film was primarily that it could be processed with negative color film, in the same machines using the same baths – the photo processing labs and the minilabs did not have to dedicate equipment and chemicals to the XP2 or BW400CN film like they would have had to do with “true” B&W film.
Two good sources of information about film photography:
At-home film processing – and at-home black and white film processing in particular, is not that hard. Once the film has been loaded in the developing tank, it’s very simple, and it can be done in full daylight.
The perceived difficulty, the step that scares the beginners, is loading the developing tank.
An overwhelming majority of amateur photographers develop their films in Paterson, Jobo, Arista (or similar) tanks, that can be operated in broad daylight, but must be loaded in the dark. In a dark room, or in a changing bag. Dark room film loading, daylight processing.
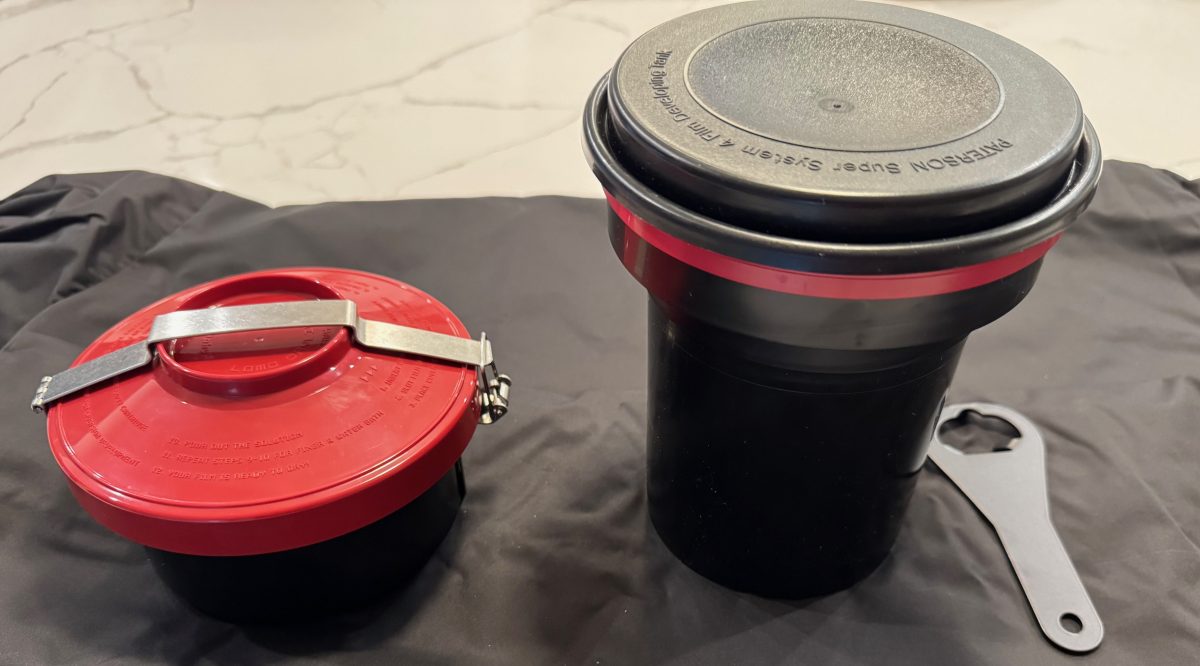
Paterson tank, cartridge opener and charging bag
Not everybody is comfortable with opening a film cassette and loading the film on the spiral of a reel without seeing anything – it takes a few dry runs and some practice before it becomes second nature.
The idea of daylight film loading, without a dark room or a charging bag, is extremely attractive to beginners, and to old farts like me going back to at-home film processing after a very long interruption. A daylight loading tank system is what is needed.
A few systems are available new (starting with the Lomo Daylight tested in those pages a few months ago), and more defunct products can be found on eBay.
The promise is always the same: you will drop the film cassette in the daylight loading tank, turn a crank to load the film on a reel hidden at the core of the system, and remove the (now empty) film cassette from the tank. At this point, you’ll be ready to go, and the development process will not be different from the routine followed with a conventional Paterson tank.
The Lomo Daylight : place the film cartridge in the loader and drop the loader in the development tank. Turn the crank to load the film on the spool inside the tank.
Of course it’s not exactly that simple. For the magic to take place, you need to prepare your film in a very specific way, and after you’re done with processing the film, you need to be able to clean all the parts and reassemble them correctly.
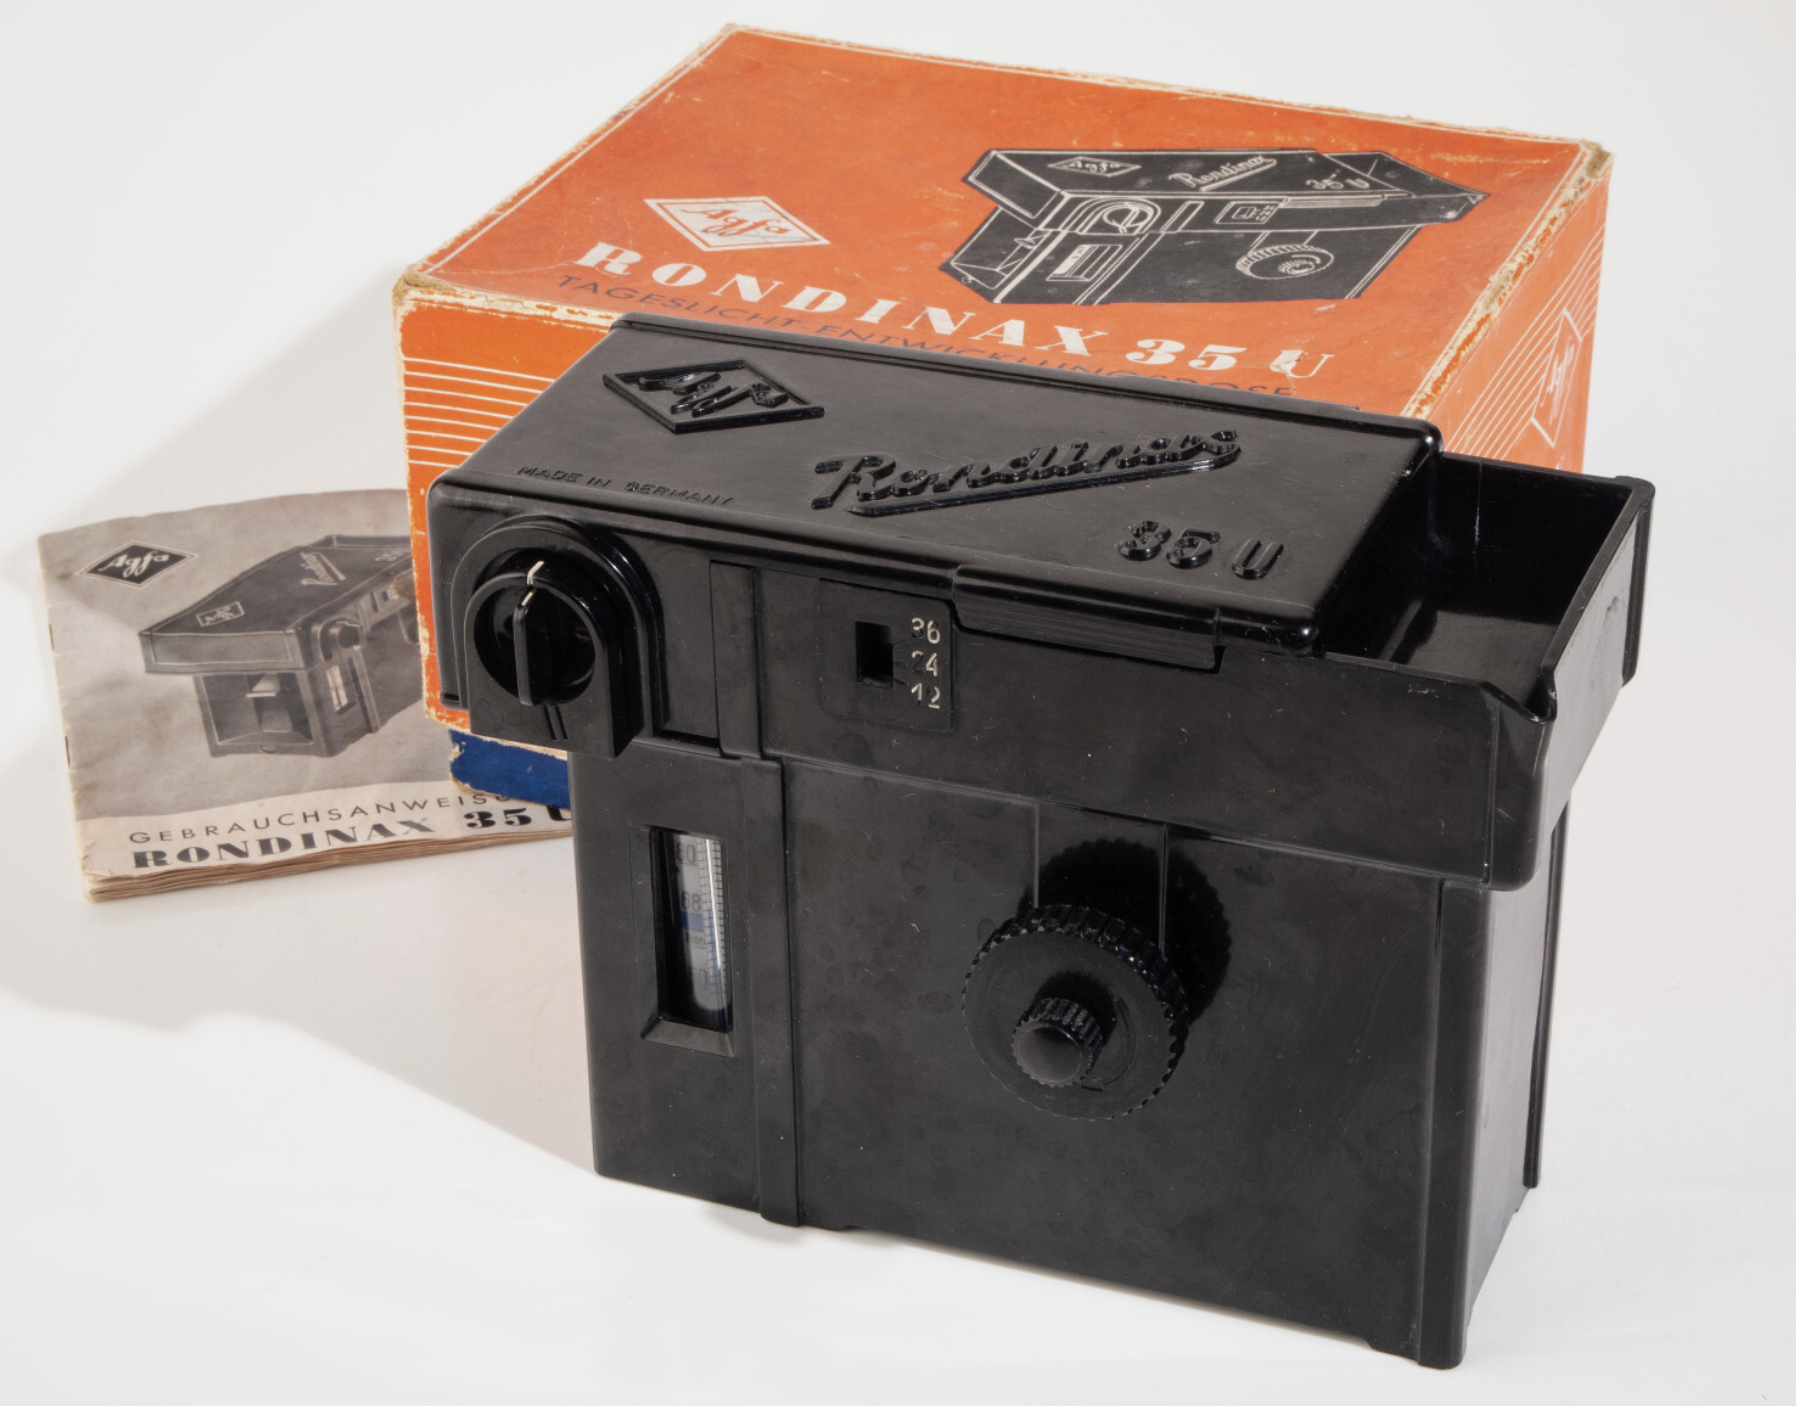
Agfa Rondinax (from an eBay listing)
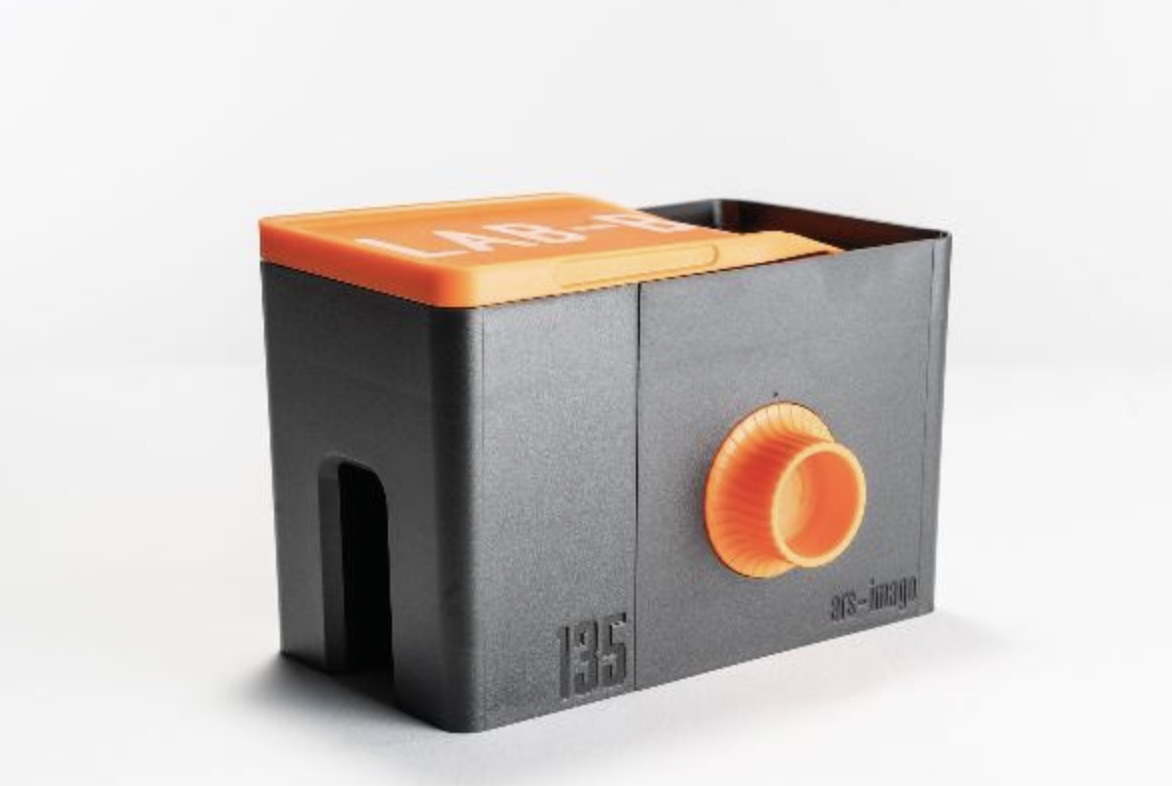
l recently bought a Lomo Daylight Developing tank, and found out even more recently that an Italian company named Ars-Imago had launched its own daylight loading tank a few years before. Ars-Imago’s “Lab-Box” is not a 100% original design- it’s a modern re-interpretation of the Rondinax, a model launched by Agfa in the late nineteen thirties (an Agfa Rondinax was tested by the Casual Photophile five years ago).
As far as I know, the Lomo Daylight and the Lab-Box are the only two daylight-loading/daylight development systems currently manufactured and distributed.
On auction sites, you can sometimes find, and not necessarily for cheap, different versions of the original Agfa Rondinax, as well as many rebrands (the Rondinax was also sold by Leitz, of Leica fame) and a few shameless copies of Soviet origin.
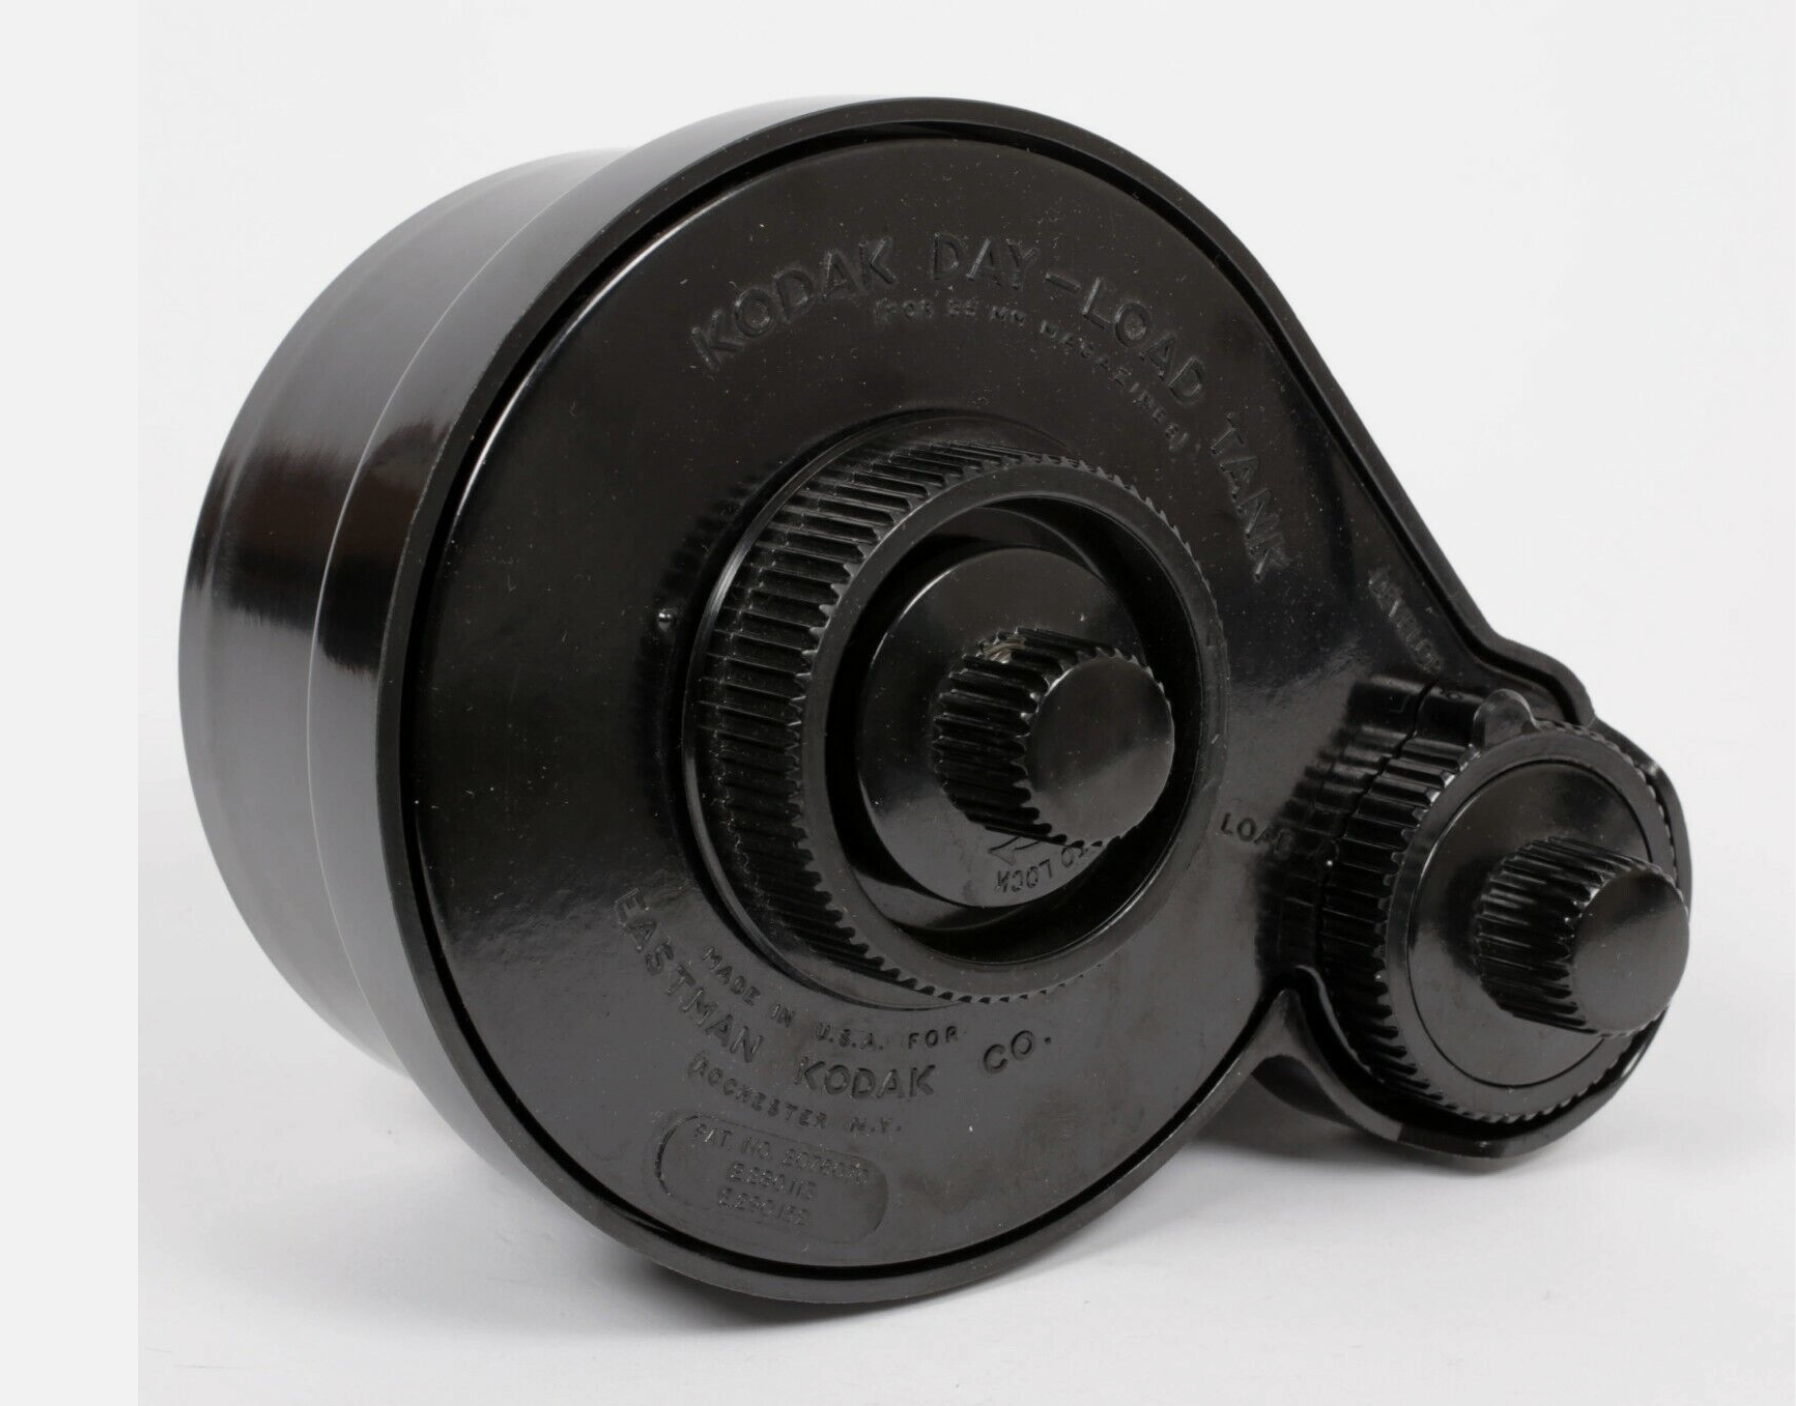
Kodak’s Day-Load Tank was launched approximately at the same time as the Agfa Rondinax. Both the Day-Load and the Rondinax are now very old pieces of equipment (eighty to seventy years old), made of materials that have not necessarily aged well, and with multiple small parts that may have been damaged or lost over the years. Assuming you can find one at a reasonable price (by that, I mean cheaper than the $89.00 of a new Lomo Daylight Tank), I’m not sure I would trust them with my film.
Kodak Day-Load (from an eBay Listing)
Over the years, Jobo, a direct competitor of Paterson, have tried their luck at making daylight loading tanks multiple times, with models like the Automat 35, and more recently with the Jobo 2400 Daylight Loading tank shown below, which is conceptually close to the Lomo Daylight.
High level, the Jobo 2400 looks like a conventional Paterson or Jobo tank, except that the reel rotates around a rather large black cylinder, which includes the film loading mechanism. It makes for a rather large tank, which will require more chemicals than a conventional tank.
The Lomo Daylight Developing Tank was reviewed in those pages recently. The film cartridge is positioned in the film loader, the film loader is dropped at the center of the tank, the operator turns a crank to push the film on the spiral reel hidden inside the tank, and when the film is fully loaded on the reel, the film is separated from the cartridge by a built-in steel cutter and the loader is removed from the tank.
The Lab-Box is clearly inspired by the Agfa Rondinax, but Ars-Imago have improved on the original design in a few ways: contrarily to the original Rondinax, the Lab-Box is modular and can accommodate either one of two film receptacles, one for a 35mm cartridge, and one for 120 roll film. Ars-Image are also selling a replacement lid for their Lab-Box, that integrates an electronic timer and thermometer, to create an all-in-one device.
In the Lab-box (as in the original Rondinax), the film leader has to be clipped to a ribbon attached to the center of the reel. When the operator has closed the lid of the box, turning the knob on the side of the Lab-Box will pull the film out of the cassette and load it on the reel.
Lomo and Lab-Box: design – similarities
They can be loaded and operated in full daylight,
They’re relatively low-tech – no motor, no battery – they’re operated by a big knob or a small crank.
Both need the film leader to be accessible – you have to extract it if your camera is motorized and rewinds the film completely in the cartridge.
They can only process one roll of film at a time.
They are more difficult to reassemble than a conventional tank after cleaning, which offers a few opportunities to goof-up.
Big differences:
The “film pull” method of the Lab-Box seems gentler than the Lomo’s “film push” design, where the crank activates two sprockets that engage in the film perforations, and push the film (through a narrow guillotine) to the reel where the film will sit.
I’ve experienced multiple difficulties with the Lomo’s loader sprockets (they tend to tear the perforations of the film if they meet any resistance) and with the very narrow slit that controls the entry of the film in the chamber where the reel sits:
When you’re finished pushing the film to the reel, it’s still attached to the cartridge, from which you need to separate it in order to start the development process. You have to turn a knob vigorously to cut the film, and if the action is not decisive, debris of film get stuck in the slit, and have to be removed to great pains when cleaning the tank before the tank can be reused.
On the Lab-Box, agitation is performed by turning the crank (you don’t flip the tank regularly like you would do on a Paterson tank or the Lomo). Agitation can be continuous or intermittent. Ars-Imago recommend the continuous agitation, because it uses half the quantity of chemicals of the intermittent process, but you have to be prepared to turn the crank continuously for the whole duration of the development phase. It’s not motorized, remember.
The Lomo only processes 35mm film, the Lab-Box is modular. A 120 roll film loader can be purchased separately.
According to Ars-Imago, the Lab-Box is not compatible with PET based films (not that many on their list). I’ve not read about such restrictions on the Lomo.
In summary –
The Lab-Box is twice as expensive as the Lomo Daylight. It’s also larger.
To its advantage,
the Lab-Box should be gentler with film than the Lomo (the film is pulled, not pushed)
It only needs 300ml (10 fl oz) of products if you opt for the continuous agitation. On the other hand, if you prefer to spare your arms and opt for the intermittent agitation, you’ll need 500 ml (17 fl oz) per film. For reference, the Lomo needs 350ml of chemicals, and a Paterson tank will need 300ml for a single film, and 500 ml if loaded with two films.
it’s more flexible than Lomo (120 roll film and “intelligent lid” options)
On the Lab-Box, continuous agitation implies that the photographer turns a knob or an optional crank continuously (of course) for the duration of the development phase. Imagine you’re pushing a film and use a developer at high dilution – do you feel like turning a crank continuously for 10 minutes?
On the Lomo, you can stick to the same intermittent agitation process (Paterson calls that “inversion”) you would follow with a more conventional tank.
The Lomo Daylight Developing Tank – the film loader – notice the sprockets pushing the film to the reel.
How the Lomo Daylight Tank compares with a conventional Paterson (or Jobo) tank system?
Let’s answer a few questions…
How long does it take and how difficult is it?
to extract the film leader
this step is only needed with the Lomo, and only if you’ve let the camera fully rewind the film in the cassette. In the end, I’ve always succeeded in extracting the film leader from a cartridge where the film had been fully rewound, but it’s always a frustrating exercise, even with a good film extractor (the Lomo’s is a pretty good one). It almost never works on the first attempt (my average number of attempts must be around four per cartridge). So, a few frustrating minutes to be expected.
to load the film in the tank.
Lomo: it’s easy. Cut the film leader as directed by Lomo in their videos, place the cartridge in the loader, the loader in the tank, lock it… and here you go. Most of the time, it will work perfectly. And it takes a couple of minutes at the most.
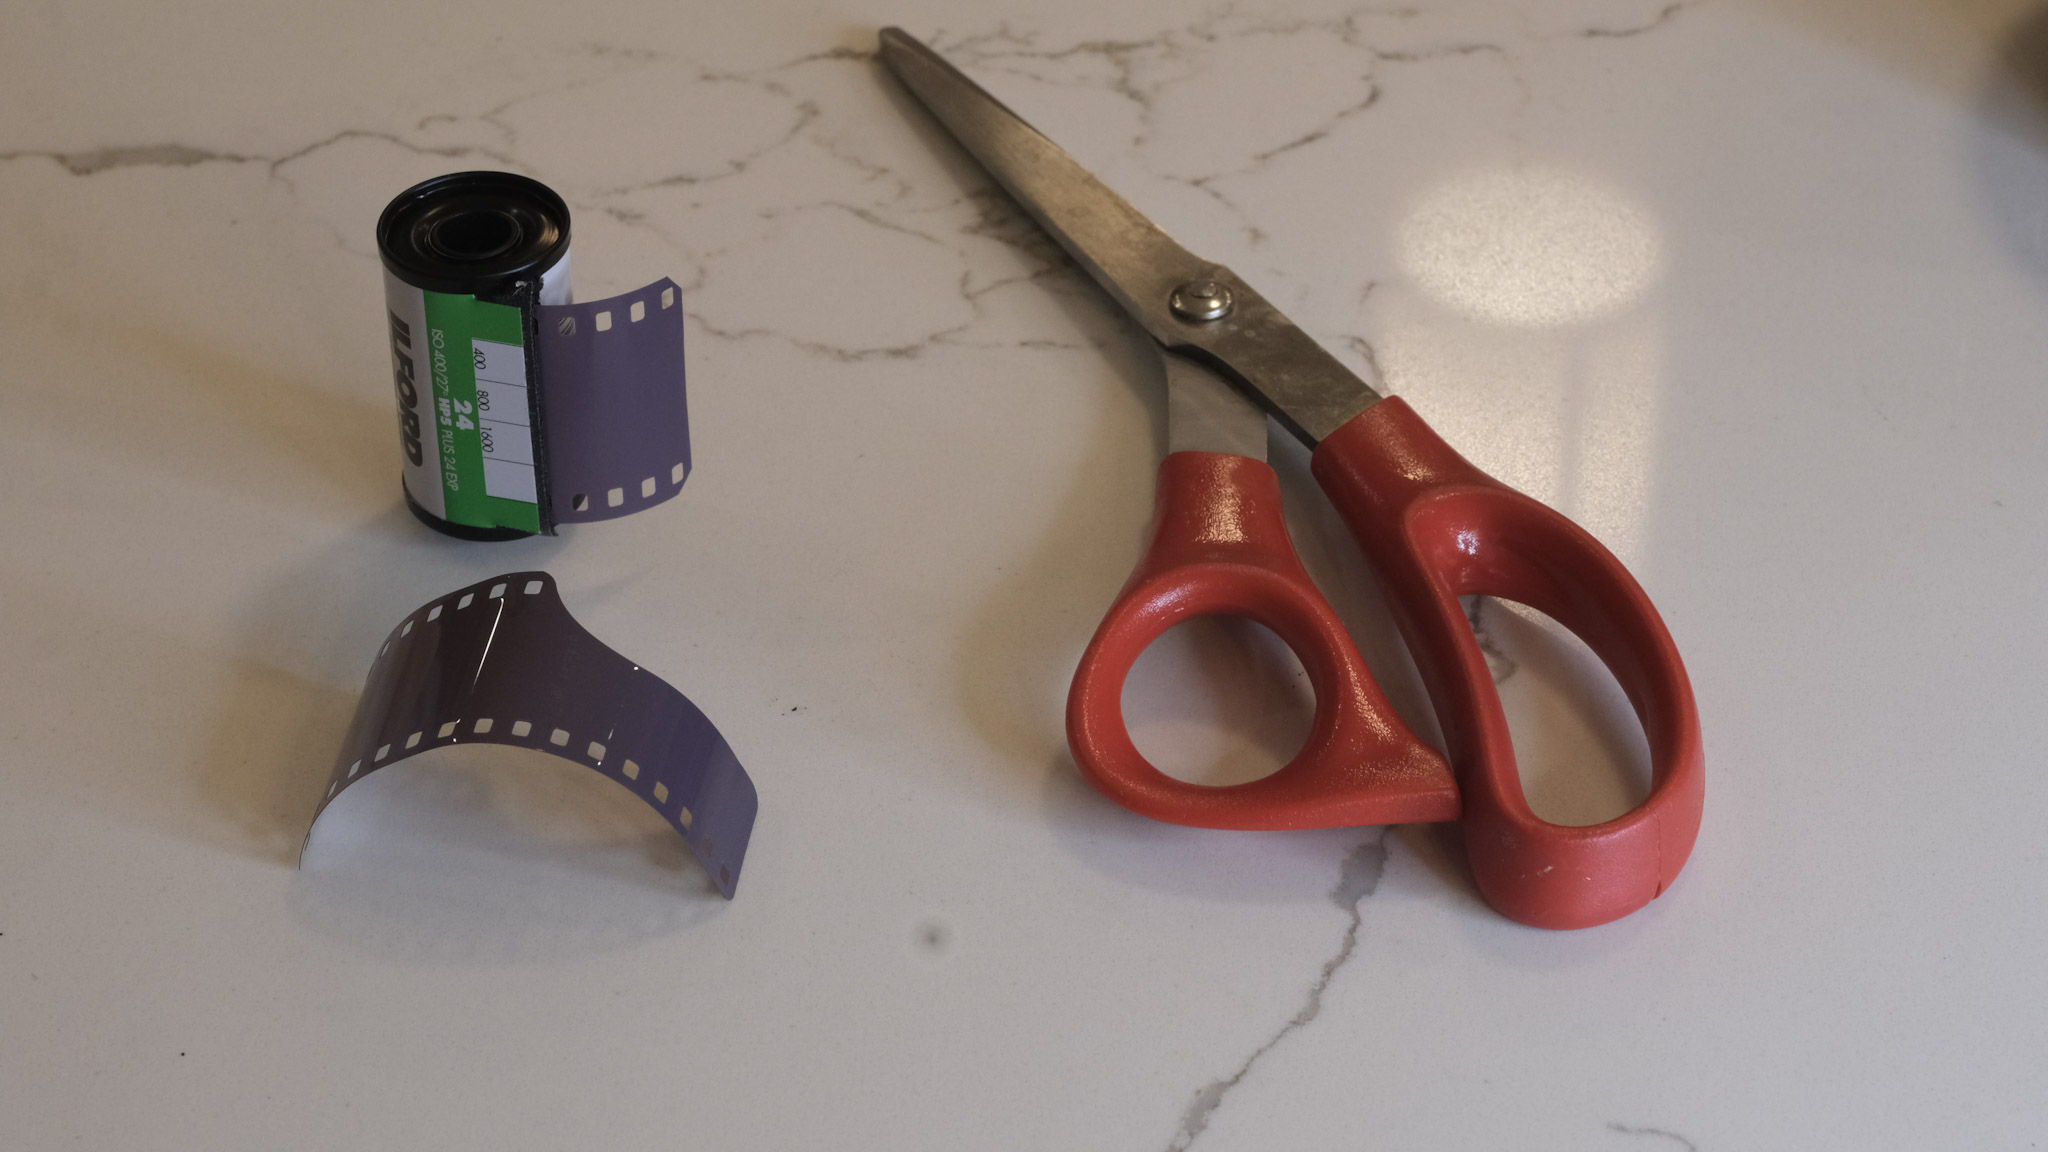
Paterson – I’m using a brand new Paterson Universal System 4 tank, that came with a so called “auto-loader” reel. It’s a plastic reel, equipped with a ratchet system. Once you’ve disassembled the tank and placed it in the charging bag with the film cassette and scissors, it’s easy to find the starting point of the reel’s spiral and turn the left and right parts of the wheel in opposite directions to move the film from the cassette to the reel. All in all it does not take longer than loading the Lomo.
to clean and re-assemble the tank?
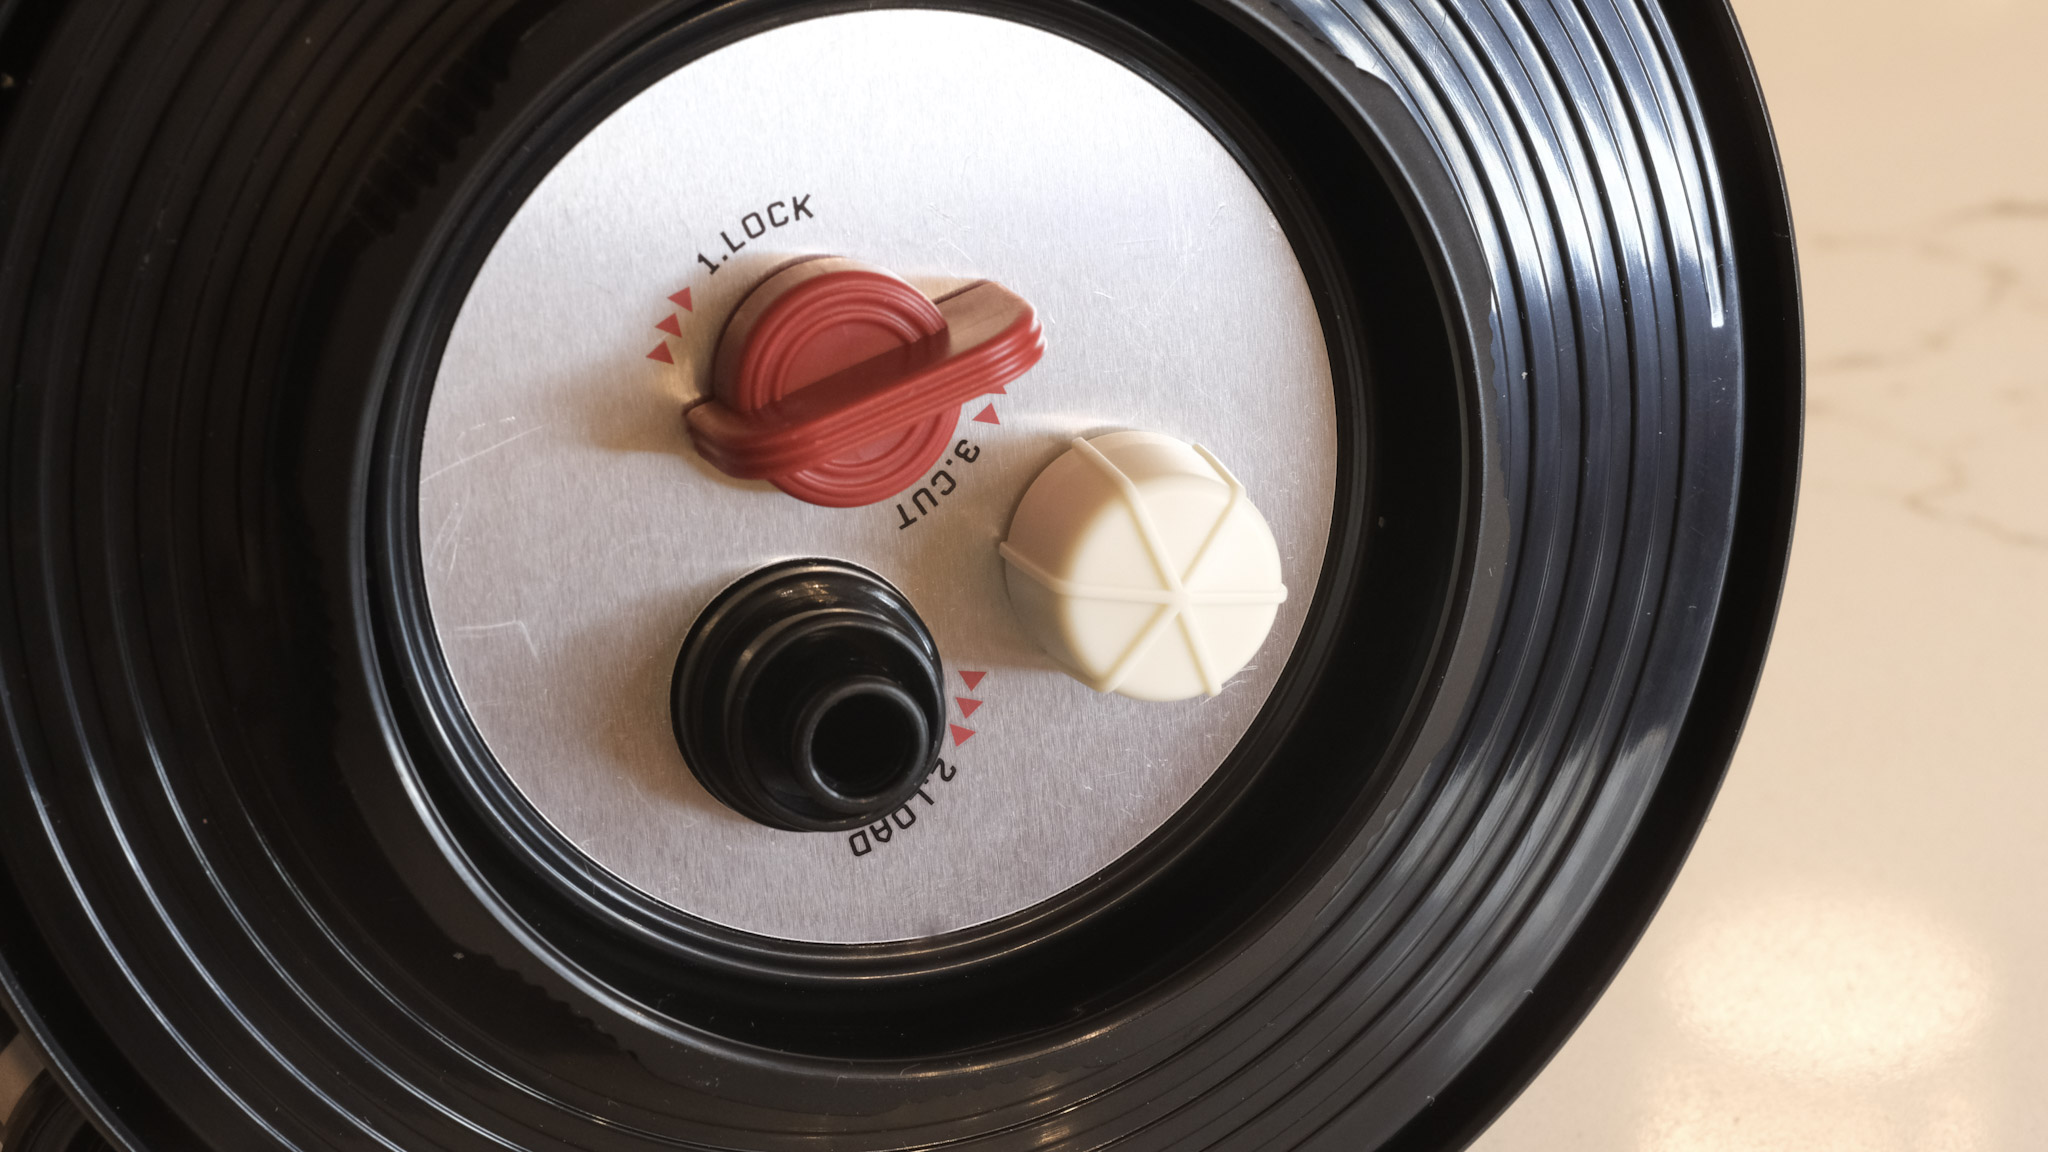
Lomo: a benefit of the Lomo’s design is that the film loader is removed from the tank before the developer can be poured in the tank. So that part remains dry and does not need to be cleaned. A total of six parts are in contact with the chemistry and have to be cleaned, and reassembled once they’re dry. The photographer is guided by red arrows and grooves of different sizes that make the whole re-assembly process idiot proof. It does not take more than one or two minutes.
Paterson: the Paterson system is even simpler. If using one reel, it’s composed of only five parts, which are extremely easy to clean and re-assemble.
Disassembling the Lomo Daylight – the film loader (bottom of the image) and the crank (of course) don’t need to be cleaned. Reassembly is guided by red arrows and keys.
As a conclusion
It came as a surprise to me. I did not remember that loading a developing tank like the Paterson Universal System 4 was so easy. All right, you need a charging bag – which is one more piece of equipment to buy and store, but it does not take much space, and could be useful in other circumstances.
So…The Lomo Daylight is easy to load, and not difficult to clean and reassemble. But after a very limited practice (one or two dry runs), the Paterson tank is as easy to load as the Lomo, and even easier to clean and reassemble.
Disassembling the Paterson tank – it could not be simpler.
The Paterson (or a system of equivalent quality) has the additional advantages of being more flexible (the reels can be configured for one or two 35mm films or one 120 film), easier to maintain at a specific temperature in a sous vide if inserted in a color process workflow, and less finicky than the Lomo, which can be a bit temperamental in my experience.
The real difference? this pesky film leader extractor. Extracting the film leader from a fully rewound cassette of 35mm film is a royal pain. You may have to do it before you can load the film in a Lomo, but never on a Paterson tank.
Two film leader extractors – the tool provided by Lomo (top) and my old and trusted Hama extractor. The Lomo is probably less of a pain, but still a pain.
Not everybody has the luxury of dedicating a room – or even a large cabinet – to use as a home photo lab.
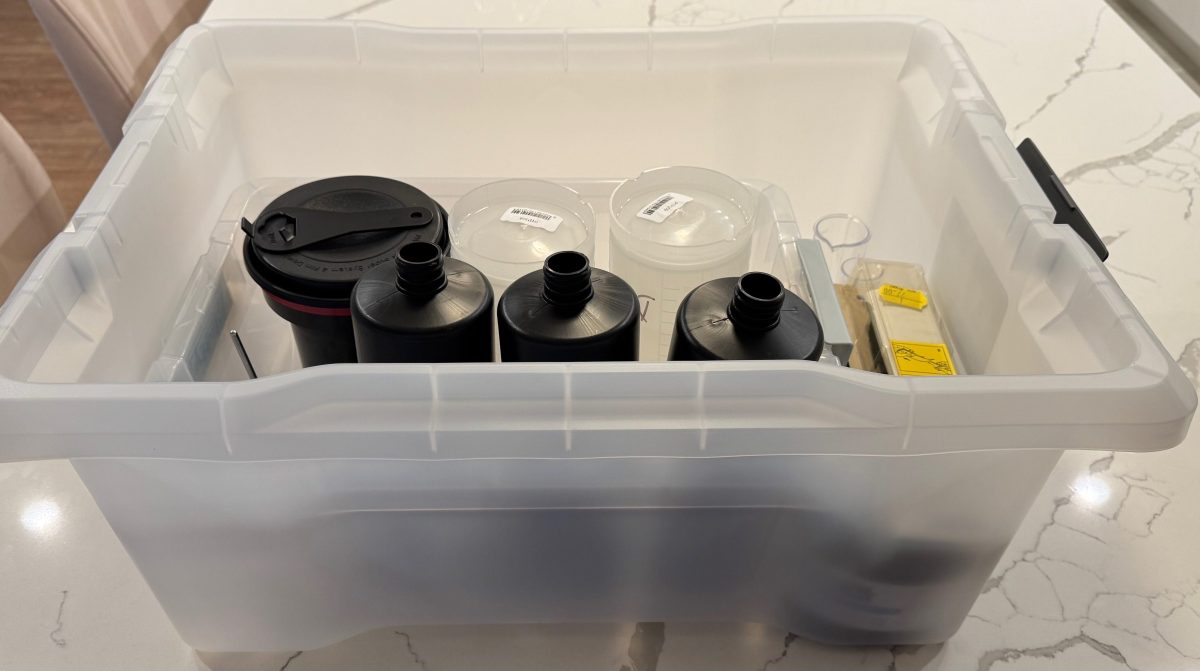
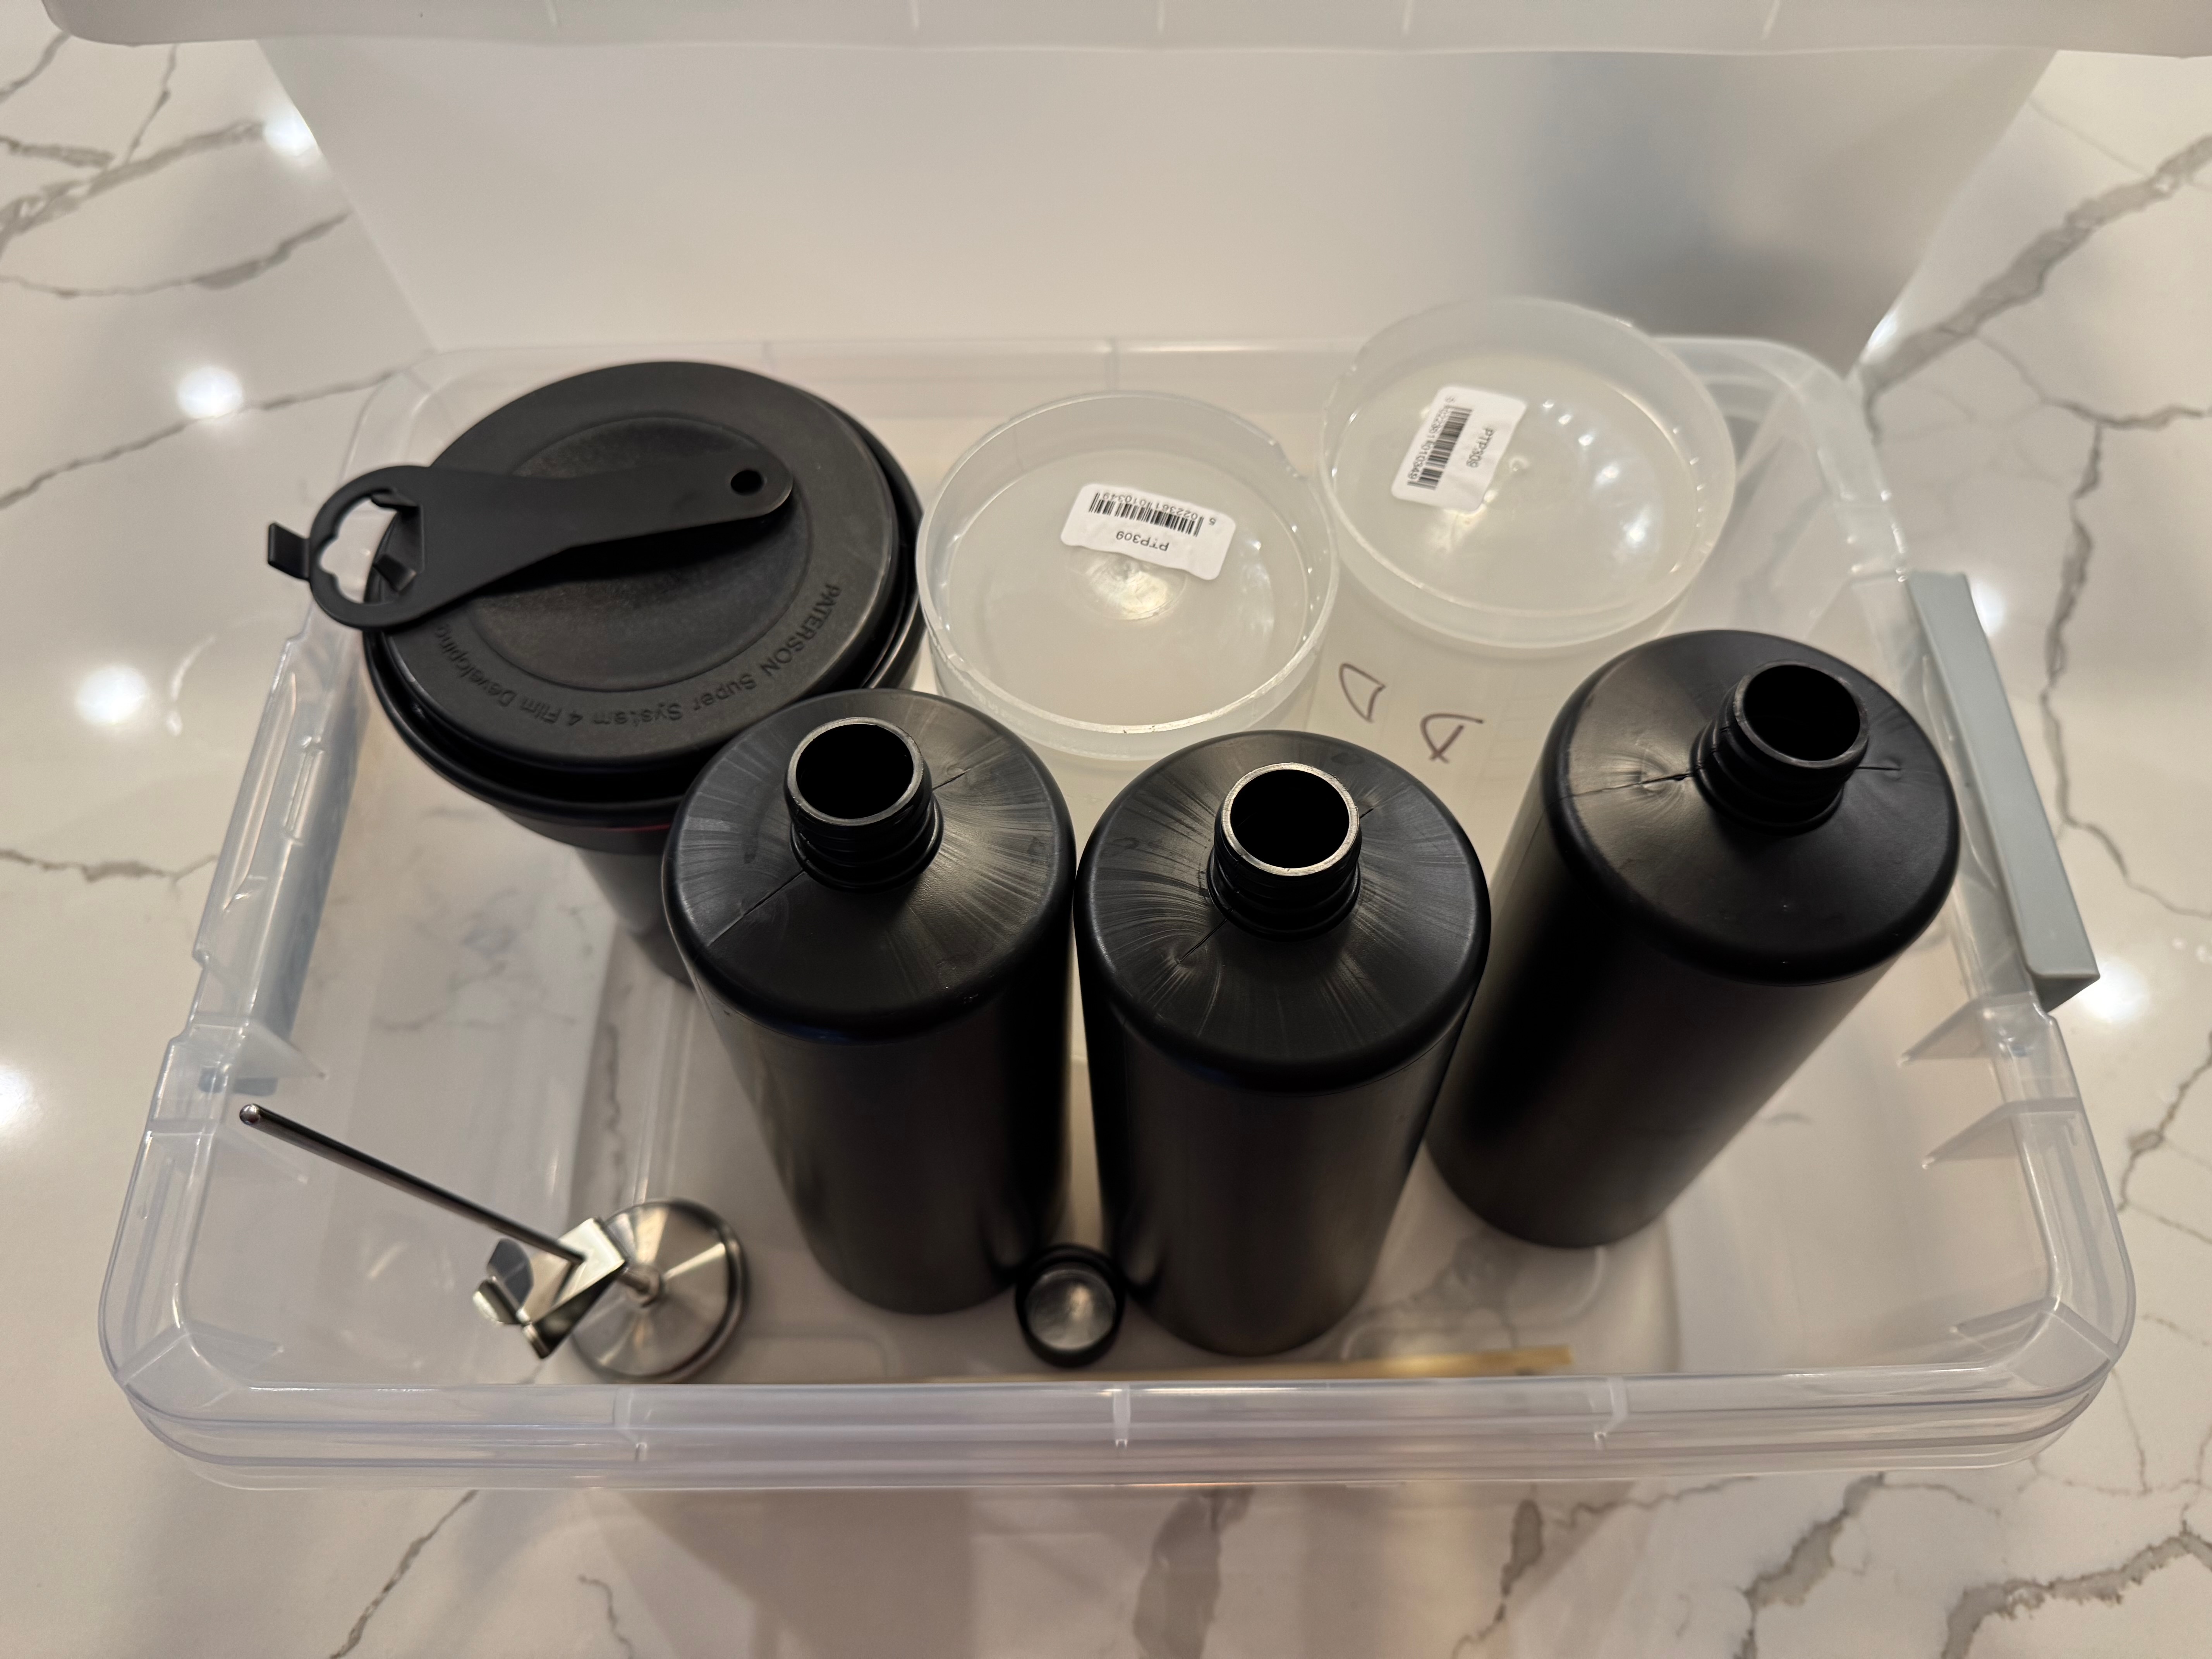
If you still enlarge and process your prints at home, you need a dark room, and plenty of space for the enlarger and the developing trays – but if you only process film, and immediately digitize it, you simply need a few square feet on the countertop of your kitchen. Once you’ve cleaned your equipment, it will fit in a 20x15x10in plastic bin, chemicals included.
Everything can fit in a 20x15x10in plastic bin, including the chemicals
A 20x15x10in plastic bin is still rather large object to carry around (and I can’t imagine people traveling with their diluted chemicals and processing film in their hotel room), but it’s easy to find it a storage place at home, even in a small apartment.
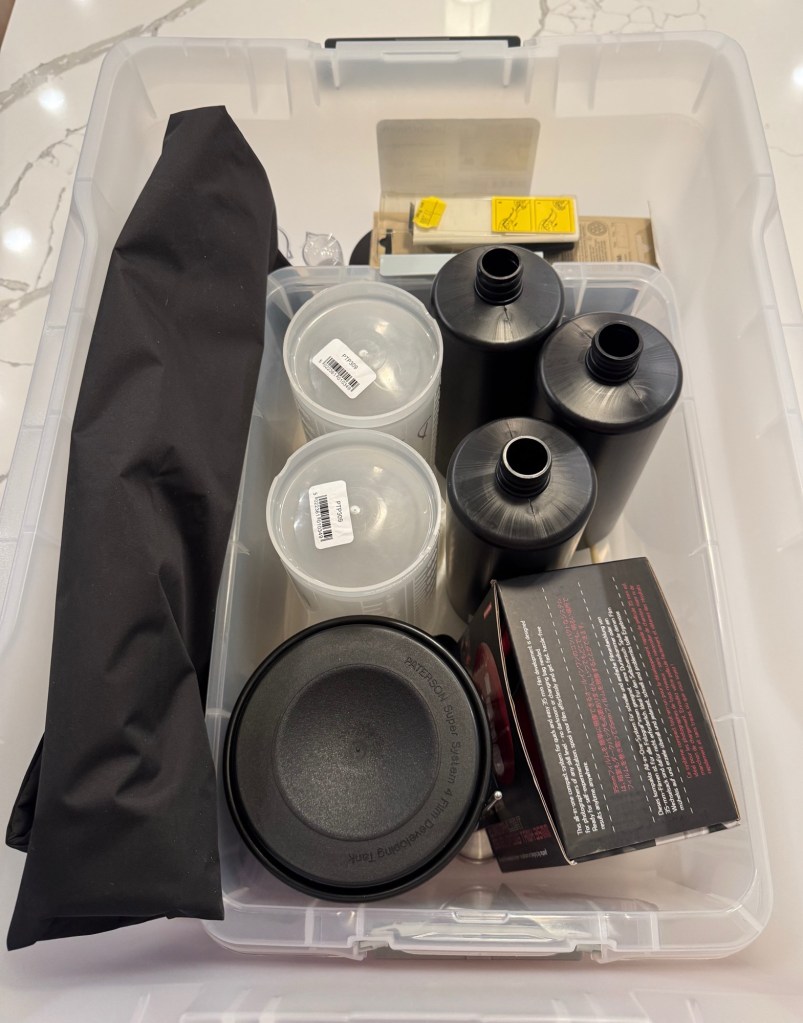
the 12 gallon bin with enough room for two tanks (one Lomo, one Paterson), bottles and even chemicals (the Tetenal tabs).
I started processing film again a few months ago, and I’m still re-discovering the secrets of the trade. I still make mistakes and I’m not ready to develop color film at home yet, but it’s one of my mid-term goals. I’m trying to keep the whole process simple and low cost, and I’m sharing here what I’ve learned, so far.
A smaller storage bin to use as a sous vide if needed
Preparing the chemicals
Preparing and storing the chemicals is the thorniest issue, in particular if you only process one or two rolls of film per month. Products (developer, fixer) are always delivered as liquid concentrate or powder, and need to be diluted before use.
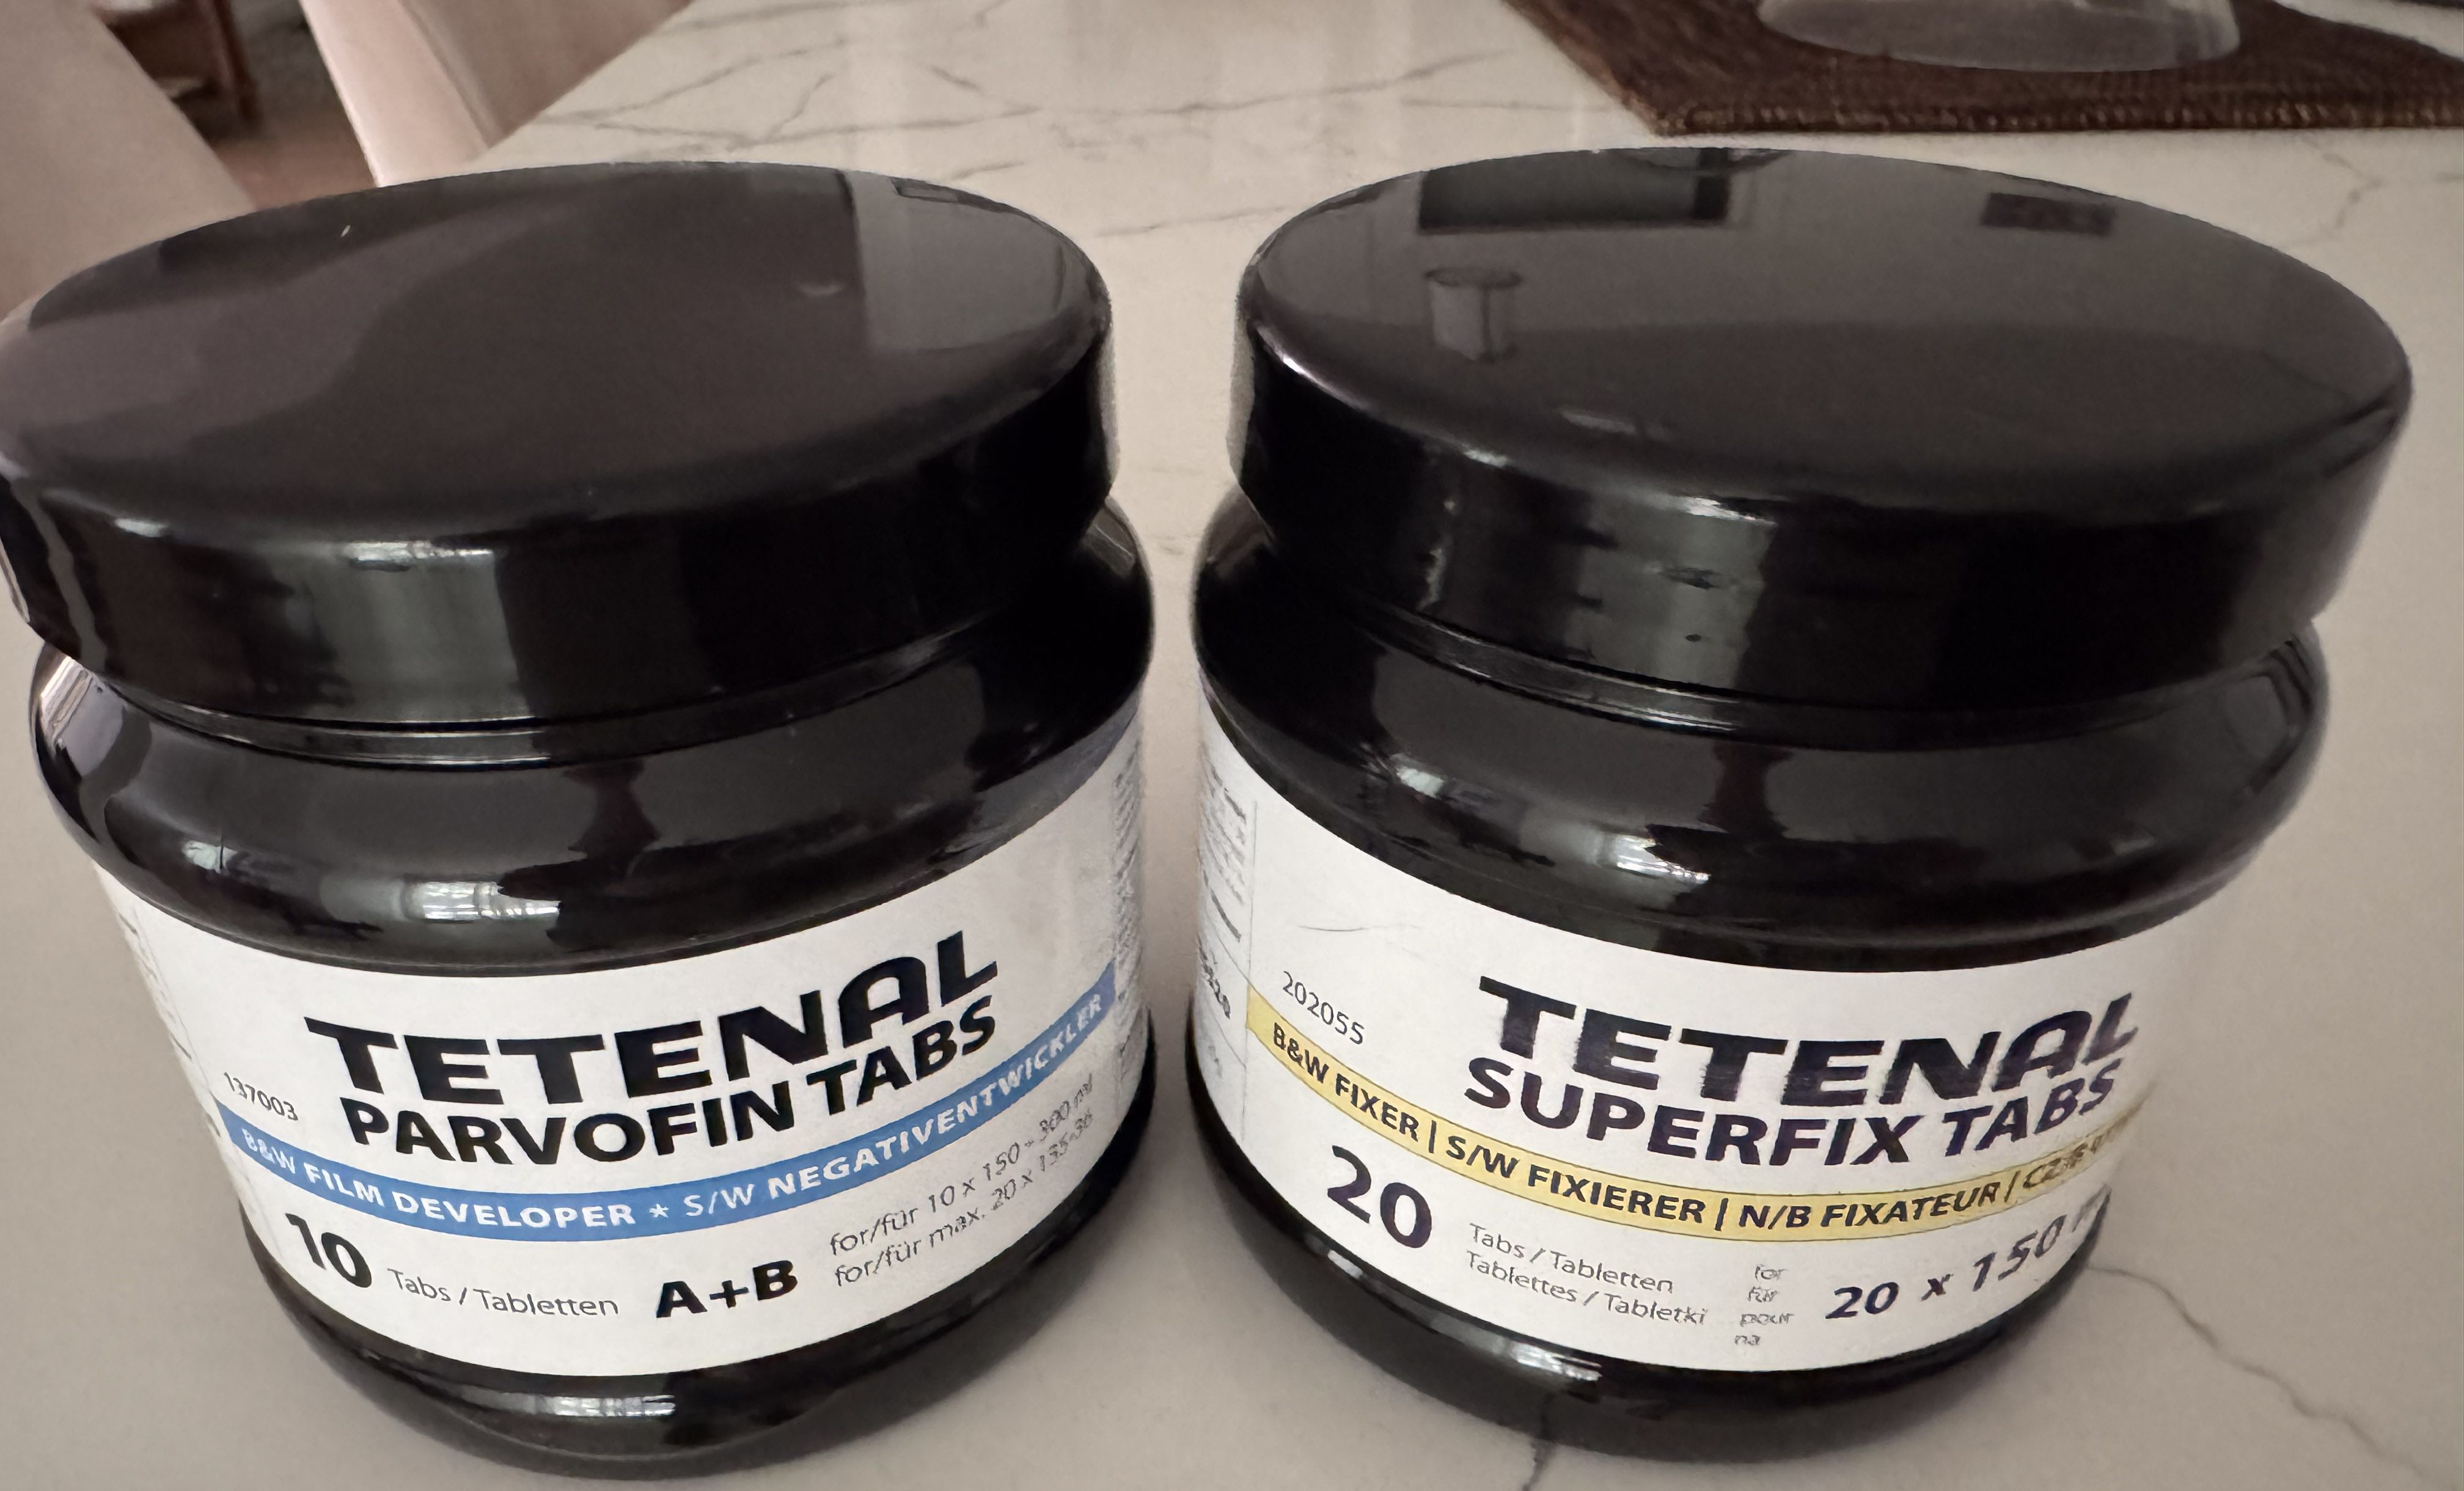
Tetenal – the developer and the fixer come is two easy to store bottles.
Ilford sells a beginners starter kit (the Simplicity Starter Pack) with enough product to process two cartridges of 35mm film, but it’s horrendously expensive at almost $35.00 once you have included the cost of shipping (that’s $17.00 per roll of film… ouch!).
Tetenal has run out of business, but Freestyle Photo (and a few other retailers) still have a some of their products in store – I bought a bottle of Tetenal Parvofin tabs (the developer) , and a bottle of Tetenal Superfix tabs (the fixer). The products are packaged as tablets (like an Alka Seltzer effervescent tab), don’t take much space, and can be stored for a long time (four years). Each tablet is good for one roll of film: you just dilute what you need a few hours before use (you have to let it cool down). It looks like a good solution if you don’t process huge volumes of film, and don’t want to store chemicals in liquid form. The Tetenal tablets are still expensive (approximately $5.00 per processed roll of film) but they’re convenient.
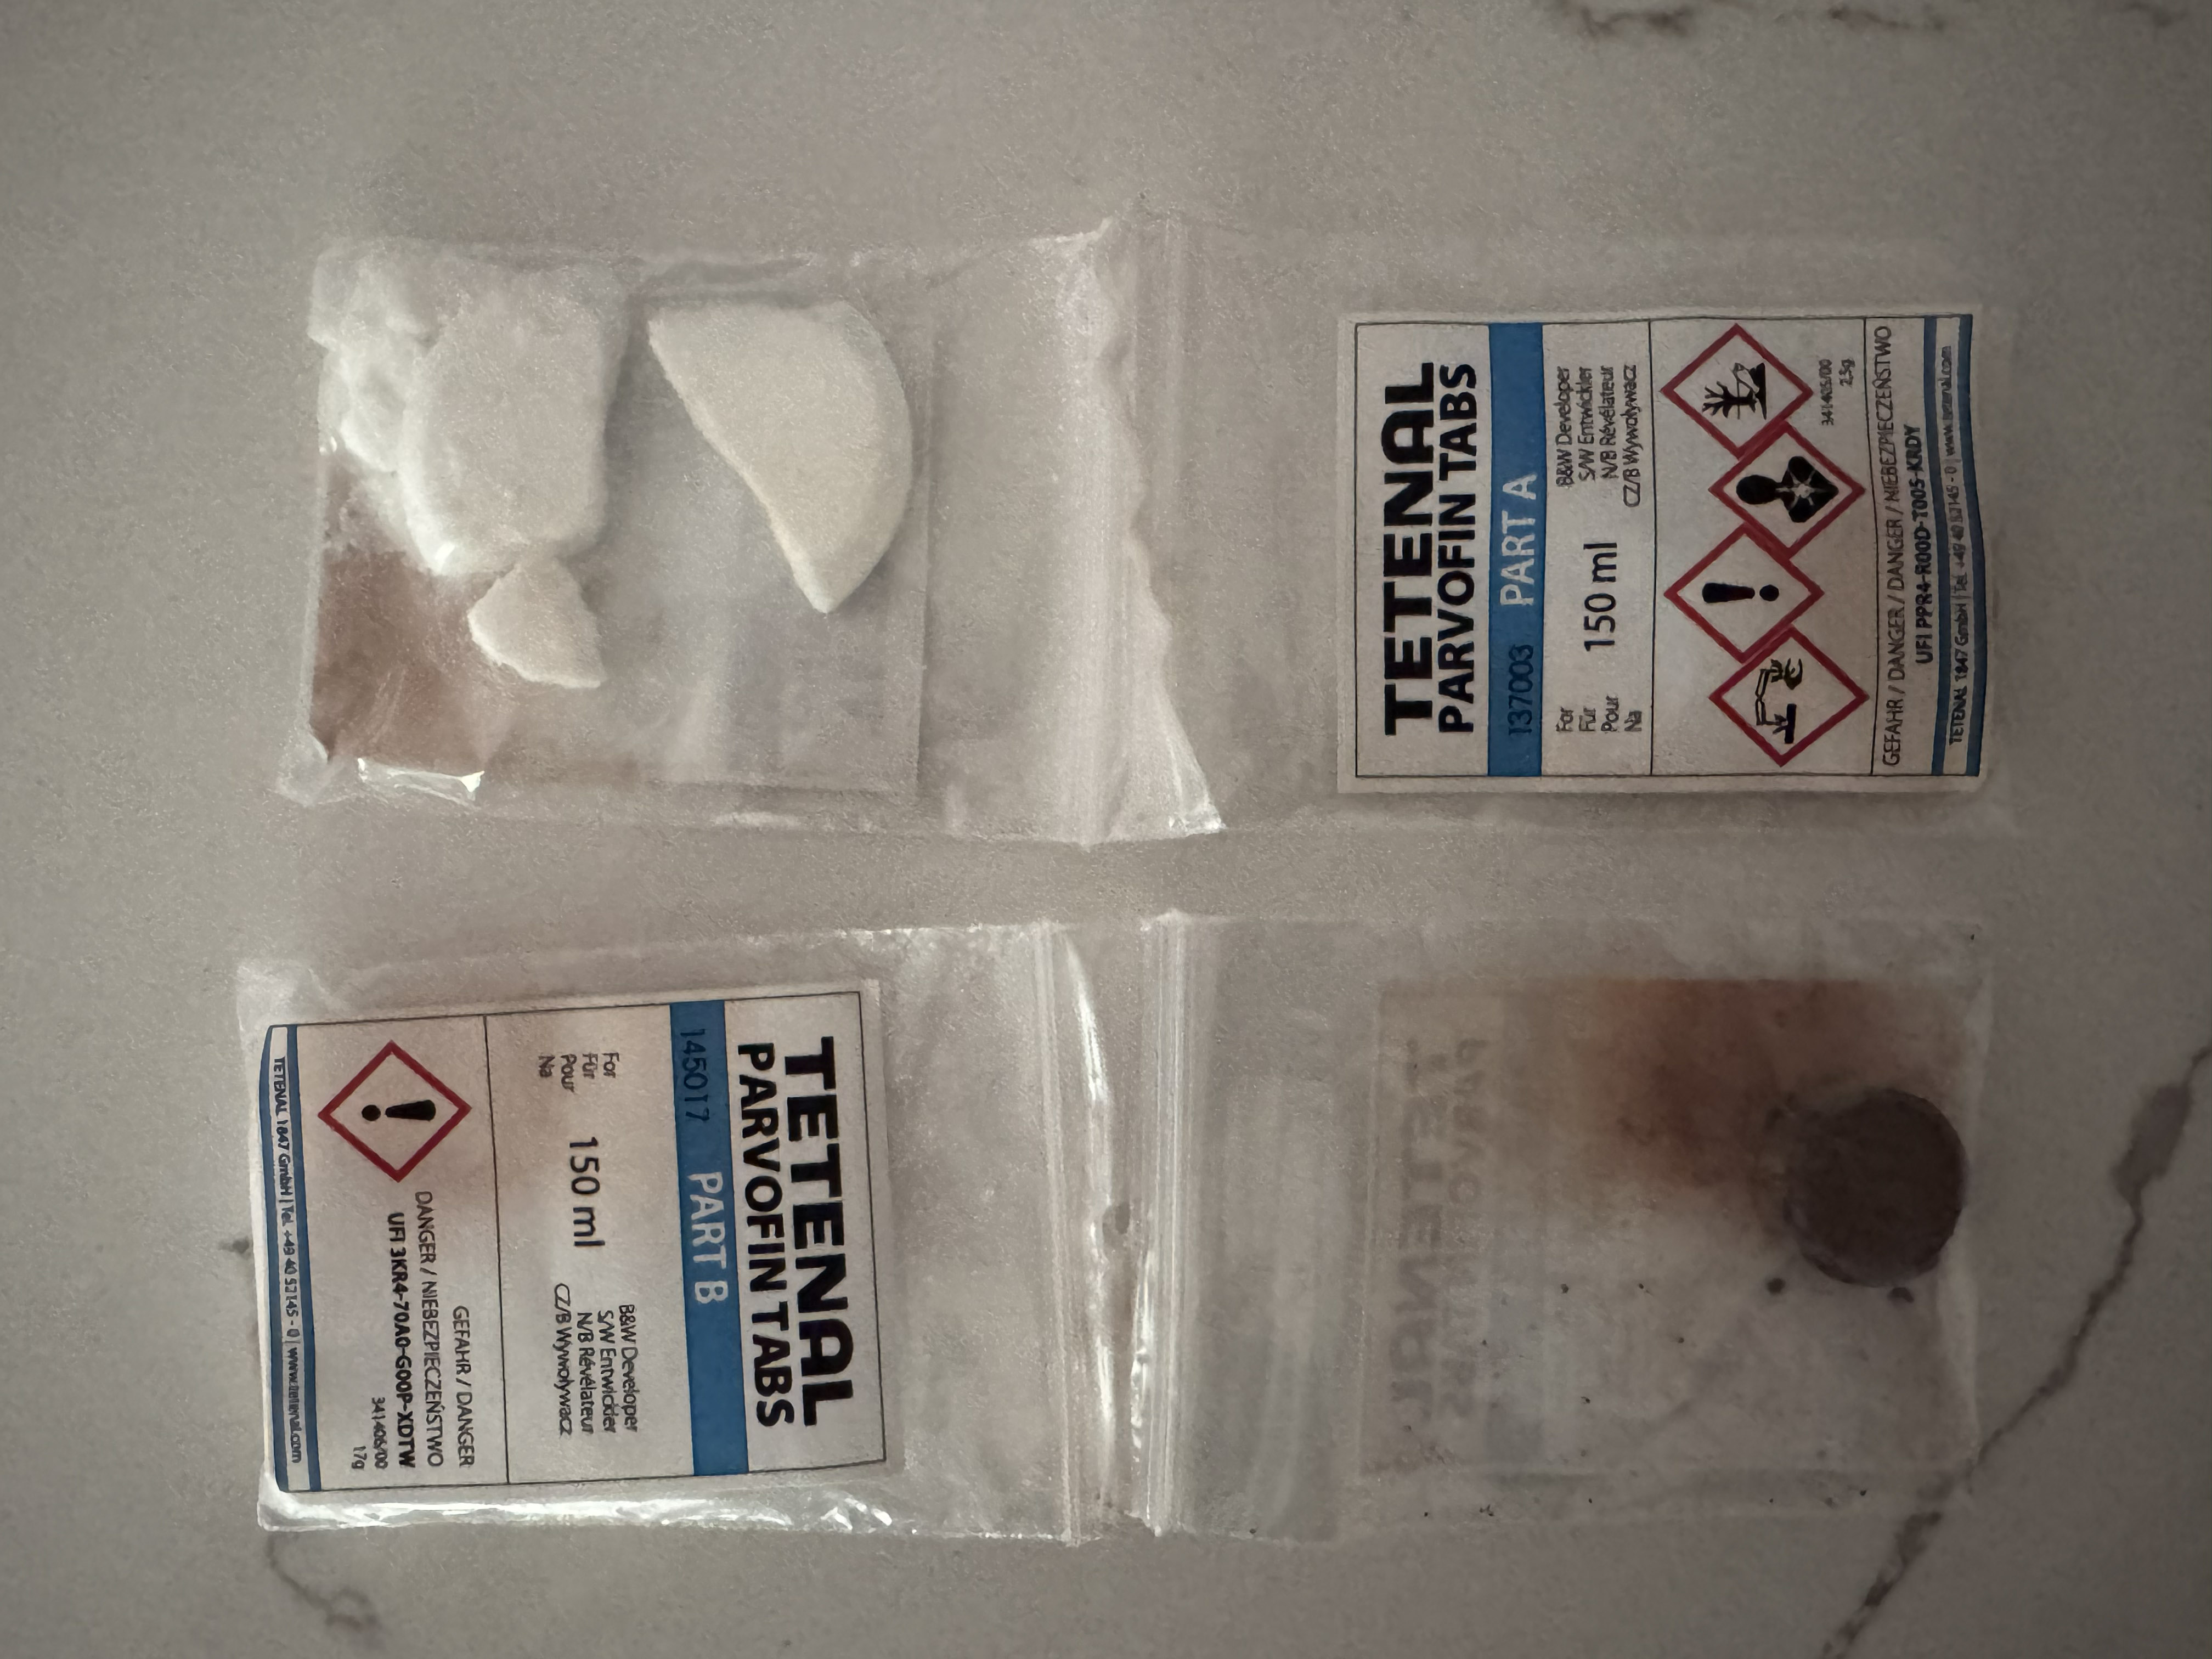
Tetenal: the Parvofin tablets. The developer solution is obtained by placing the two tabs (Part A, Part B) in hot water.
Processing the film
Amateurs typically process roll film (135 or 120) in developing tanks.
Maintaining the developer and the fixer at 22 degrees c. (It’s Atlanta in July, you have to cool the B&W baths).
Paterson, Jobo (and all sort of copycats) manufacture developing tanks that have to be loaded in the dark. I’ve never trusted a dark room to be dark enough to load film, and I’ve always used a charging bag.
You slide your hands in the two sleeves, load the film on the reel, place the reel in the tank, and close the tank. Without seeing what you’re doing – of course.
Intimidating, but not that difficult after one or two dry runs.
Lomo and Lab-Box have been promoting an easier way to process film, with tanks that can be loaded in full daylight – no charging bag needed. You simply place the film cartridge in a receptacle, turn a crank, and the film is loaded. I’ve been using the Lomo Daylight Developing Tank for a few months. Yes, it works, but I’m not totally sold on it – I may even return to a conventional Paterson tank (there was a promo recently and I bought one for cheap).
Lomo Daylight imposes a trade-off between simplicity and convenience, on the one hand, and reliability and flexibility, on the other hand
The Lomo Daylight teared the peforations of the film. If it happens, the cartridge has to be removed from the loader, and the damaged section cut off before another attempt at loading the film can be made.
I’ve never seen or tested the Lab-box, but the Lomo Daylight imposes a trade-off between simplicity and convenience, on the one hand, and reliability and flexibility, on the other hand.
Reliability because to push the film on the reel hidden inside the tank, Lomo relies on a pair of sprockets (that engage in the film perforations) – and will tear those perforations if there is any resistance. If it happens in the middle of the film loading process, you have to turn the red button to cut the film, remove the film receptacle from the tank, develop the film which is already inside the tank, clean and dry the whole thing, then return to your film cartridge, cut the section where the perforations were teared down, resume film loading, and start a new film processing cycle. Of course, you lose a few pictures in the process, and a few hours of your time. Not great.
Flexibility, because the Lomo only works with one roll of 35mm film at a time, as opposed to a conventional developing tank that will offer the flexibility of developing one or two 35mm film cartridges or a single 120 film roll in one run. Also, the Lomo tends to require more product per cycle than a conventional tank, and because of its shape, may (I’ve not tested) be more difficult to use when processing color film.
Film scanning or digitizing
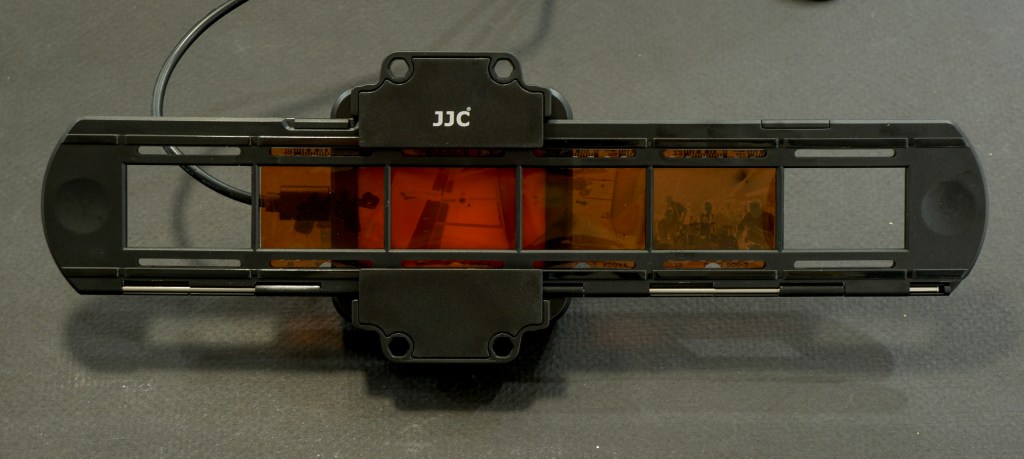
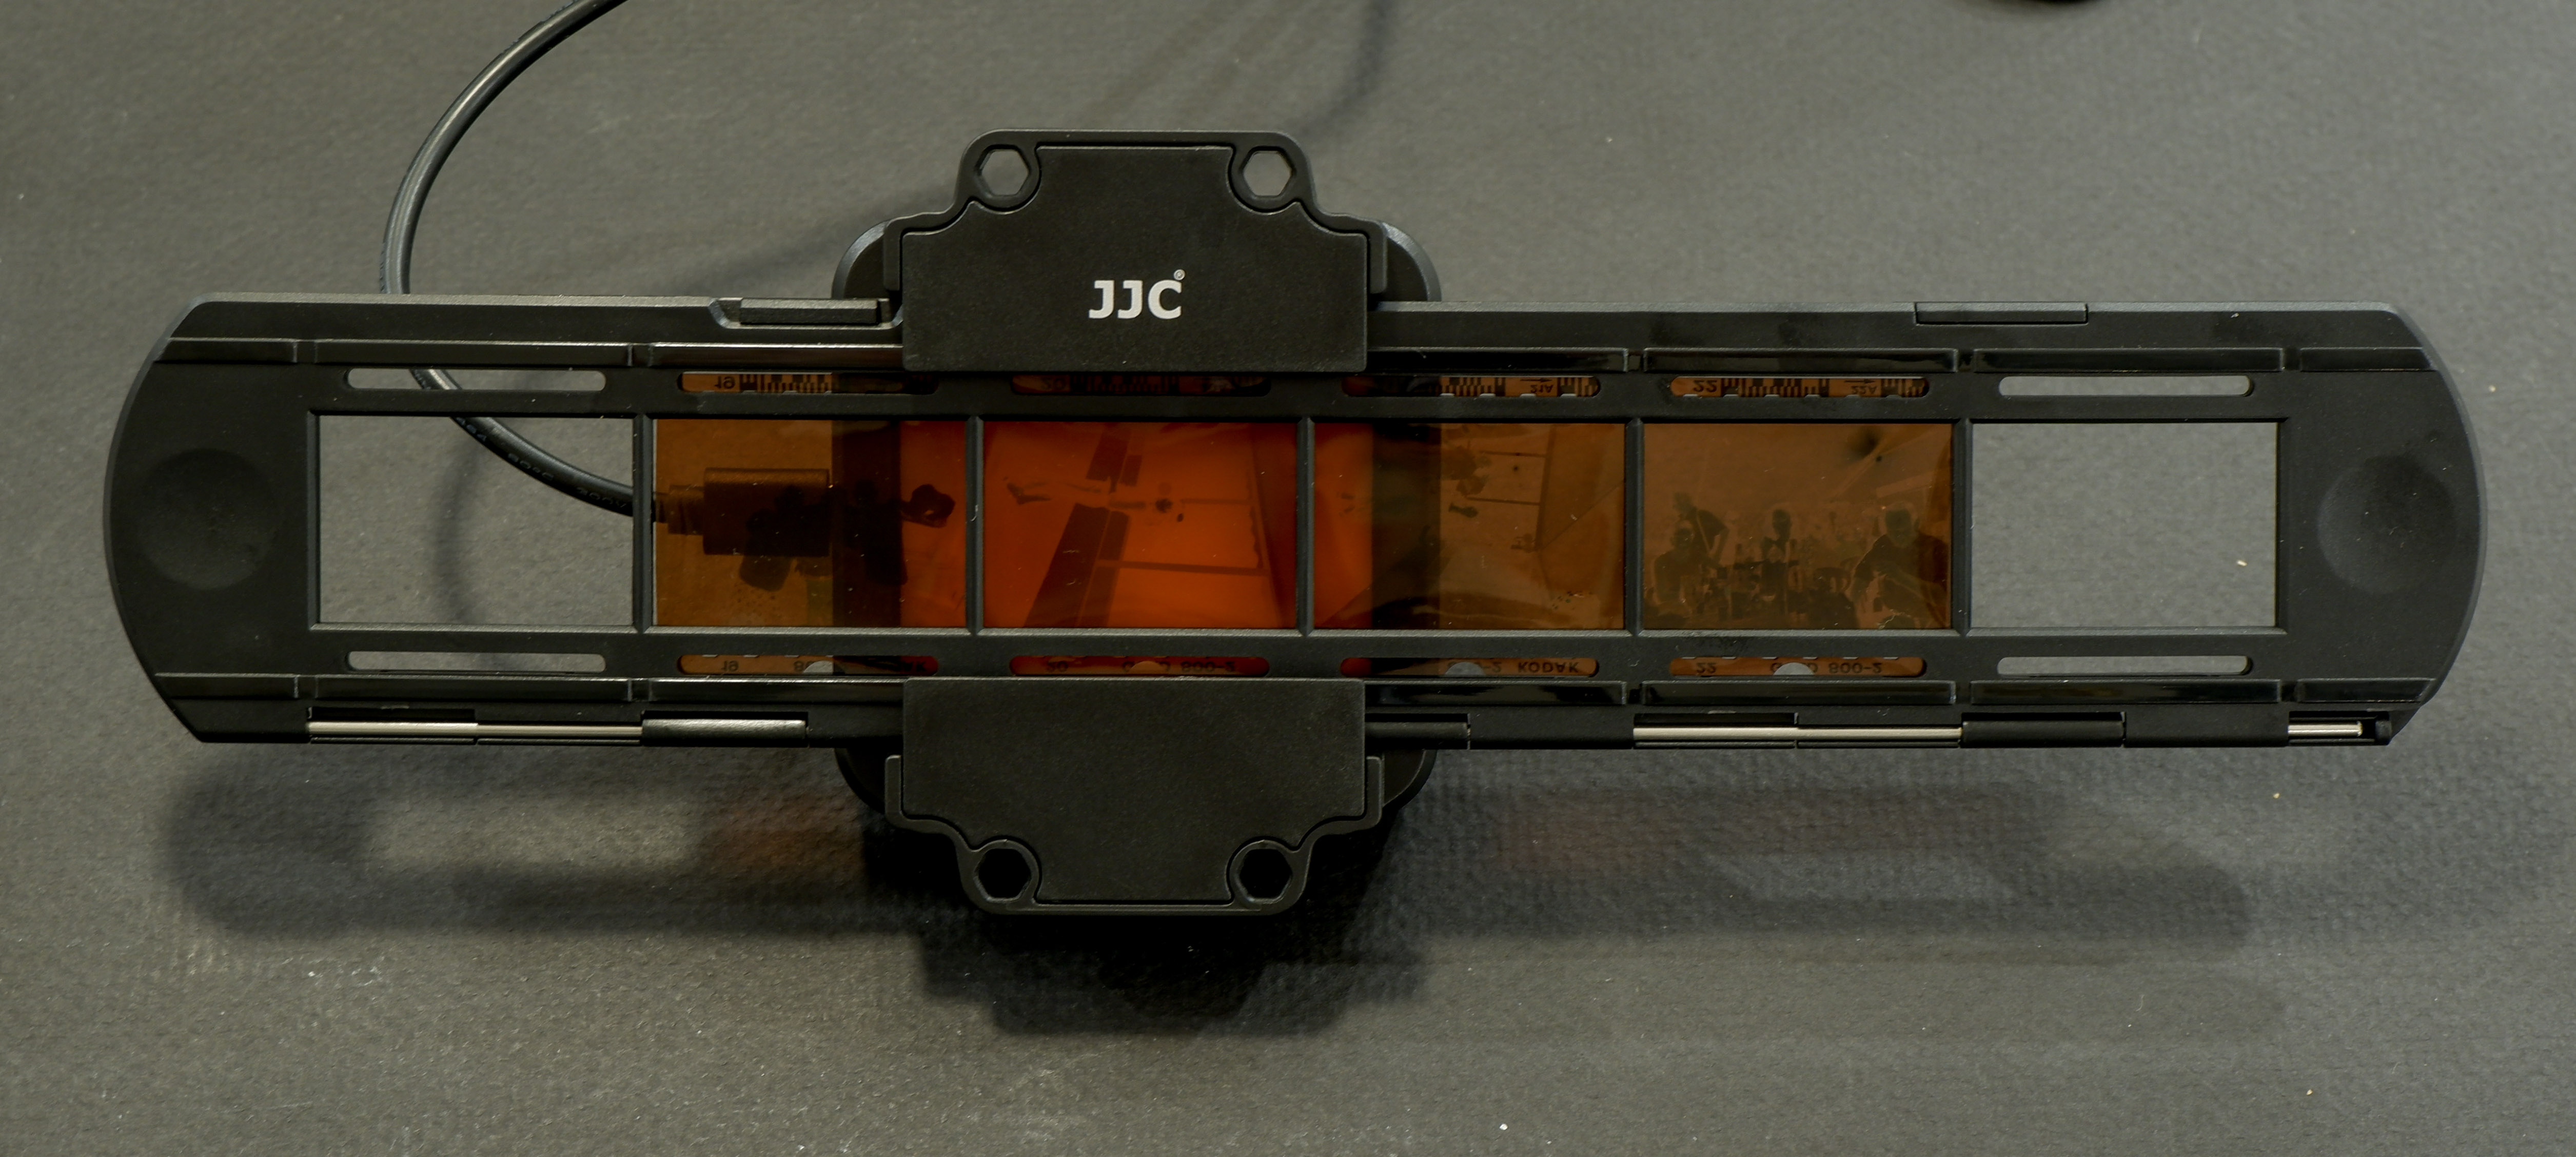
I don’t own a dedicated film scanner. I simply mount a macro lens (an old 55mm Nikkor) on my current digital camera, screw the JJC Film Digitizing adapter on the front of the lens, and digitize a full roll of film in a few minutes. I have absolutely no reservation about that part of the work flow. It’s quick, easy, and it simply works.
JJC Digitizing kit: the film strip holder
In action – Fujifilm X-T4, Fotasy Nikon F to Fujifilm X Adapter, Nikon Micro-Nikkor 55mm, JJC kit. The lightbox is included in the JJC solution, a big advantage over a similar product offered by Nikon.
Editing and sharing your images
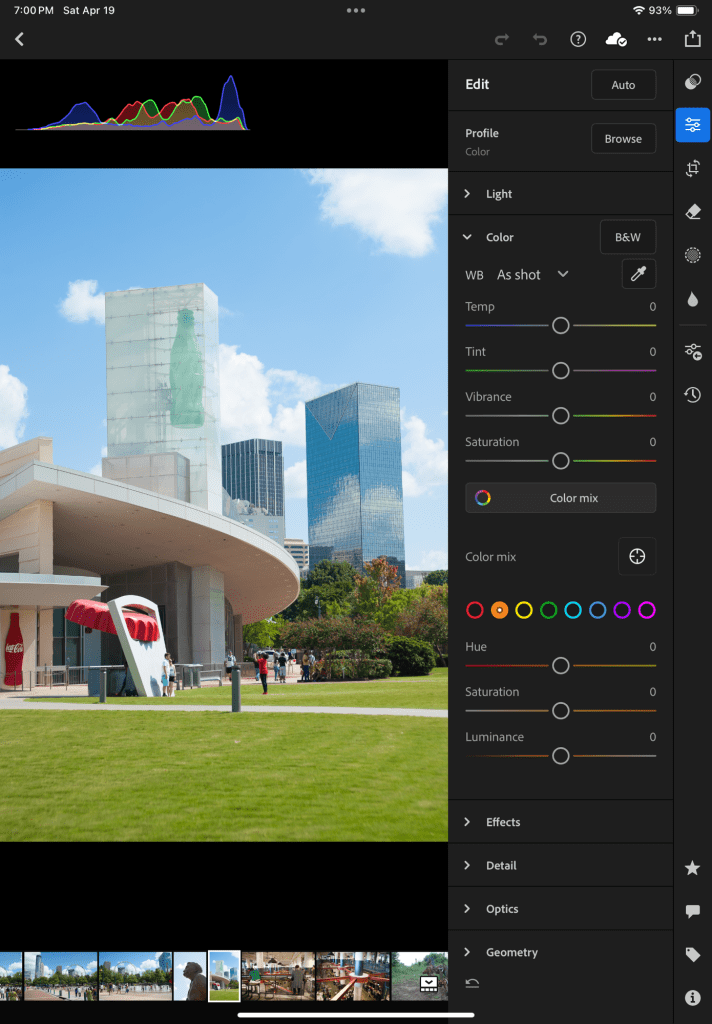
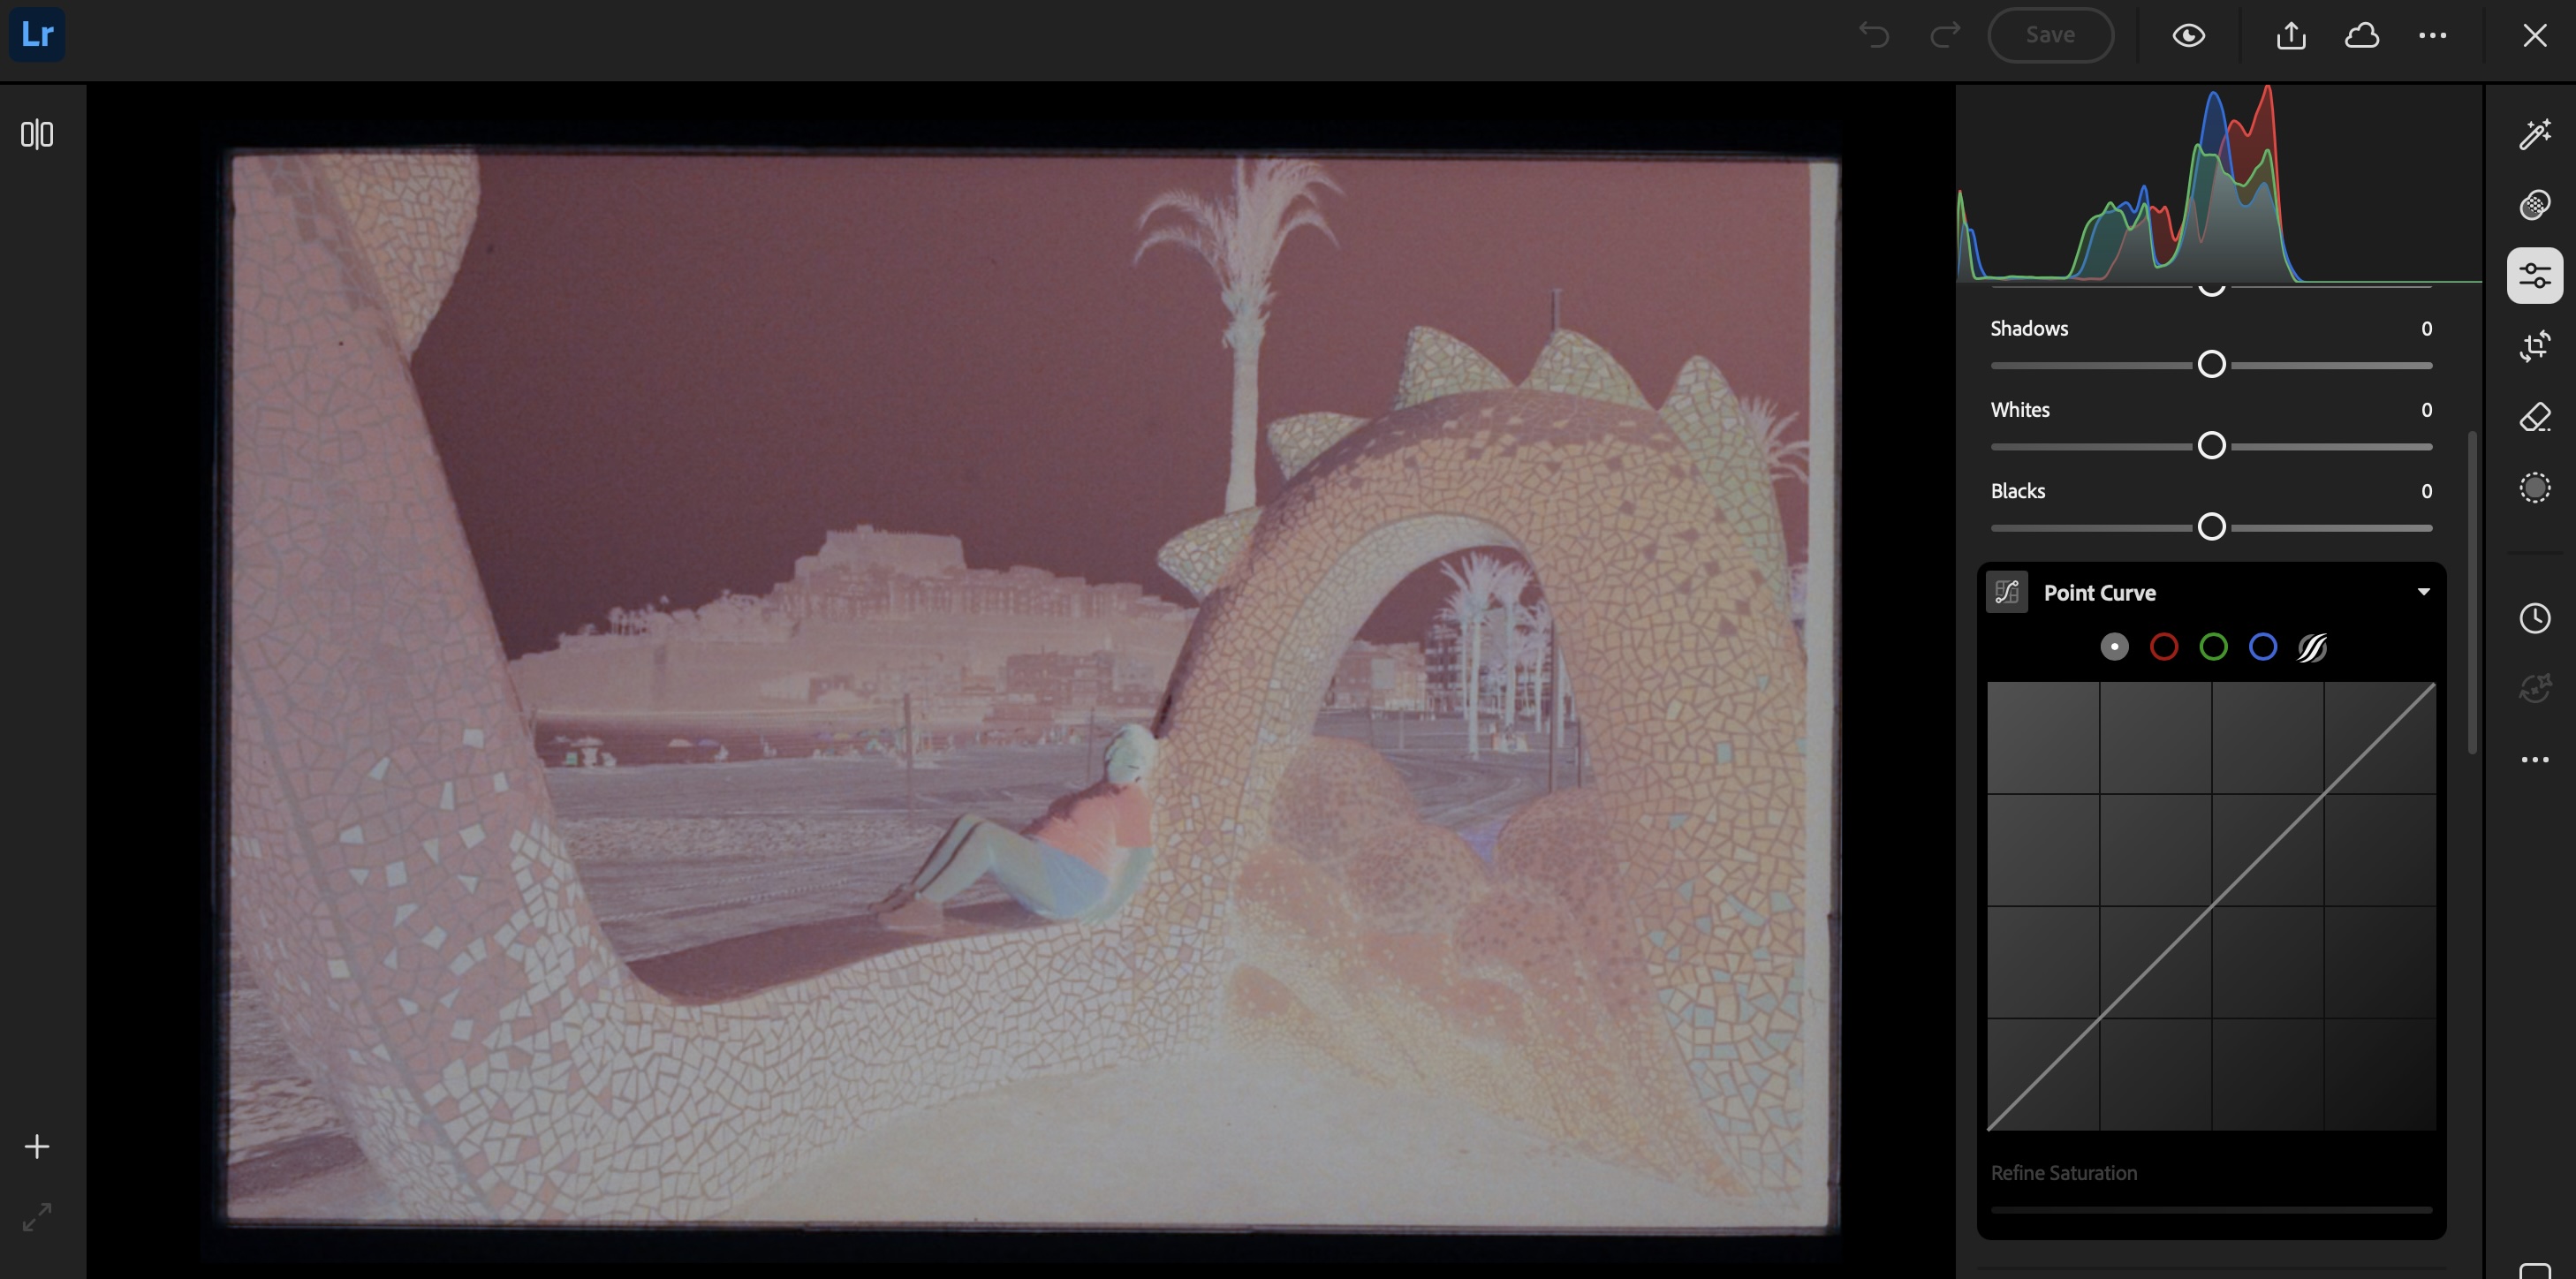
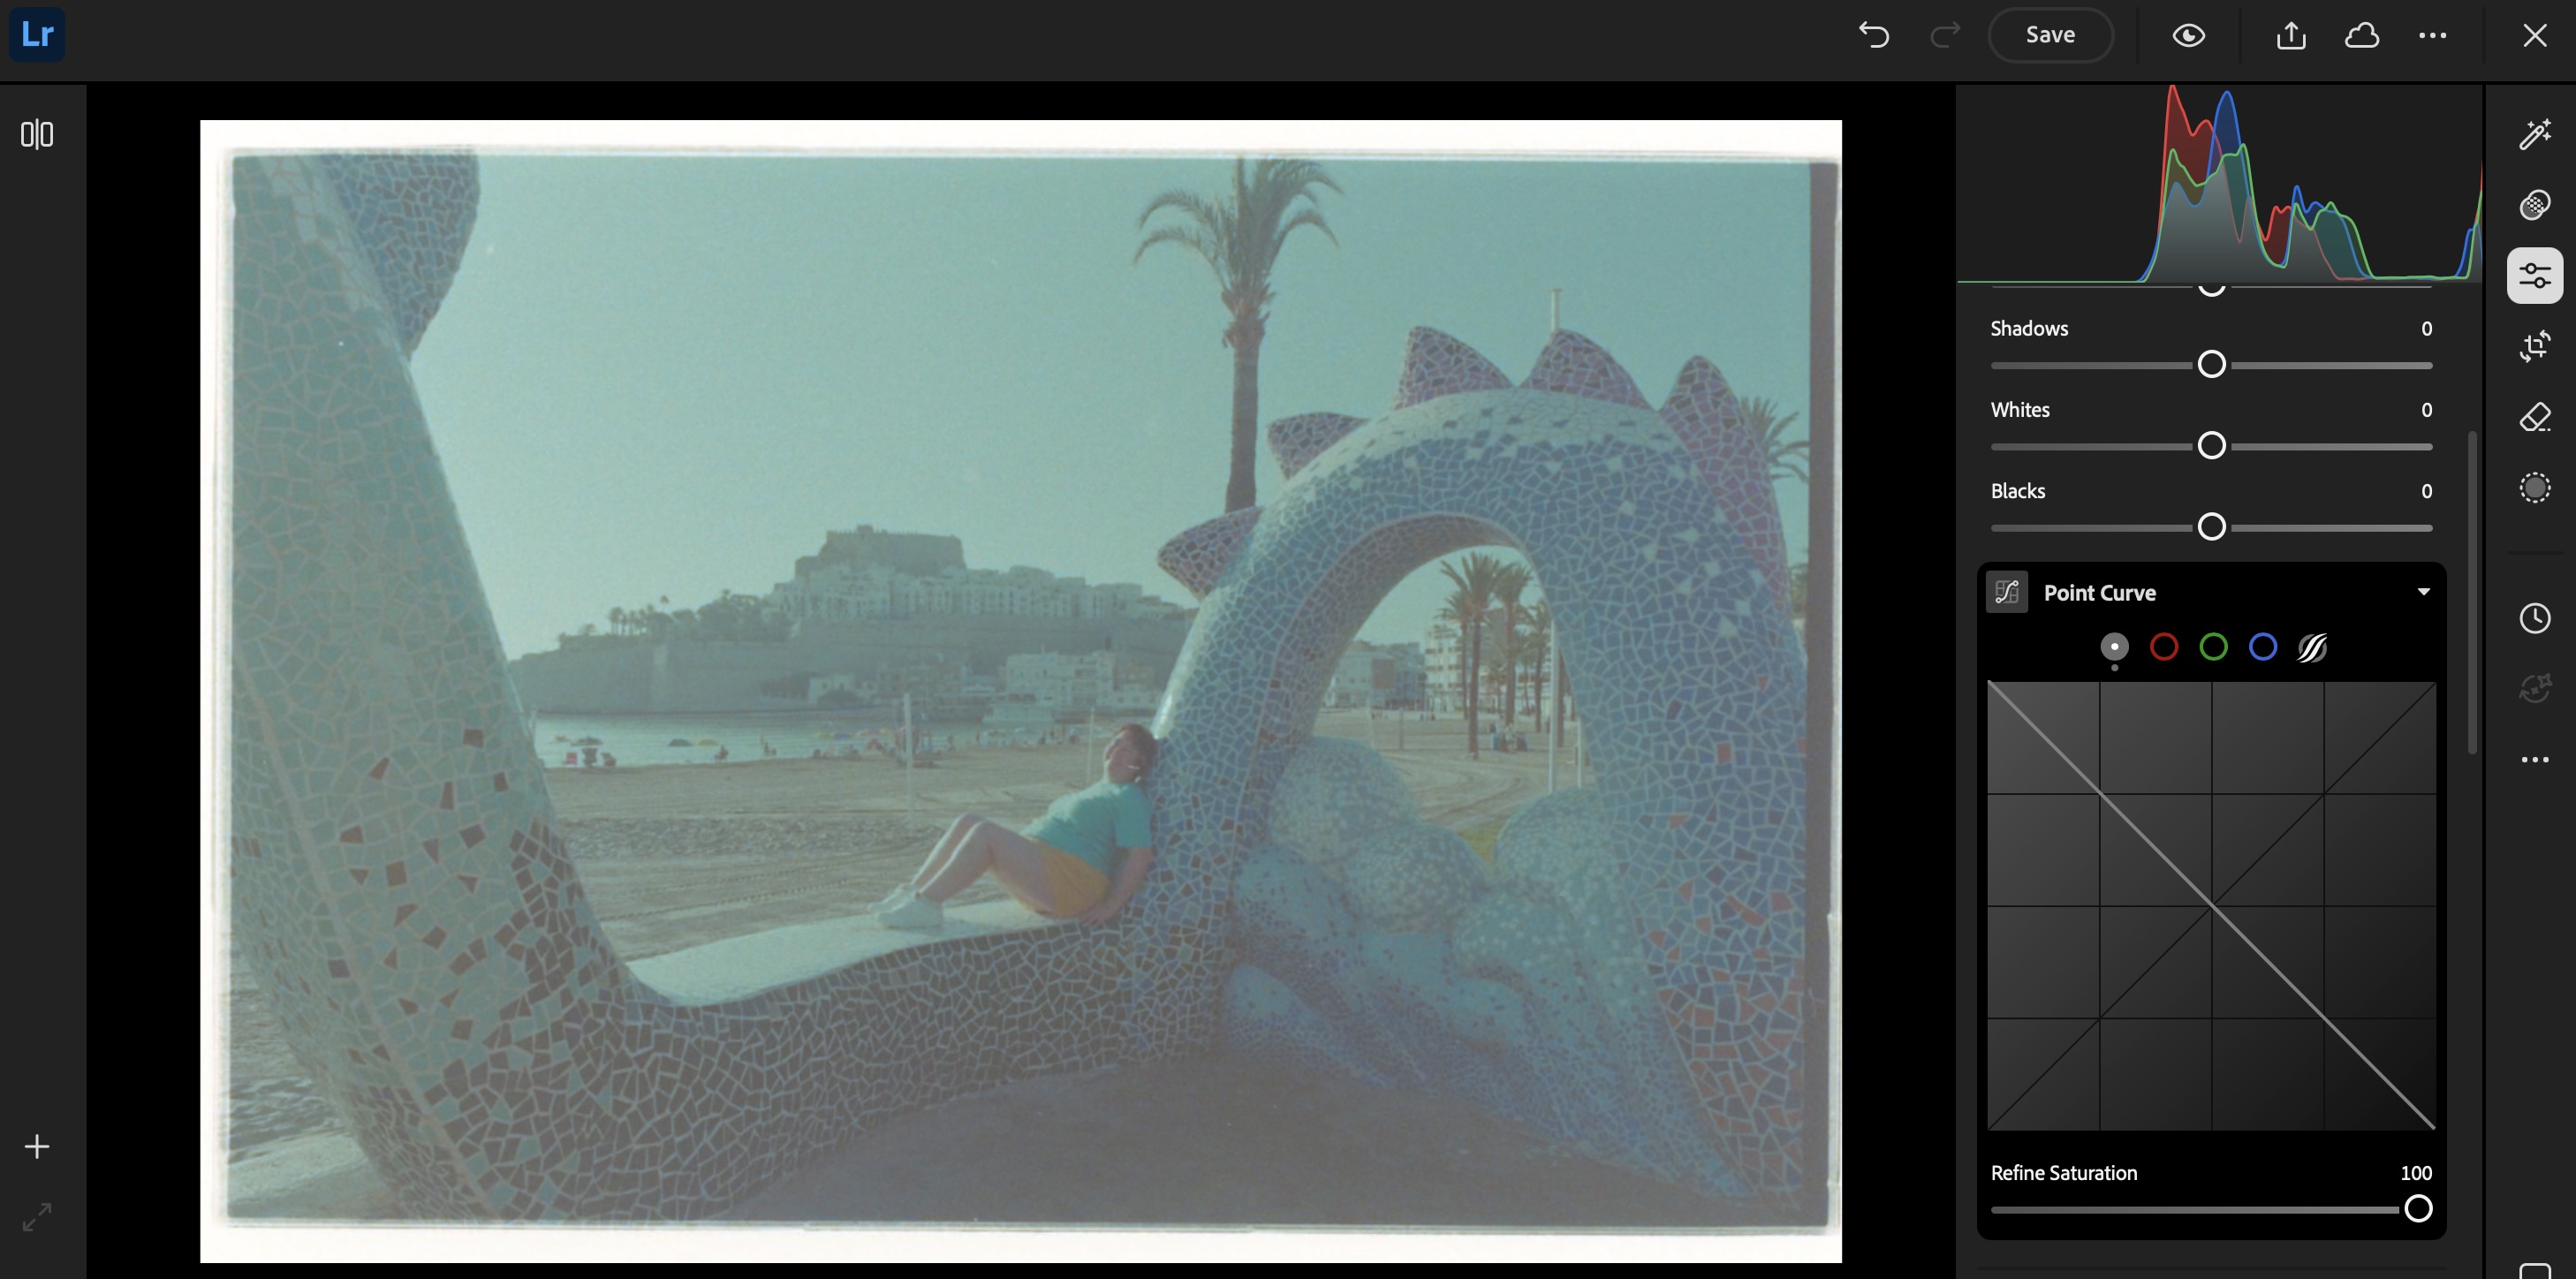
The rest of the process takes place on a “computer” (PC, Mac or iPad). I simply connect a SD card reader to my iPad or to my PC, and upload the images to Lightroom Mobile or Lightroom Web. Even the junior versions of Lightroom will let you invert the negative (by flipping the two ends of the Point Curve), and finalize the image by playing with the exposure, contrast and while balance sliders.
If correctly exposed, processed and digitized, black and white film will require very little work in a photo editing tool like Lightroom Mobile. Color film requires more effort – but so far, I’ve not felt the need to upgrade to Lightroom Classic and to a dedicated Negative Film Processing plug-in.
Step 1 – import the digitized negative Step 2: invert the image (moving the point curve)Step 3: play with the white balance and the color mixer (the difficult part)
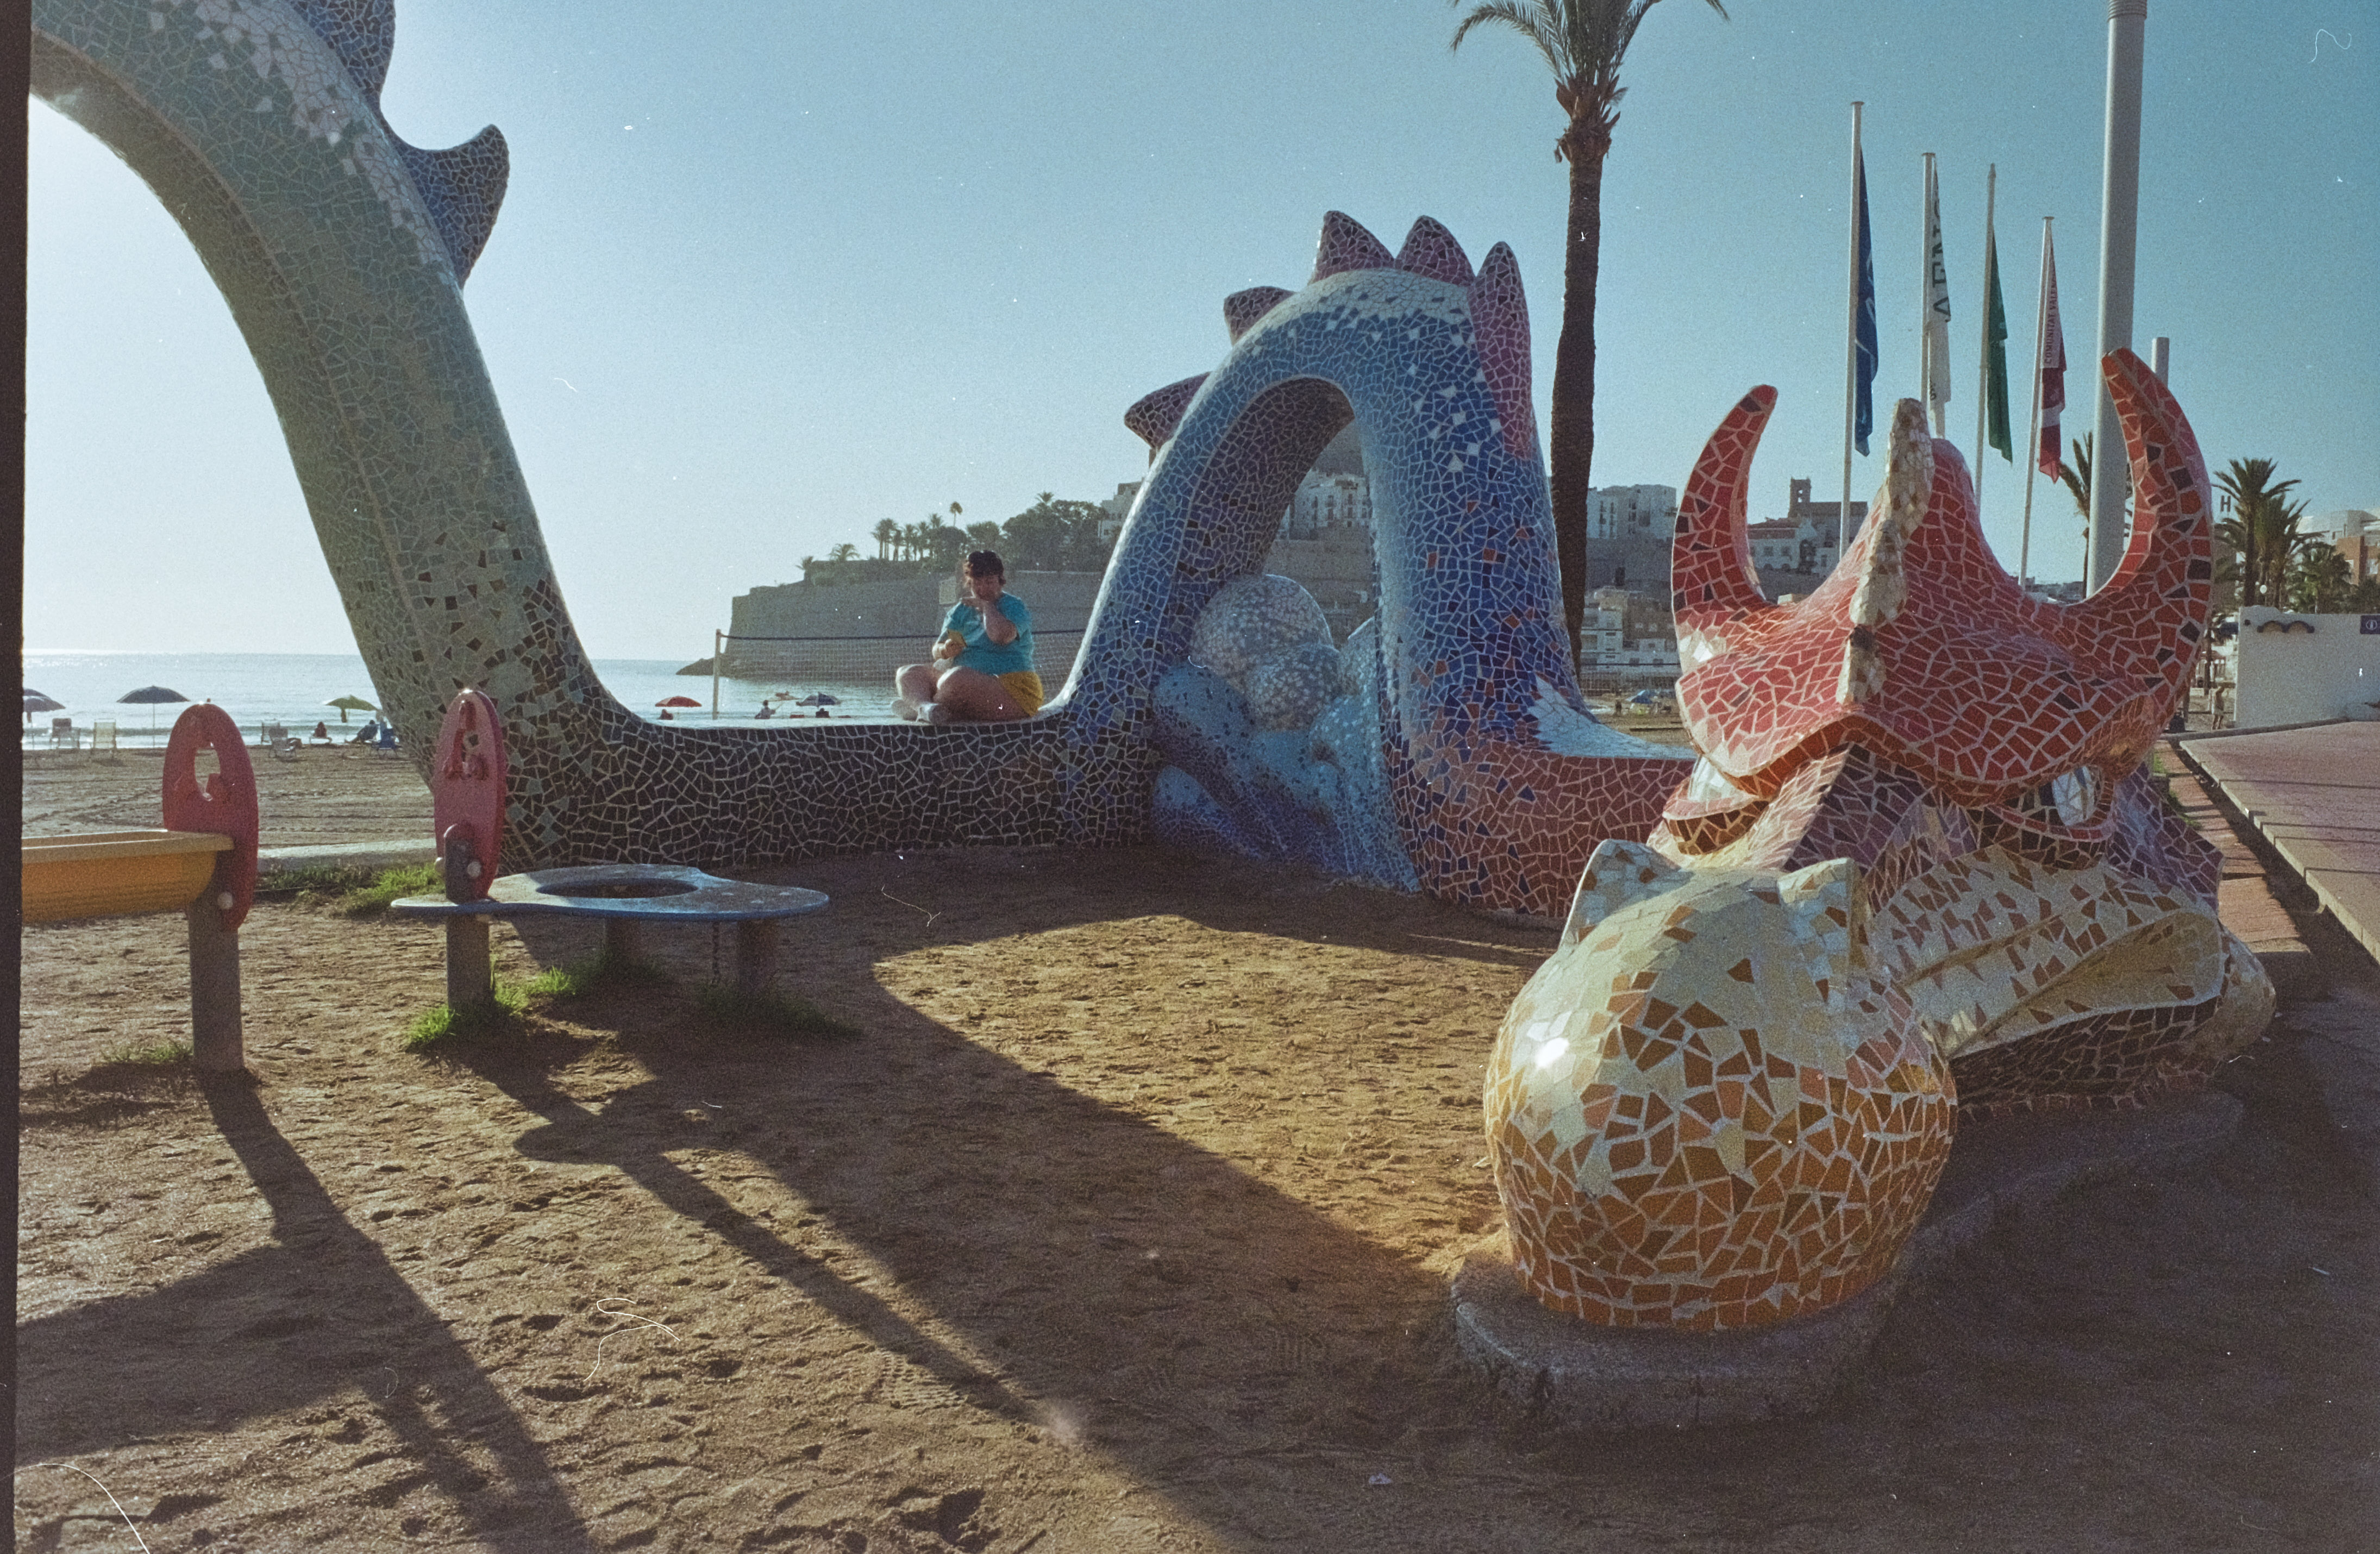
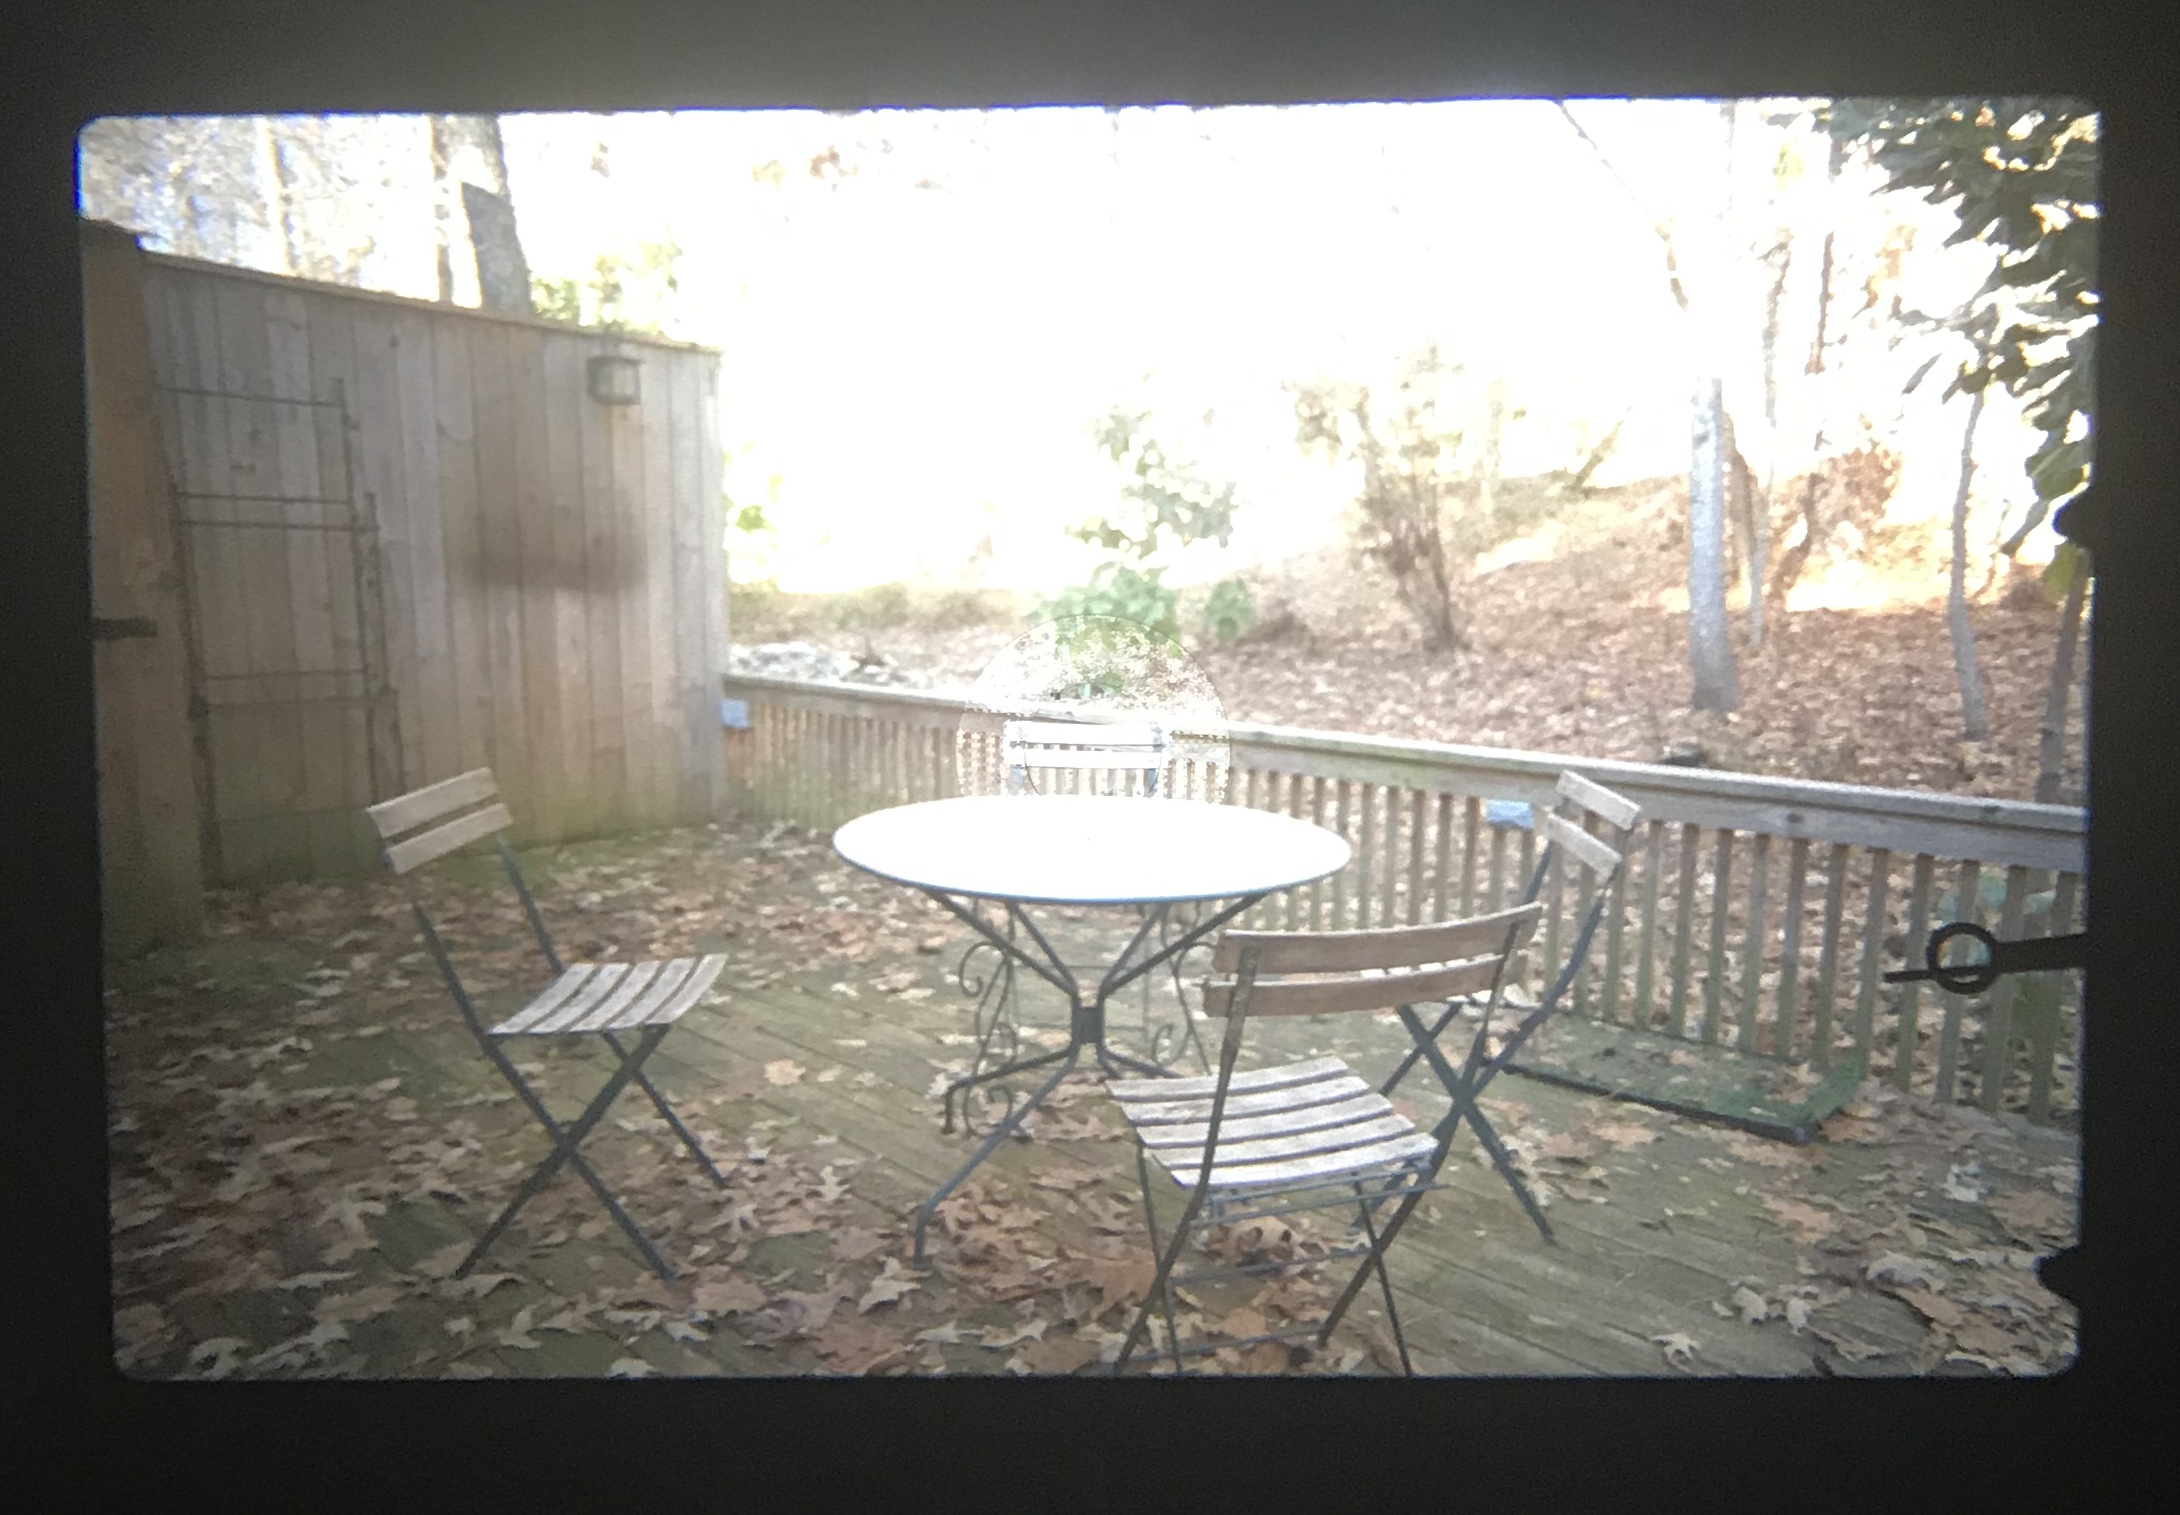
The final result: Peñíscola(Spain) – a few episodes of Game of Thrones were shot in the citadel. It explains the dragon. Digitized from film, inverted and adjusted in LightRoom Web.
As a conclusion: what’s in my plastic bin?
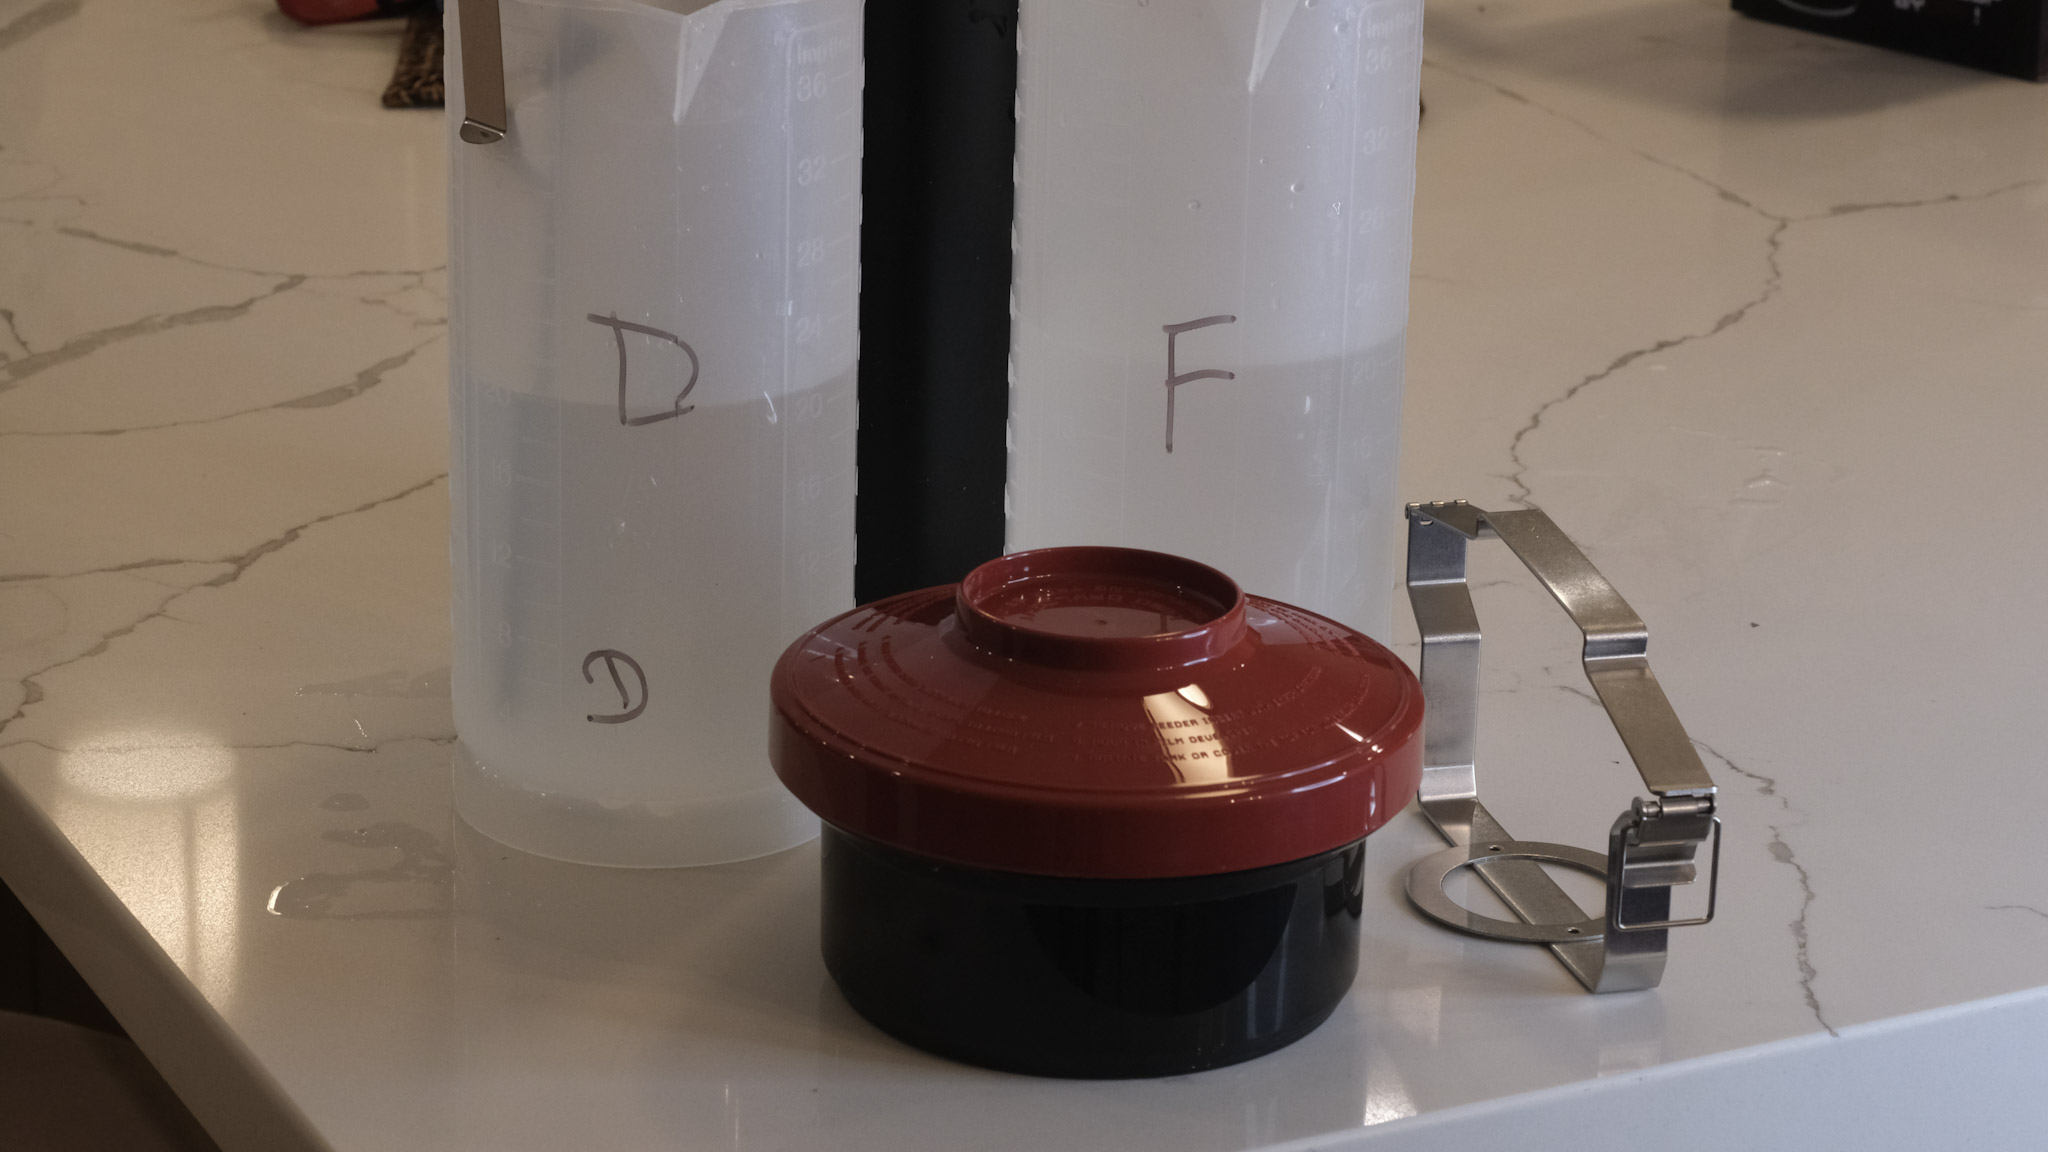
Developer, fixer, bottles, tank, thermometer, beakers, samigons, squeegee, weighted clips – everything fits in my 12 gallon plastic bin. Color processing would require an extra device to maintain the temperature of the baths and the tank at 38 degrees C, but I don’t need one for B&W film (in the Atlanta summers, the difficulty is to keep the temperature of the B&W baths low enough).
I included in my kit a smaller bin to use as a sous-vide, to keep the chemicals at a controlled temperature while processing the film. It also fits in the larger bin.
Digitizing adapter, macro lens and digital camera are stored separately, of course.
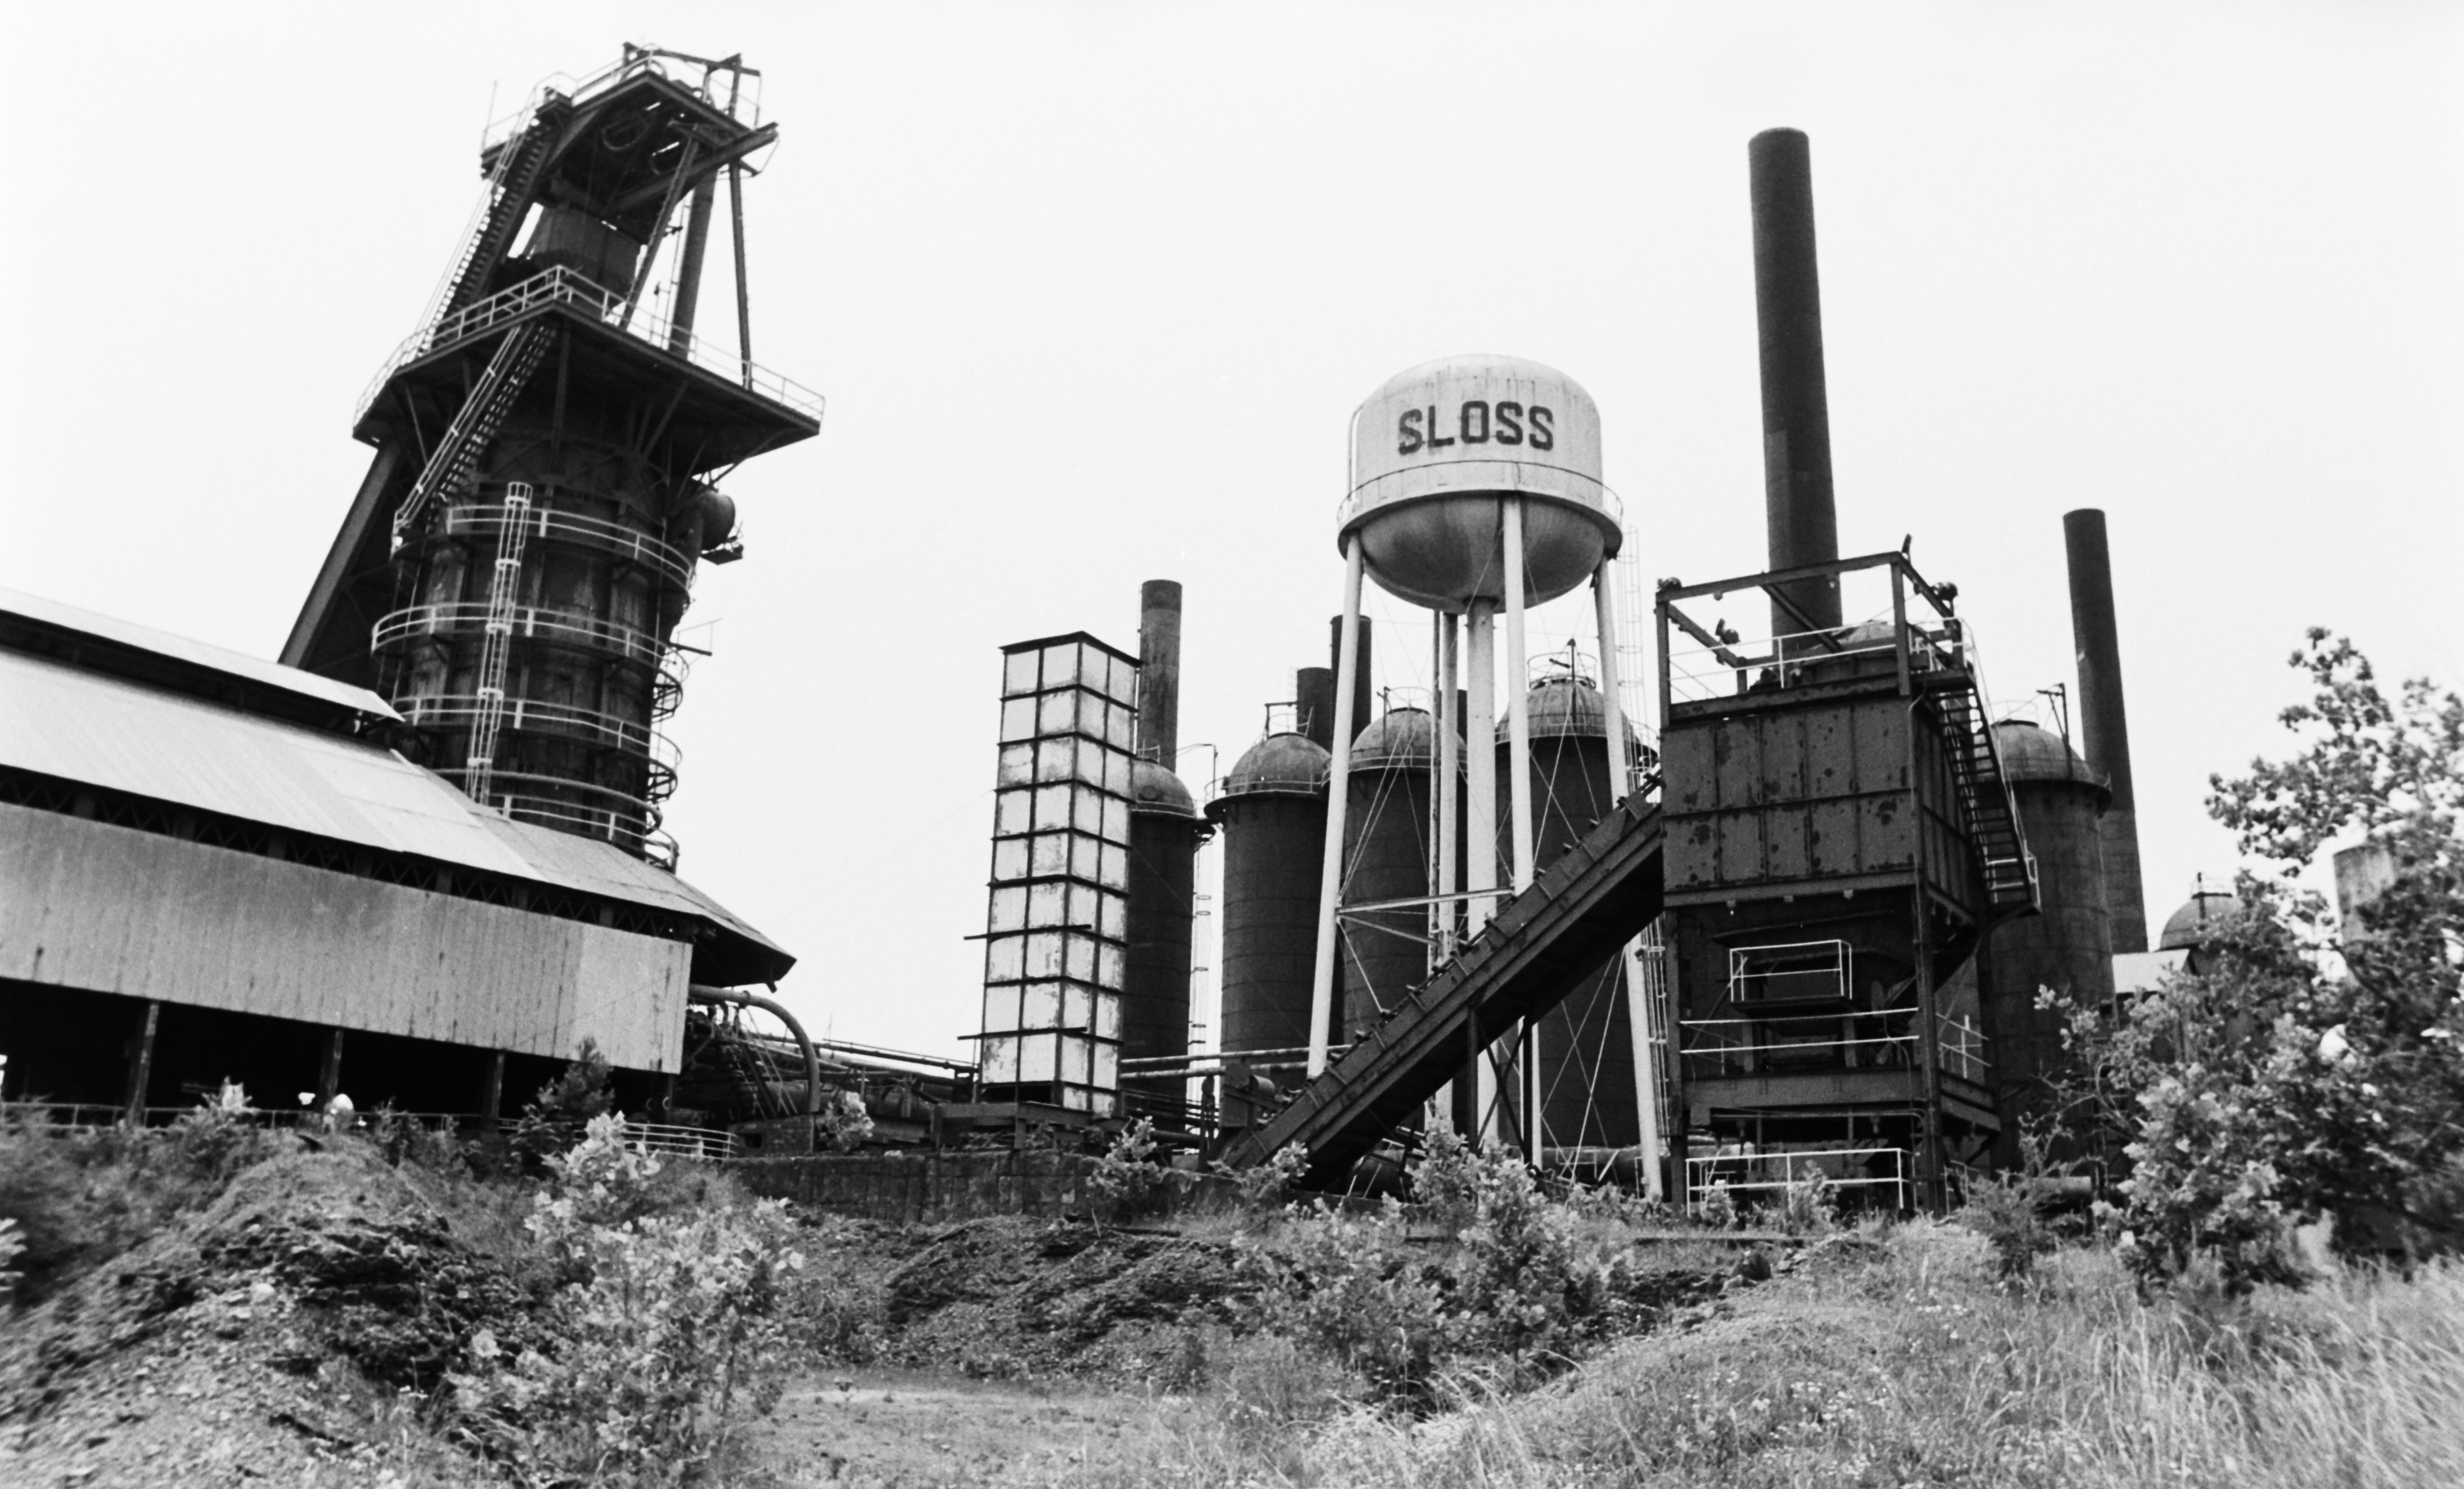
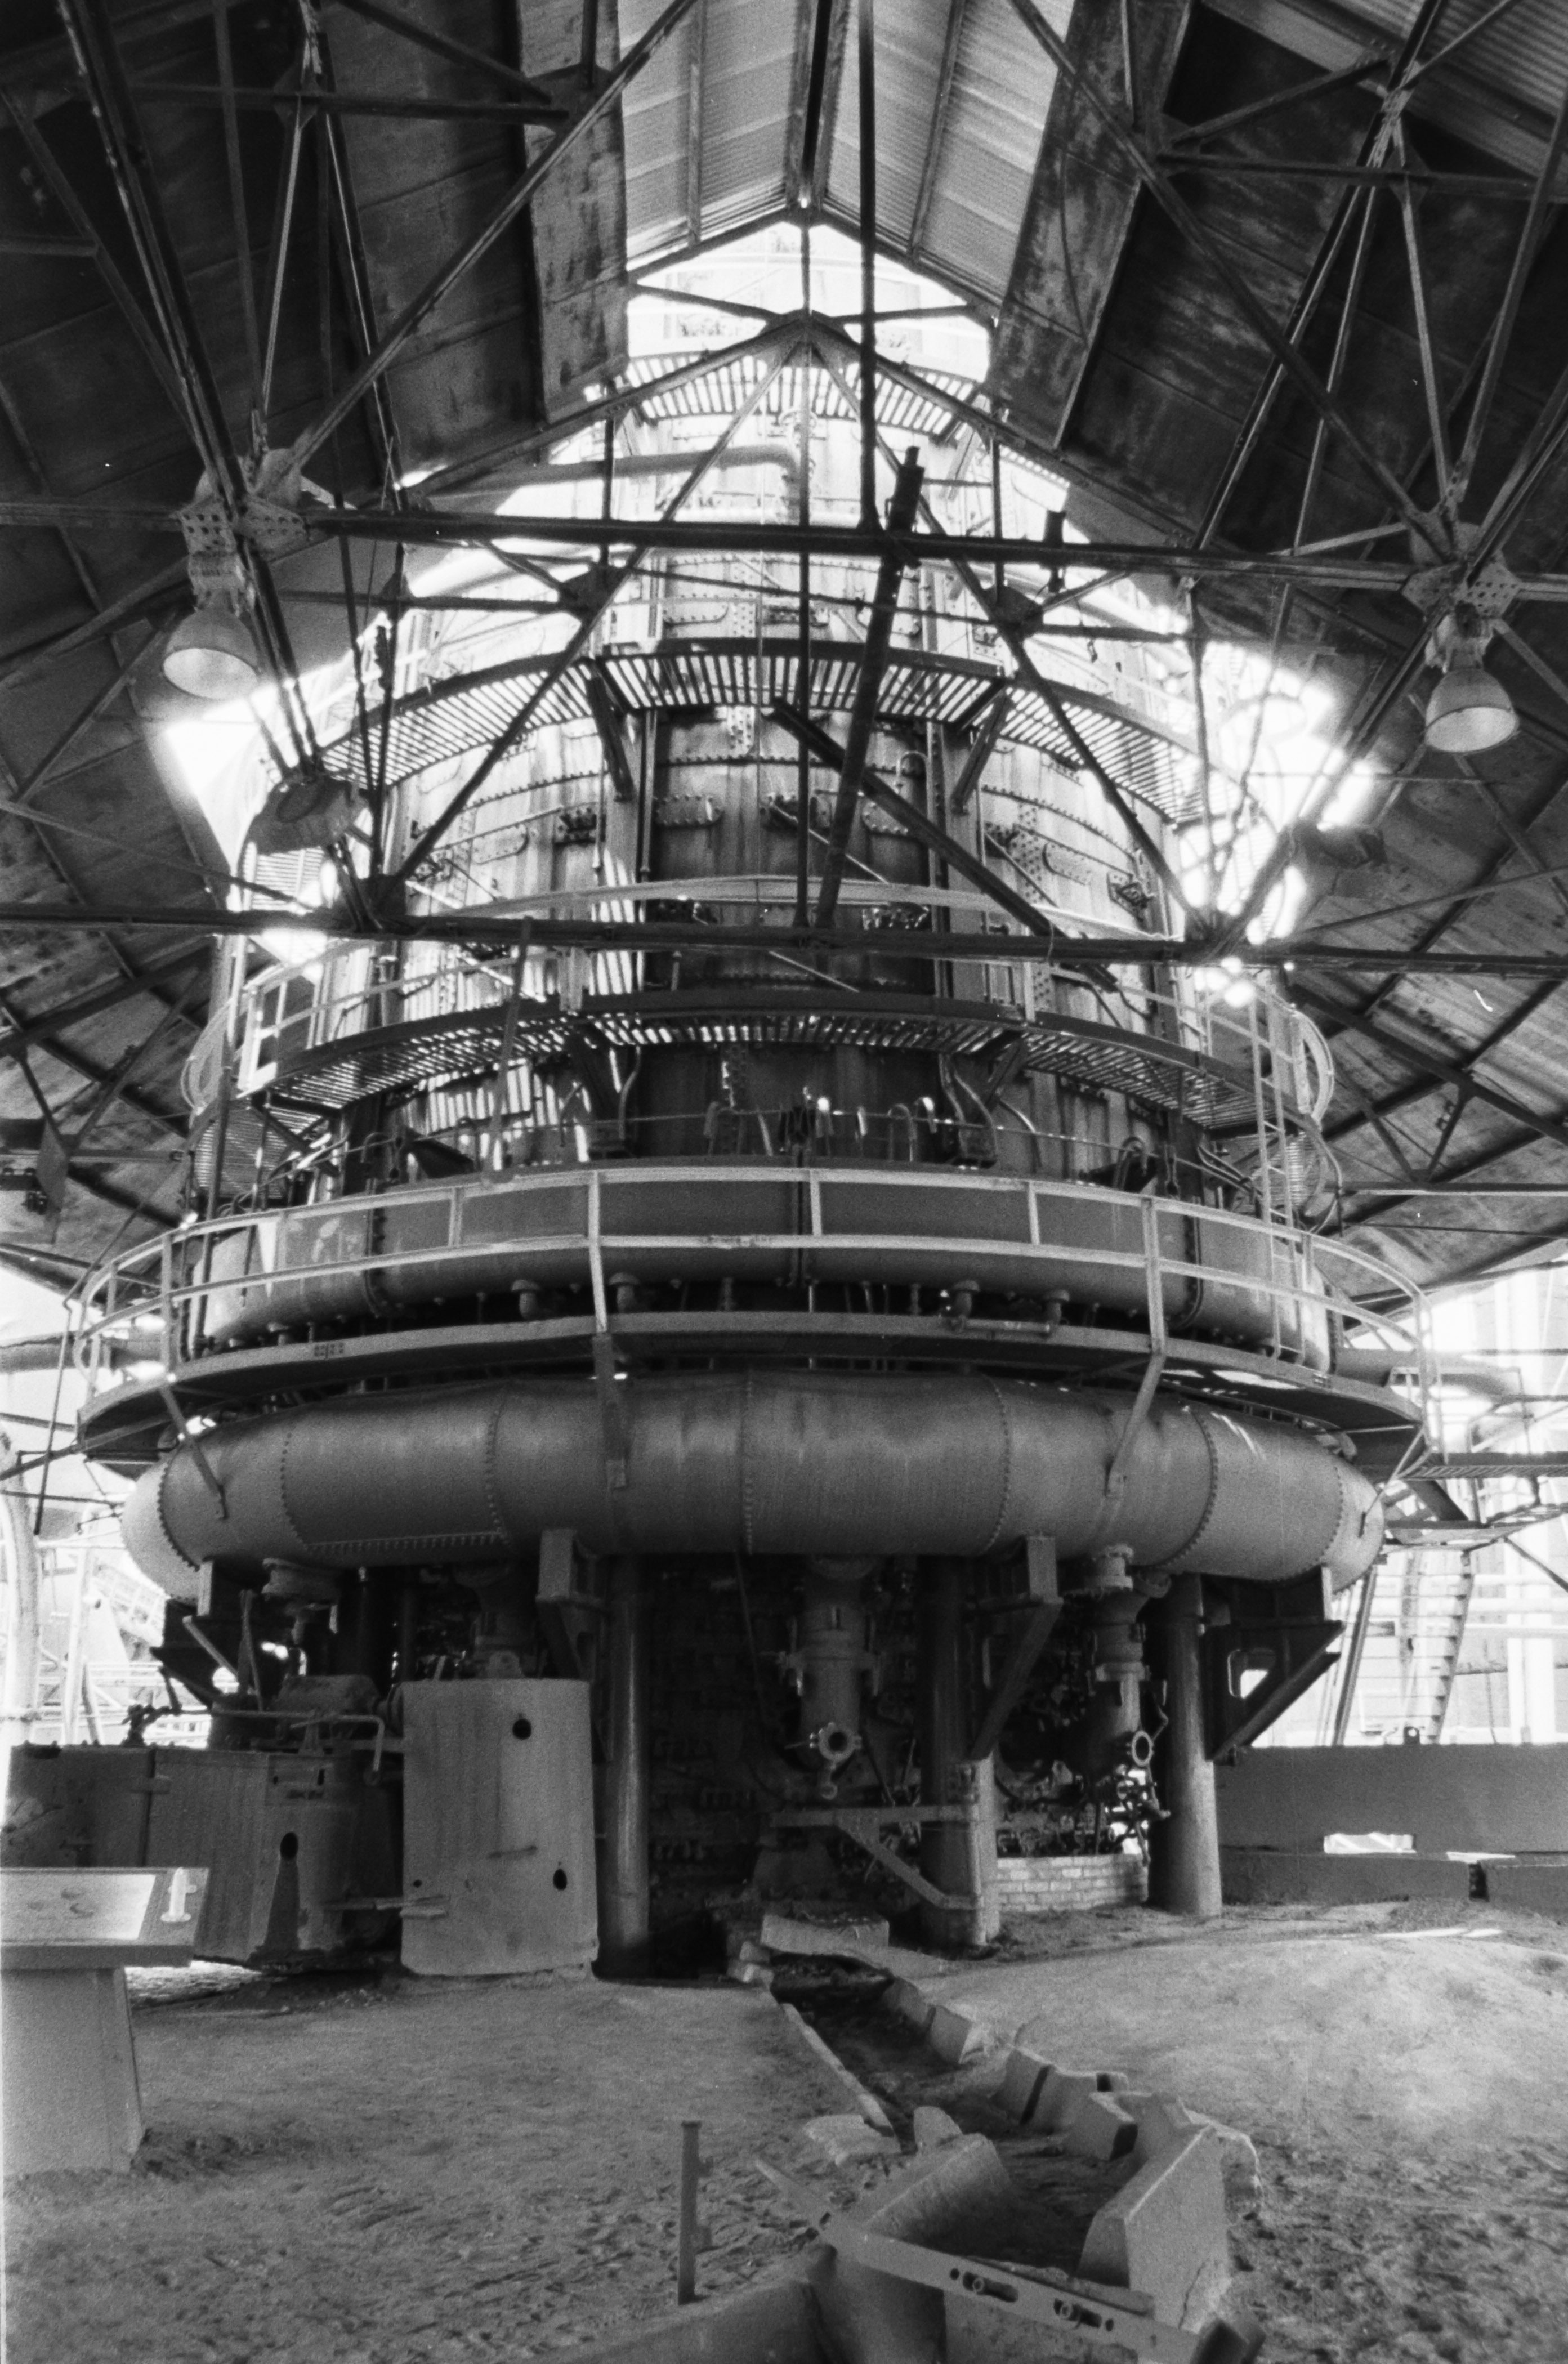
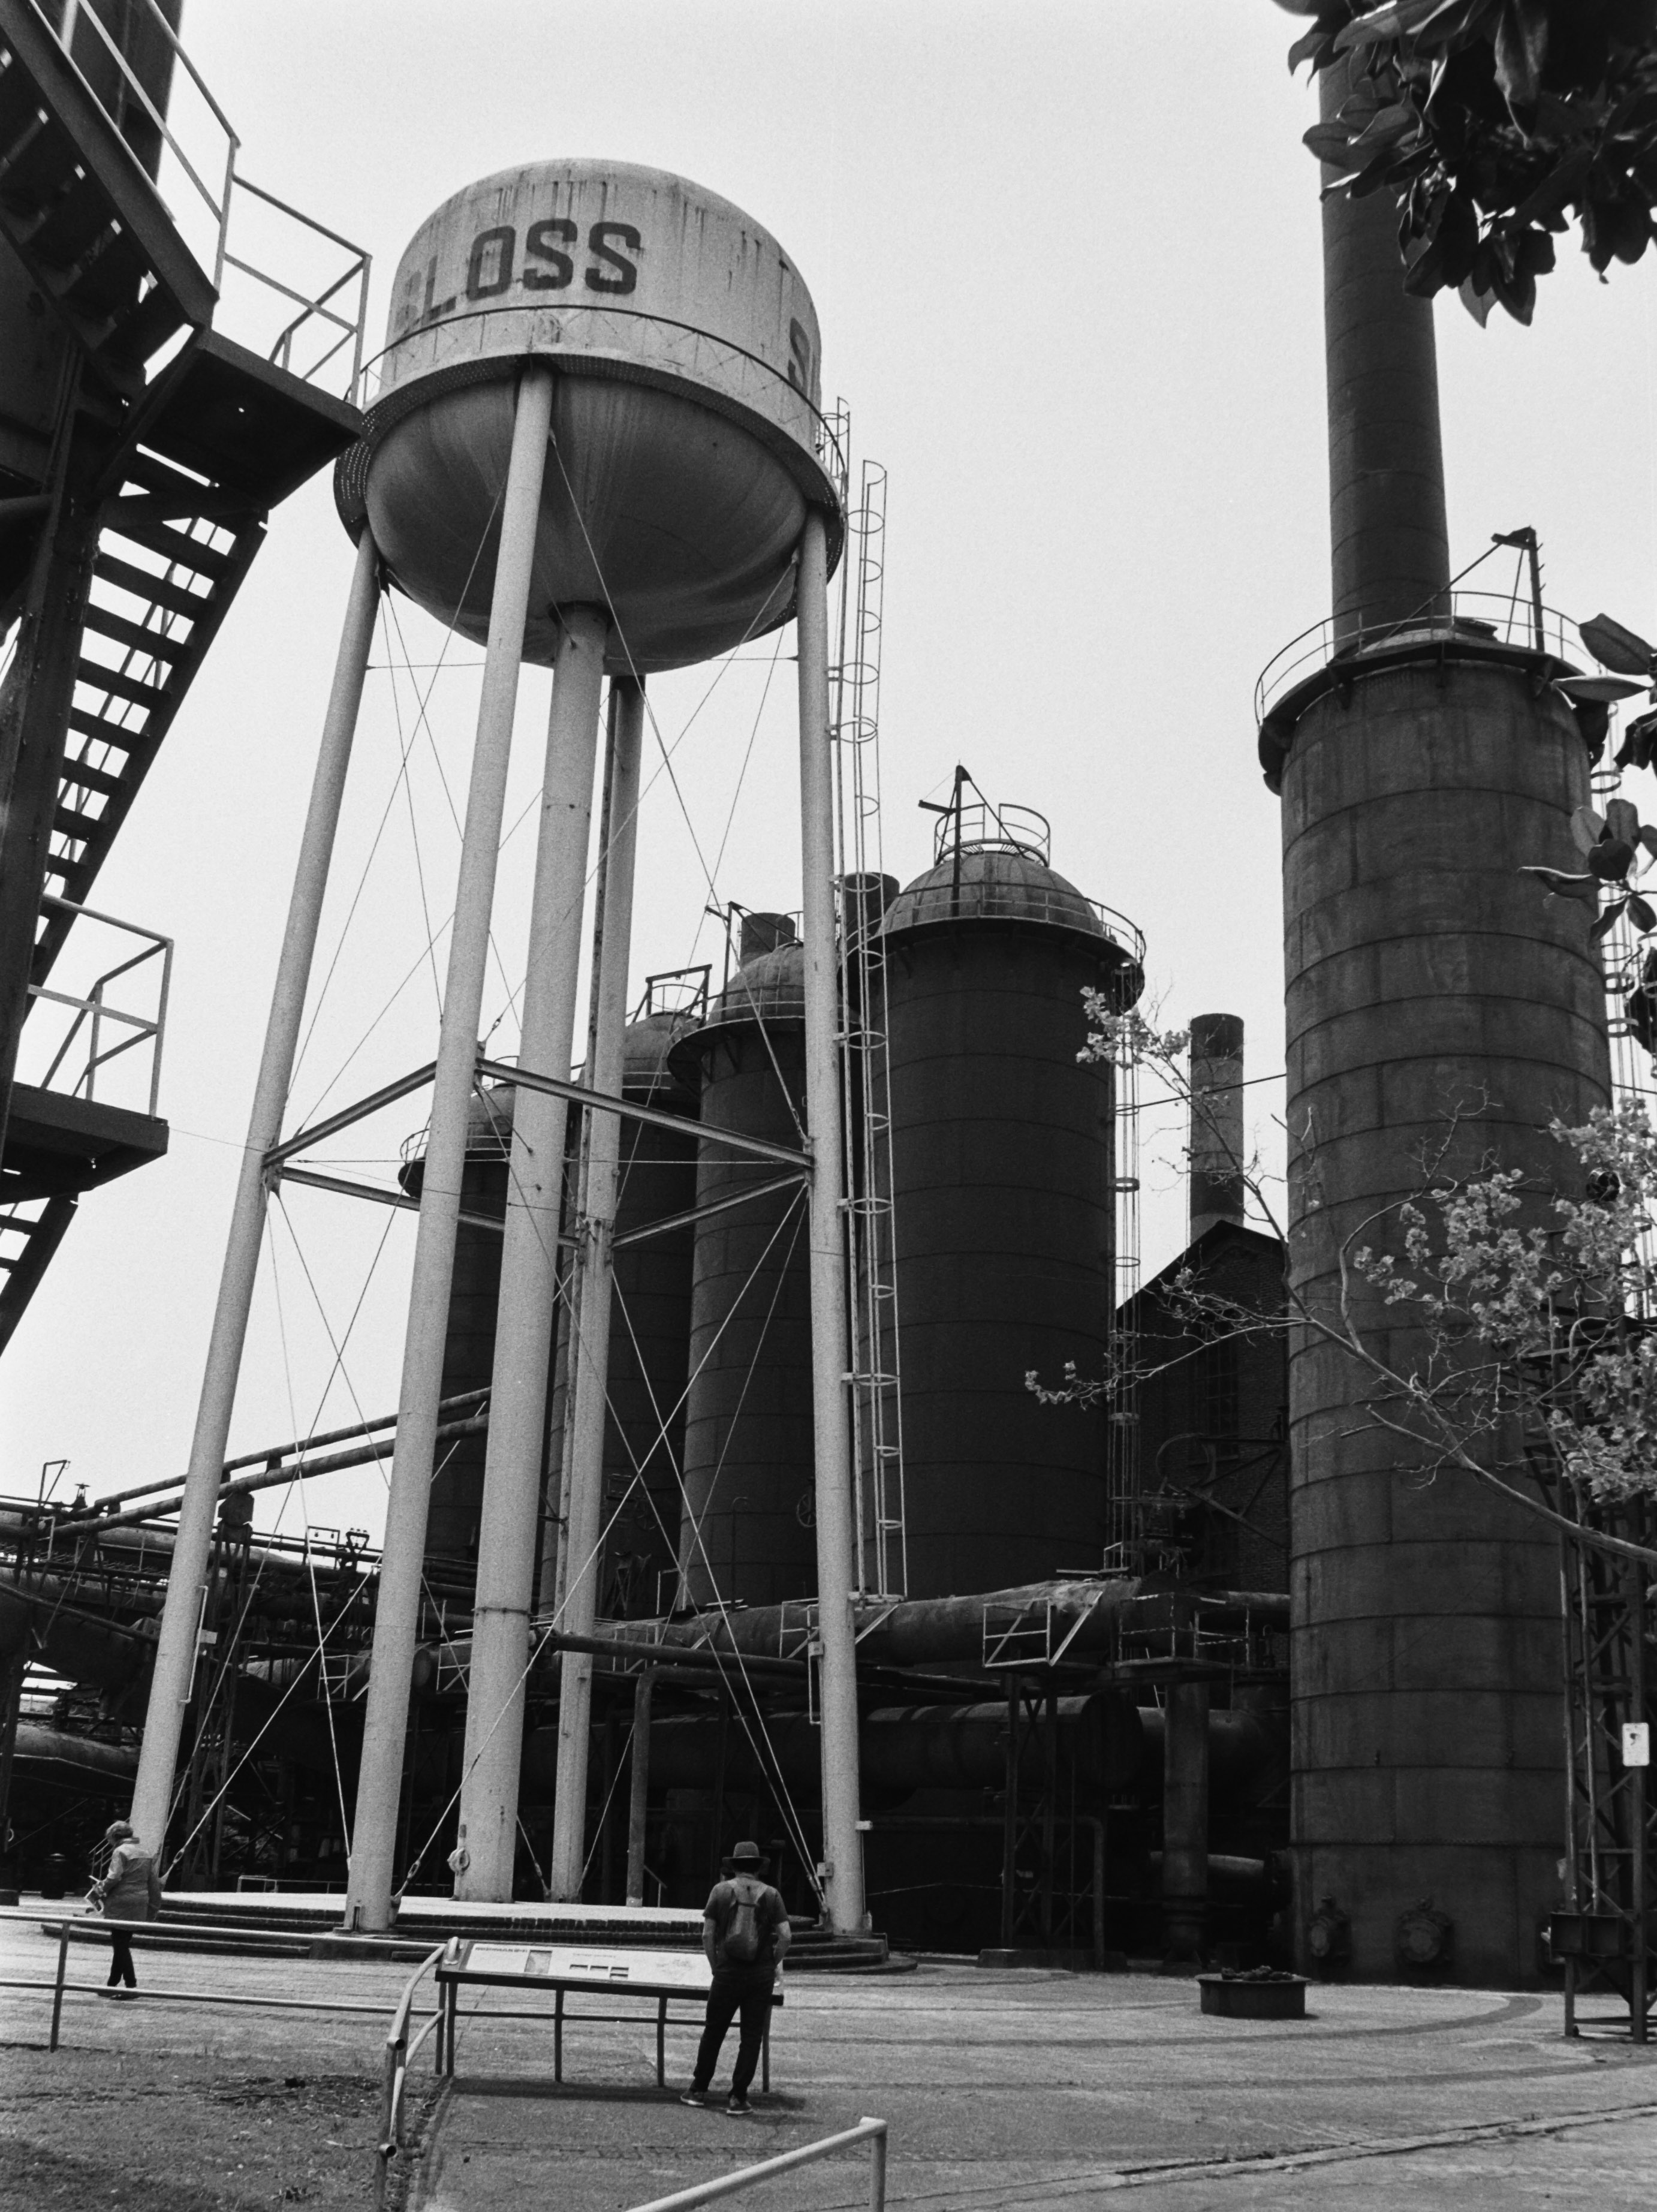
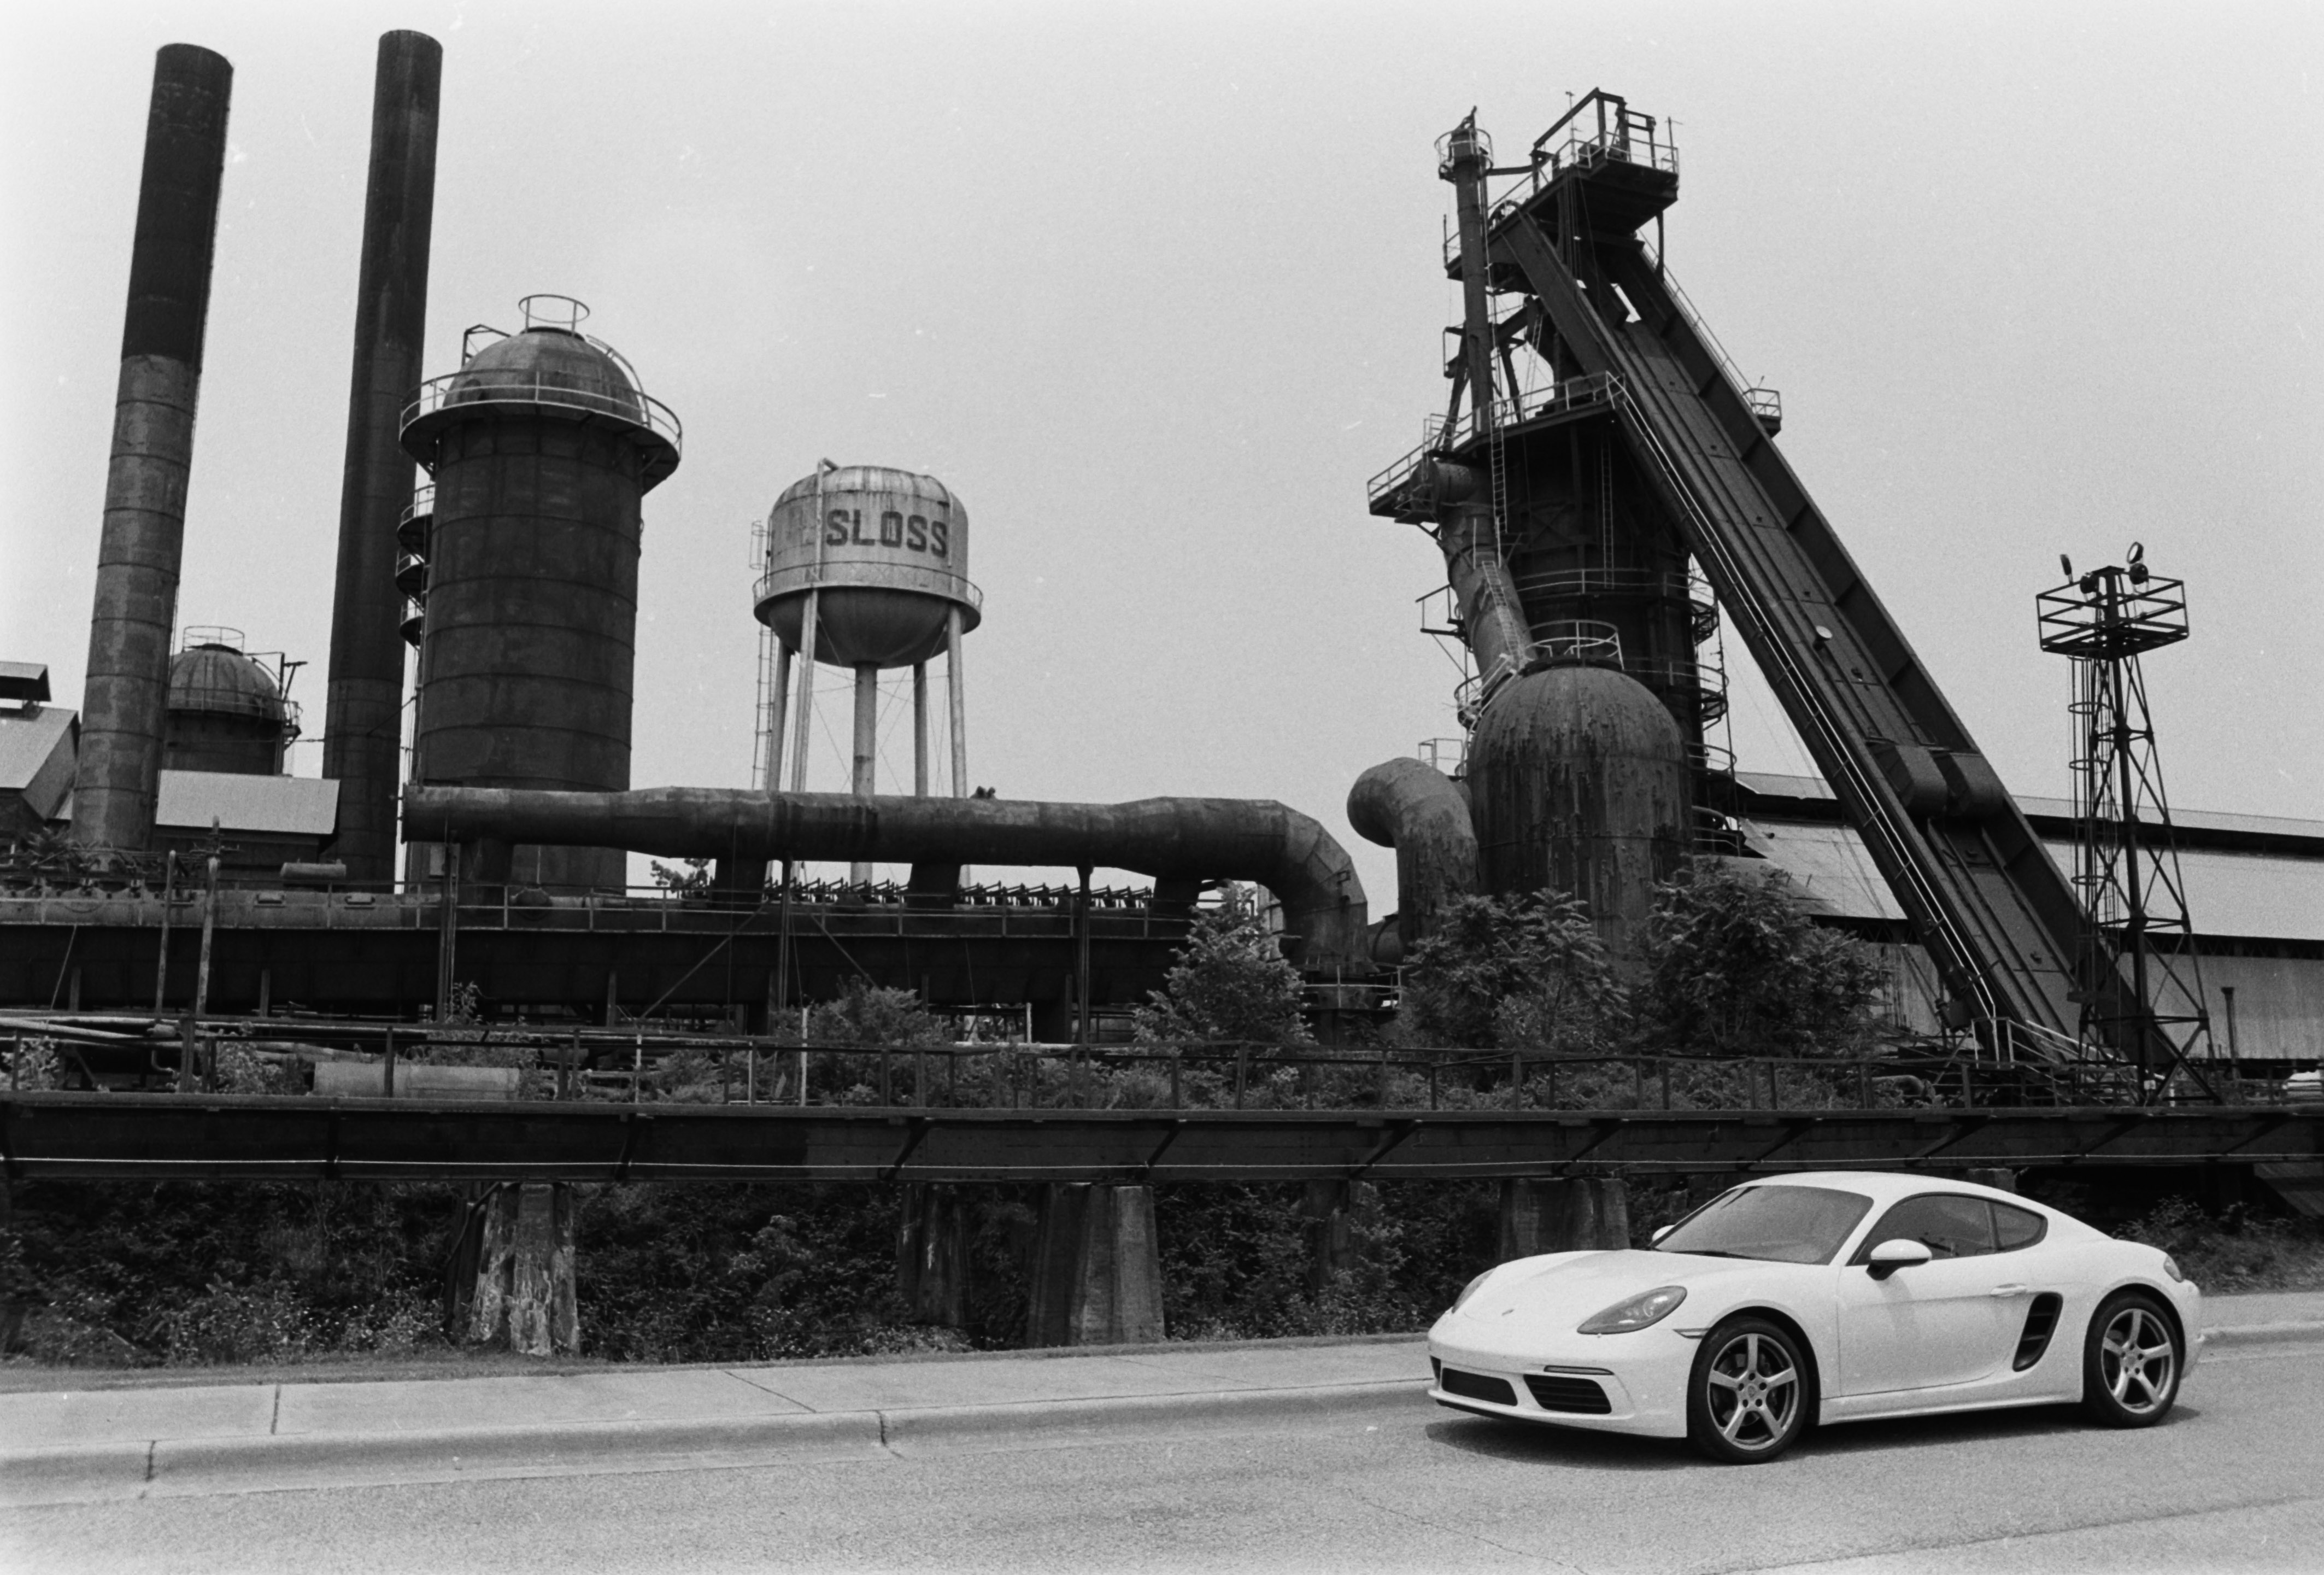
Sloss Furnaces – Birmingham, AL Pentax Program-A – Ilford FP4
Sloss Furnaces – Birmingham, AL Pentax Program-A – Ilford FP4
Sloss Furnaces – Birmingham, AL Pentax Program-A – Ilford FP4
Sports car at the Sloss Furnaces. I found the contrast between the modern white car and the dark industrial ruins interesting. All pictures of the furnaces were shot on Ilford FP4 – Developed at 22 degrees C in Tetenal PARVOFIN. Negative shot with the JJC Film Digitizing adapter and inverted in Lightroom Mobile.
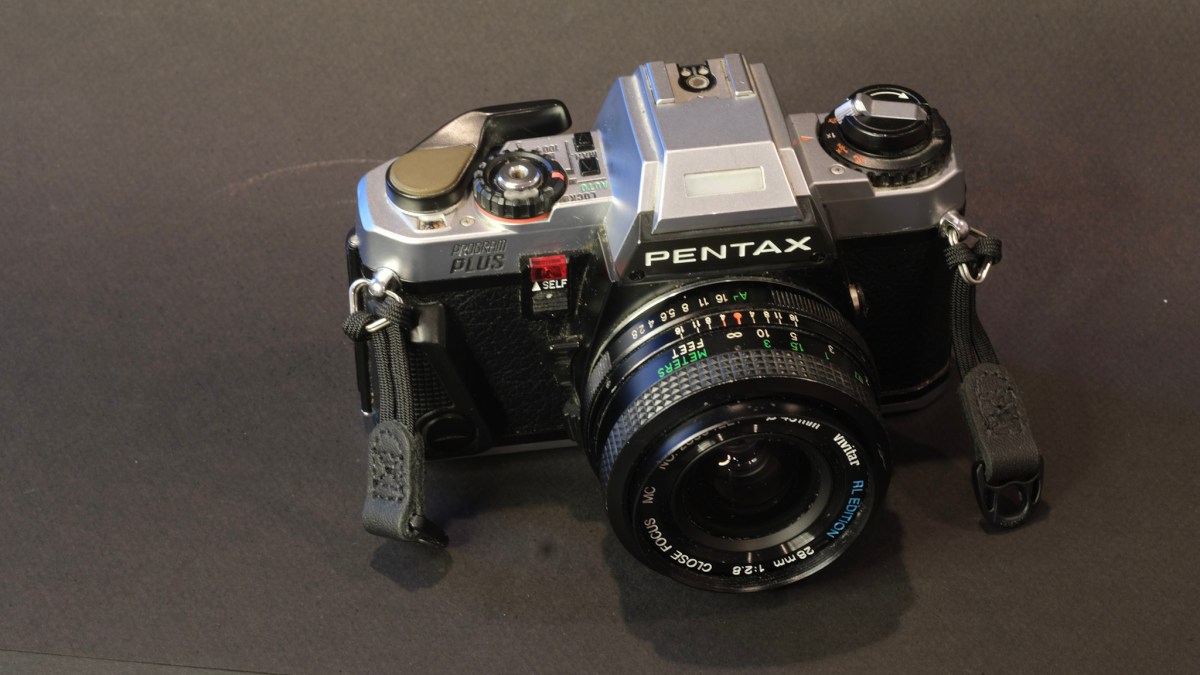
I’ve been lucky with ShopGoodwill.com lately — I recently won a Pentax Program Plus with a 28mm Vivitar lens, all for the princely sum of $21.
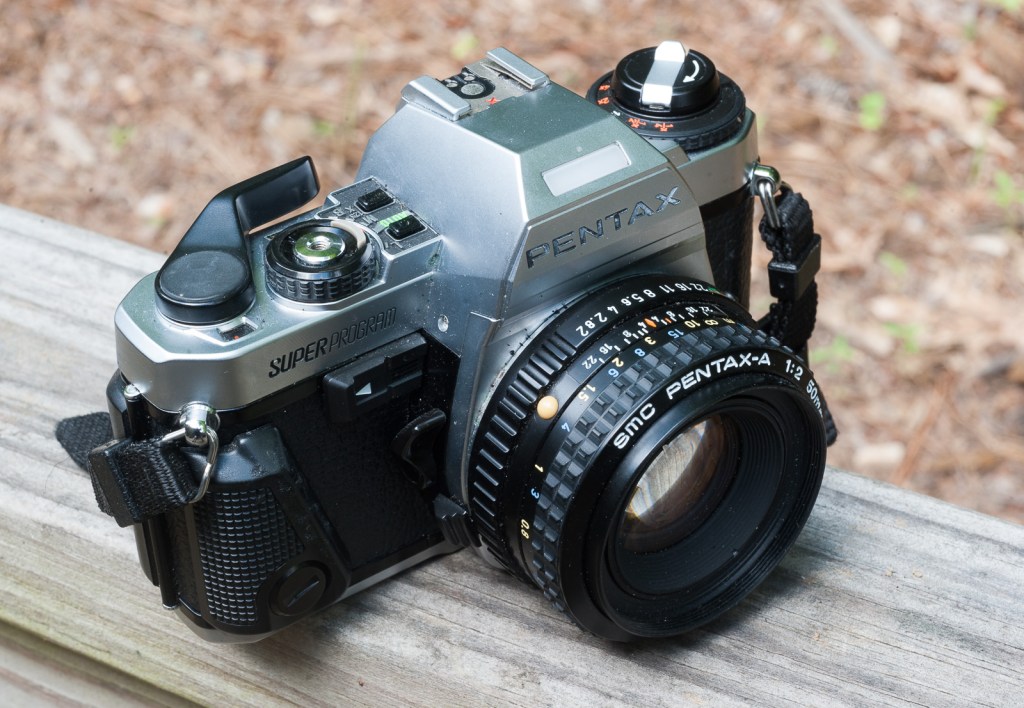
Let’s clarify one thing to begin with: like most Japanese camera companies, Pentax was selling its cameras under different models names in different geographies – the camera sold as the Super-Program in North America was sold as the Super-A in the rest of the world, and the Program-Plus was simply known as the Program-A outside of North America [*].
I had been looking for a Program Plus at a good price for a while – it’s the last of the ME family of cameras, a marginally simplified version of the Super Program, that I hoped would strike the perfect balance between too little features (the Pentax ME) and a bit too much (the Super-Program).
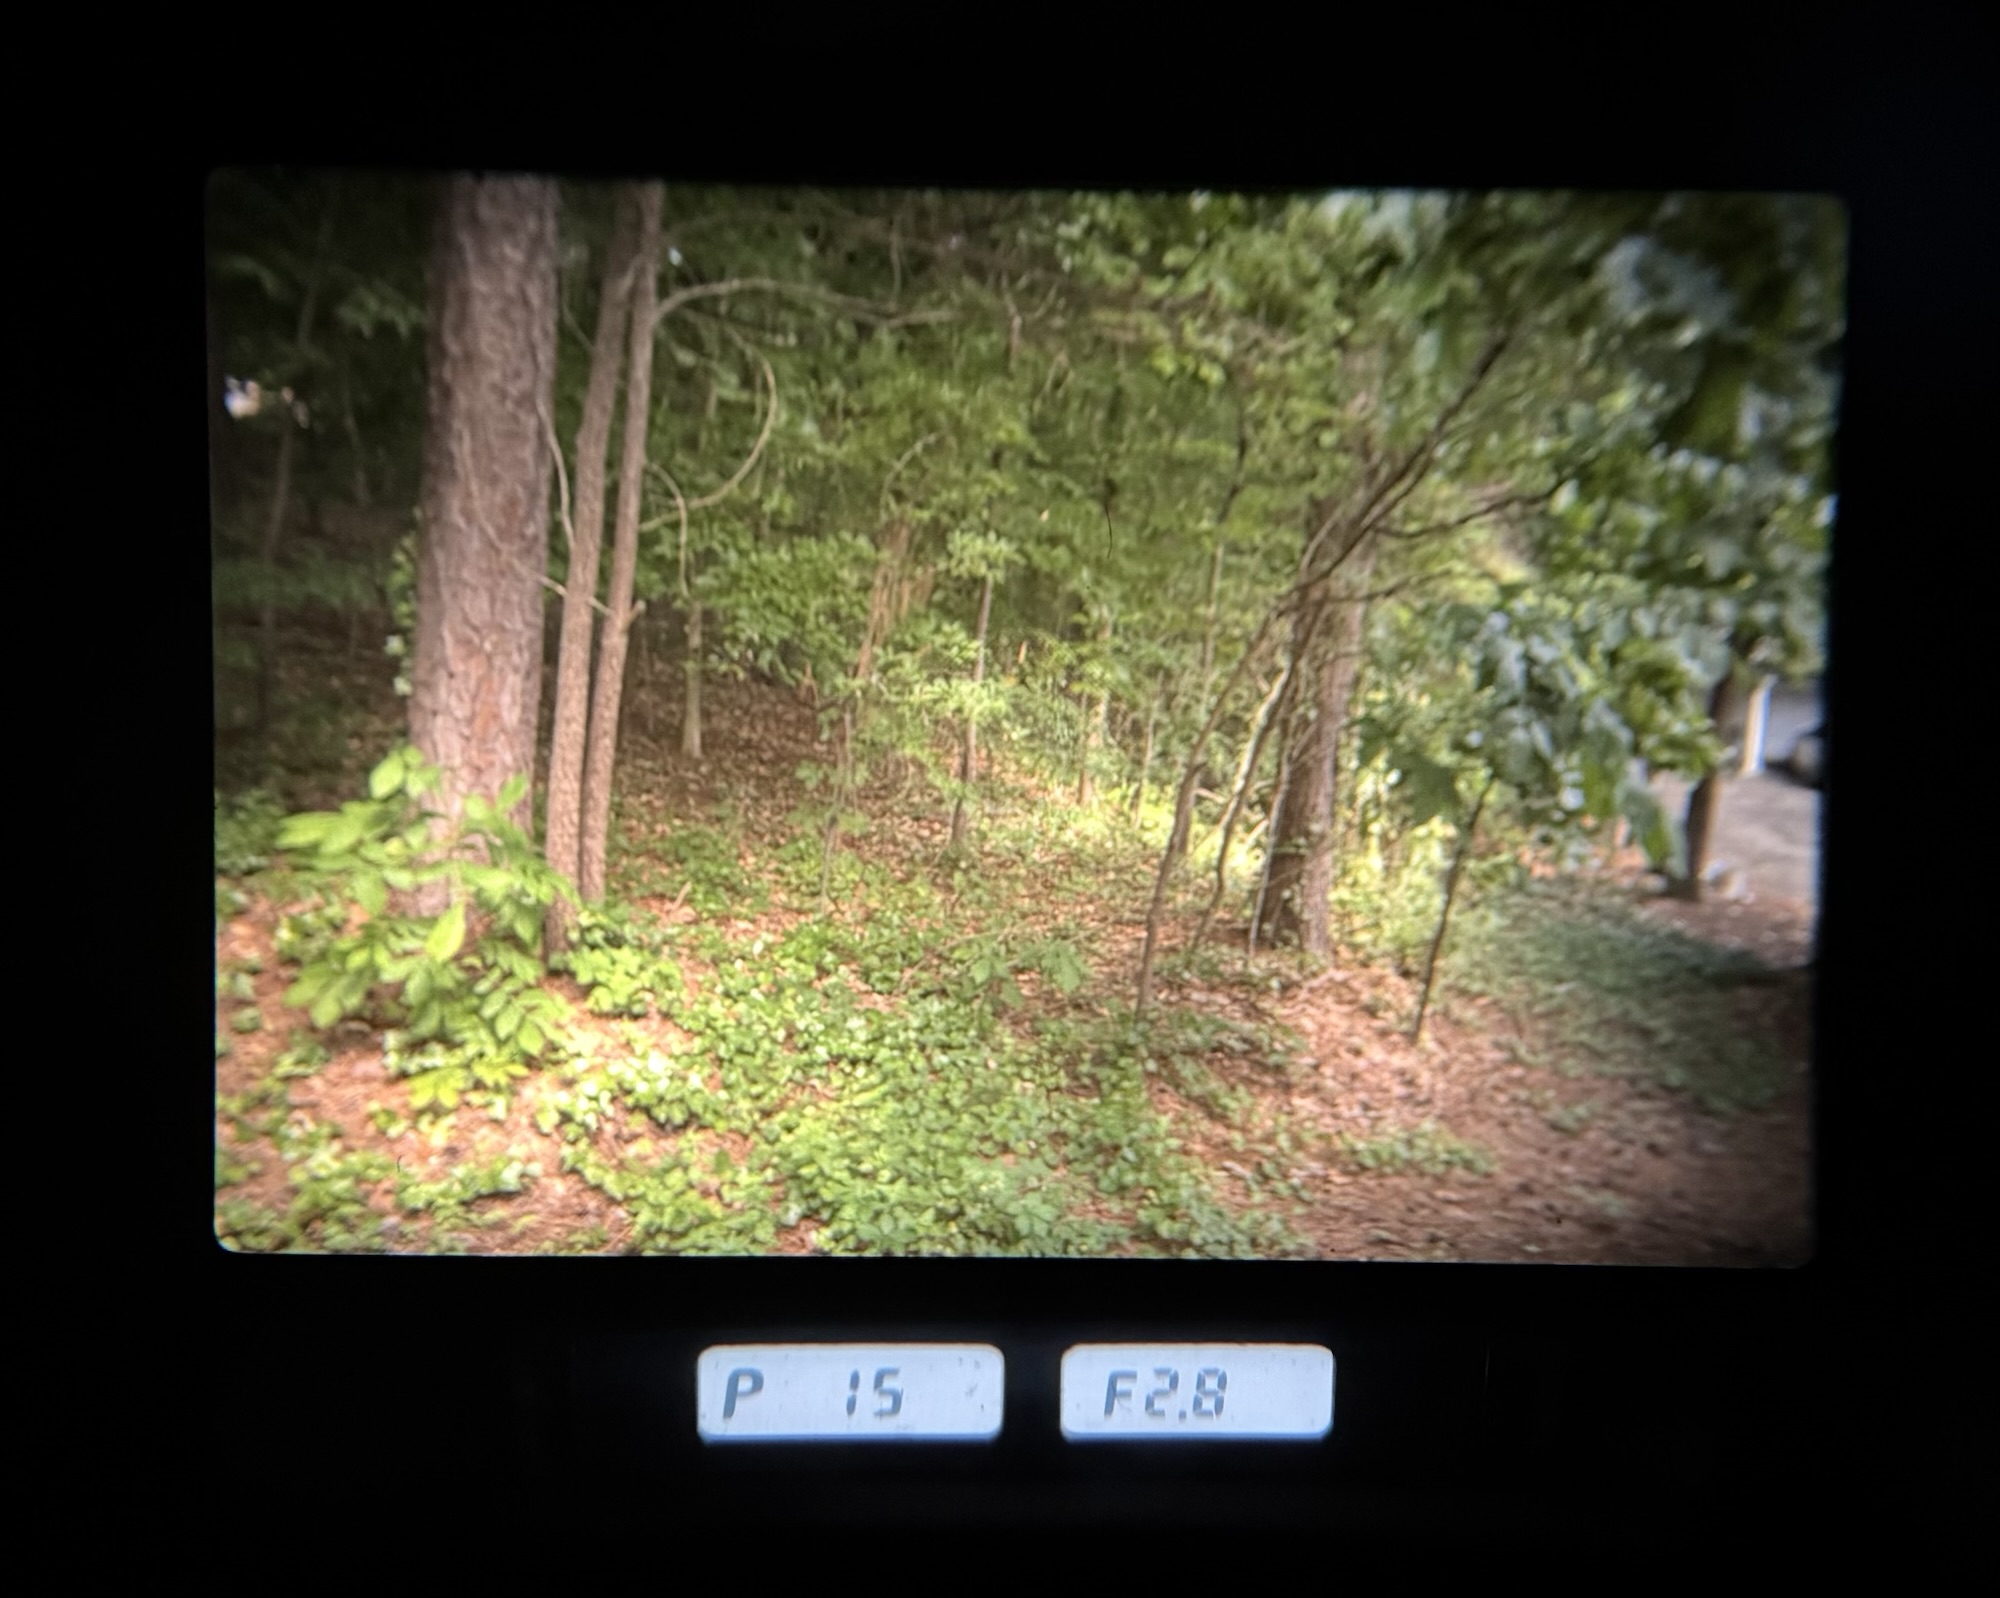
Pentax Program Plus – Program Mode (shutter speed and aperture determined by the camera).
Pentax launched the Program Plus one year after the Super Program, and did not remove much: the maximum shutter speed is limited to 1/1000 instead of 1/2000, and the camera only offers two auto exposure modes (program and aperture priority) instead of three on the Super Program.
But the right side of the top plate is a bit less cramped (it does not have a tiny LCD screen showing the selected shutter speed forced between the mode selector and the film advance lever) and the mode selector has been redesigned to be a little bit easier to set as a result.
Pentax Program-Plus with the 28mm Vivitar lens
Vivitar
I had not paid much attention to the lens that came with the camera. I had assumed it was one of those horrible third party lenses that you generally find on cameras donated to Goodwill. Not this time. It was a Vivitar lens – but not any Vivitar lens – it was the highly regarded 28mm F/2.8 Close Focus MC “RL Edition” manufactured by Komine.
You can still find Vivitar entry level digital cameras at Walmart nowadays, but today’s Vivitar is a shadow of what the brand was in the seventies. They used to be a major distributor of very good lenses and electronic flashes, a credible alternative to the leading camera companies. Some historical context, then.
Vivitar 28mm f/2.8 Close Focus MC RL Edition
When the Japanese camera industry started its expansion in the years following WW2, it was still for the most part a cottage industry – even the largest players were relatively small and highly specialized companies (in the early fifties, Nikon was only manufacturing lenses, and Canon only camera bodies, and some of Canon’s cameras came equipped with Nikkor lenses).
Only very few of those companies grew enough to find the financial strength to establish their own distribution networks outside of their country of origin.
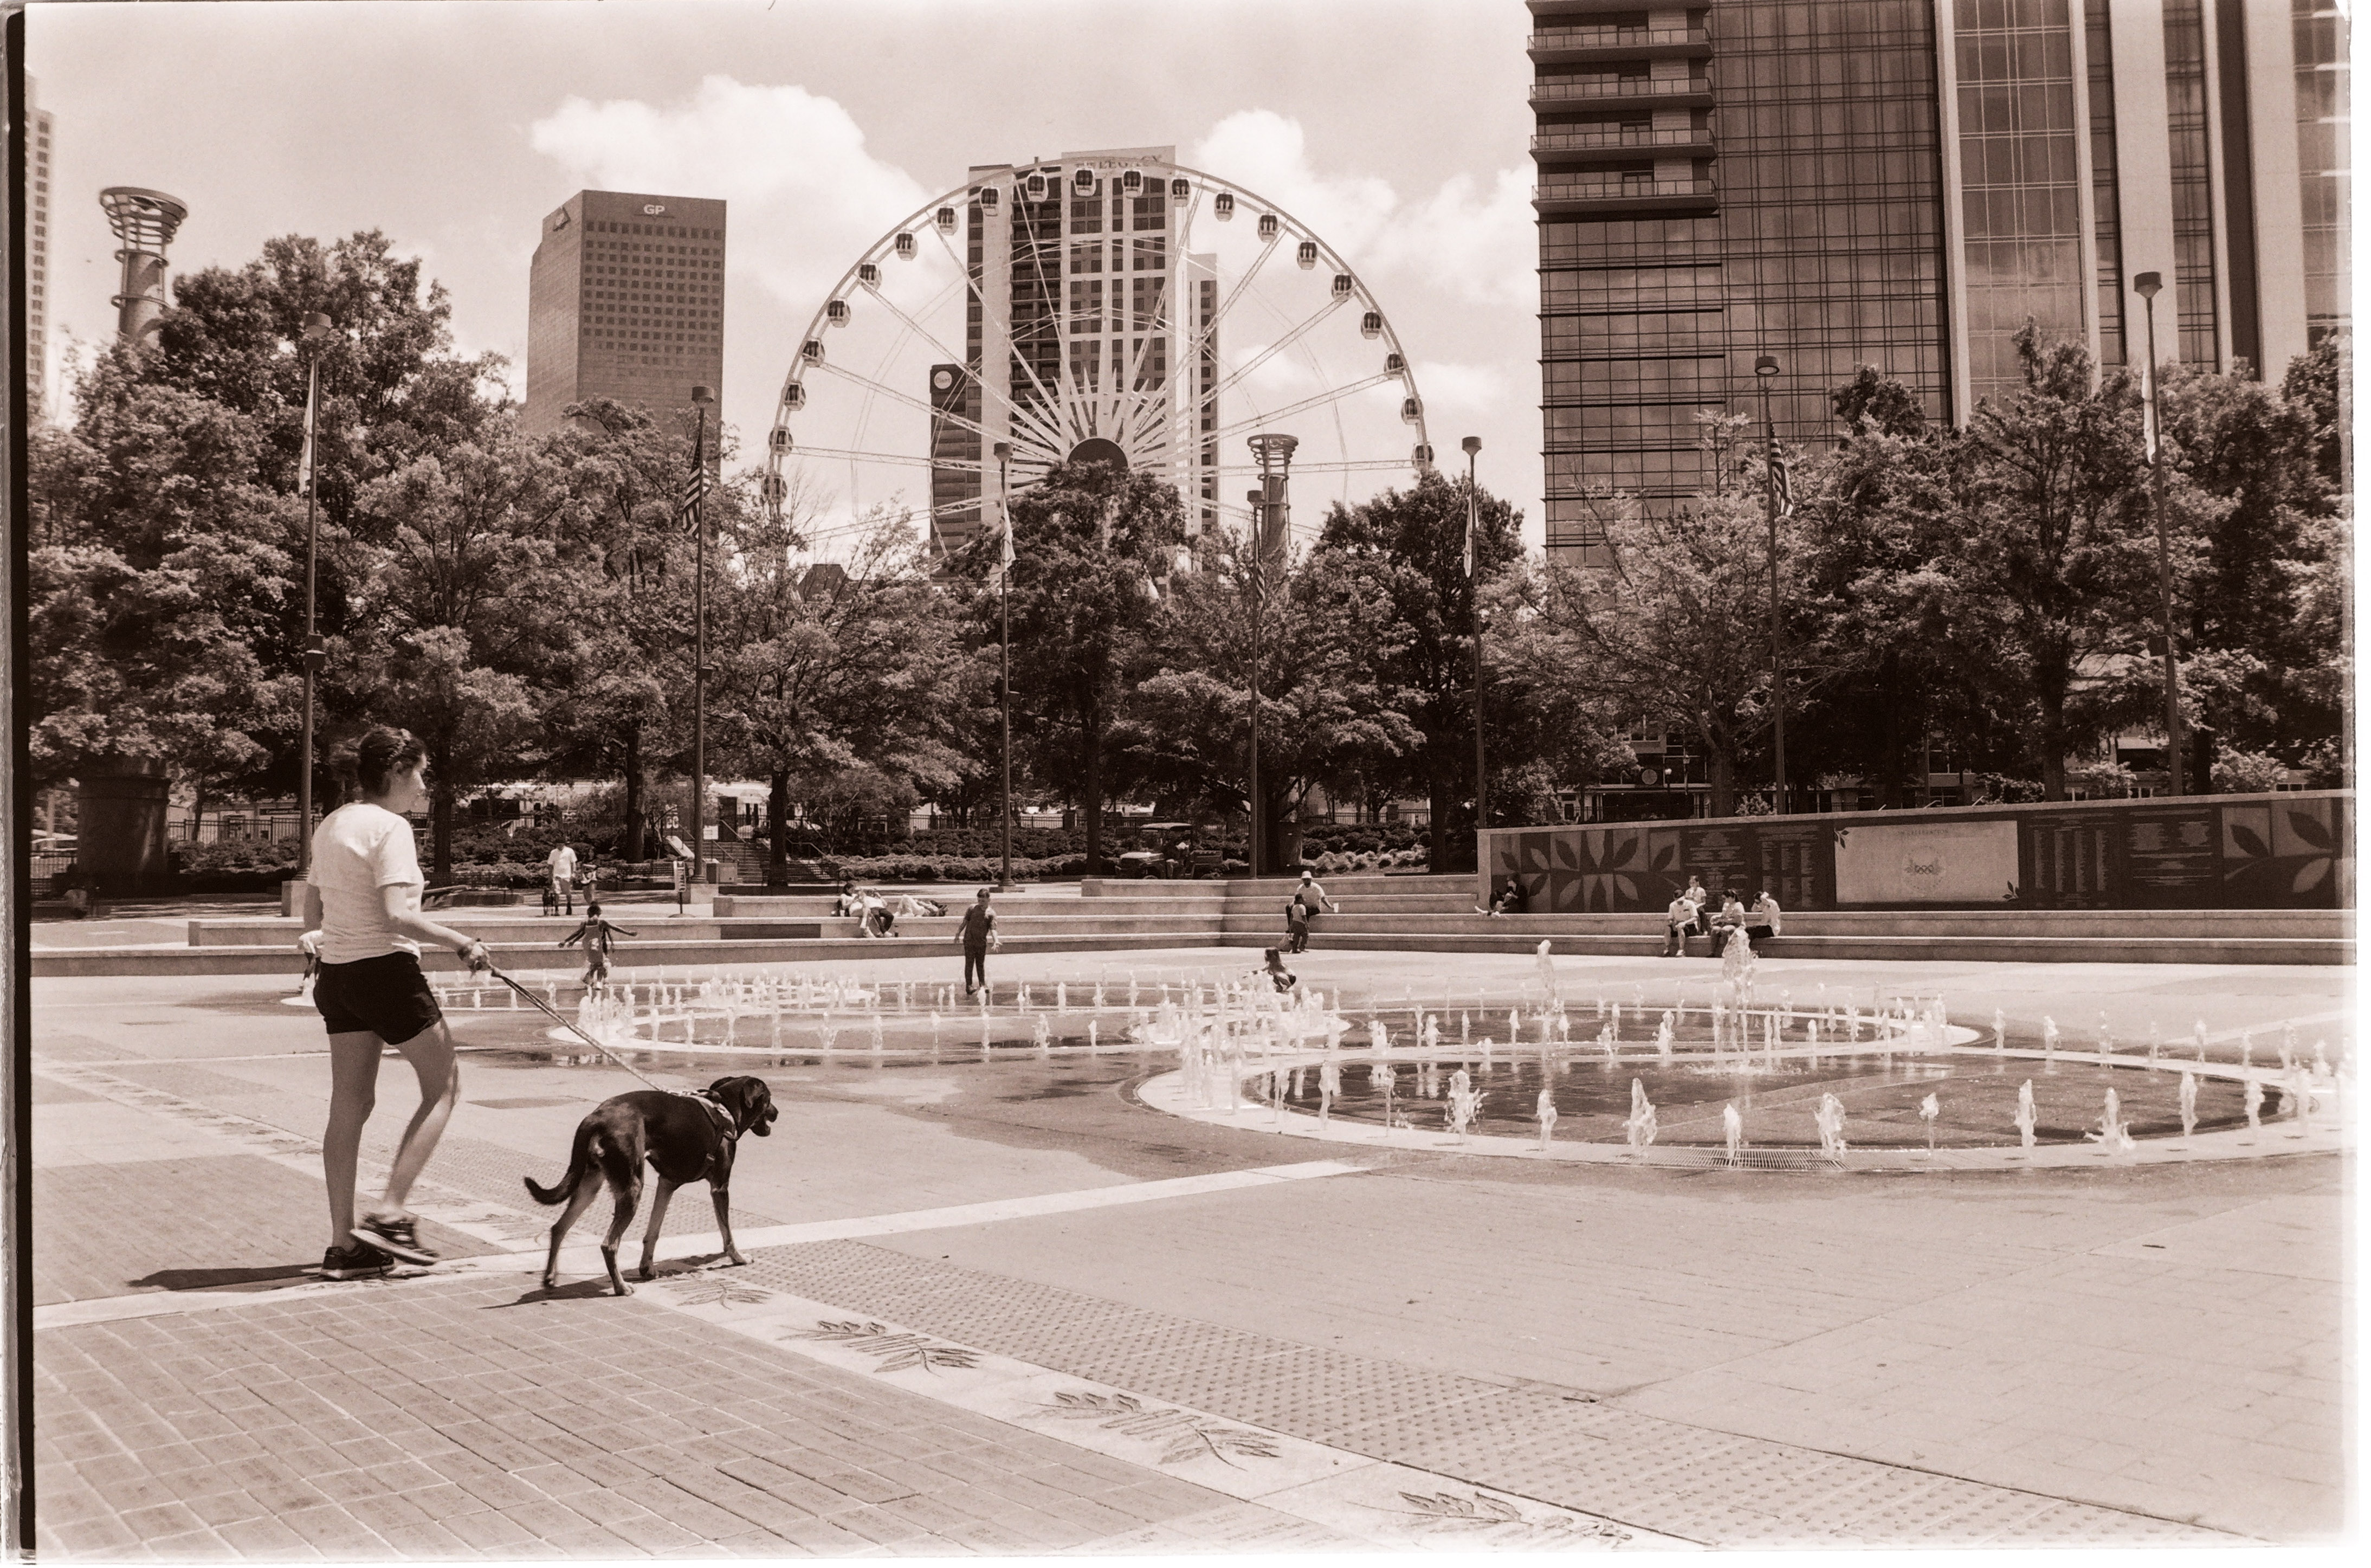
Atlanta – Centennial Park – Pentax Program-Plus – Vivitar 28mm – Ilford FP4 Plus – a pretty good lens.
An American company named Ponder & Best saw an opportunity, and started distributing under its own “Vivitar” label the lenses and accessories that it procured from a myriad of small Japanese workshops. Most of those products were probably average, but a few were very good.
Vivitar never disclosed who their suppliers were, but the urban legend attributes the best of the Vivitar lenses to a Japanese company named Komine. Vivitar lenses benefitted from a 5 year warranty, but on the “RL Edition” models made by Komine it was extended to a total of seven years. So, this 28mm from Komine is supposed to be Vivitar’s very best.
A very pleasant little camera
Shooting with the Program Plus
I’ve burnt a few rolls of film with almost each representant of the Pentax ME family recently, and the Program-Plus is the one I prefer. The ME only works in Aperture Priority auto exposure mode, and the Super-Program is borderline too complicated. Even if there is not a huge difference in the organization of the commands on the right of the top plate, it’s a bit less cramped on the Program-Plus and easier to live with.
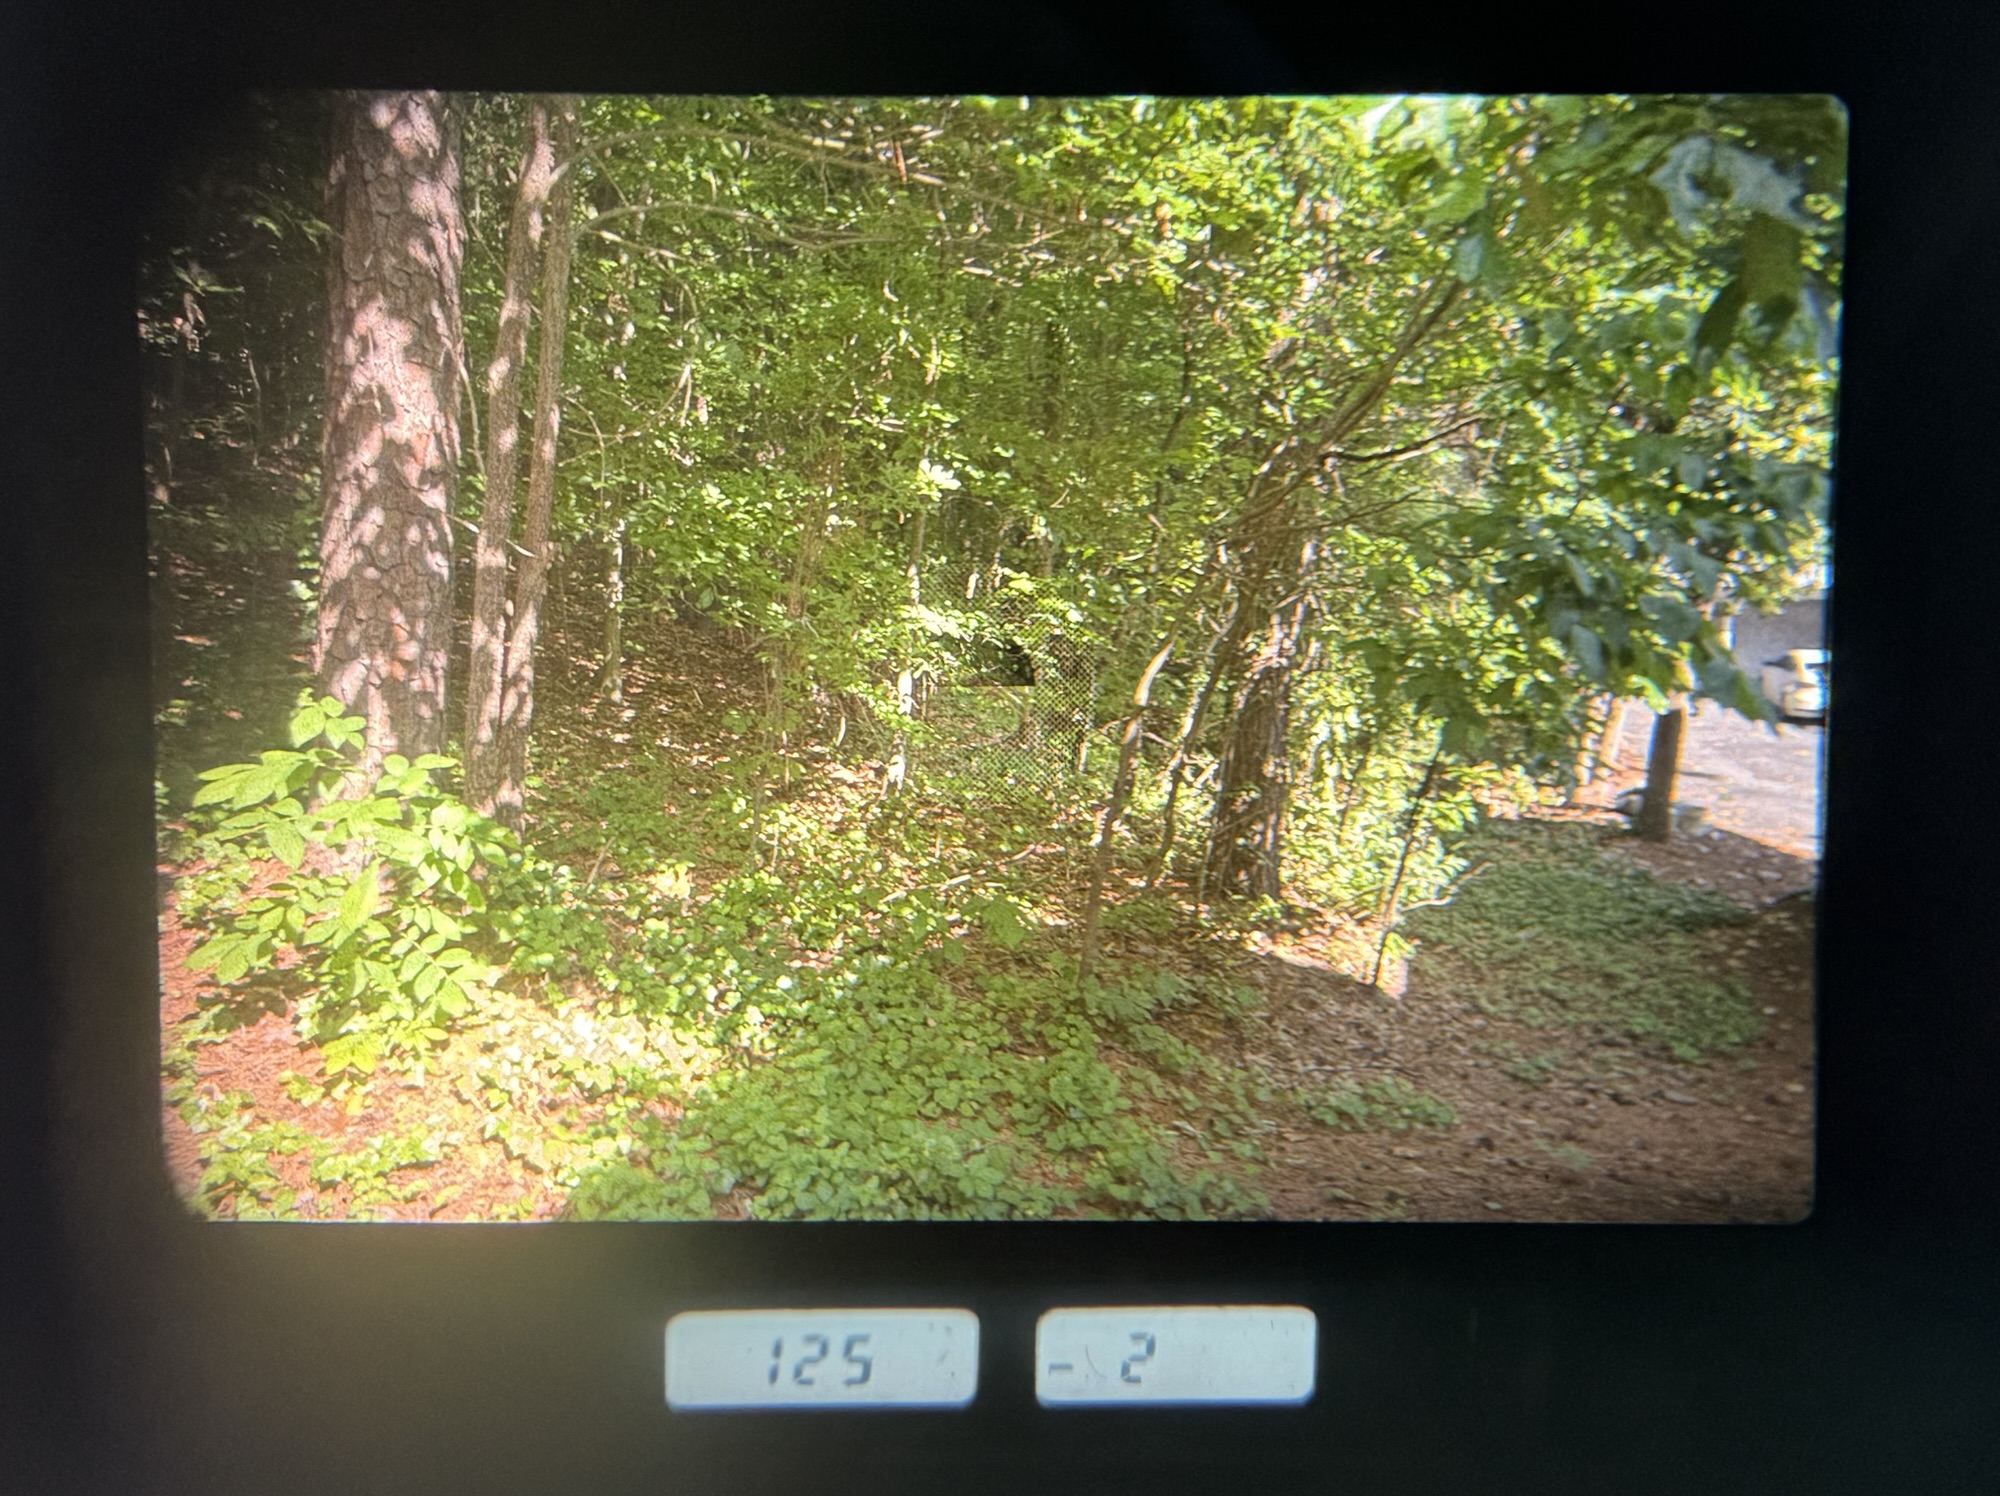
Pentax Program Plus – Semi Auto mode -here the operator has selected a shutter speed of 1/125sec, and the metering system determines that the image will be under exposed by 2 stops.
For an amateur interested in the technique of photography, the Program Plus is a very nice little camera. It’s among the smallest and lightest film SLRs of the eighties, but its compacity does not come at the cost of the user experience – the viewfinder remains very good – wide, bright and informative. The “programmed auto exposure mode” in particular is very well implemented – it lets the photographer know (on two LCD displays in the viewfinder) the aperture and shutter speed selected by the camera’s program. And in semi-auto mode, it displays the selected shutter speed on the left display, and the level of over or under exposure (in EVs) on the right one. Pretty unique in this class of camera in 1983.
Of course, nothing is perfect: the LCDs are back-lit through a large window cut at the front of the prism cover, and become very difficult to read in the dark. The Super Program is equipped with a little lamp that the photographer can activate at the push of a button, but I found it totally useless and I don’t miss it here (one of the things that were removed from the Program Plus).
Pentax Program Plus – three exposure determination modes (named M, A & P on a modern camera) are present and selected by playing with the Aperture ring (A or an aperture value) and the mode selector (Auto or Manual) – for instance, P is obtained by setting the aperture ring and the model selector on A/Auto.
For the rest, it’s one of the good Pentax cameras – no horror stories when it comes to reliability, and because it was designed for the “KA” version of the Pentax lens mount, it operates with a very wide range of lenses – anything from Pentax K lenses of 1976 up to some of the most recent D FA models.
While not as nicely finished as an ME or a Super Program, it’s still a well build and solid camera – nothing to be compared with the plastic-fantastic cameras of the following decade that look so cheap today.
Like all the cameras of the ME series, it simply needs two easy to find and (relatively) cheap SR44 1.5 batteries, that it does not seem to tax too rapidly.
As a conclusion
Eight years separate the Pentax ME from the Program-Plus. Being based on a similar platform, they’re not that different of course, but the Program-Plus is definitely a better camera for an amateur who is interested in photography – in addition to the Aperture priority mode of the ME, there is a very useful Program Auto Exposure mode, and a real semi auto mode to use when the exposure is too tricky to trust the automatism. The focusing screen is probably a bit finer as well, and the fragile mechanical selfie timer has been replaced by an electronic one that should be more durable.
Pentax Program-Plus (top) and Super-Program – some cost cutting is visible on the Plus, but the commands are not as cramped.
At $21.00 (good lens included), my copy is probably on the cheap side (I admit I was lucky on this one), but even from a reputable seller, you should not pay more than $50.00 for a nice one.
The Program-Plus sits with a few other cameras of the same vintage (the Nikon FE2, the Olympus OM-2 and the Canon AT-1) at the top of my very personal list of preferred manual focus film cameras. And it’s definitely one of my keepers.
[*] I don’t know why the Japanese camera makers were using different names for models sold in the US – “to reflect the local preferences” is often mentioned as an explanation (for instance, naming a model “Rebel” would be perceived positively in the US but would not in other parts of the world). I suspect there are other reasons as well – like protecting the US distributors from grey imports, or (maybe), helping the Japanese revenue service make the difference between cameras destined for local consumption (and subject to sales tax), and cameras destined ultimately to be taken out of the country and sold to tourists or Army personnel in the duty free shops or in the PX.
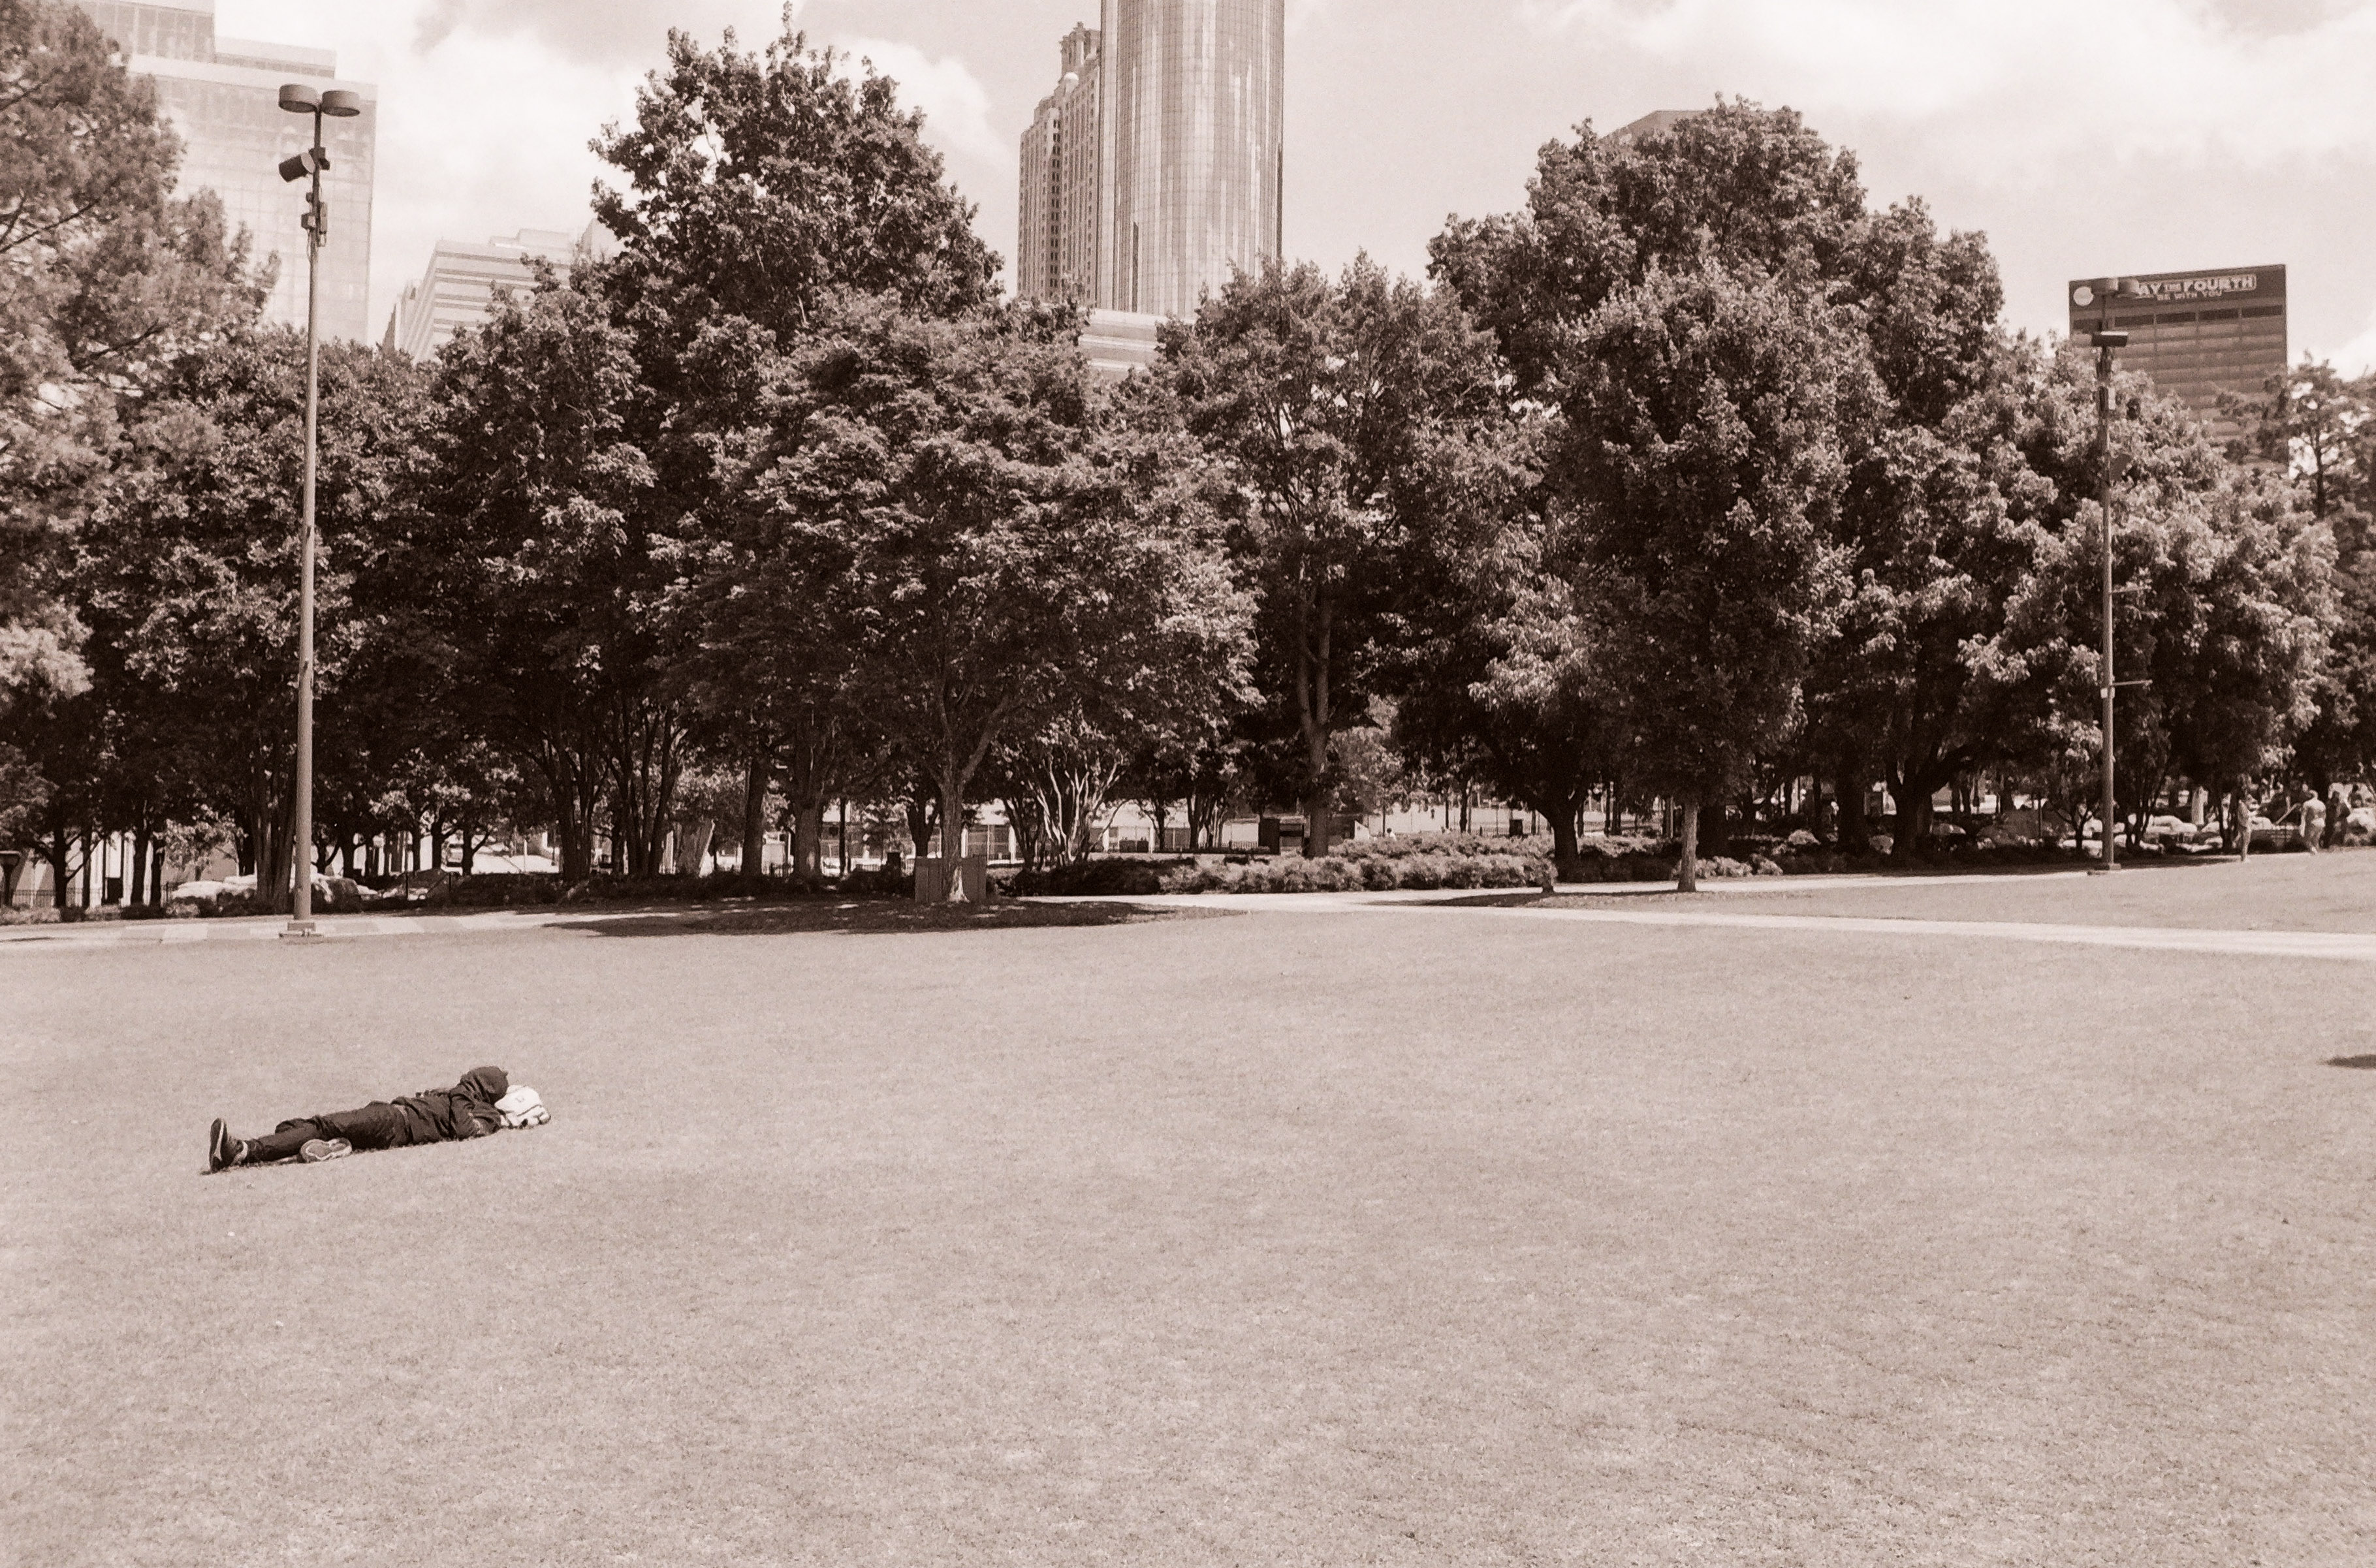
Atlanta – Centennial Park – Pentax Program-Plus – Ilford FP4 Plus
Atlanta – Centennial Park – Pentax Program-Plus – Ilford FP4 Plus – May, 4th, 2025 – May the Fourth be with him.
Atlanta – Centennial Park – Pentax Program-Plus – Ilford FP4 Plus. Centennial Park – all 4 photos developed with the Lomo Daylight Developing Tank and digitized with the JJC adapter.
I had been tempted to start processing film again for a while, but I did not want to invest in dark room equipment or a dedicated film scanner. Two products launched recently, the Lomo Daylight Developing Tank and the JCC Film Digitizer, promise to make film processing at home easier than it has ever been, and made me take the plunge.
I ordered the “Lomo Daylight Developing Tank” a few weeks ago, and since I had just shot a few rolls of Ilford Black and White film, I put it to its paces.
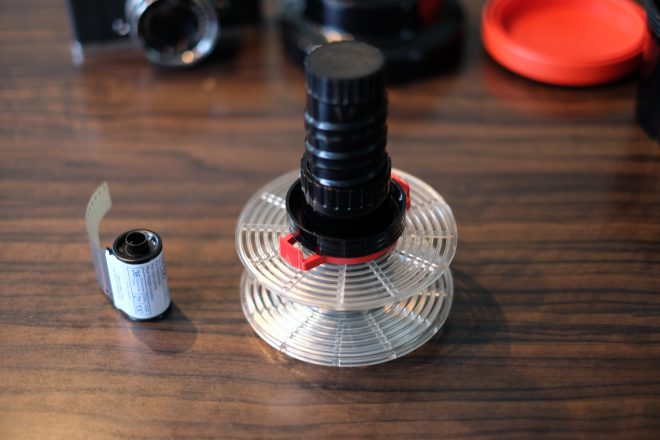
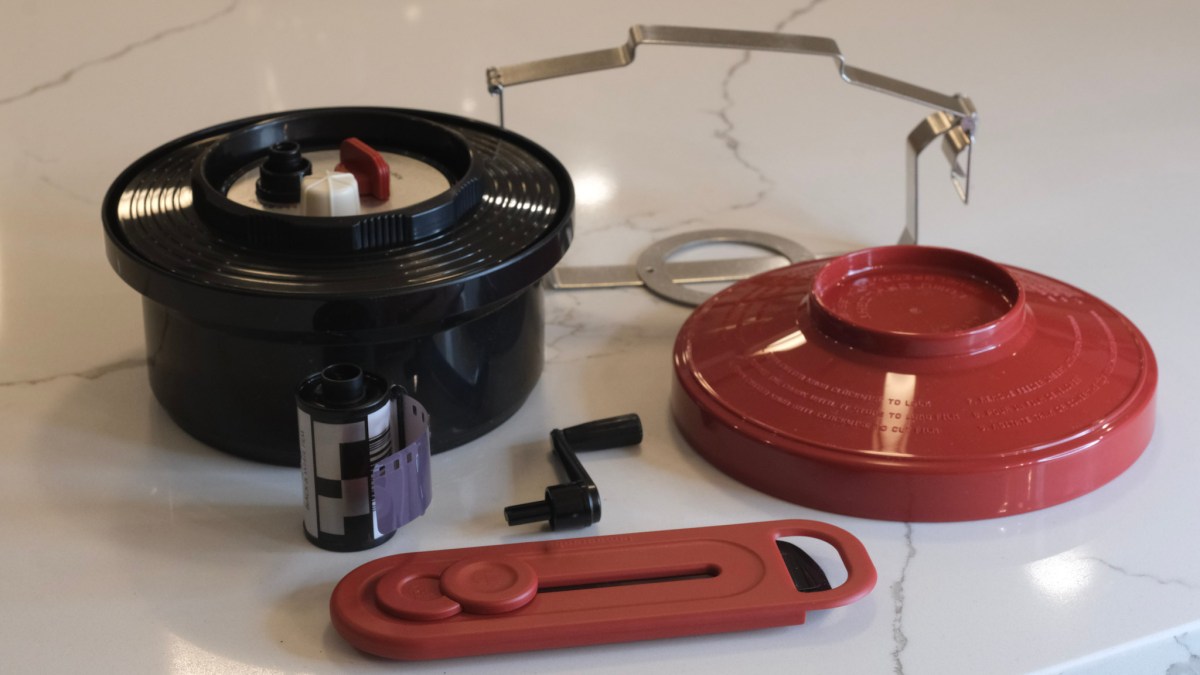
It’s probably best to watch the Youtube video posted by Lomo to see how it works. High level, the development tank contains a spiral reel (on the left in the picture below), and you will use the film loader (on the right) to move the film from the cassette to the spiral. In full daylight.
Where the magic happens: place the cassette of film in the loader and drop it in the development tank. Turn the crank to load the film on the spool inside the tank, remove the film loader, and process your film.
Let’s cut the chase: It works
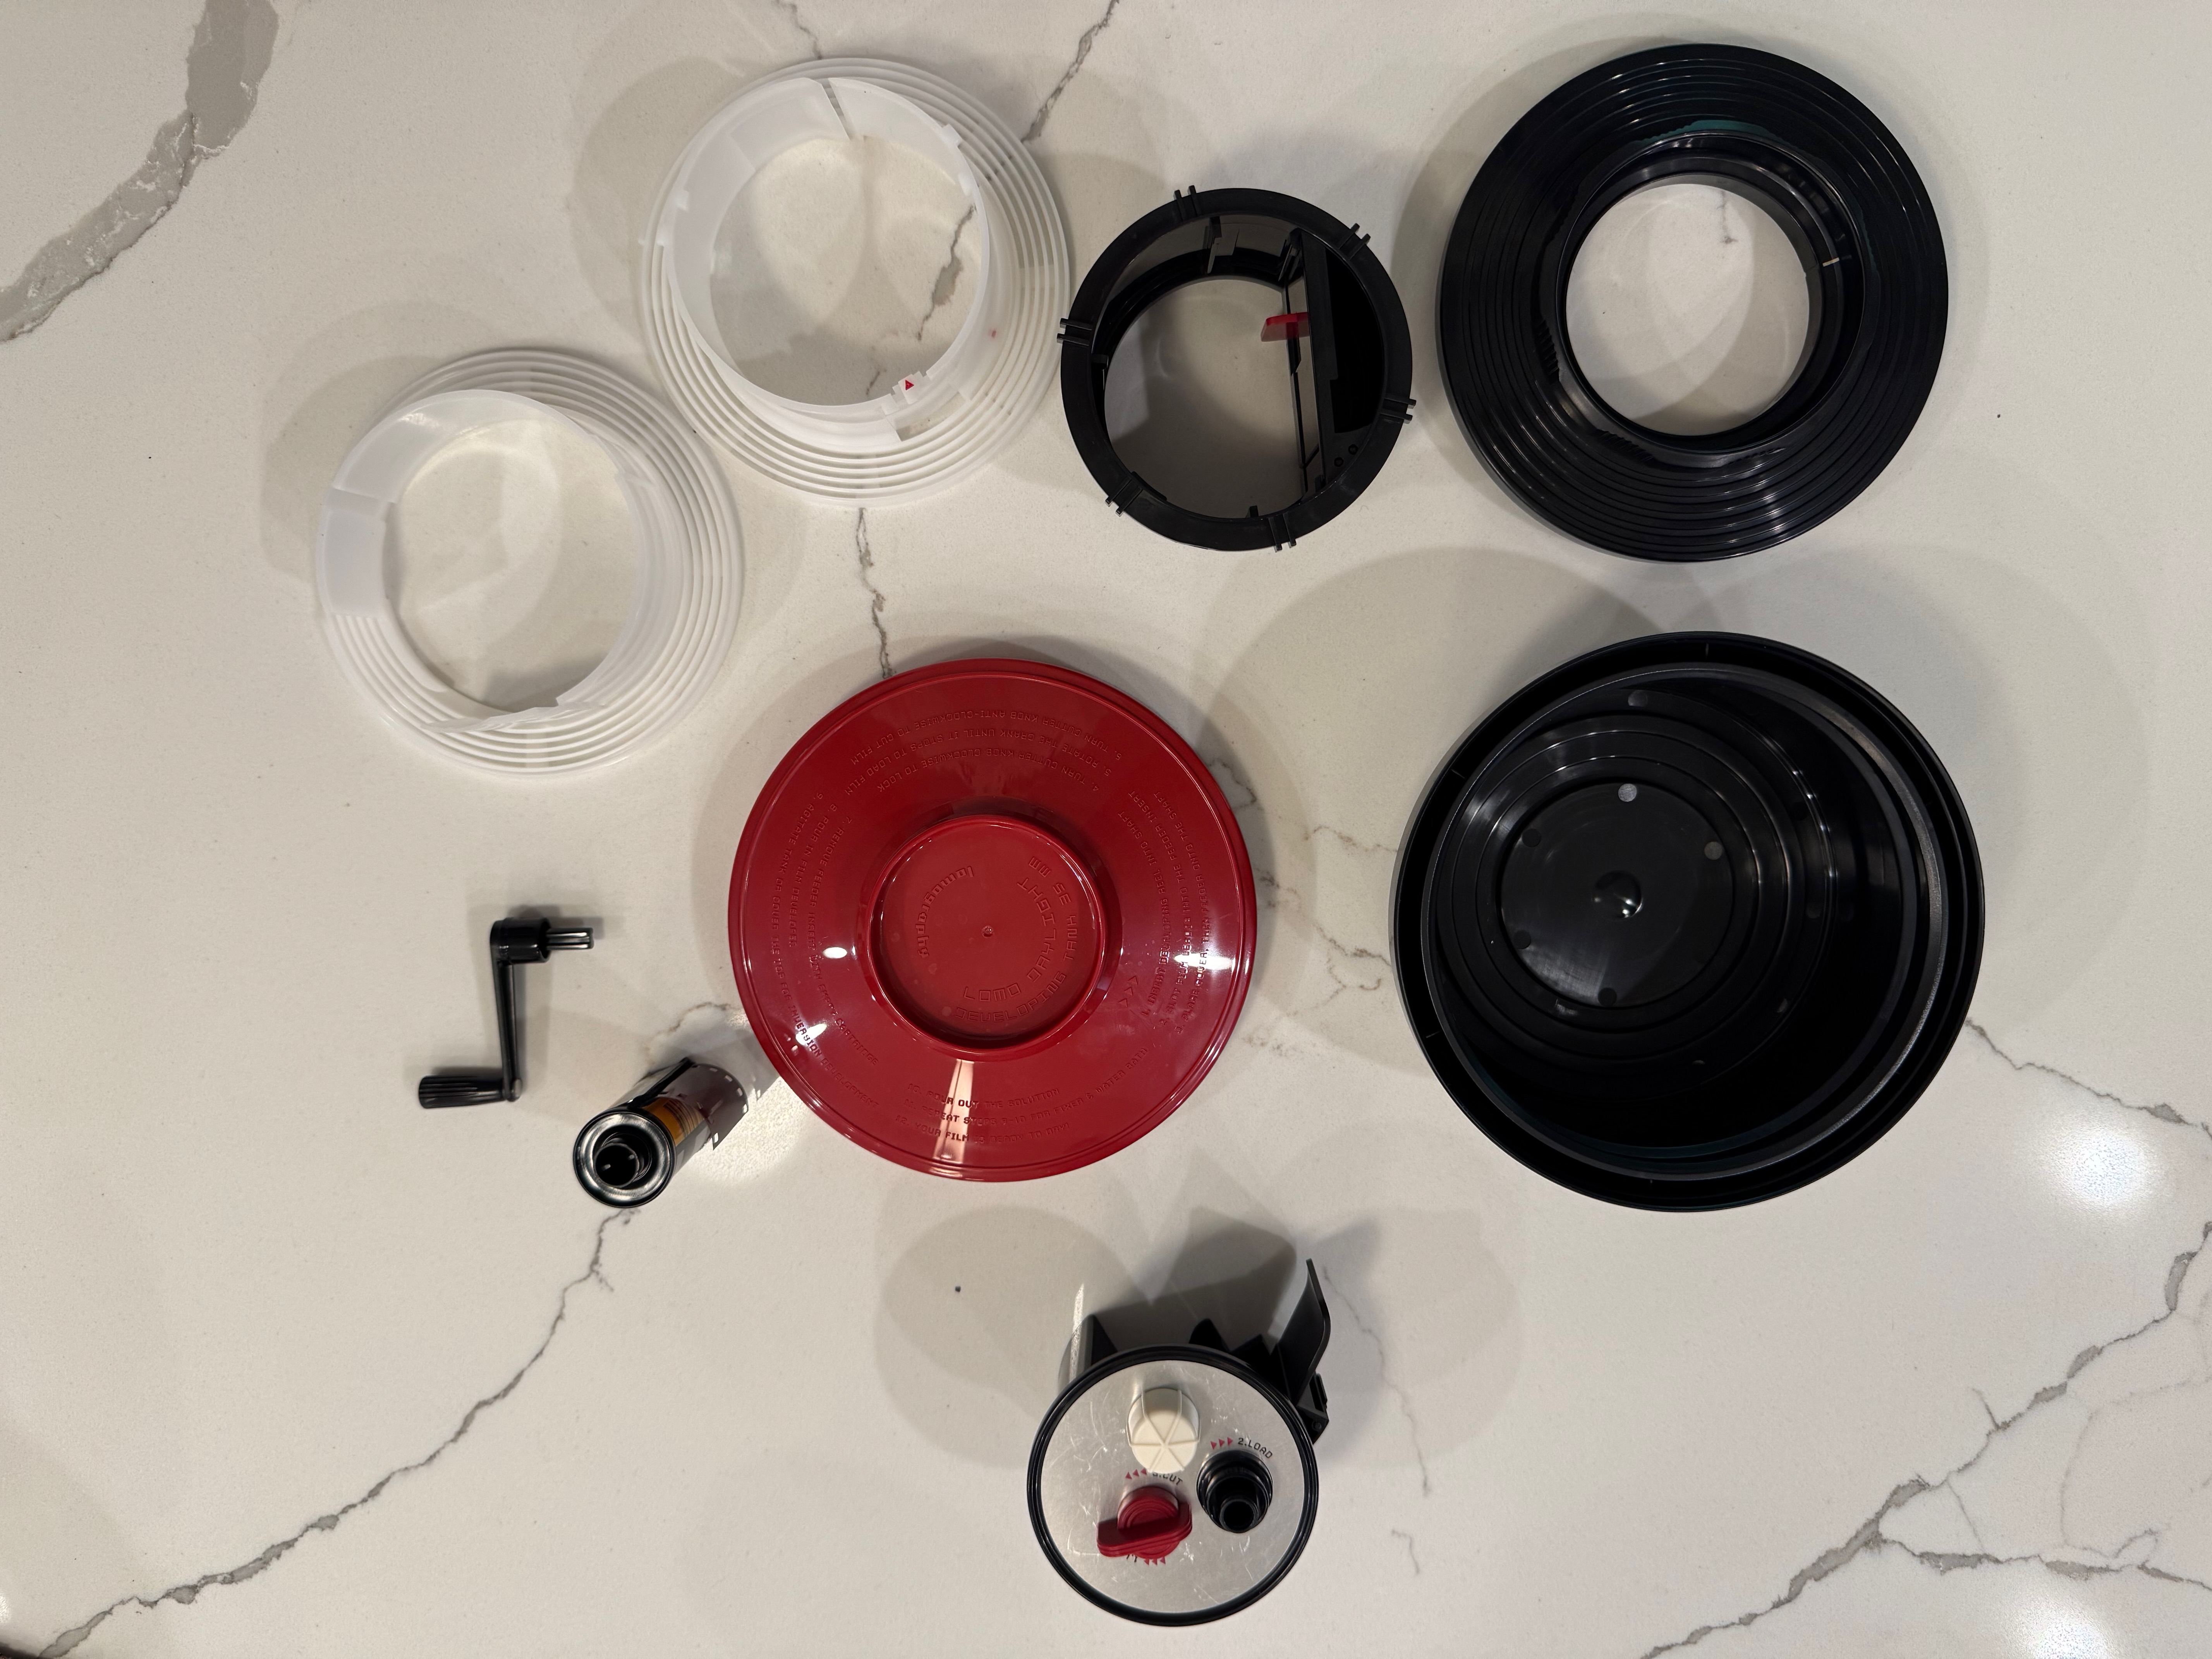
The set (tank, spiral, loader, film extractor) is build of plastics of good quality and looks durable. It’s very cleverly designed, and it does the job:
if you follow the instructions carefully (no user manual, watch the Youtube video at the bottom of this post), it works as promised, and in full daylight: cut the leader of the film, place the cassette in the loader, place the loader in the tank, turn the crank of the loader until all the film has been loaded on the spiral reel, turn a knob to activate a cutter that will separate the film from the cassette, remove the loader from the tank – and from then on, develop, agitate, stop, fix, agitate, rinse – as you would do with a conventional Paterson or Jobo tank.
the film is not damaged in the process, and when you open the tank at the end of the development process, you see the film perfectly rolled on the spool.
There is no light leaks, and no stain on the developed negatives – the system obviously respects your film.
It seems to be fool proof – while I was struggling with a piece of debris (user error, more about this below), I may have lost a few frames, but the rest of the film was never at risk and gave me negatives I can be proud of.
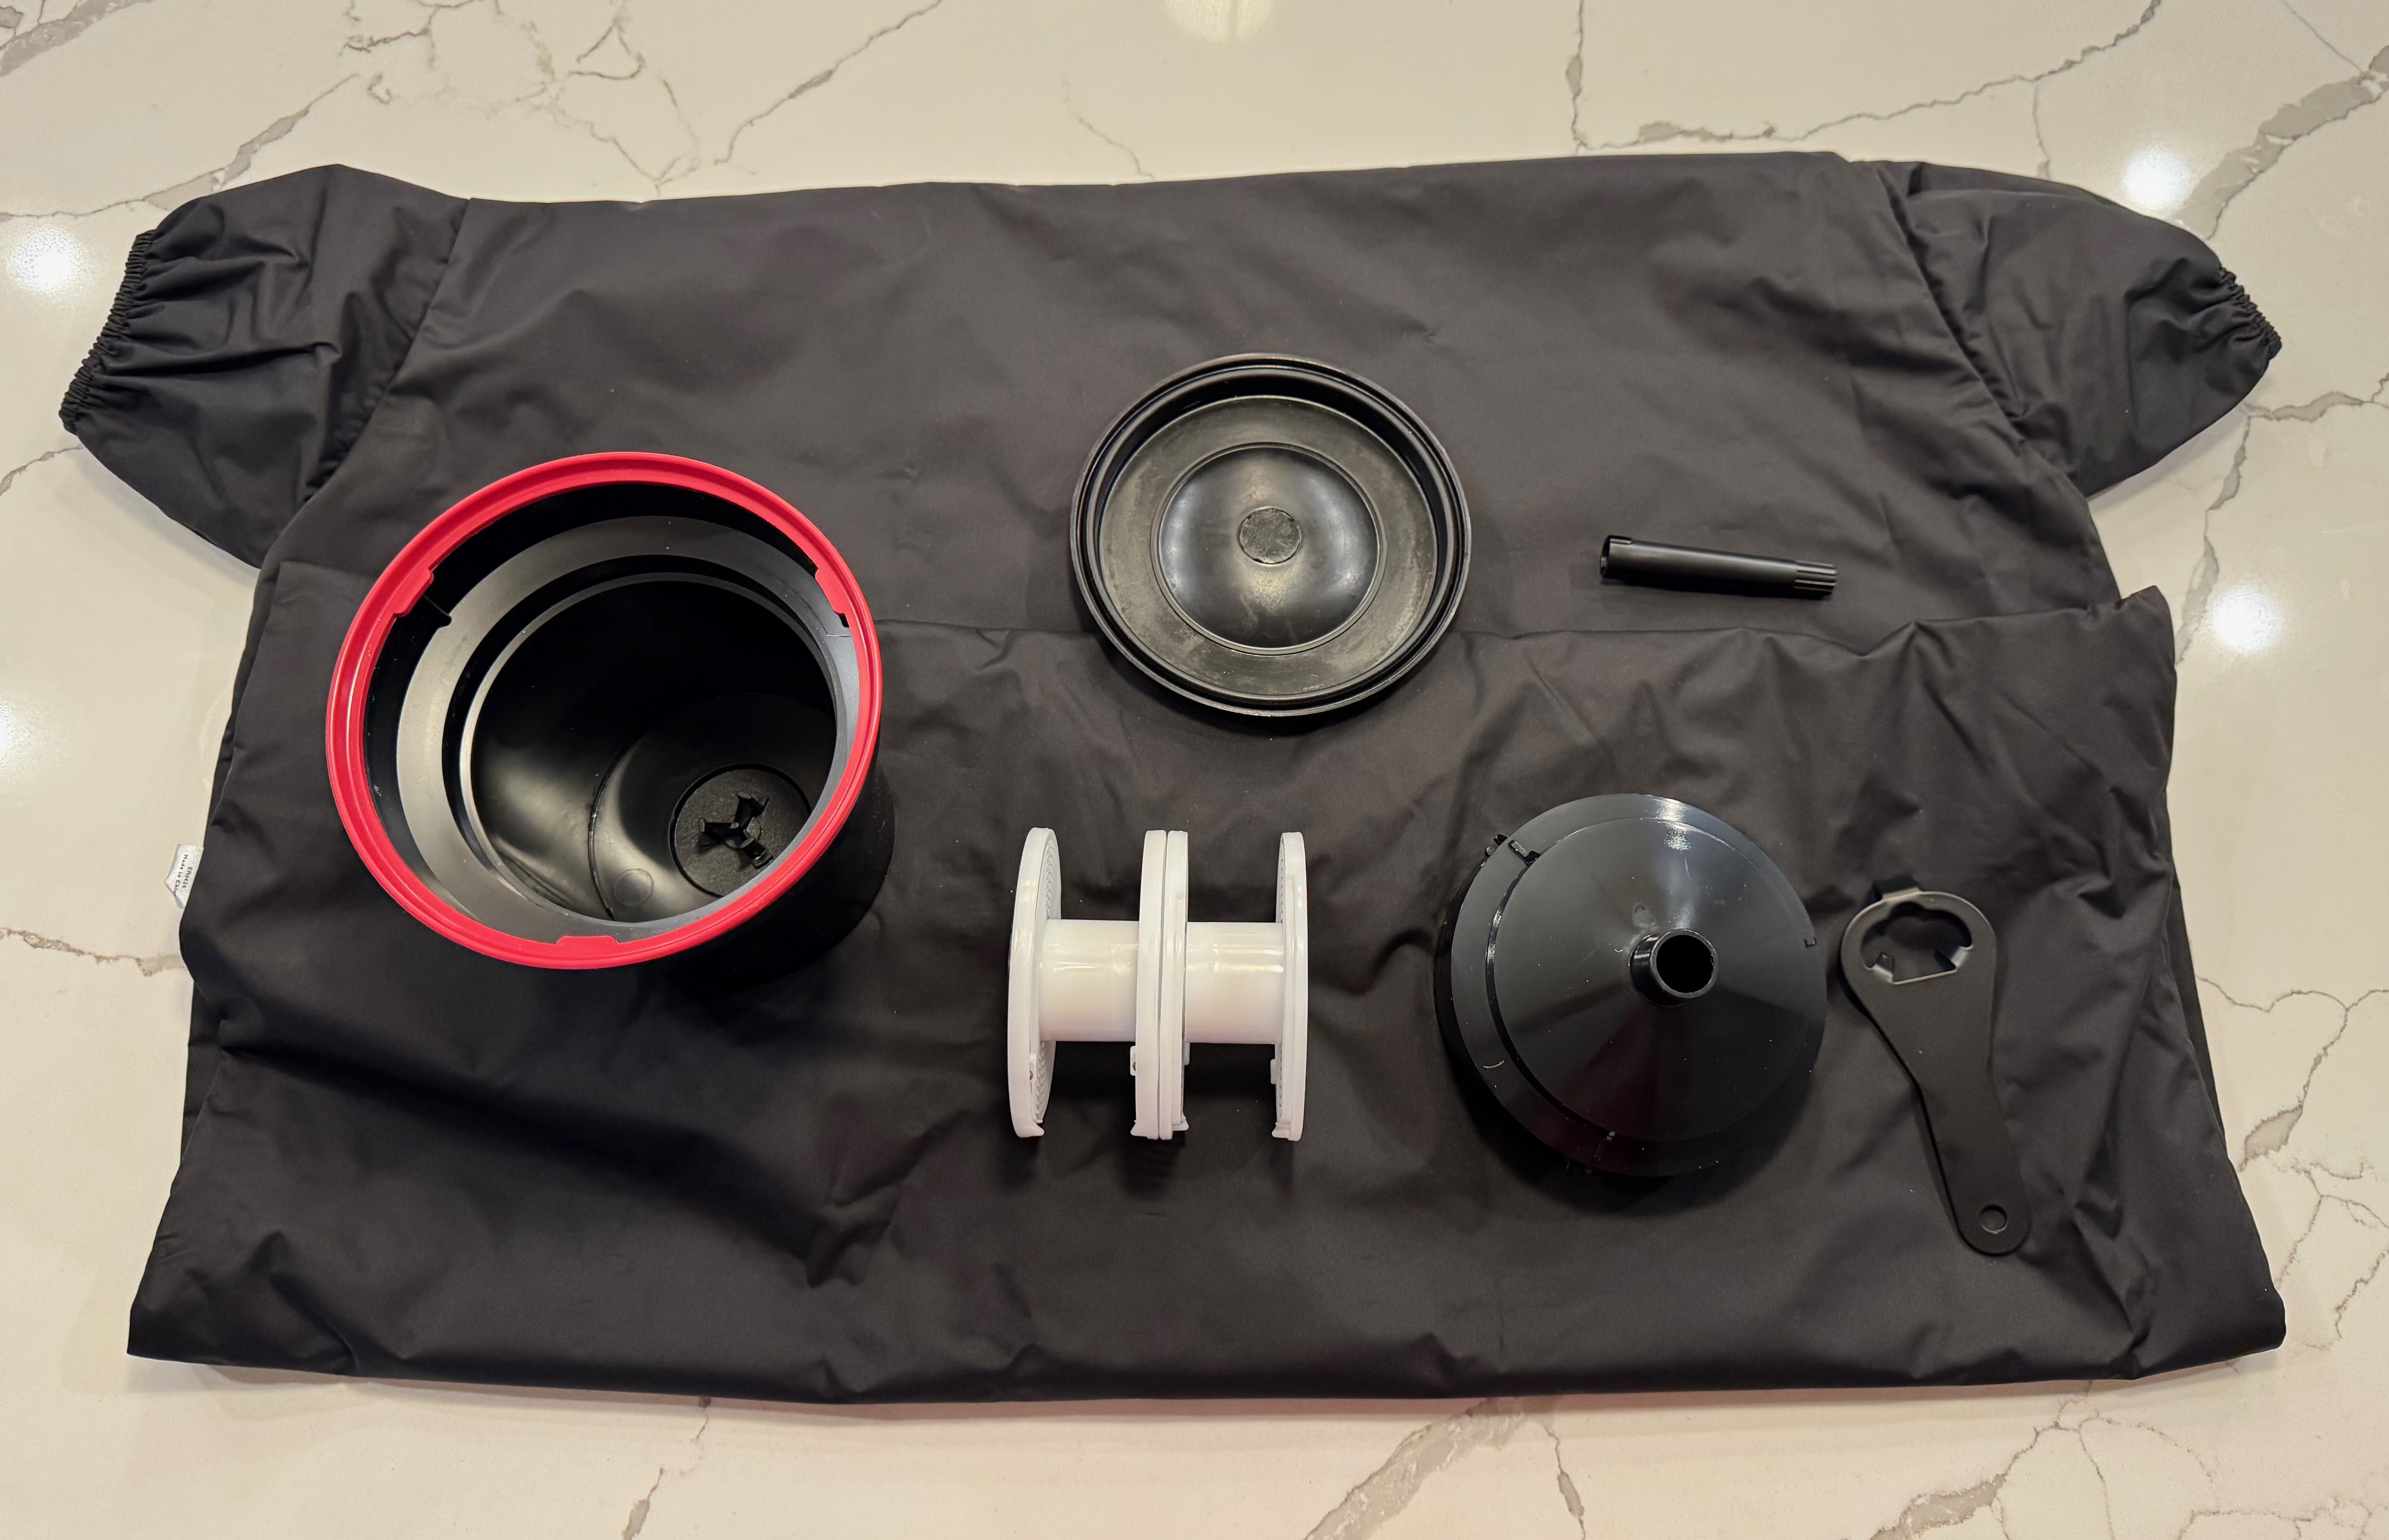
The whole kit (the film leader extractor was included in the kit I purchased).
So, is it the greatest invention since sliced bread, or a solution in search of a problem?
Well, somewhere in between – it’s a clever system, but there are couple of drawbacks.
First, you can only develop one roll of 135 film at a time, when the “market standard”, the Paterson Universal System 4 Development tank, has room for two rolls of 135 film. And because the capacity of a Paterson tank is 600ml, most single use processing kits are designed to be diluted to produce a 600ml solution.
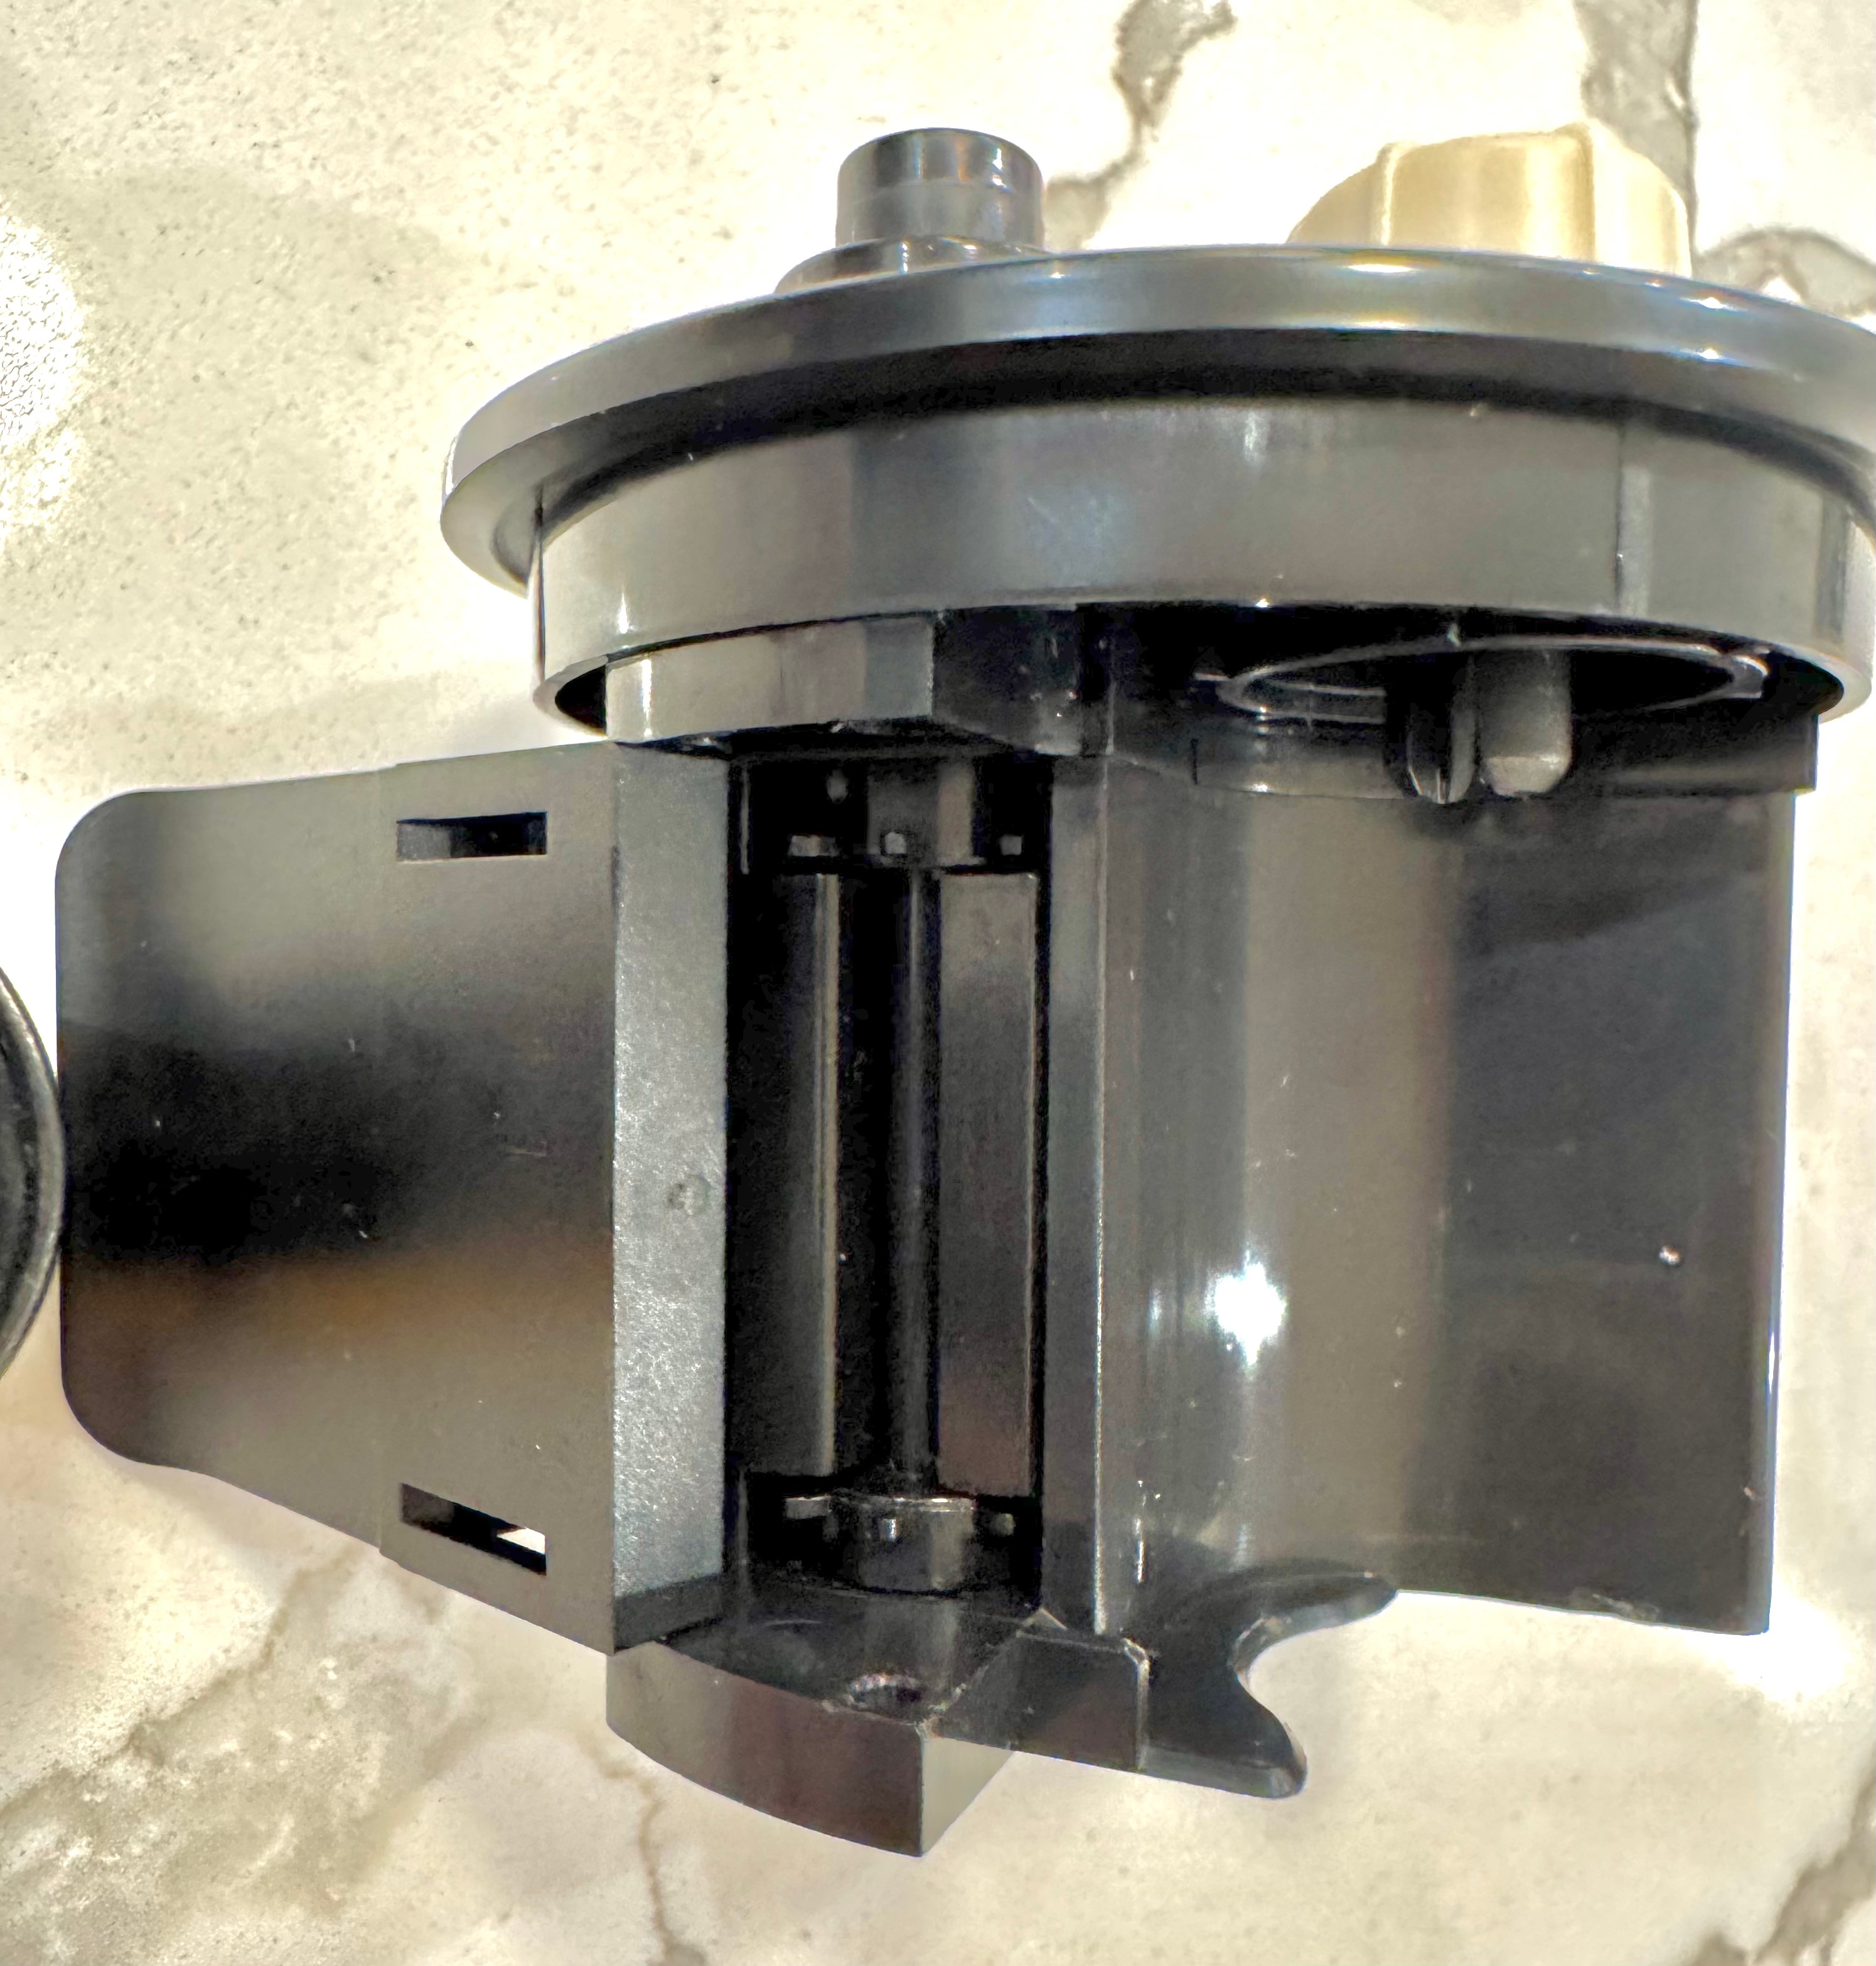
The film loader (right) and the development tank (right).Capacity: 350ml
Unfortunately, the capacity of the cuve of the Lomo is 350ml – so you need to dilute a bit more if you want to process two rolls of film with one dose from a standard processing kit.
Secondly, the film should not be fully rewound, and the film leader should be accessible. If you use a darkroom bag and load your conventional Paterson cuve in the bag, it does not matter that the film leader is still accessible or fully rewound in the film cassette, since you’re going to use a cassette opener to access the film. It’s different with the Lomo.
The film leader as to be cut in a specific way before the cassette can be placed in the loader
The Lomo Developing Tank’s loading mechanism only works if the film leader is accessible – if the film has been fully rewound in the cassette, the photographer will have to use a film extractor to pull the leader from the cassette. There is one included in the kit, and it works reasonably well for a film extractor, but it’s an extra step that the user of a darkroom bag would not have to perform.
Extracting the film leader from the cassette – the tool provided by Lomo (top) and my old and trusted Hama extractor.The Lomo tool worked better.
Thirdly, when the loader is finished loading the film on the spool, the operator has to turn the red knob to the left to cut the last section of film and separate it from the cassette – so that the loader (and the now empty cassette) can be removed from the cuve. You have to fully, and decisively, turn that knob to the left.
Because it could happen (it happened to me) that if the cut is not perfect, a little tiny bit of film is kept prisoner in the cutting mechanism and obstructs the very narrow slot where the next (undeveloped) roll of film is supposed to pass to reach the spiral reel. It makes loading the film impossible, until you have found that tiny piece of film and removed it. Lessons learned, the hard way.
Processing my second roll of film, I had to fight to load the film because of a tiny piece of film of the first roll kept prisoner on the cutting mechanism – after I found it and removed it, everything worked fine.
Lastly, when you cut the film to separate the section which is reeled on the spiral from the cassette which still sits in the loader, a short length of film remains attached to the cassette (11 perforations, approximately two inches or 5cm), which (depending on the camera and how you loaded the film) may (or may not) mean that the very last frame of each roll of film will not be processed, and will be lost forever.
As a conclusion
The main benefit of the Lomo Daylight Developing Tank is that it makes film development at home less intimidating for the beginners.
They won’t have to use a darkroom bag, and won’t need to learn how to operate a cassette opener and load the film on a spiral reel just by touch, without seeing what they’re doing.
With the Lomo Daylight Developing system, everything takes place in full daylight, and does not require any particular skill, experience or muscle memory. If the equipment is clear of any film debris and you follow the instructions, it simply works.
Film Loader – detail
The system is intelligently designed, seems carefully built using components of quality, and should withstand the test of time.
At $89.00, it’s probably a bit more expensive than a good quality set composed of a universal tank, a darkroom bag and a cassette opener, but not by much. And as an easy introduction to film processing, it’s worth it.
But…
Does it save time? I doubt it.
First, unless your camera can be set not to fully rewind the film and leave the leader outside of the cassette (or you remember not to fully rewind it if you use a non motorized camera), you will have to extract the leader with a specialized tool before you can place the film cassette in the loader of the Lomo system.
Which is a step you don’t need to go through if you use a darkroom bag and a cassette opener.
Secondly, after you’ve developed your first roll of film of the day, you will have to carefully disassemble, rinse, dry and patiently reassemble the whole system, which takes definitely more time than simply rinsing the components of a Paterson tank.
And if you want to avoid the trouble I experienced with the second roll of film I processed, you will thoroughly check that there is no tiny piece of film obstructing the film insertion slot inside the cuve.
The film is now loaded on the spool – from there on it’s absolutely similar to what you would do with a Paterson tank.
If you are already equipped with a darkroom bag, a cassette opener and a conventional development tank , and know how to use them, I honestly don’t see any benefit in switching to the Lomo Daylight Developing Kit.
And I would not consider developing color film (whose chemistry is much more temperature sensitive) in a Lomo Daylight as well.
As for me? It’s been ages since I used a conventional development tank and a darkroom bag for the last time. I’m pretty sure I would still be able to use it, but I was not be able to locate my old kit – probably lost when moving from one place to another. I had to start afresh. So why not try something different?
The Lomo Daylight Developing Tank is not perfect. It will not be as efficient at processing large quantities of film as a conventional Paterson or Jobo development tank, but I’m not planning on processing a large volume of film (one or two rolls of black and white film per month at the most).
For my use case, the Lomo Daylight makes sense. And used in conjunction with the JJC Digitizing kit, it will give me access to my images a few hours after they have been shot, with a minimal hassle, and no darkroom.
Details – the tank, the spiral reel and the loader. You see the spiral reel for the first time when you open the tank to remove the developed film
More about the film processing at home in CamerAgX
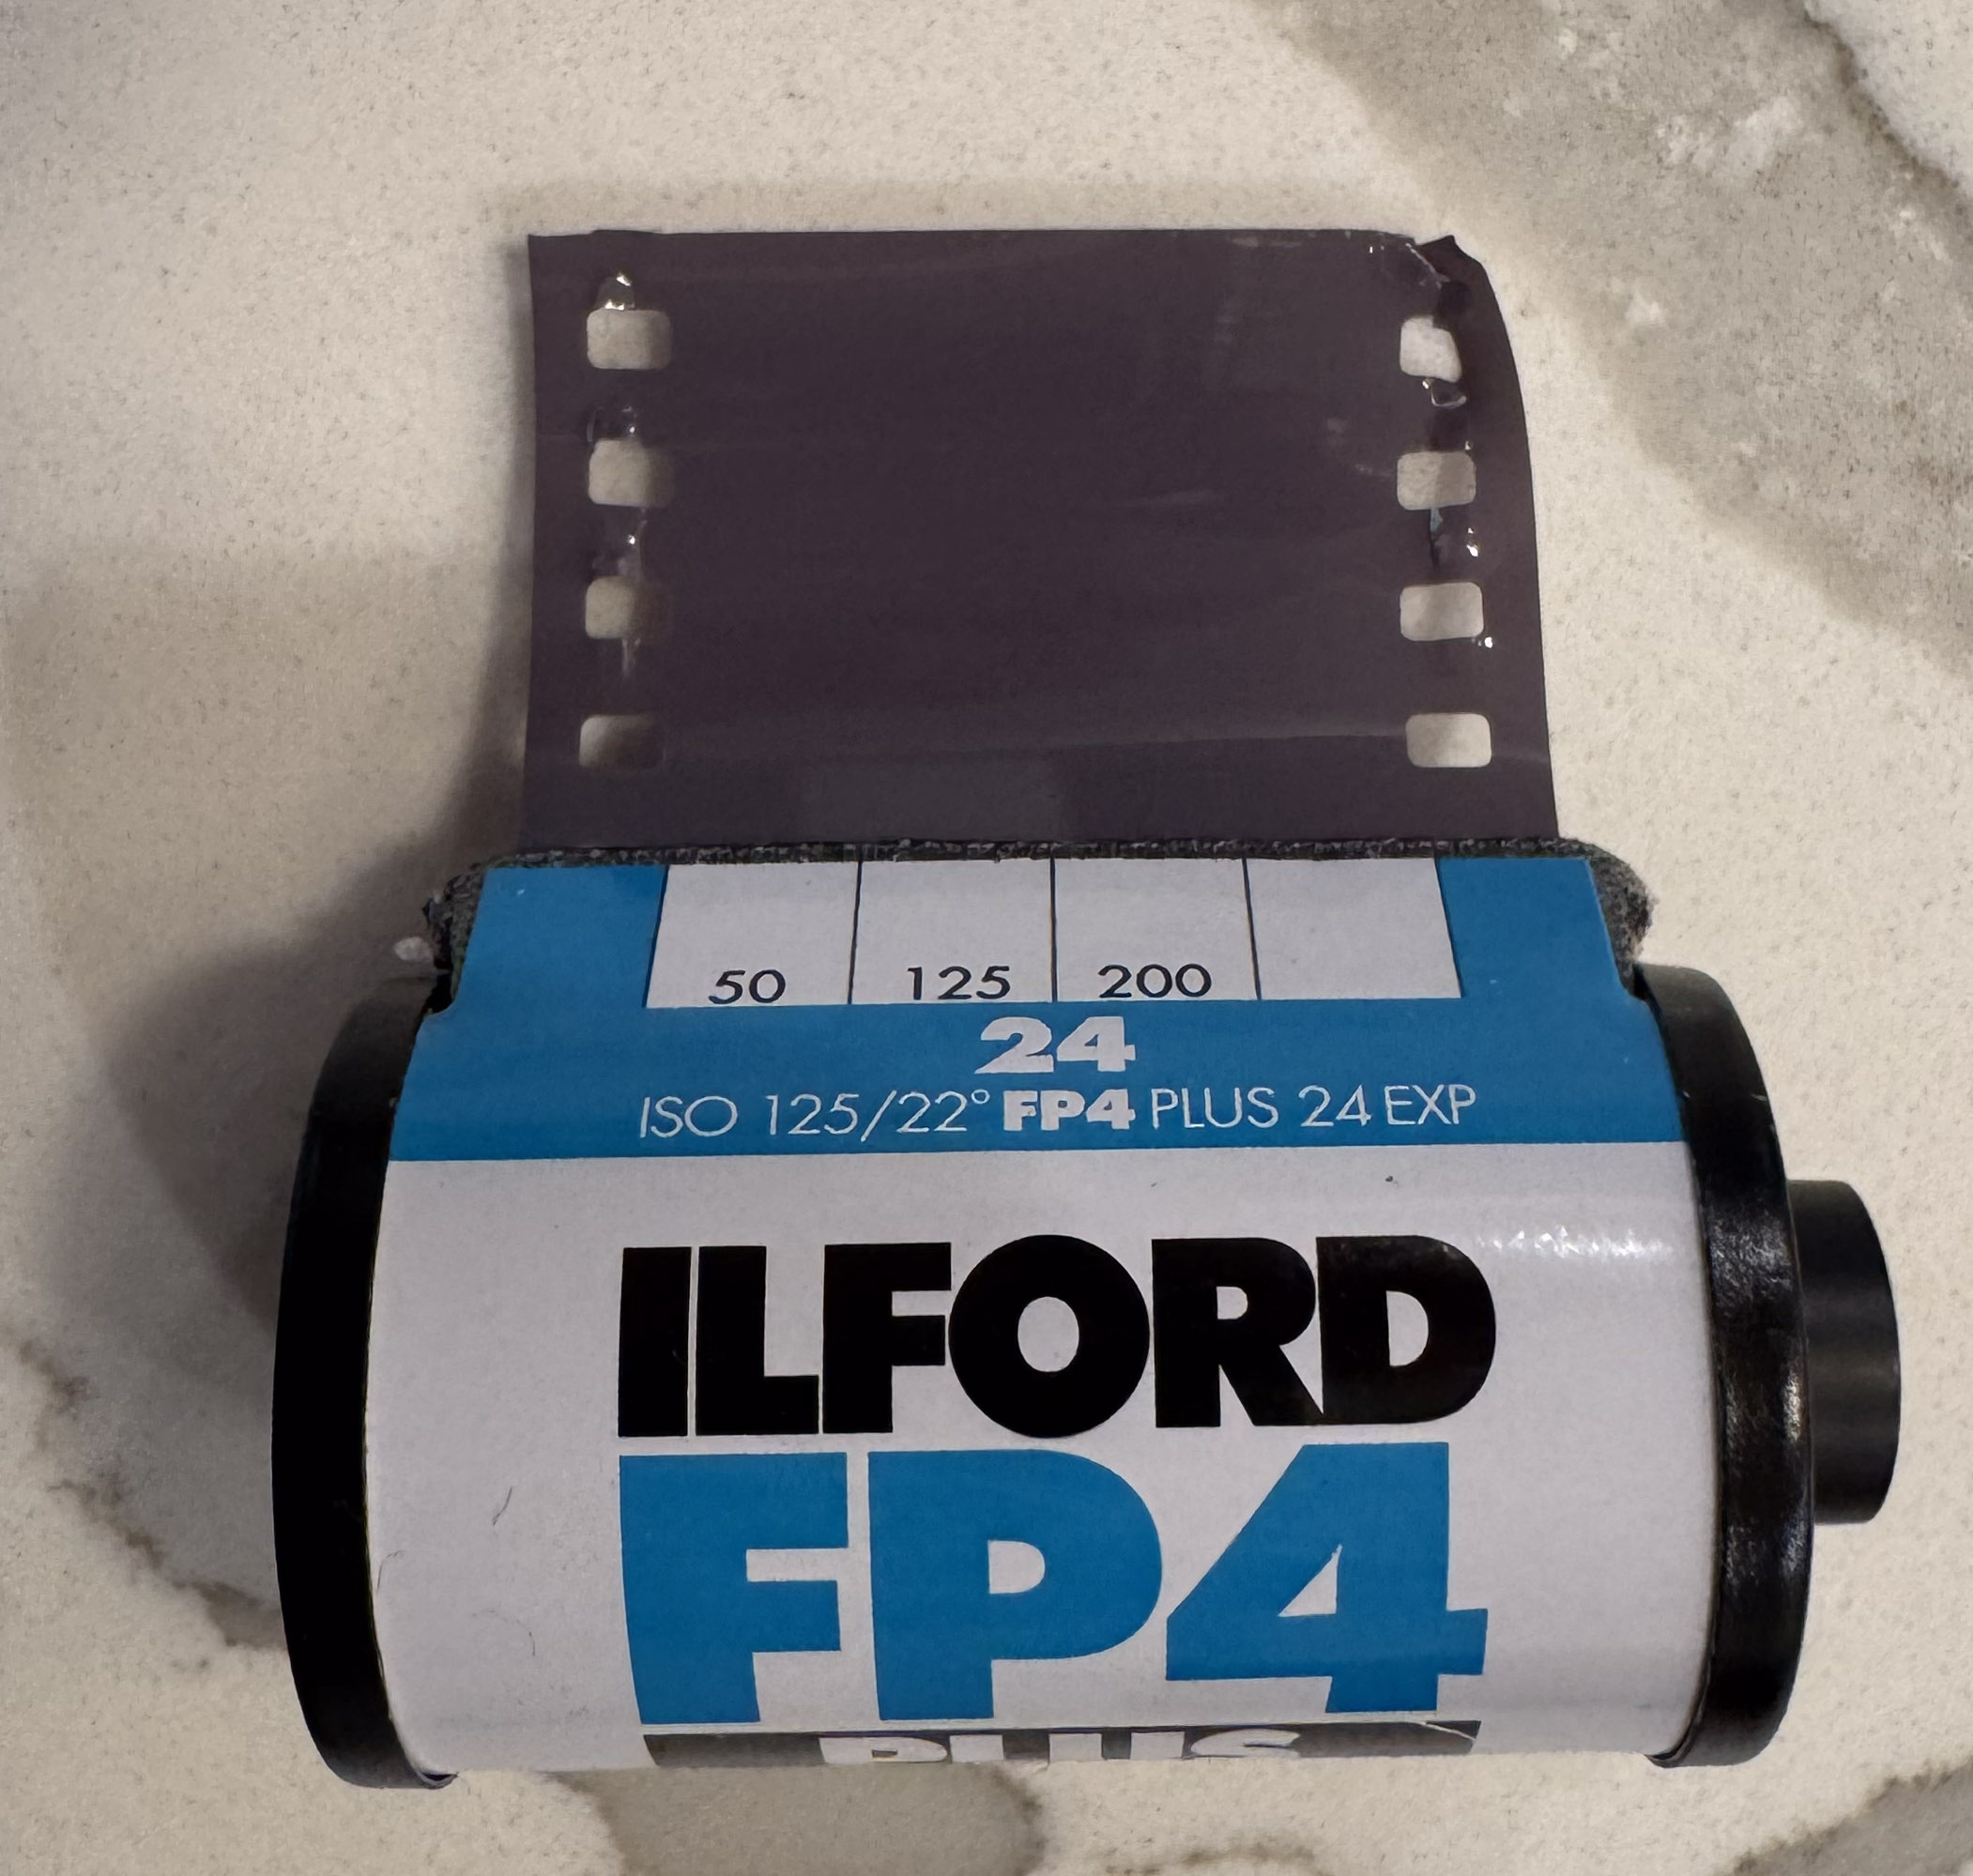
The first roll (HP5 Plus) was not a complete success – my bad – I did not configure the timer correctly, but I’m pleased with the second roll (Ilford FP4 Plus)
Atlanta – Beltline – Pentax ME – Ilford HP5 Plus
Atlanta – Centennial Park – Pentax Program-Plus – Ilford FP4 Plus
Atlanta – Centennial Park – Pentax Program-Plus – Ilford FP4 Plus
You “take” pictures, but how do you “give back” to the people you’ve just photographed? Here is a suggestion: print the pictures, and give the prints, on the spot, right after you’ve shot them. It’s a nice gift to family and friends with whom you’re sharing good moments, and to the people who have generously let you capture their image, and, maybe, a bit of their soul.
Very few people still create photo albums. Because nobody has prints. Composing a photo-album online takes time, effort and money, and it can be one to two weeks before you receive it. Printing a selection of images on a pocket printer is an easy way to create pocketable photo albums with no hassle; wherever, just when you feel like it, for not much money. Instant gratification.
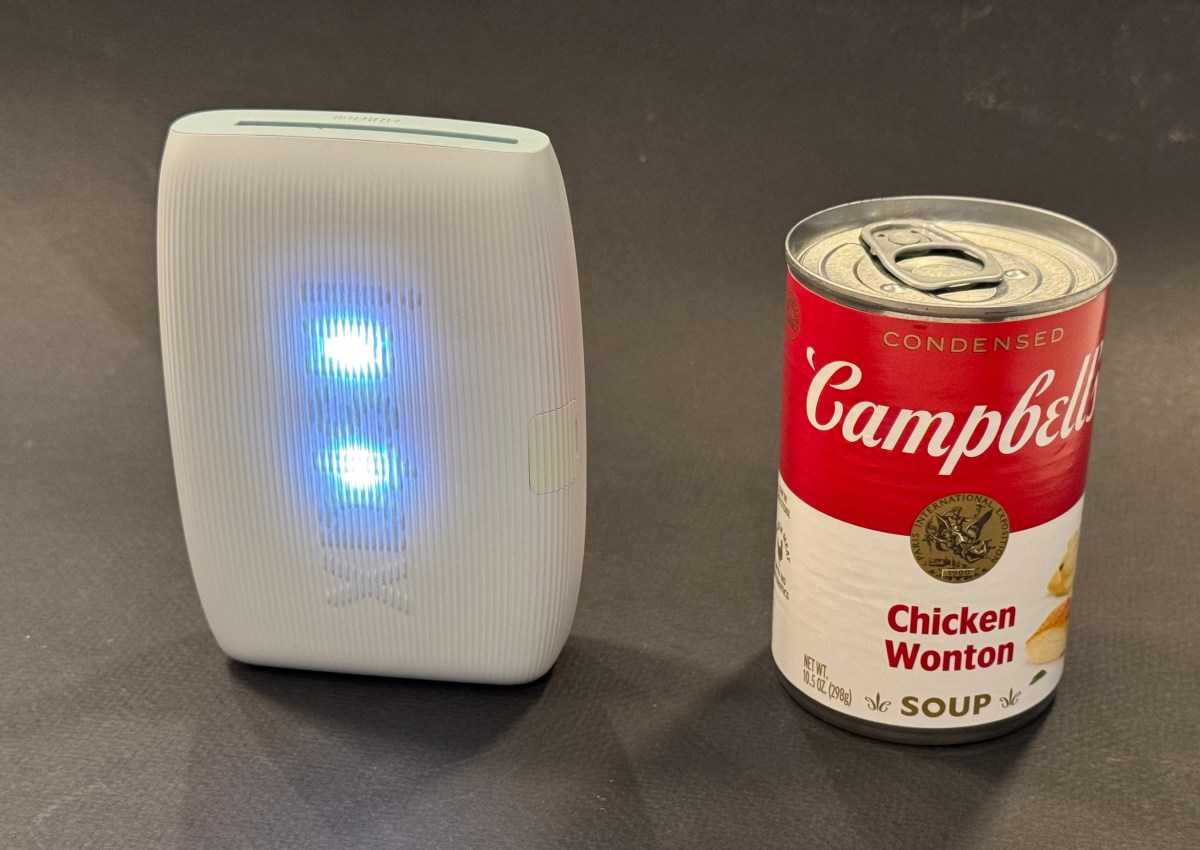
No Campbell Soup for you – the mini Link 3 is about twice the size of a compact camera. It’s totally wireless and the battery is good for 100 prints between two charges.
There are many more ways to use those mini-prints: in Japan school girls insert their Instax prints in plastic cases that they use to accessorize their bags, and I create my own personalized luggage tags – you won’t confuse my suitcase with anybody else’s. Your imagination is the limit.
How does it work?
Fujifilm sell their instant film in 3 sizes: Instax Mini (the image is roughly the size of a business card), Instax Square (a bit larger, and square), and Instax Wide (twice the size of the Mini). They manufacture cameras for each of the three formats, as well as dedicated portable printers.
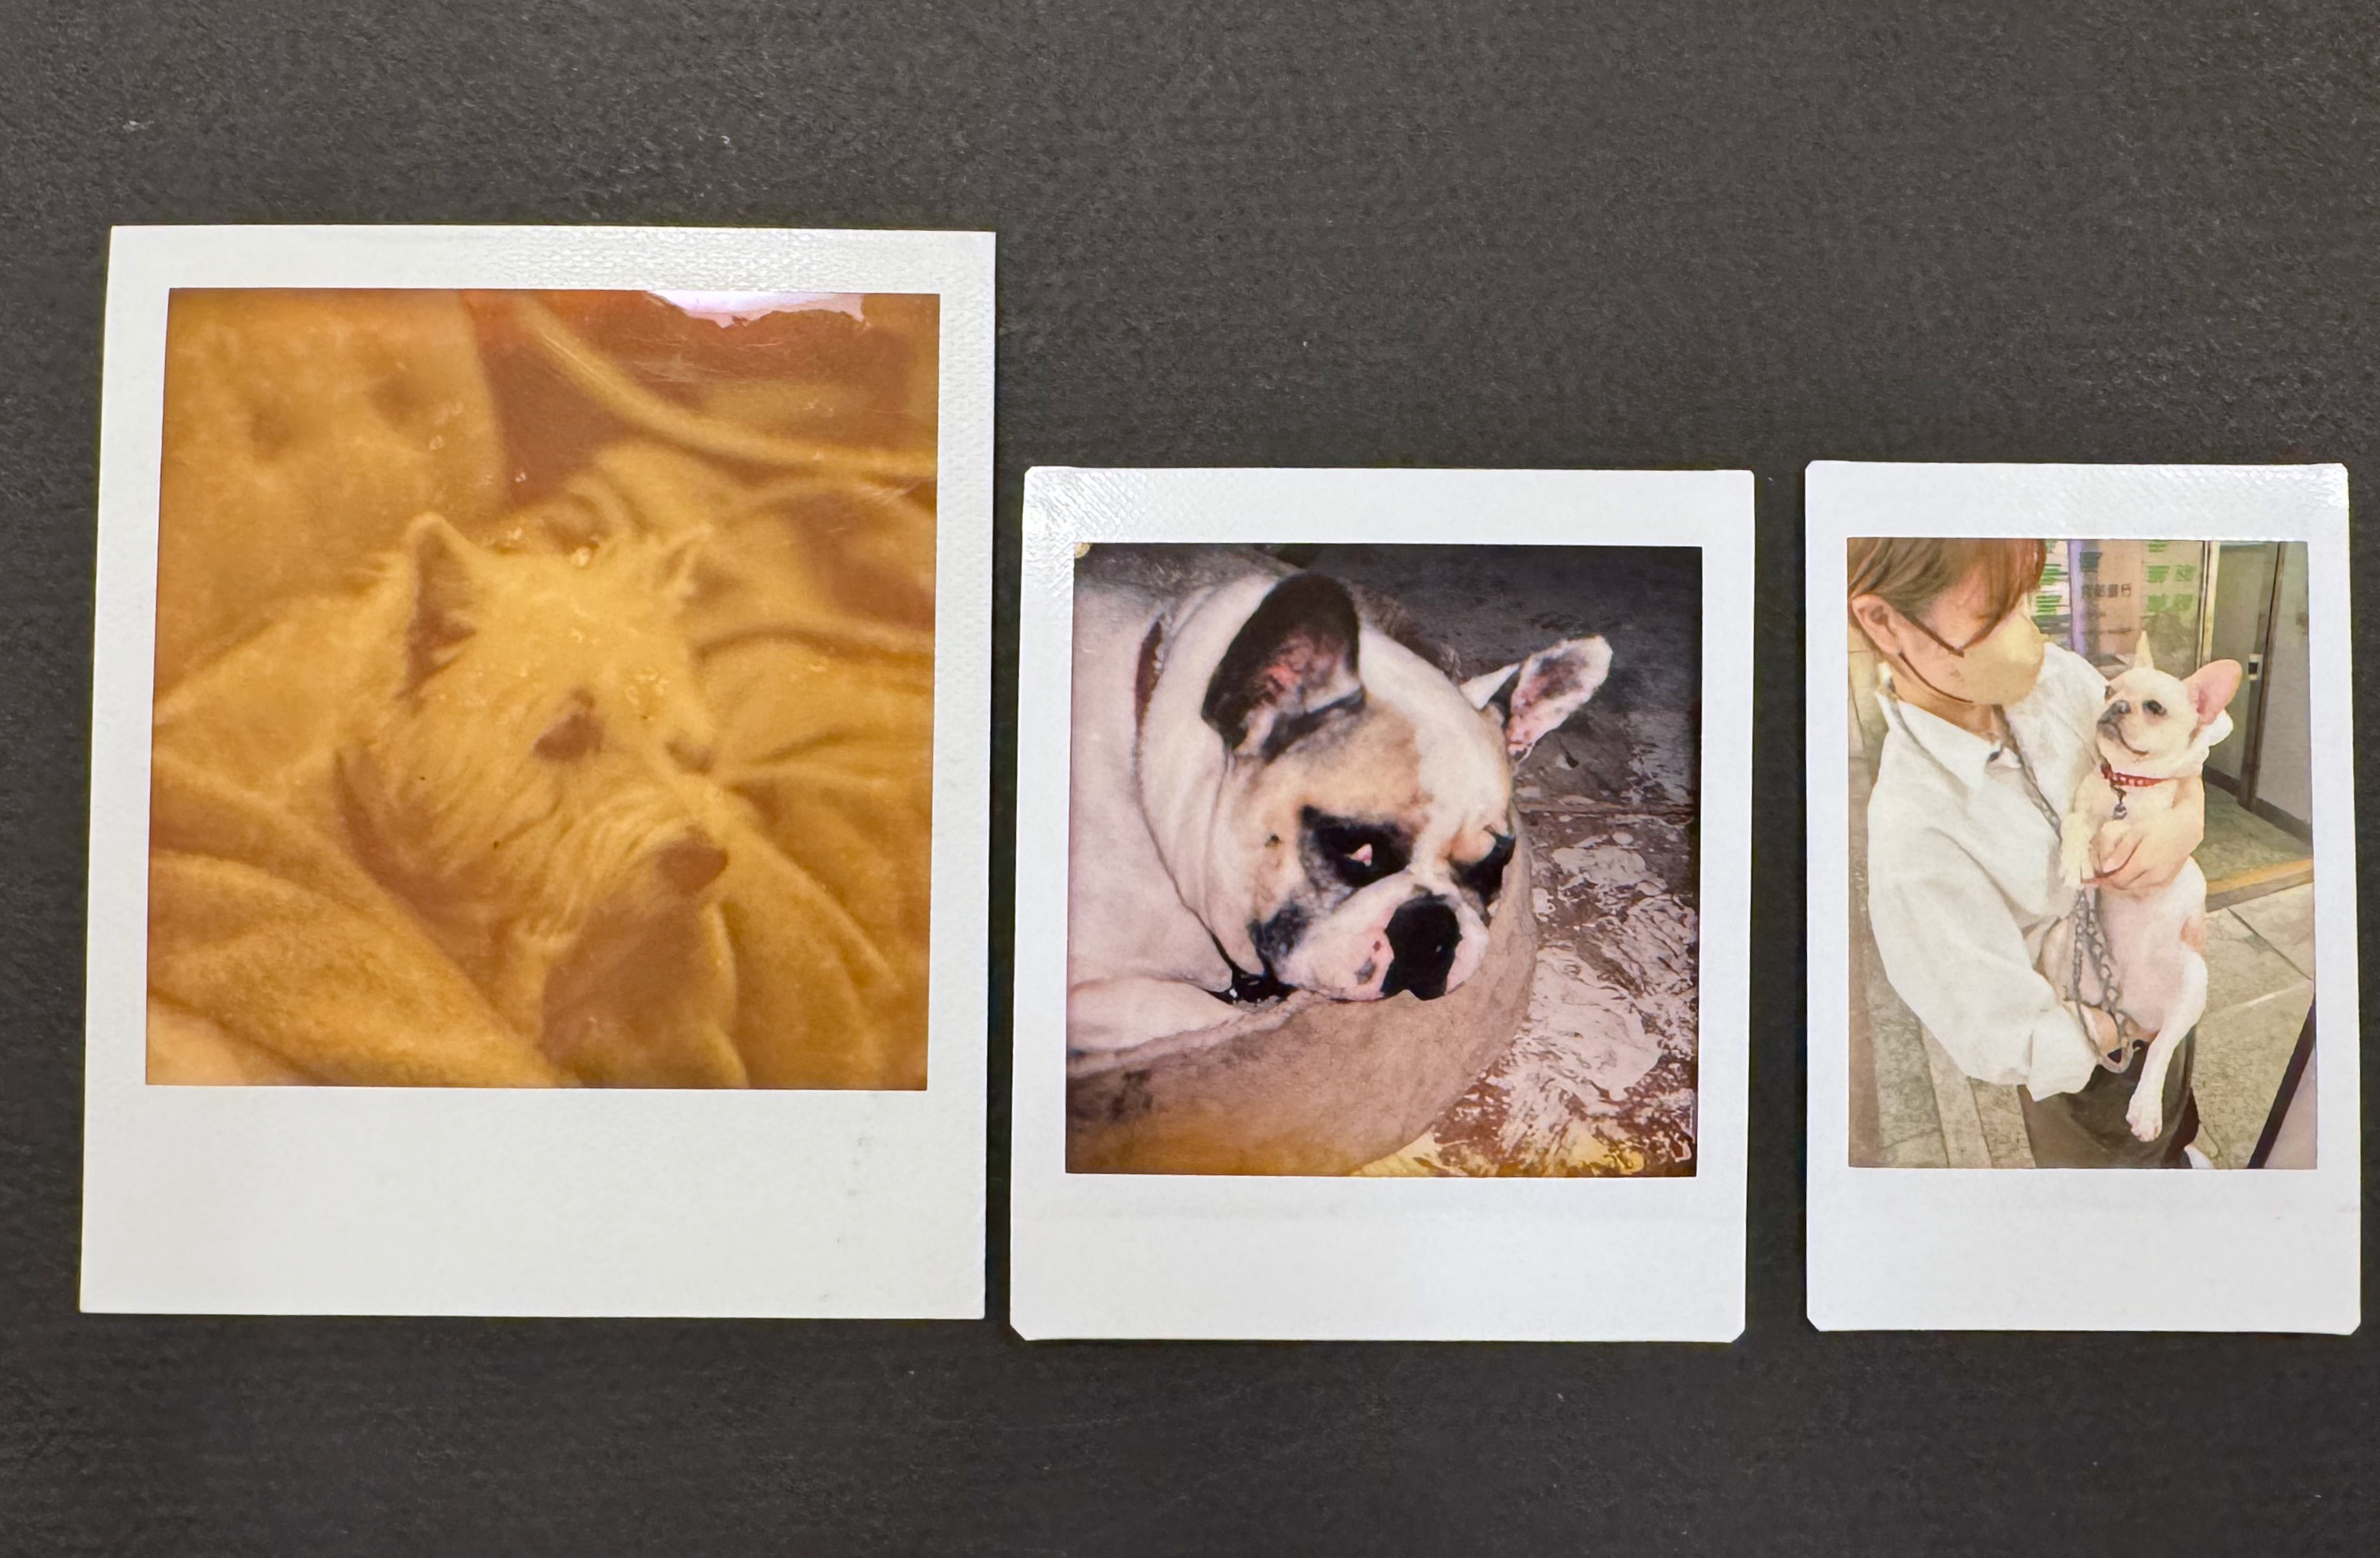
Comparing print sizes: Polaroid SX-70 vs Fujifilm Instax Square vs Fujifilm Instax mini.
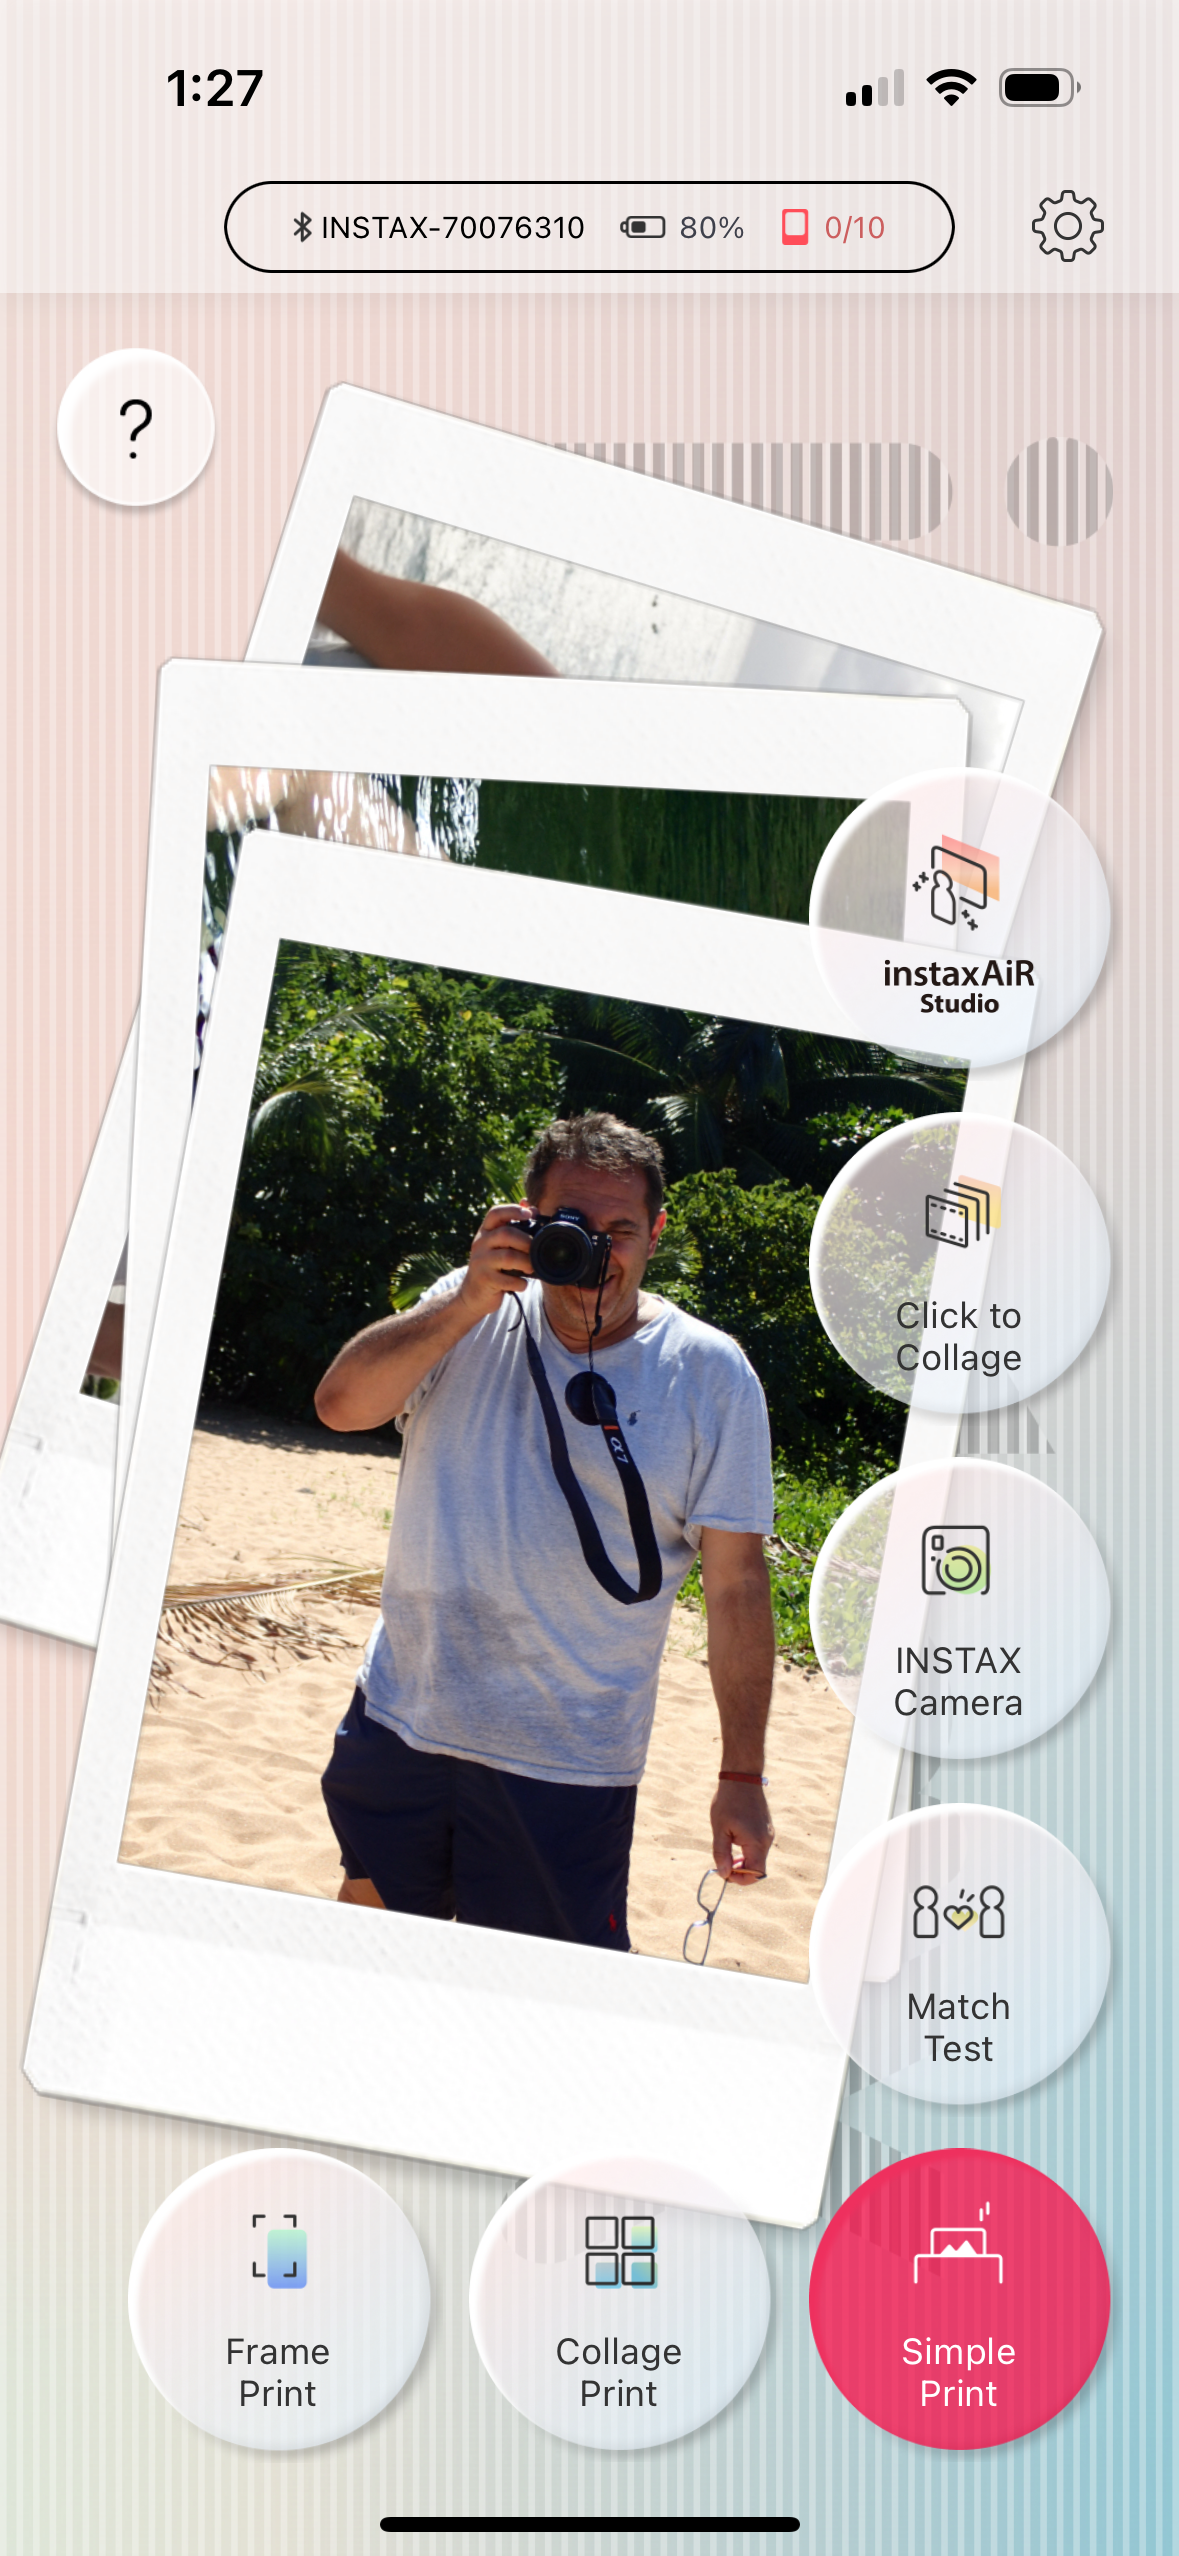
Other makers of pocketable printers use different technologies (zero ink paper, generally) but with Fujifilm, it’s about silver halide, of course. Once a print is ejected from the printer, the image needs a few minutes to fully develop, but it’s part of the magic of instant film. Today we’ll focus on Fujifilm’s Instax Mini Link 3. It’s a pocketable, battery operated printer, that, when paired with a smartphone and loaded with a 10 print Instax Mini pack, will print business card size pictures. Of course, there’s an Instax Mini Link app to download and install on your smartphone.
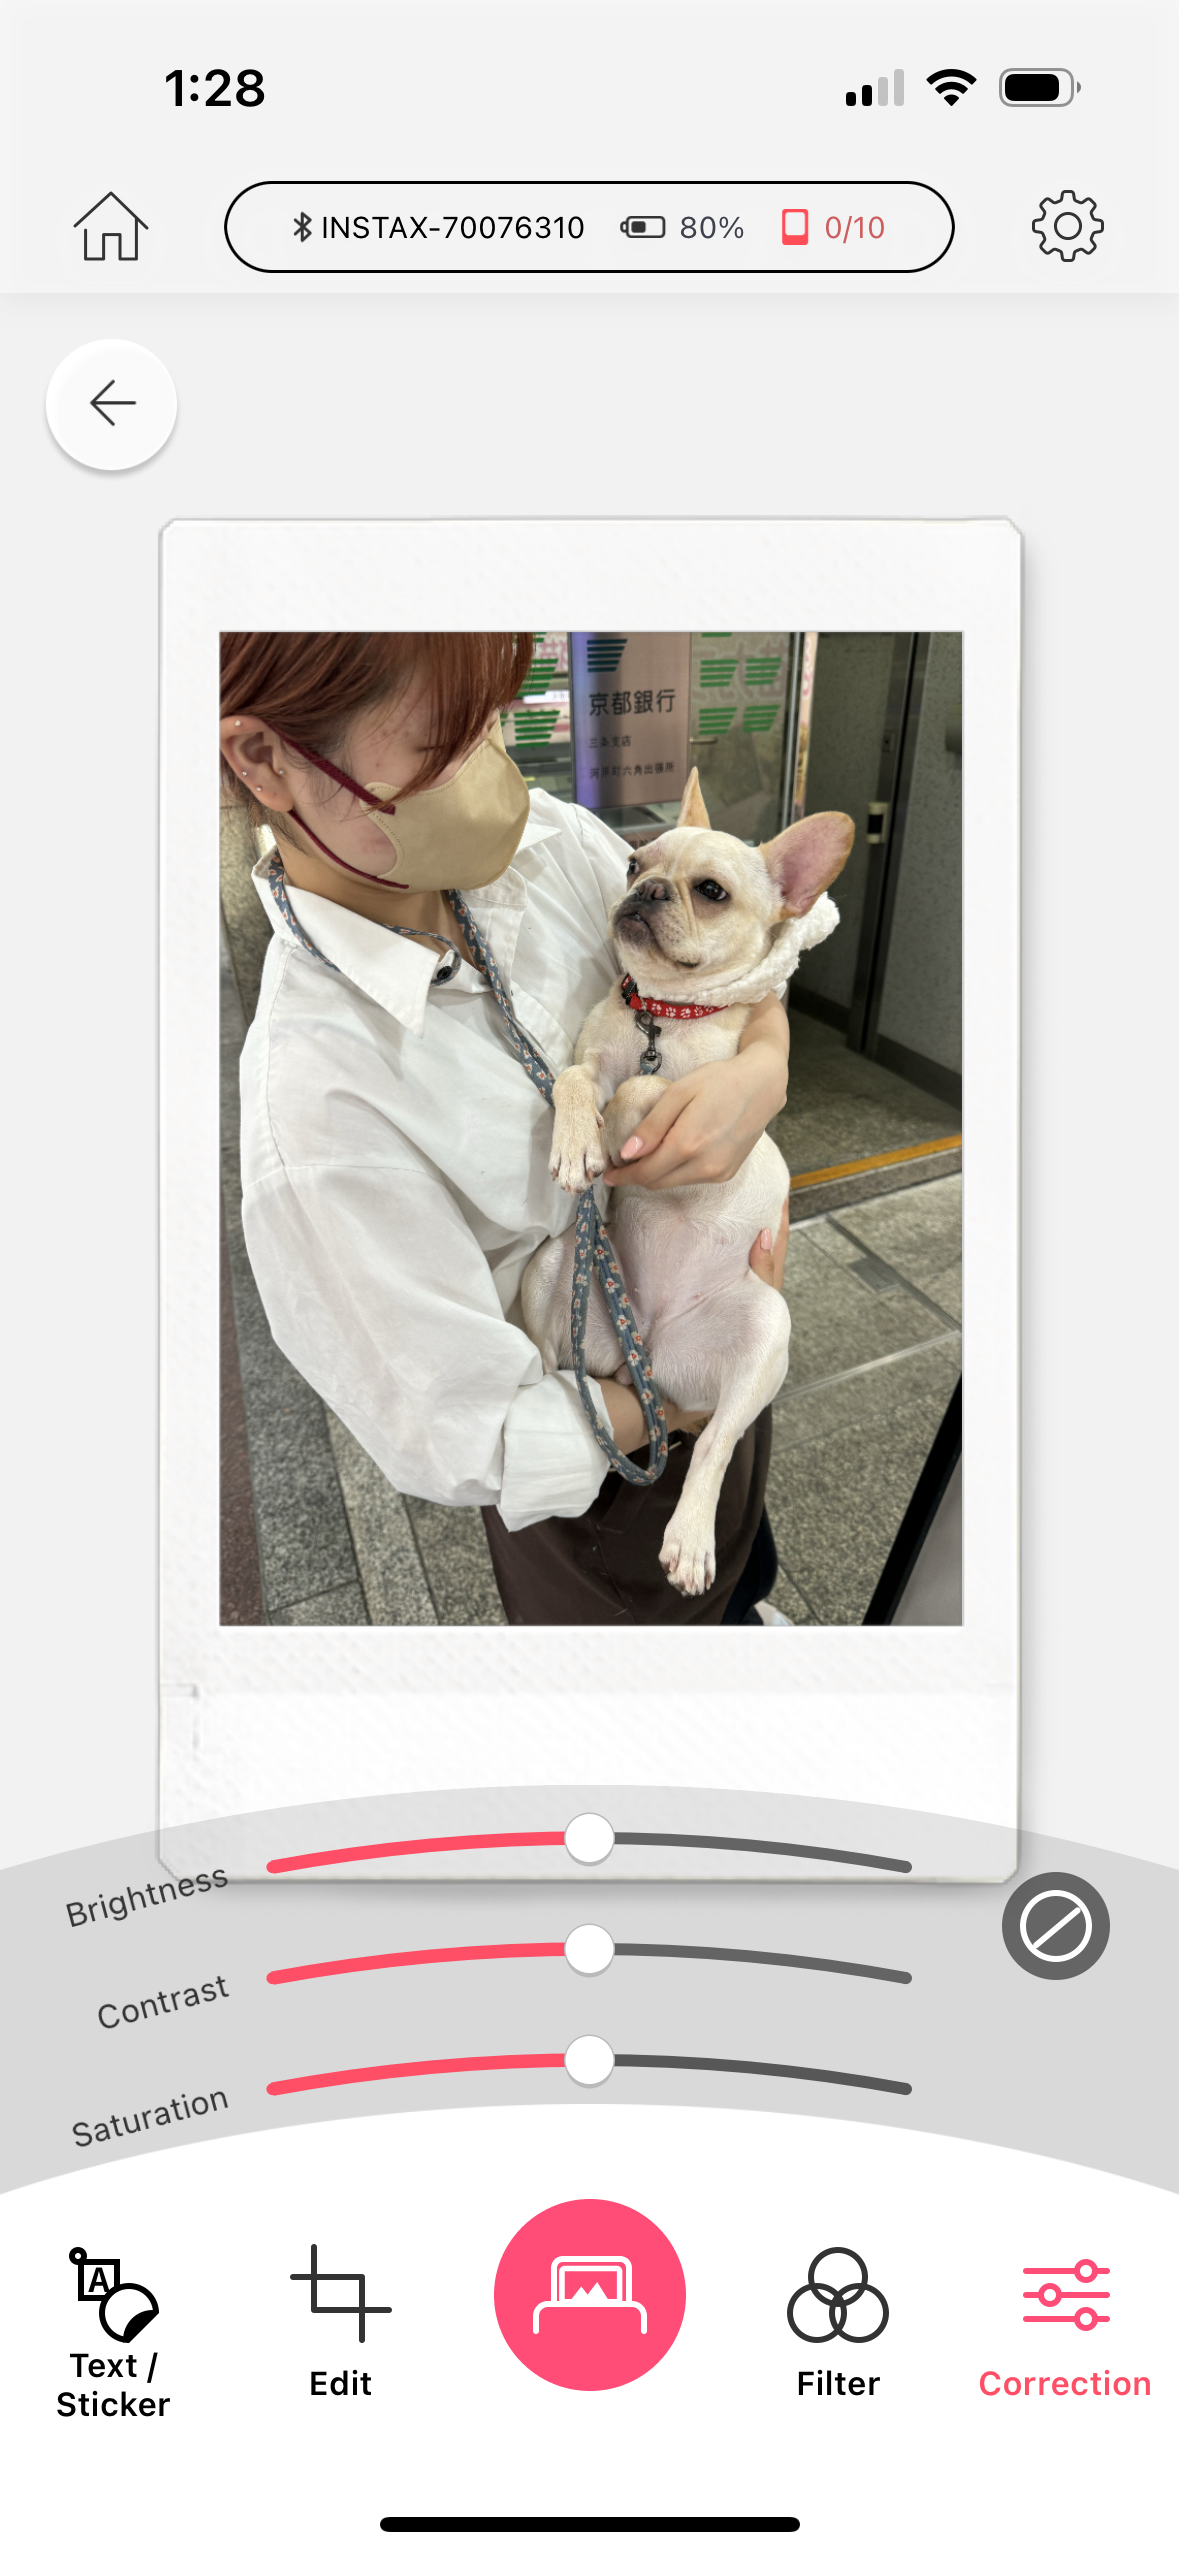
Images can be printed directly from the photo gallery of the mobile device (with Fujifilm’s default settings), but the output will be better if you first bring the images in the Mini Link app, play with the contrast slider (I always boost it a notch), and print them from there.
The Mini Link app. For me “Simple Print” will do.
In my experience, the Mini Link transposes the colors and the exposure of the original picture accurately, and its prints are more defined and massively nicer than what you would get if you took a picture with a Fujifilm Instax camera. The Instax film is a much better performer than the very basic Fujifilm cameras designed to consume it, and the printer takes advantage of its potential. When you start from a good picture taken by a smartphone (or a dedicated camera), you’ll be happy with the prints.
The mini Link app and its basic settings.
I understand why people use instant cameras. There is a “fun”, almost magic component to it. But instant cameras are bulky, the quality of the prints generally poor, and if by pure luck you get an interesting picture, it will be unique, and the only way to share it will be to take a photo of it with a smartphone, and print the copies. From a totally dispassionate point of view, it’s a rather inefficient and wasteful way to use a pack of film.
No such issue with the Instax printer. You lose some of the magic – it’s not as “immediate” as pushing the shutter button on a Instax camera and the results are not as unpredictable – but you only print your good images after you’ve had an opportunity to crop them and tweak the exposure parameters on your smartphone. Your “keeper” rate will be very close to 100%, and you will print as many copies as your budget (and your patience) allow.
The image is being printed. It only takes a few seconds.
There is not much else to say about the Mini Link. It simply works. Prints are small and but good enough for the intended use – reminiscing of good times spent with loved ones, and instantly sharing a token of appreciation.
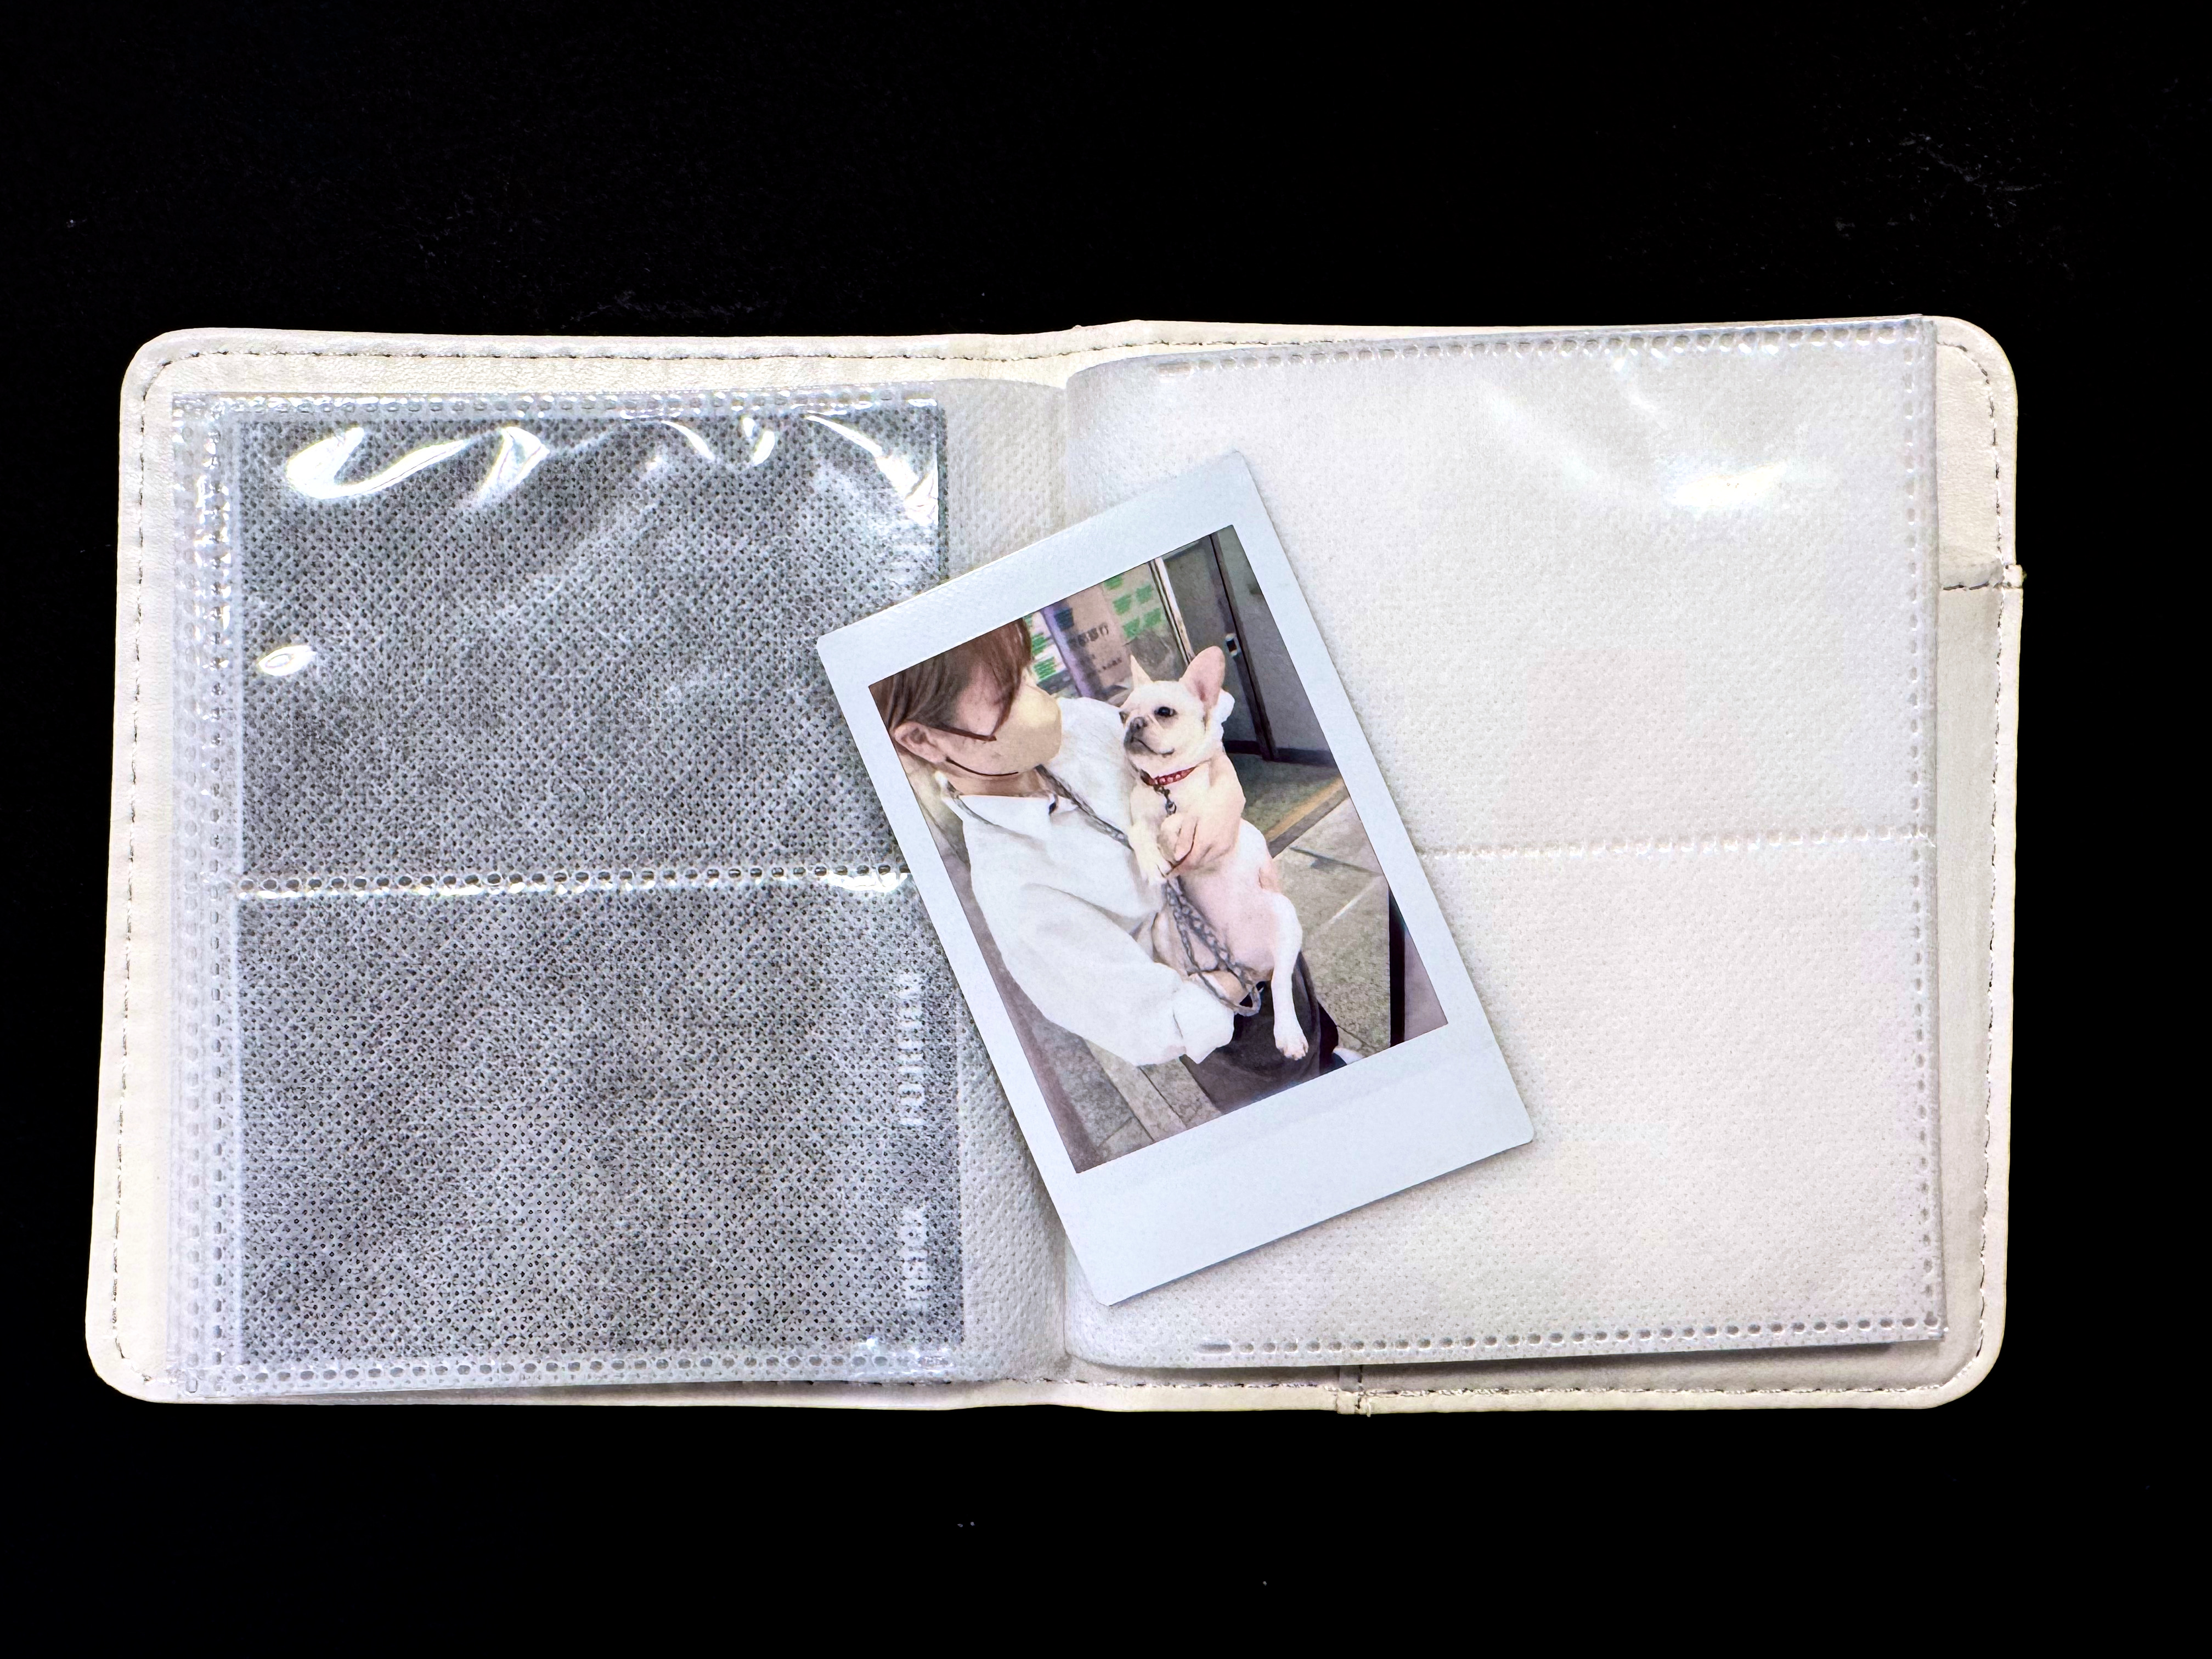
The mini print and one of the mini photo albums proposed by Fujifilm. This one is not particularly nice but came for free with an Instax camera.
The Mini Link 3 comes in three different colors (mine is “matcha green”) and sells for approximately $100. Prints cost a bit less than $1.00 each. I’m leaving mine permanently in my photo bag, and share the love whenever I can.
Hybrid Instax cameras: In addition to conventional “analog” Instax cameras and pocketable printers, Fujifilm also has a few hybrid Instax cameras in its lineup (Instax LiPlay, Instax Evo). Hybrids can be described as Instax printers, with a tiny 5 Megapixel sensor and a lens in the front, and a small color display at the back, packaged as a compact integrated device. The camera captures a digital image, that the photographer can evaluate on the color display, and decide to print, or not to print. Because the images are captured as digital files and saved on a micro-SD card, they can be edited, printed once or multiple times (in camera), and uploaded to a smartphone.
Zero Ink paper – if you over simplify, it’s not dissimilar to the thermal printer technology used to print receipts at the cash register or at the gas pump. But nicer, and more stable over time. The photo paper contains microscopic dye crystals that are initially colorless, and change color when they are heated. I had tested a Zero Ink (Zink) printer from Polaroid a long time ago. The prints aged well. Polaroid, Kodak and Canon are currently selling pockable printers integrating Zink technologies.
The “DP” in dpreview stands for “Digital Photography” of course, and the site was launched in 1998, at the beginning of the digital camera craze. And they’ve never reviewed a film camera. As far as I know. But over the years, they compiled two lists of recommended, “excellent and affordable” film cameras, the first one in 2017, with a follow up in June 2019.
A few of the cameras listed as “analog gems” by DPreview have been presented in this site over the years (the Nikons FE2, N90, the Olympus OM-1 and the Canon T90). Very often, my preference goes to other models of the same family (I prefer the Olympus OM-2 to the OM-1 because its battery is much easier to find, the Canon AT-1 to the AE-1 because I’m not a fan of shutter speed priority automatism, and the EOS-620 to the EOS-5 for its simplicity).
Nikon FM
I’ve never been a fan of compact cameras in the days of film (poor viewfinder, not enough controls for the photographer). Their only advantages were their small size and their ease of use, but a film SLR with a pancake lens was not much larger and delivered much better images. And today, why would you spend money on film and processing to use a compact camera which will give you less control over your images than a good smartphone?
My absolute favorite? The ones I would bring on the proverbial desert island (assuming the desert island has no electricity, no Internet access but a huge stack of film cartridges waiting for me)?
Canon T90 – the ergonomics of an EOS camera with an FD lens mount
a compact, mechanical, semi-auto SLR – not the Olympus OM-1, not the Pentax MX, but the rugged and supremely reliable Nikon FM. The FM2 is probably an even better camera, but it’s also more expensive.
the most elaborate pre-autofocus SLR, the Canon T90, for the looks, the ergonomics, the crazy exposure system, with no concern for its questionable reliability or its mass, because I would always have the Nikon FM as a backup.
And of course, when I would be back from the desert island, I would reconnect with my cherished Nikon FE2…
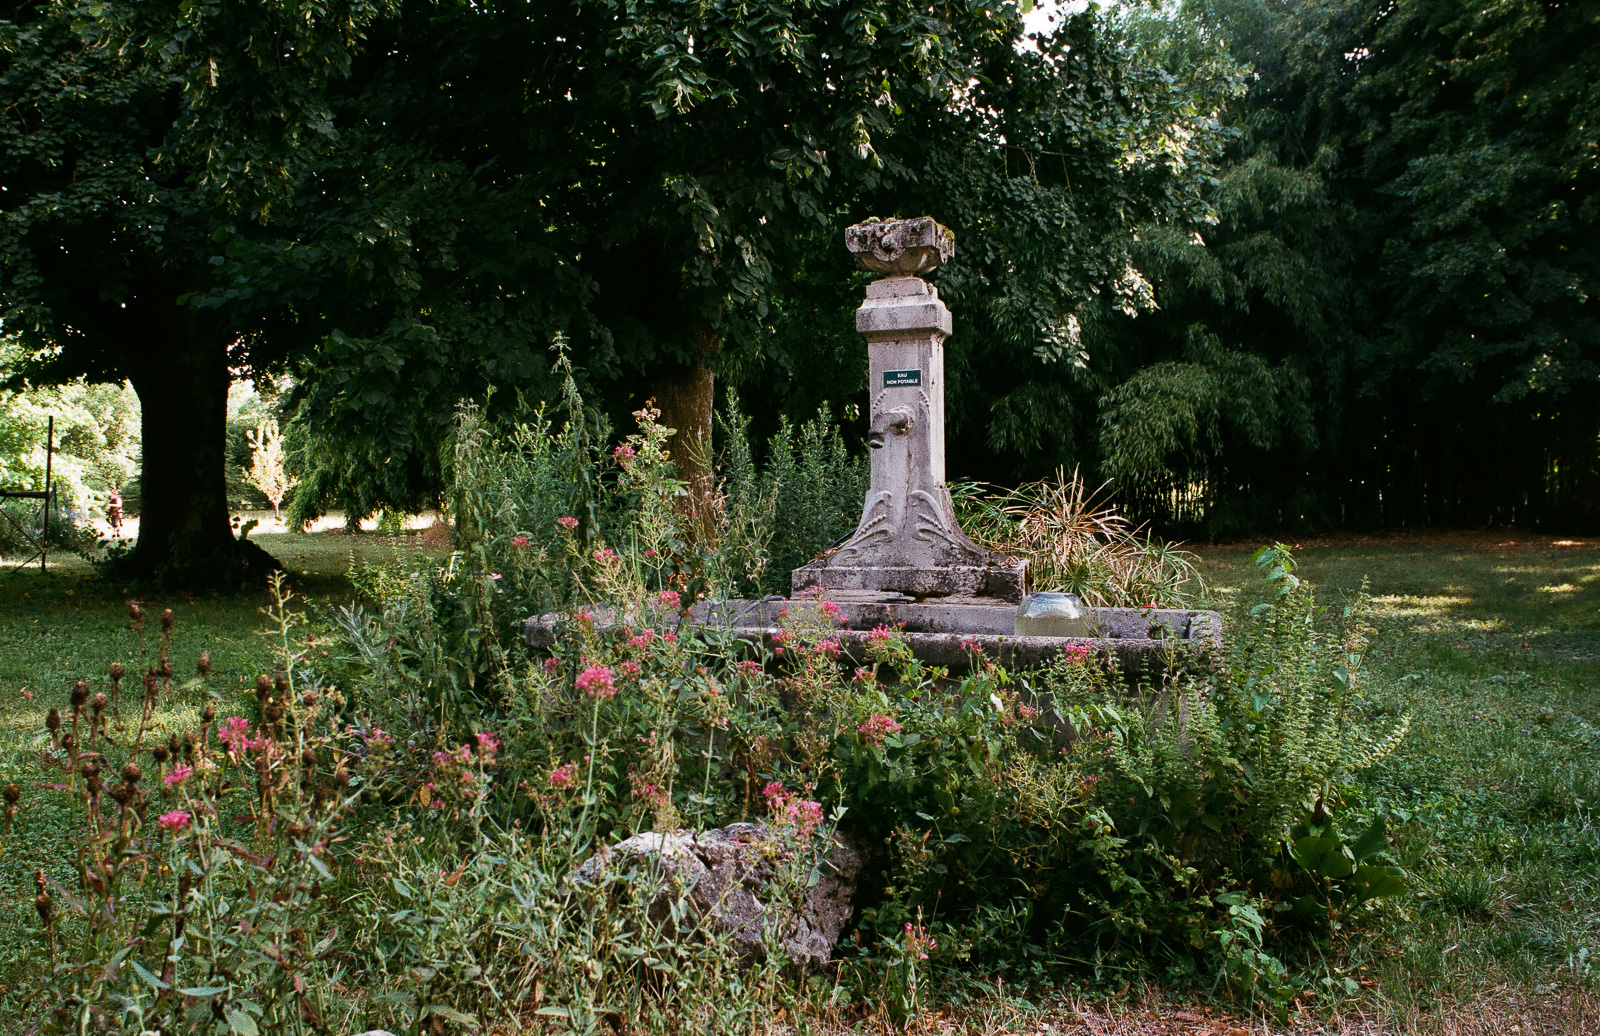
“La Maison aux Bambous” – Bed and Breakfast – Vinay (France). Canon T90 – Canon FD 24mm – Fujicolor 400.
Thom Hogan has been on the Web forever, it seems. He’s a pro photographer, has a background in marketing and product planning, and he also teaches, I believe. He’s been publishing very detailed user guides for Nikon cameras for ages, and his collection of Web sites (www.bythom.com; www.dslrbodies.com, www.sansmirror.com) is always an interesting read, not only for users of Nikon equipment, but also for anybody who wants to understand the market forces shaping the photo equipment industry.
He has much more experience of Nikon cameras than I do, and my tastes have been – at least in part – formed by what I read in his books and Web pages over the years. So I won’t say “I’m right, he’s wrong”. Let’s be honest: if there’s such a thing as being right in photography, the odds that he is are much higher than mine. But sometimes I simply beg to differ.
Film Era:
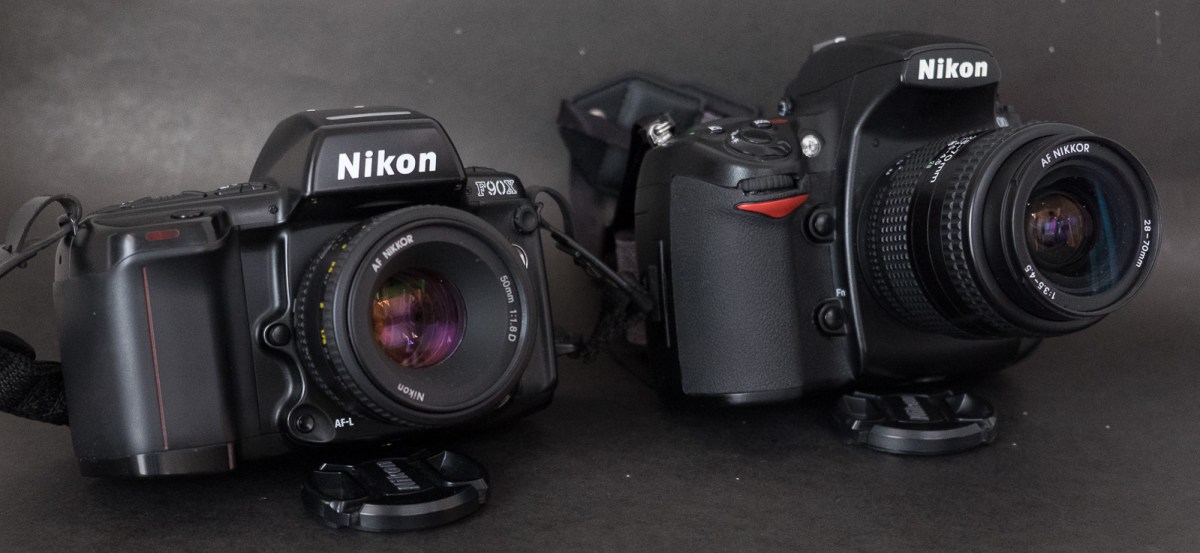
Thom’s list includes some cameras that grace my personal collection, even if they’re not my preferred in Nikon’s range. The F90/N90 is extremely efficient, but a bit too automatic for me, and the F4 is really too heavy to be used anywhere but in a studio. I never used the F100 or a F5 (too modern for me – I tend to like my film cameras with a conventional user interface – you know, knobs instead of LCDs and control wheels).
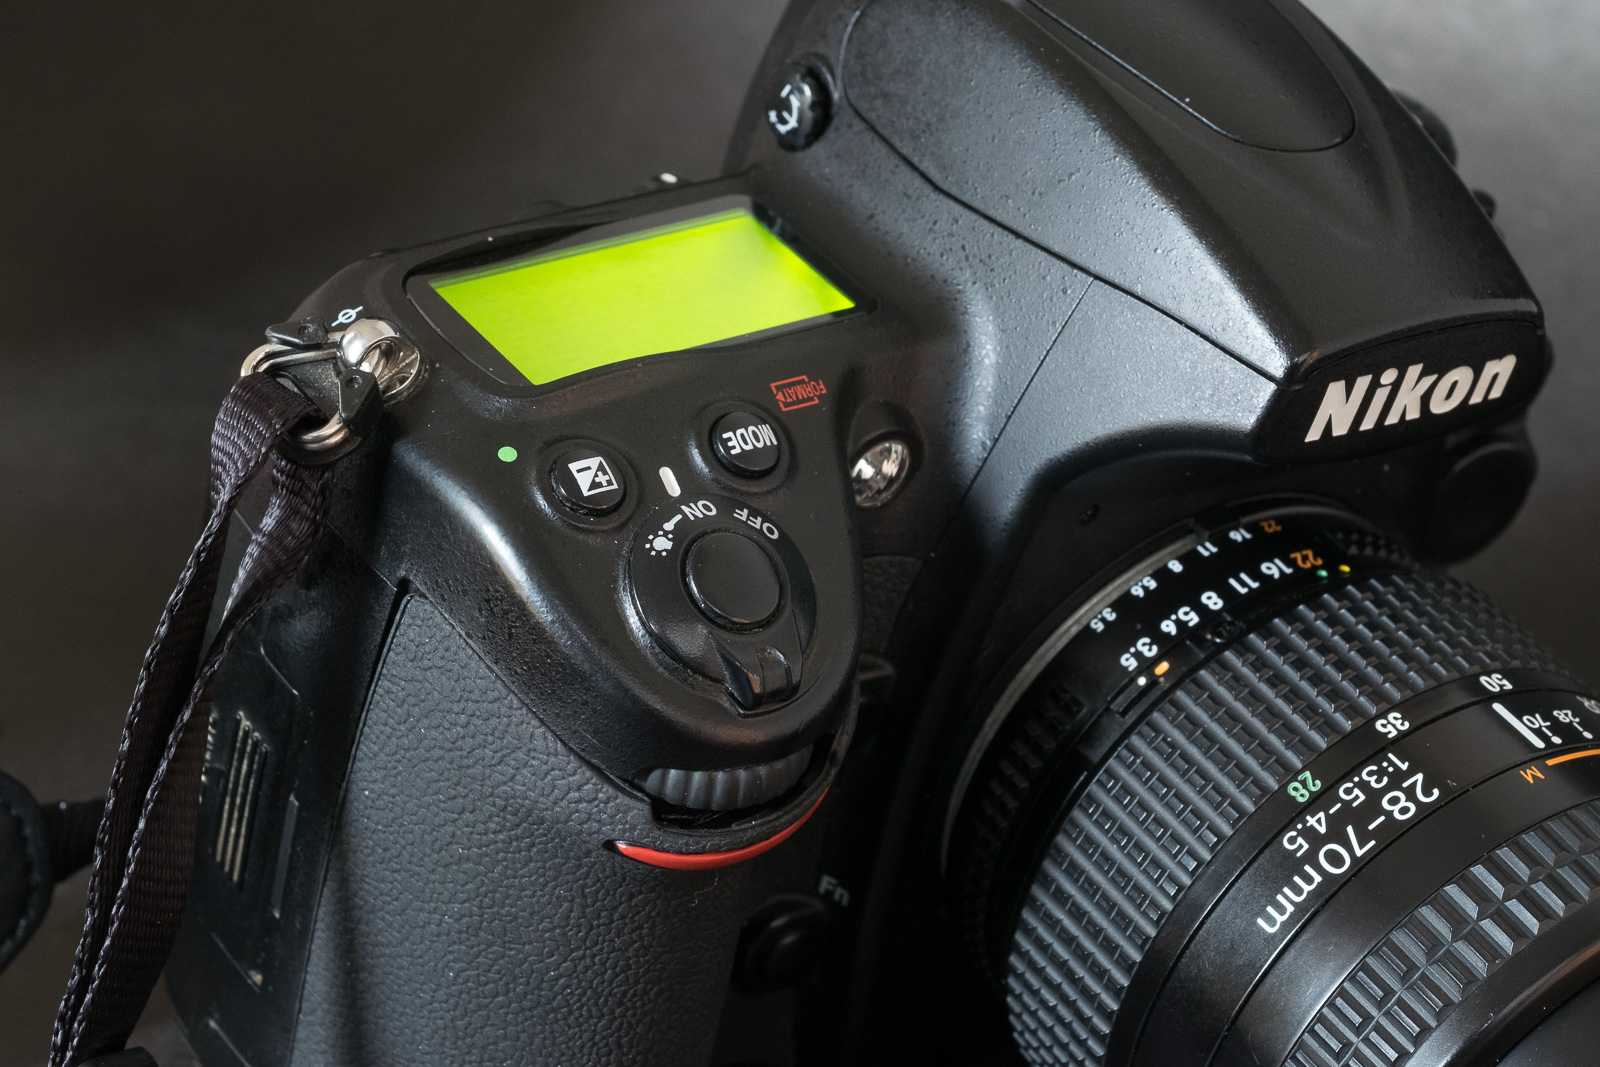
A single control wheel, and the aperture value controlled by the aperture ring on the lens itself: the two major differences between the N90 and a modern Nikon body.
Nikon F4 with the MB-20 grip. The MB-20 grip is smaller than the MB-21, and was standard equipment in most of the world. In the US, the MD-21 was standard.
Which leaves us with the last entry of his list, the FM3A.
The FM3A is an evolution of the FM2/FE2 cameras, with a dual shutter control mechanism (electronic and mechanic) – which offers the best of what the FM2 (mechanical) and the FE2 (electronic with On the Film TTL flash control) can offer. I don’t own a FM3A, but two of its direct ancestors are at the top of my list: I use my old FM relatively often – because it’s a rugged camera and I know it’s going to work no matter what. The FE2 is a peach (it oozes quality, and it’s so pleasant to use) – one of the very best film cameras ever.
Nikon FE2
Digital Era
You can collect “classic” cameras for their beauty and for their importance in the history of the industry or a brand, but to me, a camera I can’t use to take pictures doesn’t qualify as a classic – it’s at best a “curiosity”.
In my opinion, early digital cameras are not really usable anymore, primarily because of their very limited dynamic range and very low resolution. If I brought one to cover a photo opportunity, I would most probably end the day disappointed and frustrated for having missed what could have been a great shot because of the technical limitations of the camera. Or I would have put it back in the bag, and used an iPhone instead. That’s why there is no early digital camera in my collection.
I recognize the importance of cameras like the D1h or the D100 in the evolution towards modern digital photography, but I will not add them to my collection. On the other hand, I believe that cameras like the D3 and D3X are still perfectly usable, but because they’re so big and heavy, I would ignore them, and buy their little brother, the D700 instead. Admittedly it’s still a big and heavy camera, but its performance is still exceptional, and with it I can use all the Nikon (and Nikon-compatible) lenses I own.
Because I’ve been using Nikon cameras for so long, I find the D700 very intuitive and rewarding to use, and even today, the quality of the pictures that the 12 Mpixel sensor produces is incredible (in particular in low light or high contrast situations).
Nikon D700 – a classic
It may be too early to add a D850 to a collection of classics, but it will most probably be the last enthusiast / pro DSLR from Nikon – the future is clearly mirrorless. They may launch a D6 for the Olympic Games next year (who knows) but I doubt they will keep on developing the D800 series beyond the D850.
Atlanta – World of Coke – Nikon D700
My always available and patient models – the performance of the camera in low light and with multiple light sources of different color temperatures is simply incredible. Nikon D700 – Nikkor 28-70 f/3.5-4.5 AF – 3200 ISO.
Something strange happened to the Canon AT-1 recently – it has become sought after.
When the AE-1 was establishing sales record for reflex cameras, its little brother, the AT-1, was struggling on the marketplace (Canon did not even bother selling it in Japan) and it remained until recently an under-appreciated camera.
The AE-1 was the undisputed star of the new Canon A line-up, the real successor of the FTb. The AT-1 was a bit of an afterthought, developed for cost conscious photographers who did not trust auto-exposure systems. With the same shell, the same electromagnetic shutter command and the same accessories as the AE-1, the AT-1 had some of the attributes of a modern camera, but its CdS meter (as opposed to the Silicon cell of its siblings) and its semi- auto exposure system with matching needle inherited from the FTb anchored it in the past. Contrarily to the FTb (and to almost any other semi-automatic camera), it could not operate at all without batteries – because of its electromagnetic shutter command.
The large shutter speed selector and the shutter release are very smooth.
The electromagnetic shutter has its advantages (soft shutter release, smooth shutter speed knob, automatic selection of flash sync speed when a Canon Speedlite is mounted on the camera), but the ability to operate without batteries has always been a huge selling point with users of semi-automatic cameras. The AT-1 was not meeting this basic requirement, and it could explain why it remained under appreciated for so long.
the timer of the shutter release is electronic – much more reliable than the fragile mechanical timer of conventional semi-auto cameras.
Before buying a good copy recently on eBay, I never had used one. When I bought my first semi-auto SLR a long time ago, I only had eyes for the Nikon FM and for the Pentax MX – for the record that’s the Pentax I ended up buying, the Nikon was far too expensive. At that time, Canon’s marketing pressure was completely focused on the AE-1 and as far as I can remember, I did not even look at the AT-1. In any case, in comparison to the Nikon and the Pentax (with their LEDs and GASP metering cells), the AT-1 would have looked too primitive to me.
Weight, Size and ergonomics The AT-1 shares its general dimensions and layout with the AE-1. The construction is similar (with some components like the prism housing using a mixed polycarbonate and copper plating construction). It’s not the most compact camera of its generation (the honor goes to the Olympus OM-1) but it’s not significantly larger or heavier – all the cameras of this generation (1975-1980) are more or less the same size. The AT-1 is one of the simplest conventional cameras you can find – the on/off switch on the left, the large and smooth shutter speed dial on the right, a large shutter release button – that’s all.
Viewfinder The viewfinder is relatively large with enough eye relief for photographers wearing glasses (larger than on a Nikon FM/FE, for instance). And because the viewfinder does not provide any information about the shutter speed or the aperture at the periphery of the frame, the eye of the photographer can remain focused on the center of the frame, which makes the viewfinder seem larger than it is. The focusing screen is not as clear as what you find on a comparable Nikon camera, but it’s fine enough. The split-image telemeter and the micro-prisms are present, and focusing is easy. The two needles of the metering system are located at the bottom right angle of the viewfinder, and are easy to read as well.
Very simple viewfinder – and a perfect implementation of the old “matching needle” semi-auto metering.
Metering system Based on a CdS cell, it’s one generation behind the Silicon or GASP cells that Fujica, Nikon or Pentax were installing on their semi-auto cameras in the second half of the Seventies. CdS cells are supposed to be less sensitive in low light, and to suffer from a memory effect (they need 30 seconds to adjust when you move to a low light scene immediately after a bright scene). The matching needle mechanism is very easy to read (when there is enough light) but is not as easy to read as LEDs if the scene is dark.According to Canon, the camera uses some form of average/center weighted metering (I could not find any further explanation). In my experience, it does not seem to be as selective as the cell of a FTb (or of a T90 in the “partial selective” mode), and most of the images, including those with a large bright blue sky, are correctly exposed.
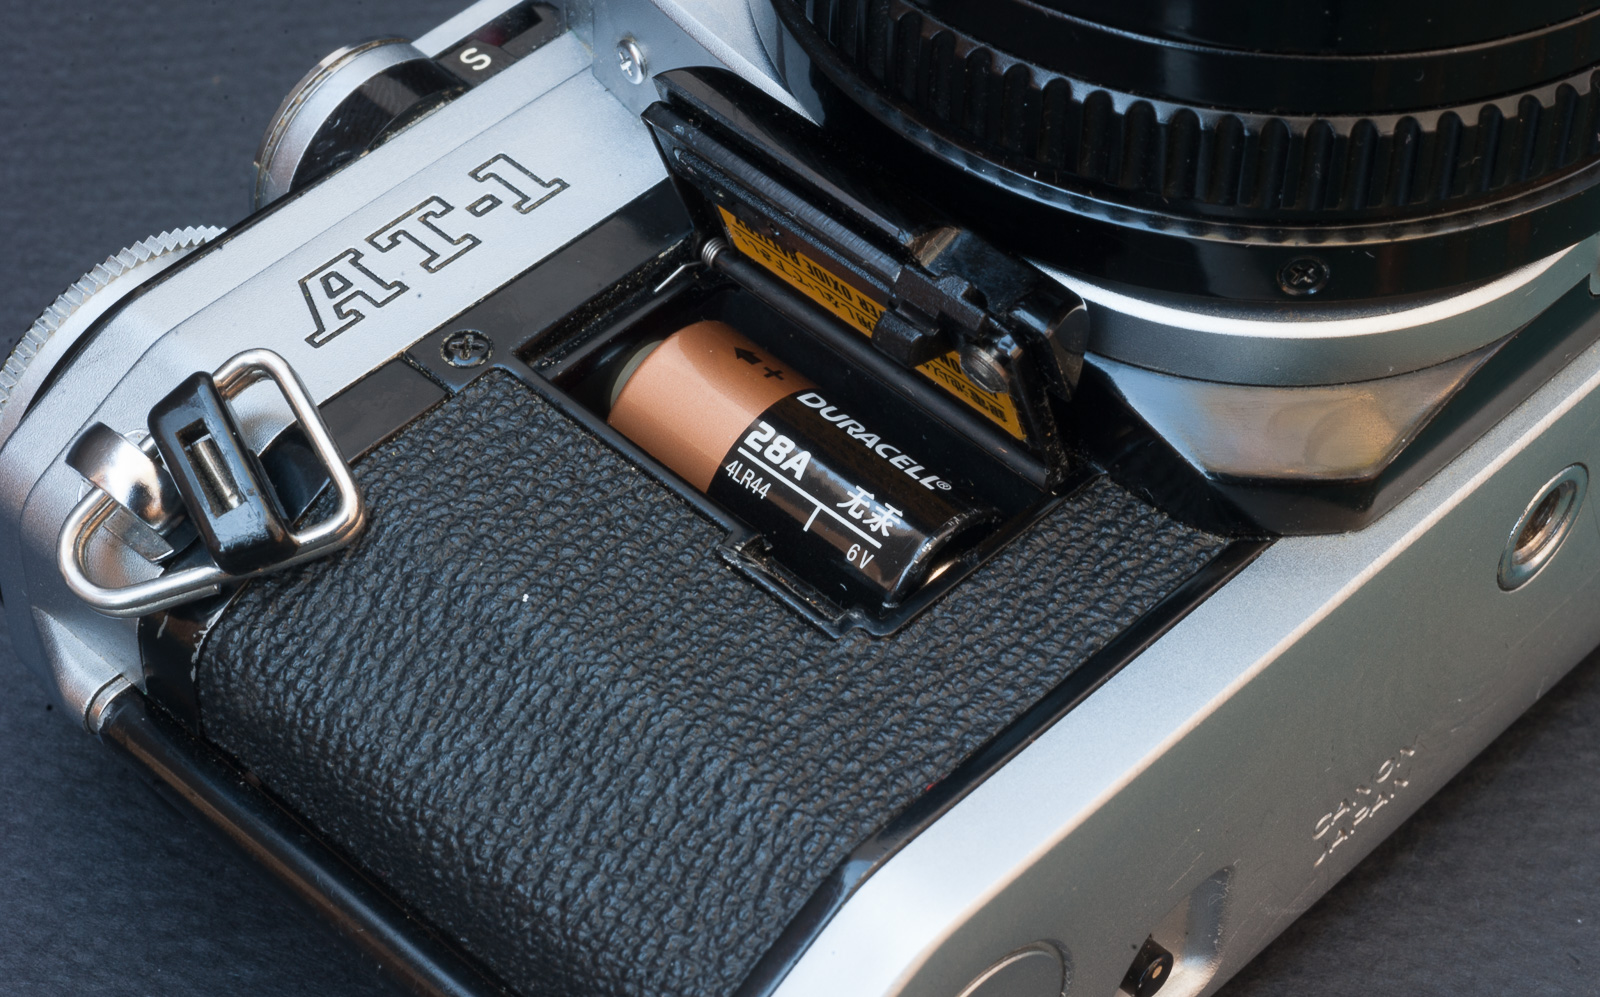
Battery Like all the cameras of the A series (AE-1, A-1, AL-1,…), the AT-1 relies on a relatively easy to find (and cheap) 6v battery. This battery is available in an alkaline and in a silver oxide version. As explained before, the camera can’t operate without a battery.
The AT-1 does not work without this battery.
Compatibility Canon manufactured tens of millions of FL and FD lenses, that the AT-1 will happily support. FD lenses used to be cheap until the advent of mirrorless cameras and the development of FD to Sony FE lens mount adapters made them popular again. Truly exceptional lenses (the L series) are now seriously expensive, but cheaper alternatives abound. Most of the Canon accessories (winder, flash) can be shared with the AE-1 or A-1 models.
Reliability Compared to the multi-auto-exposure and auto-focus cameras launched in the following decade, the AT-1 is a very simple machine. With the A series, Canon had introduced new design and manufacturing methods, with significantly more plastic and electronic components that before, but Canon’s engineers did a good job and the cameras of that family don’t have a bad reputation when it comes to reliability. Over time, cameras of the Canon A family can be affected with the squeaky shutter syndrome, but I’ve not found anything on the Internet showing that the AT-1 is affected (my copy is not). In any case, the AT-1 was not designed for war correspondents or National Geographic photographers taking tens of thousands of photos per year in impossible situations; it was an entry level camera designed for cost conscious amateurs, and it does not seem to have betrayed its targeted audience.
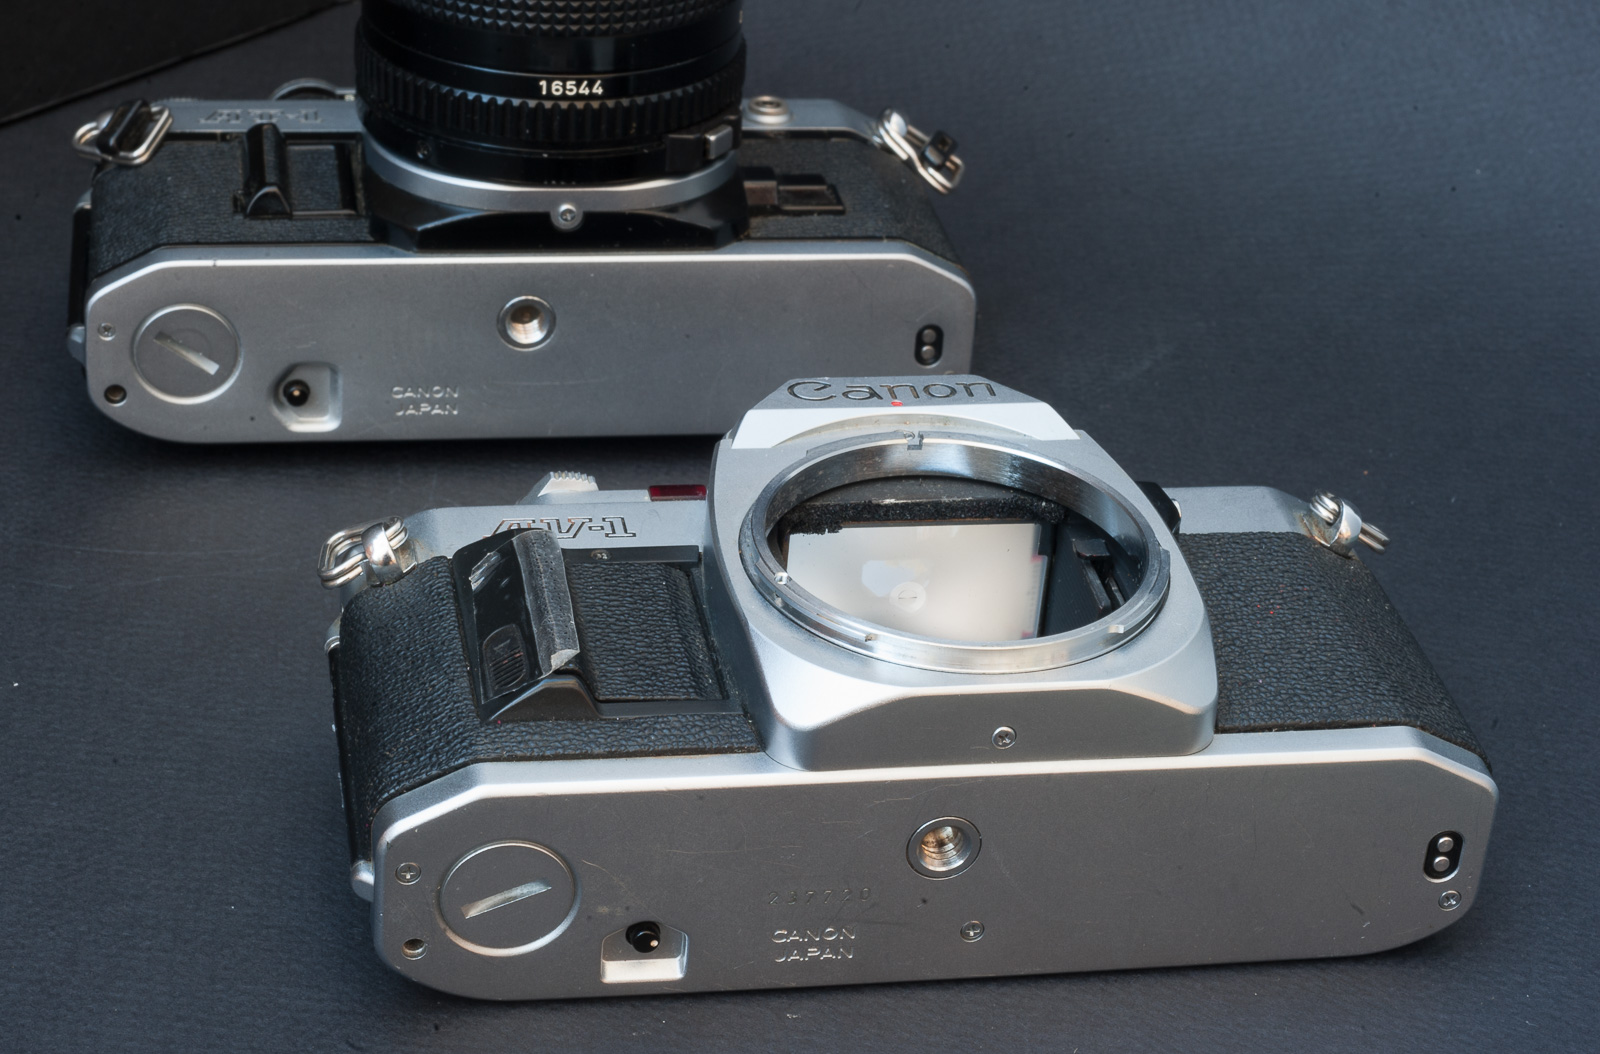
Canin’s platform strategy – in the foreground the Canon AV-1 (automatic, aperture preferred), the AT-1 (semi-auto) in the background. Both were positioned under the flagship AE-1 model and share their chassis with their bigger brother.
Scarcity and price With only 520,000 copies manufactured between Dec 1976 and 1985 (to be compared with 9,700,000 AE-1/AE-1 Program during the same period), the AT-1 was not very popular – for a Canon SLR, that is. Today, with the AE-1 and the AE-1 Program becoming seriously expensive (for mass market SLRs of the early eighties), the AT-1 suddenly becomes a sort of next best option for people eager to use Canon FD lenses, and not willing to spend more than $50.00.
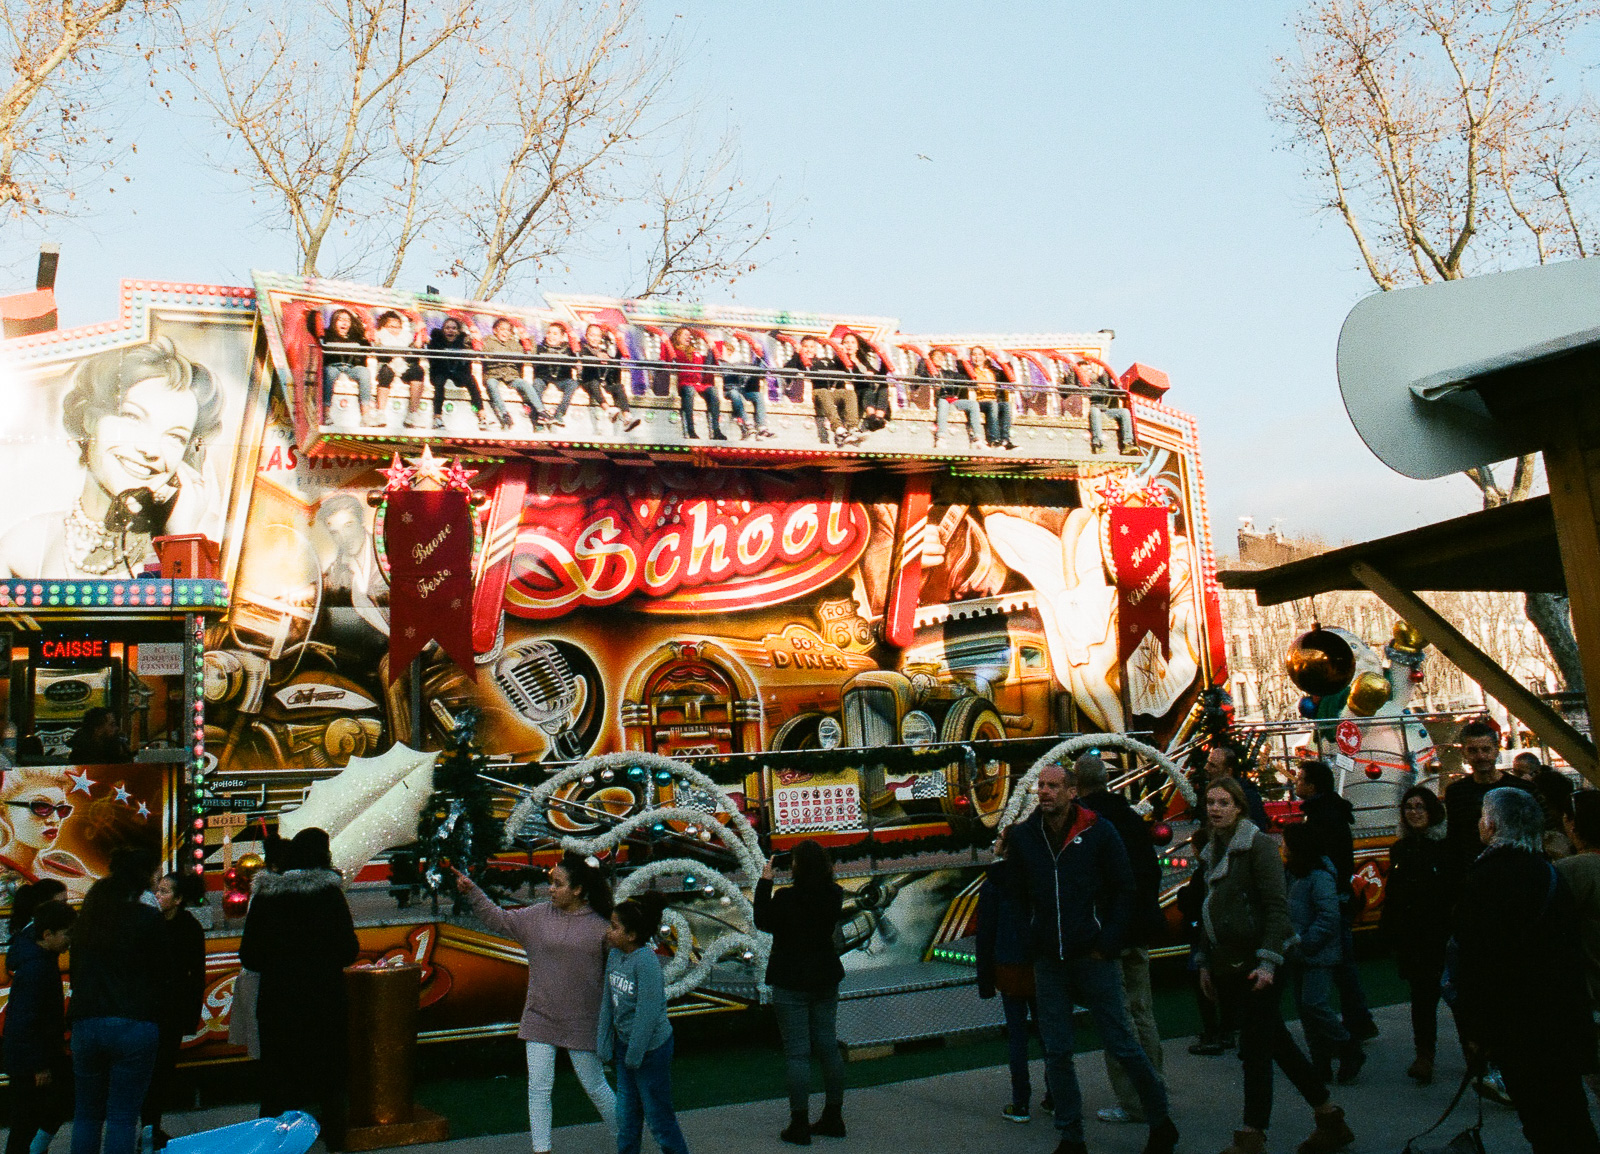
Narbonne (France) – Christmas market – Canon AT-1
Conclusion
Compared to its more expensive siblings of the Canon A family (AE-1, AE-1 Program, A-1), the AT-1 is a very simple camera – but to my surprise, it did not feel like an excessively spec’d down camera, and happened to be very pleasant to use.
The viewfinder is large and bright, and focusing is easy thanks to a combination of micro-prism and split image telemeter. The shutter speed dial is large and smooth, which makes it easy to adjust the exposure by changing the shutter speed (the shutter speed dial is generally very stiff on semi-auto/mechanical cameras, but the AT-1 benefits from its electromagnetic shutter command).
Nothing important is missing (it has an electronic timer for “selfies” and a depth of field preview button) and little details taken over from the AE-1 make the life of the photographer easier. Even though it retains the metering and the on/off switch of the FTb, it feels like a much more modern camera than its famous ancestor, its only limitation being the lack of any information about shutter speed or aperture in the viewfinder.
In the Canon family, there are more elaborate cameras for users of Canon FD lenses. Their performance may be better (more precise metering, faster shutter, larger viewfinder), but they’re also less flexible and – for some of them – not as reliable. Simpler and offering more control over the exposure than the AE-1, lighter and not as expensive as the A-1, more reliable than the T90, it’s a very good camera to go back to the basics.