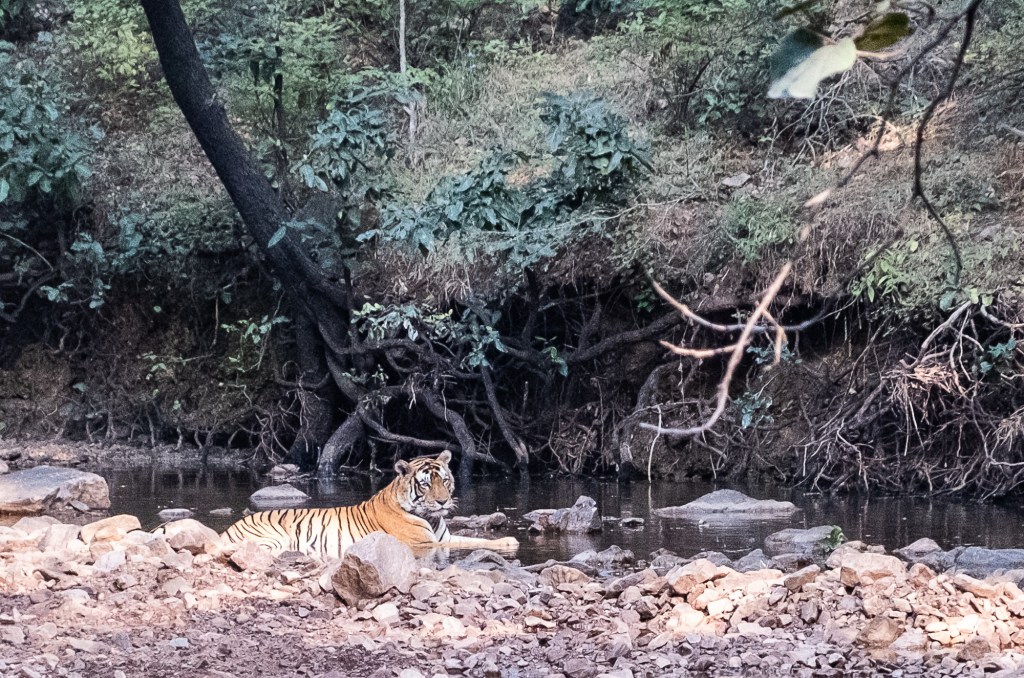
I just devoted two successive blog entries to the Pentax KP in the last two months. It’s my go-to camera at the moment, and I was wondering why I was neglecting my more modern mirrorless camera for an older dSLR.
I have a small set of very good Fujinon XF lenses and a mirrorless camera – a Fujifilm X-T4, that when properly set up, will deliver great pictures. The X-T4 is the camera I have with me on “important” occasions, when I know the result matters and I won’t have a second chance. And when traveling with the family because they won’t let me spend 20 minutes on a single picture, and I know the X-T4 will capture very good images, quickly.
But when there is no particular pressure to deliver, when I have the time to carefully compose the image and finesse the settings, I tend to use a single lens reflex camera. And I was wondering why.
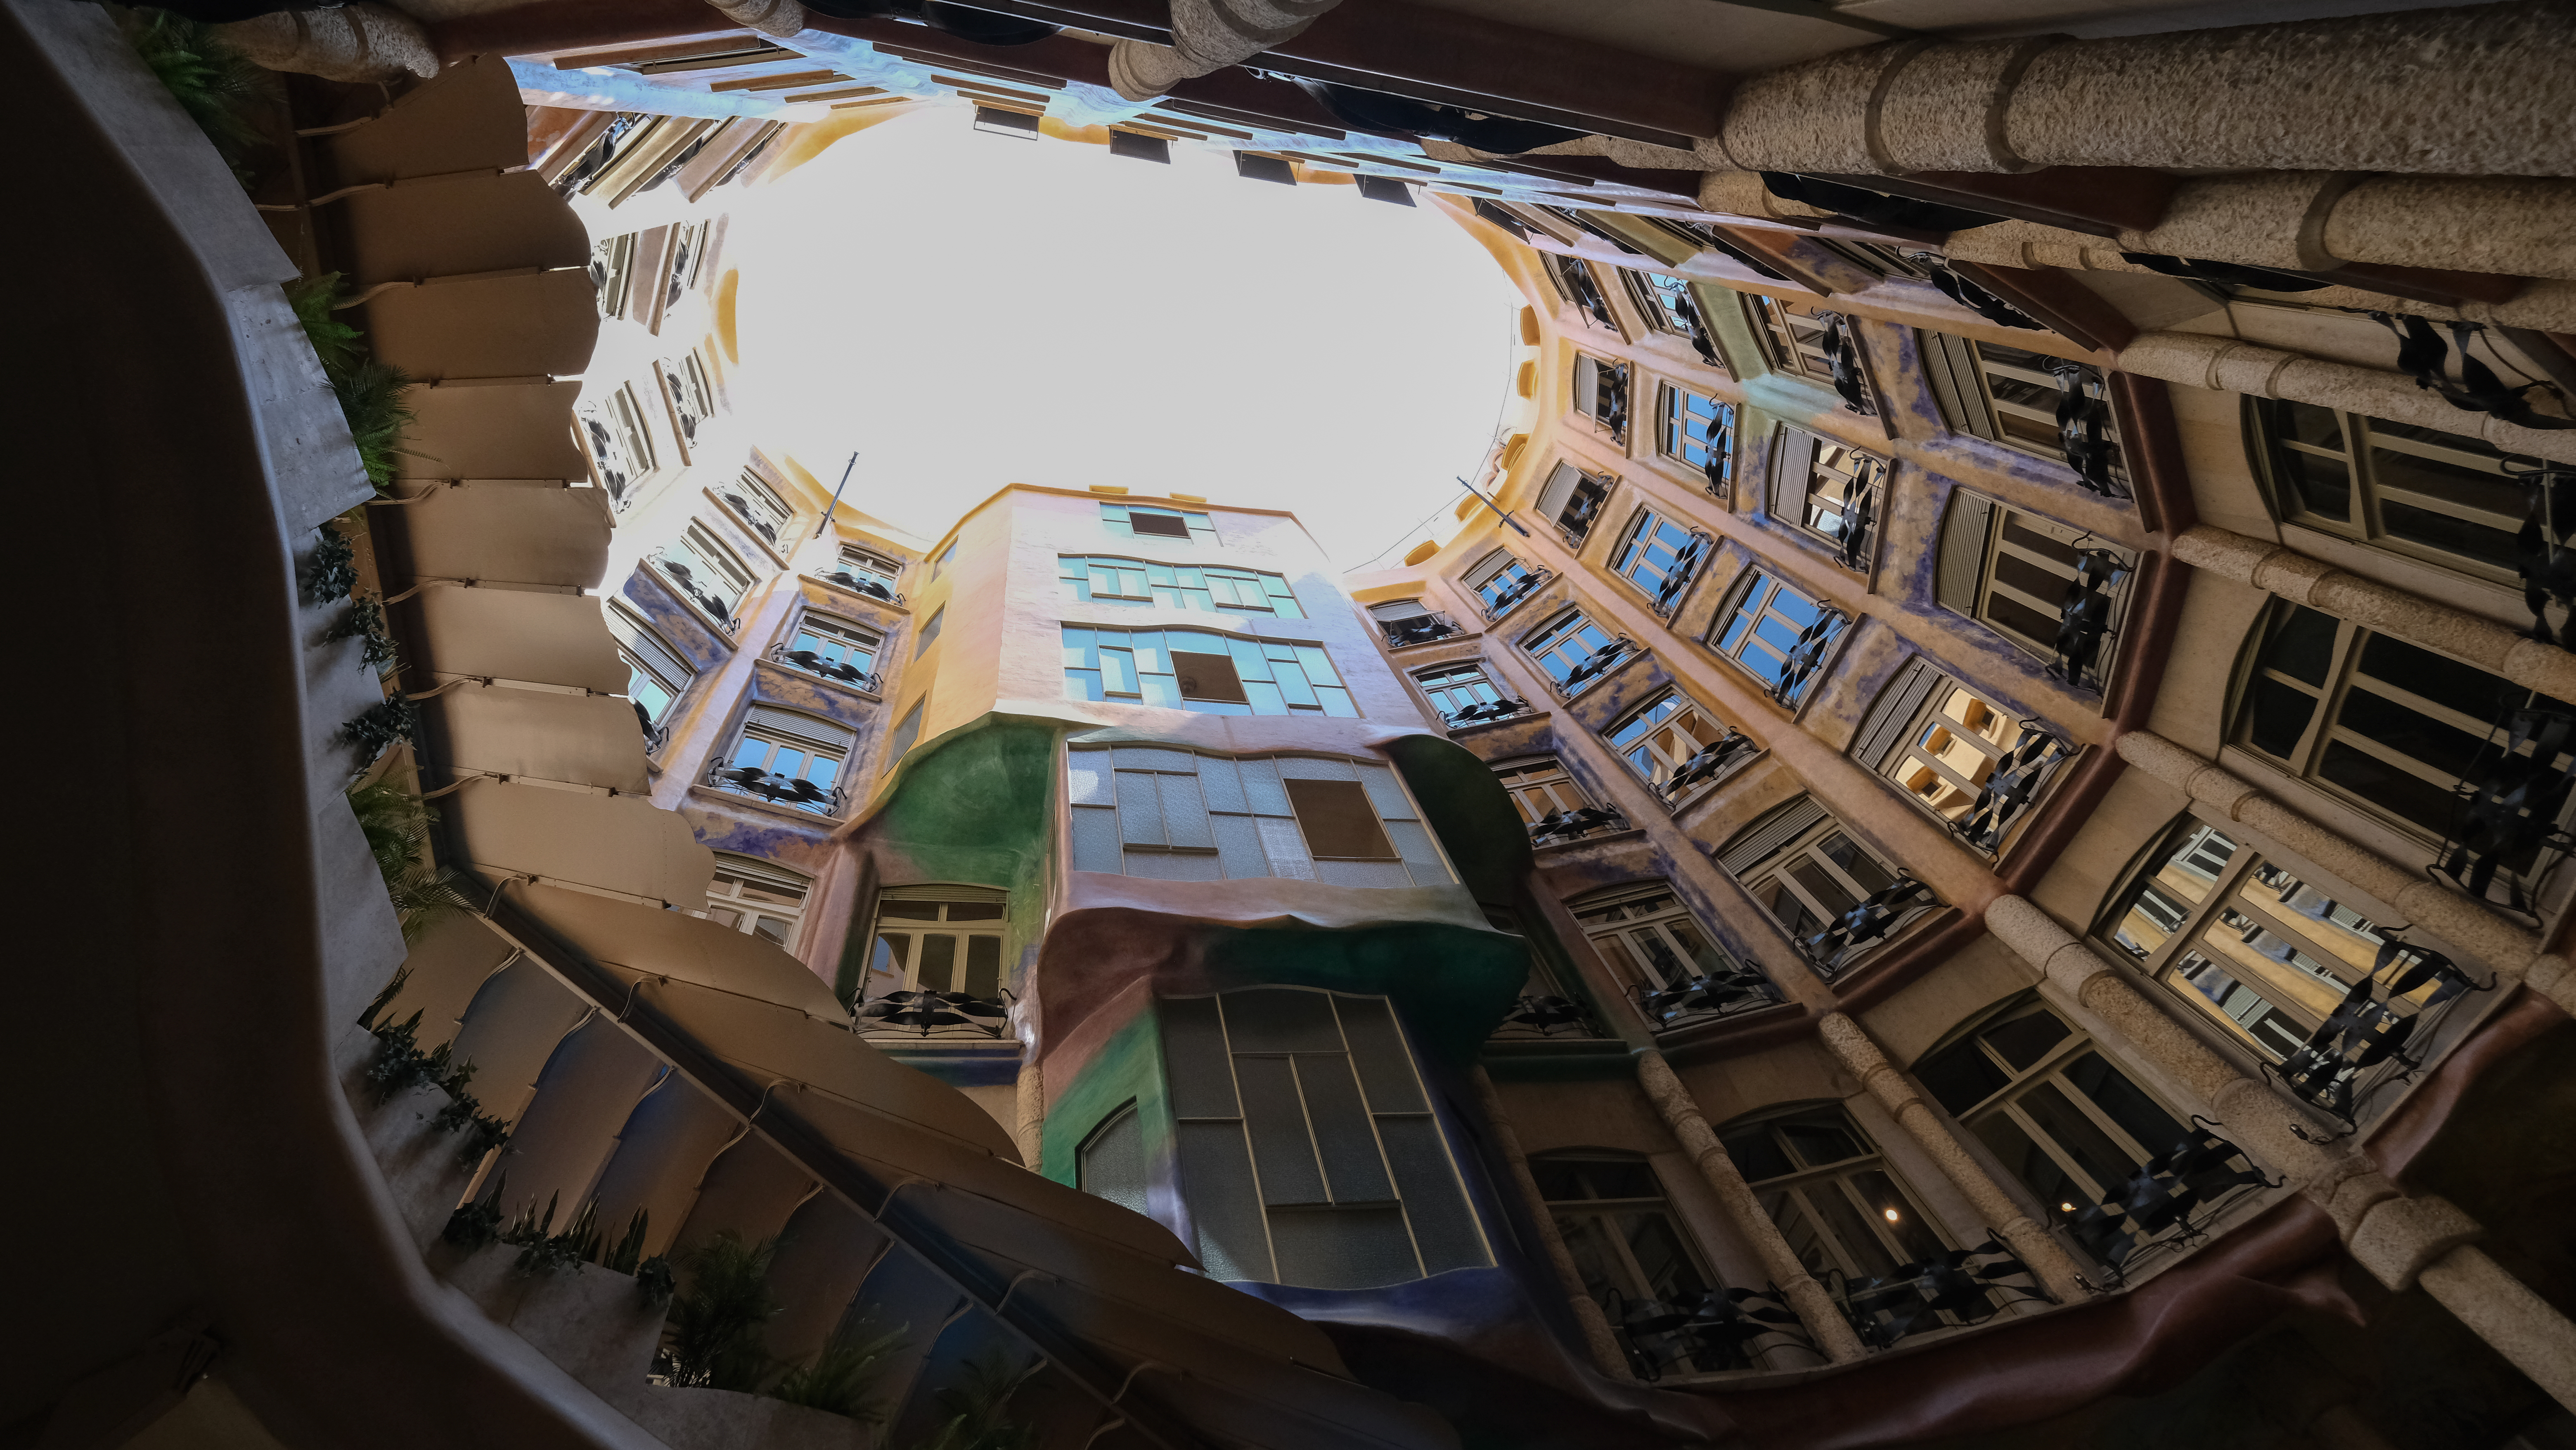
Casa Milo – Barcelona – Fujifilm X-T4 – Fujinon 10-24mm f/4 XF lens (electronic viewfinder)
I guess that when I’m watching the scene through an optical viewfinder, it is easier for me to mentally project the final photograph. Through an optical viewfinder, I’m looking at the scene itself, unmediated by processing, and my brain actively completes the image, interpreting light, contrast, depth, and intent. Because I am looking directly at the scene, my brain remains responsible for transforming reality into an image.
The focusing screen does not dictate the outcome; it leaves space for intention, anticipation, and interpretation. I imagine the photograph before it exists, and I will work with the settings of the camera and shoot again and again until I’m pretty confident that I have captured the image I originally had in mind.
An electronic viewfinder, on the other hand, replaces mental projection with visual confirmation. The LCD shows me what the camera thinks the picture should look like, already interpreted — shaped by the camera’s exposure simulation, tone curves, and color rendering. It shifts my role from author to reviewer. Instead of projecting the image mentally, I am reacting to the camera’s preview. The act of imagining gives way to the act of evaluating.
It’s probably a question of habit. Because I had been shooting with single lens reflex cameras for so long, I simply kept on following the same routine when I started using a mirrorless camera – bringing the viewfinder to my eye, and looking at the scene through the lens of the camera until I had a clear idea of the image I wanted to create.
Composing an image through an electronic viewfinder required another approach – I needed to learn how to abstract from the relative information overflow of the EVF, and let my brain define the image I wanted to capture without being limited by what the camera had decided to show me. I’ve had ten years to adjust (and I assume I did), but shooting through an optical viewfinder is still more natural to me.
There are still enough photographers who want to compose their images through an optical viewfinder to keep Leica in business, and for Fujifilm to make a killing with the X-100 and its hybrid viewfinder. And there may even be enough OVFs fans over the world for a trickle of Canon, Nikon and Pentax new dSLRs to keep on coming from the production lines. For the time being.
Corsica – view from MonteMaggiore – Fujifilm X-T4 – Fujifilm lens XC 15-45mm – I like contrasty images, and I often compose facing the sun, using its rays to shape the atmosphere and character of the image. It’s much easier to do through an optical viewfinder.
Out of curiosity, among the readers of this blog, am I the only one with a preference for the clear, unmediated view of the scene offered by optical viewfinders?
Providence Canyon State Park, Georgia – Nikon D750. (optical viewfinder)
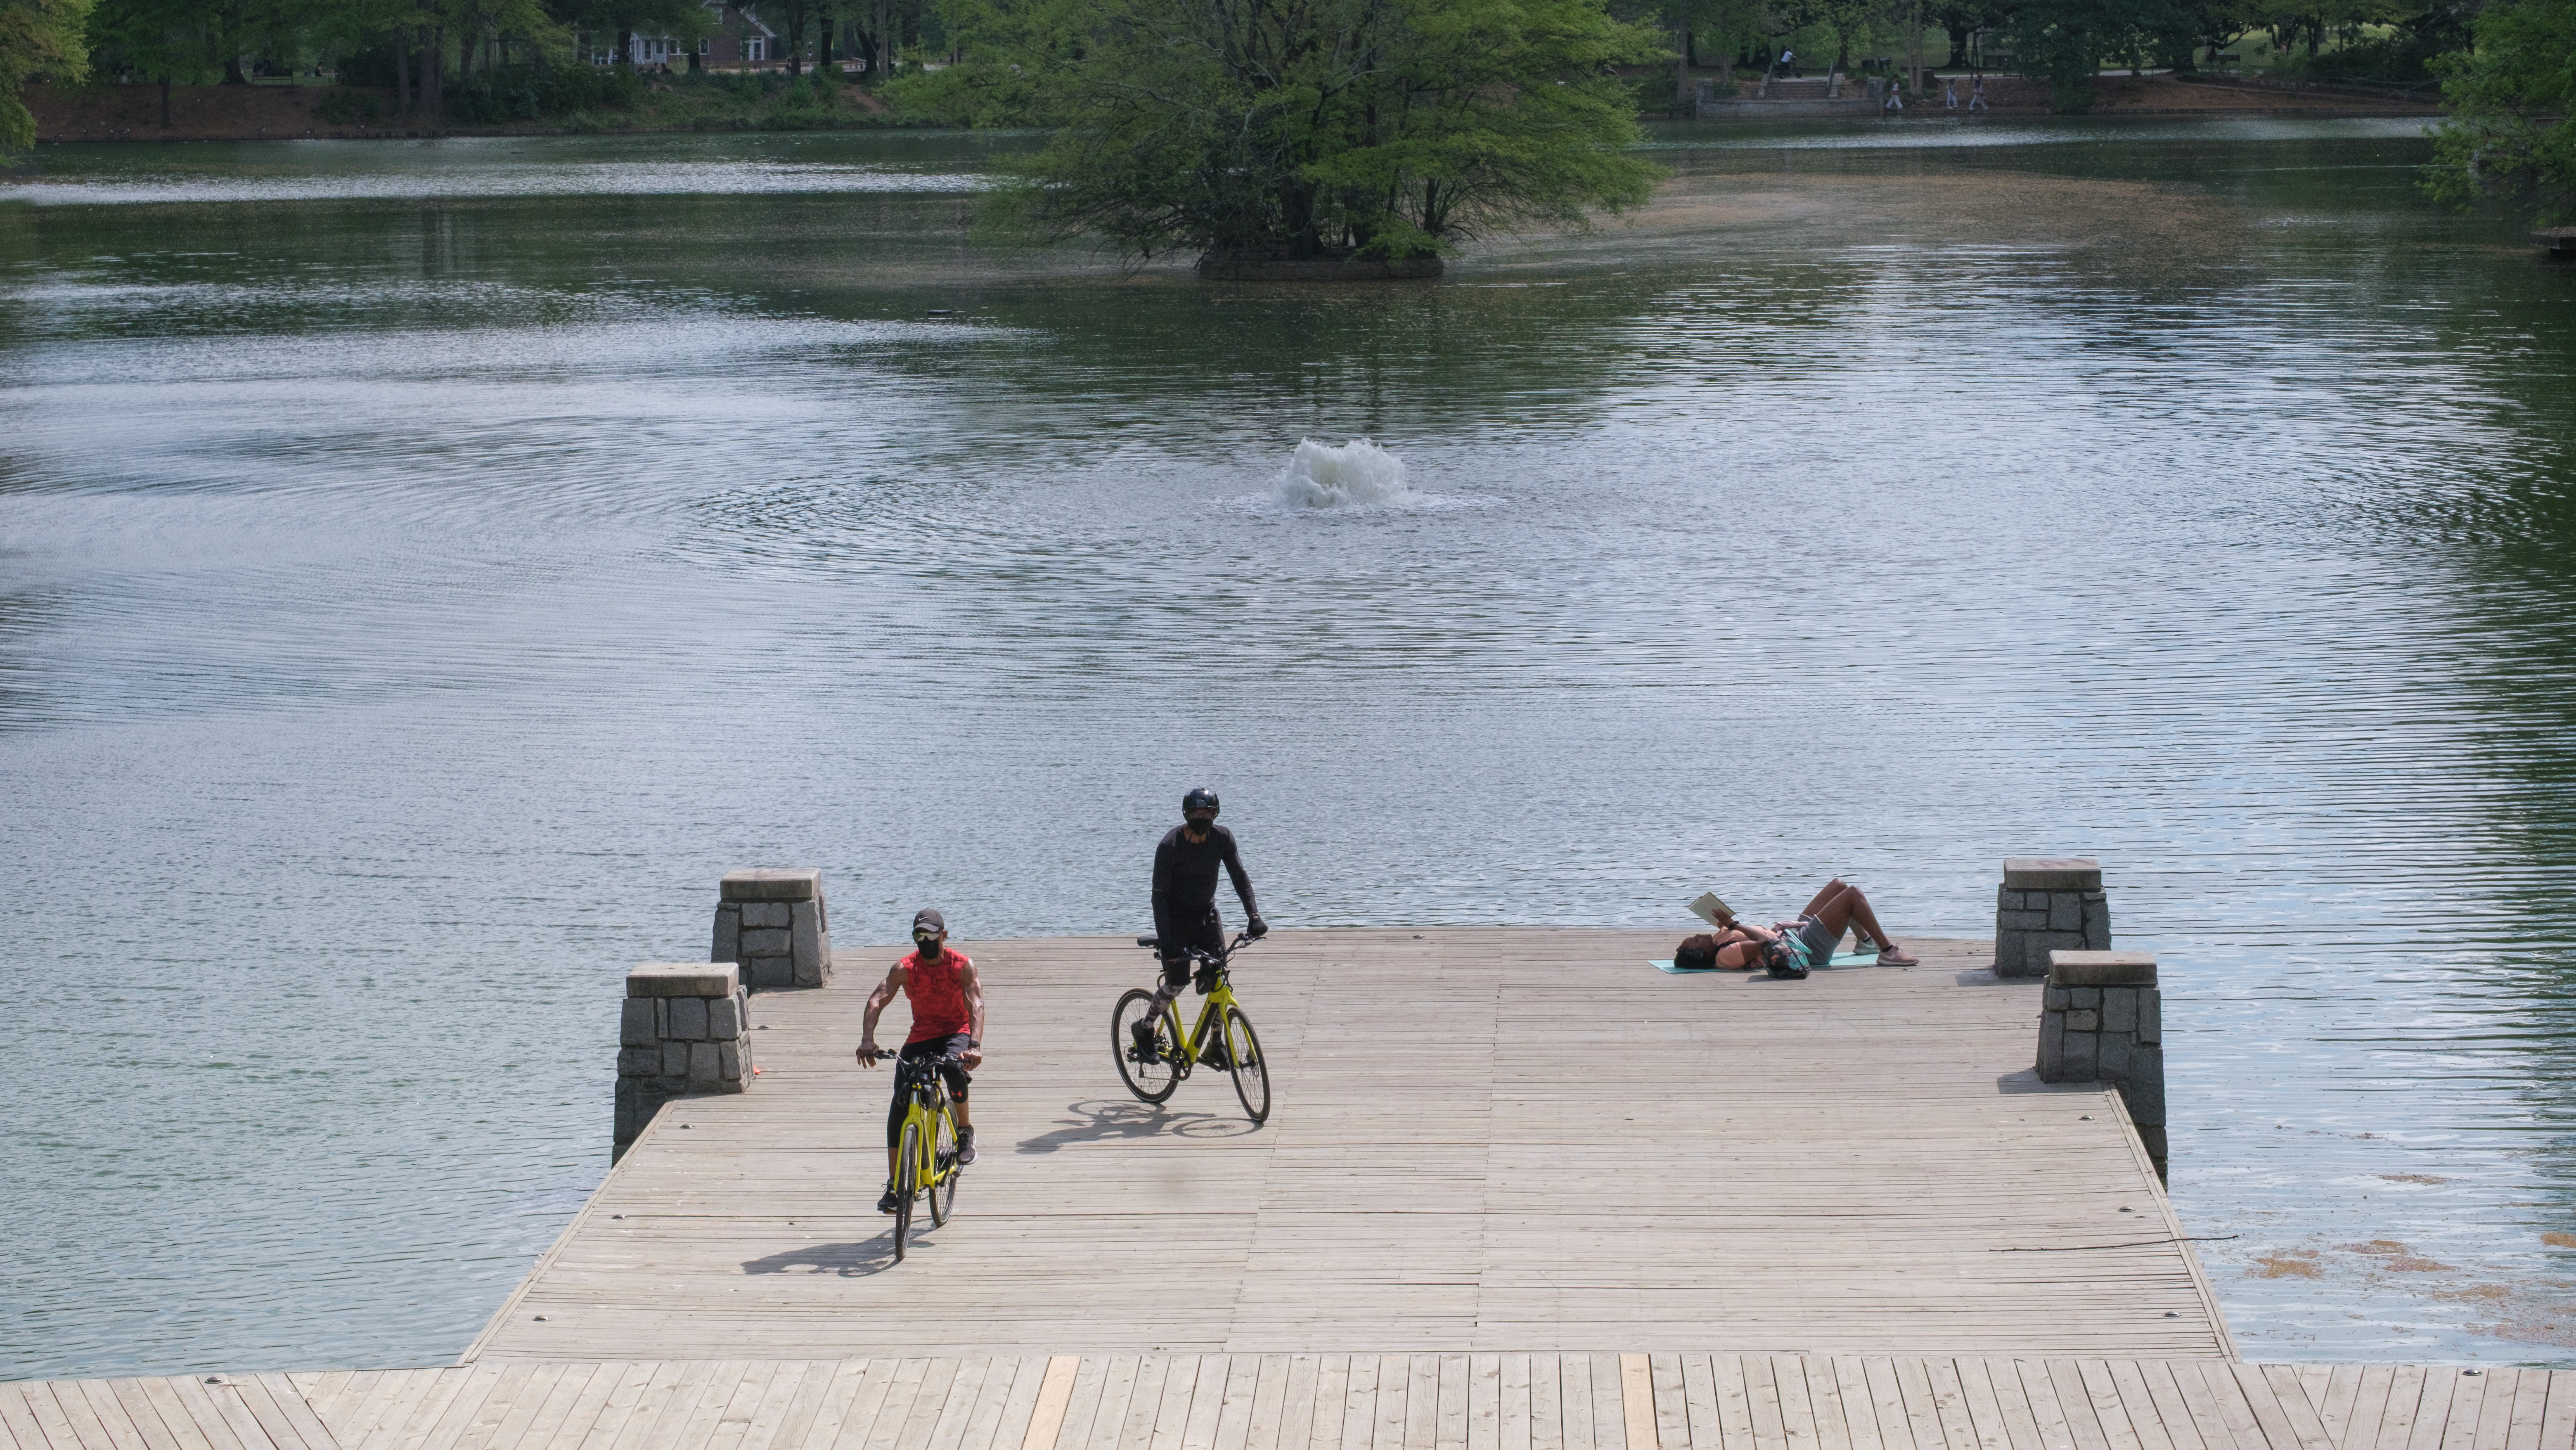
Cochran Shoals, Atlanta – Pentax KP – Pentax DA 21mm Limited.
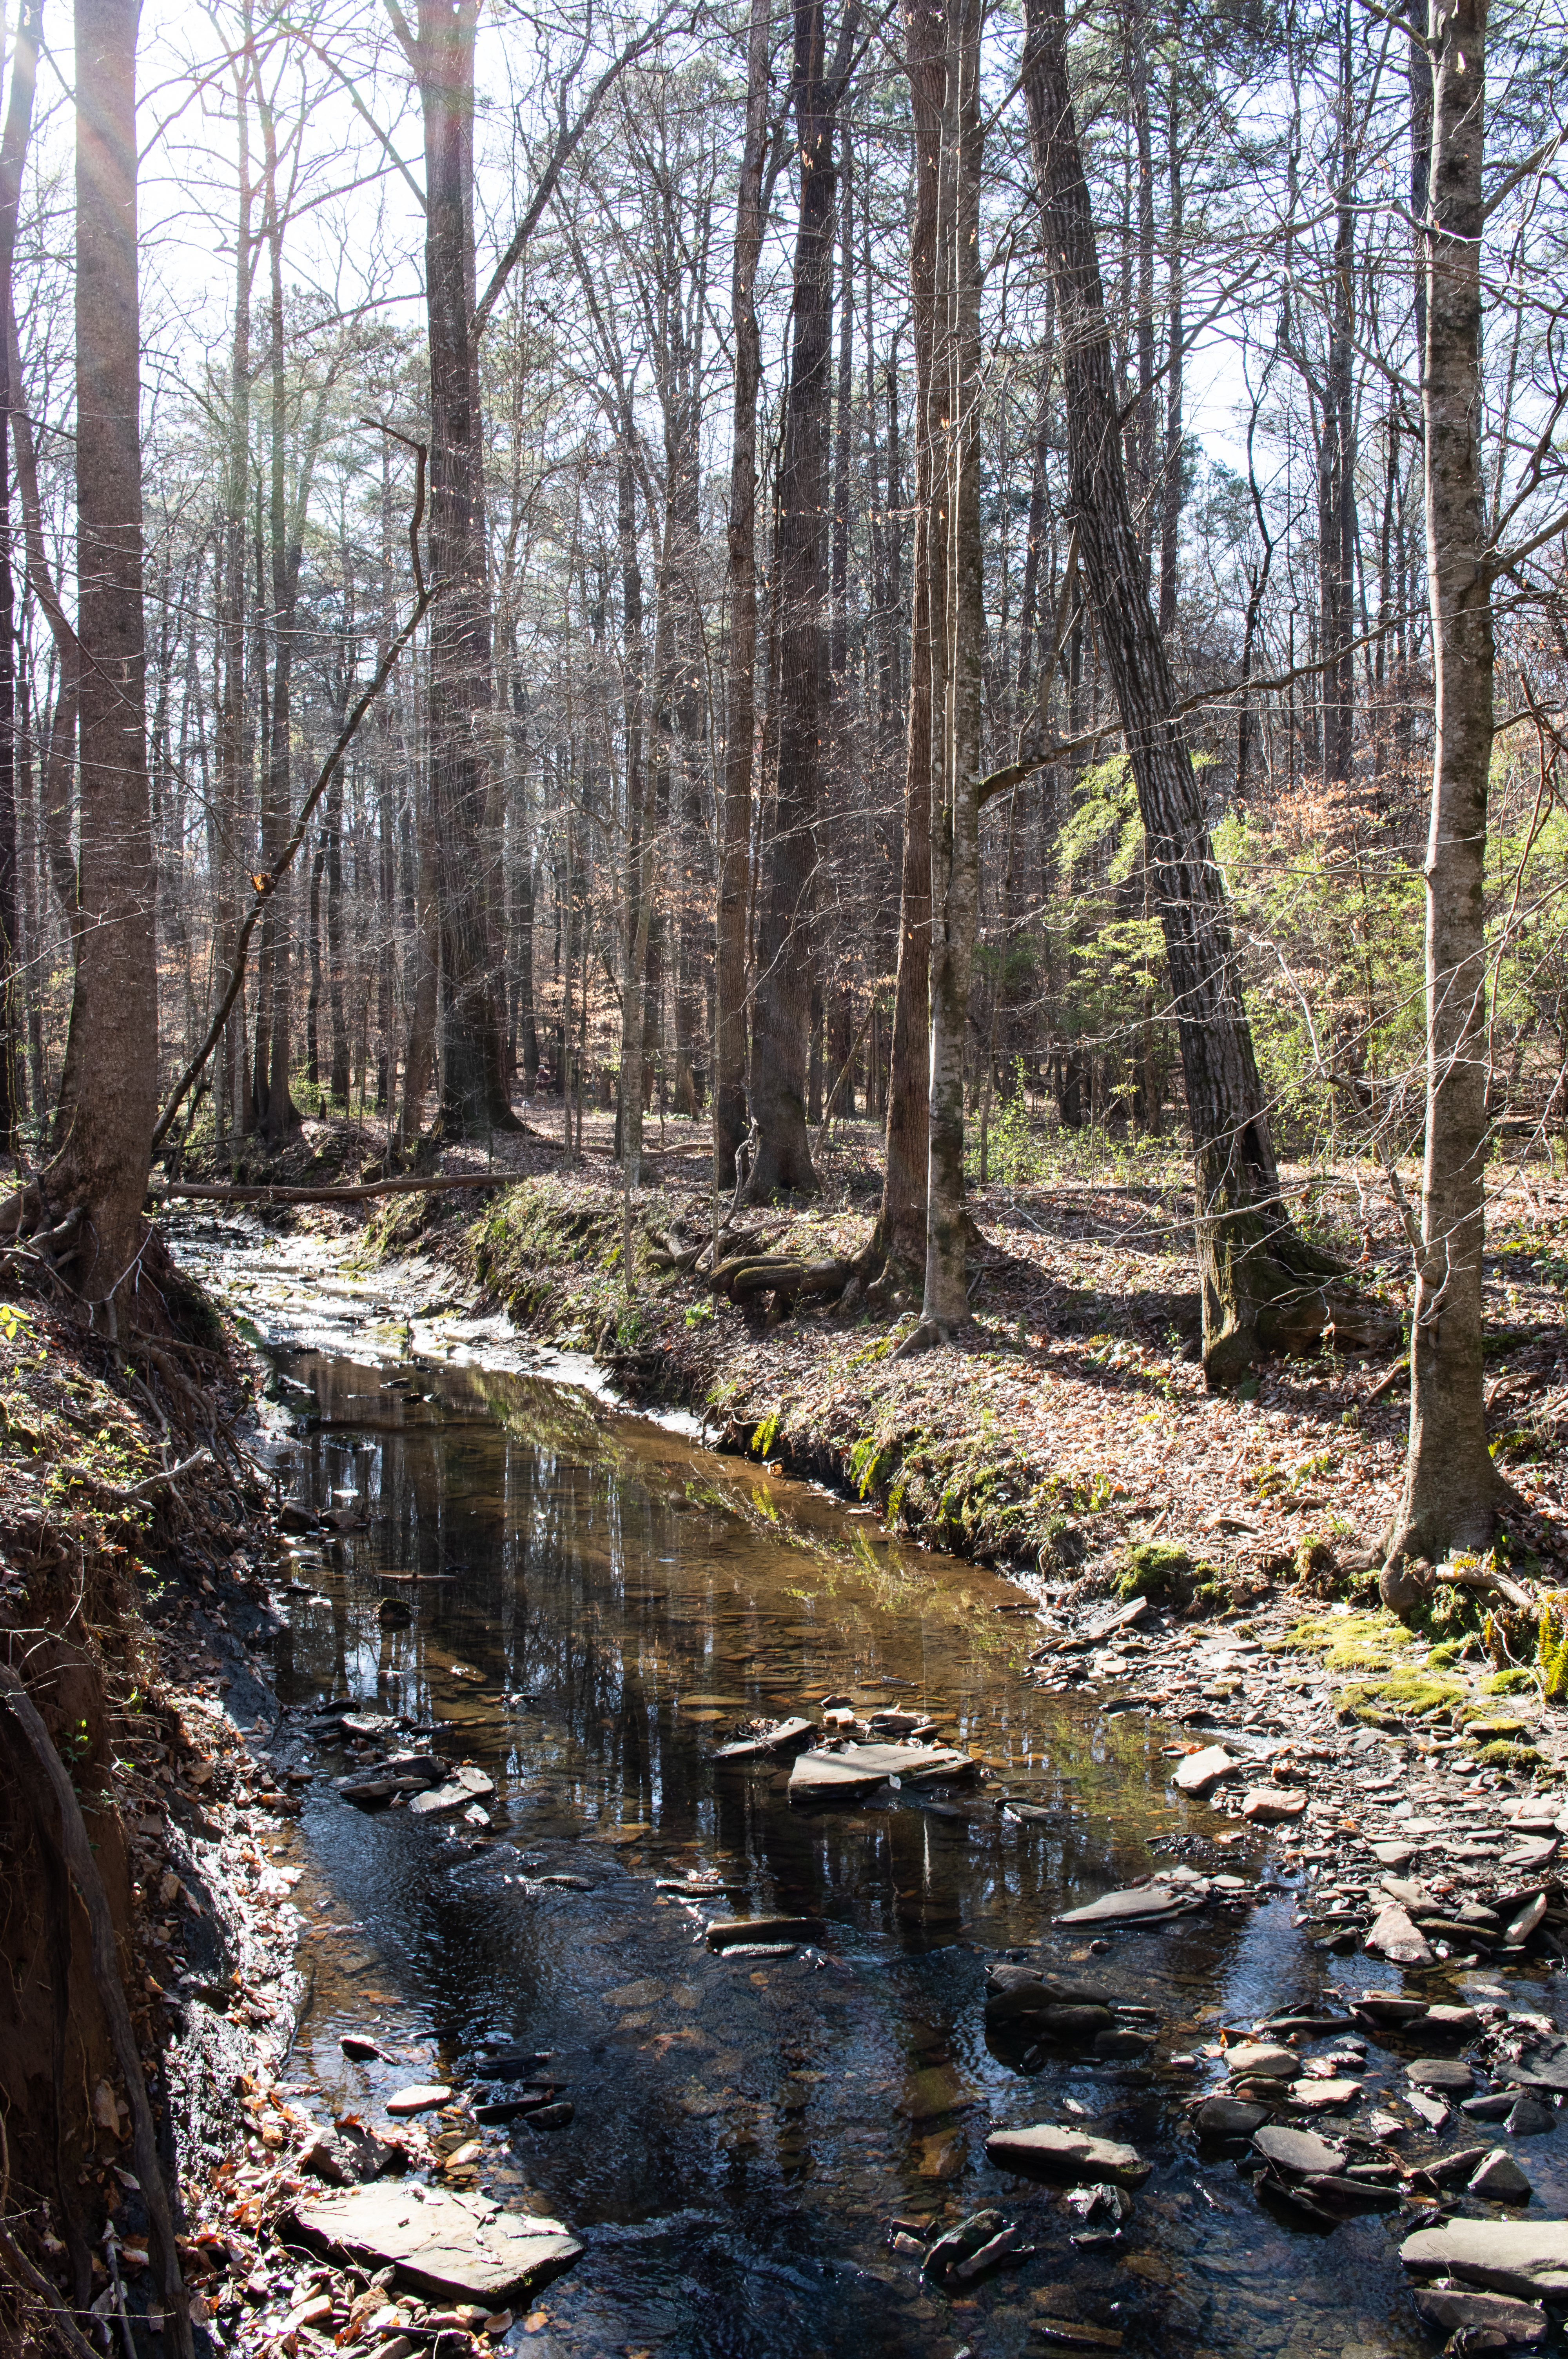
Vickery Creek – Roswell, GA. Pentax KP, Pentax DA 21mm Limited
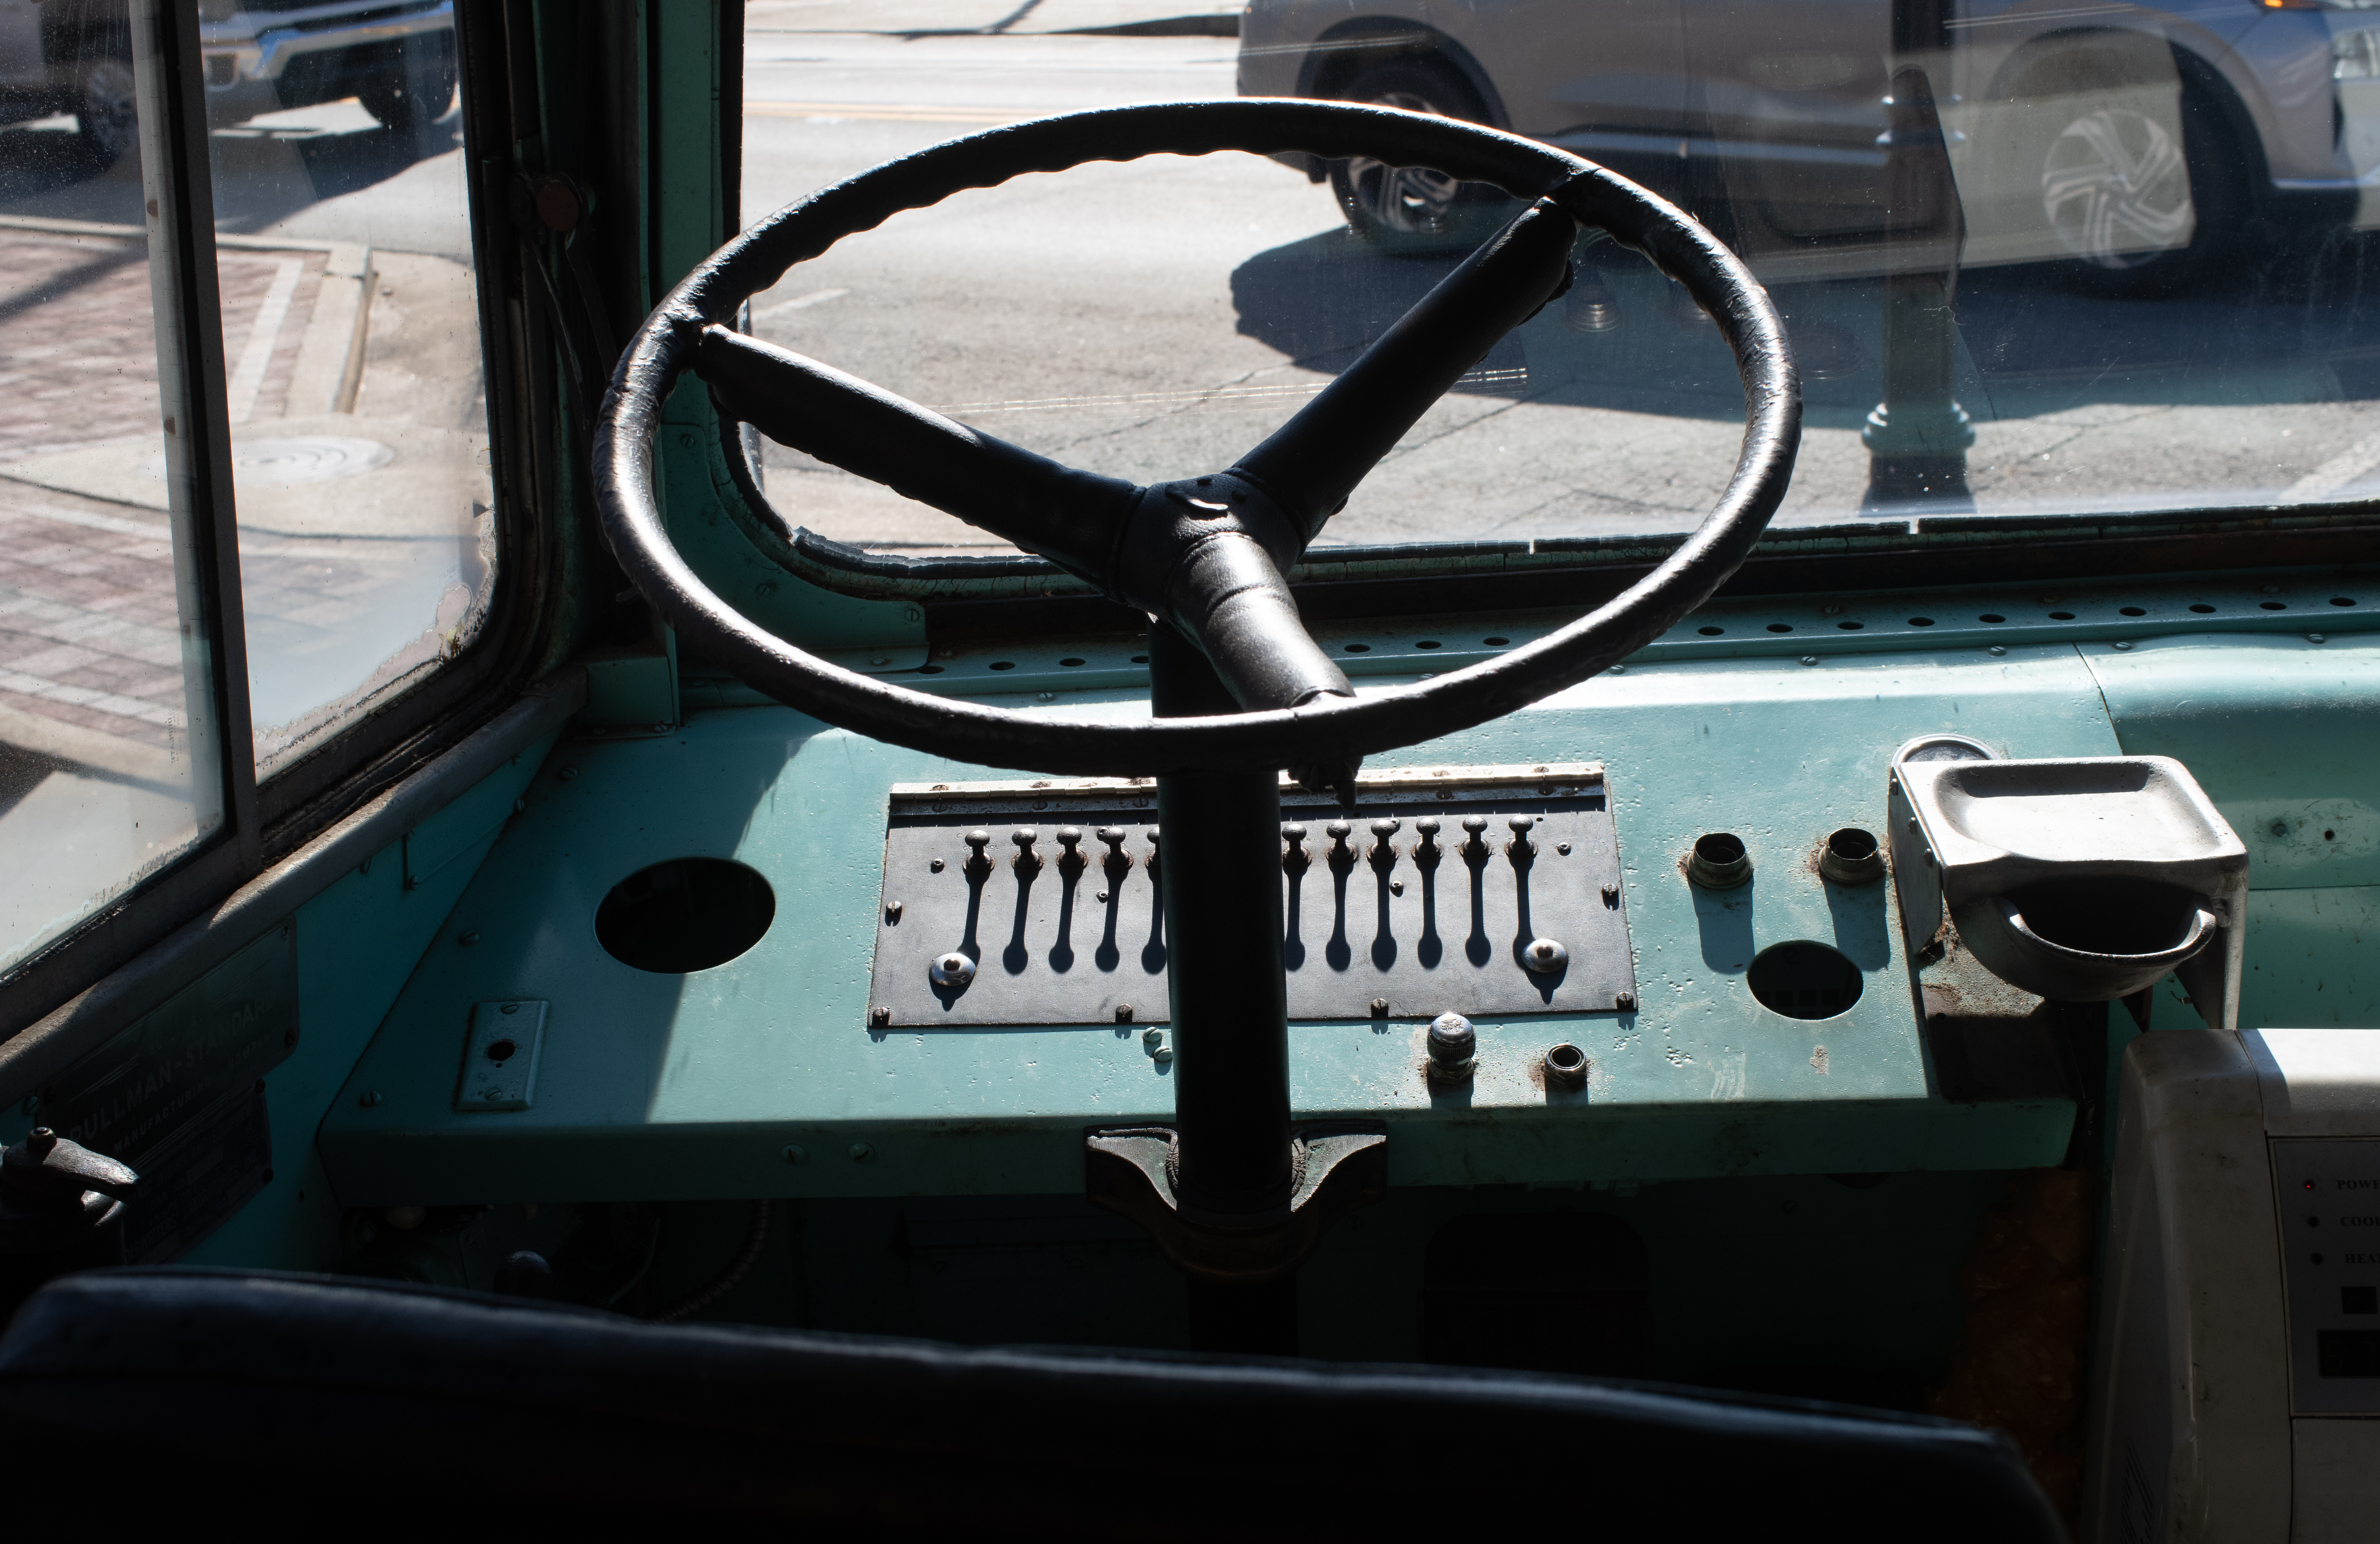
Ball Ground – GA – inside the “Burger Bus” Pentax KP – Pentax lens 35mm f/2.8 Limited (optical viewfinder)
Driving around Montepulciano, in Tuscany – Fujifilm X-T4- Fujinon lens XF 10-24 F/4 ((electronic viewfinder)
The first generations of dSLRs from Konica-Minolta-Sony, Nikon, Olympus and Pentax were all built around CCD image sensors. Then, around 2006, the camera makers started integrating CMOS sensors, and within a few years CCD sensors were history.
Today, some photographers compare the images they get from their modern cameras (all equipped with CMOS sensors offering a very broad dynamic range and reaching very high ISO sensitivities without much noise), with the images they were taking with the best cameras of the CCD era, and they like the photos taken with the old cameras better. What is so special about CCD sensors, and why have they disappeared if they were so good?
A cenote near Cozumel – Pentax *ist DS – July 2007 (6 Megapixels CCD sensor)
Why CMOS won
For all the hype surrounding CCD sensors, they had reached their peak in the 2006-2009 years – the last CCD sensors from Kodak and Sony were either unreliable or performing poorly above 800 ISO – and the technology of CMOS sensors had much more potential.
In 2006, camera makers started switching to CMOS sensors because they saw three main advantages in them:
a much lower power consumption – we now tend to forget that the CCD’s high power consumption and the related heat dissipation were major engineering issues at that time,
a much faster data acquisition,
a potential for higher ISO performance and wider dynamic range.
Live-view (composing the photo on the rear LCD of dSLRs), video capture in available light and mirrorless cameras were only made possible by the generalization of CMOS sensors, and would have been next to impossible with the CCD sensor technology.
Why this love for CCD sensors ?
In a few words, photographers tend to believe that images captured with a CCD sensor equipped camera are more “film like”.
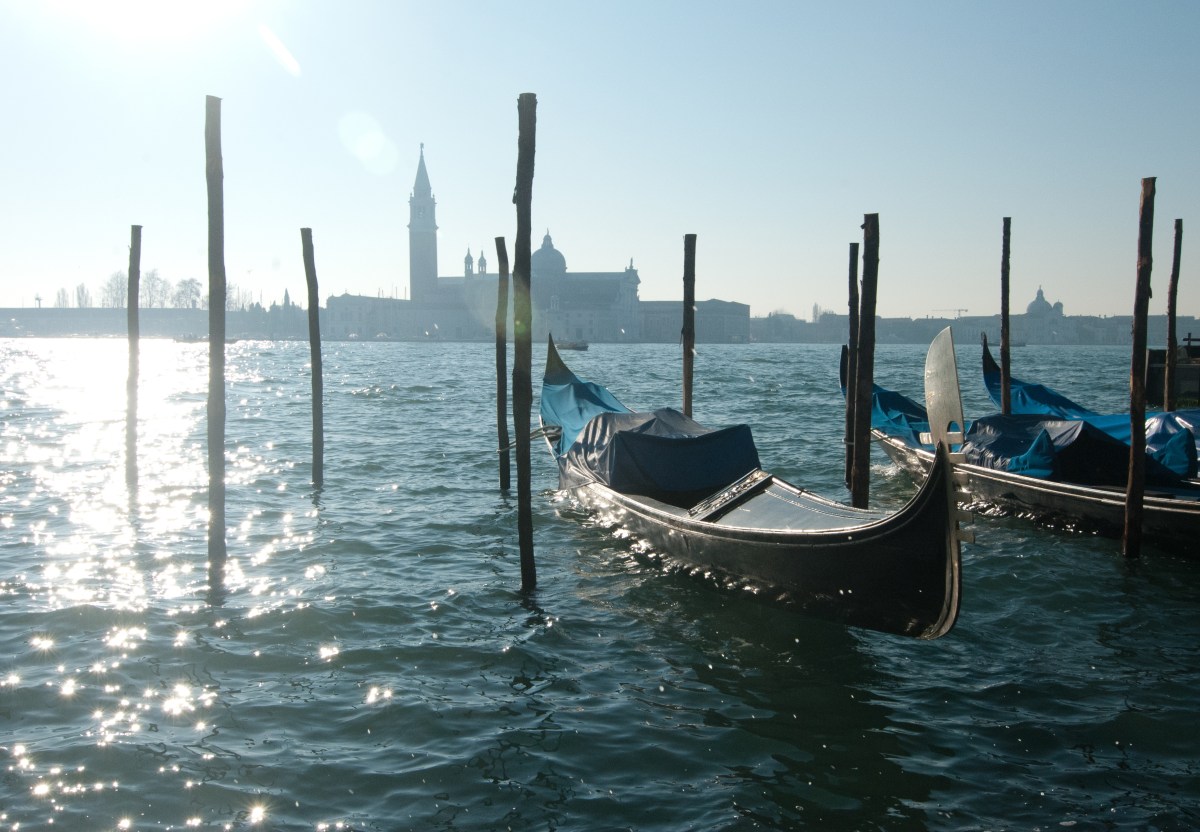
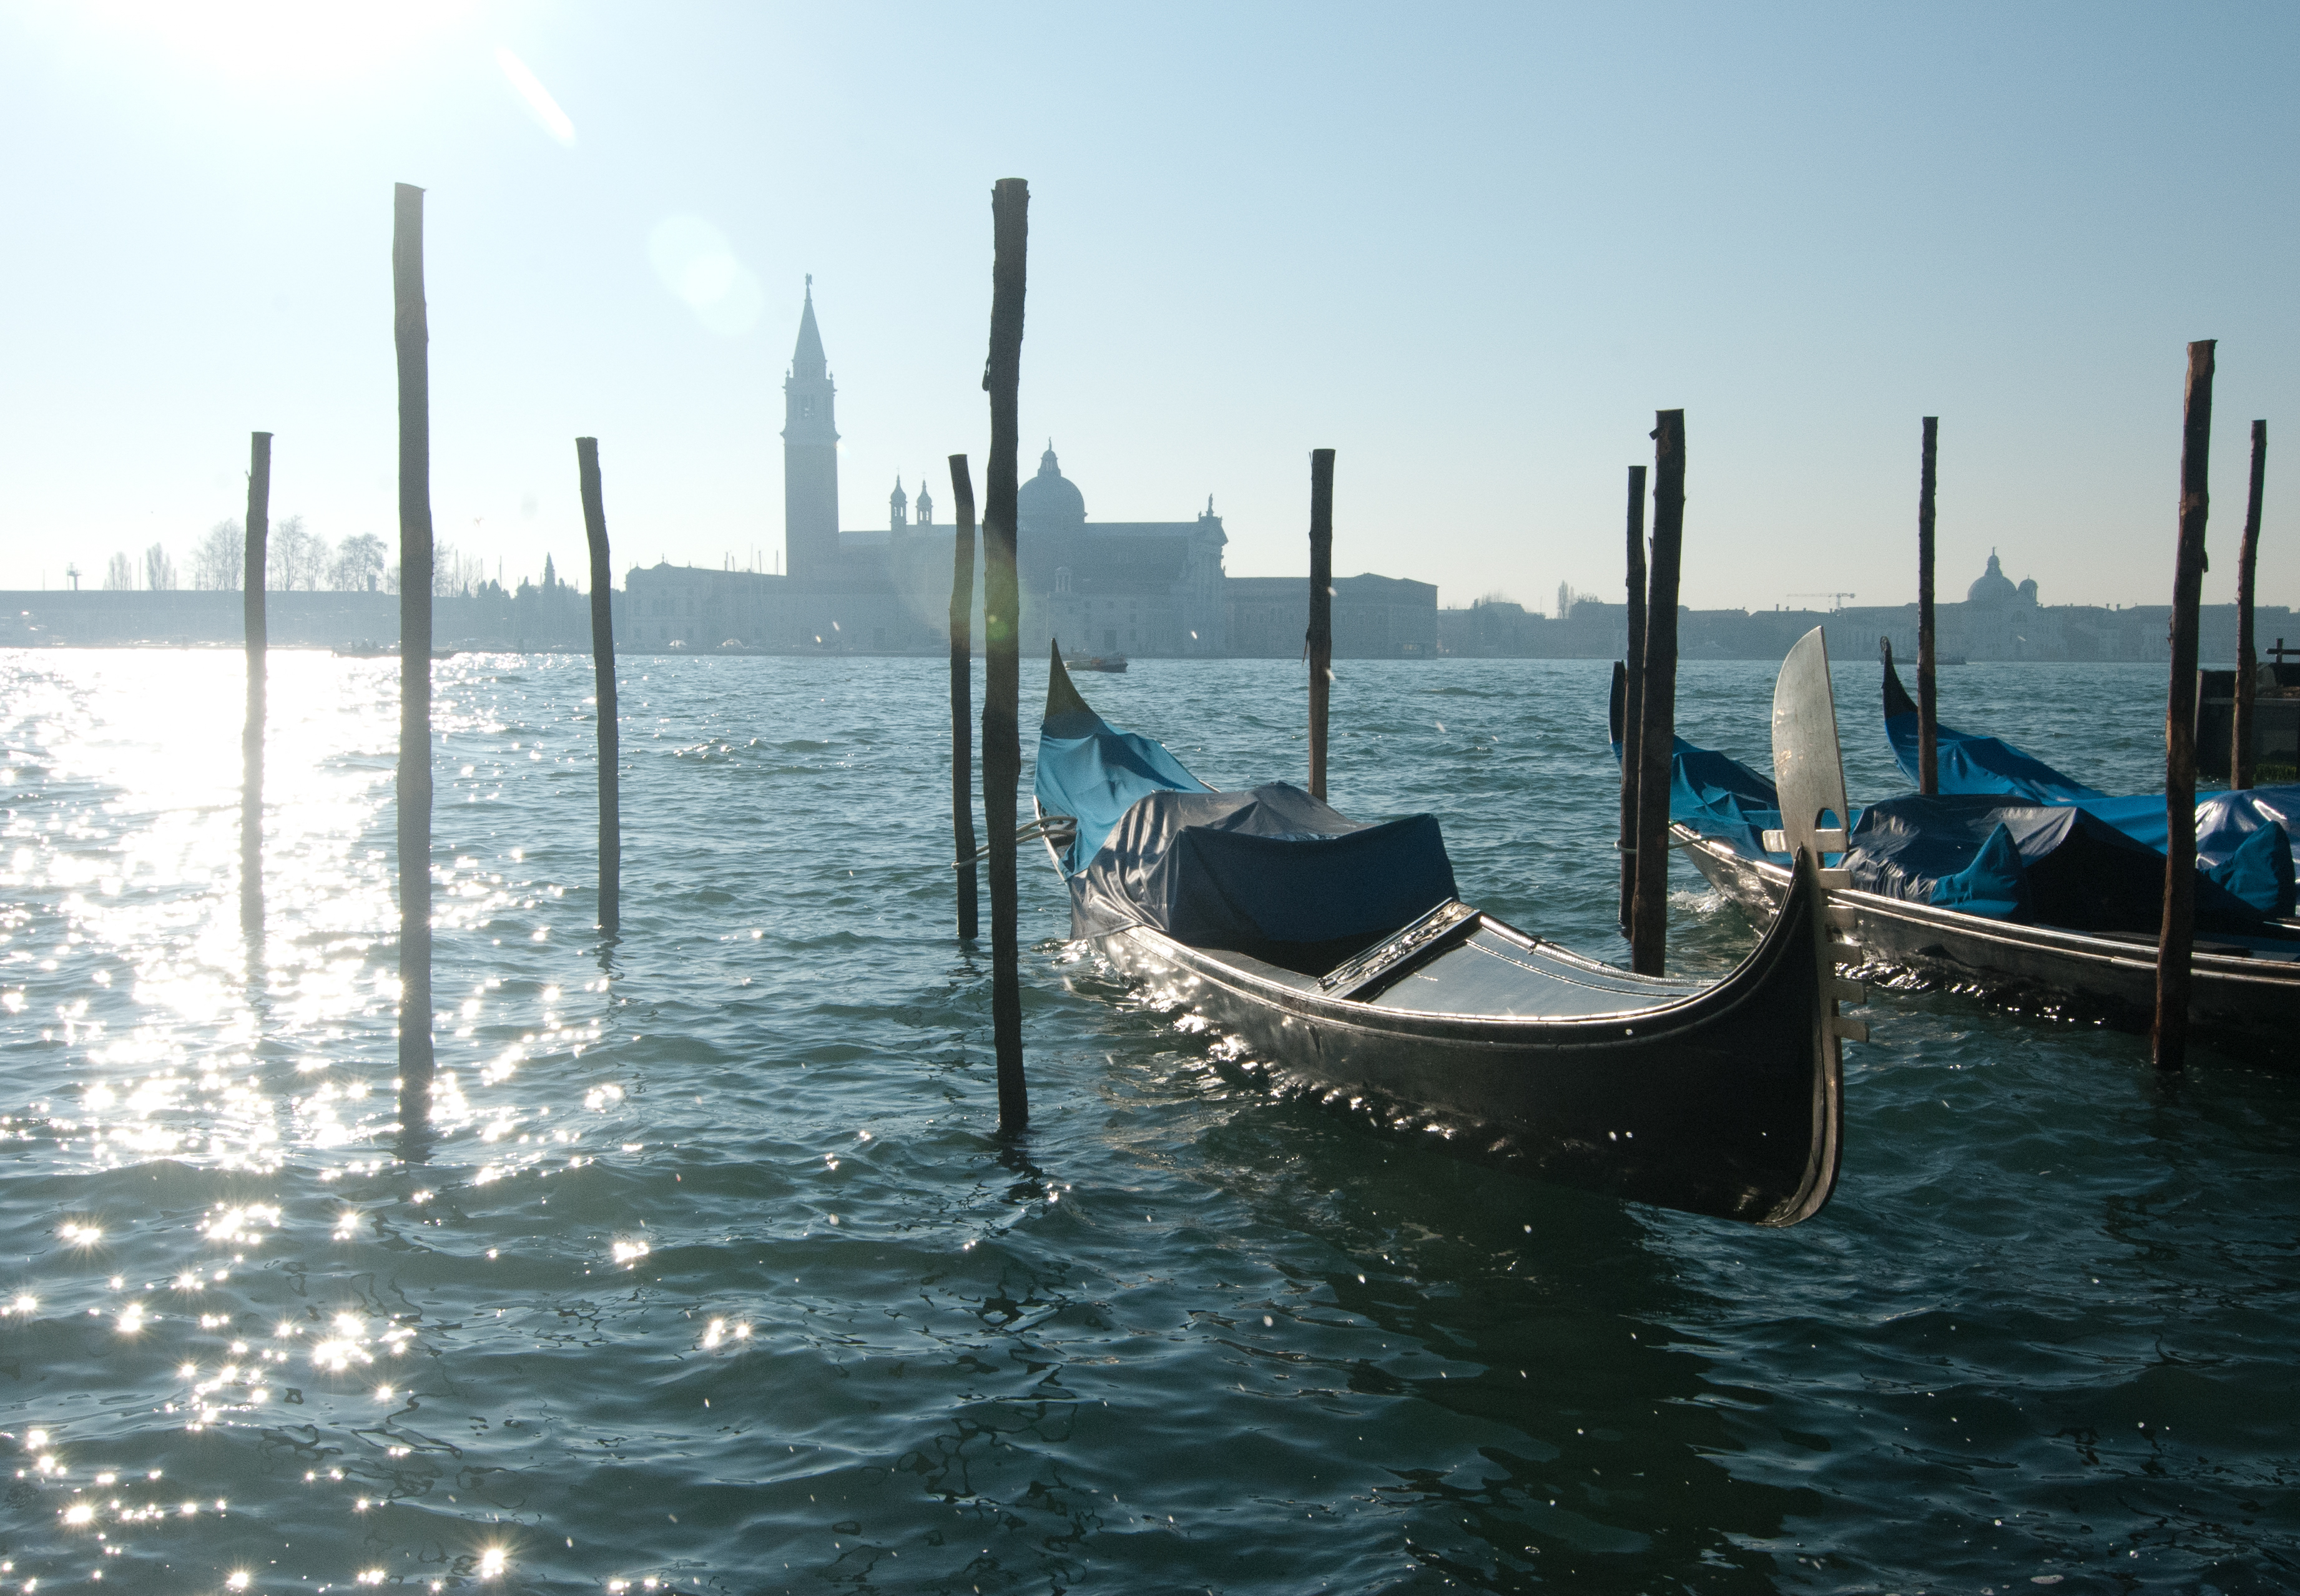
The film look? – Venice – Gondoliers in the sun set. Nikon FE2. Fujicolor 400 film
I suffered for you and watched half a dozen Youtube videos where the authors are comparing the pictures taken with some of the best CCD equipped dSLRs with images taken with the CMOS equipped cameras that immediately followed. The conclusion is that if you make a serious apples to apples comparison on RAW files (same brand of camera, same lens, same resolution), there may be a difference, but really minimal. Images taken with a CCD may have a bit more punch, a bit more contrast, and the transition between colors may be more abrupt than on images captured with a CMOS. But again, the differences are marginal, only visible to pixel peepers.
So, if the RAW files are to a large extend similar, where is the perception coming from, that CCD sensors deliver more natural images than CMOS sensors? Could it be that the supporters of CCD sensors are only shooting JPEGs?
CCD and CMOS are different technologies, and their noise characteristics are not the same. They also behave differently in presence of strong highlights (the tone curve of images captured with a CMOS sensor is linear, as opposed to film and, to a lesser extent, CCD, which have a more S shaped tone curve). At the beginning of the transition from CCDs to CMOS sensors, camera vendors had more experience dealing with the noise patterns and tone curve characteristics of the images coming from CCDs than from CMOS sensors, and as a consequence their JPEG rendering algorithms were giving more “natural” (understand crowd pleasing) results when starting from the raw data of CCDs.
The CCD bias of the JPEG Rendering engines did not last. Camera manufacturers learned how to take advantage of the larger dynamic range and the lower level of noise of CMOS sensors to deliver images that mimic film behavior more closely than CCD sensors ever did.
The generalization of CMOS also allowed a raise in the pixel density of the sensors, and with it the end of the need for an “anti-aliasing” filter (the Nikon d800e launched in 2012 was the first dSLR deprived of an AA filter). By 2014, the “new normal” was a camera with a 16 to 24 Megapixel sensor and no anti-liaising filter, capable of a much higher real-life resolution than a 6 or 10 Mpix CCD operating behind an anti-liaising filter. No wonder a photographer upgrading from an early dSLR was a bit surprised by the “surgical” nature of the JPEGs.
Venice, on Dec 25th 2010 – Shot with a Nikon D80 and a Sigma 18-125 lens. (10 Megapixel CCD Sensor)
So…
The “CCD look” was a JPEG thing.
the “film like” look of images captured with CCDs was the result of lower resolution sensors, thick anti-liaising filters, and above all a product of the JPEG image processing algorithms used at that time.
With modern cameras, “film like” behavior can be emulated to a much higher degree than what the JPEG engines of the cameras of 2005 could do. Film emulation (or Picture Styles or whatever the camera manufacturer calls its brand of JPEG rendering recipe) is not only good at mimicking the tonal response and the colors of film, but also its grain.
Now that every camera maker is proposing some form of “Picture Control” or film simulation to customize the output of their JPEG rendering engine, it’s remarkable that nobody is proposing “CCD emulation”. Maybe it was not so much of an issue after all?
CCD equipped cameras are still available on the second hand market, are generally very cheap, and will give your images the full CCD look if it’s what you’re after.
CCD equipped compact cameras
The compact (point and shoot) cameras of the early days of the digital migration are the ones delivering images closer to the film look, probably because of the low resolution of their image sensor and the very consumer oriented tuning of their JPEG rendering engine. I’m still impressed by the “Barbie at the beach” look of the JPEGs of my old Canon S400 Powershot (Digital Elph or Ixus).
Compact cameras switched from CCD to CMOS sensors later than dSLRs – the last models being launched around 2011.
With the exception of sensors manufactured by Kodak for the Leica M9 (which had very significant long term reliability issues), there is no Full Frame CCD sensor, and only one APS-C sensor with a resolution higher than 10 Megapixel (a 14 Mpix APS-C sensor only used by Sony on the Alpha 280/380 series, which had a reputation of being no good above 800 ISO).
Because of the technical characteristics of CCDs, there never was a CCD equipped mirrorless camera, or a CCD equipped dSLR offering real Live-View capabilities (the Sony Alpha 350/380/390 used a second, dedicated sensor in its viewfinder to offer Live-View). The last dSLRs equipped with CCD sensors were launched around 2010 (Nikon D3000, Sony Alpha 290 and 390).
Let’s focus on the 10 megapixel cameras from Nikon, Olympus, Pentax and Sony:
Nikon D200, D80, D40X, D60, D3000 – they all share a 10 Megapixel CCD sensor of the same family. The D200 is often considered the best CCD equipped dSLR ever, but it’s a big and heavy camera designed for pros. There is little difference between the D40X, the D60 and the D3000 – all three are entry level dSLRs designed for beginners and amateurs. The D80 sits in-between. A Nikon D80 was my main camera for years, and I’m still impressed by the quality of the pictures I took with it (I love the D80’s JPEGs).
Olympus was the first camera maker to take advantage of CMOS sensors to offer Live View in a limited fashion (on the E330 in 2006). The e400 of the same year is their last dSLR with a CCD sensor (a 10 Megapixel sourced from Kodak). Like the Nikon D200, the e400 has a legion of enthusiastic fans and is comparatively expensive second hand.
Pentax K10D, K200D, K-M, K-2000 – the K10D is the big semi-pro camera, the other models are smaller and more amateur oriented. The 10 Megapixel Pentax dSLRs are generally appreciated for their beautiful RAW files, but reviewers complain about their comparatively poor JPEGs, which may not be great if you’re after the CCD look.
Sony a100, a200 and a300 series – all are the successors of Konica-Minolta 5D. The 100 and 200 series are very conventional amateur oriented models, the models of the 300 series offer Live-View capabilities thanks to a second dedicated image sensor.
Canon is absent from that list. For their line of dSLRs, they made a very early bet on CMOS – I believe that the EOS-1d of 2001 is their only CCD-equipped dSLR. Note that they kept on integrating CCD sensors in their line of digital point and shoot cameras until 2011.
Venice – Nikon FE2 – Fujicolor 400 – Dec. 2010
The value of cameras on the second hand market tends to be driven primarily by the sensor resolution – and 10 megapixels is considered so low that all the cameras of this list can be bought for less than $150 (the Nikon D200 is the most expensive, the oldest “amateur” models being the cheapest at $50.00 to $70.00). Interestingly, 10 Mpix CCD compact cameras like the Canon G12 or the Nikon P7100 currently sell for more than the best 10 Megapixels dSLRs. Nikon D200 included.
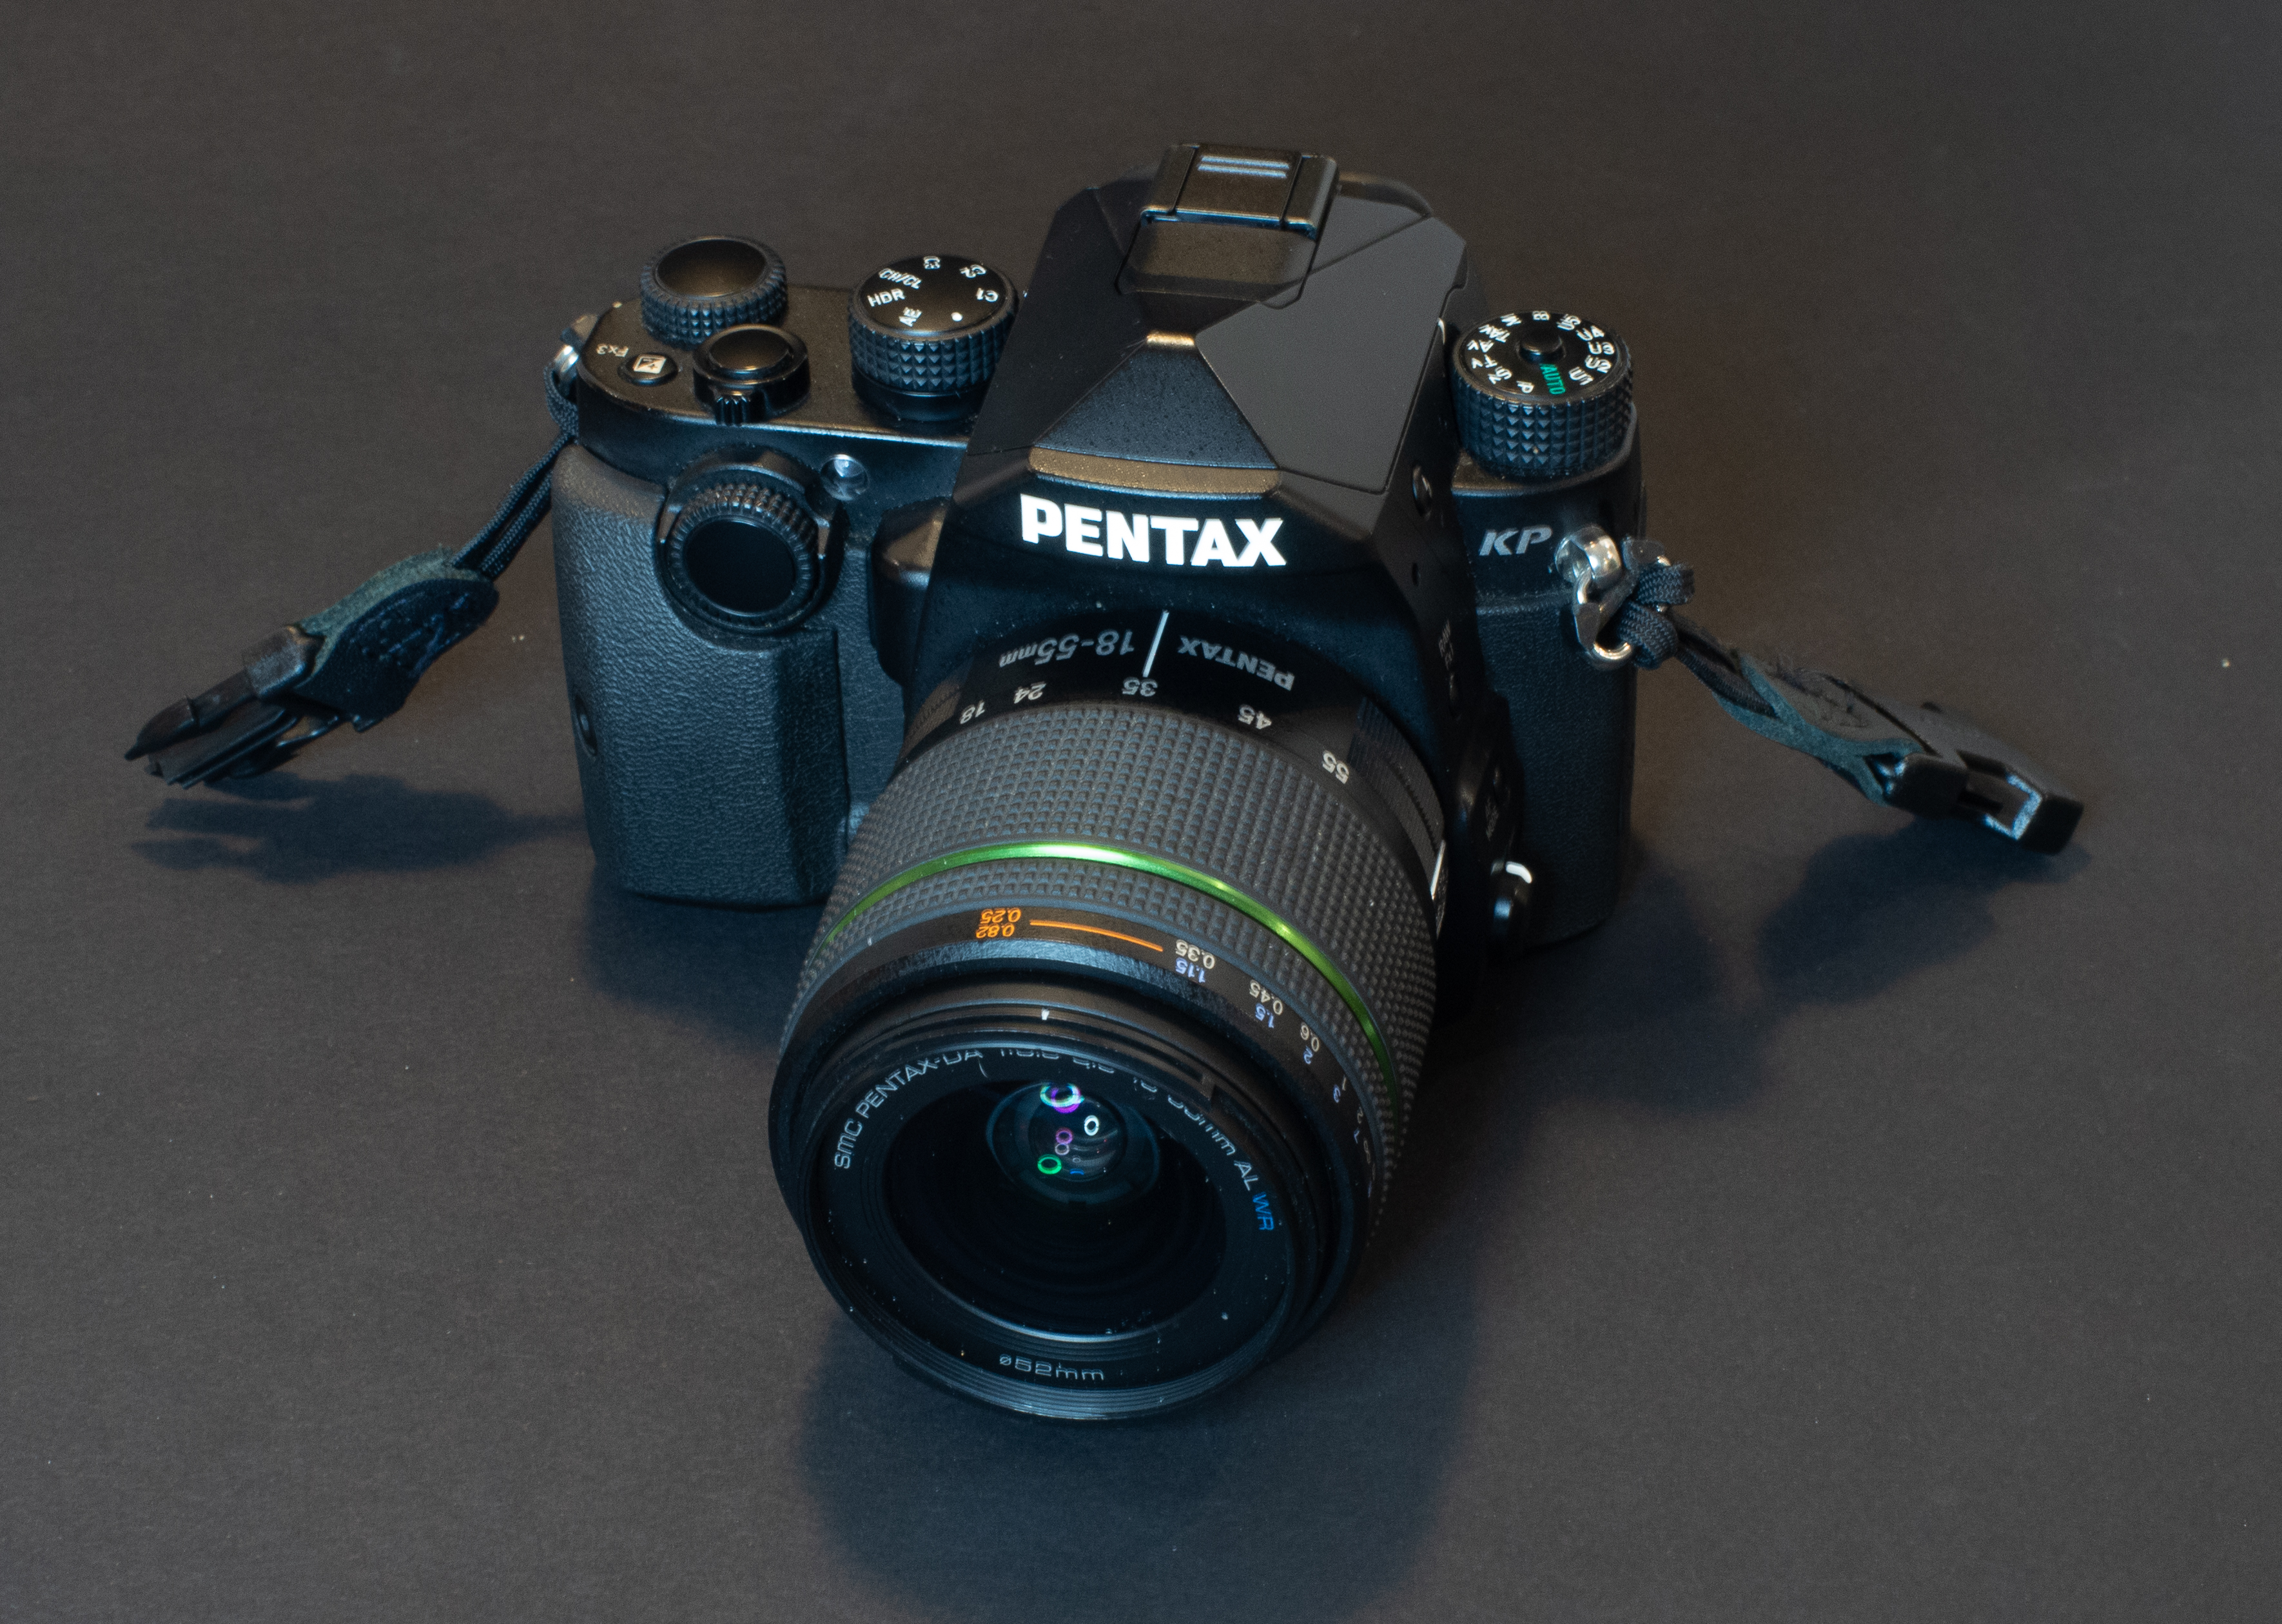
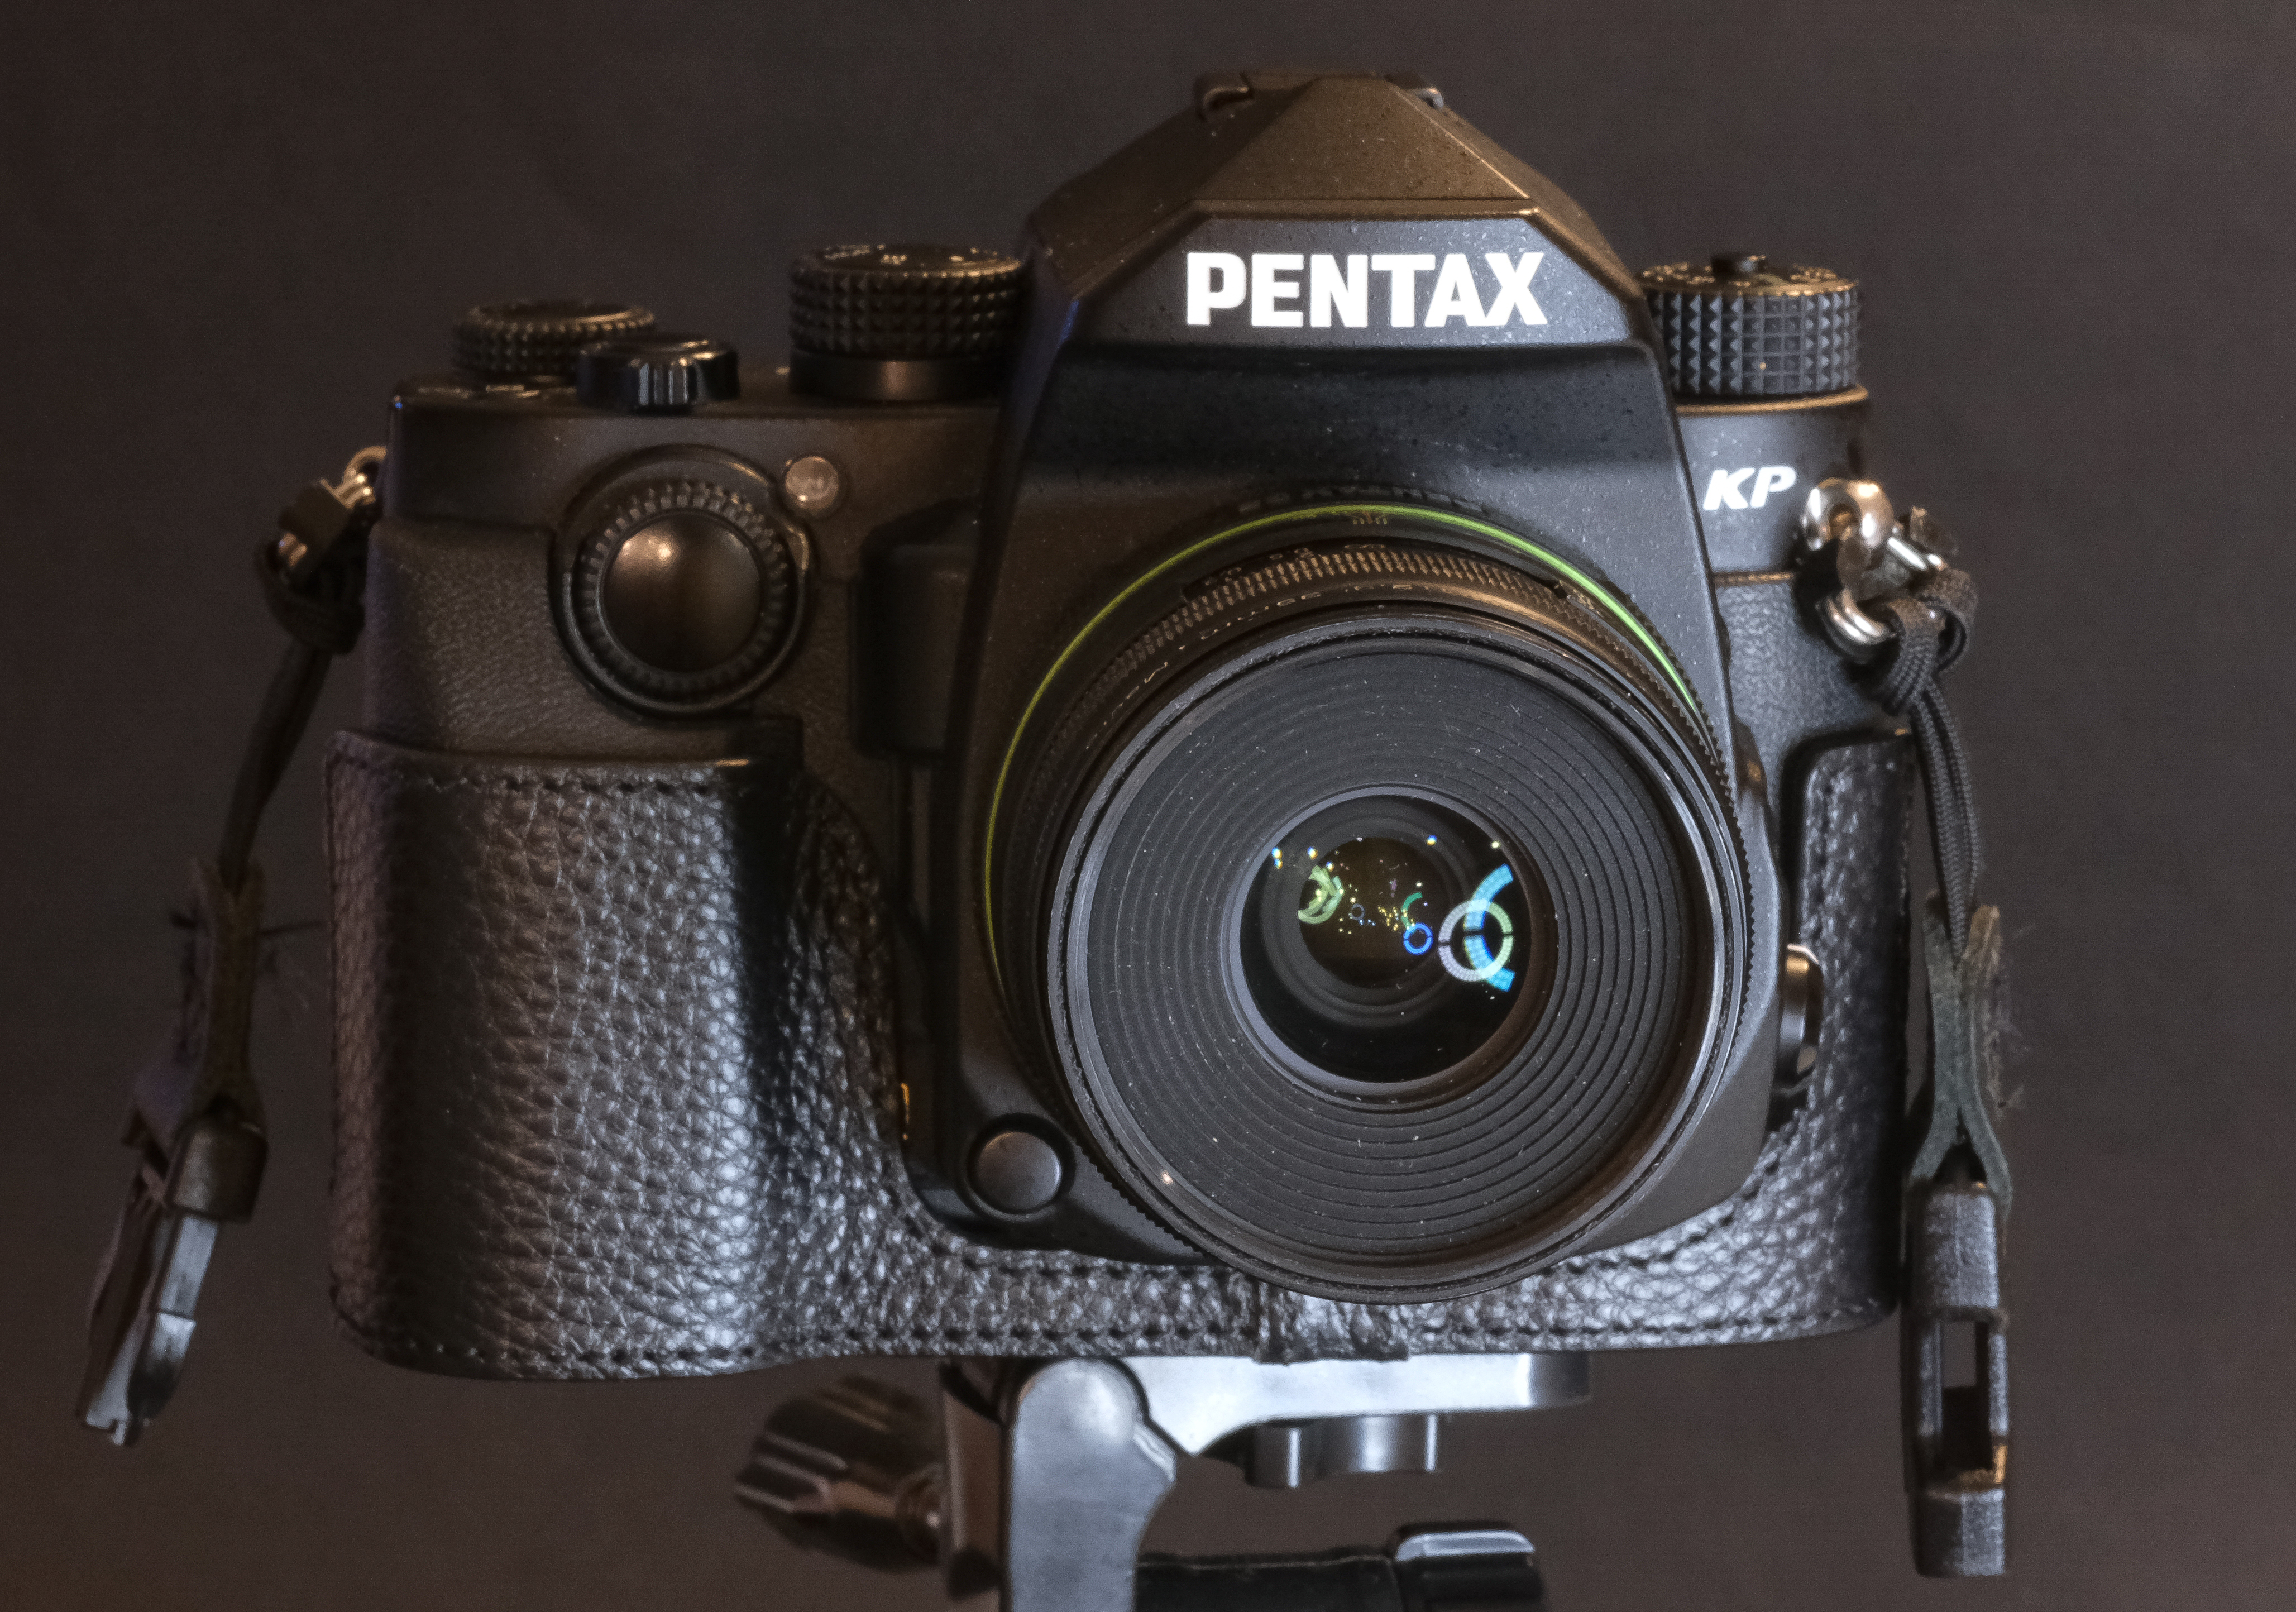
The Pentax KP – an APS-C Digital SLR competing in the same category as the Nikon D7500 and the Canon 90D – was presented in a recent blog entry. It was sold between 2017 and 2021, and was spec’d to slot between the “amateur” oriented Pentax K-70/KF, and the very expensive Pentax K-3 Mk III.
The K-70/KF and the K-3 have bodies which are very conventional for dSLRs (and make them easy to live with), but the design of the KP is reminiscent of the manual focus SLRs of the eighties (and of the very successful Fujifilm X series mirrorless cameras), which creates some ergonomics and battery life challenges.
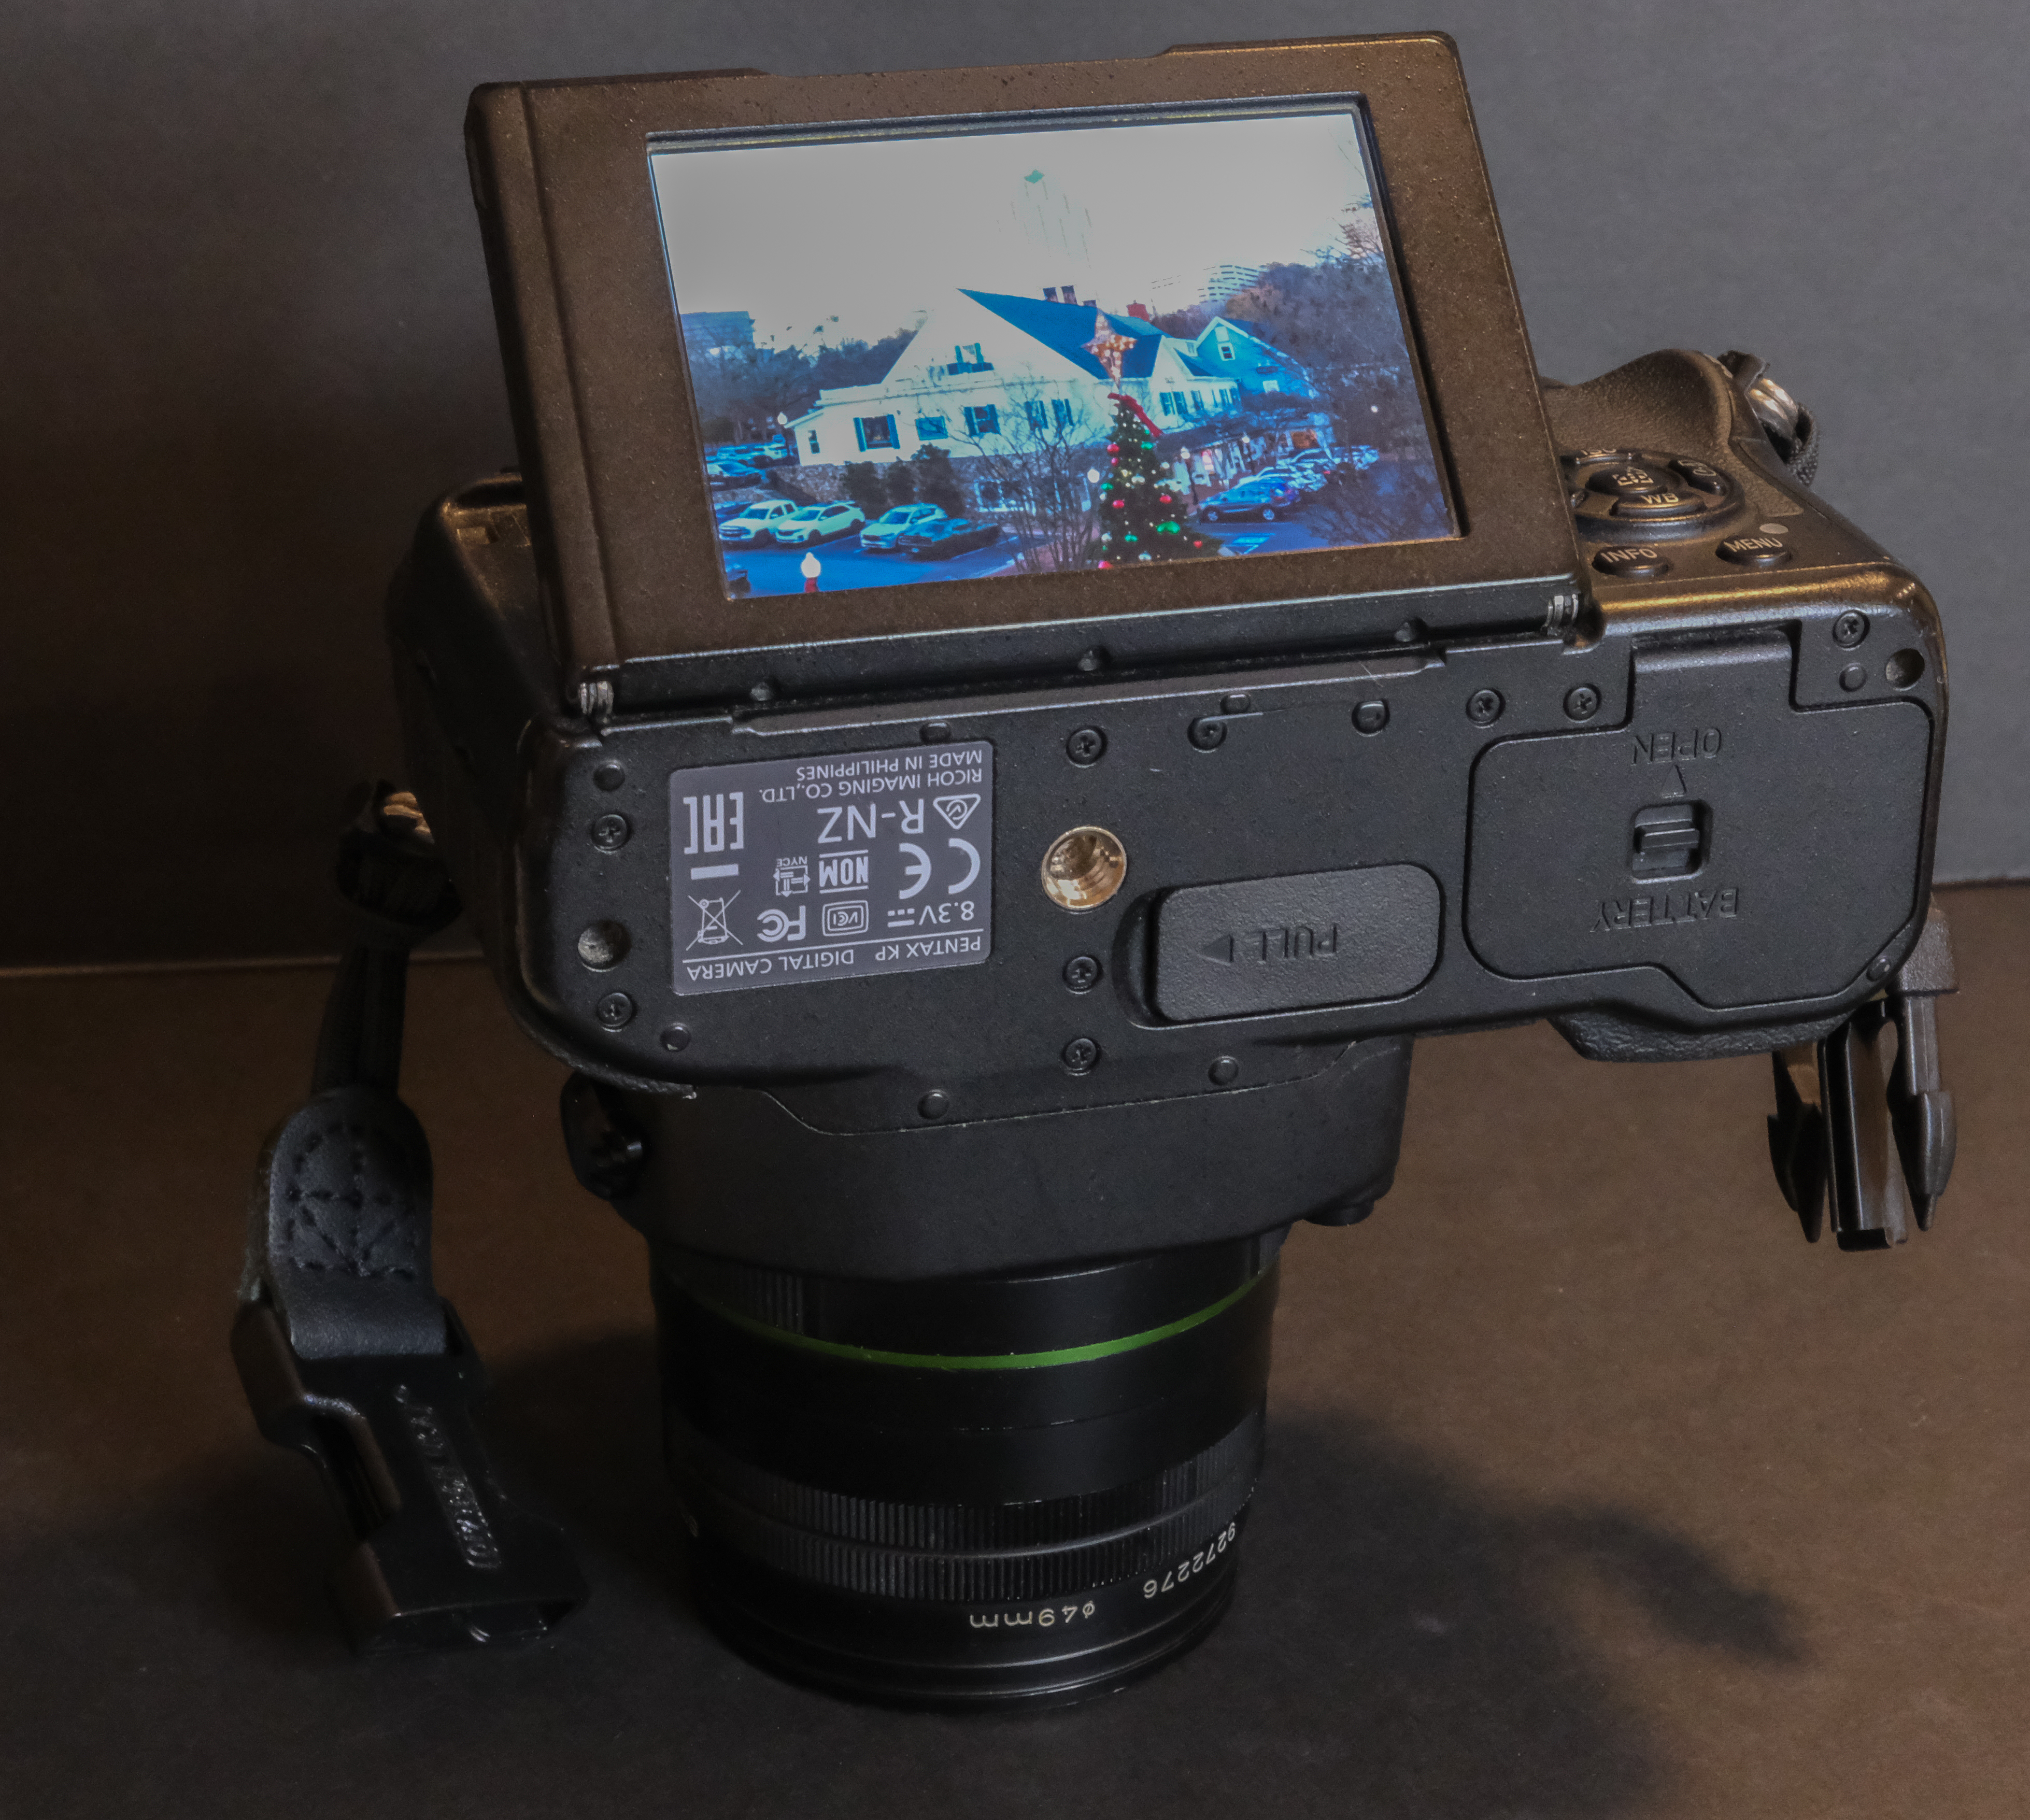
Without a direct legacy in the current Pentax line-up, the KP remains a very interesting proposition for Pentax shooters – with a 24 Mpix sensor and a processing engine of recent design, it is still up to date when compared to mid level APS-C mirrorless cameras. In fact, in terms of image quality and high ISO performance, it’s only second to the much more expensive K-3 Mk III in the Pentax APS-C line-up. And contrarily to its K-3 biggest brothers, it has an articulated rear display, which makes composing the image in “Live-View” mode easier.
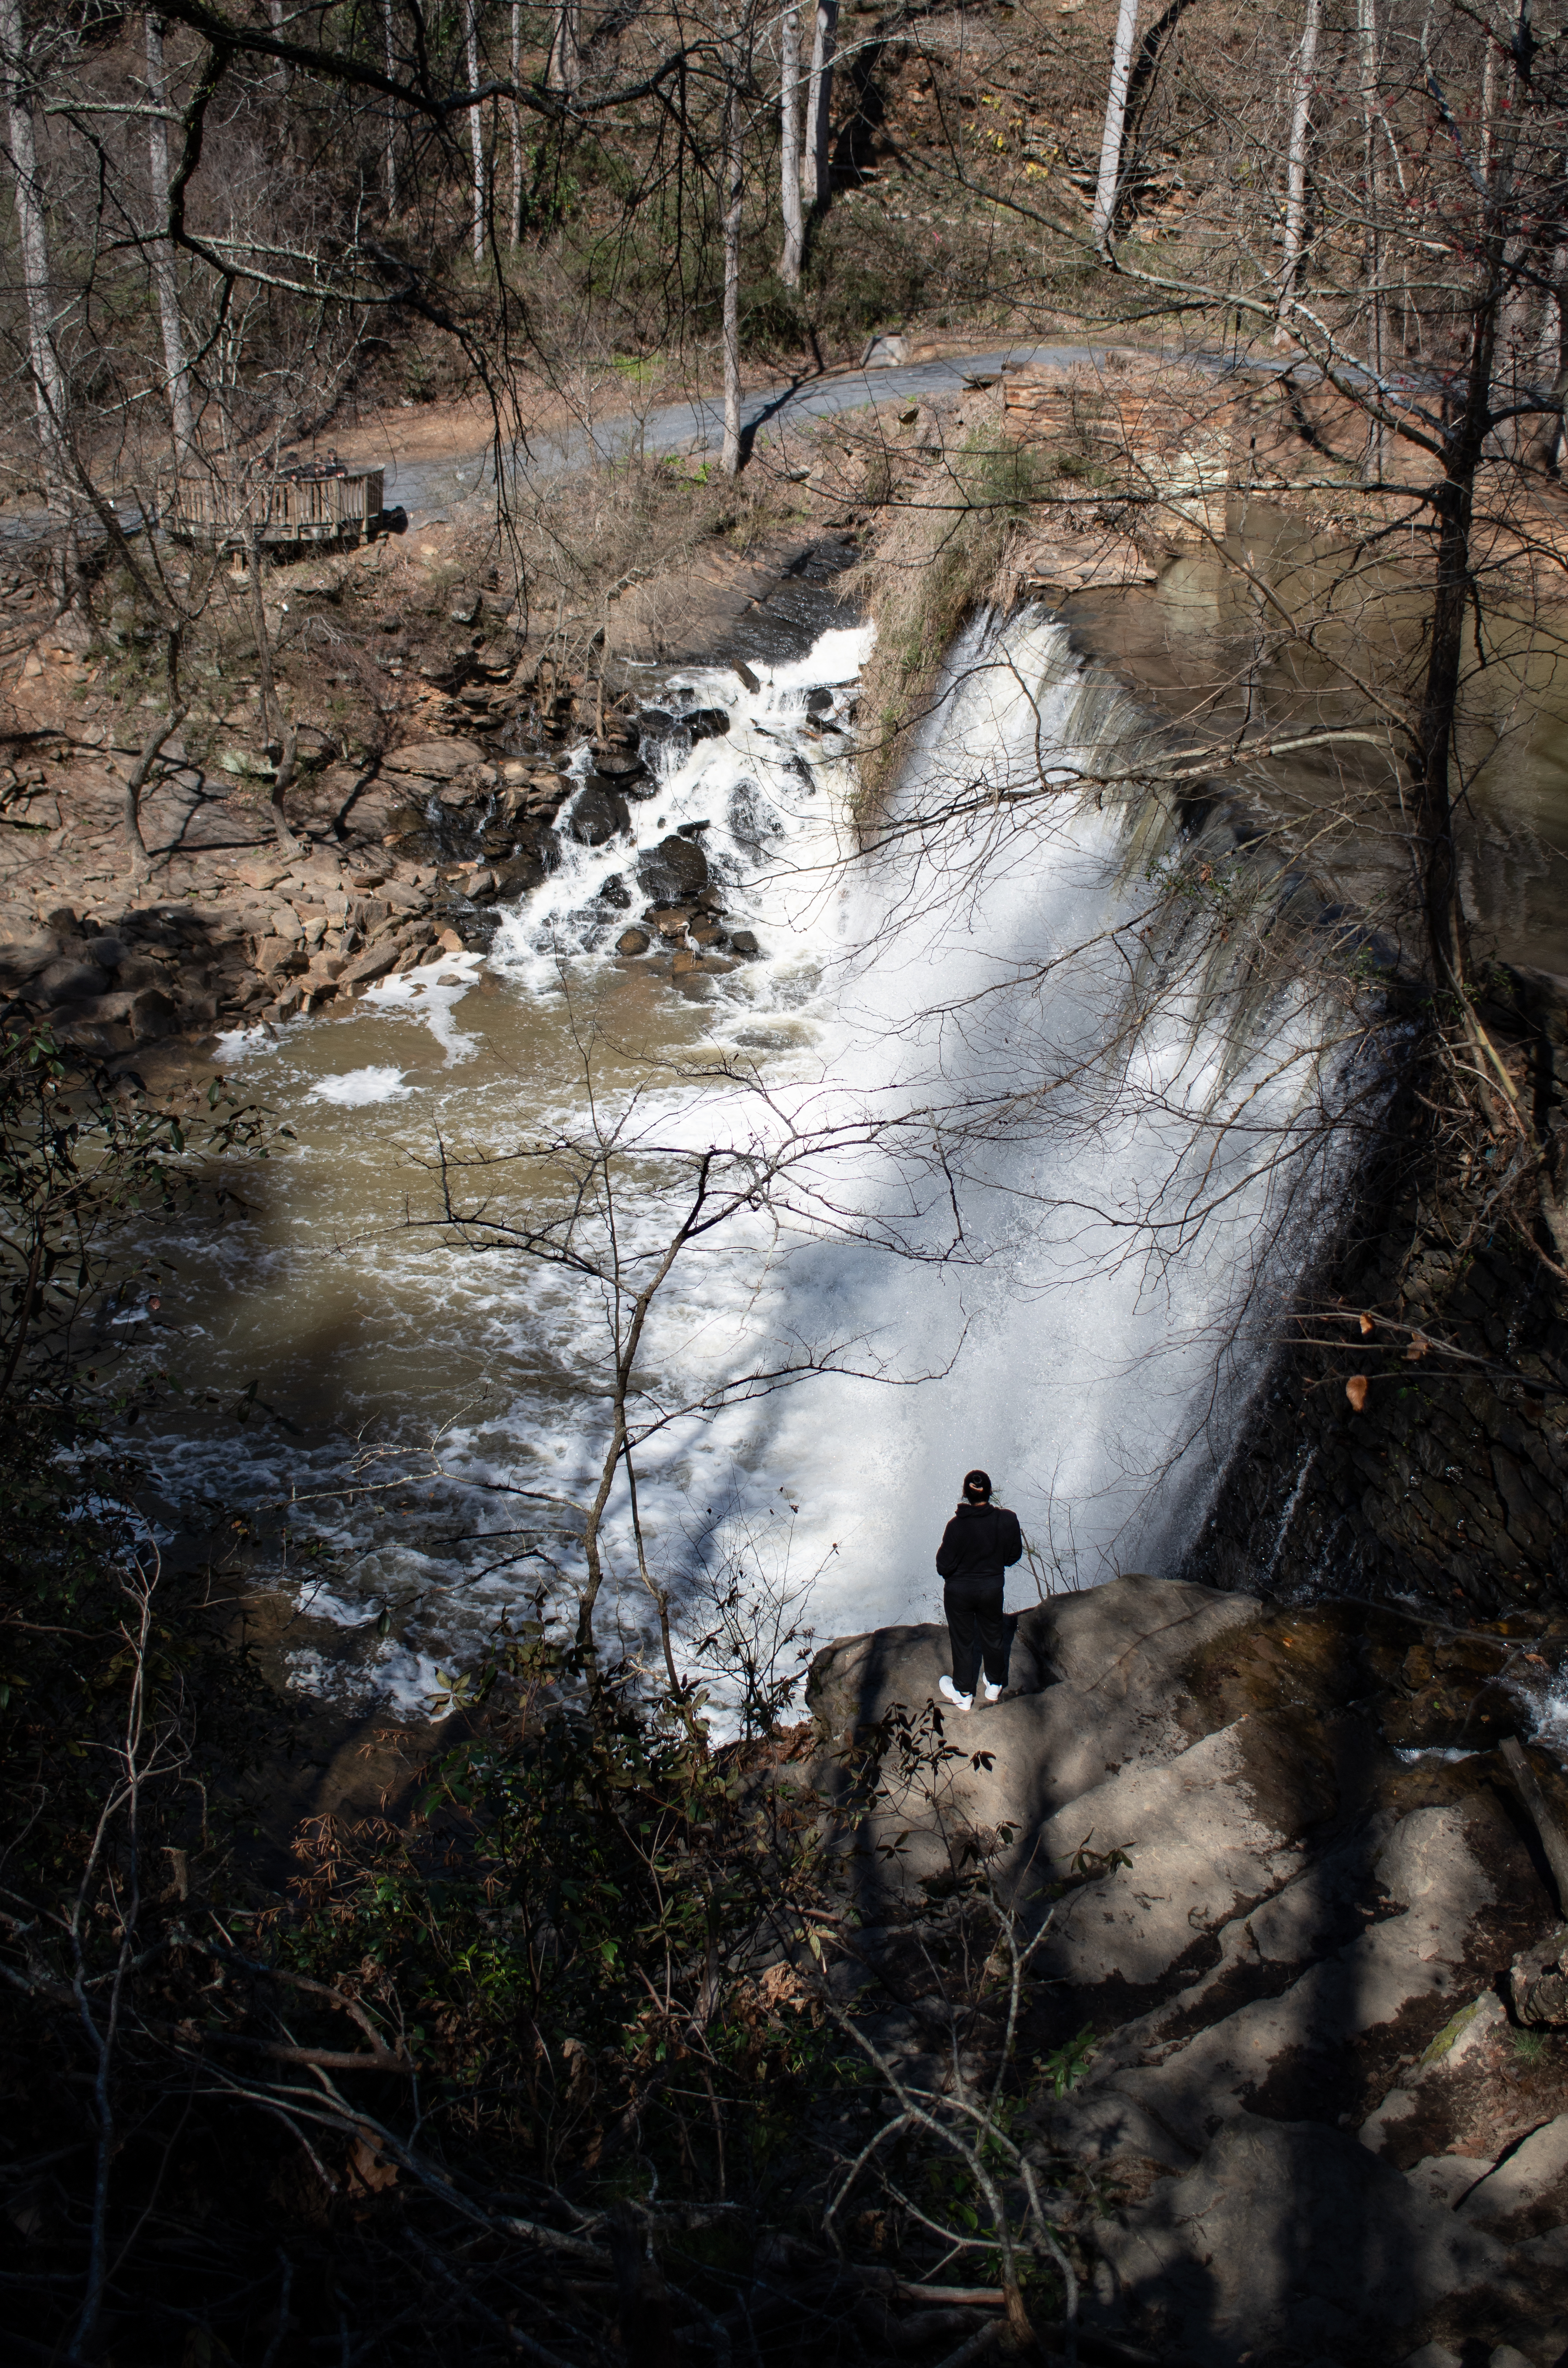
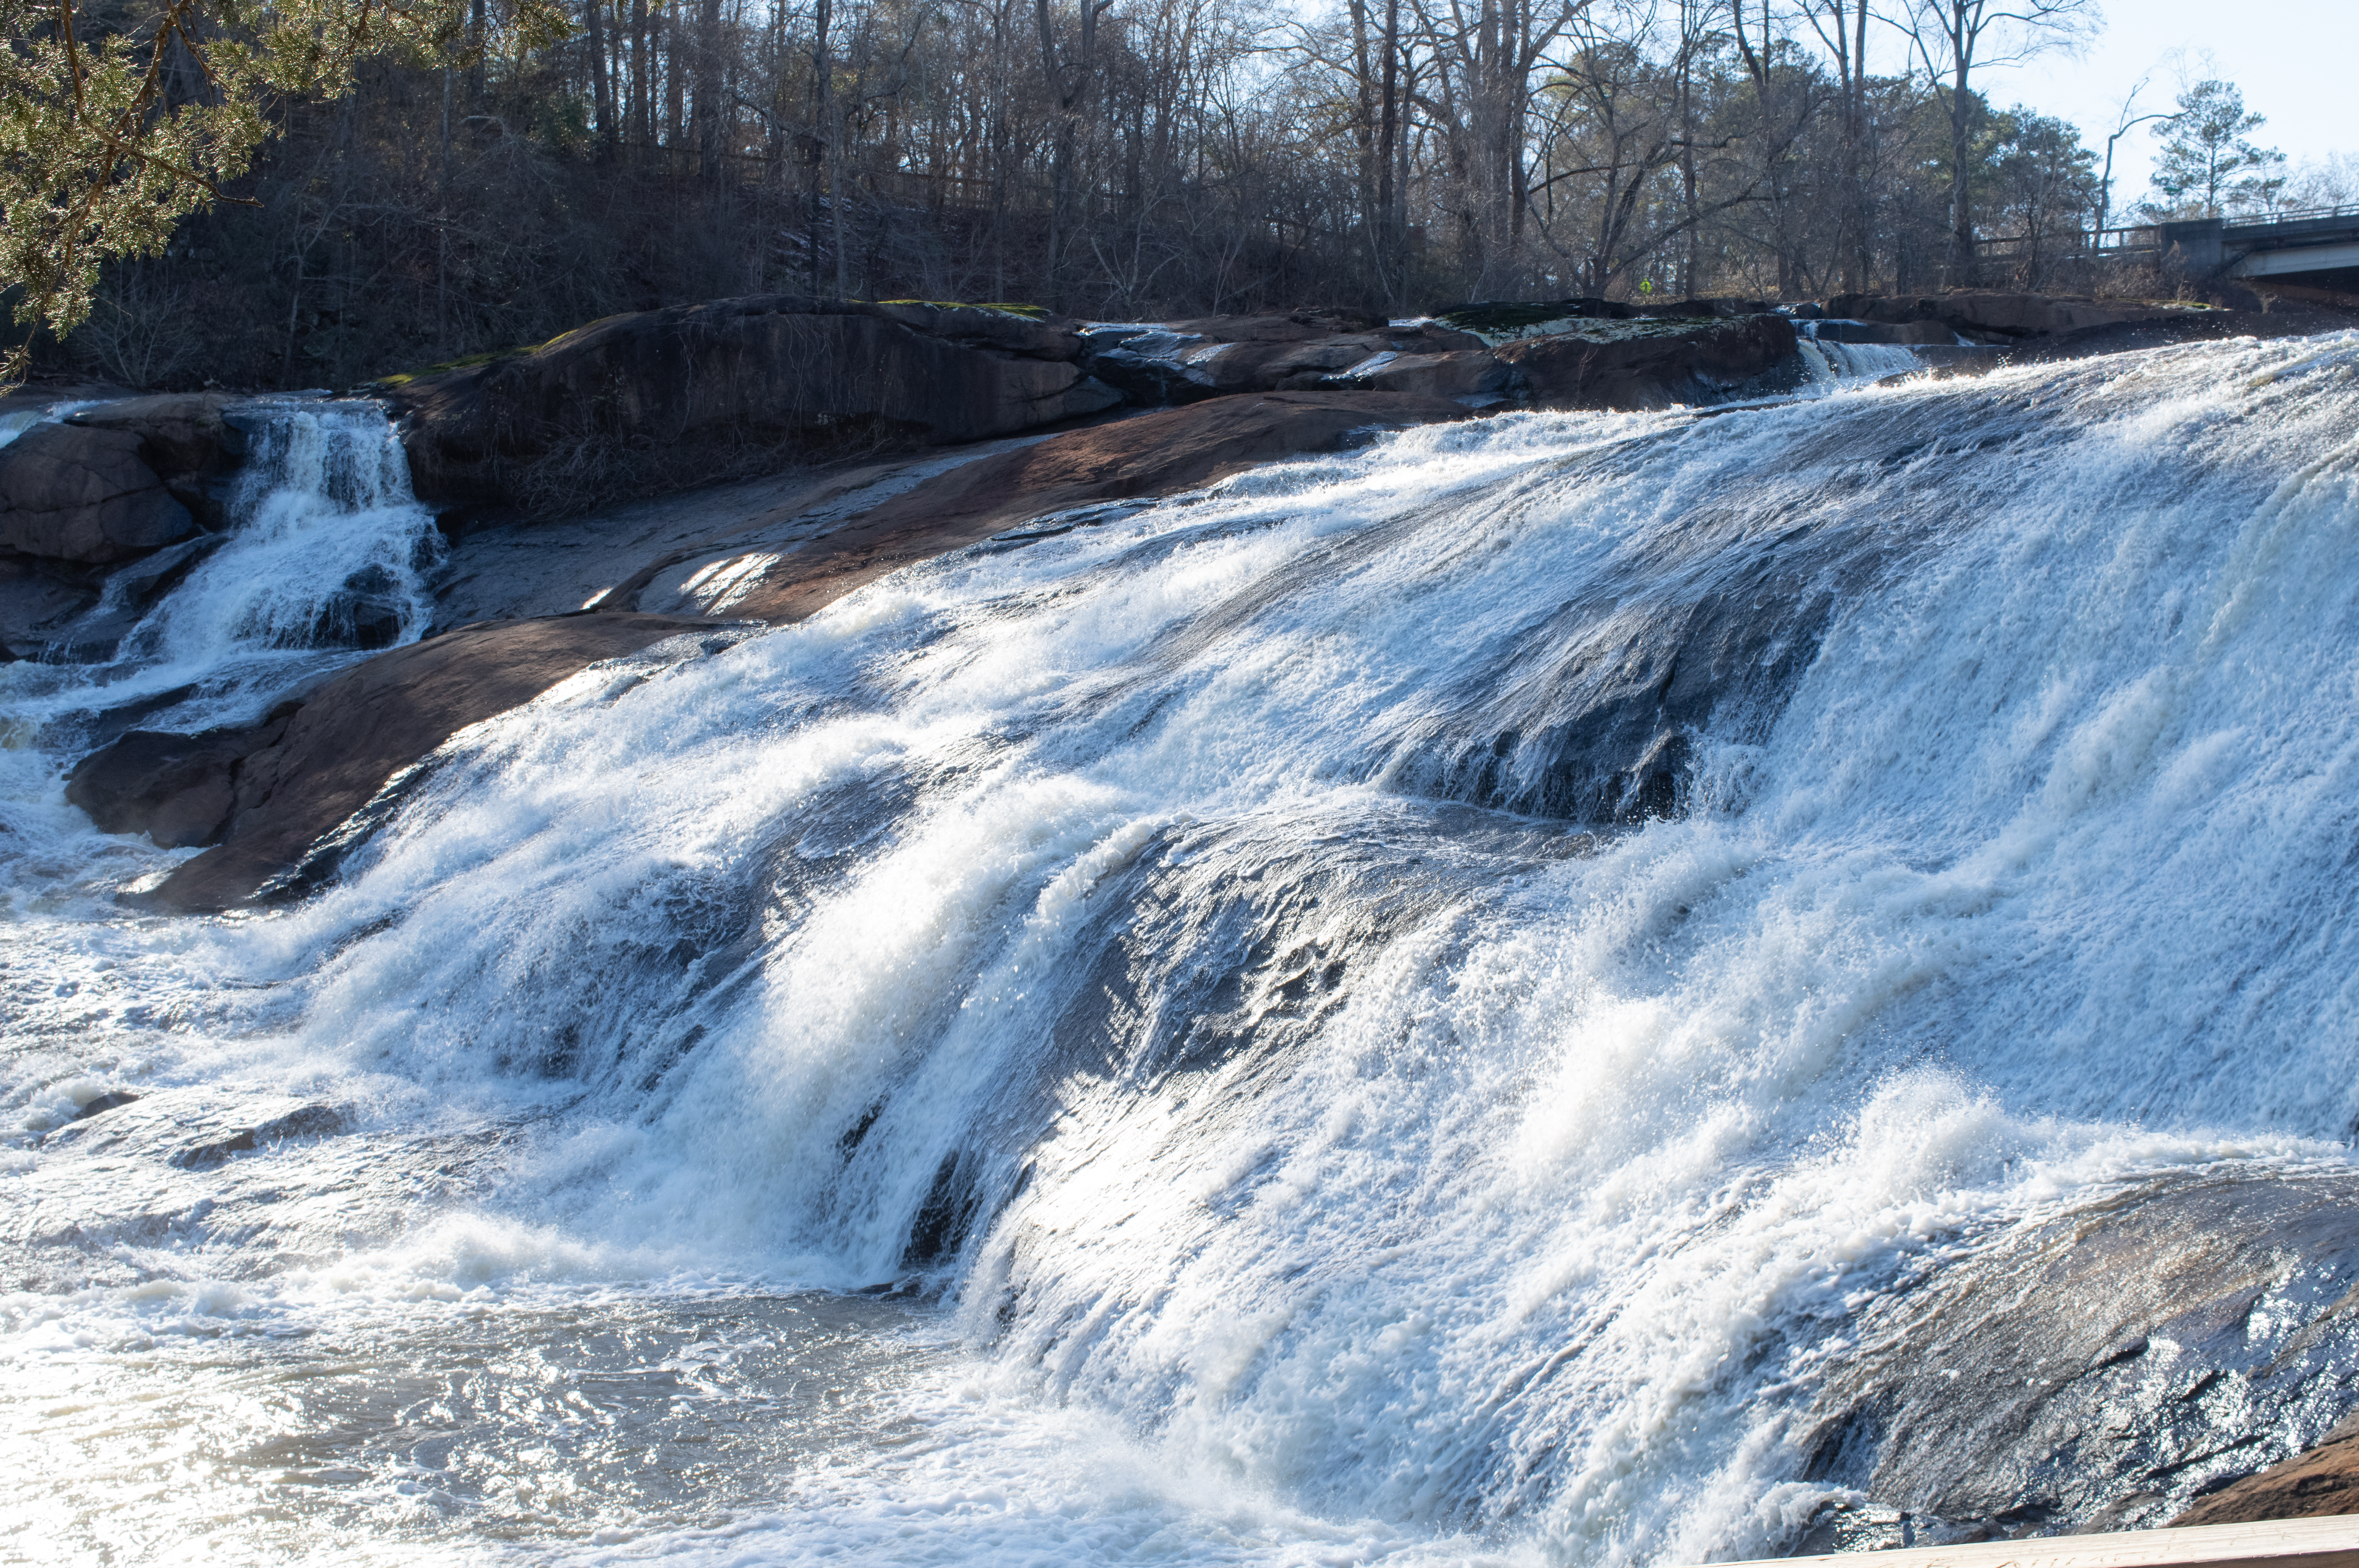
High Falls State Park, GA – Pentax KP – Pentax DA 35mm f/2.8 Macro Limited
Shooting with the KP : the optical viewfinder
Because it’s Pentax’s main differentiator, the optical viewfinder of their dSLRs is the object of the utmost care – and the truth is that – for an APS-C camera, the KP has a very good OVF. The specs sheet reads like a dream come true. The OVF’s pentaprism is made out of glass, it covers almost 100% of the captured image, with a magnification factor of 0.95x and an eye relief of 20.5mm. The focusing screen is fine and bright enough to let you set the focus “manually” with pre-autofocus era lenses.
It’s still an APS-C (meaning cropped sensor) camera, which makes some of the figures of the specs sheet misleading – the announced magnification factor of 0.95x would translate into a relatively mediocre 0.63x on a full frame dSLR (a Pentax K-1 or a Nikon D780 reach 0.7x, and the very best full frame cameras 0.76x). The viewfinder does not exactly give you the immersive view you get in the OVF of a professional full frame dSLR – but composing your pictures through the viewfinder of the KP is still a very pleasant experience – it is large and luminous enough to let you judge how the image will look like without having to double check the rear digital display all the time – it’s very significant step up over the “dark tunnel vision” experienced with the entry-level dSLRs from some other manufacturers.
There is no electronics to introduce a delay between what happens on the scene and what you see on the focusing screen, and – for whatever reason (I know, old habits and old age…), I find it easier to mentally project the final image when I compose on the focusing screen of an optical viewfinder rather than on the LCD panel of an electronic viewfinder.
Pentax KP with the small grip
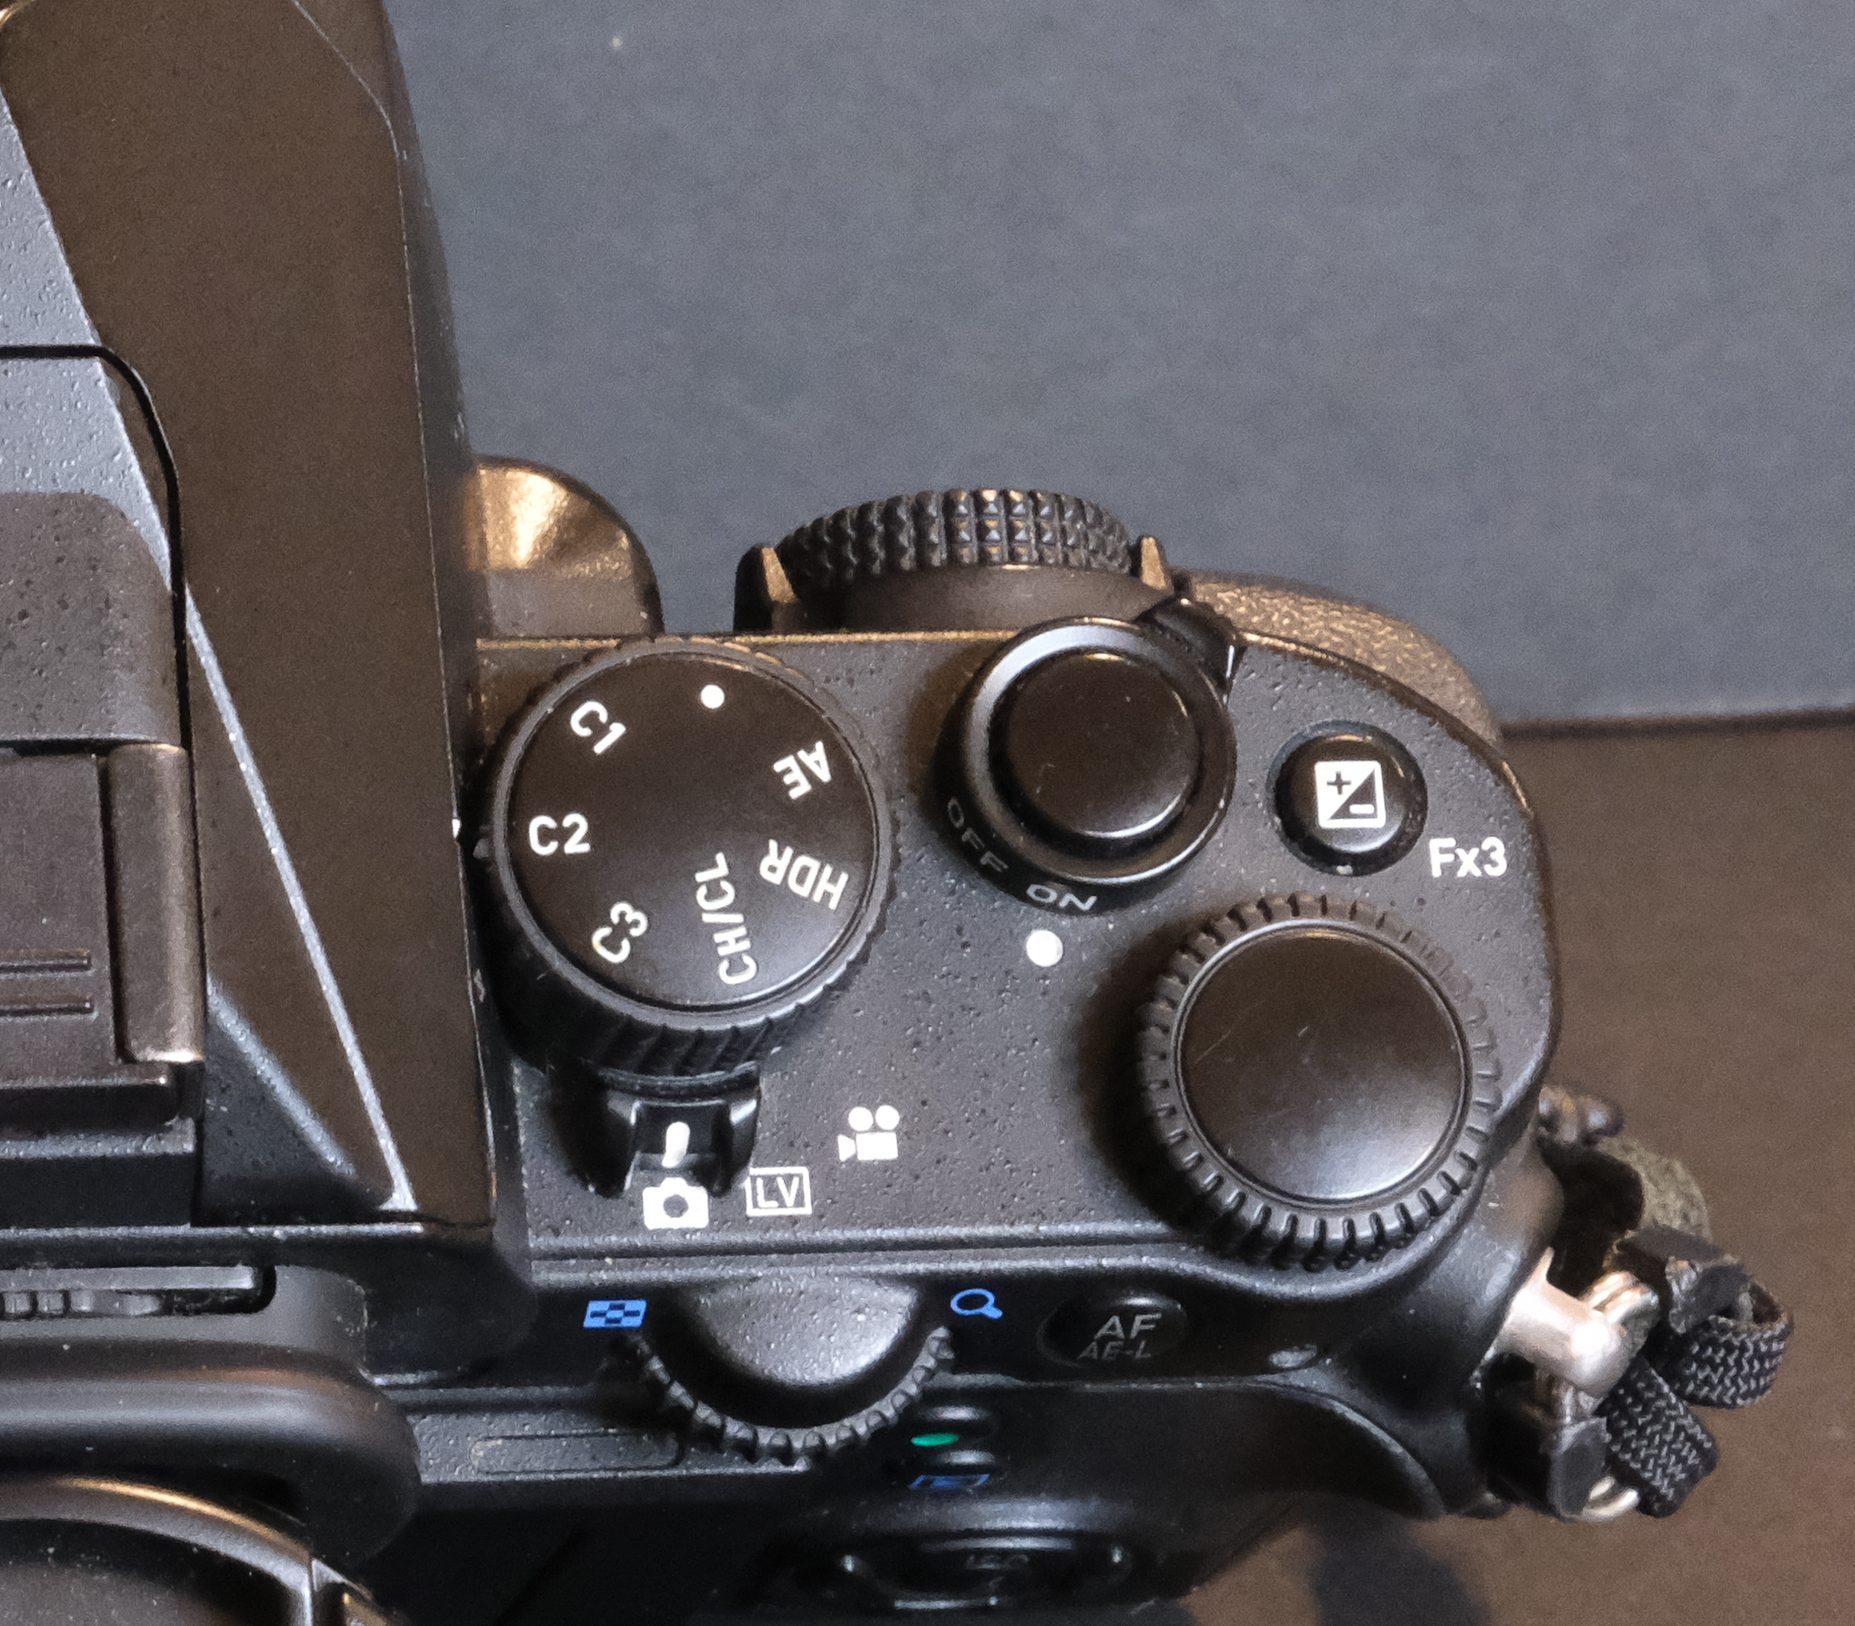
Shooting with the KP: The third control wheel
Like cars, cameras are software defined those days. Everything can be configured and menus have become incredibly long and complex. The KP is not different, but Pentax has introduced one trick to make the photographer’s life easier, the “third control wheel”.
On a relatively compact camera like the KP, the real estate where to place dedicated buttons and switches is limited, and the quantity of options and settings offered in the menus can be overwhelming.
There are settings for which no dedicated physical control is available but that you may wish to change without having to dig deep into pages and pages menus. That’s where the third control wheel – the so called “smart function dial” comes into play.
The “smart function dial” is a big knob on the top plate that can take one of six positions – three pre-defined by Pentax, and three user-defined. Imagine you’re in front of a high contrast scene – you know you’re going to need to set the camera to HDR mode, but don’t know how to configure it. Place the big dial on the HDR position, and rotate the third control wheel at the far right of the top plate to select the desired HDR setting. Take the picture, review the result, then simply rotate the third control wheel left of right to select another HDR setting, and repeat until you get a picture you like.
The “smart function dial” with its “AE-HDR-CH/CL…” markings is paired with the unmarked control wheel on its right. A very good idea, nicely implemented.
In my experience, the real value sits with the user configurable functions, C1, C2 and C3. I’ve set C1 to change the exposure compensation value. If I’m facing a scene difficult to evaluate, I position the knob on C1, and use the third wheel to circle through the different exposure compensation values. Similarly, I configured C2 to easily switch from an ISO value to another.
The third control wheel may seem gimmicky, or redundant (I could also access the exposure compensation or the ISO settings using a dedicated key and the second control wheel or the Info page on the rear display), but it saves time if you need to change a parameter frequently or if you’re trying different options when facing a complex scene, and I ended up using it a lot.
Not so good: Battery life
Well, it’s not brilliant. Not as bad as a Fujifilm X-H1, for instance, but not great at all, and frankly disappointing for a dSLR. Because there was no room in the KP’s body for the large battery of the K-5/K-3 series, Pentax used the small 1050 mAh battery introduced in 2010 with the K-r, and typically coming with Pentax’s entry level models (it’s still being used in the KF). For reference, the K-5 and the K-3 use a 1860 mAh battery, delivering almost twice the capacity.
The KP is begging to be used in Live View Mode (why would Pentax have specified a tiltable rear screen otherwise), which increases the power consumption and makes the choice of a small battery even more puzzling. When Nikon dSLRs can easily shoot 1000 pictures on a charge, the KP is struggling to deliver more than three hundreds (it’s rated at 420 shots per charge by CIPA, which seems pretty optimistic). Be sure to have one or two charged spare batteries with you, or the battery grip attached.
The battery grip accepts one lithium battery (either the small type of the KP/KF or the large type of the K-5/K-3) and its capacity comes in addition to the battery already in place in the body of the camera, effectively doubling the total battery capacity (with the small KP/KF battery) or almost tripling it (with the large K-5/K-3 battery).
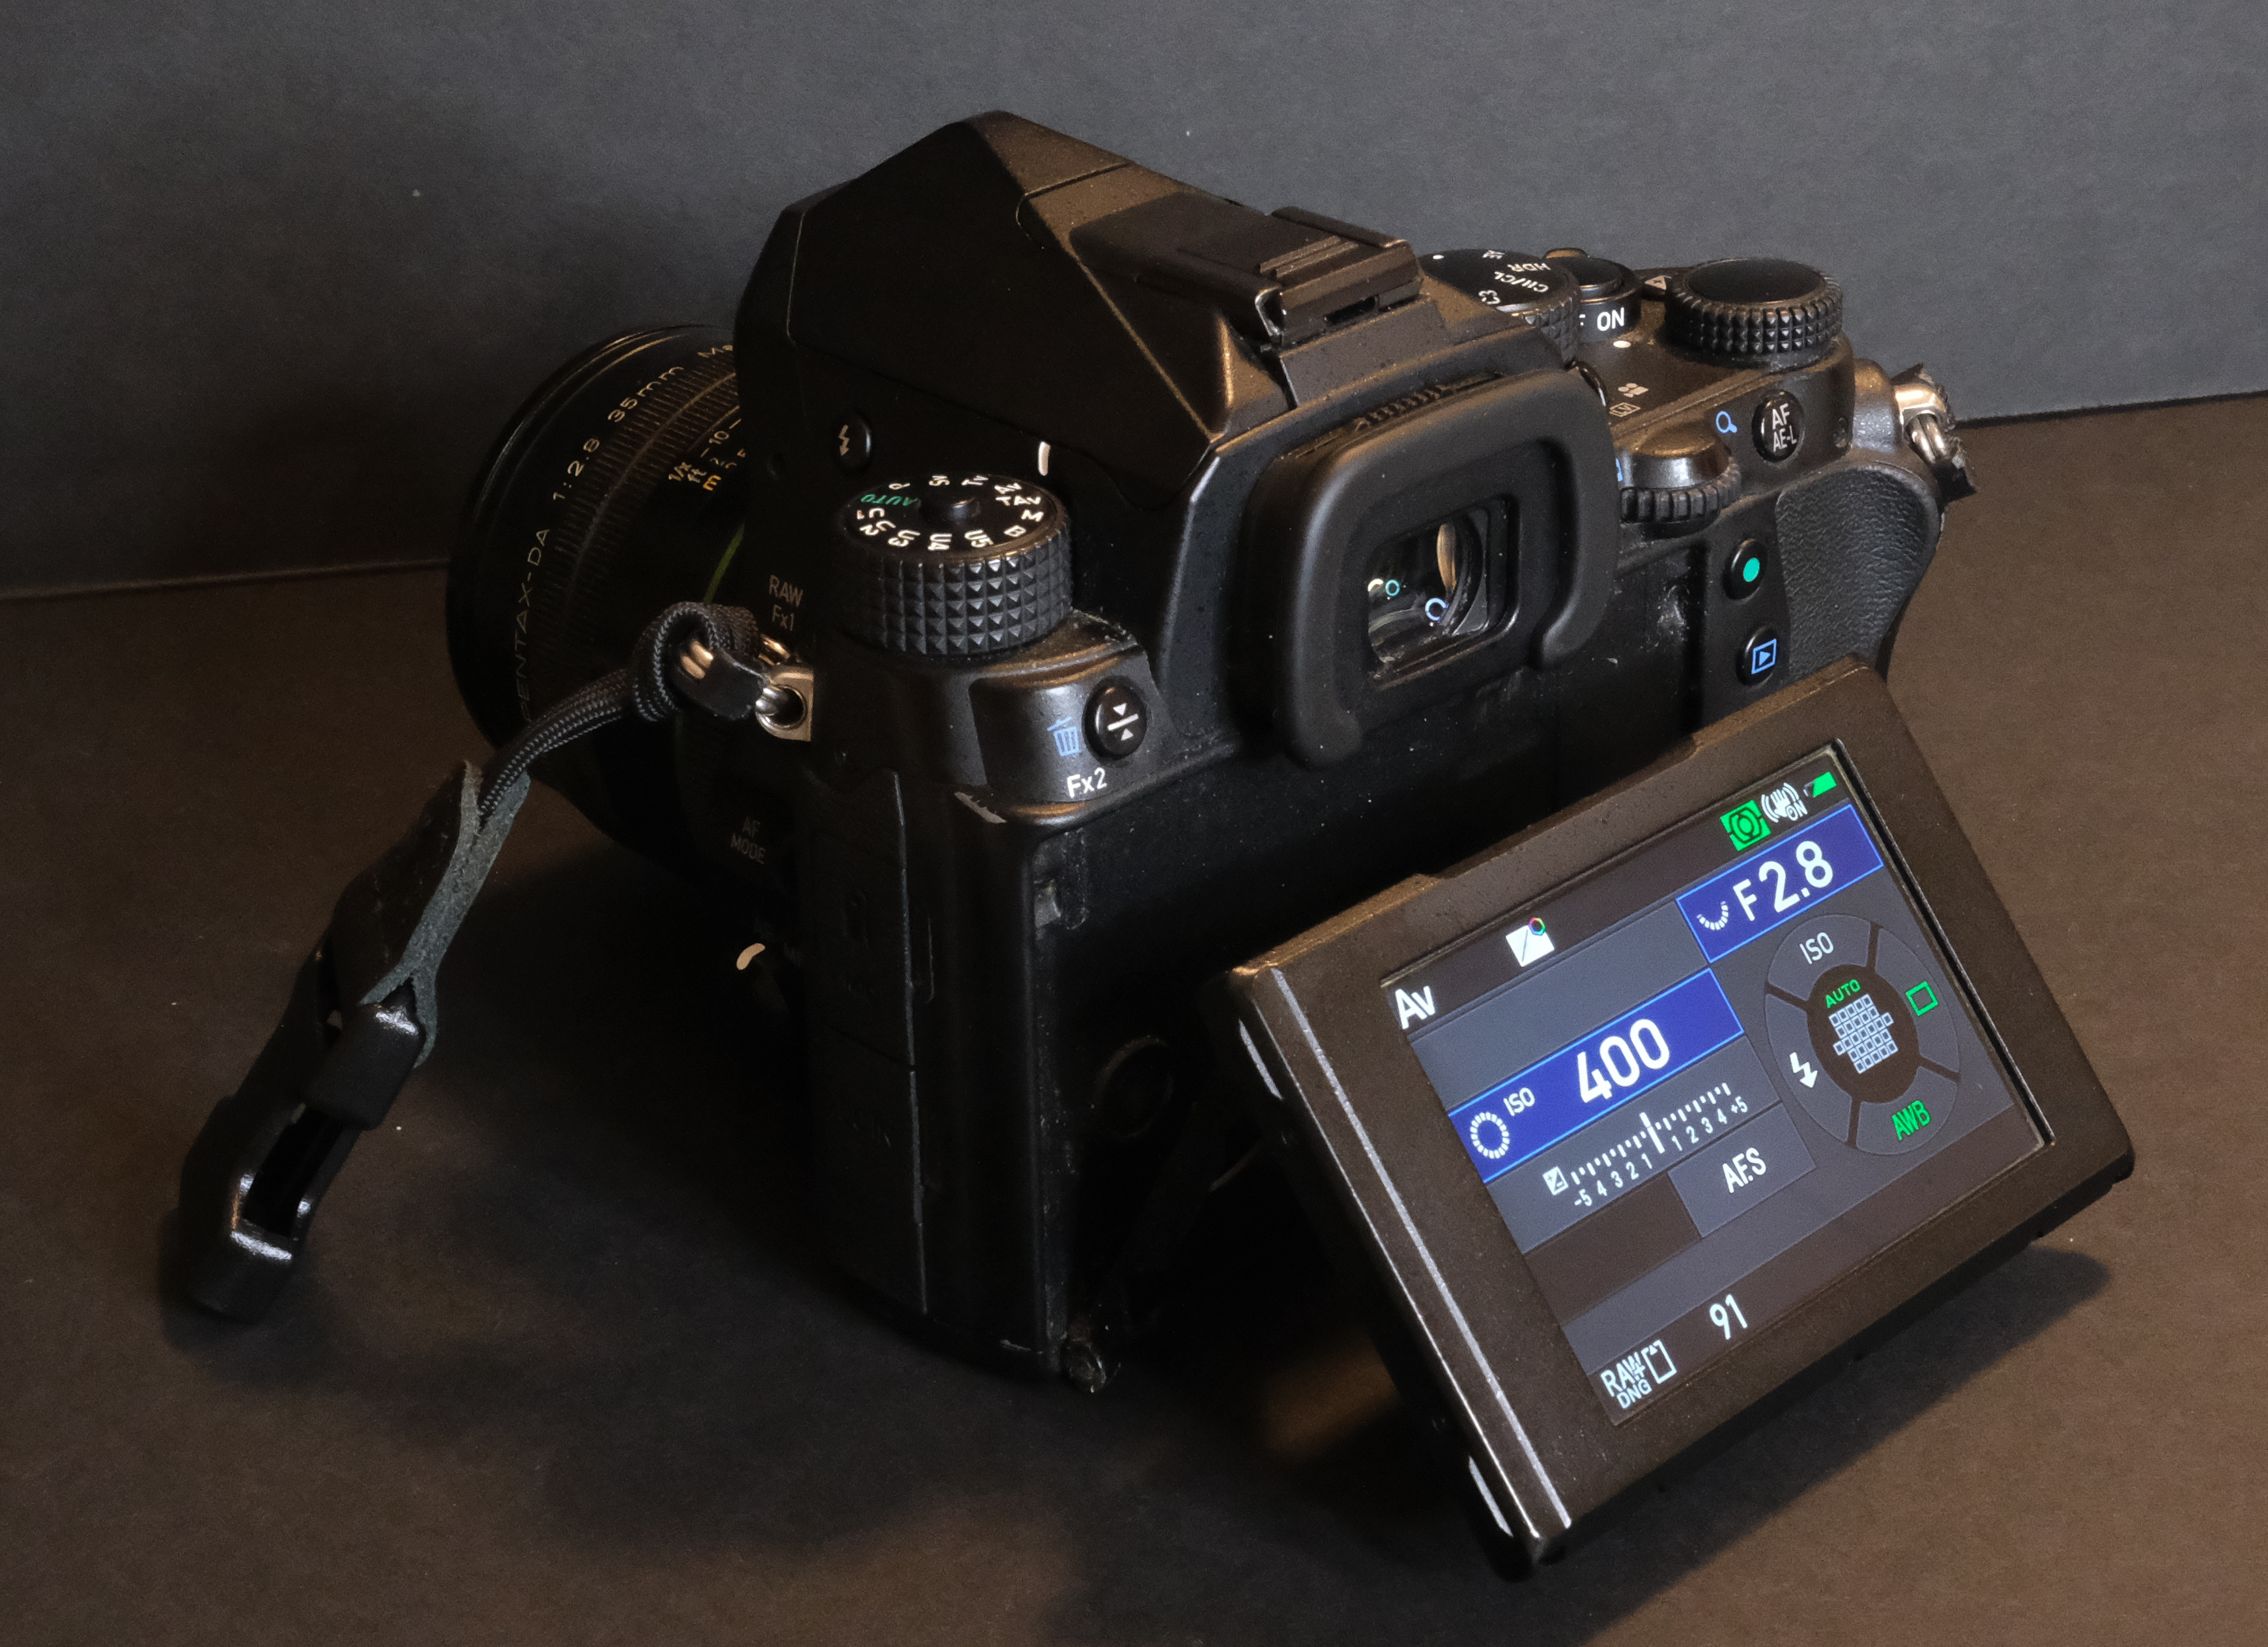
Apart from the KP, only the full frame Pentax K-1 has a tillable rear display – it tilts forward….
The Live View mode and macro-photography
This is not a mirrorless camera, and even though the image sensor has photosites dedicated to phase detection autofocus, they are only mobilized when shooting videos, and not when taking still images.
Therefore, when in the Live-View mode, the KP won’t have the speed and reactivity of a good mirrorless ILC (to shoot sports, wild life or other moving subjects, use the optical viewfinder, that’s what it’s here for). But on relatively static and evenly lit subjects (landscape, interior photography, macro photography), the autofocus of the Live View mode works extremely well.
On other subjects (moving objects or people, scenes with strong highlights), it struggles, and hunts vainly for focus (I’ve read it performs better with recent lenses equipped with an internal focusing motor). On earlier Pentax models, Live-View looked like a clunky afterthought. Here, it’s well implemented but only usable with a limited type of subjects.
…and backwards.
Image Quality
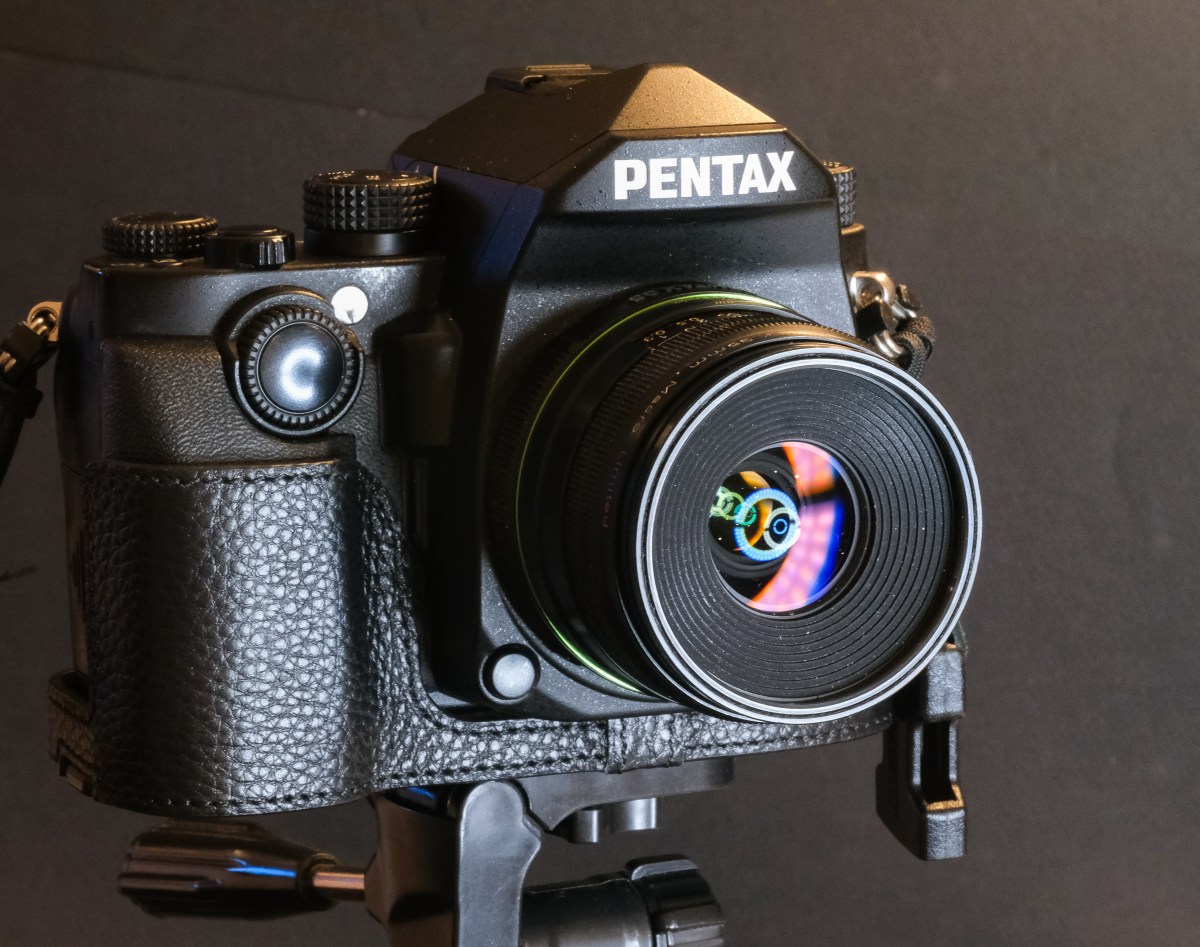
I don’t know if it’s the camera, or the prime Pentax 35mm Macro “Limited” prime lens . Or the combination they form. But I’ve been really pleased and genuinely impressed with the quality of the images.
The images (RAW and JPEGs) are correctly exposed, with pleasing colors, they show an impressive dynamic range, and need very few adjustments – no need to play with the exposure, the highlights or the clarity sliders to get pictures you can be proud of. And it’s true for landscapes, for interiors, for pictures of objects, when composing through the optical viewfinder and on the rear display in Live-View mode.
You can see Pentax dSLRs as obsolete pieces of machinery, and you would have a point when it comes to their live-view or video capabilities, but as far as still image quality is concerned, they’re perfectly up to date.
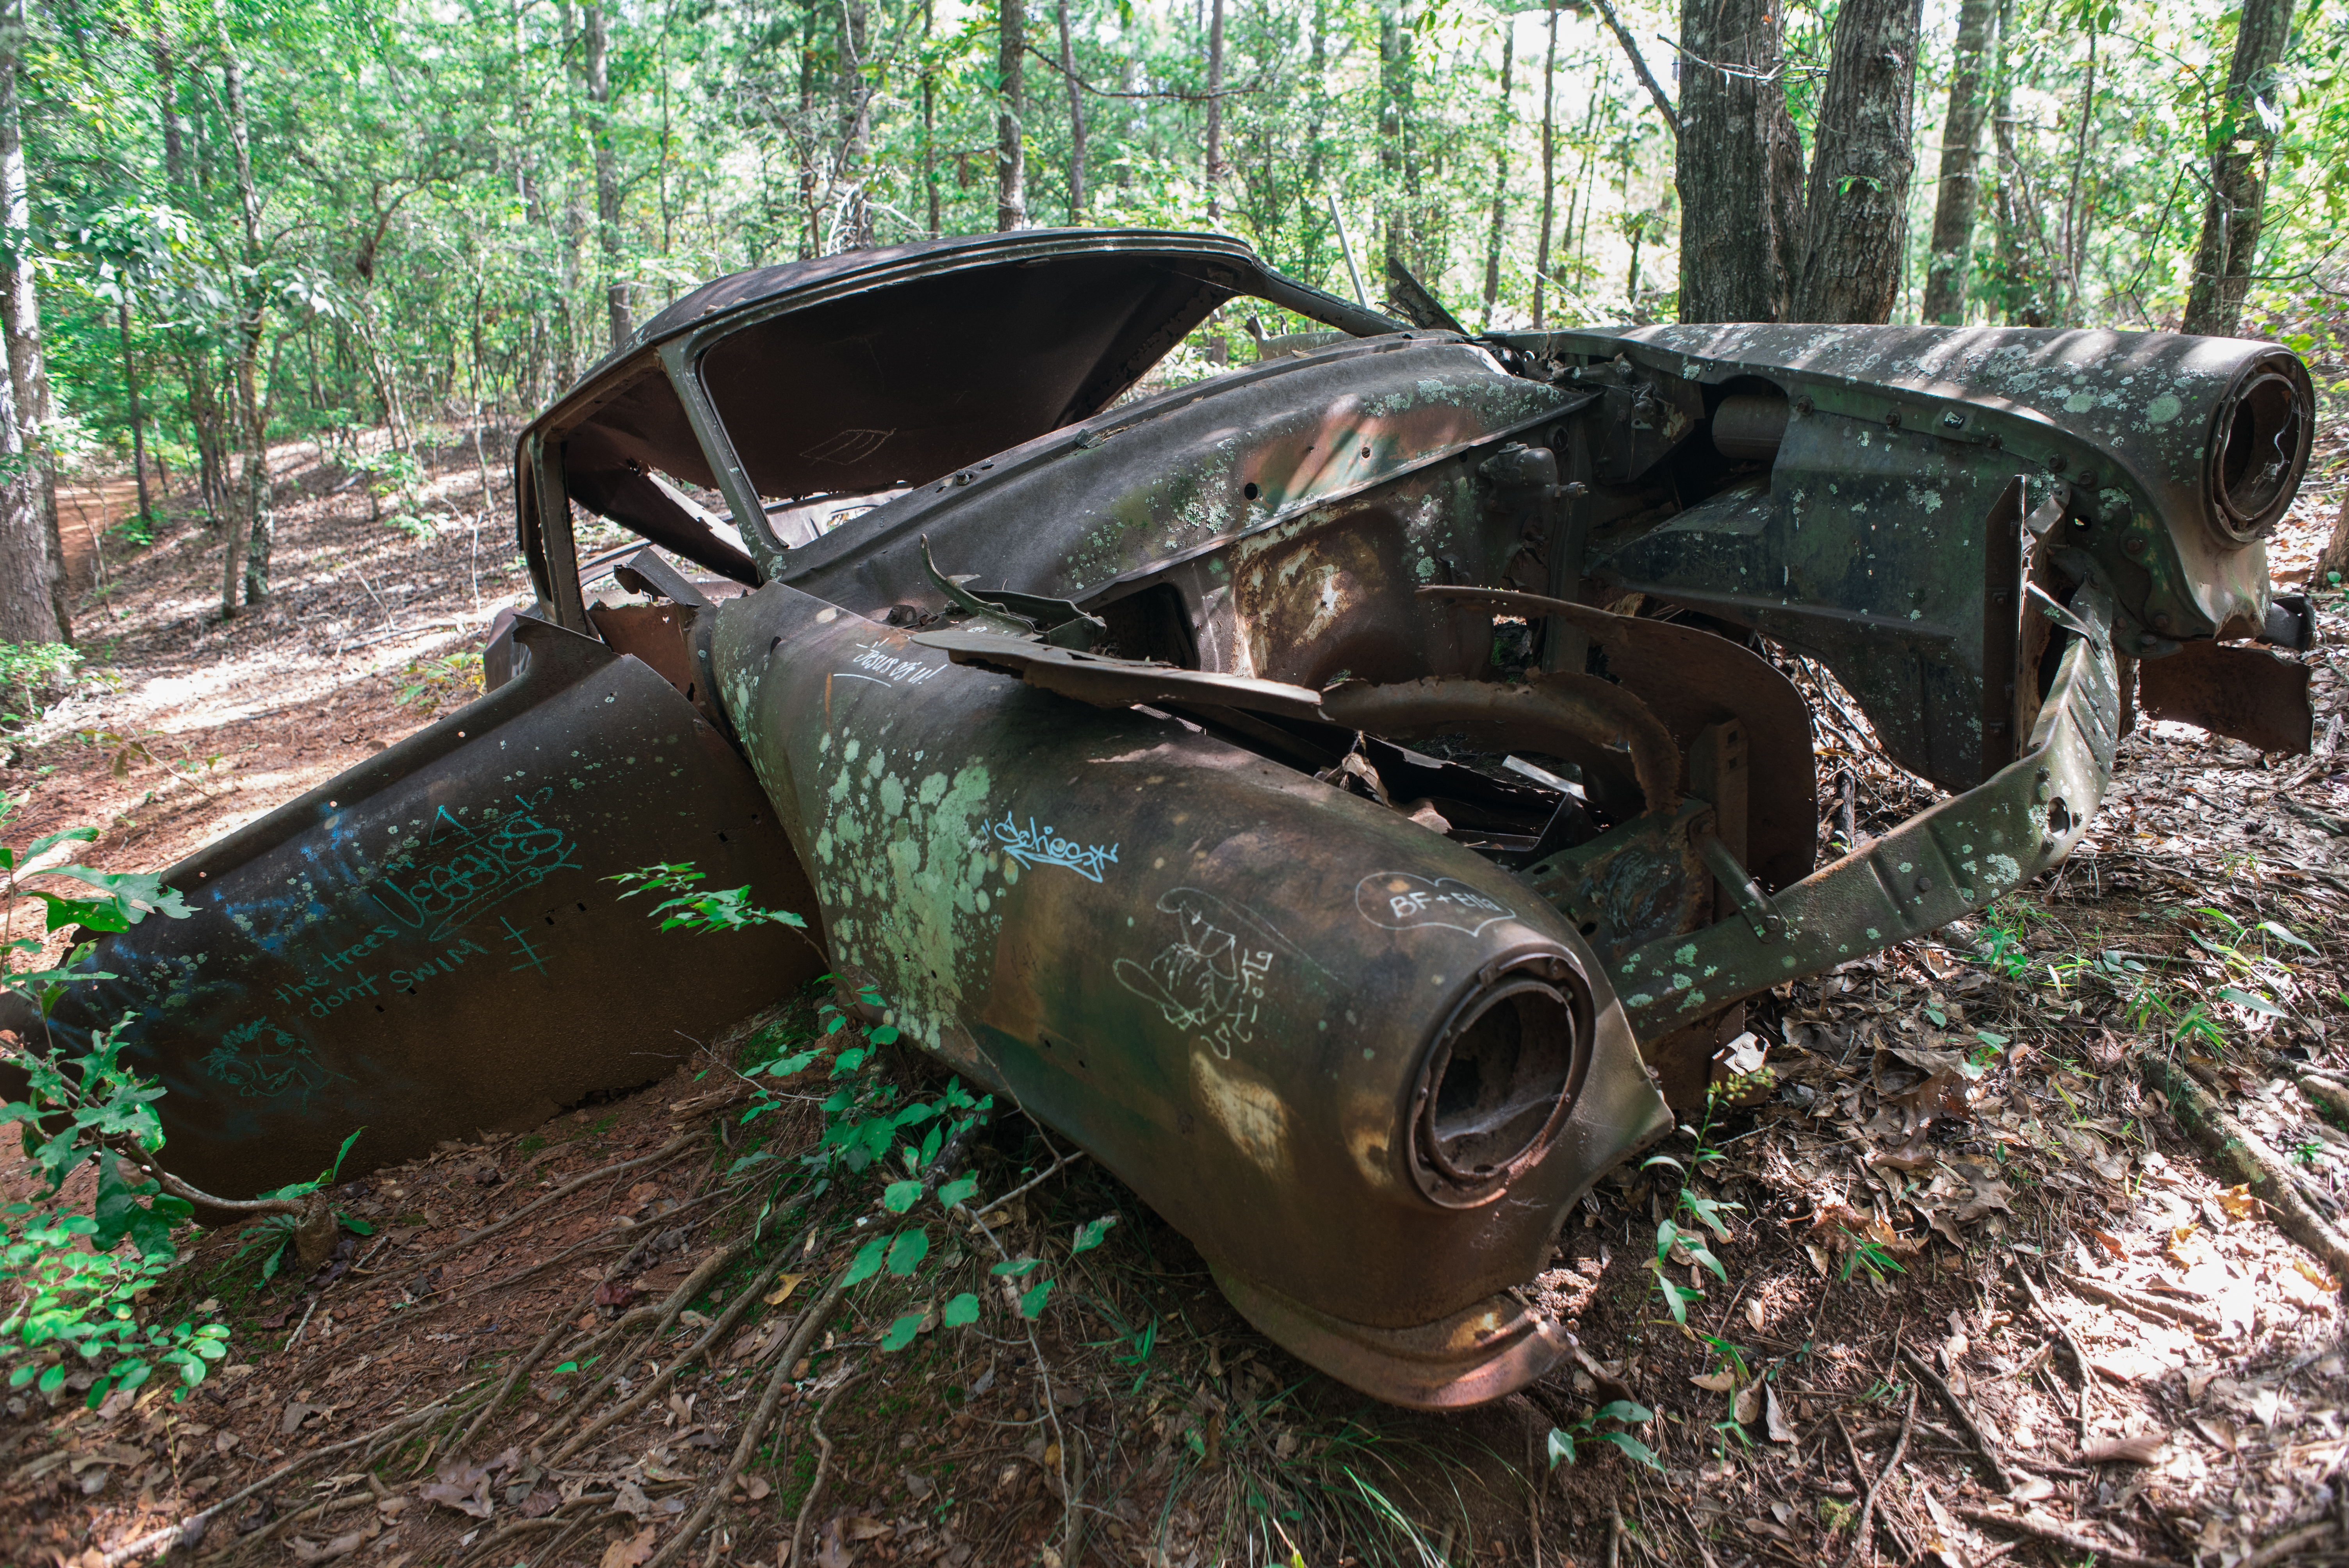
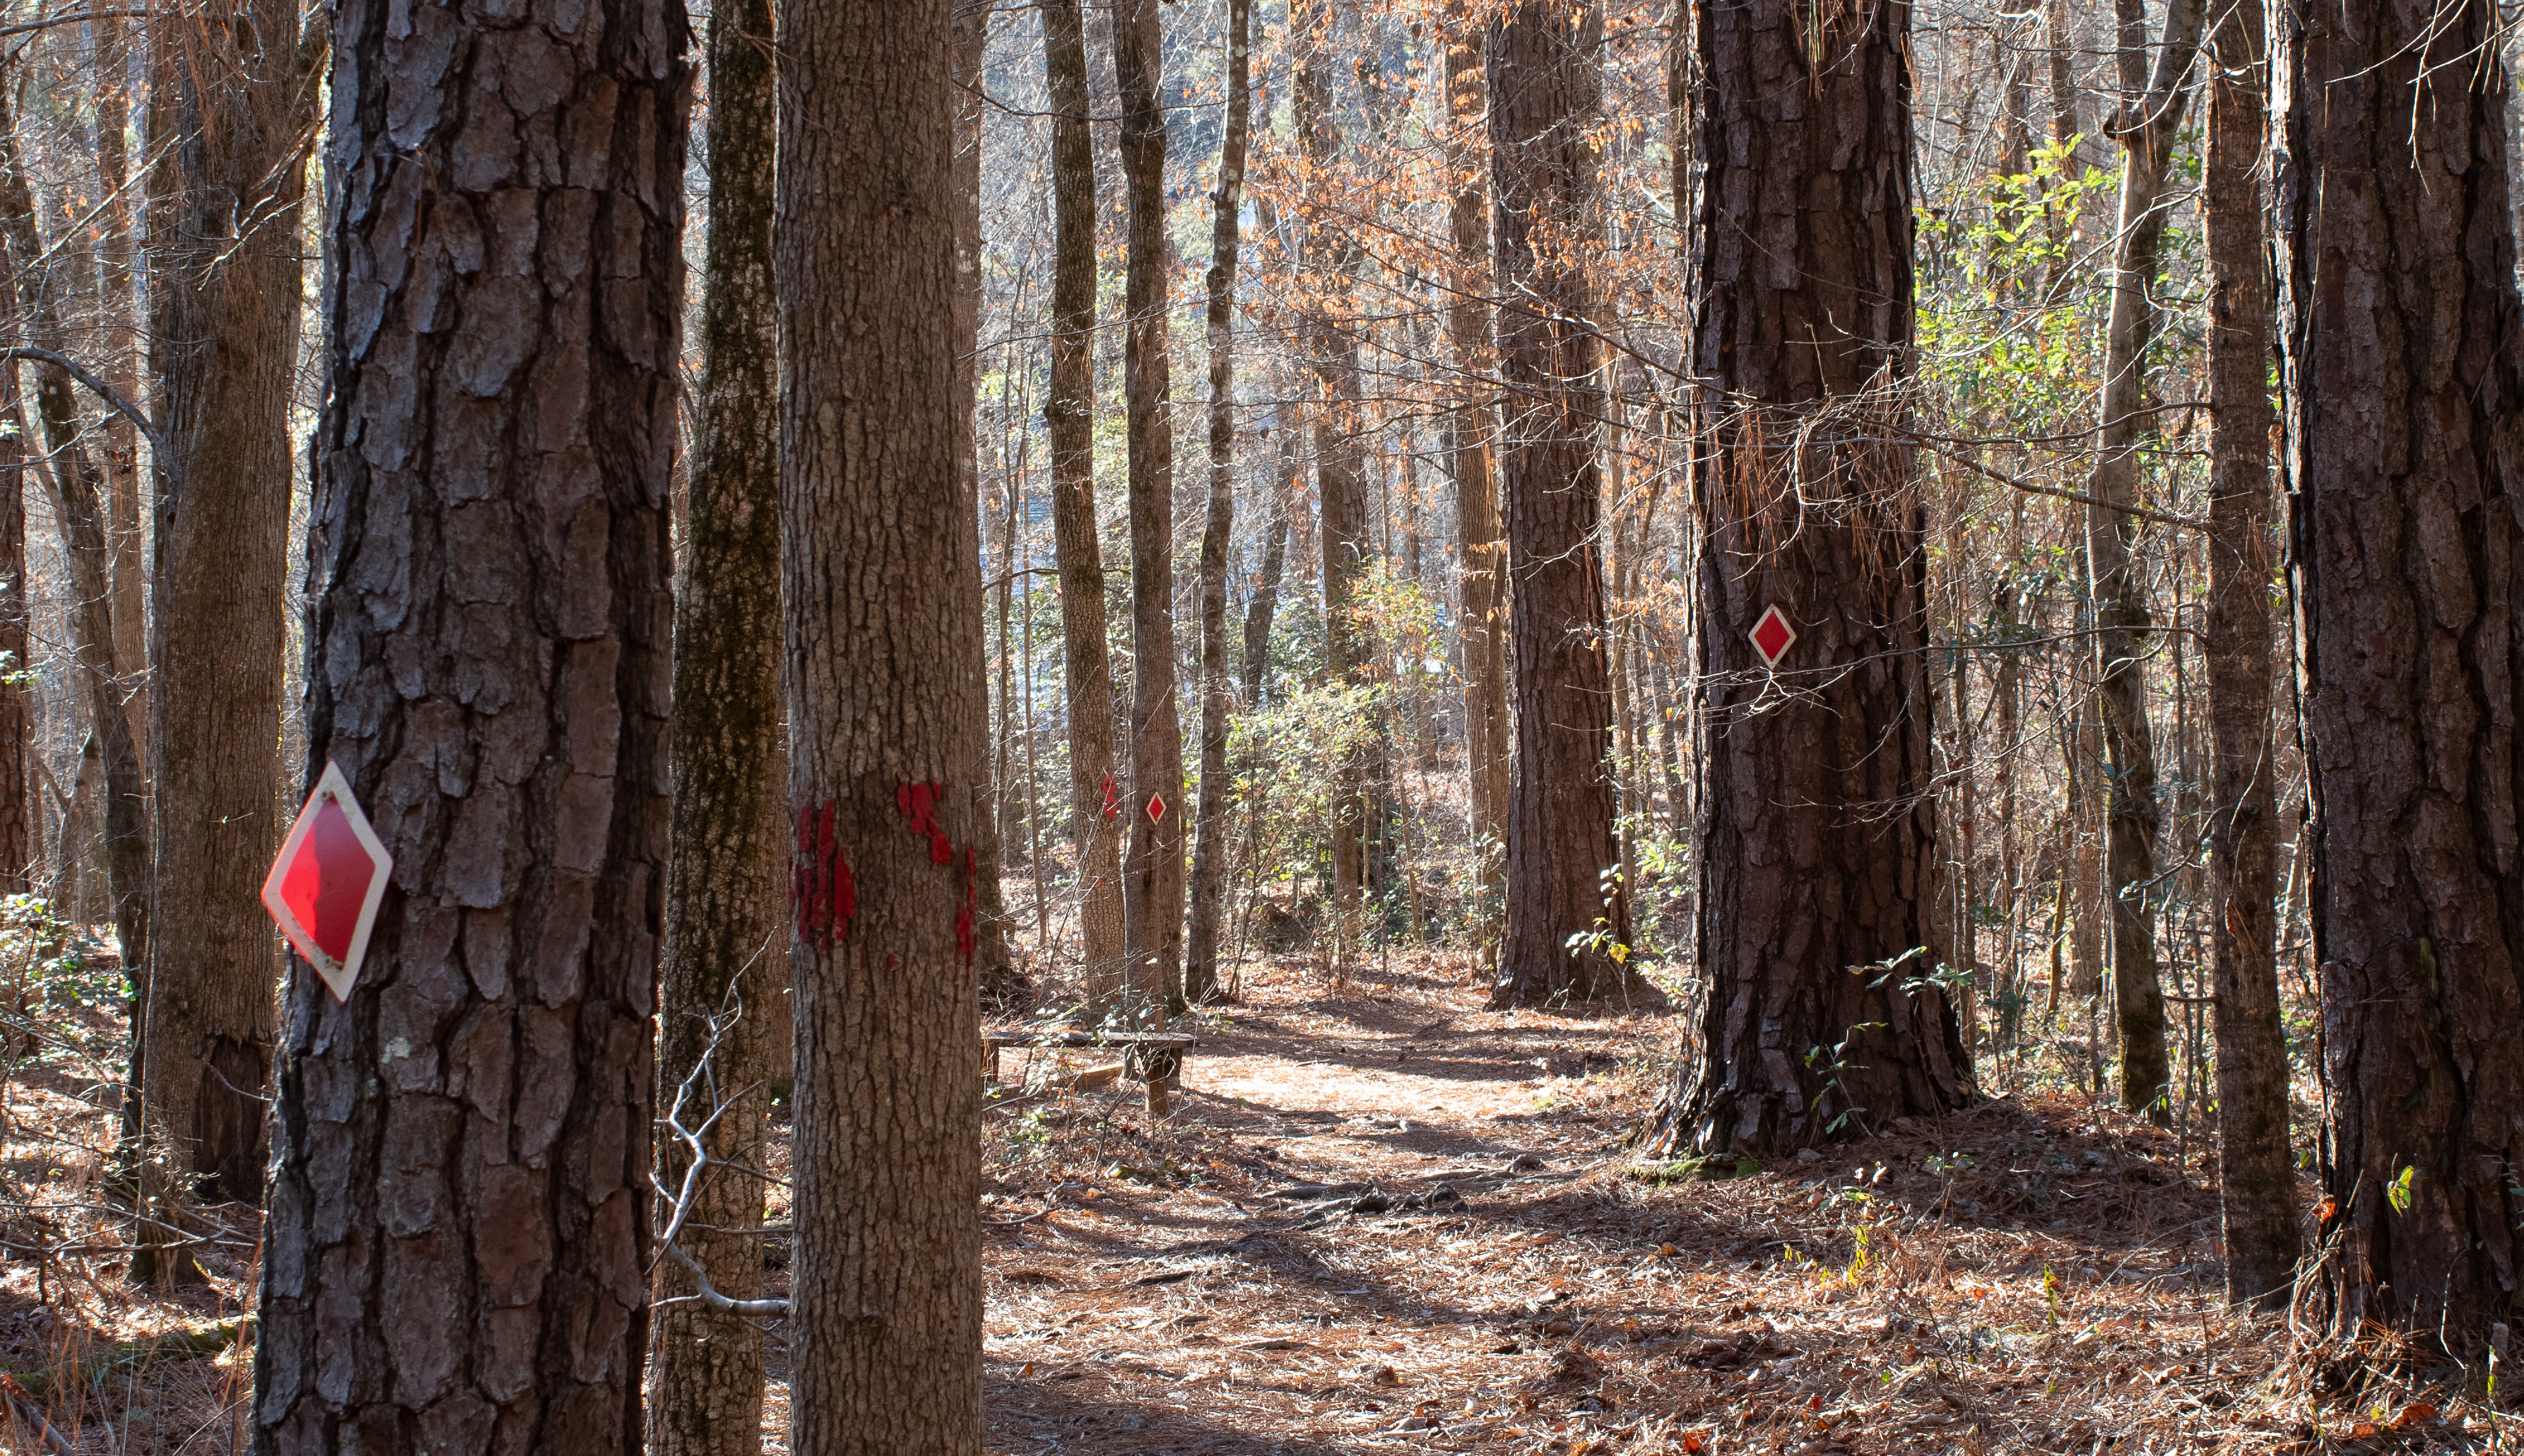
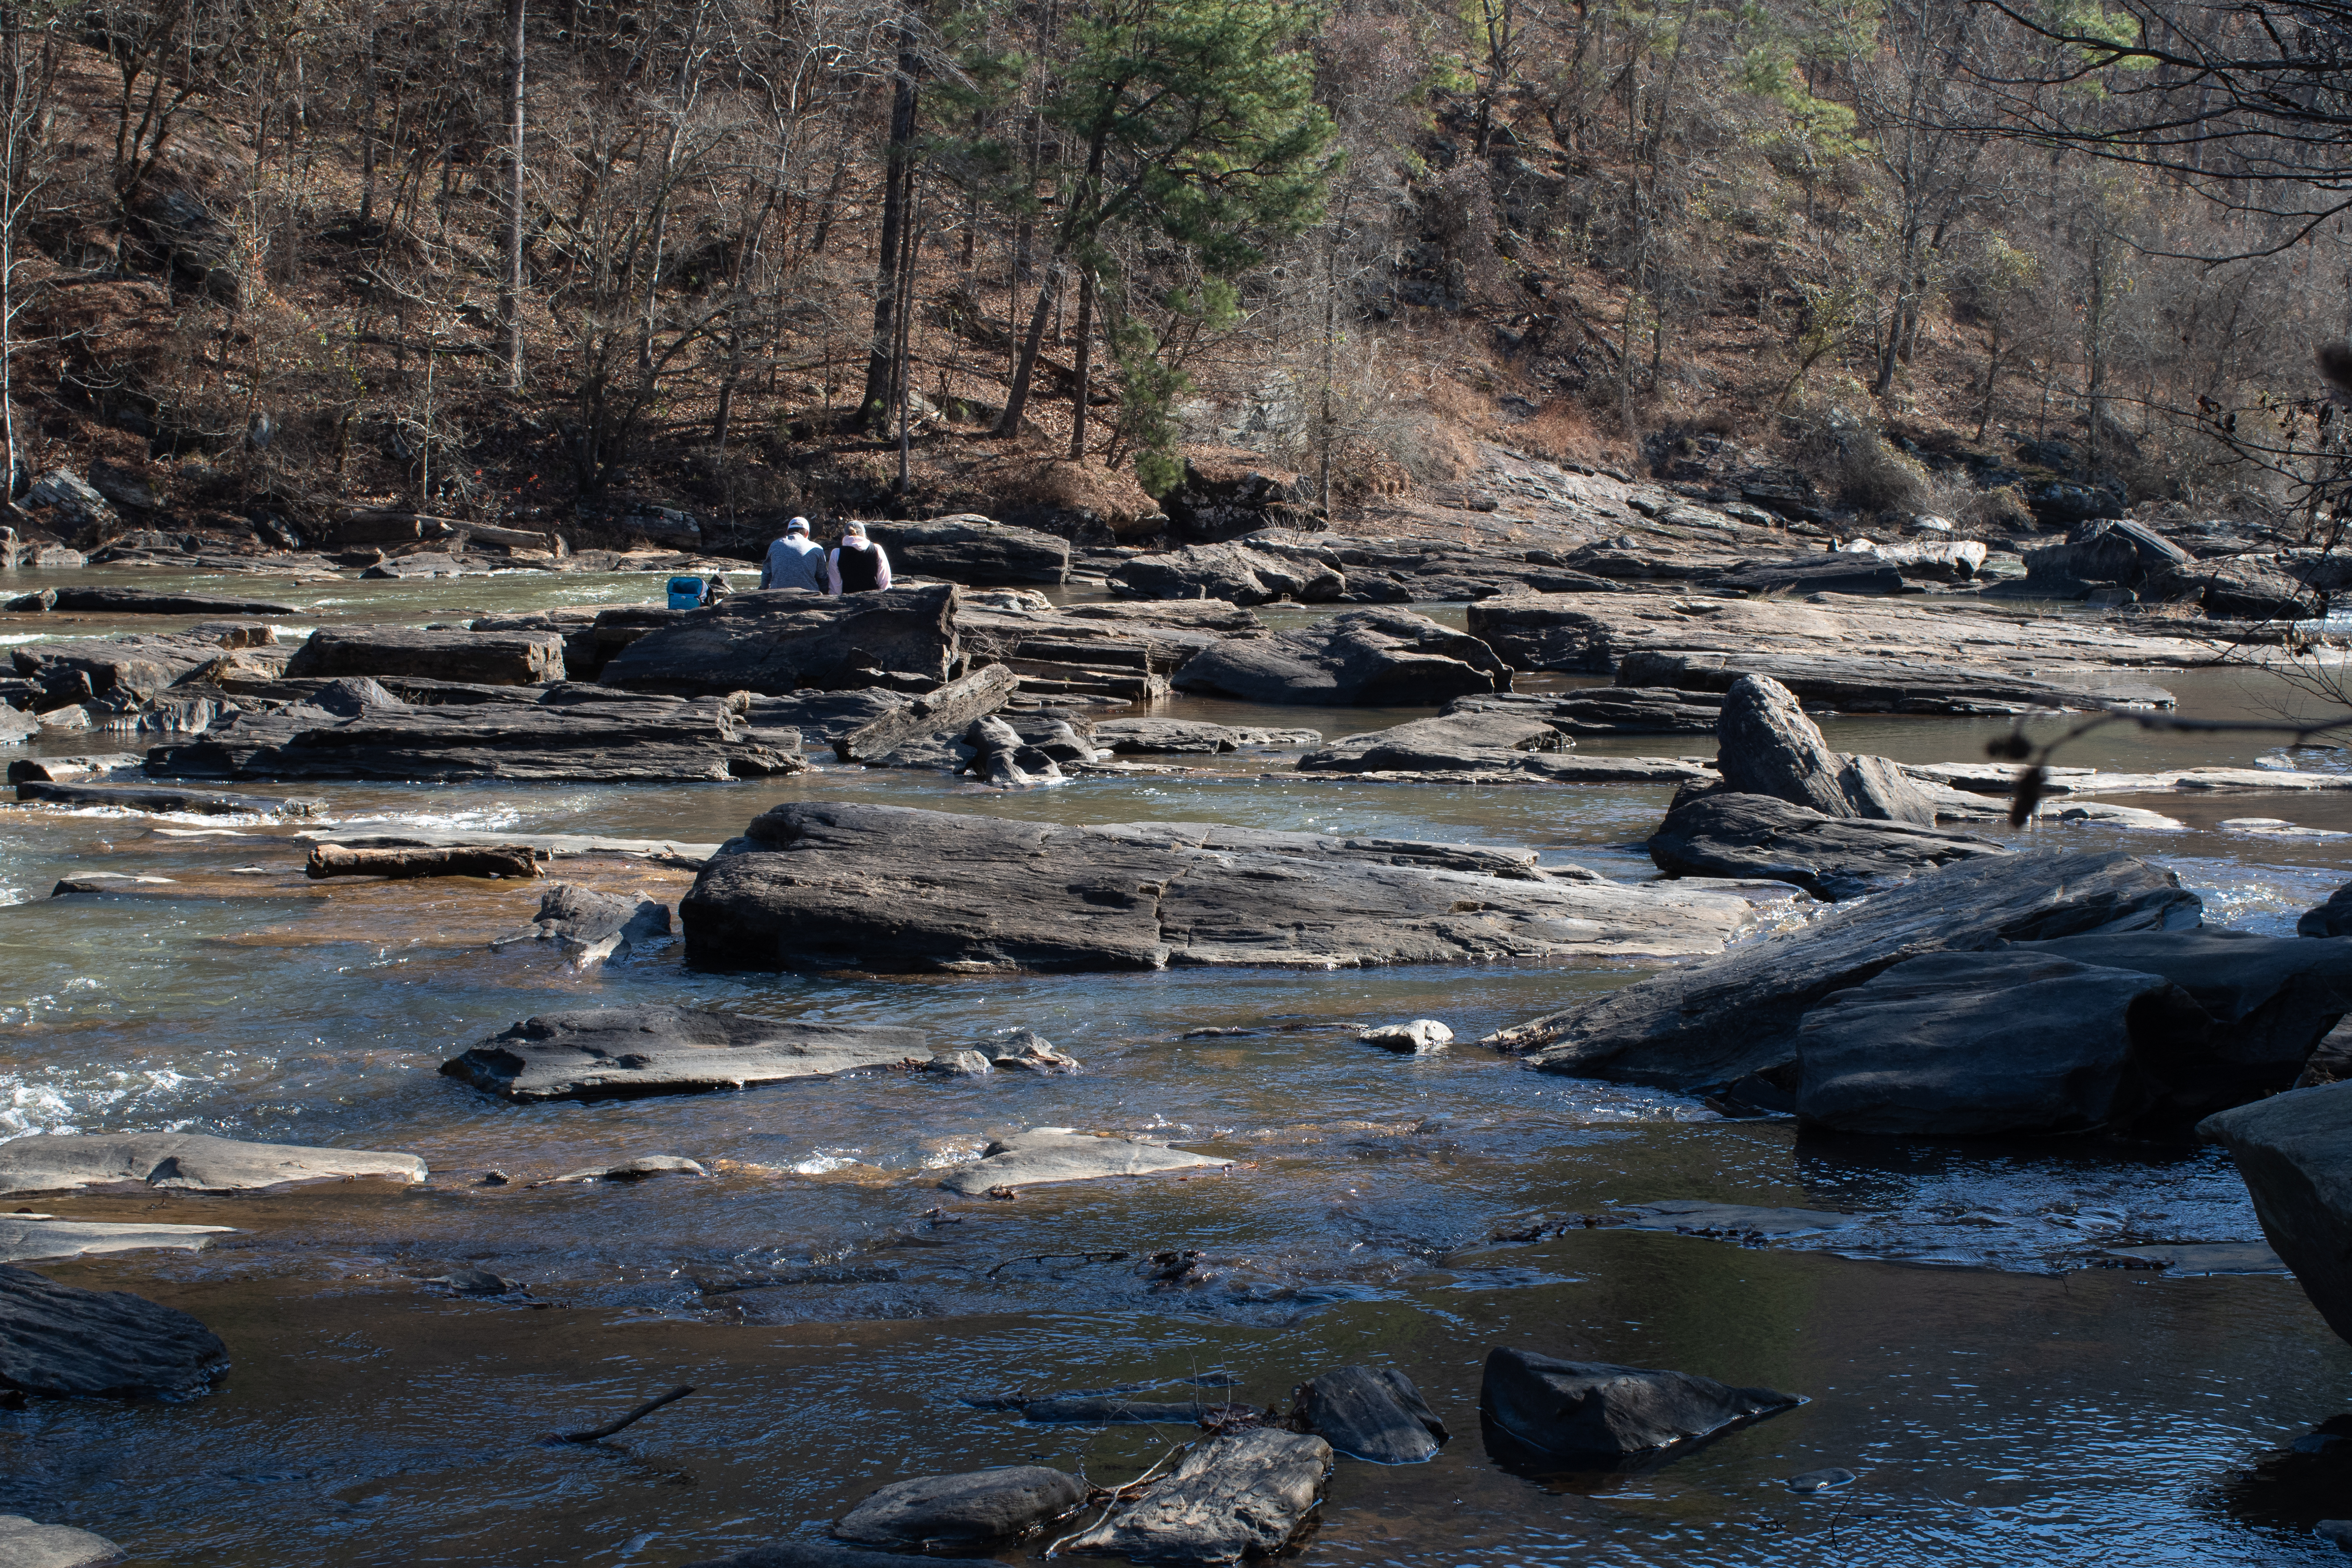
“Only time will tell” – on the trail markers of the Sweetwater Creek Park (GA), interesting messages are often written by visitors. I saw this one long after the picture was taken.
A mirrorless killer?
No way.
The KP is a niche product. You shoot with a KP either because you’re a committed Pentax dSLR photographer and will not consider any other camera system, or because from time to time you want to enjoy to experience of composing your images through an optical viewfinder, with a camera whose user interface you can configure in depth and to your liking.
Objectively, compared to the best mirrorless ILCs, the KP’s autofocus is not as capable (it only offers face detection in live view, for instance, not when composing through the optical viewfinder), the autofocus in the live-view mode only works well with relatively static and evenly lit subjects, video capture is comparatively primitive and most surprisingly for a dSLR, battery life is sub-par (recent mirrorless cameras do better). As for the ergonomics, it’s an acquired taste – the KP is extremely compact (smaller than a Fujifilm X-T series for instance), but also heavier and not as pleasant to hold if paired with its small grip.
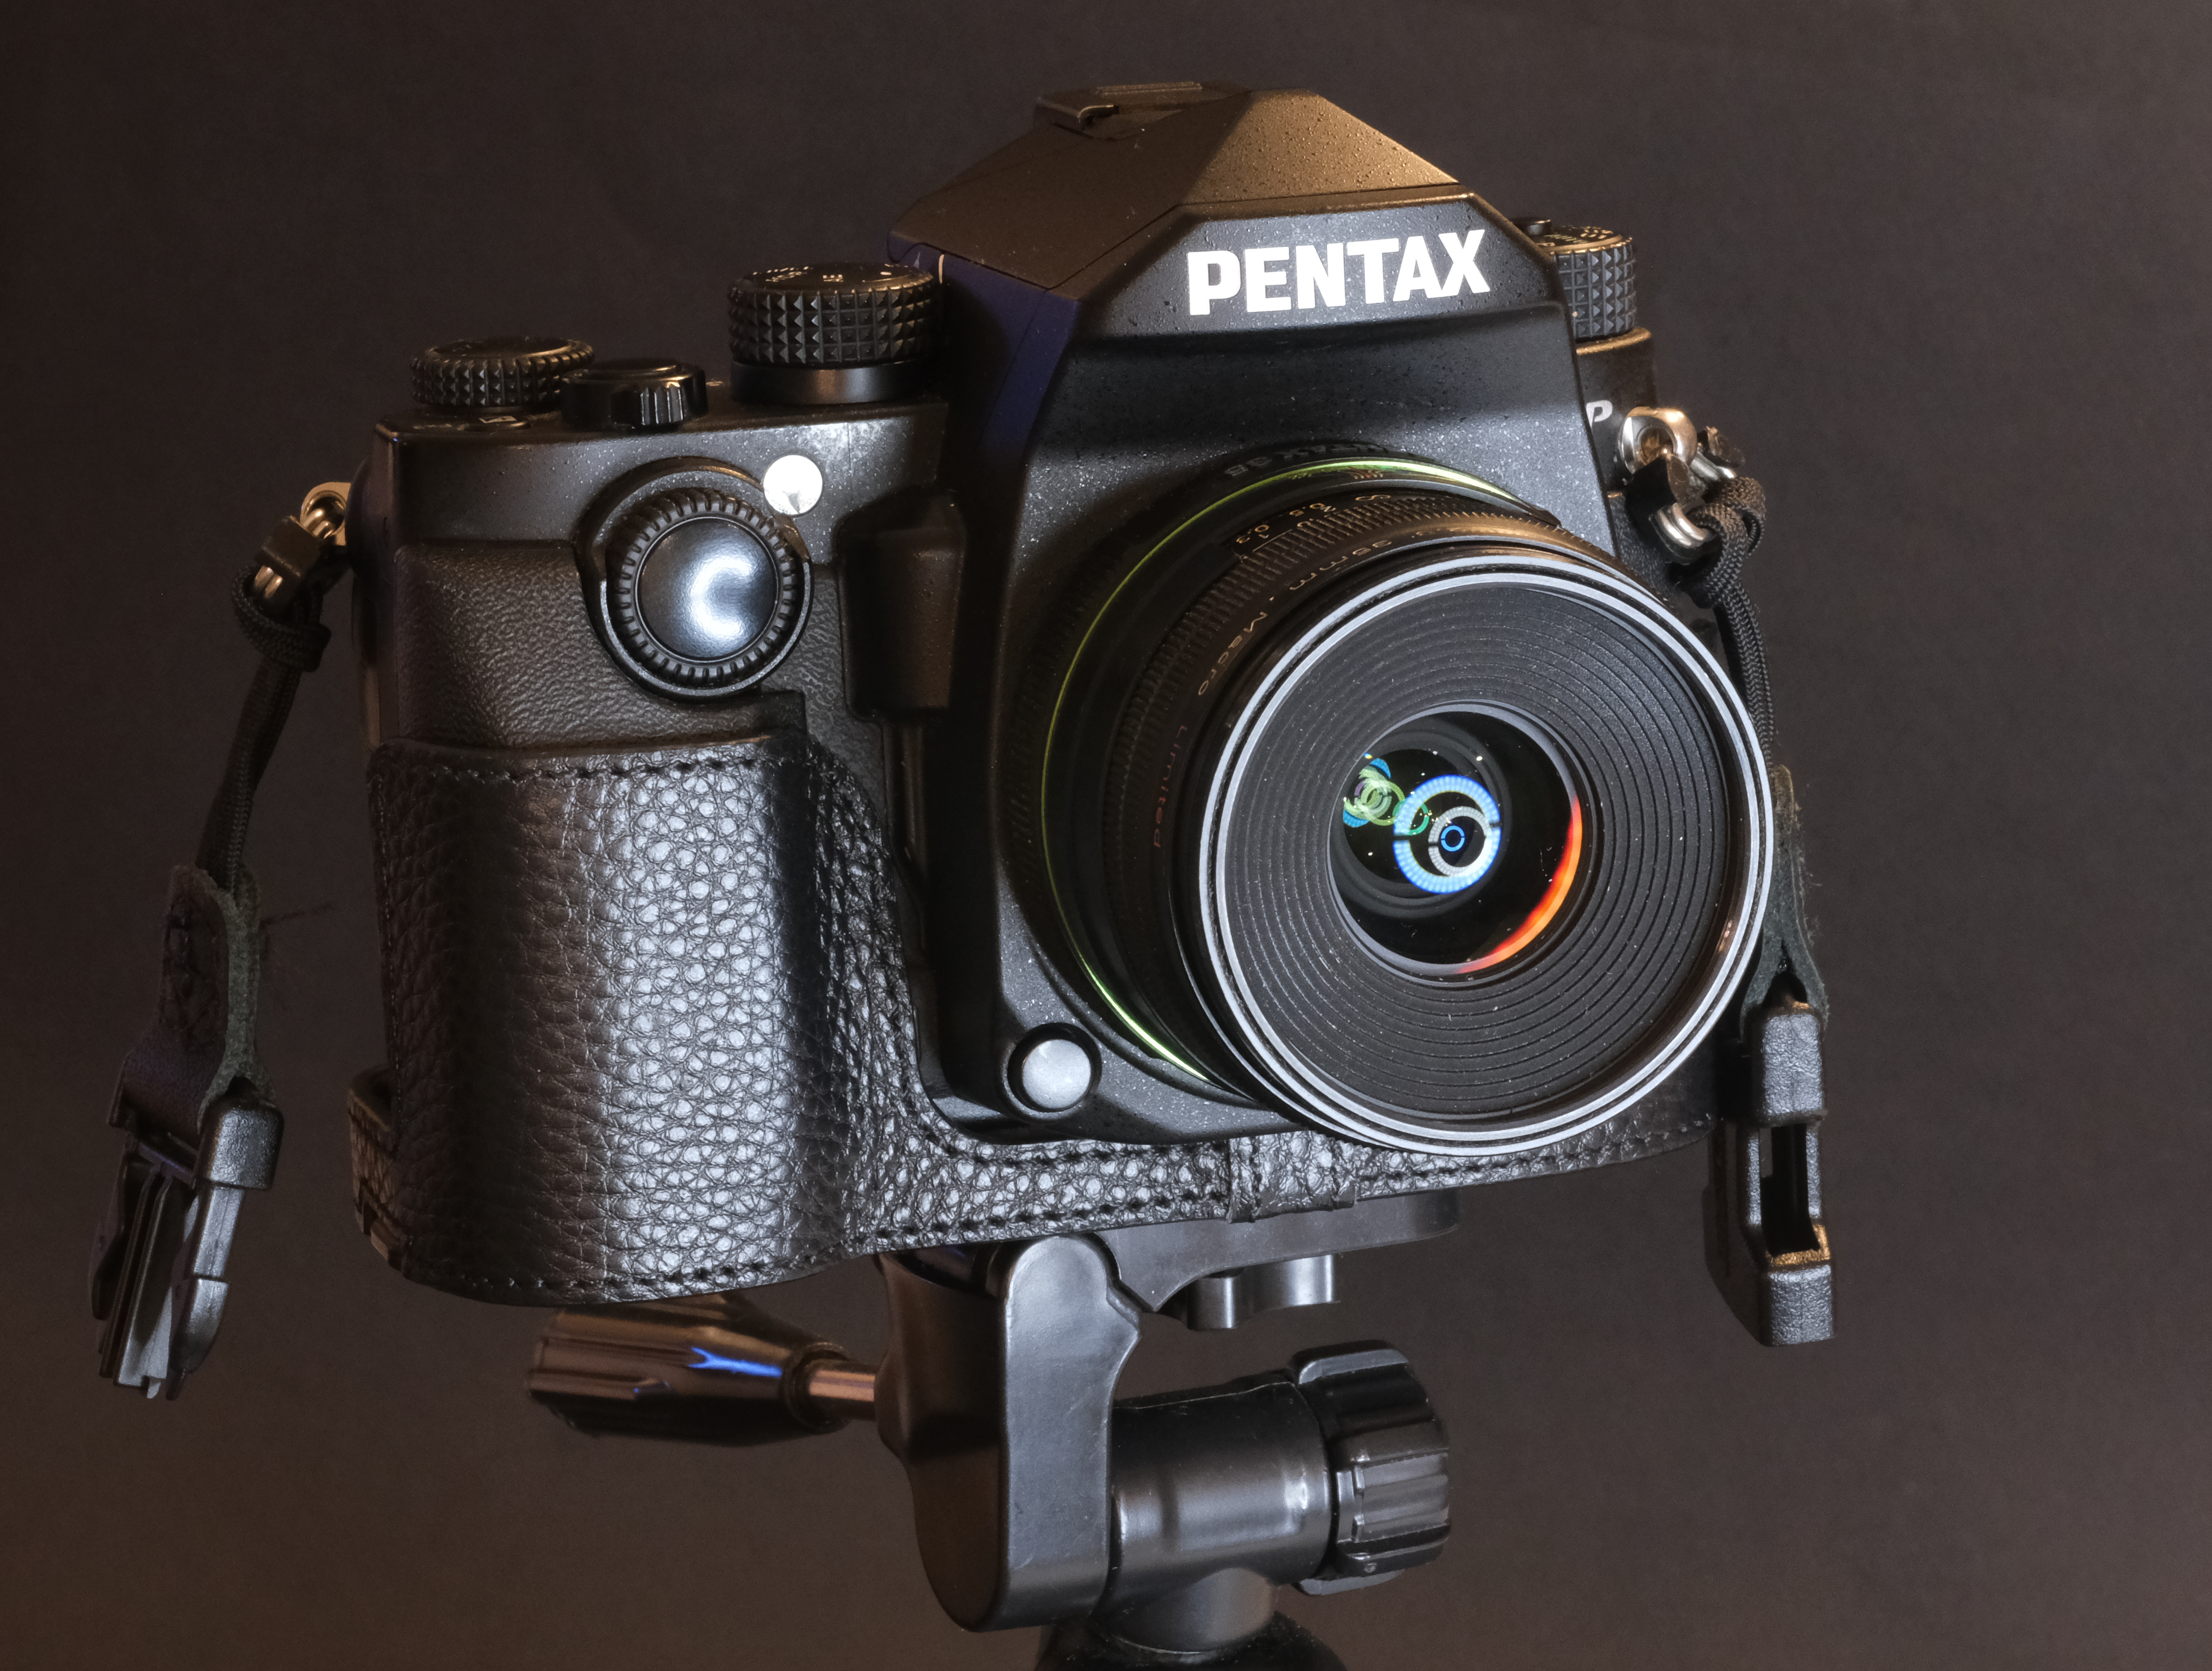
Pentax KP with Leather Half Case
Image quality is extremely good and pictures have a pleasant “Pentax Touch”, but the best mirrorless cameras are no slouch either, and nowadays a lot can be accomplished with presets and filters in image editing software. Last by not least, the vendors of APS-C mirrorless cameras – Canon, Fujifilm, Nikon or Sony – all have a significant market presence and a clear product roadmap, which can’t be said for Pentax.
So, what’s left? The thing that mirrorless cameras can’t offer: the direct, immediate view of the scene through an optical viewfinder. That, and the fact that the user interface is so rich in buttons, knobs and control wheels that the camera can be configured to work exactly like you feel it should. The KP is a genuine pleasure to shoot with and naturally pushes the photographer to explore and experiment.
Except to pay between $550.00 and $750.00 for a used KP located in the US. Pentax cameras used to have a much stronger following in Japan than in America, and most of the used KPs are located there. They will be subject to tariffs and fees if imported into the US. Tariffs and fees may (or may not) be included in the announced shipping costs. It’s a point to validate before placing the order.
For a similar budget, should you buy a used K-3 Mk II or a used KP?
The KP is a more modern but somehow quirky evolution of the K-3 Mk II. Its image sensor is more recent, its image processing engine more elaborate, and it will deliver marginally nicer pictures, particularly at high ISOs. The third control wheel is also unique to the KP, and more useful than I thought.
The tiltable rear screen is in my opinion the main reason to prefer a KP over a K-3 II. It makes the camera easier to use for macro photography, when shooting with a wide angle lens or from the hip in the street, all situations where the live-view option can be put to better use with a tiltable LCD. Alternatively, its more conventional design is the main reason to prefer a K-3 Mk II, in particular if you shoot with long and heavy lenses, and believe that the tiltable rear screen is going to make the KP too fragile in the long run.
K-3 Mk II or KP, it’s up to you – but be warned: it may whet your appetite for an even more modern take on the classic Pentax optical viewfinder camera theme, the K-3 Mk III.
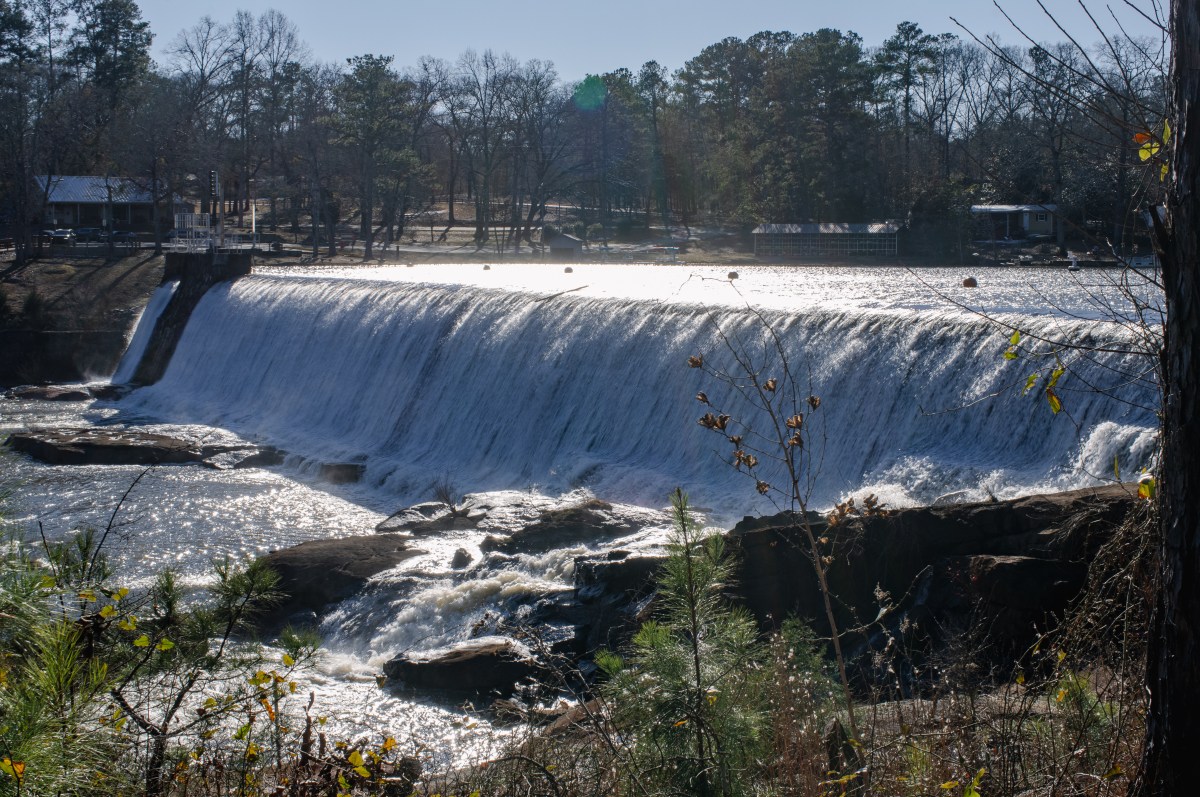
High Falls State Park, GA – Pentax KP – Pentax DA 35mm f/2.8 Macro Limited
High Falls State Park, GA – Pentax KP – Pentax DA 35mm f/2.8 Macro Limited
High Falls State Park, GA – Pentax KP – Pentax DA 35mm f/2.8 Macro Limited
Only Canon, Nikon and Pentax still have dSLRs in their product catalogs, but although they’re still on the shelves of the retailers, I don’t know if any of those dSLRs is still being manufactured.
Pentax is committed to the dSLR architecture, and with the full frame K-1 Mk II, and no less than three cropped sensor models, the KF, the K-3 Mk III and the K-3 Monochrome, they have the youngest dSLR model range of the remaining big three (all four Pentax models were launched between 2018 and 2023).
Between the predecessor of the current KF (the K-70) and a then to come K-3 Mk III, Pentax thought there was room for an intermediate model, the KP, a technical evolution of the K-3 Mk II, but with a totally different design.
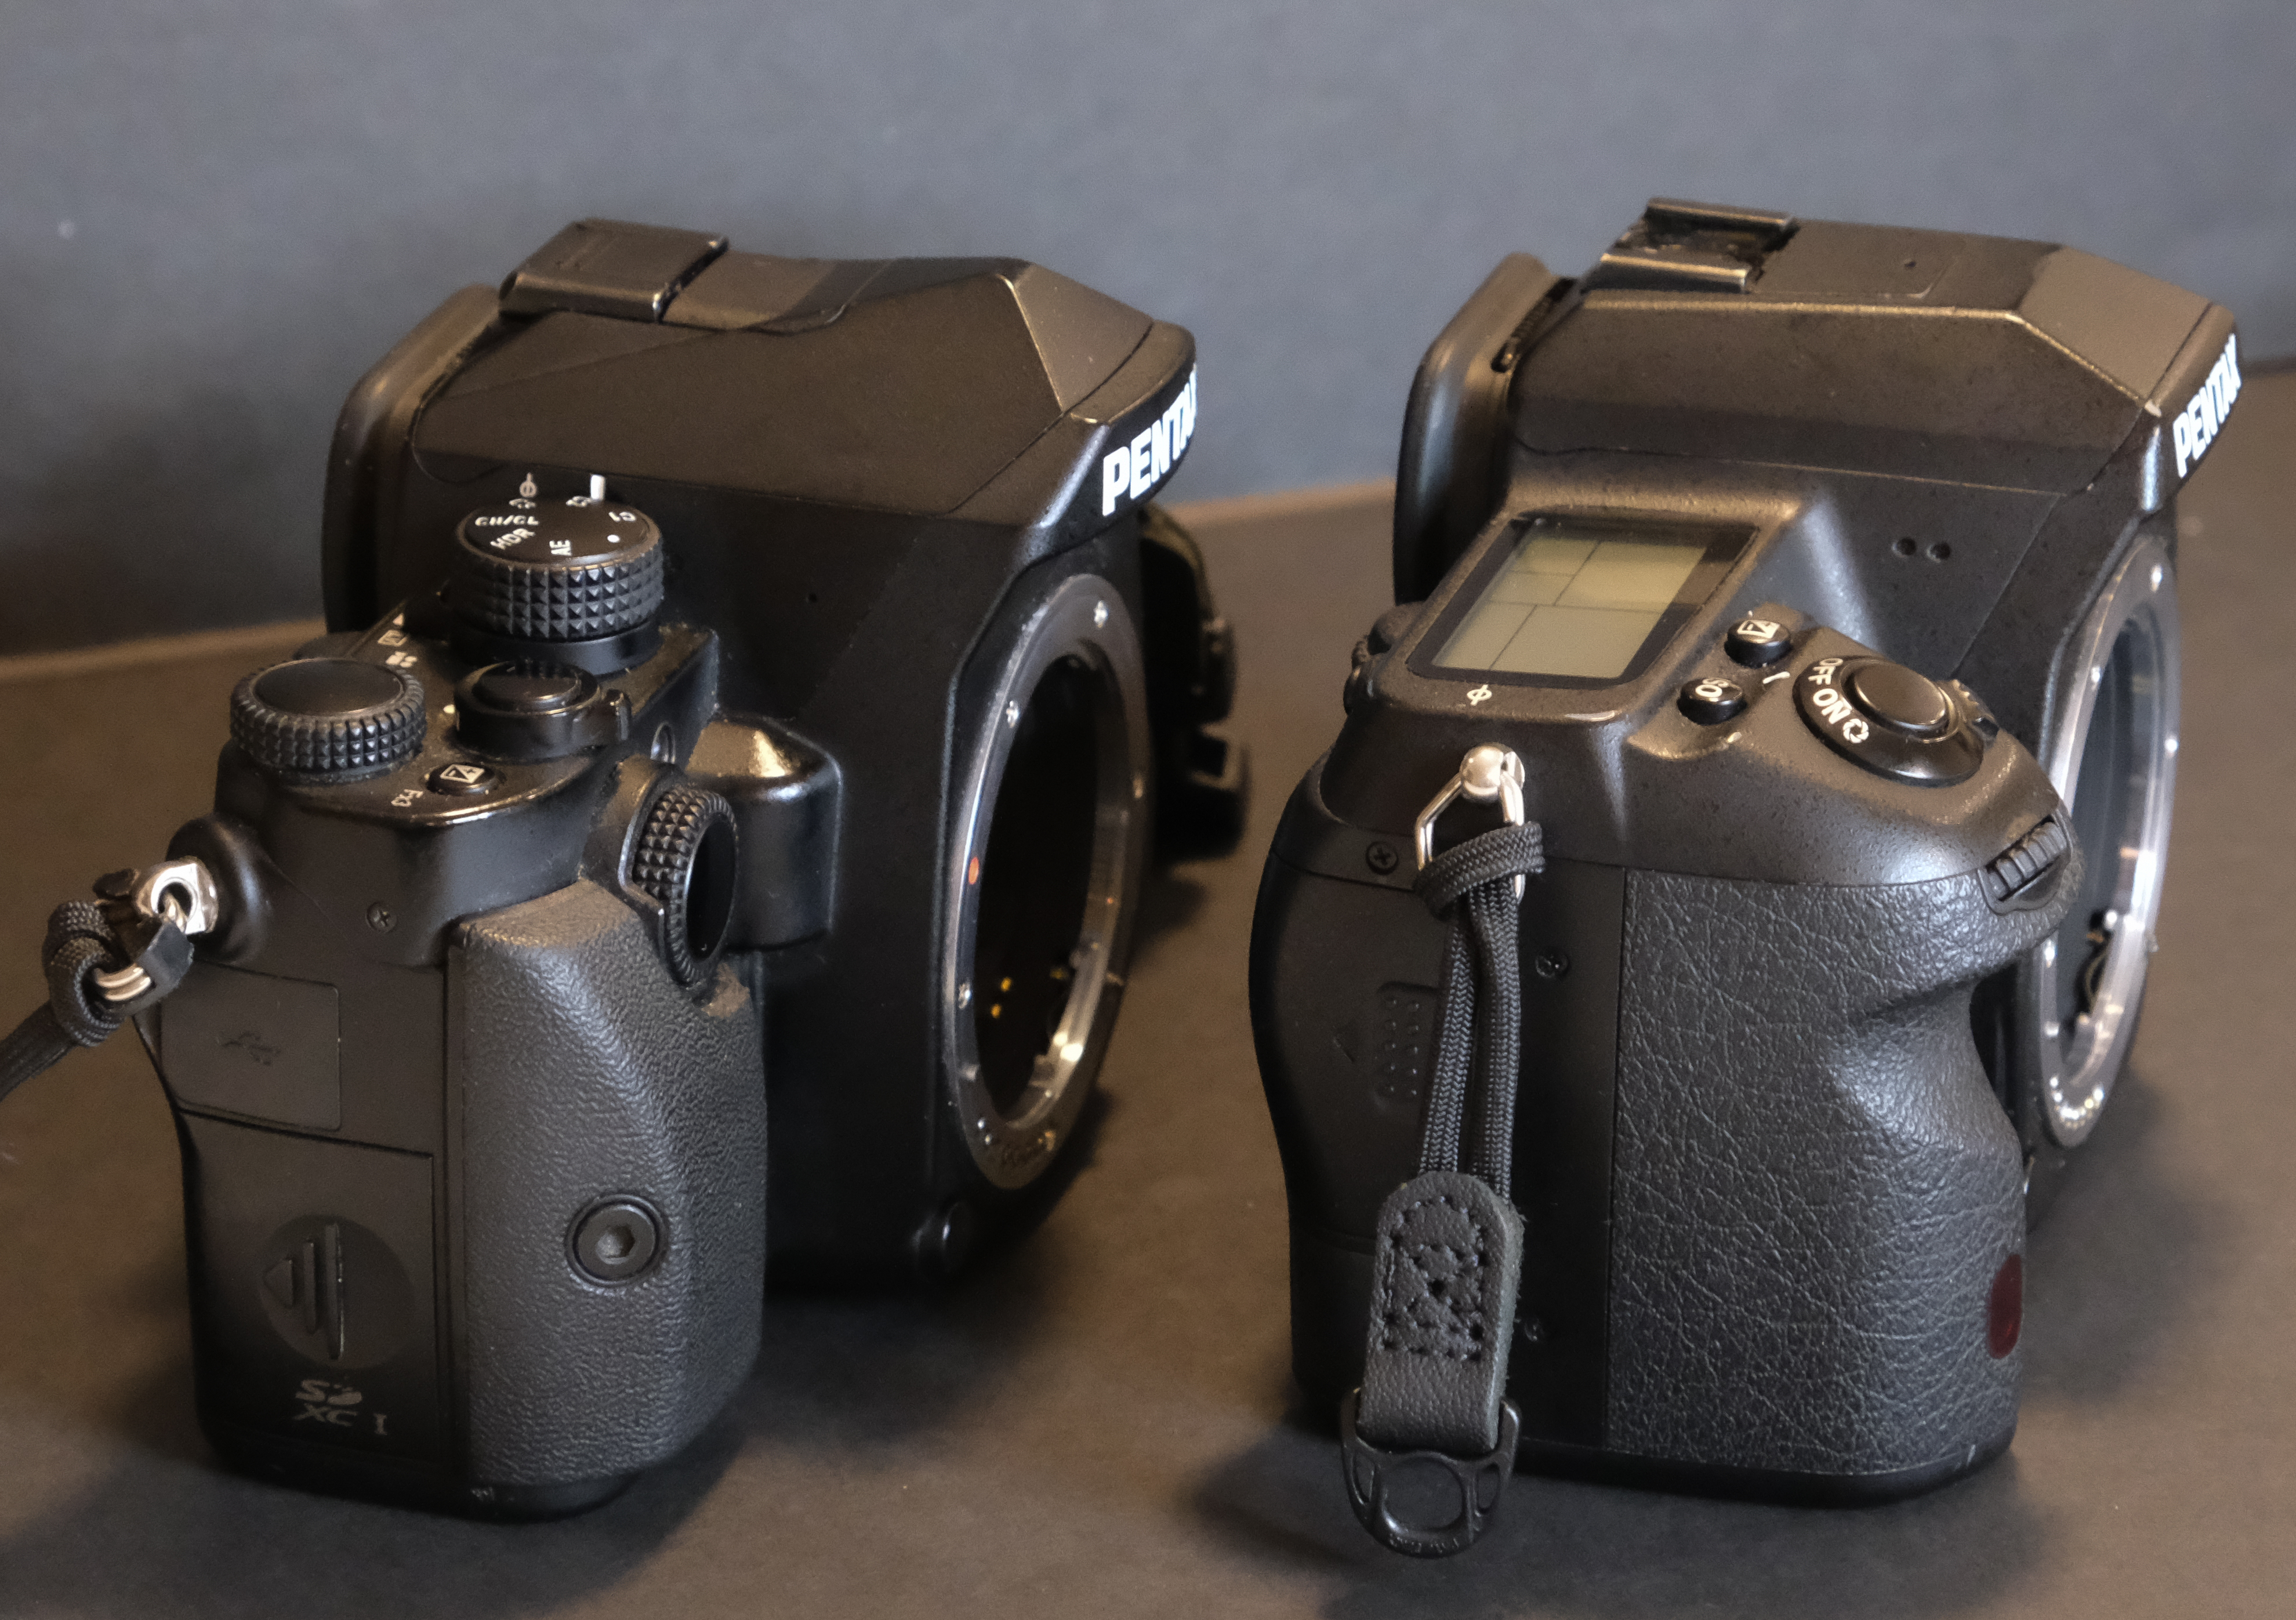
Pentax KP (left) and K-5 (right).A very different ergonomic study(this KP is shown with the “small” removable grip).
Launched in 2017 and retired in 2021, the KP begged to be different – from its Pentax siblings and from Canon & Nikon’ remaining dSLRs.
The KP was designed as a sort of mini K-1, with the aim of looking physically smaller than the K-3, but be more configurable and more solidly built than the entry level K-70. Its styling was reminiscent of the manual focus, non motorized cameras of the nineteen seventies, with a slim body and a shutter release button placed in the middle of the top plate.
Equipped with a newer generation 24 Mpix sensor, the KP retained the autofocus module of the “pro” K-3 Mk II. Like it, it could be fitted with an optional battery grip. It inherited the image processing engine of the K-1, and improved on its full frame brother with a more flexible configuration for its third control wheel.
Beyond the style, the KP’s main differentiation point with the K-70 and the K-3 Mk II was the ability for the photographer to choose between 3 sizes of hand grips.
The design of those interchangeable hand grips is somehow controversial. Professional reviewers like Chris Nichols of DPReview and Petapixel fame positively hated it. Among the Pentax photographers, some like it, some shoot with a KP in spite of it, and some remained true to the K-3 Mk II because of it.
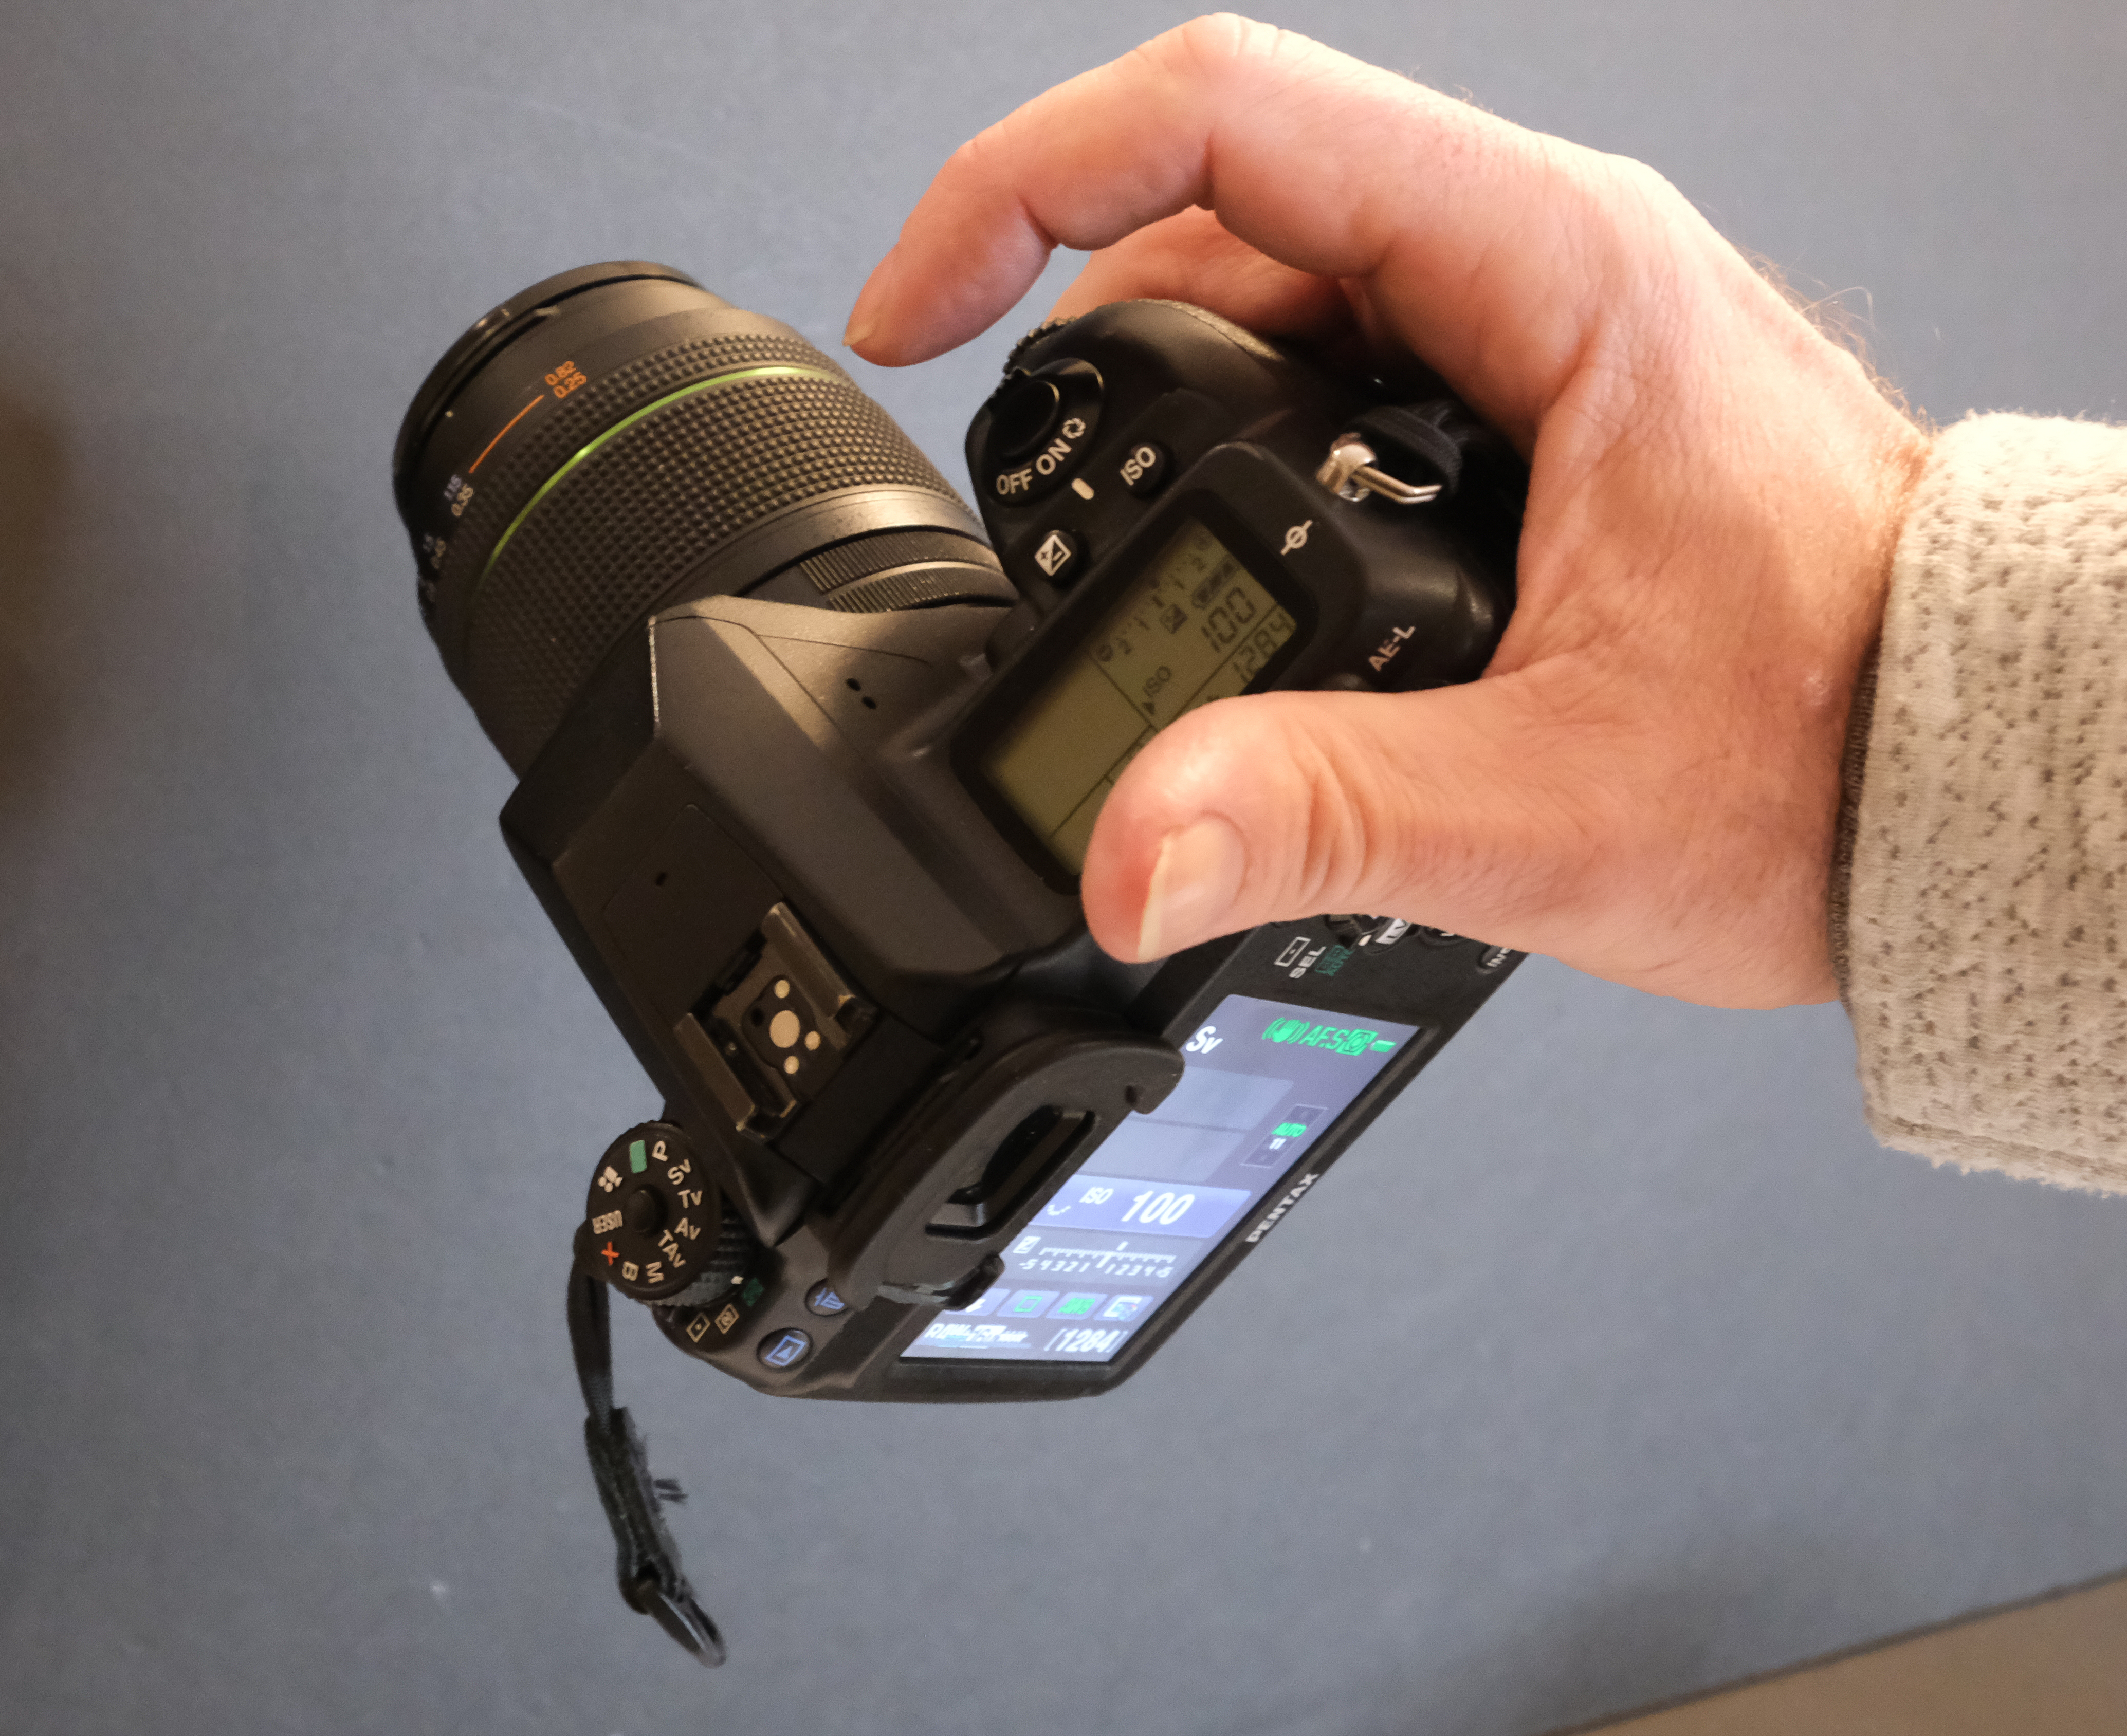
Trying to hold the KP firmly with one hand – a rather uncomfortable way to use this camera
The small grip was supposed to be mounted on the KP when the photographer was shooting with small (and light) primes, the large grip (and the battery grip) when shooting with a long and heavy tele-lens or tele-zoom, and the medium one the rest of time.
In the American market, the camera was packaged with the three hand grips initially, but after a while Pentax only included the small grip in the base configuration, the large one being part of an extra cost bundle also including a battery grip, and the medium sized one being sold separately for $49.99. None of those grips is available now, and my KP will be stuck with its small grip for the time being.
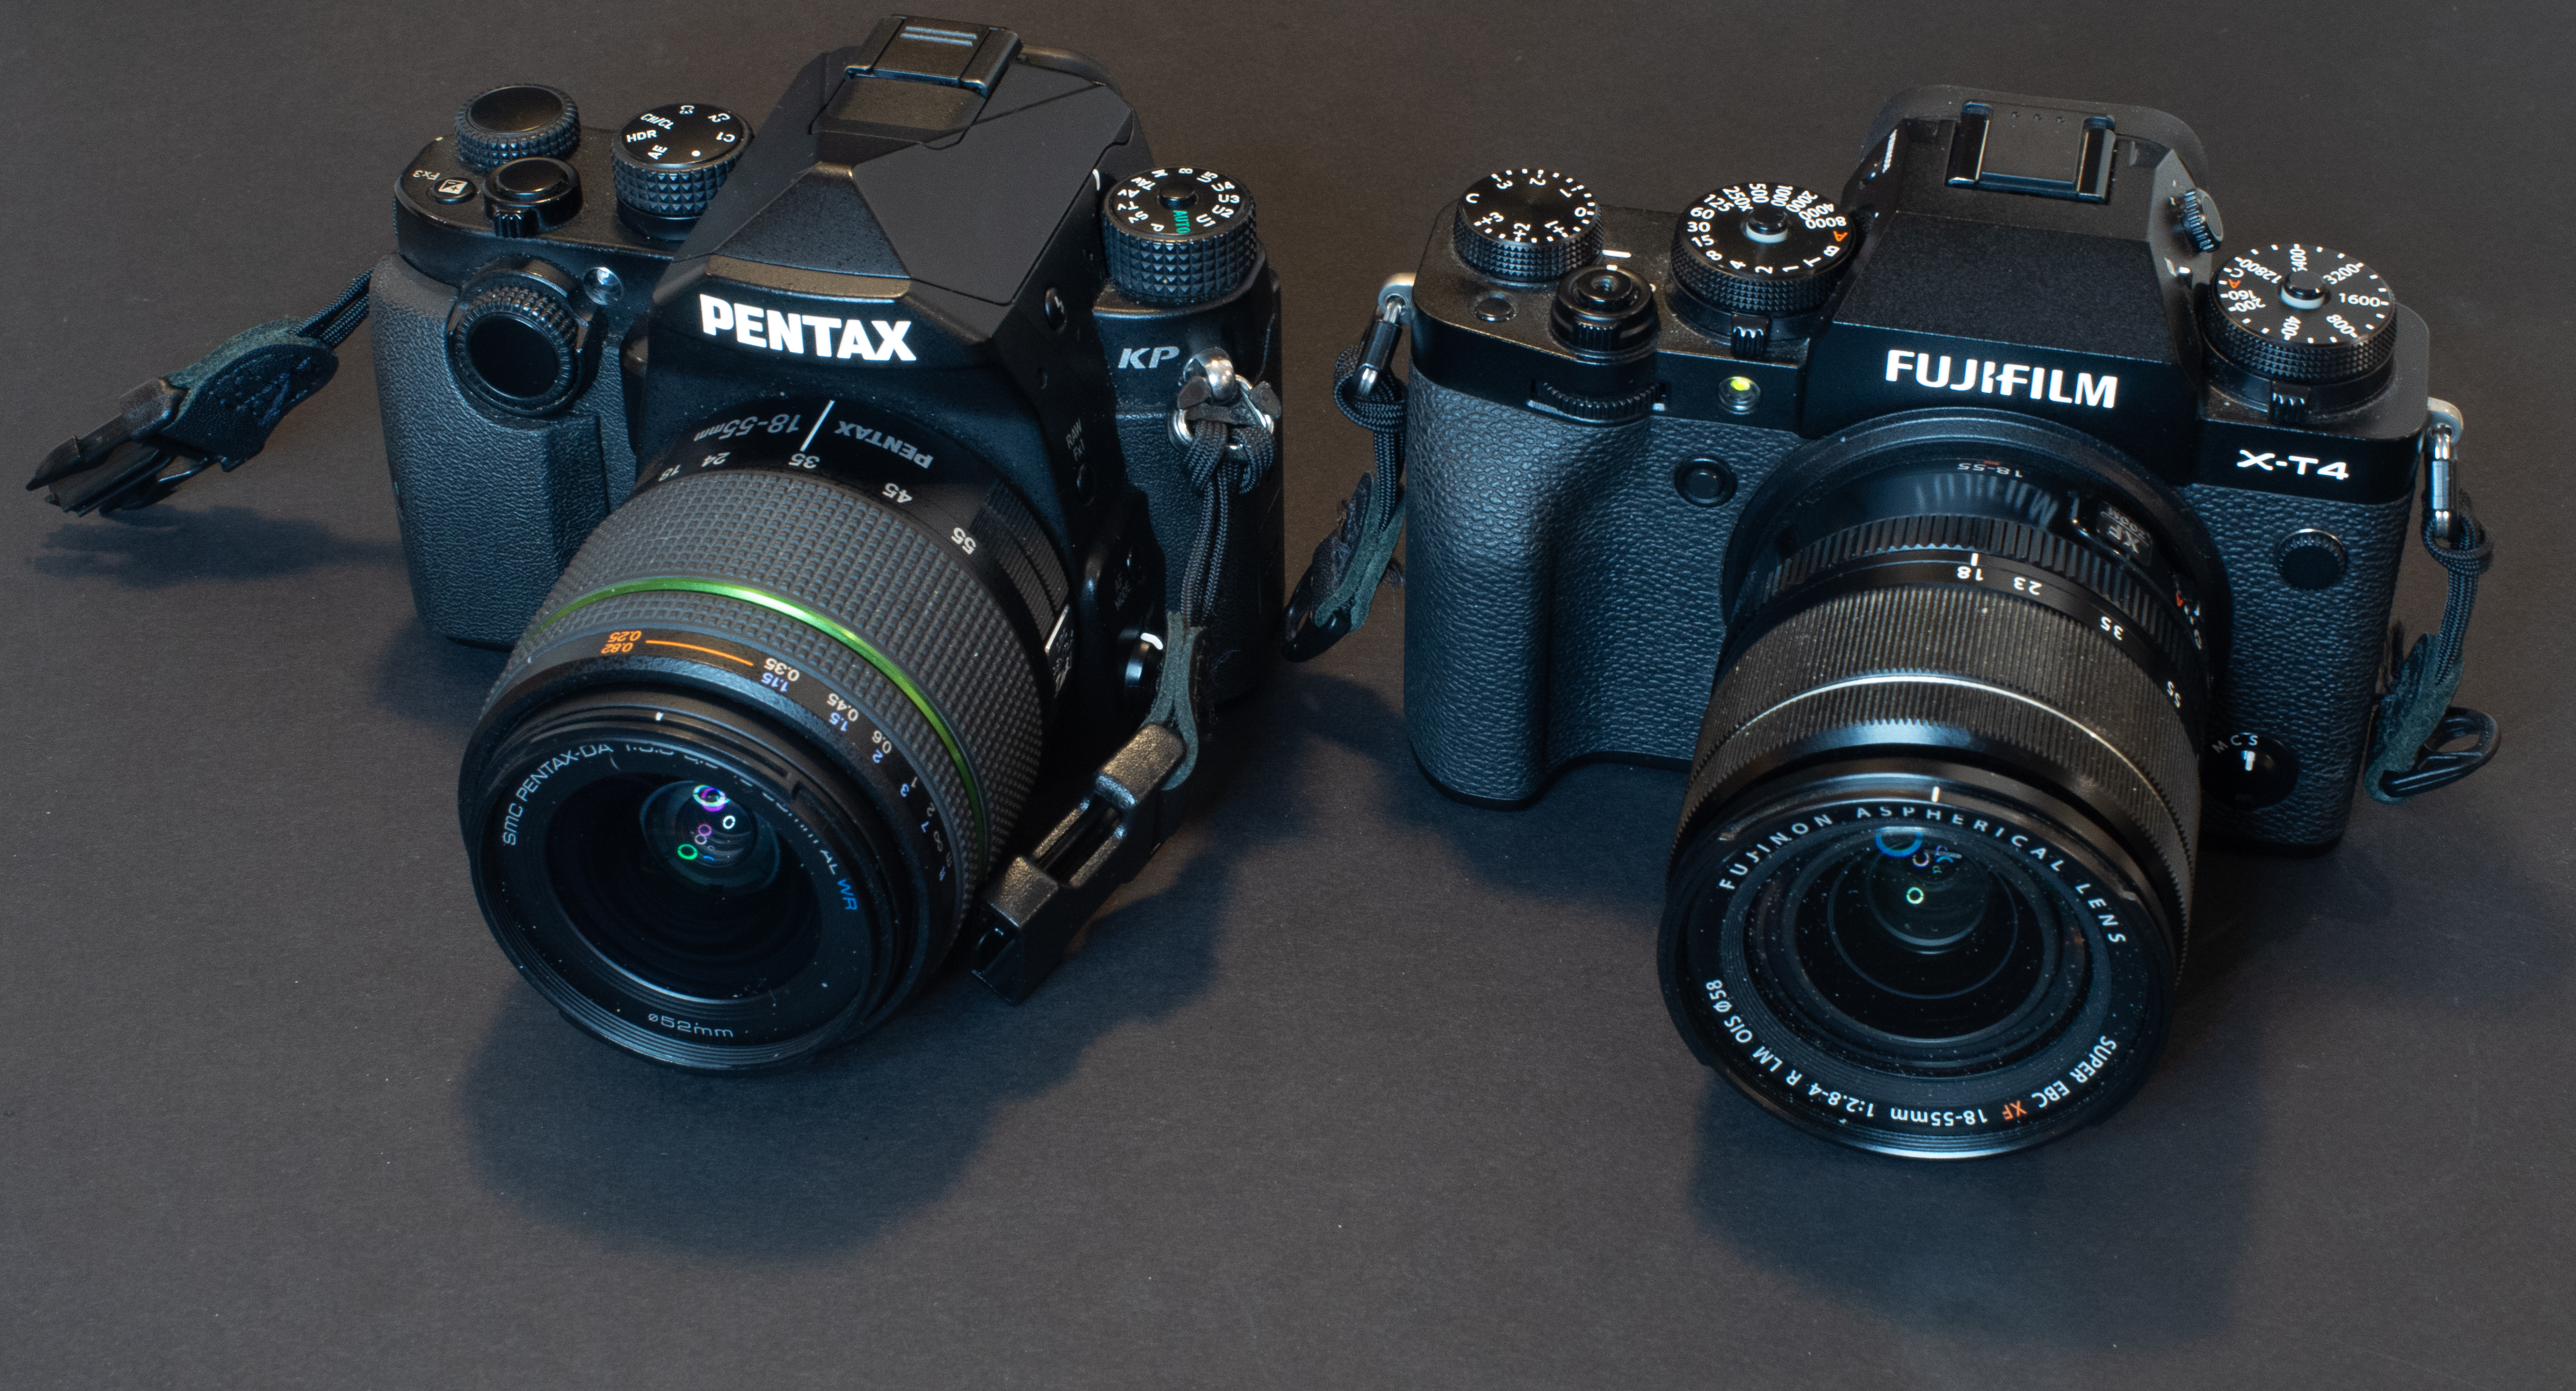
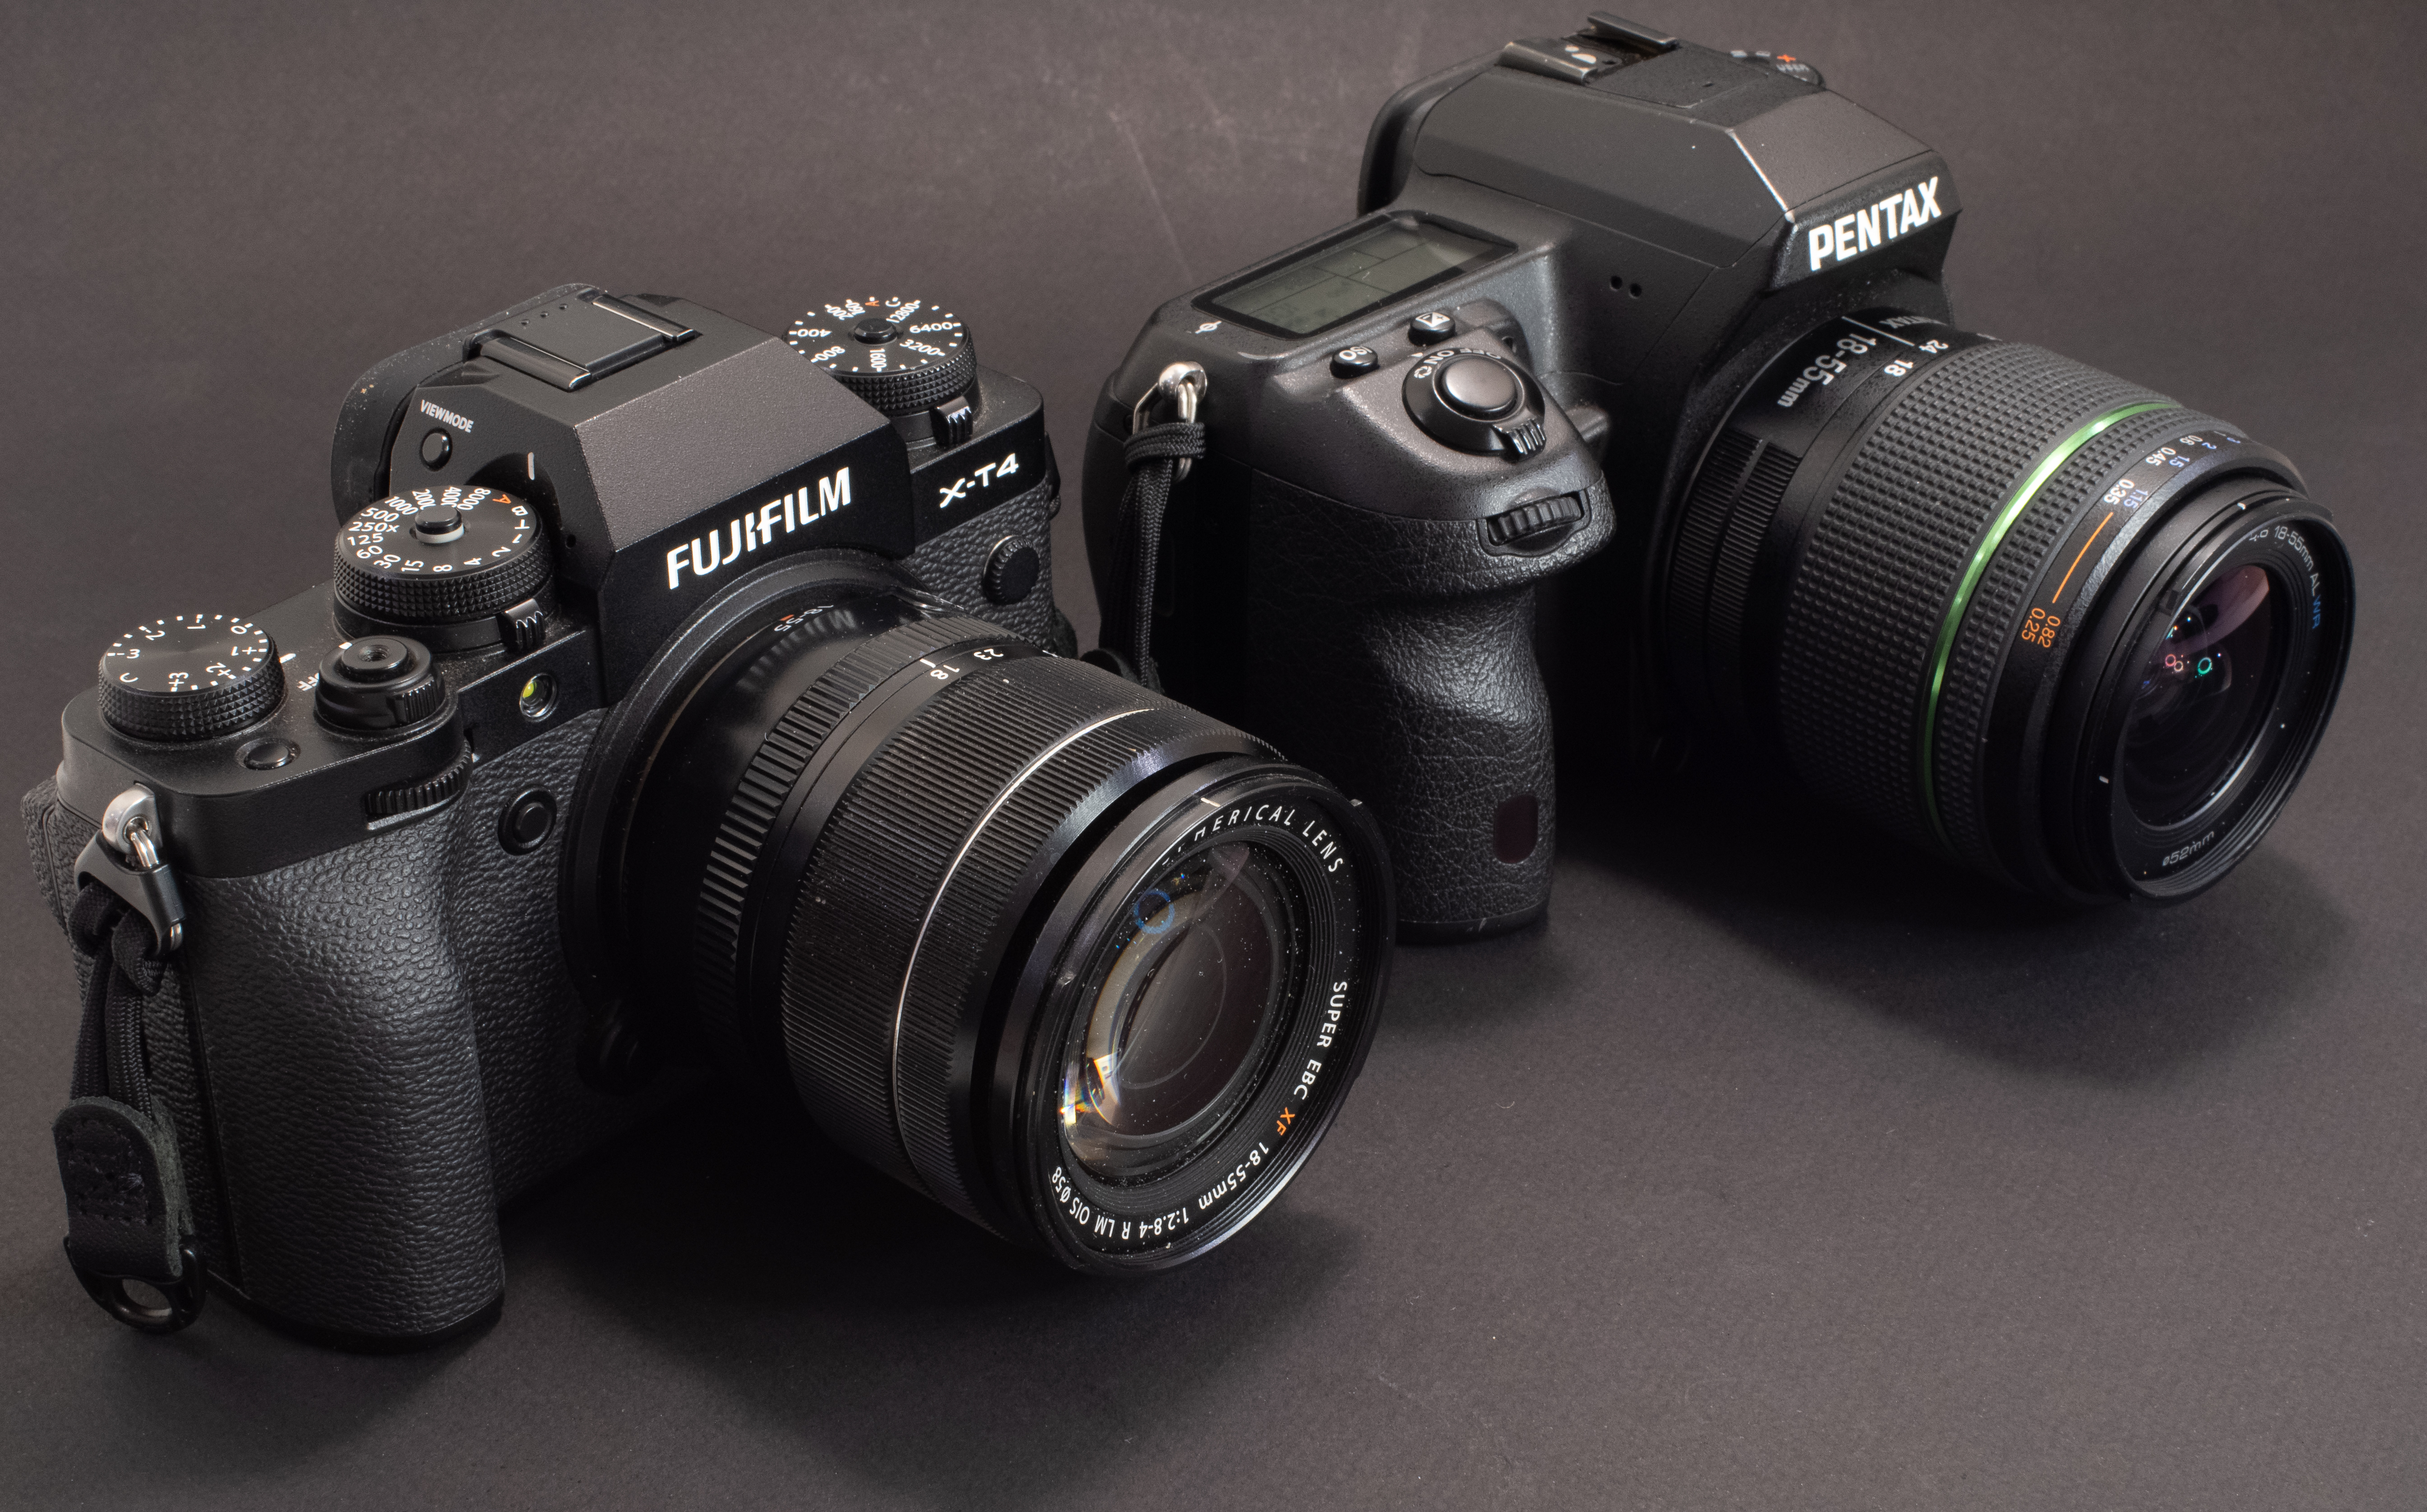
Pentax KP next to a Fujifilm X-T4 – counter-intuitively, the mirrorless camera is larger than the dSLR, and offers a significantly longer battery life.
The Pentax KP is not the only camera with a retro-inspired, small grip design – look no further than the very successful Fujifilm X series, but what works very well on a X-100 or a X-T4 does not click on the KP.
First impressions – is the grip worth the buzz?
Pentax APS-C cameras tend to be small, and the KP looks even smaller than its siblings. But it’s not its compact size that strikes you the most when you bring the viewfinder of the camera to your eye for the first time, it’s its weight. It’s not really heavier than a Pentax K-5 or K-3 (all tip the scales at approximately 700 g), but its compact design and its small grip make its weight much more noticeable.
Pentax K-5 – you can hold it with one hand with confidence, and even adjust some settings with the rear control wheel.
On a K-5 or a K-3 (and on other dSLRs of more conventional design), the camera can be held firmly with the palm of the right hand and the three lower fingers, leaving the thumb and the index free to move and reach the different control wheels and commands. You can be confident that you won’t drop the camera while you’re moving around your subject, looking for the right angle.
If you try and hold the KP with one hand, you have to pinch the right side of the camera between your thumb and three of your remaining fingers (no room for the pinky). Even with a prime lens or a light zoom, we’re talking about two pounds of glass and metal here, that you will be afraid to drop if your fingers start releasing their grip (it’s not a coincidence that the previous owner of this camera had included a wrist strap in the package I received).
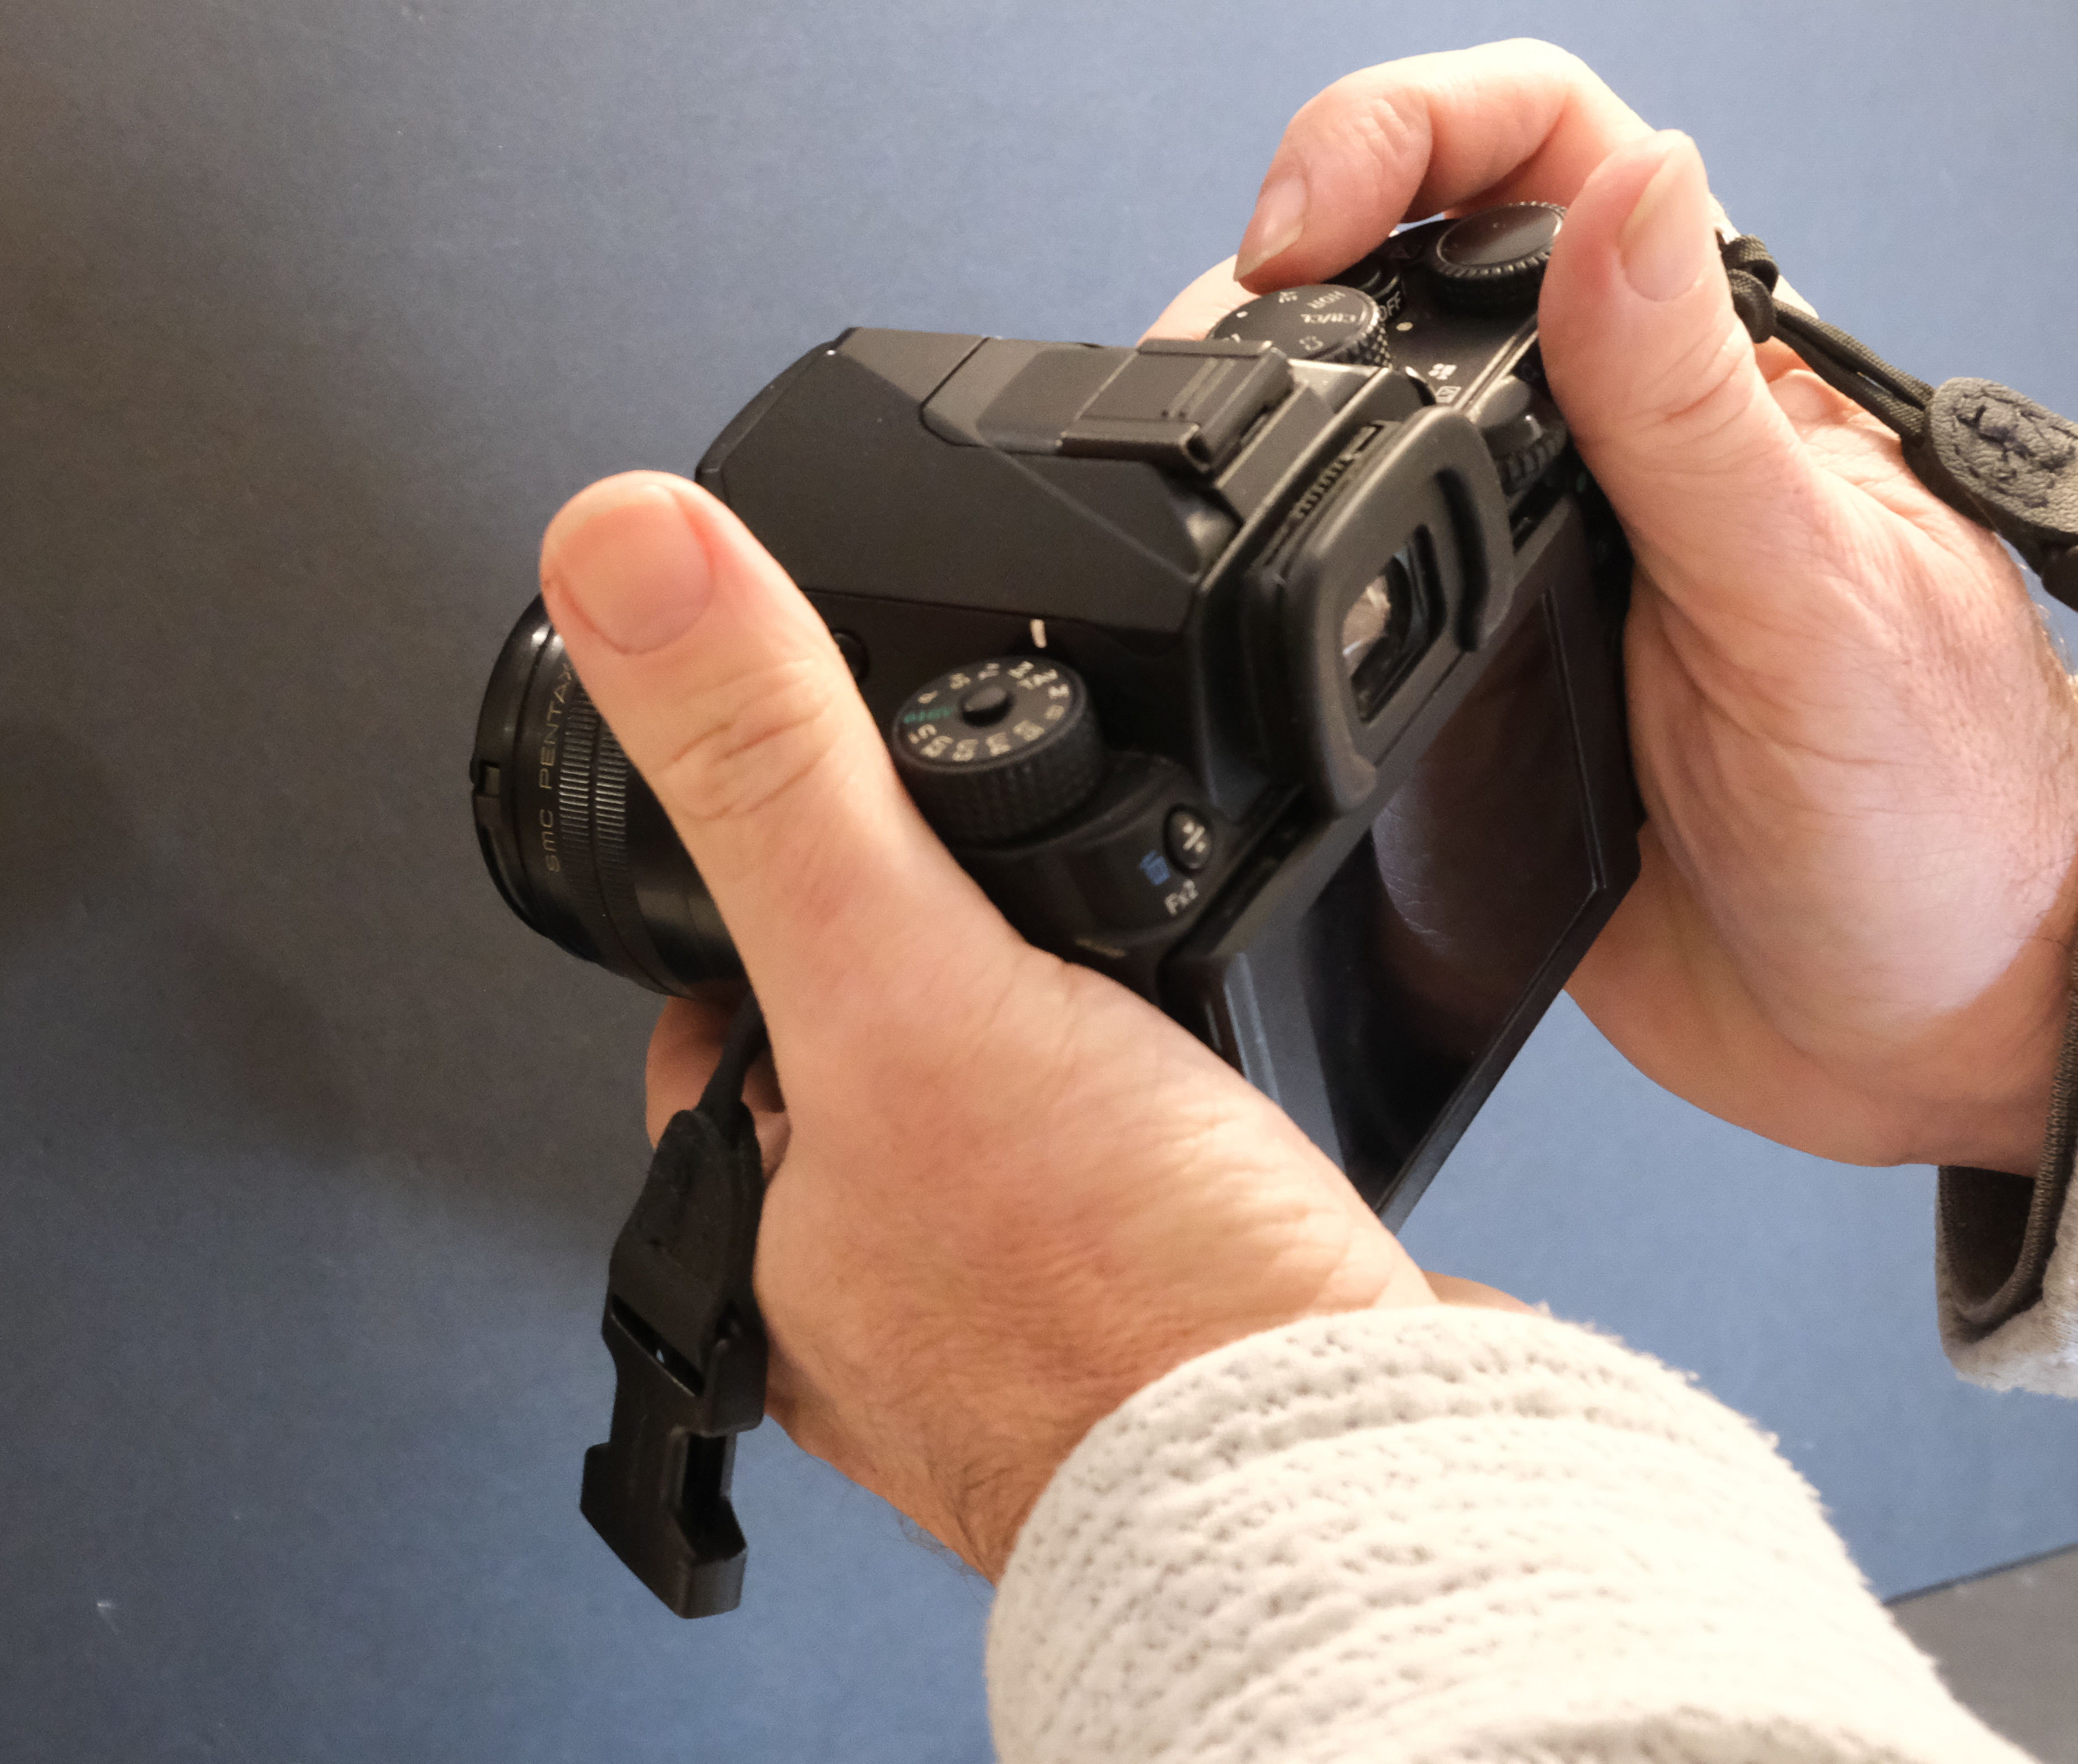
How the KP has to be operated if equipped with the small grip – held firmly in the palm in the left hand, right hand thumb and index on the controls.
With the small grip in place, the KP definitely requires a two-hand operation.
Solutions to the hand grip challenge
The design, the ergonomics and the small grip of the KP may work for you. Personally I would have liked the camera to be more conducive to one hand operations, and I believe that the slim design of the KP would have worked better if the camera had been one or two hundred grams lighter and its body just a bit taller.
The simplest way for me to address my “grip problem” would be to buy the OEM large grip (Pentax reference O-GP1672). Based on the input of other KP users, it should make “one hand operations” easier. If only I could locate one.
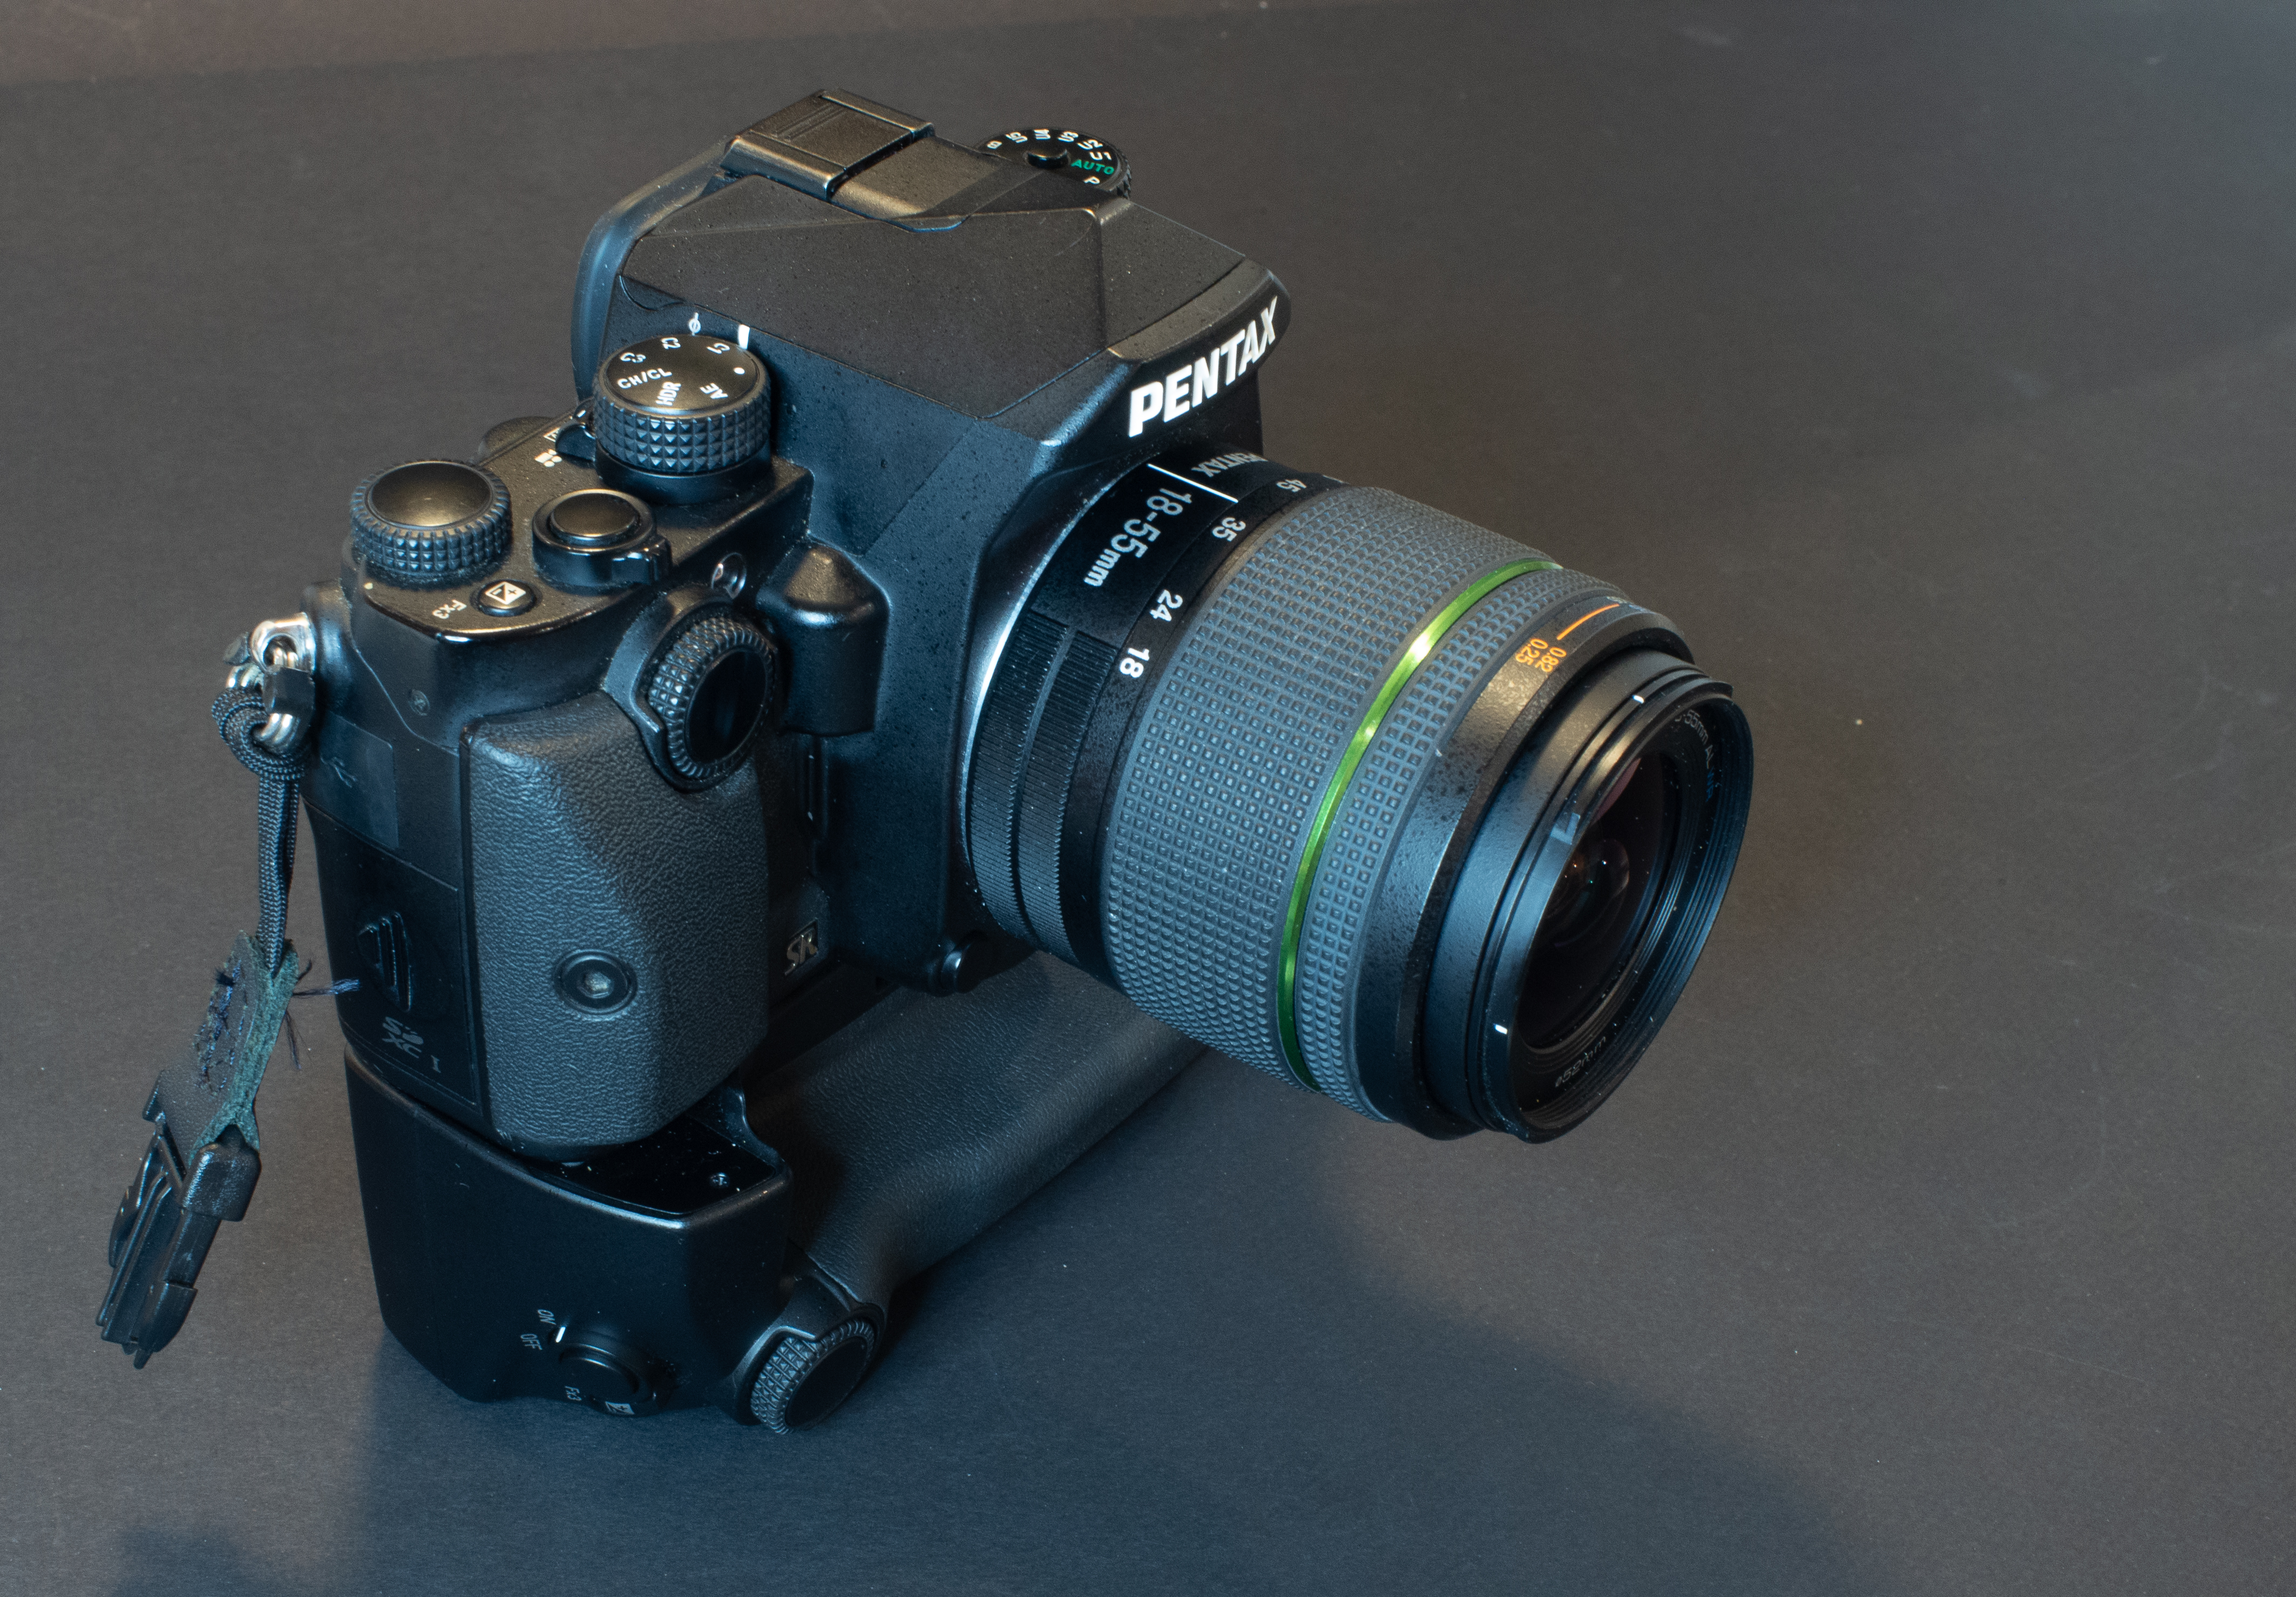
Pentax KP with the Battery Grip – the battery grip is designed to be paired with the large hand grip – but even with the small hand grip still in place, it makes the camera much more comfortable to hold.
The camera I bought came with the optional Pentax D-BG7 battery grip (but without the large hand grip, unfortunately). I’m not a fan of battery grips in general because they make the camera bulkier and often require to remove the battery door, but in the case of the KP, the battery door (and the OEM battery) remain in place, and the grip addresses two of the KP’s glaring issues – the battery life and the ergonomics, without much of a weight penalty (300g approx).
With the battery grip in place, the battery capacity of the camera almost triples: the 1050 mAh battery remains in the body of the camera, and only starts being drained when the battery located in the grip is depleted (the grip accepts the same 1050 mAh battery as the camera does, or the larger 1860 mAh battery of the Pentax K-5/K-3 series).
As for the ergonomics, the battery grip is a huge improvement. It’s supposed to help with vertical composition, but even when composing an horizontal image it makes the camera much easier to hold and control : I’m not afraid to grab it with one hand anymore, and although the front control wheel remains difficult to access, the one at the back of the body is easily reached.
A last option is to do for the KP what I did for my other “slim bodied” cameras (the Fujifilm X series and Sony HX-60): I ordered a Leather Half Case from a non specified Chinese vendor on AliExpress. Those half cases add almost a centimeter of leather under the bottom plate, they also make the front of the camera’s body a bit thicker and increase the surface presented to the fingers, making the camera much easier to hold.
One of the many online stores selling KP half cases.
I picked the black one (it’s also available in fancier colors). This half case is well finished, and makes the KP much more comfortable to hold. A few millimeters here and there can do a lot. I can even reach the rear control wheel while holding the camera firmly in the palm of my right hand. A definitive improvement, and a permanent fixture on my camera now.
The leather half case makes the KP much easier to work with.
Shooting with the Pentax KP
Now that I’ve described in length my two major gripes with the KP, it’s time to discuss the positives. Optical viewfinder, abundance of physical controls, configurability, and of course, image quality. It’s a very pleasant camera to use, that begs to be taken to a photo stroll, and will reward you with great pictures. More about the Pentax KP in the next blog post, in two weeks.
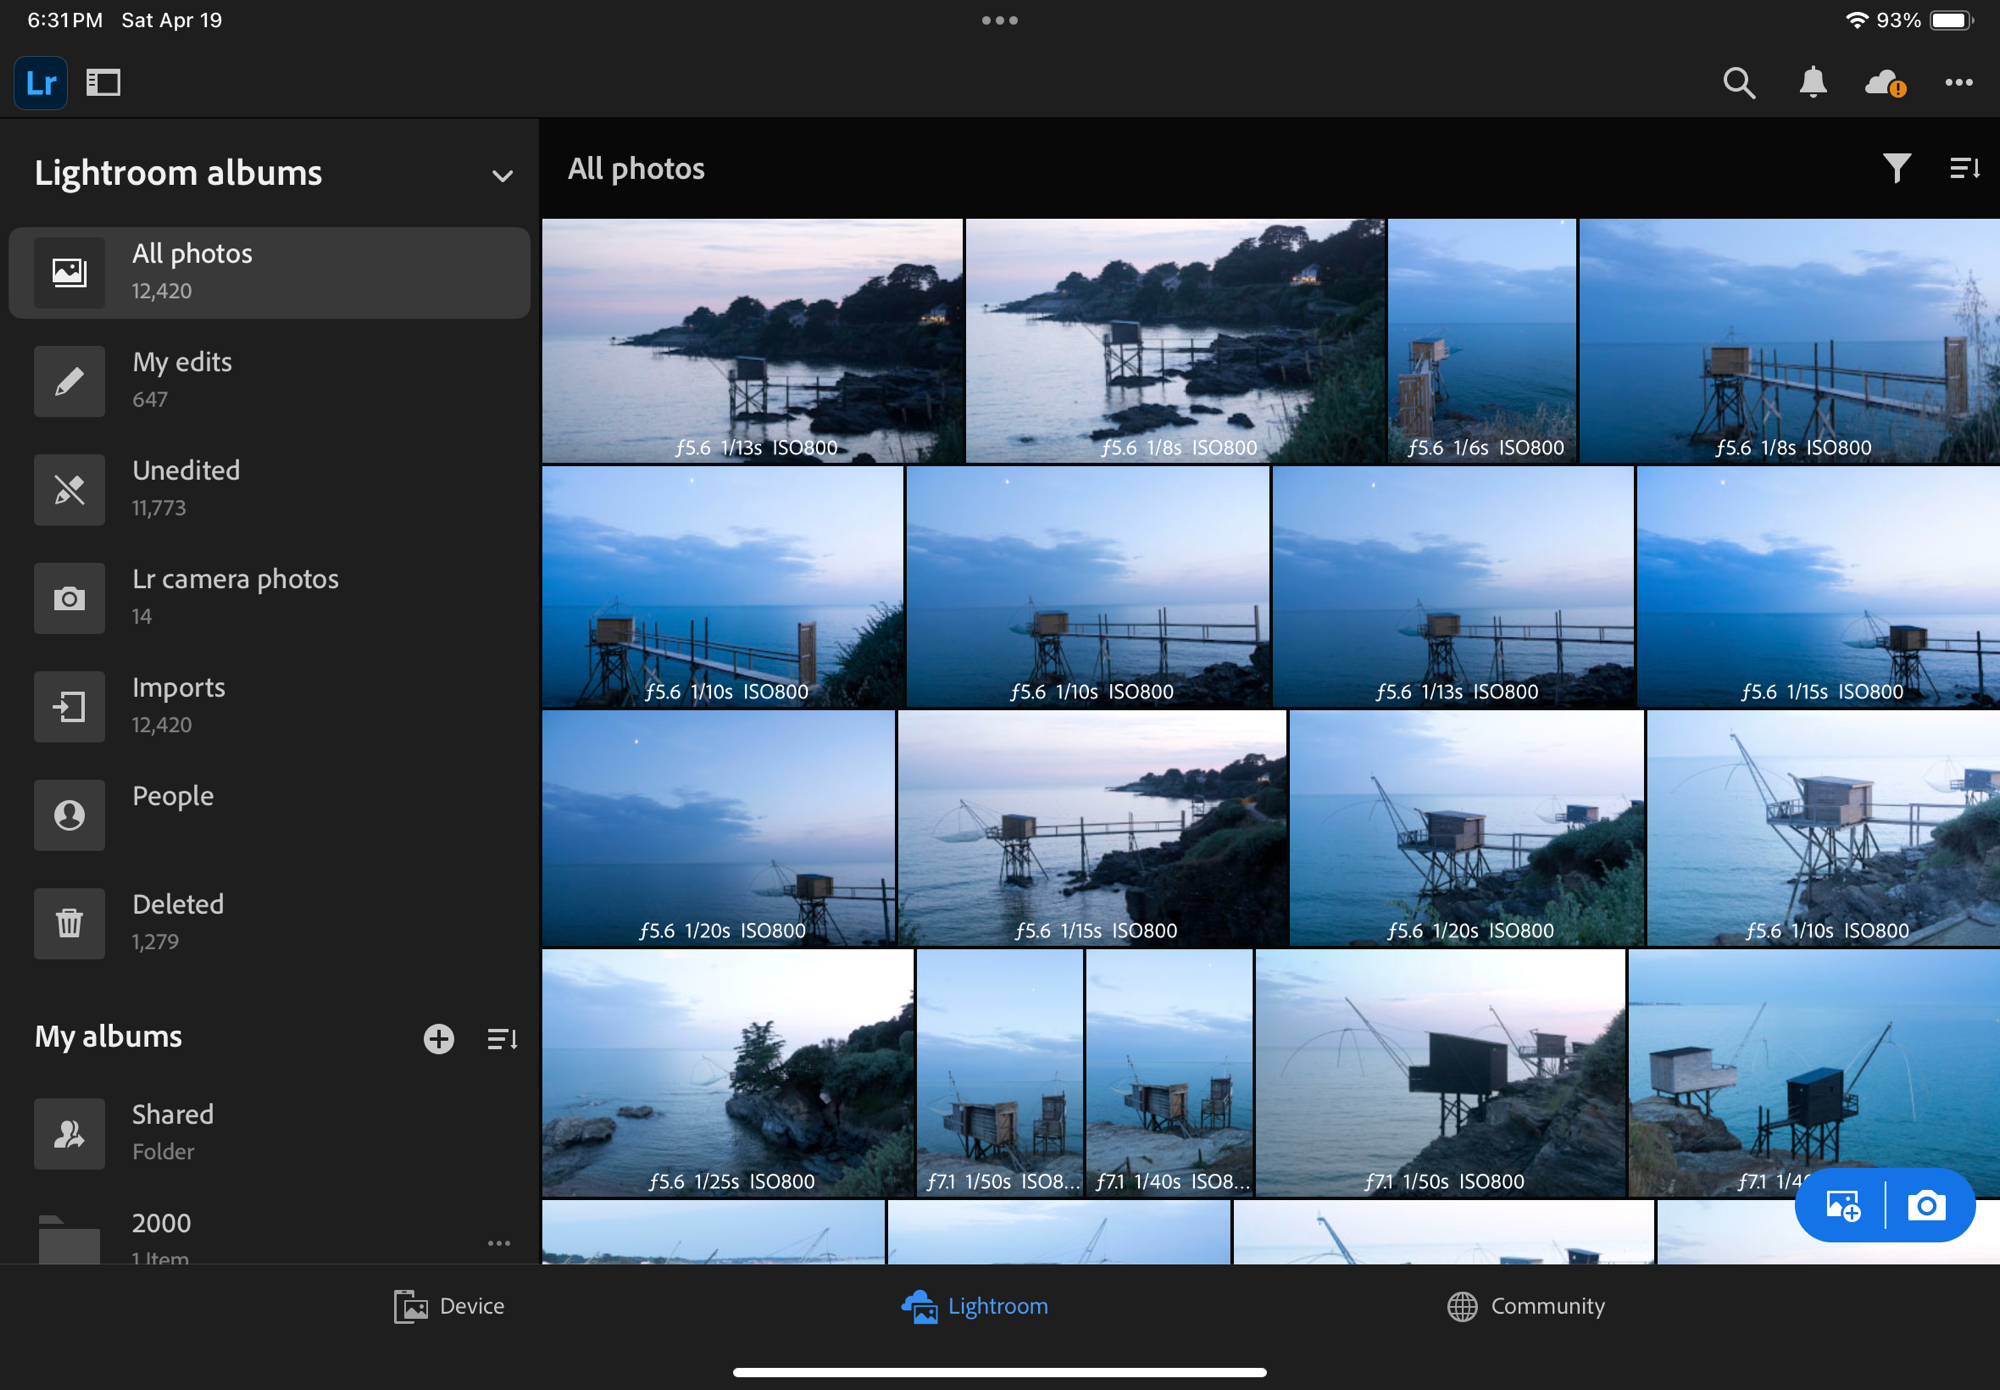
My big 2025 photography project was to move all my pictures out of my hardware dependent local storage, and migrate them to Adobe’s Creative Cloud. I knew I would not convert my Lightroom 6 catalogs (theoretically possible, but too cumbersome), but the folders on the Network Attached Storage device (NAS) where the originals were stored had always been carefully organized. I thought I would not lose much by not converting the catalogs. I subscribed to Adobe’s Lightroom Creative Cloud (first through the Apple Store, later directly on the Adobe Store), and uploaded all the original images, folder by folder, to Lightroom. The process was described in detail is a series of blog entries dedicated to Lightroom.
Which means I’m now trusting Adobe for preserving 28 years of scanned negatives and digital images in their cloud. What can possibly go wrong?
A recent post by Jim Grey (about “the lost photos era”) and interactions I’ve had with cloud service providers in a professional context brought back to my attention that storing my images in a cloud was a good first step but not enough.
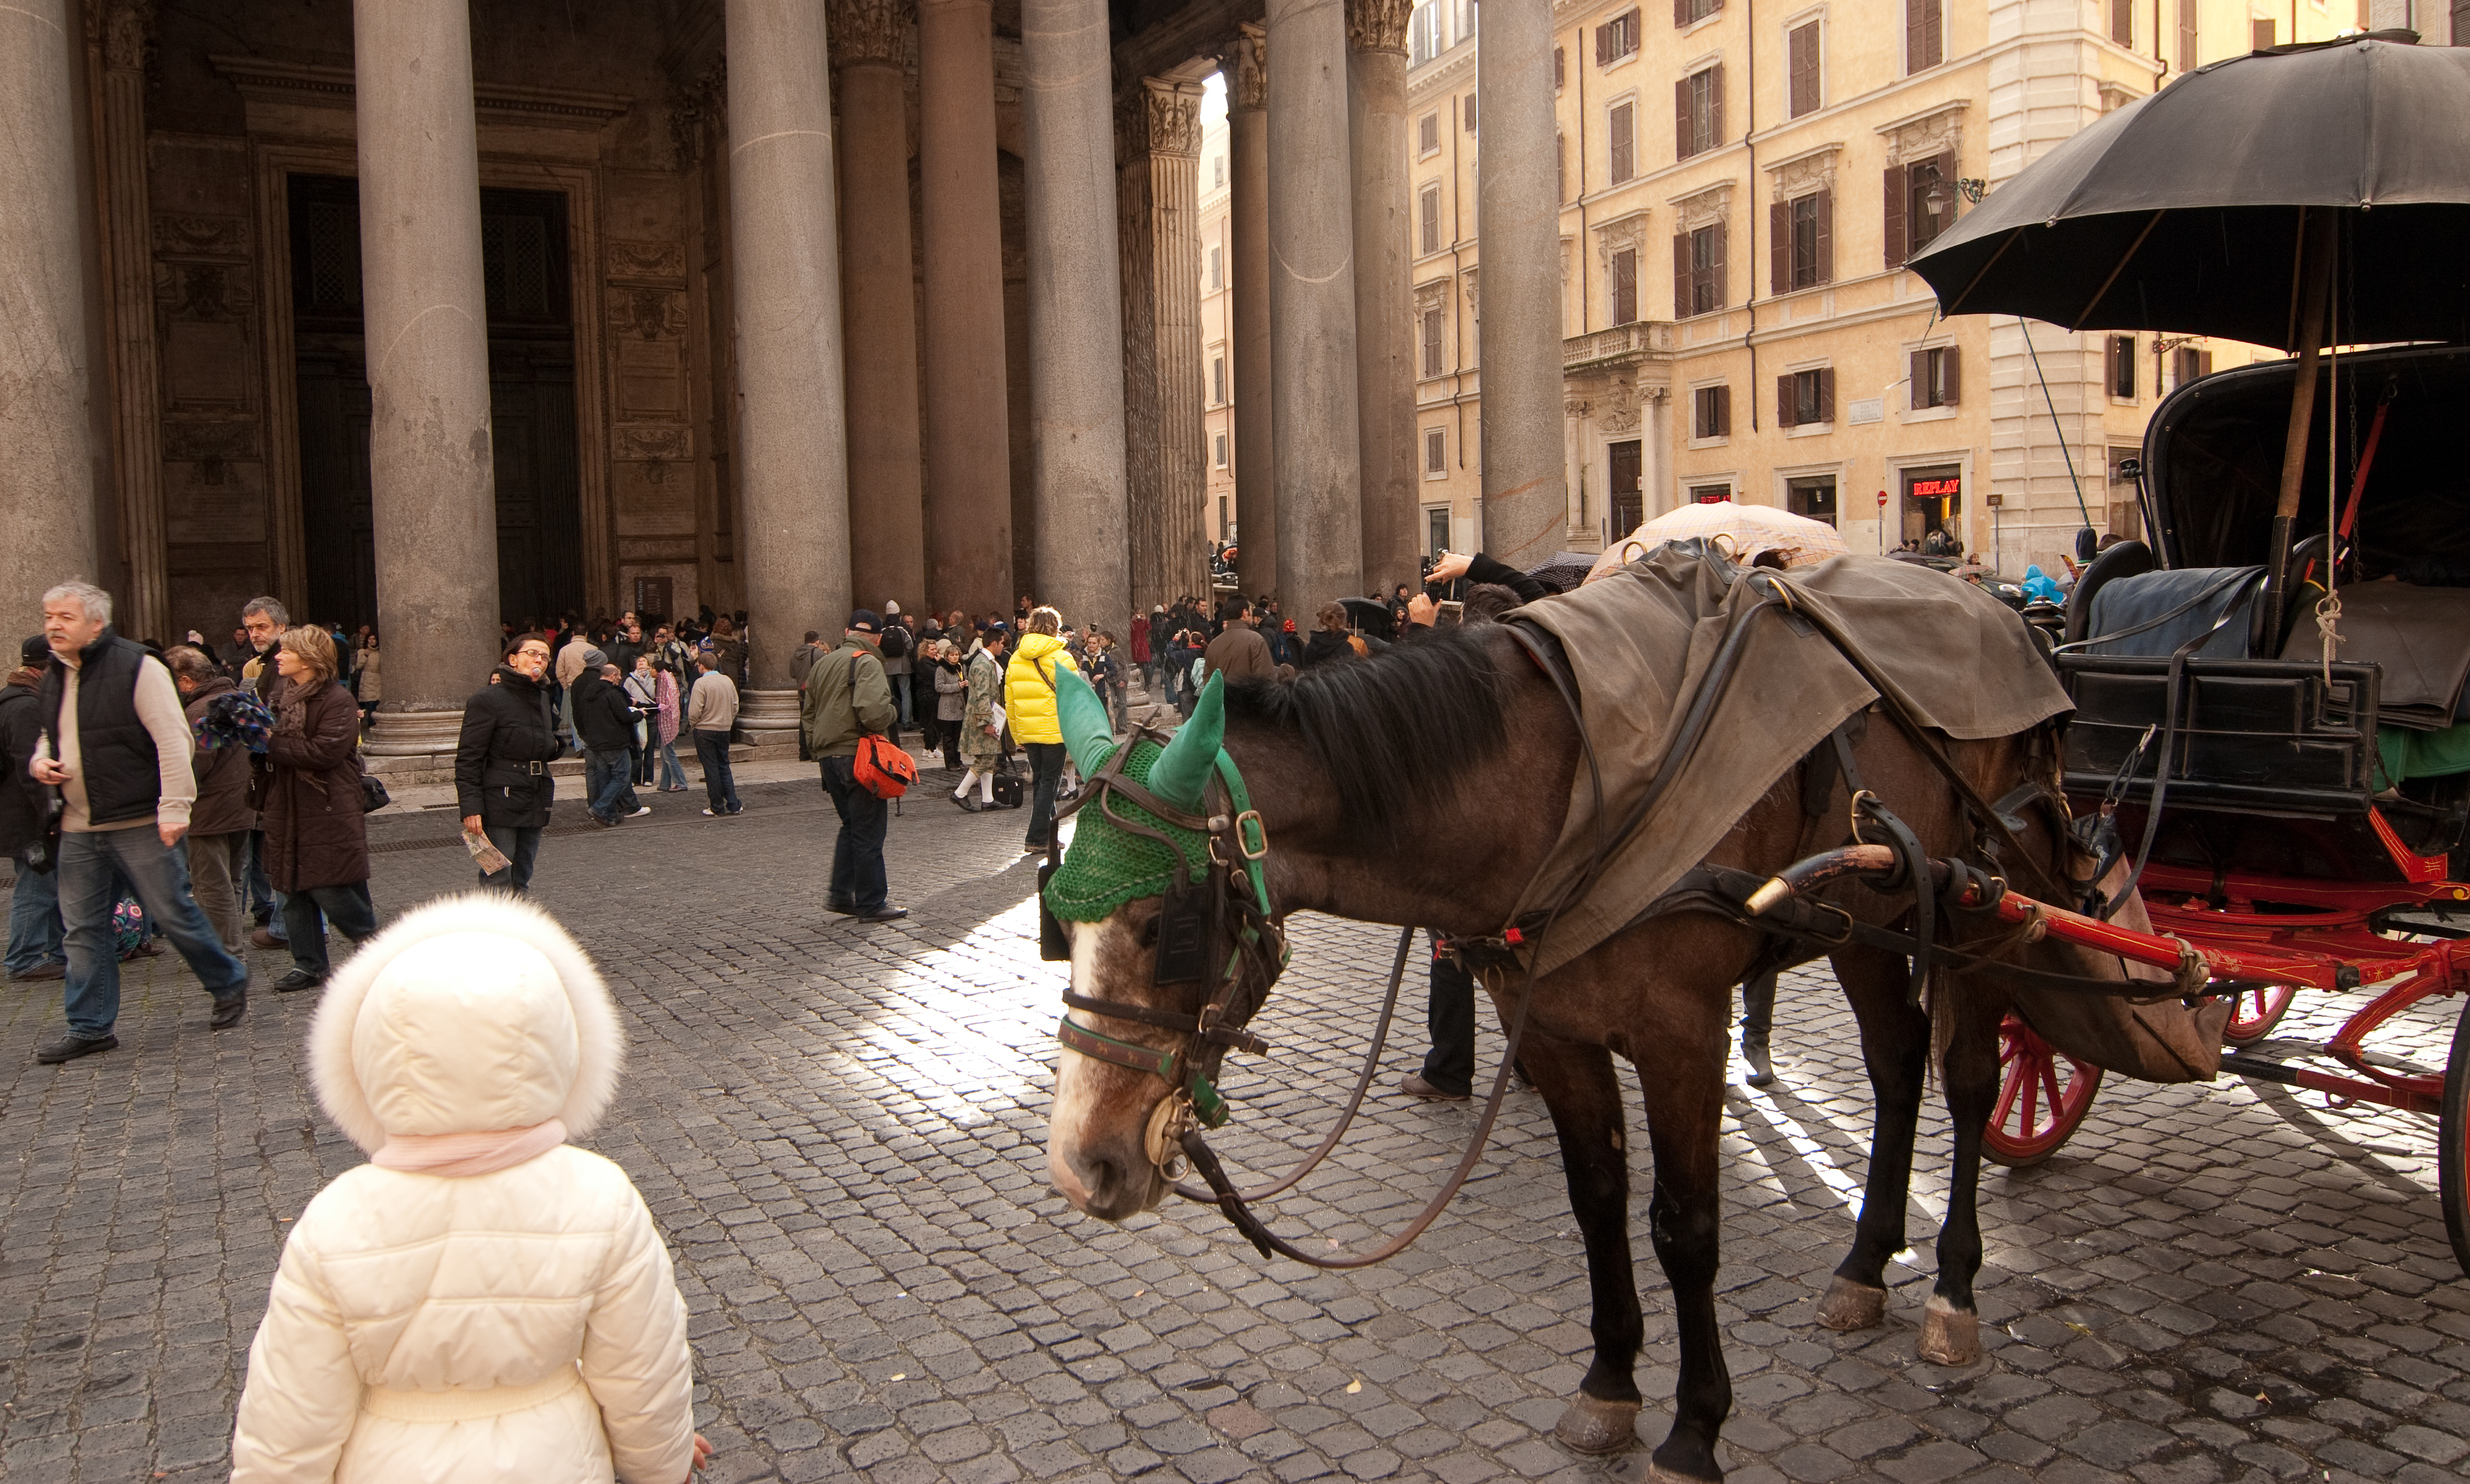
Rome – Fontana de Nettuno – Piazza Navona. Nikon D80 – Jan 2010
The “shared responsibility model”
All cloud service providers (CSPs) operate under a shared responsibility model. It’s the CSP’s job to ensure that their technical platform remains available and secure, and that the data entrusted to them can be recovered in case of a disaster in their data centers. As the client, it’s your responsibility to “govern your content”: manage the uploads, the regular cleanups, and configure how the data is accessed and shared.
The grey area is of course backup – CSPs generally commit to recovering your data at Day Minus One if something really bad happens to their infrastructure, but they won’t be obligated to do anything if you deleted a folder by mistake, or if you wanted to recover a group of files as they were at a specific point in time. CSPs generally consider that backups and restores are the responsibility of the client.
Although Adobe is a reliable company, I know I have to protect my images from a catastrophic error on their part, and from a major mistake (fat finger?) on mine.
Rome, Jan 2010 – Nikon D80
A reminder – the differences between Adobe Lightroom and Adobe Lightroom Classic
Adobe Lightroom Classic is the current iteration of Adobe’s original image edit and management software, launched in 2007 as Lightroom 1.0.
It’s a “fat client” application designed to work on Windows or MacOS workstations (desktop or laptop), which stores your images locally (on the hard drive of your workstation or on some form of higher capacity local storage, DAS or NAS). Lightroom maintains at least one local catalog of your images, which contains all the ratings, flags, titles, captions you have entered, as well as a log of all the edits and setting changes (crops, exposure, color balance, sharpening,…) performed on the images.
The system is totally self contained – but as everything (catalog, images and edits) is kept locally, it’s your responsibility to manage the storage, the backup and the disaster recovery of your images.
Under the same Lightroom brand, Adobe is selling a totally different range of cloud based products simply named Lightroom or Lightroom CC, whose lightweight clients run on a smartphone (iOS or Android), a tablet (iPadOS or Android) and on a desktop or laptop (Windows or MacOS). All those products share the same on-line library (hosted on Adobe’s Creative Cloud).
Contrarily to Lightroom Classic, the Creative Cloud versions of Lightroom (smartphone, tablet, PC or Mac) don’t keep any image or catalog on your device – just a cache to reduce the response time. The whole system works very well: I can upload images from my camera through a smartphone while traveling, perform light edits on a tablet at the hotel the same day, and spend more time perfecting the images on a laptop when I’m back home – it’s seamless. As long as I keep paying for the subscription, of course. And bar a catastrophic event in Creative Cloud.
Rome – Fontana de Nettuno – Piazza Navona. Nikon D80 – Jan 2010
Backup workflows don’t live forever
Even if the image formats themselves (jPEG and DNG) have been remarkably stable over the last 20 years, the hardware, the software and the cloud services offerings have not stopped evolving – and what used to work reliably ten years ago does not work any more. Which means that every now and then, we need to take a hard look at our workflow and re-engineer it.
When I put it in place in 2018, my image preservation workflow made sense – I was using Adobe Lightroom 6 running on a Mac to edit my photos and manage my libraries. Lightroom 6 was keeping the catalog on the local hard drive of my Macbook and was pointing to a volume on the Netgear NAS to store the images themselves. I was also running a backup application named Arq on the Macbook, and using it to keep a backup of the NAS in Amazon’s long term storage, AWS Glacier.
Along the years, this finely tuned workflow crumbled.
First, the OS of my old MacBook stopped being supported, and I saw its capabilities decline progressively as it could not access the services that Apple (and others) kept on making more secure with more refined security protocols and longer encryption keys.
To make the matter worse, Netgear decided to get out of the network storage business – my RN214 NAS still works, but is not supported and (of course) its OS and its built-in backup apps are not updated anymore.
Last but not least, AWS has now sunset Glacier as I was using it – it’s not a stand alone product anymore, just a storage class in the S3 product portfolio, using different APIs.
Rome, Jan 2010 – Nikon D80
My storage and backup strategy was crumbling and I had to act. That’s why I migrated the libraries themselves to Adobe’s Creative Cloud last year, and why I’m now implementing a new backup and restore workflow now.
My new workflow– saving the “digital negatives“
As often nowadays, I called ChatGPT for help. The workflow it recommended, and that I implemented, is still based on Adobe Creative Cloud being my primary image store, the “source of truth”. Lightroom (the PC/Mac edition of Lightroom) on my MacBook will act as a sort of gateway to the NAS, and the NAS volume will store my local replica of the originals stored in Creative Cloud.
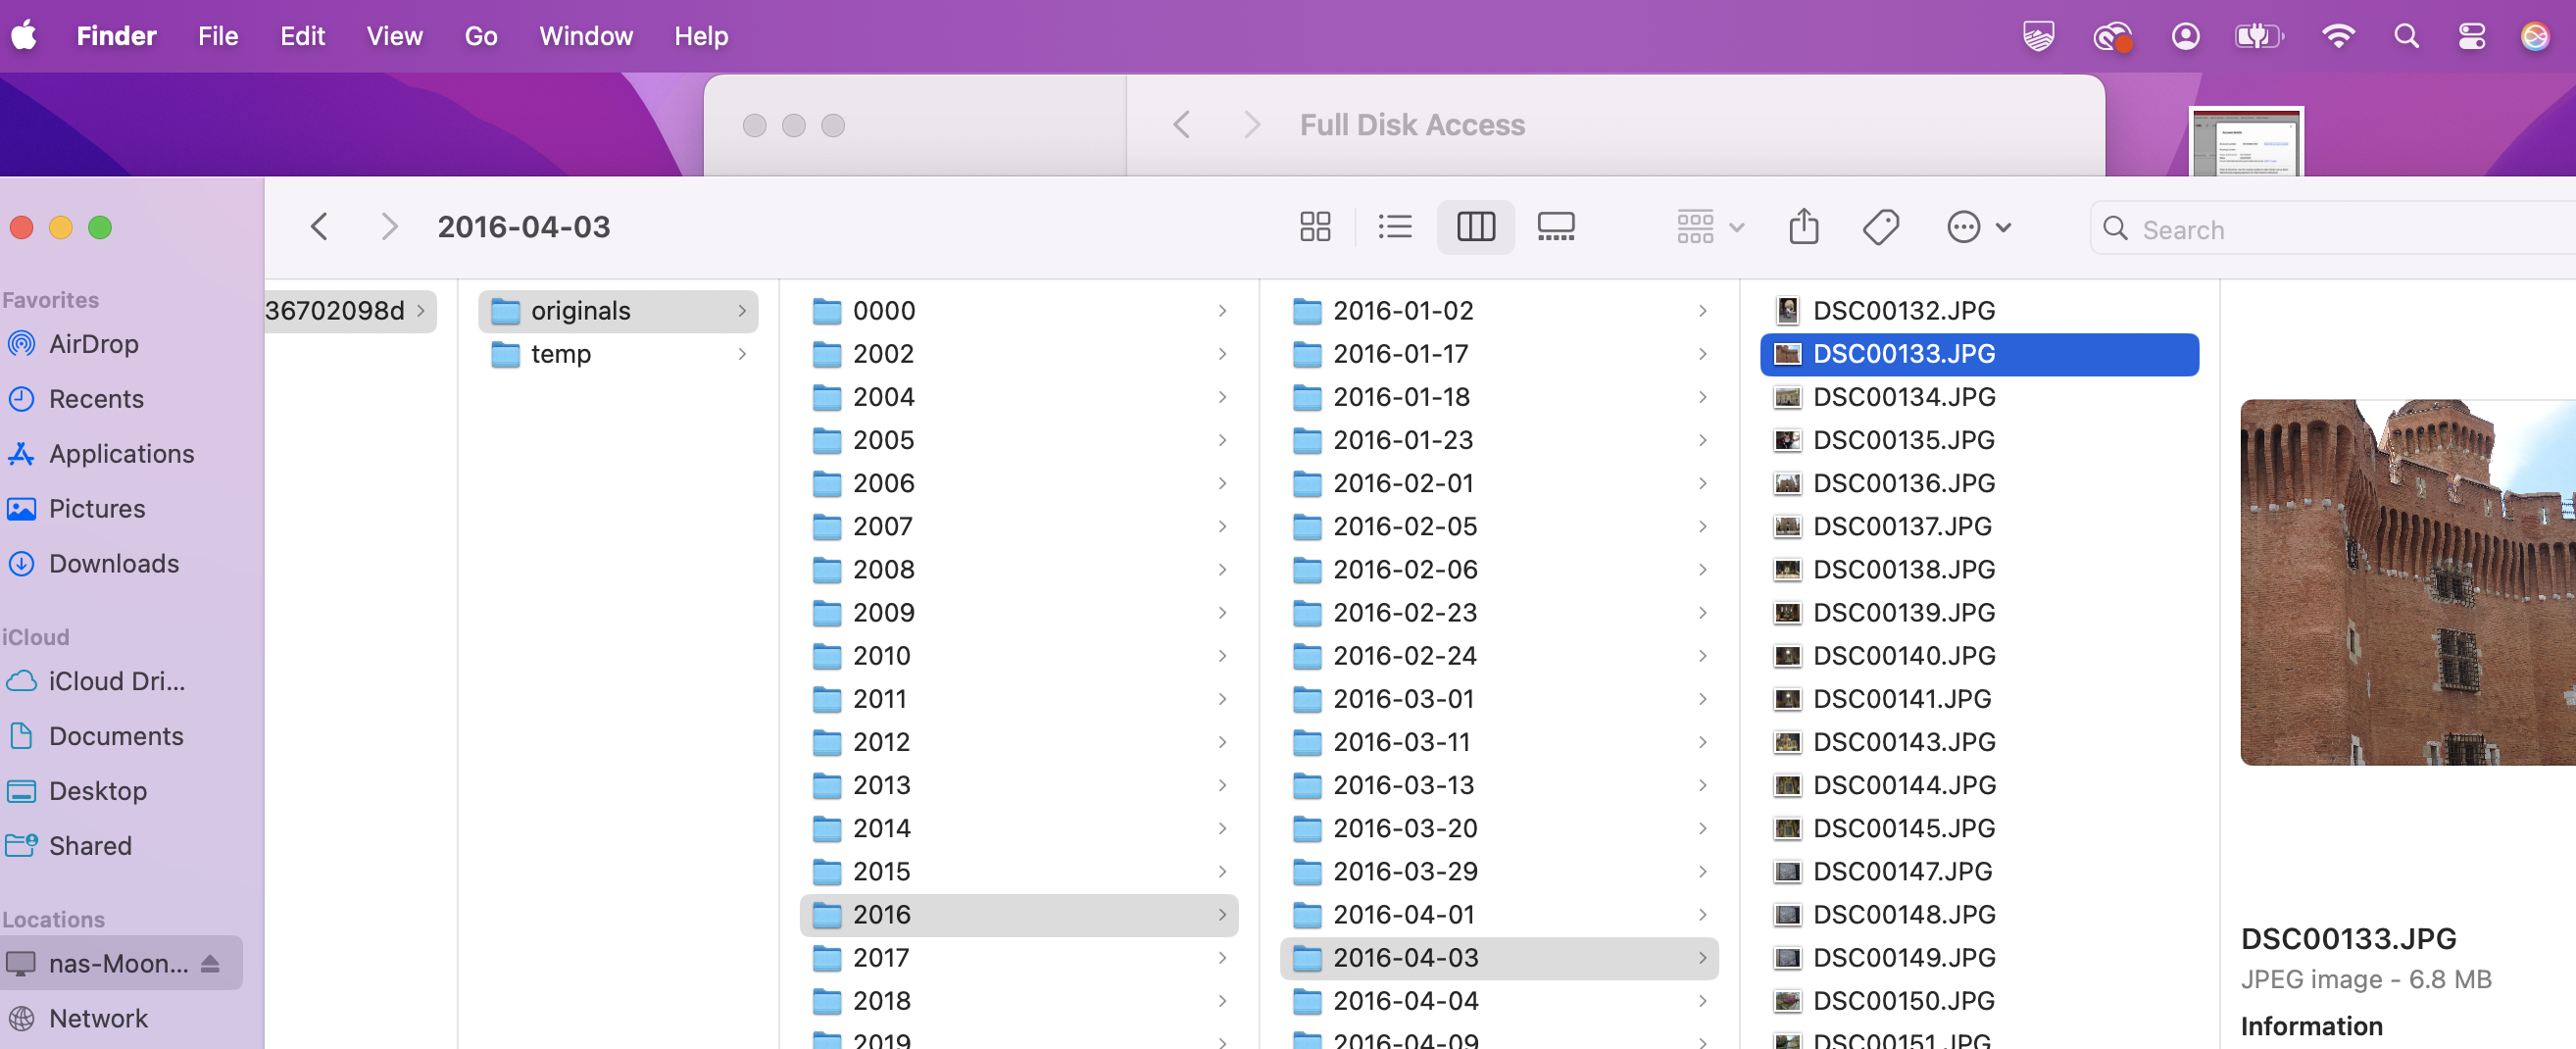
It’s important to remember that for Lightroom, a local storage volume is nothing more than the place where it stores a local cache. What is being replicated to the local volume is the source image – the original JPEG or raw files exactly as they were originally uploaded from the camera – before any transformation, optimization or edit was performed. The images are grouped on the SAN by date (one folder per year, one subfolder per day) and the album structure you defined in Lightroom is not respected. Again, it’s a cache that we use as a way to backup our source images, not a backup of the final images after Lightroom has processed them.
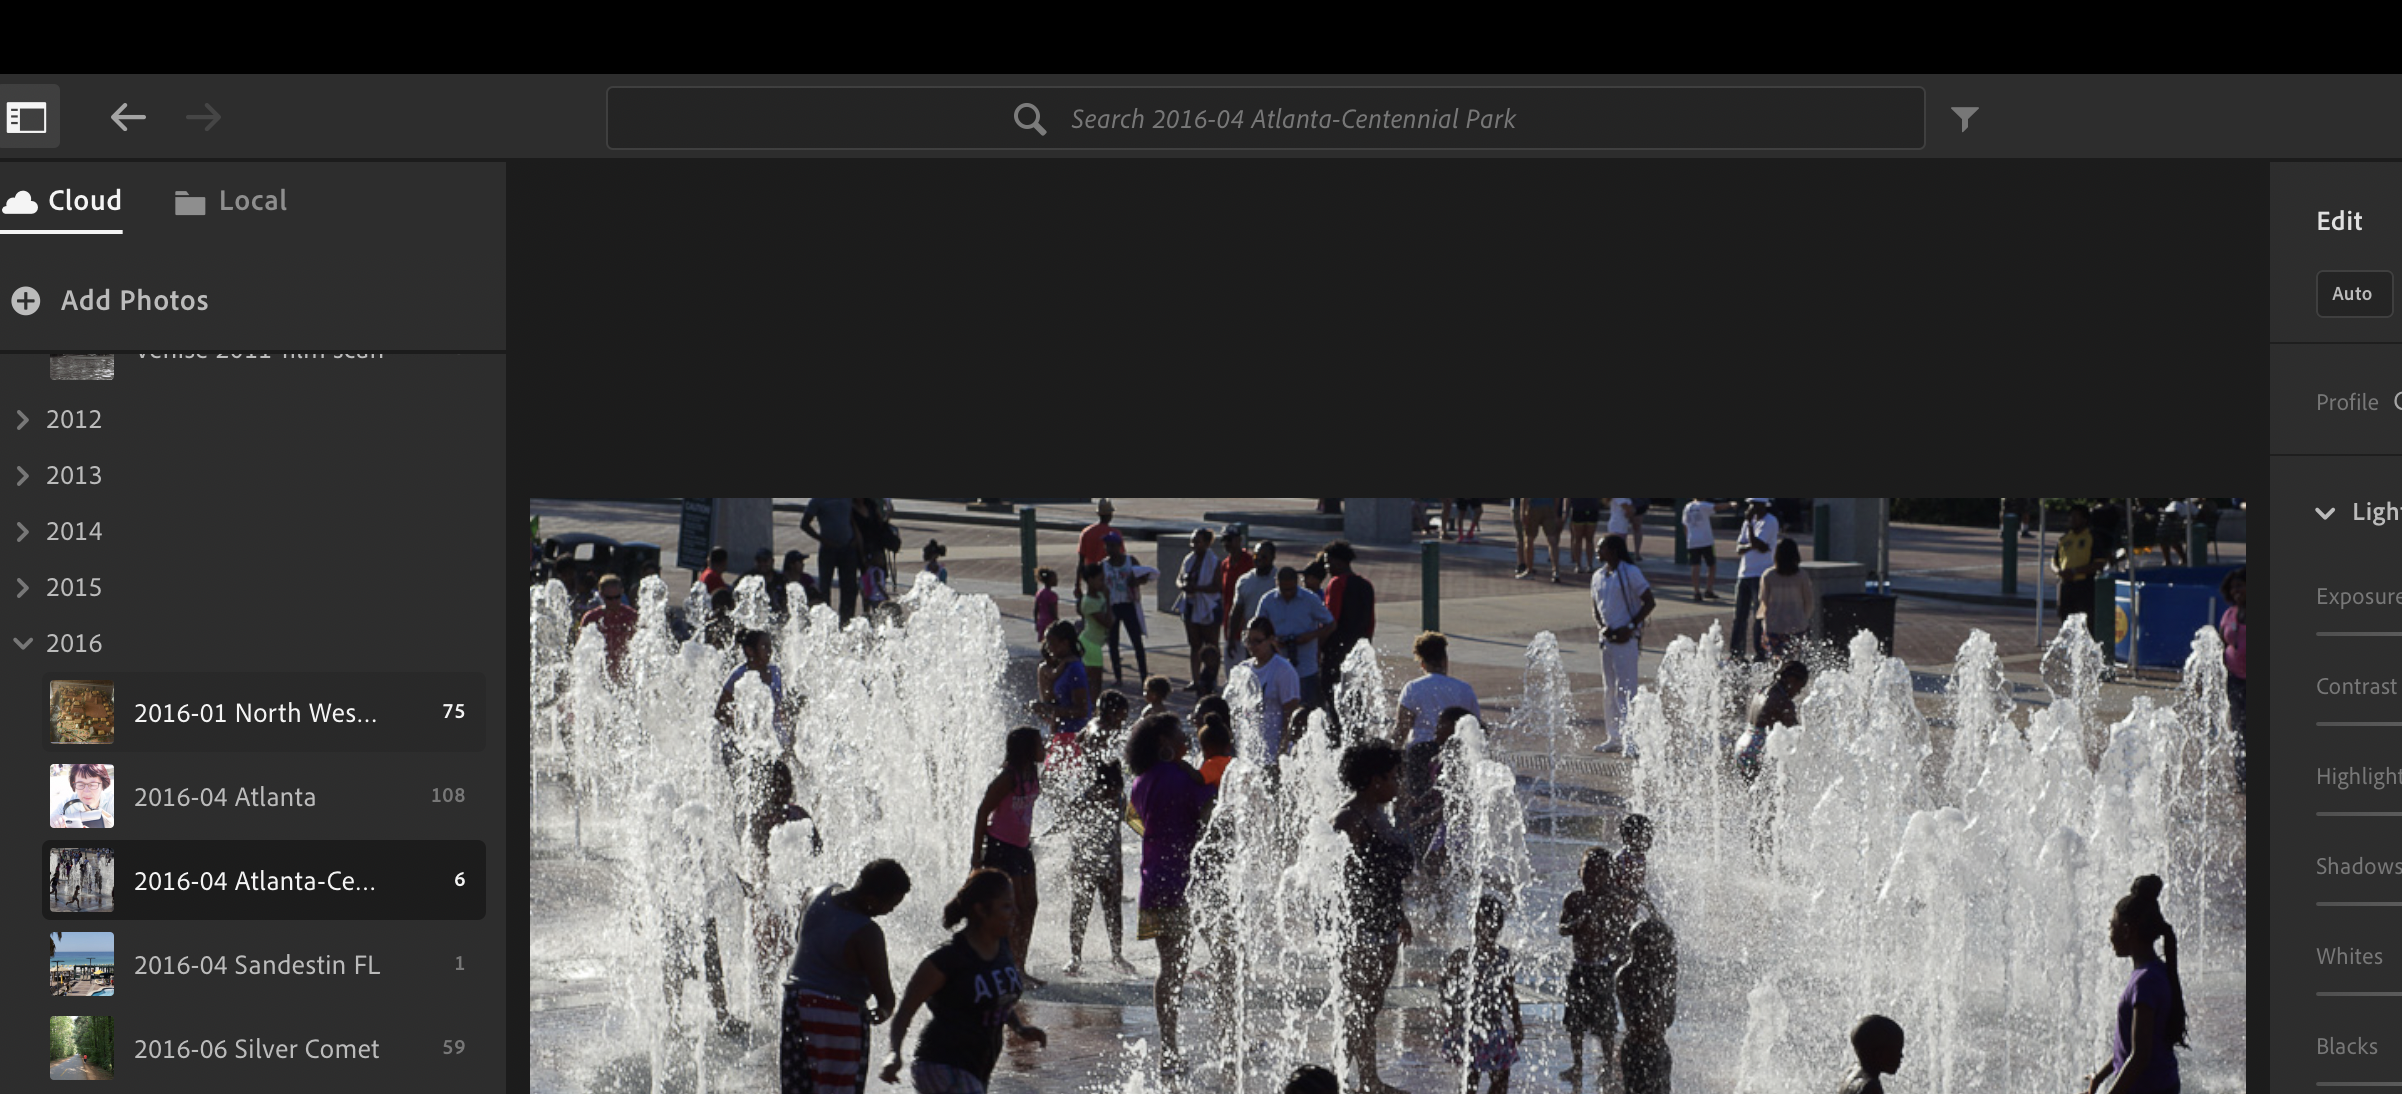
The local cache on the SAN shows the original files grouped by date of capture – the Lightroom Album structure and the edits are not preserved, only the original image itself (compare with the structure of April 2016 in Lightroom, as shown below).
Lightroom CC – the folder/album structure (here, April 2016). In Lightroom the images are grouped in user defined folders and albums.
How to setup Adobe Lightroom
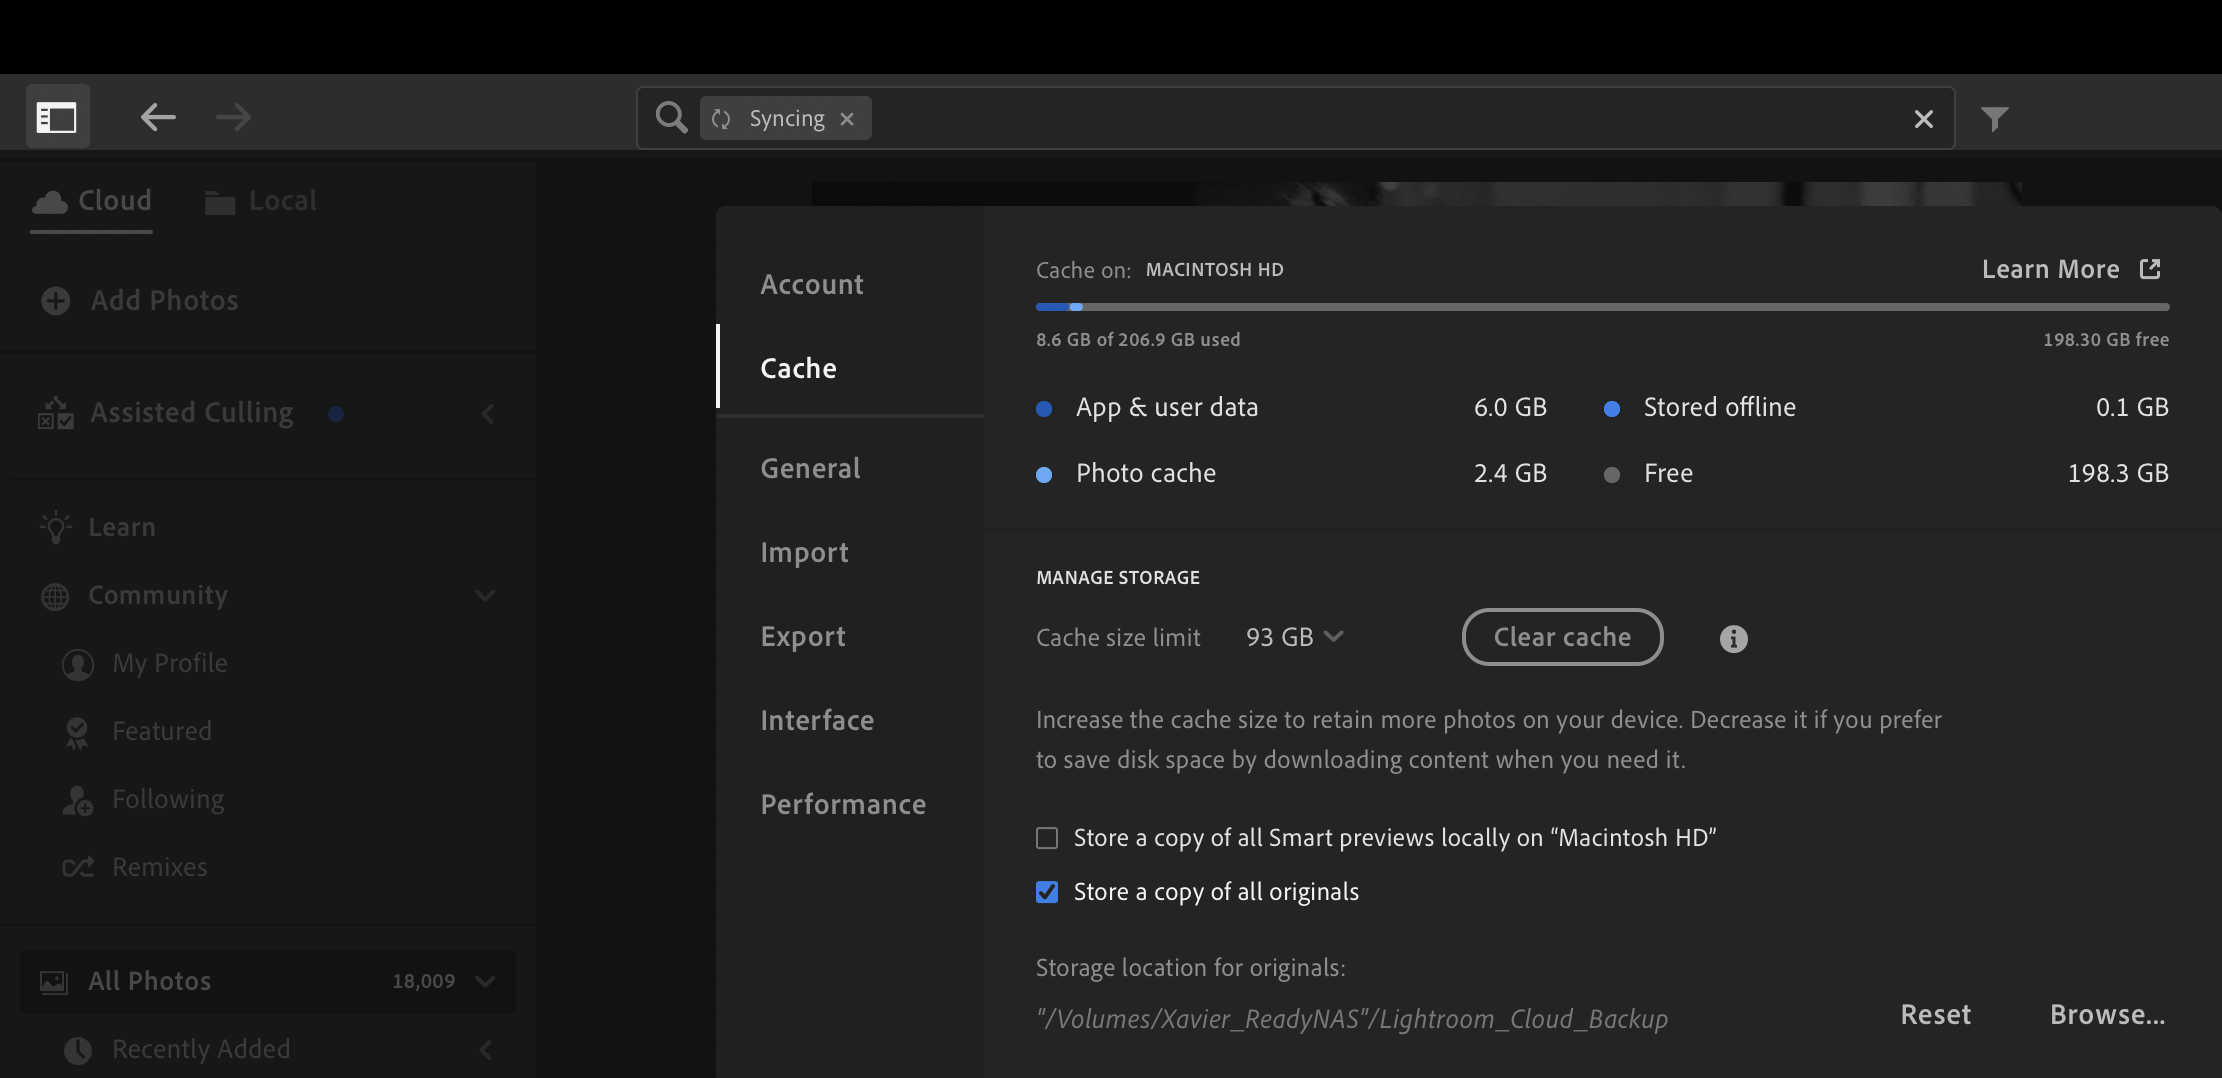
Once the Mac is logged in the Network Attached Storage volume, simply click on the “Adobe Lightroom” option at the top left of the screen, select “Cache”, and under Performance, check the “Store a copy of all originals option”, and point to the folder of the NAS where the original images will be dropped.
The sync process is managed automatically by Lightroom. Every time you add new pictures to Lightroom, it will start replicating them to the SAN.
If you’re working with Lightroom away from your home network, no problem. Adobe will consider that the cache is not available, and will download the images from the cloud.
In Lightroom CC – check the “Store a copy of all originals” option and point to the NAS as a the local storage
Creating an off-site backup of the Network Attached Storage volume
The primary storage location of my images is Adobe Creative Cloud. I keep a replica of the originals on a network attached storage device (NAS) at home. It’s a pretty solid data protection system, but it’s only keeping one replica of Creative Cloud’s originals – and a replica is not a backup (because it only keeps the most recent version of a file). It is not very complicated or expensive to make it even more robust, and create an off site backup of the original images.
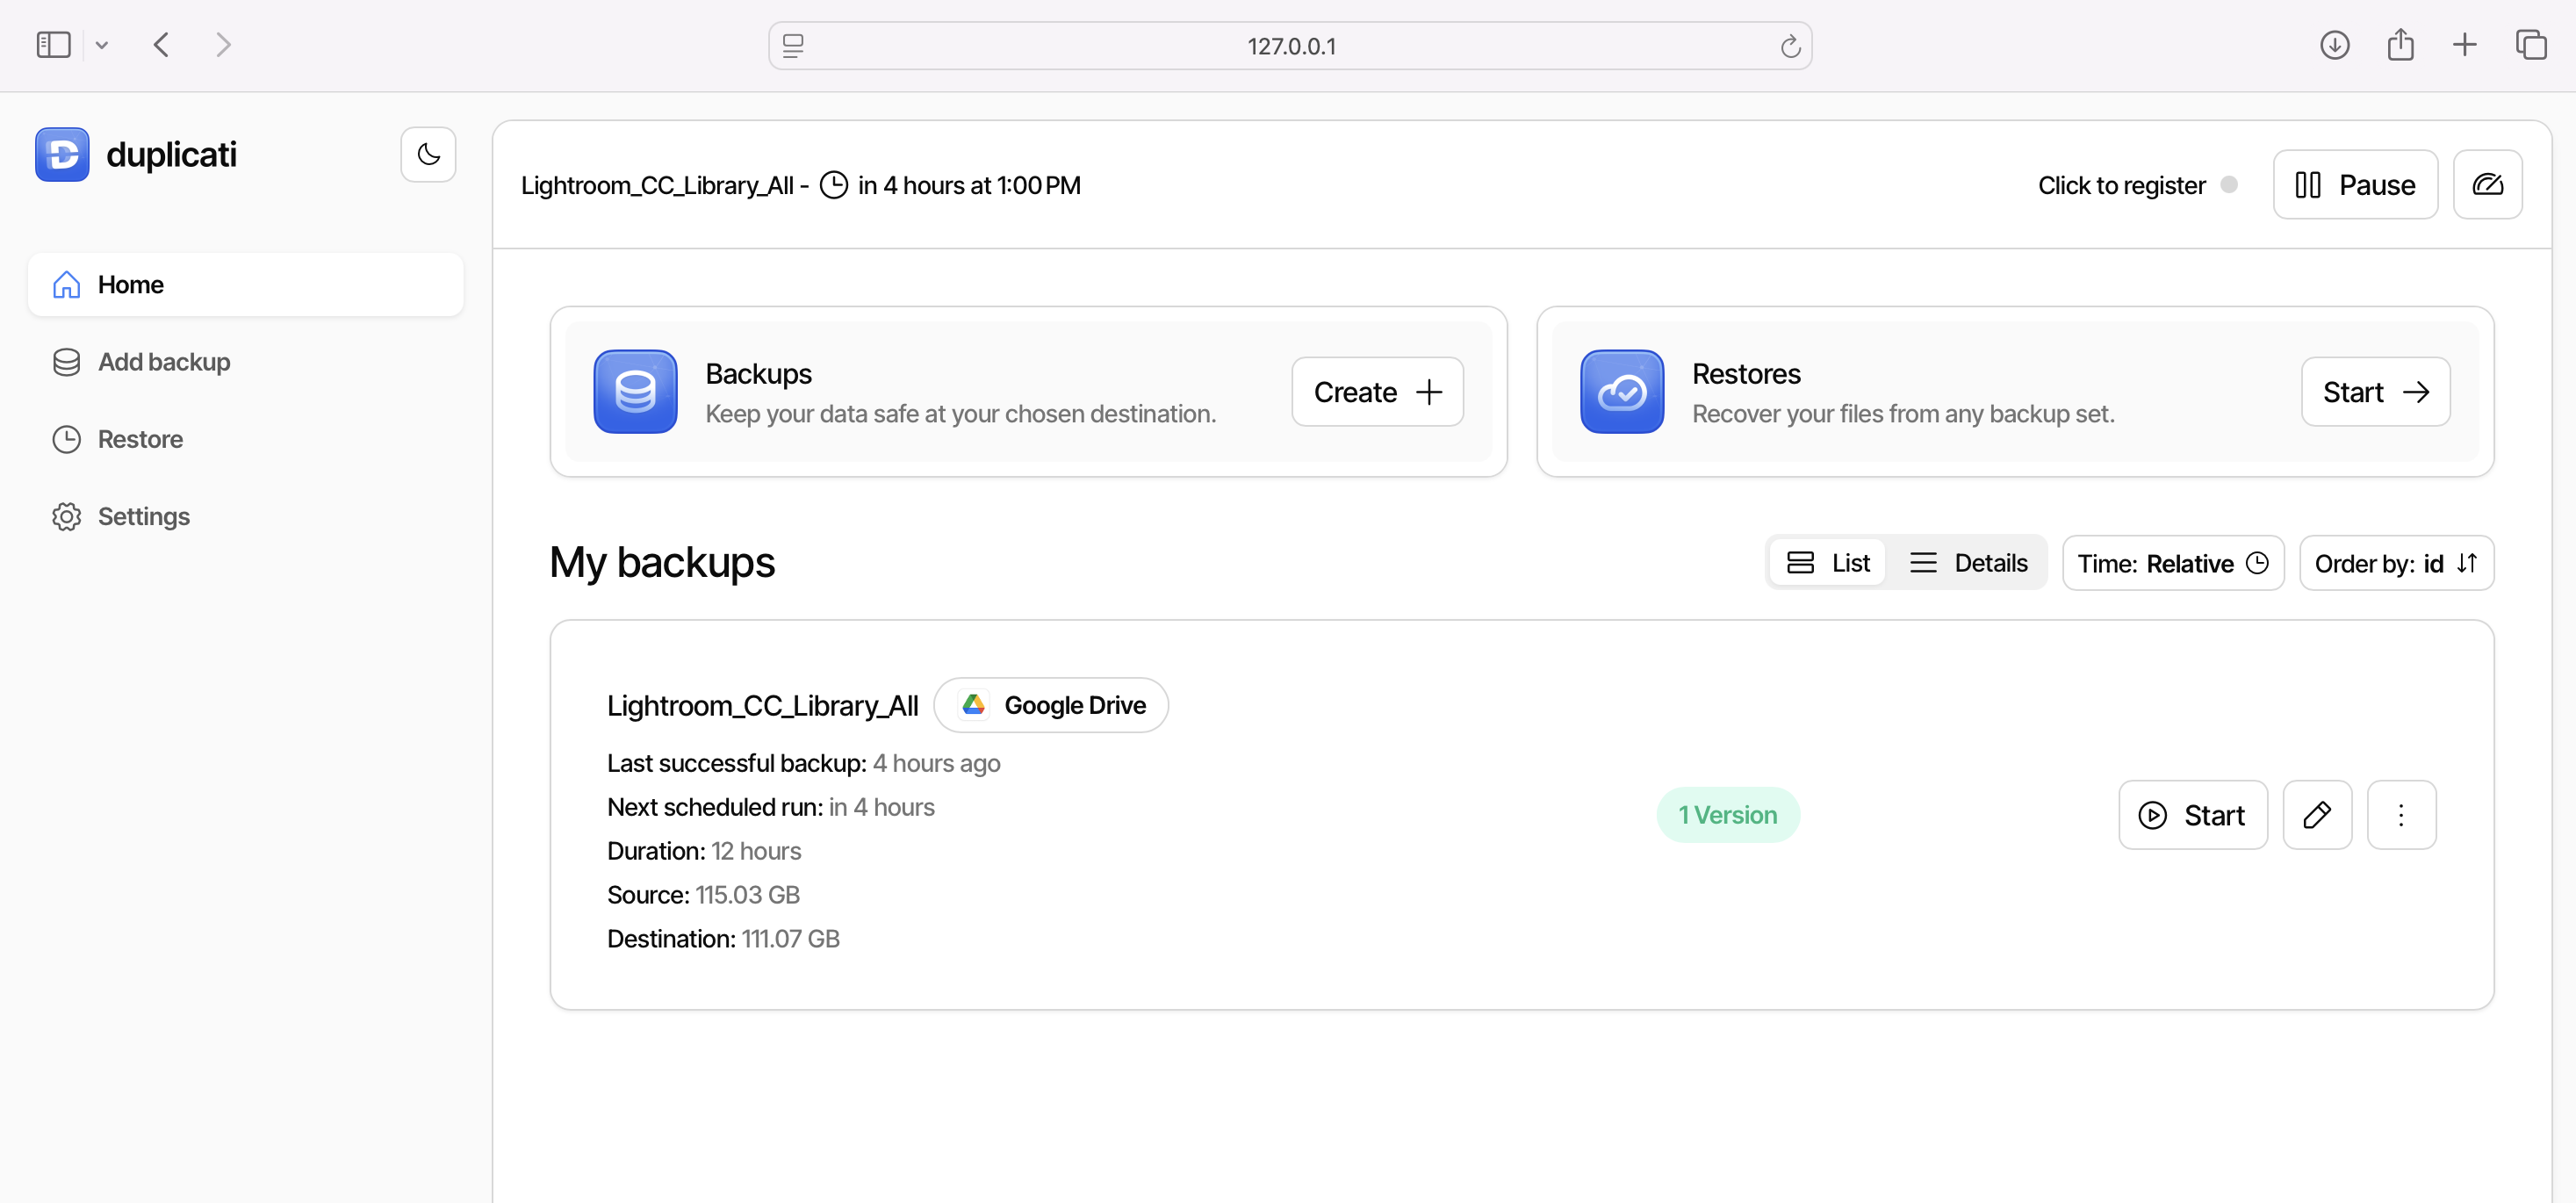
Duplicati – the backup job (it took it 12 hours to backup 110 Gbytes of pictures – not bad at all).
That’s what I used to do with Amazon Glacier – and having an off site backup of my photo library was a saving grace when my first Netgear NAS device gave up the ghost. Restoring the images from Glacier took a week, but it’s better than losing everything.
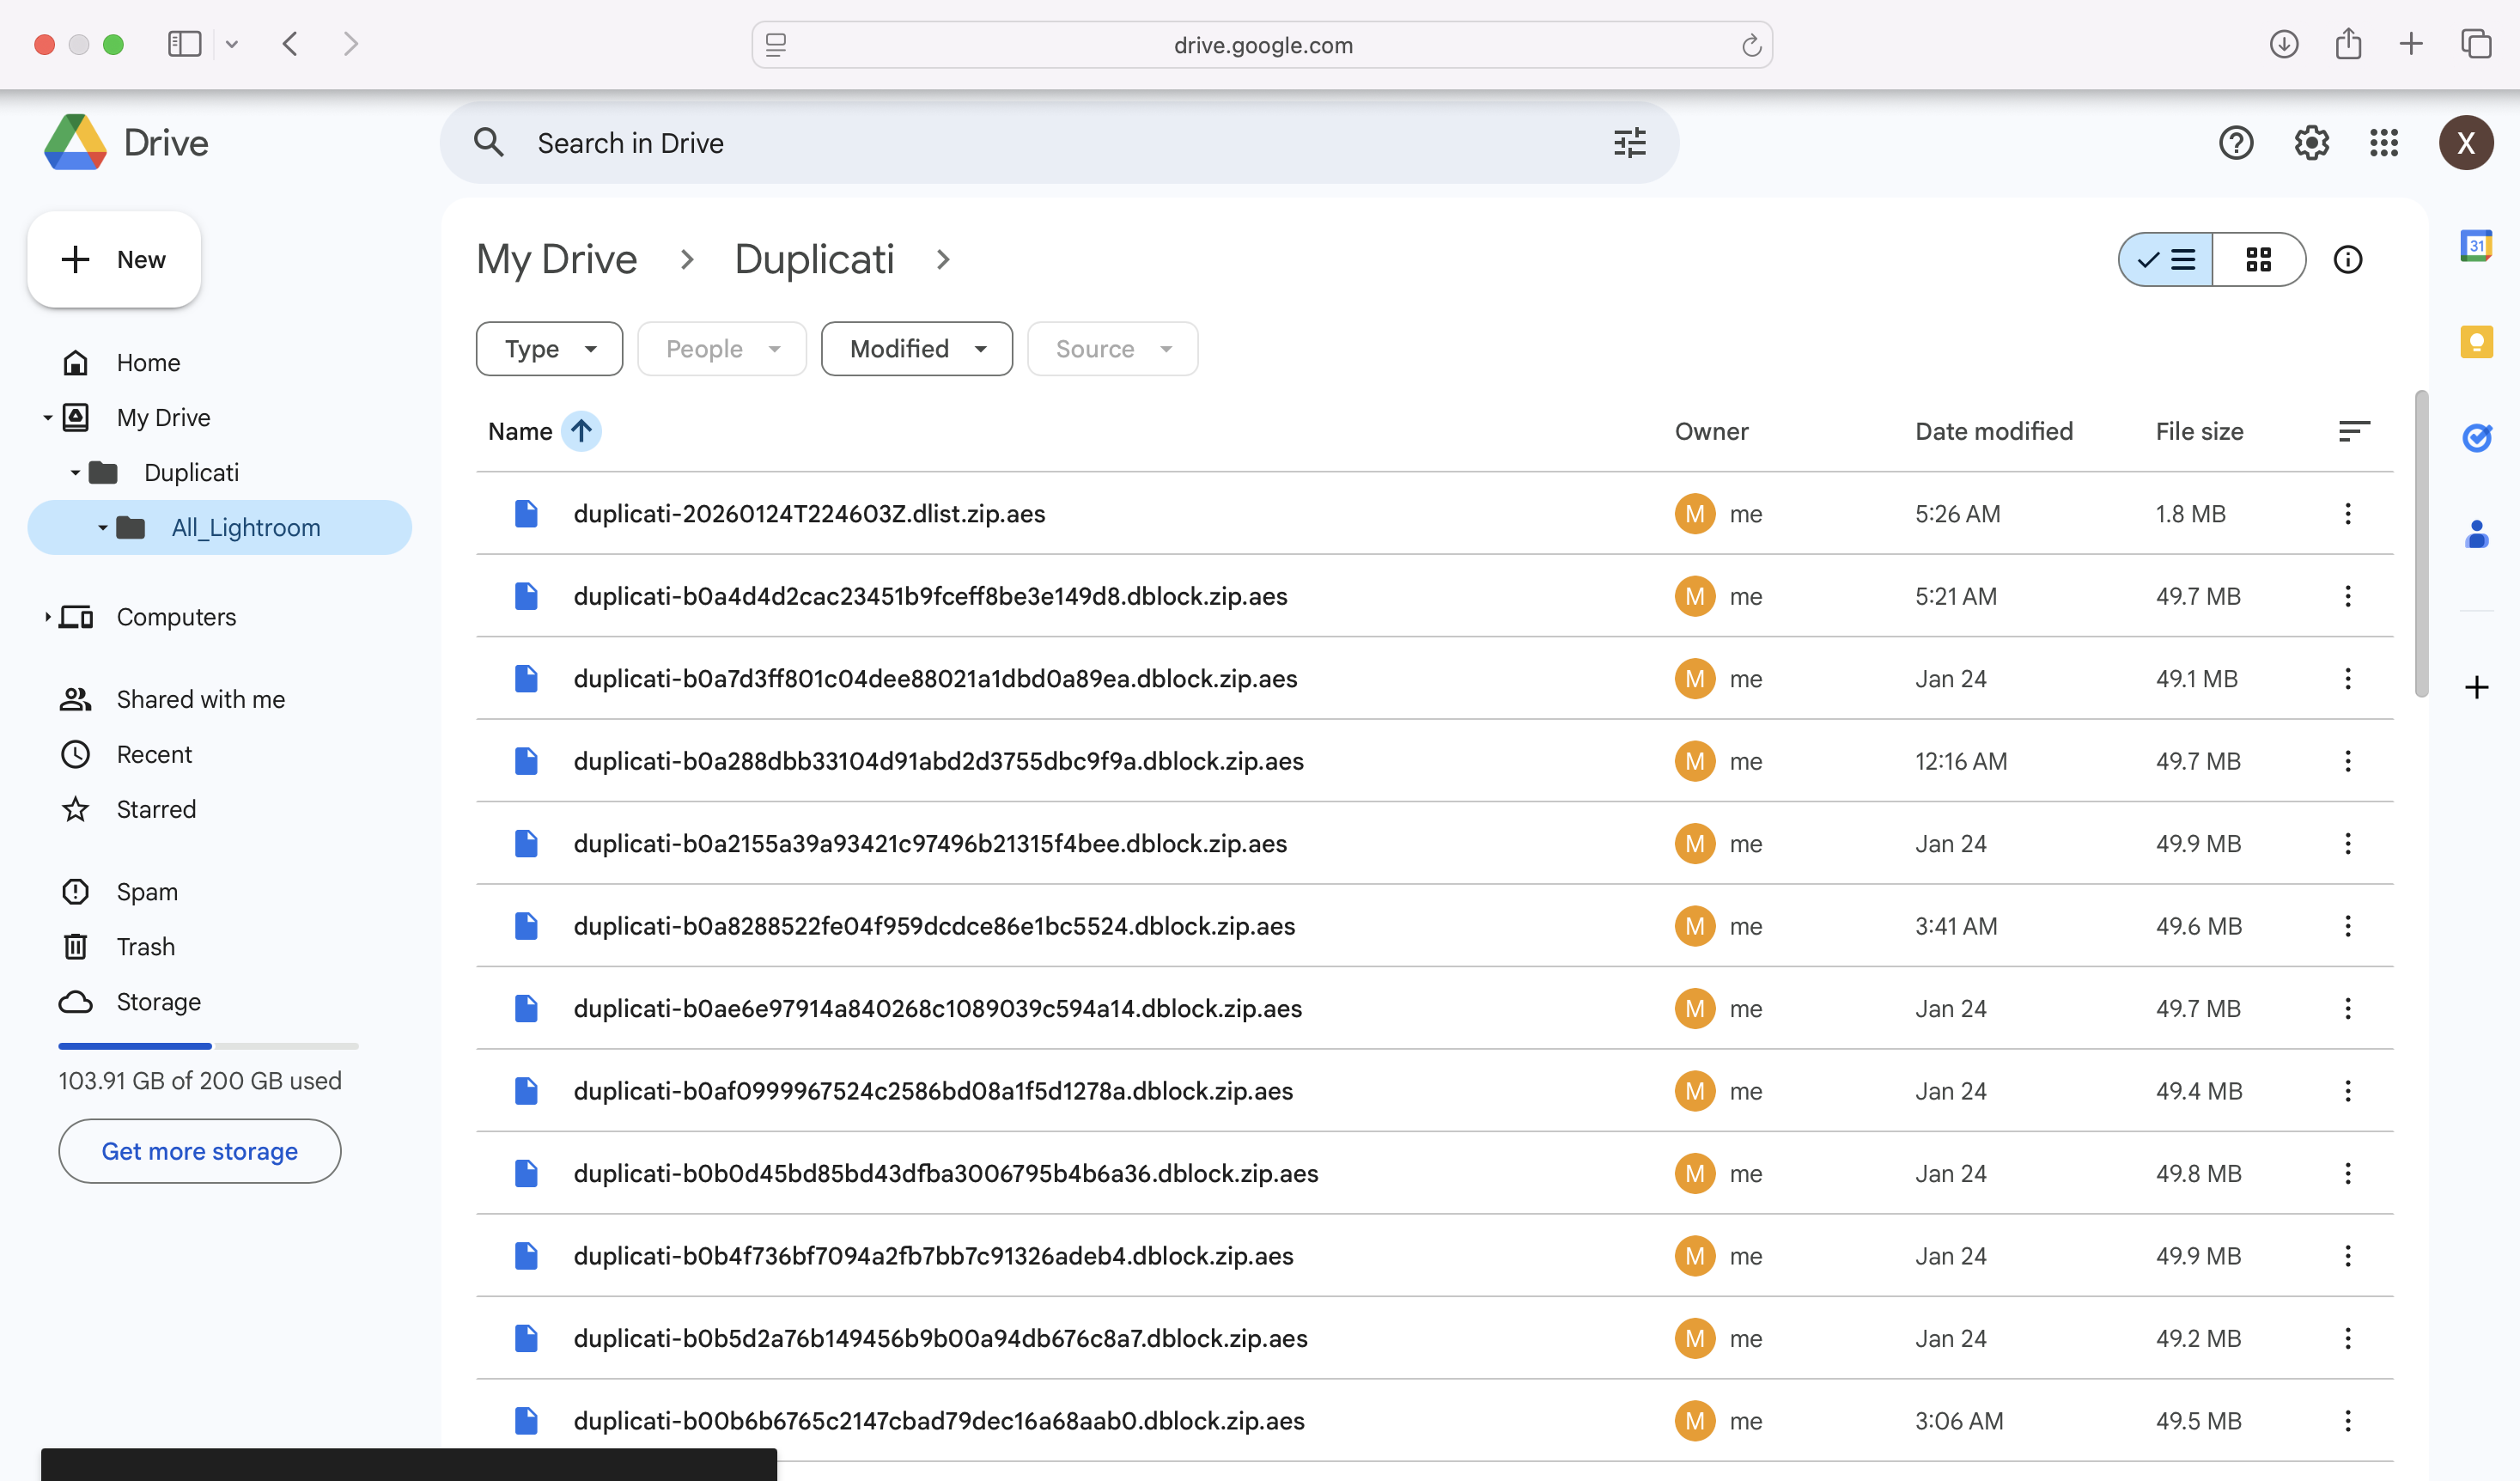
The target Google Drive after the backup – the data is grouped in blocks of 50 Mbytes.
This time, I tried different options (Arq, Backblaze) which for various reasons (performance, cost, no support of network attached devices) did not work for me. My current setup is based on an open source software named Duplicati, which is pushing the Lightroom replica on the NAS to a Google Drive. It works, backups are reasonably fast (around 2.5 Mbytes/sec), and it’s flexible enough: I can recover a specific image in a few minutes if I need to.
Validating that the setup works
Backup and restore workflows are fragile, and they can fail for all sorts of reasons (expired passwords or keys, OS or software upgrade, hardware or network related issues, human error). And it’s not because the backup is successful that the restore will be.
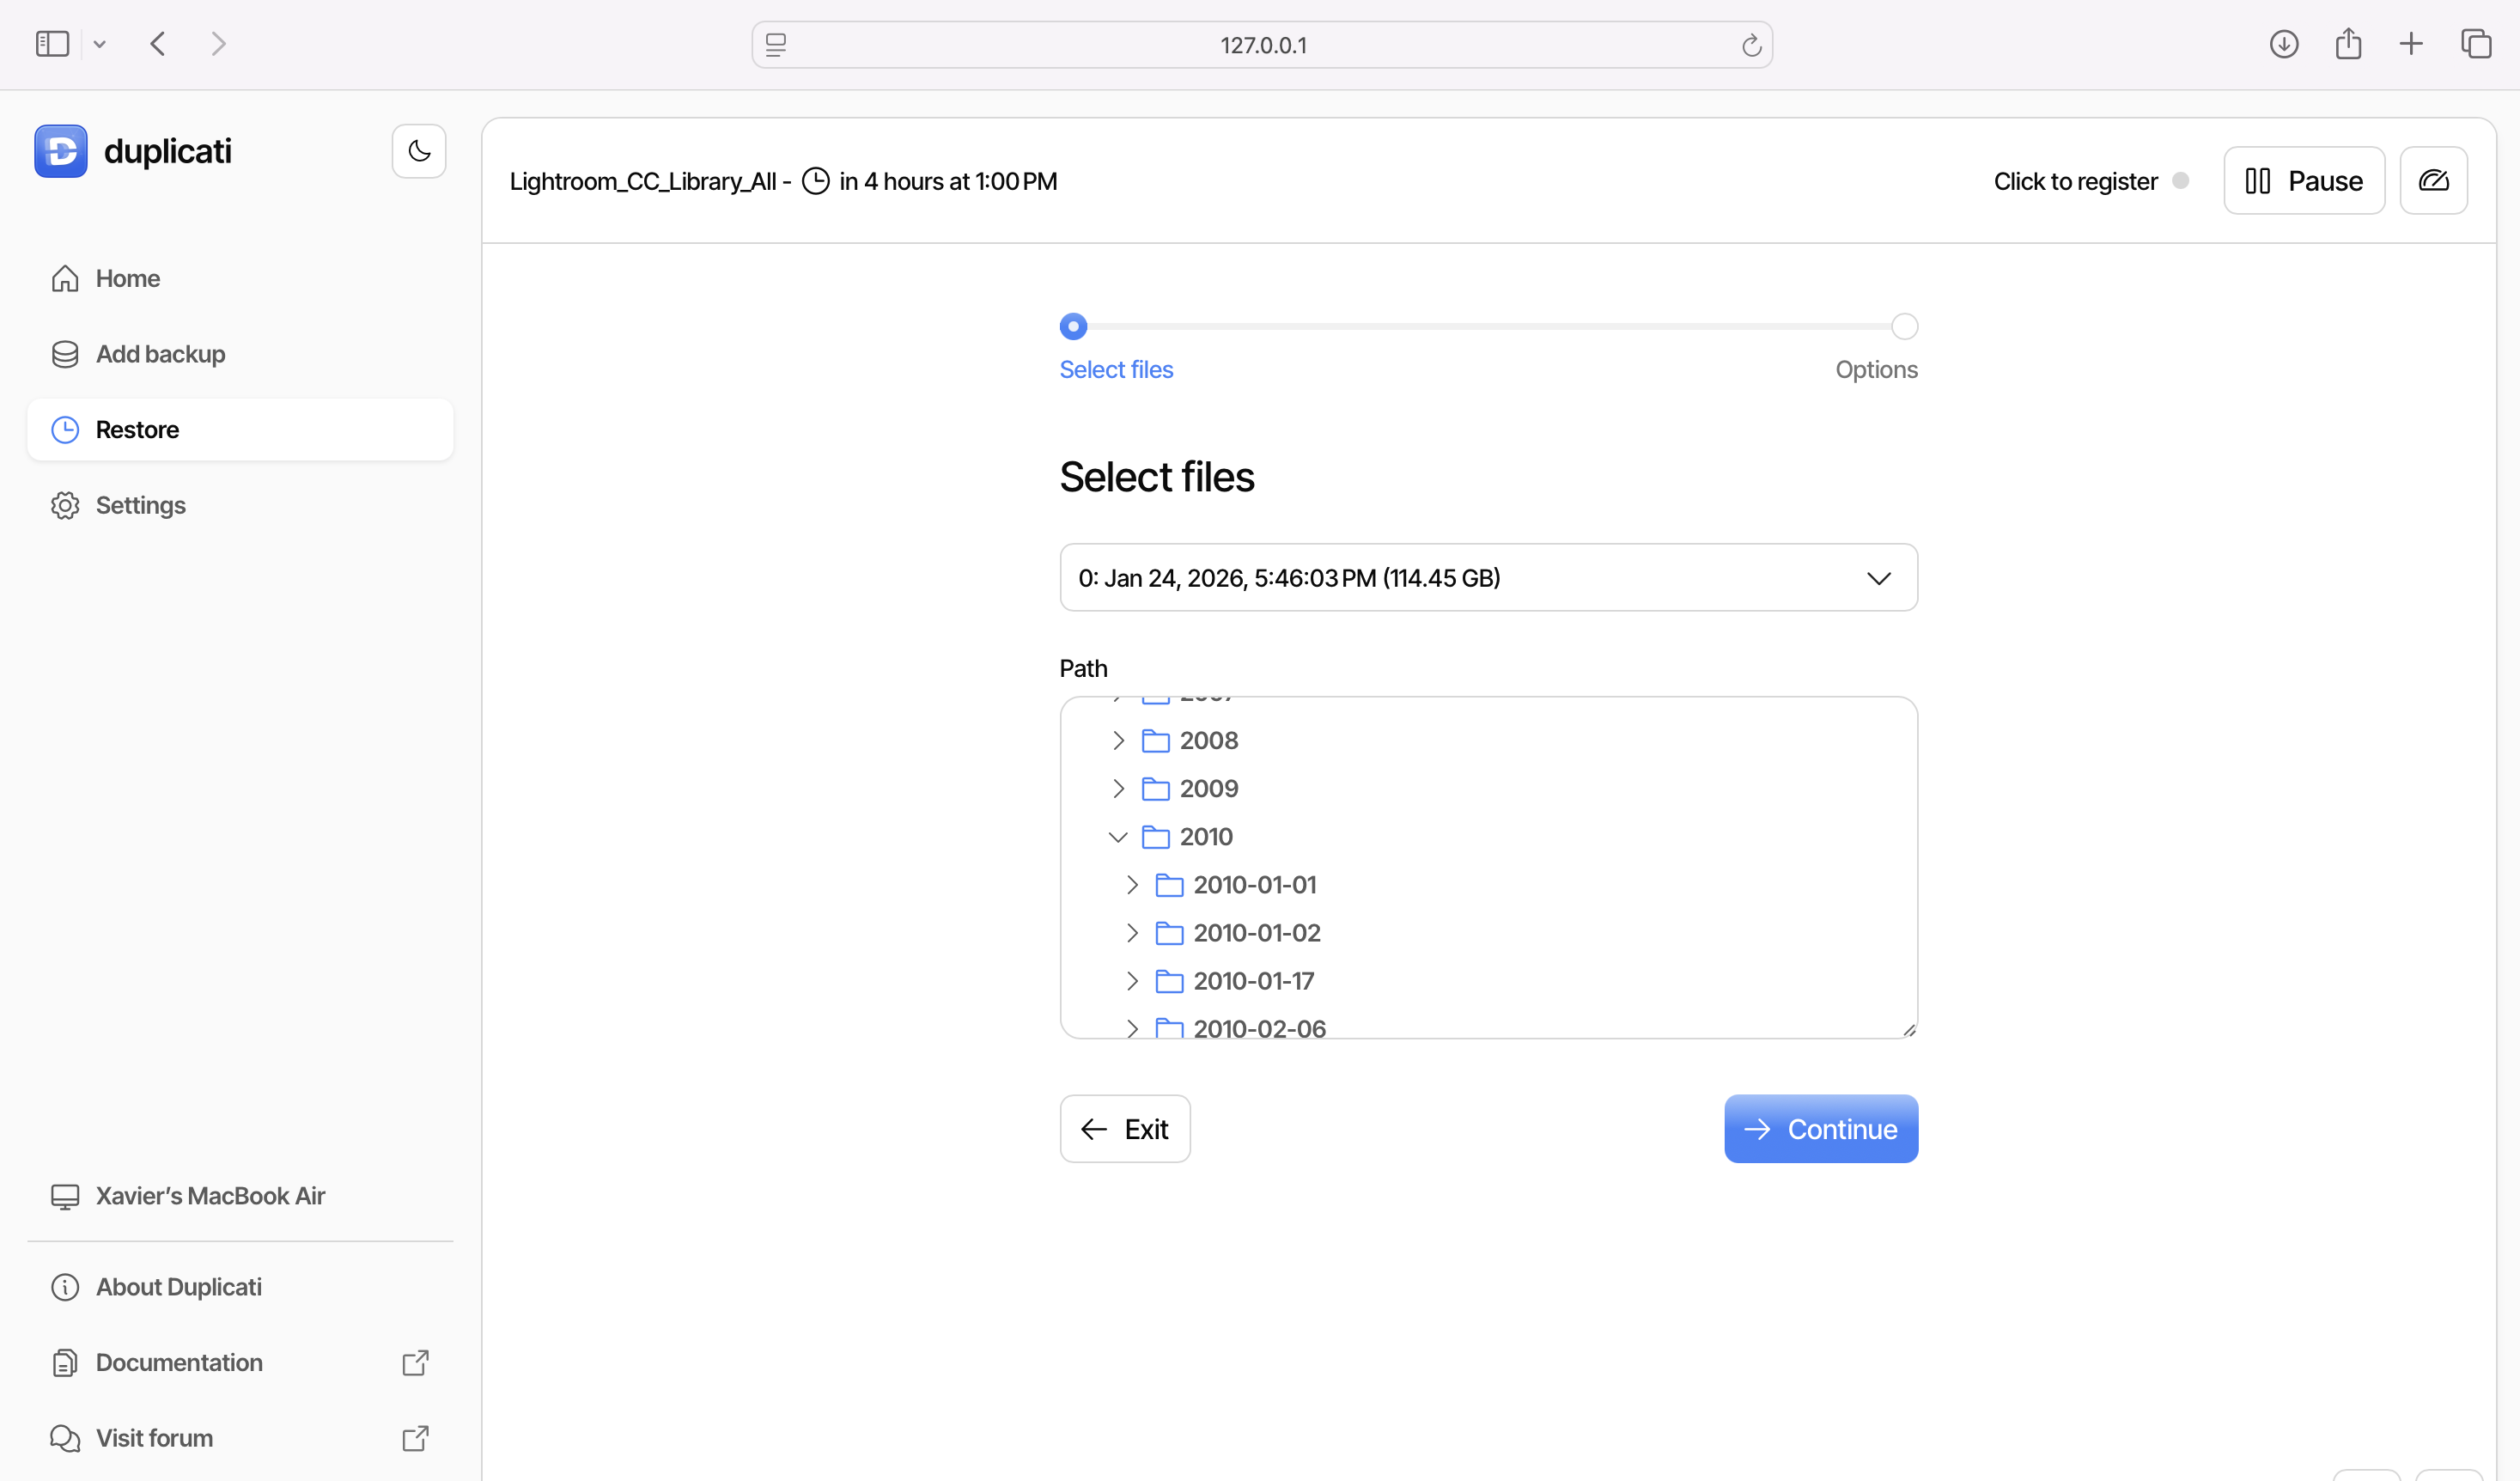
Restoring the data – selecting the document to restore is easy and the restore takes no more than a few minutes.
I had to validate that, with the Mac and Lightroom CC up and running, and the NAS volume mounted, that:
any new image added to the Lightroom CC library was replicated to the SAN, in its original state,
the backup software would catch the new image and back it up to the Google drive,
and that I could restore any image or any group of images as needed.
The tests were successful.
Saving the final images
You may also want to preserve a copy of the final state of your images, after Lightroom has applied all of its edits.
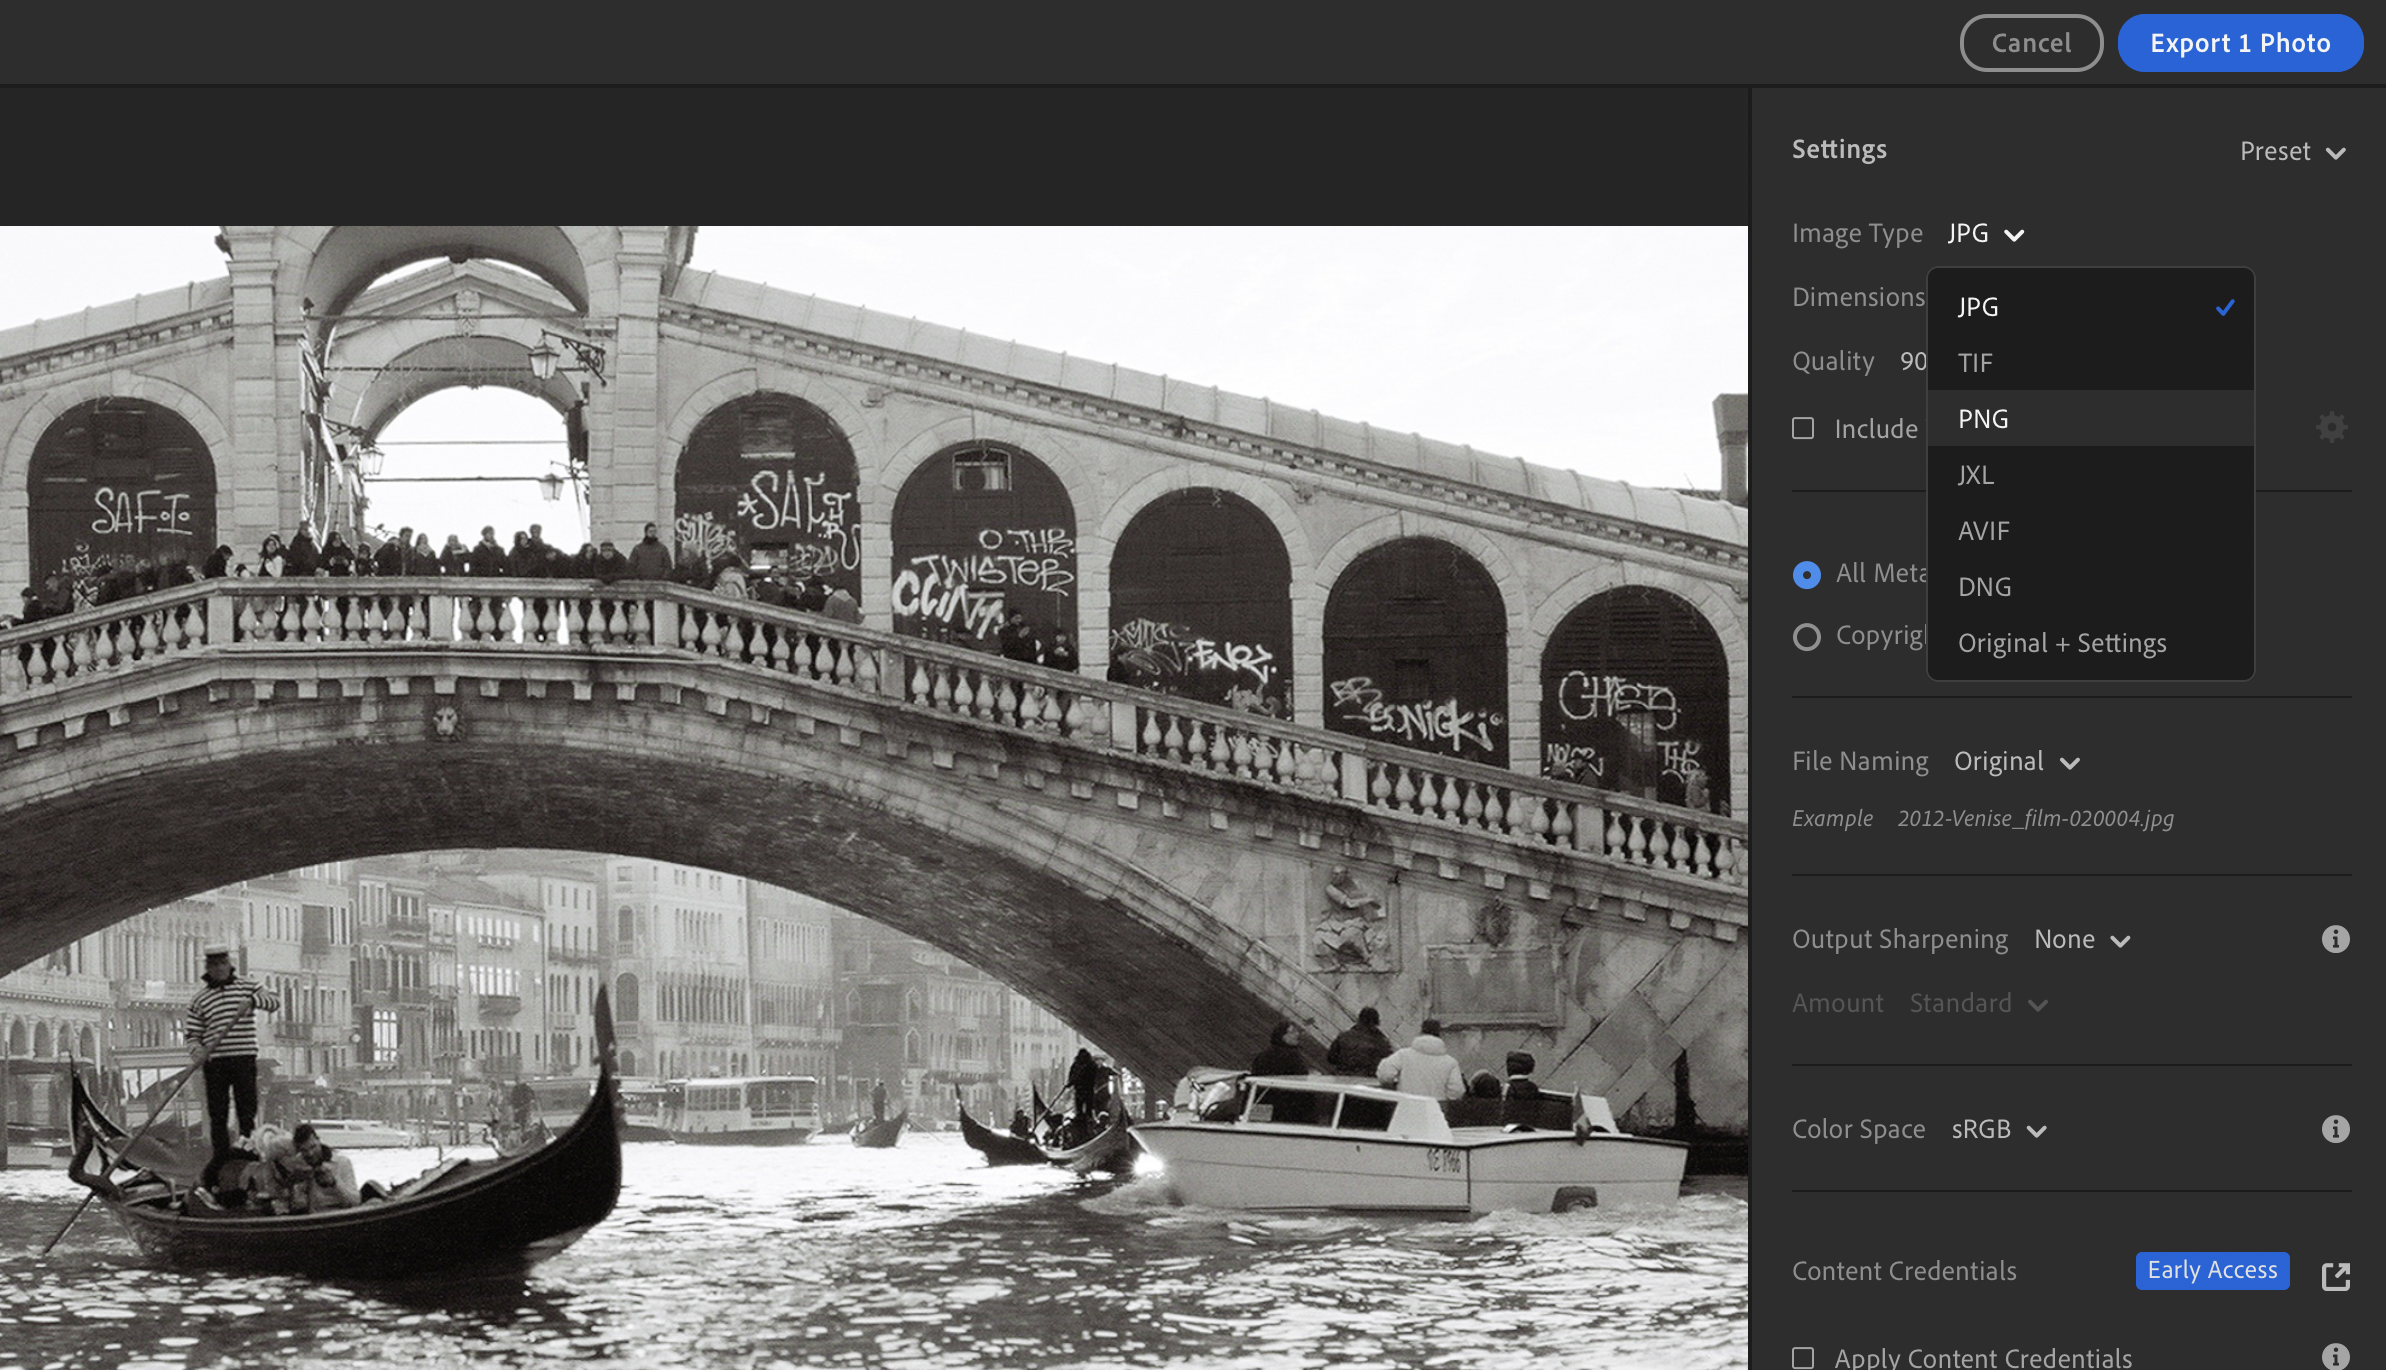
The challenge of course is that in Lightroom, the images don’t really have a final state. Adobe keeps your original photo and a sort of log of the transformations you performed, and dynamically creates a file containing the image you want after you have requested an export. You pick the quality, the dimensions, and the file format (small JPEG, large JPEG, PNG, TIFF, DNG, …) with or without sharpening – depending on what you intend to do with the image (email attachment, social media, photo gallery, photo album, print, …). And the image you need is created on the fly.
Lightroom – so many ways to export a photo
I understand that a professional photographer delivering images to many clients may want to keep a trace of what was delivered, and have an archival system specifically tuned to preserve them. (And pros may prefer working Adobe Lightroom Classic, anyway).
I’m not in this situation and I’ve never really given much thought about it. I simply export the images I need to the same shared folder in Apple’s iCloud, that all my Apple devices (iPhone, iPad, MacBook) can access.
Final words
In the days of film, it was not easy (or cheap) for amateur photographers to create duplicates of their color slides or their negatives, and store them in a second location as a backup. Photographers were at the mercy of fire, floods and burglaries, and could lose the images of a lifetime in a few minutes.
Digital images can be easily duplicated, and the duplicates stored in totally different locations, on totally different media. The setup described here is very easy to implement: a NAS is not even needed (the local SSD of a PC or a Mac would work as well), and many of our subscriptions (Microsoft Office Family for instance) already include 1 TB of storage and could be used as backup target.
More about Lightroom and fifty five camera reviews:
All the images of this series were shot in Rome, in April 2009 and in January 2010, with a Nikon D80. They were saved as originals on multiple generations of storage, recovered from a catastrophic NAS failure, and imported in Adobe’s Creative Cloud last year. I just adjusted a few sliders before exporting them to WordPress.
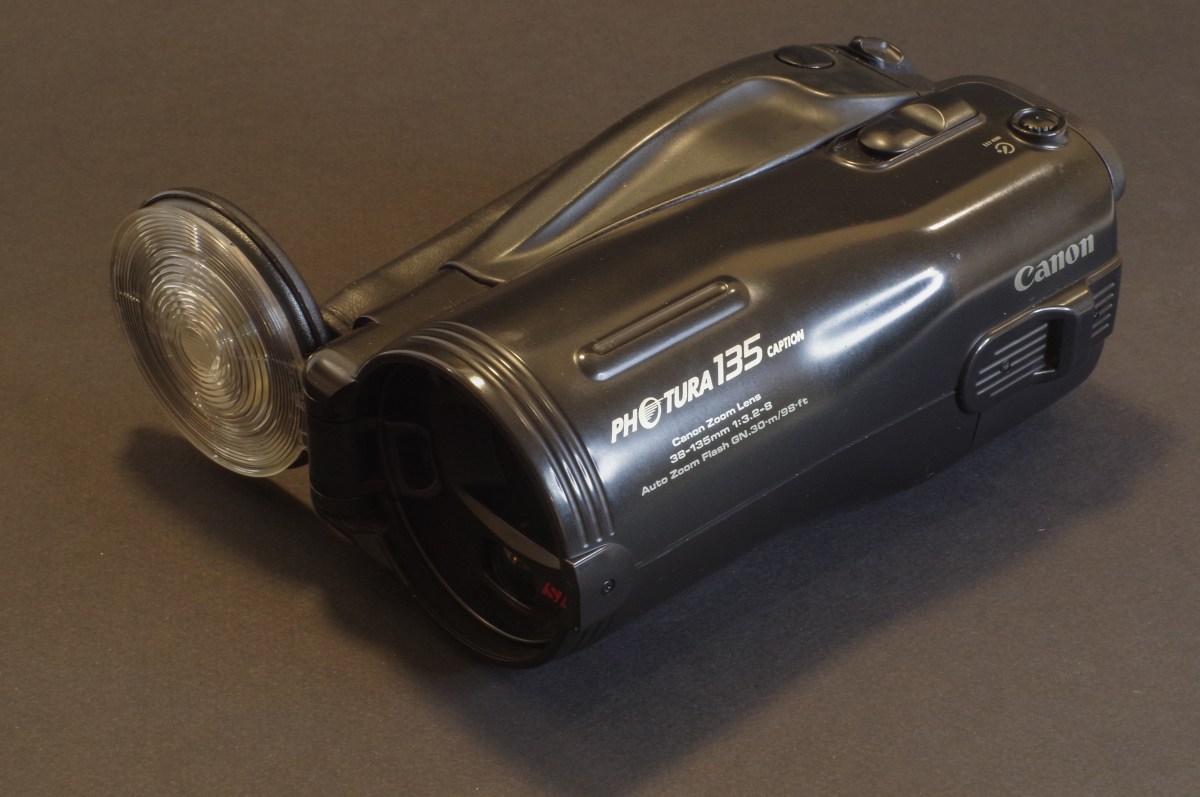
I don’t know much about the genesis of the first version of the camera sold by Canon under the names of “Photura”, “Epoca” or “Autoboy Jet”. Being a profoundly original camera (which, because of its unusual shape, probably required some very specific tooling in Canon’s manufacturing plants), I can only guess that the version 1.0 was not rushed to market but was the product of a long and well thought out development process instead.
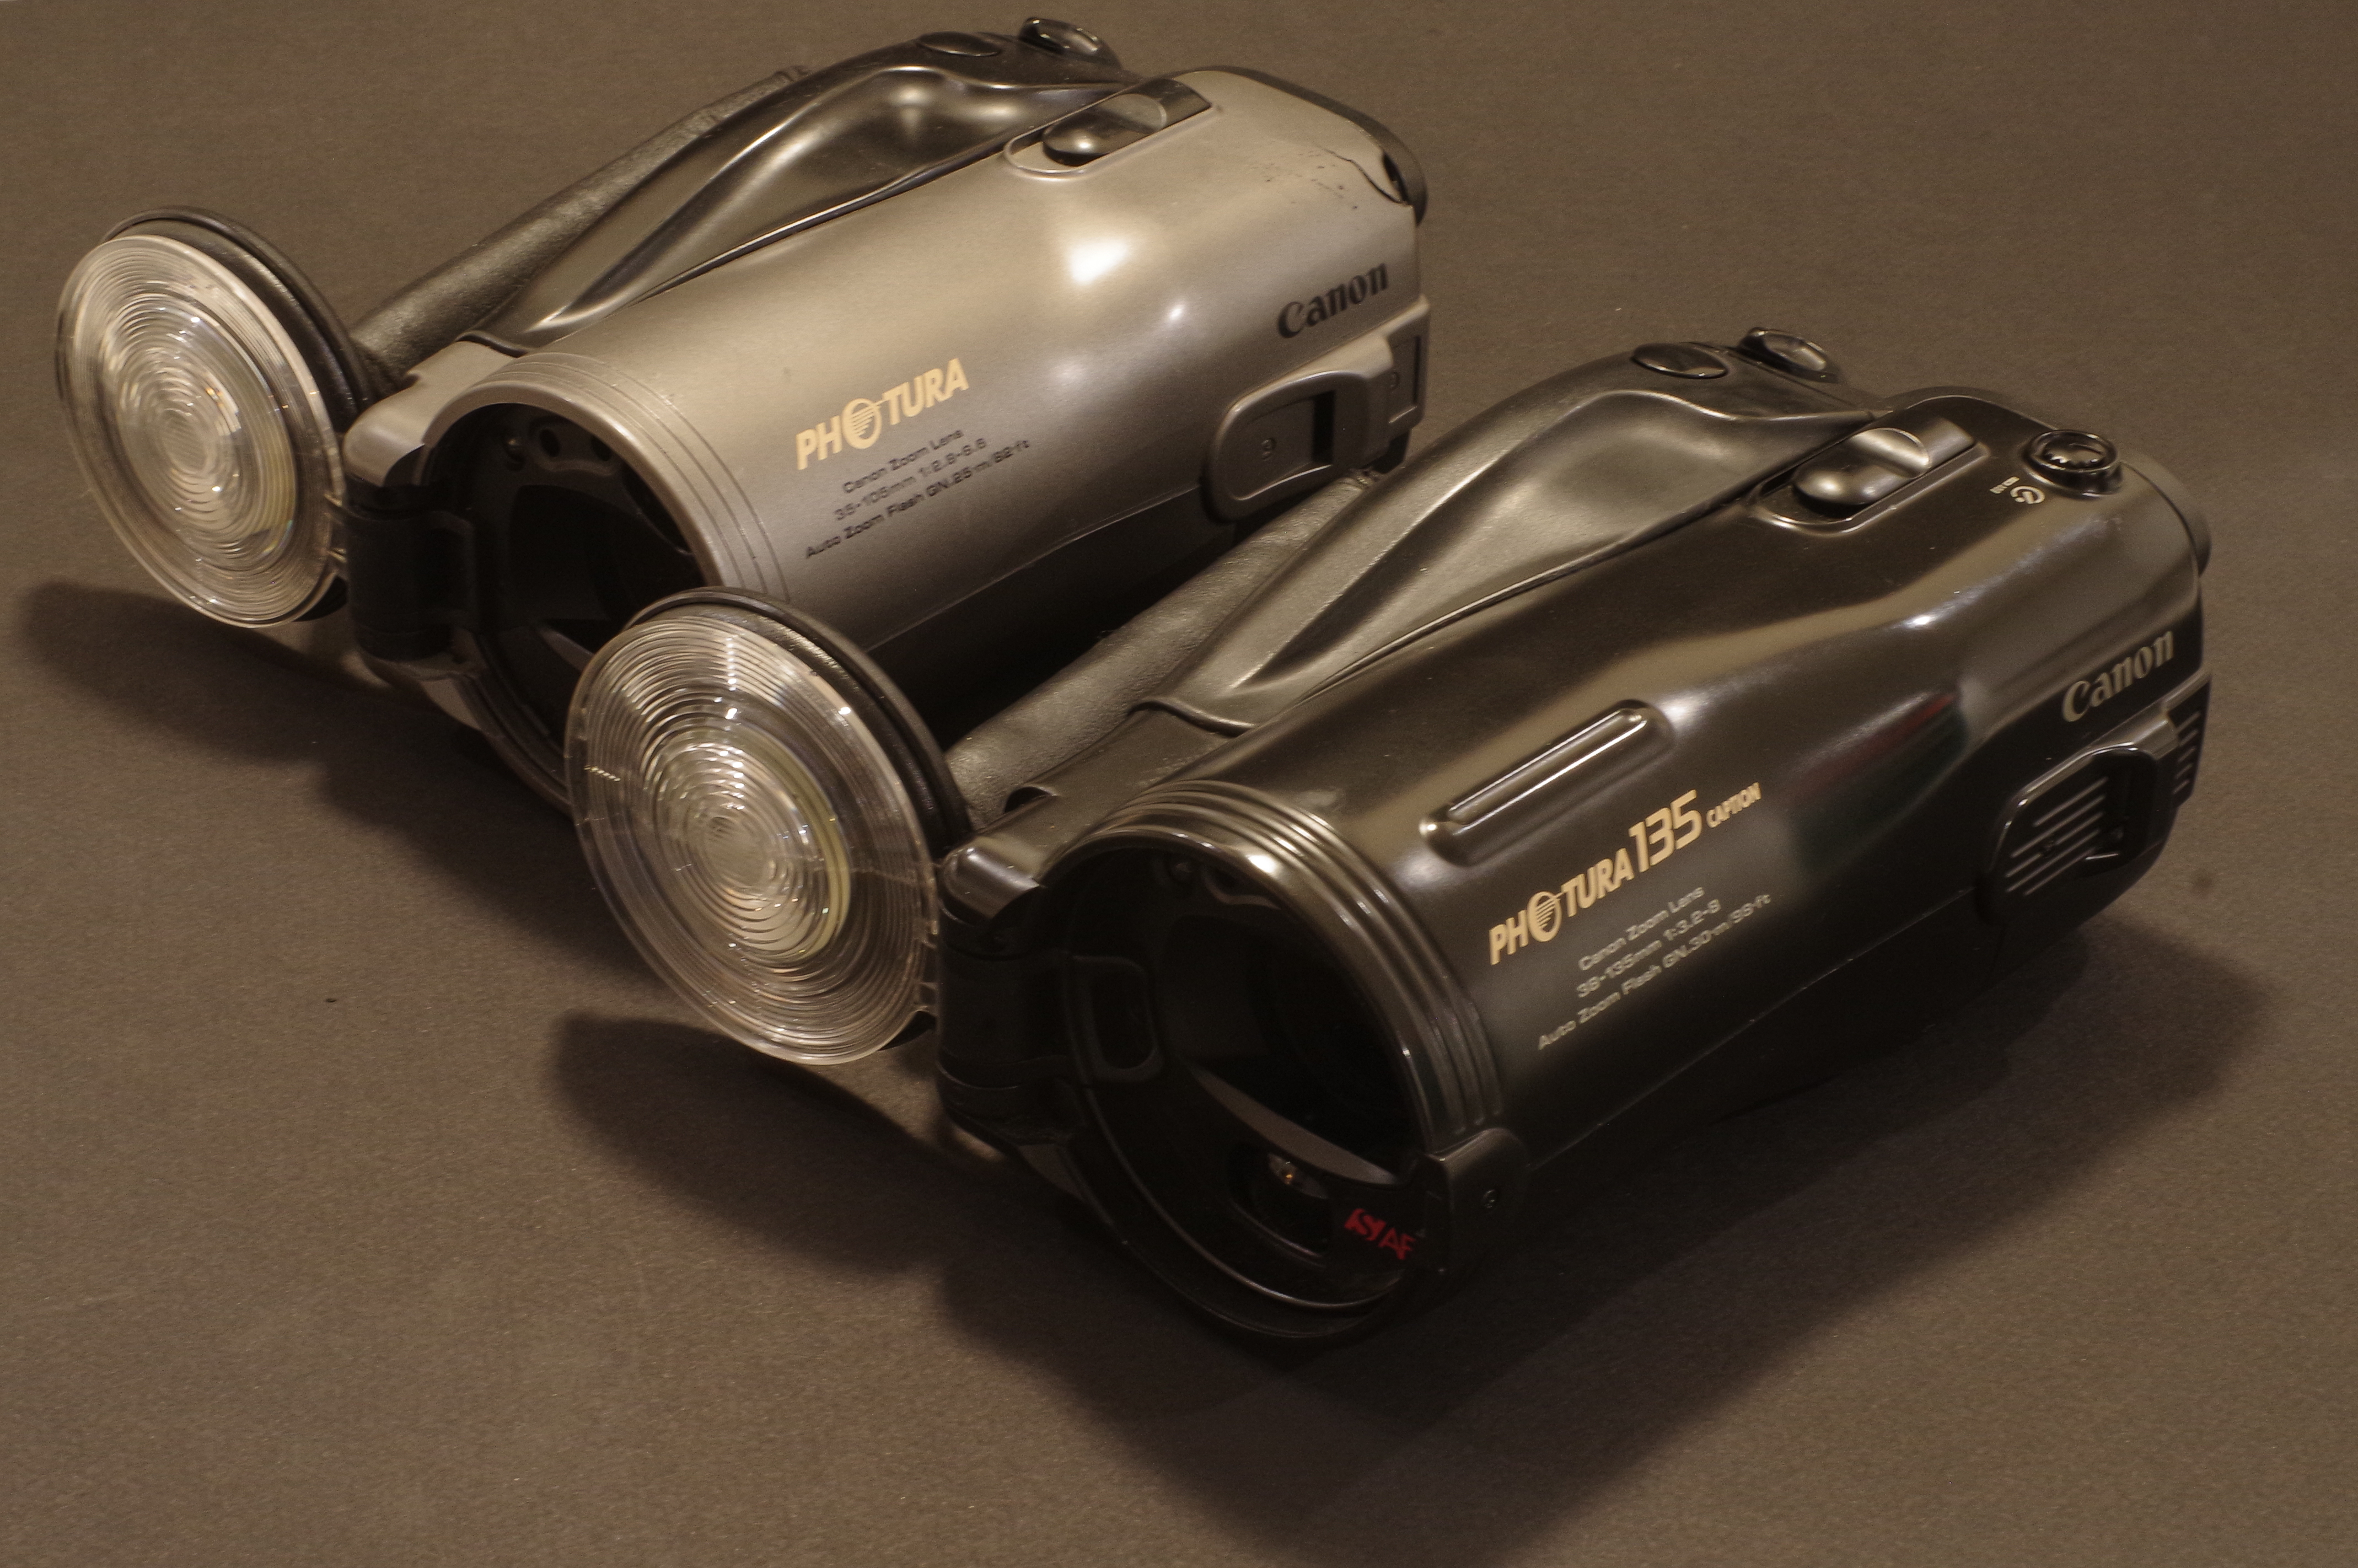
Case in point, the model that replaced it two years after its launch, the Photura 135, was not that different from the original. It simply addressed some of the weaknesses of Photura 1.0, and its two main points of differentiation over its predecessor were its longer zoom (a 38-135mm instead of the 35-105mm of the first Photura), and the color of its body.
I had been so pleasantly surprised by the first series Photura when I had tested it in the Cabbagetown neighborhood in Atlanta, that I decided to bring it with me to a trip in Corsica, where it did not disappoint, for the most part.
Canon Photura 135 next to the first Photura – the 135 is painted satin black and bit longer to make room for the 38-135 zoom
In spite of its size, I found it easy to store in a bag (it’s shaped like a tube, at the opposite of the normal SLR shape, which is more like a long a tube attached to a large brick). It’s easy to keep your right hand wrapped around it when walking around town, and it’s fairly reactive for an autofocus point and shoot. The color pictures I had taken with it in Atlanta had impressed me (the exposure and the focus were tack on, the colors pleasant), and most of the B&W pictures I shot in Corsica and in the Riverside neighborhood happened to be pretty good as well.
My biggest gripe with the first Photura was that it its autofocus system was still very primitive, incapable of focusing on its own on a human being when held in portrait orientation (it needed a complex gymnastic to memorize the focus before re-framing). It also required the photographer to force the focus to infinity when shooting landscapes (by pressing a tiny rubber key at the back of the camera while pressing the shutter release). And the camera missed the exposure in some tricky situations.
This “Canon Photura 135 Caption” is another of my Shopgoodwill finds – there were two of them for sale the week I bought it, and only one bidder, me. I picked what I believed was the nicest of the two for $19.00.
Canon created at least three different variants of the Photura 135, the “Base”, the “Caption” and the “Panorama”. Mine is a “Caption”. It can print the date or a choice of 5 messages on the negatives. Cool!
Contrarily to my Photura 105 which was a bit scruffy, this “135 Caption” is in a very good shape, cosmetically. And it’s finished in satin black, with pale, matt gold lettering. It may sound tacky, but it’s done with restraint, and the camera is rather pleasant to the eyes.
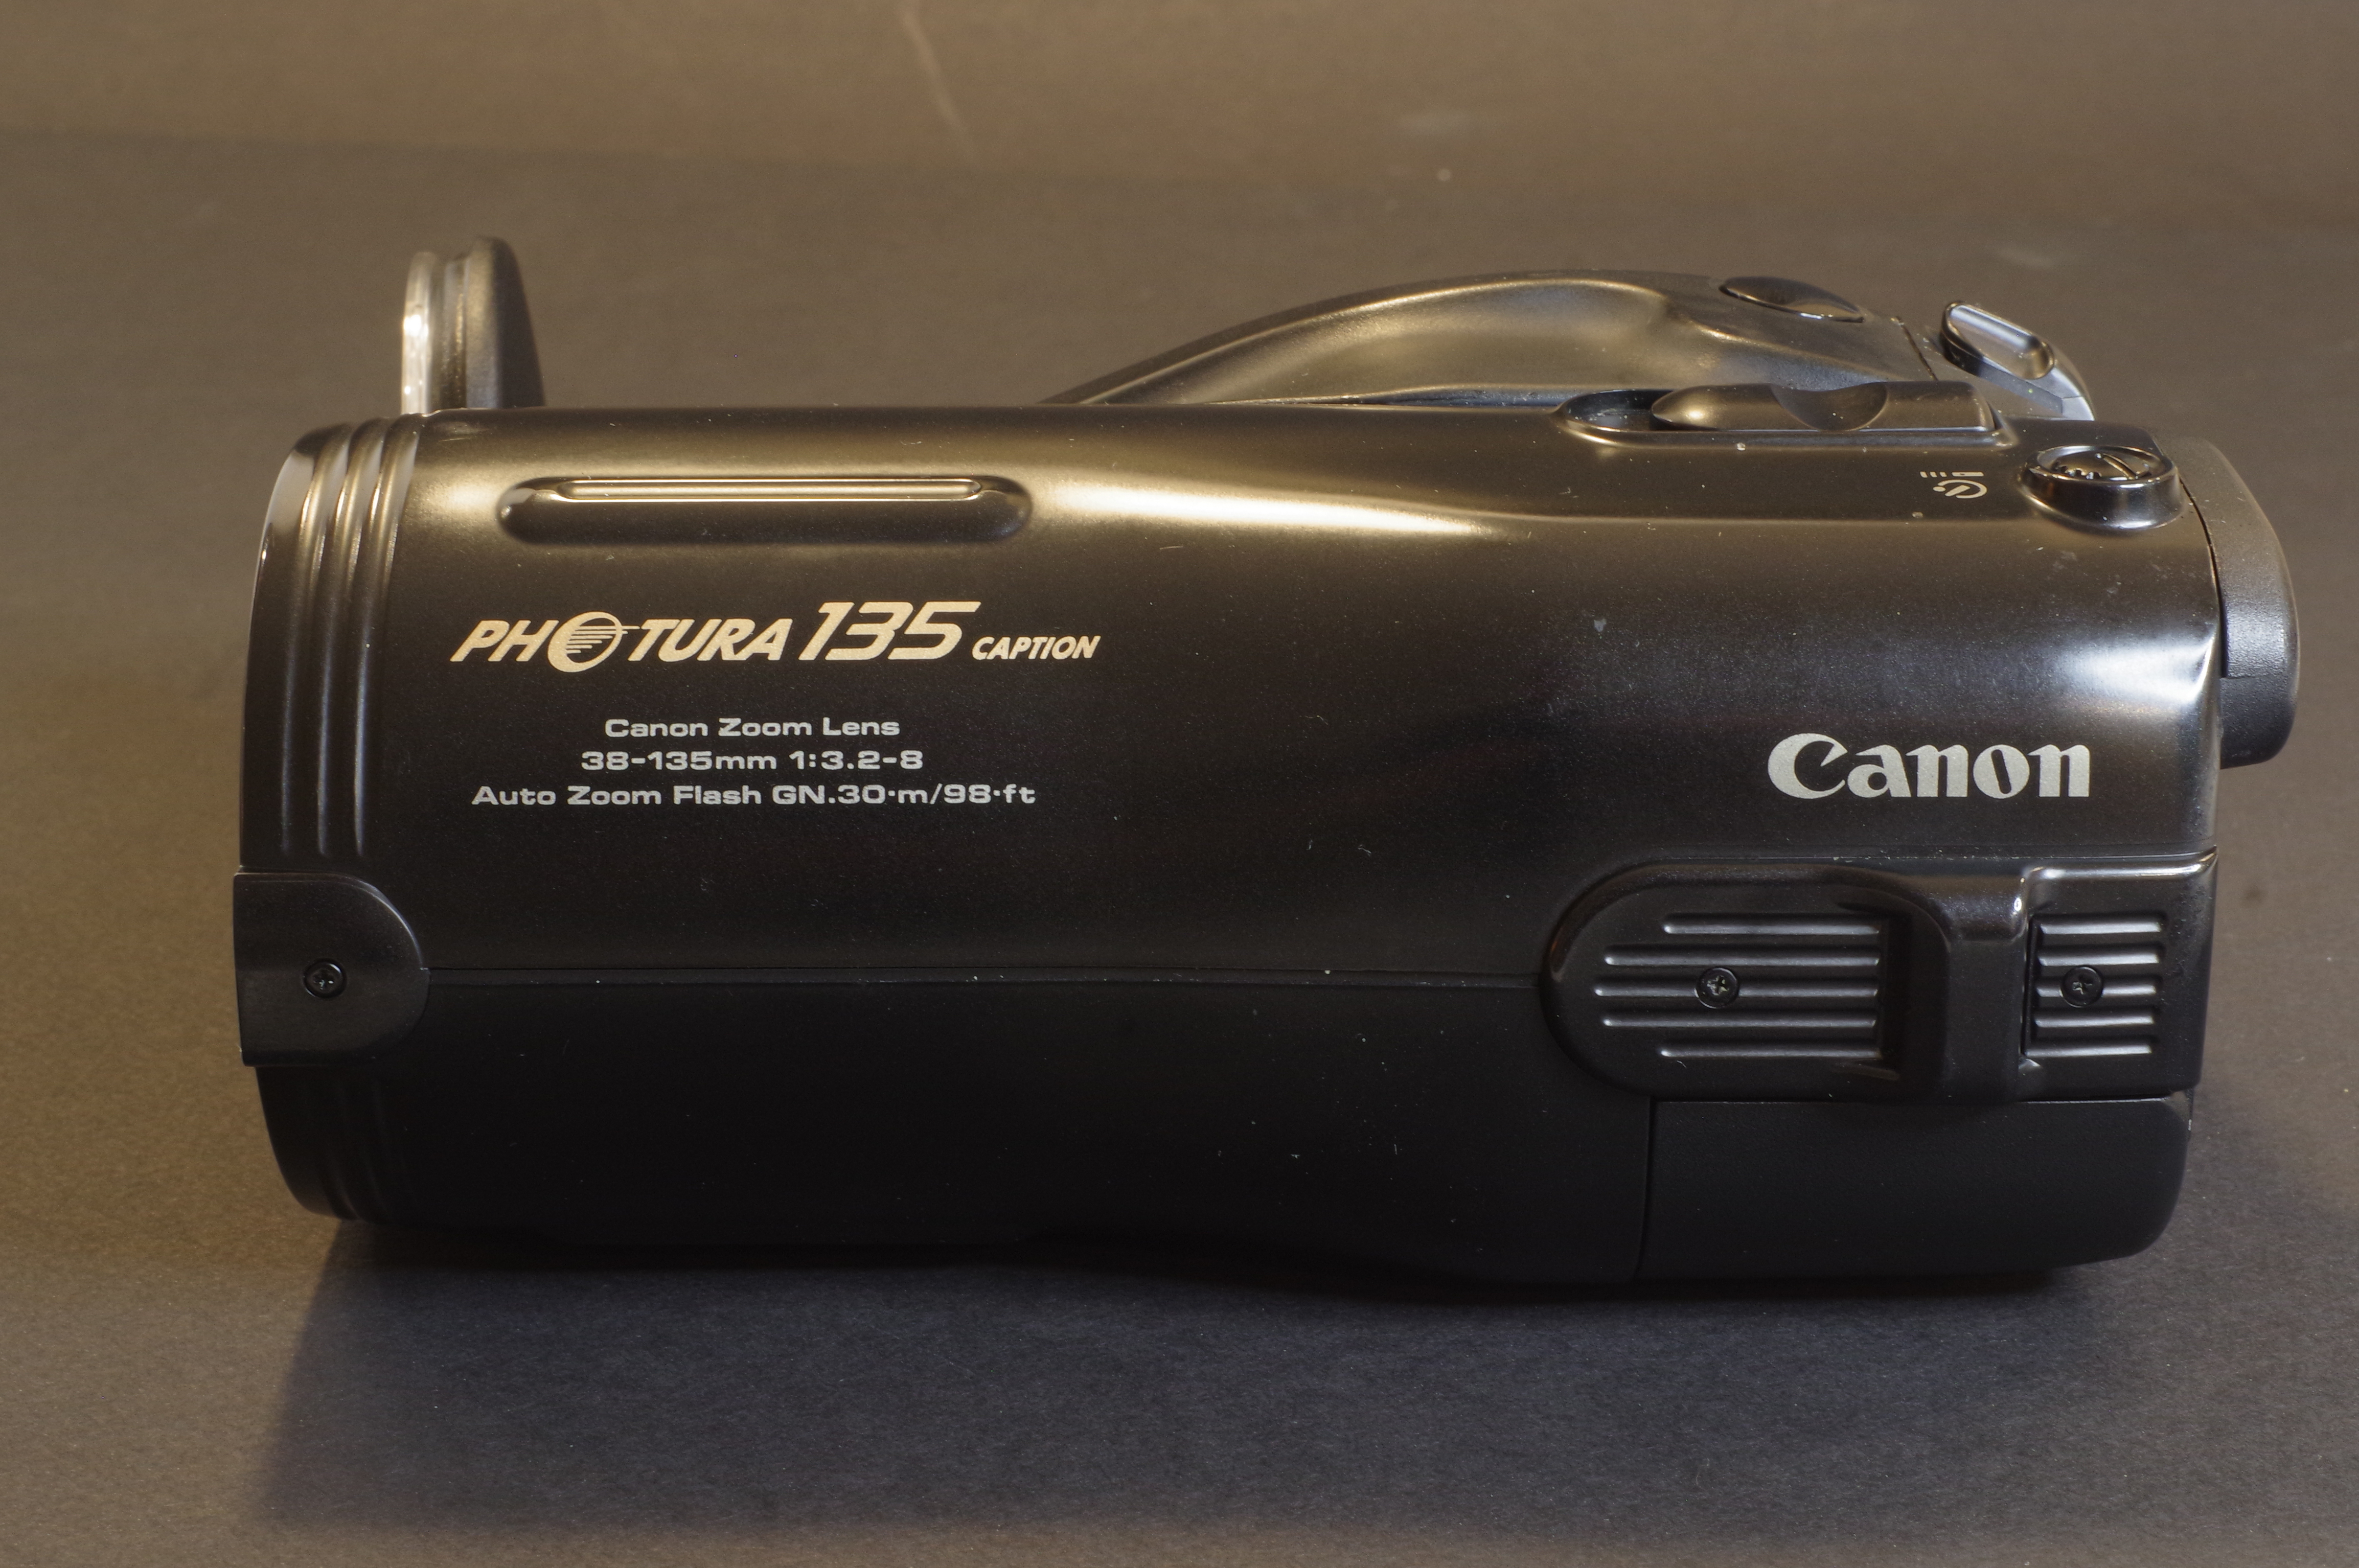
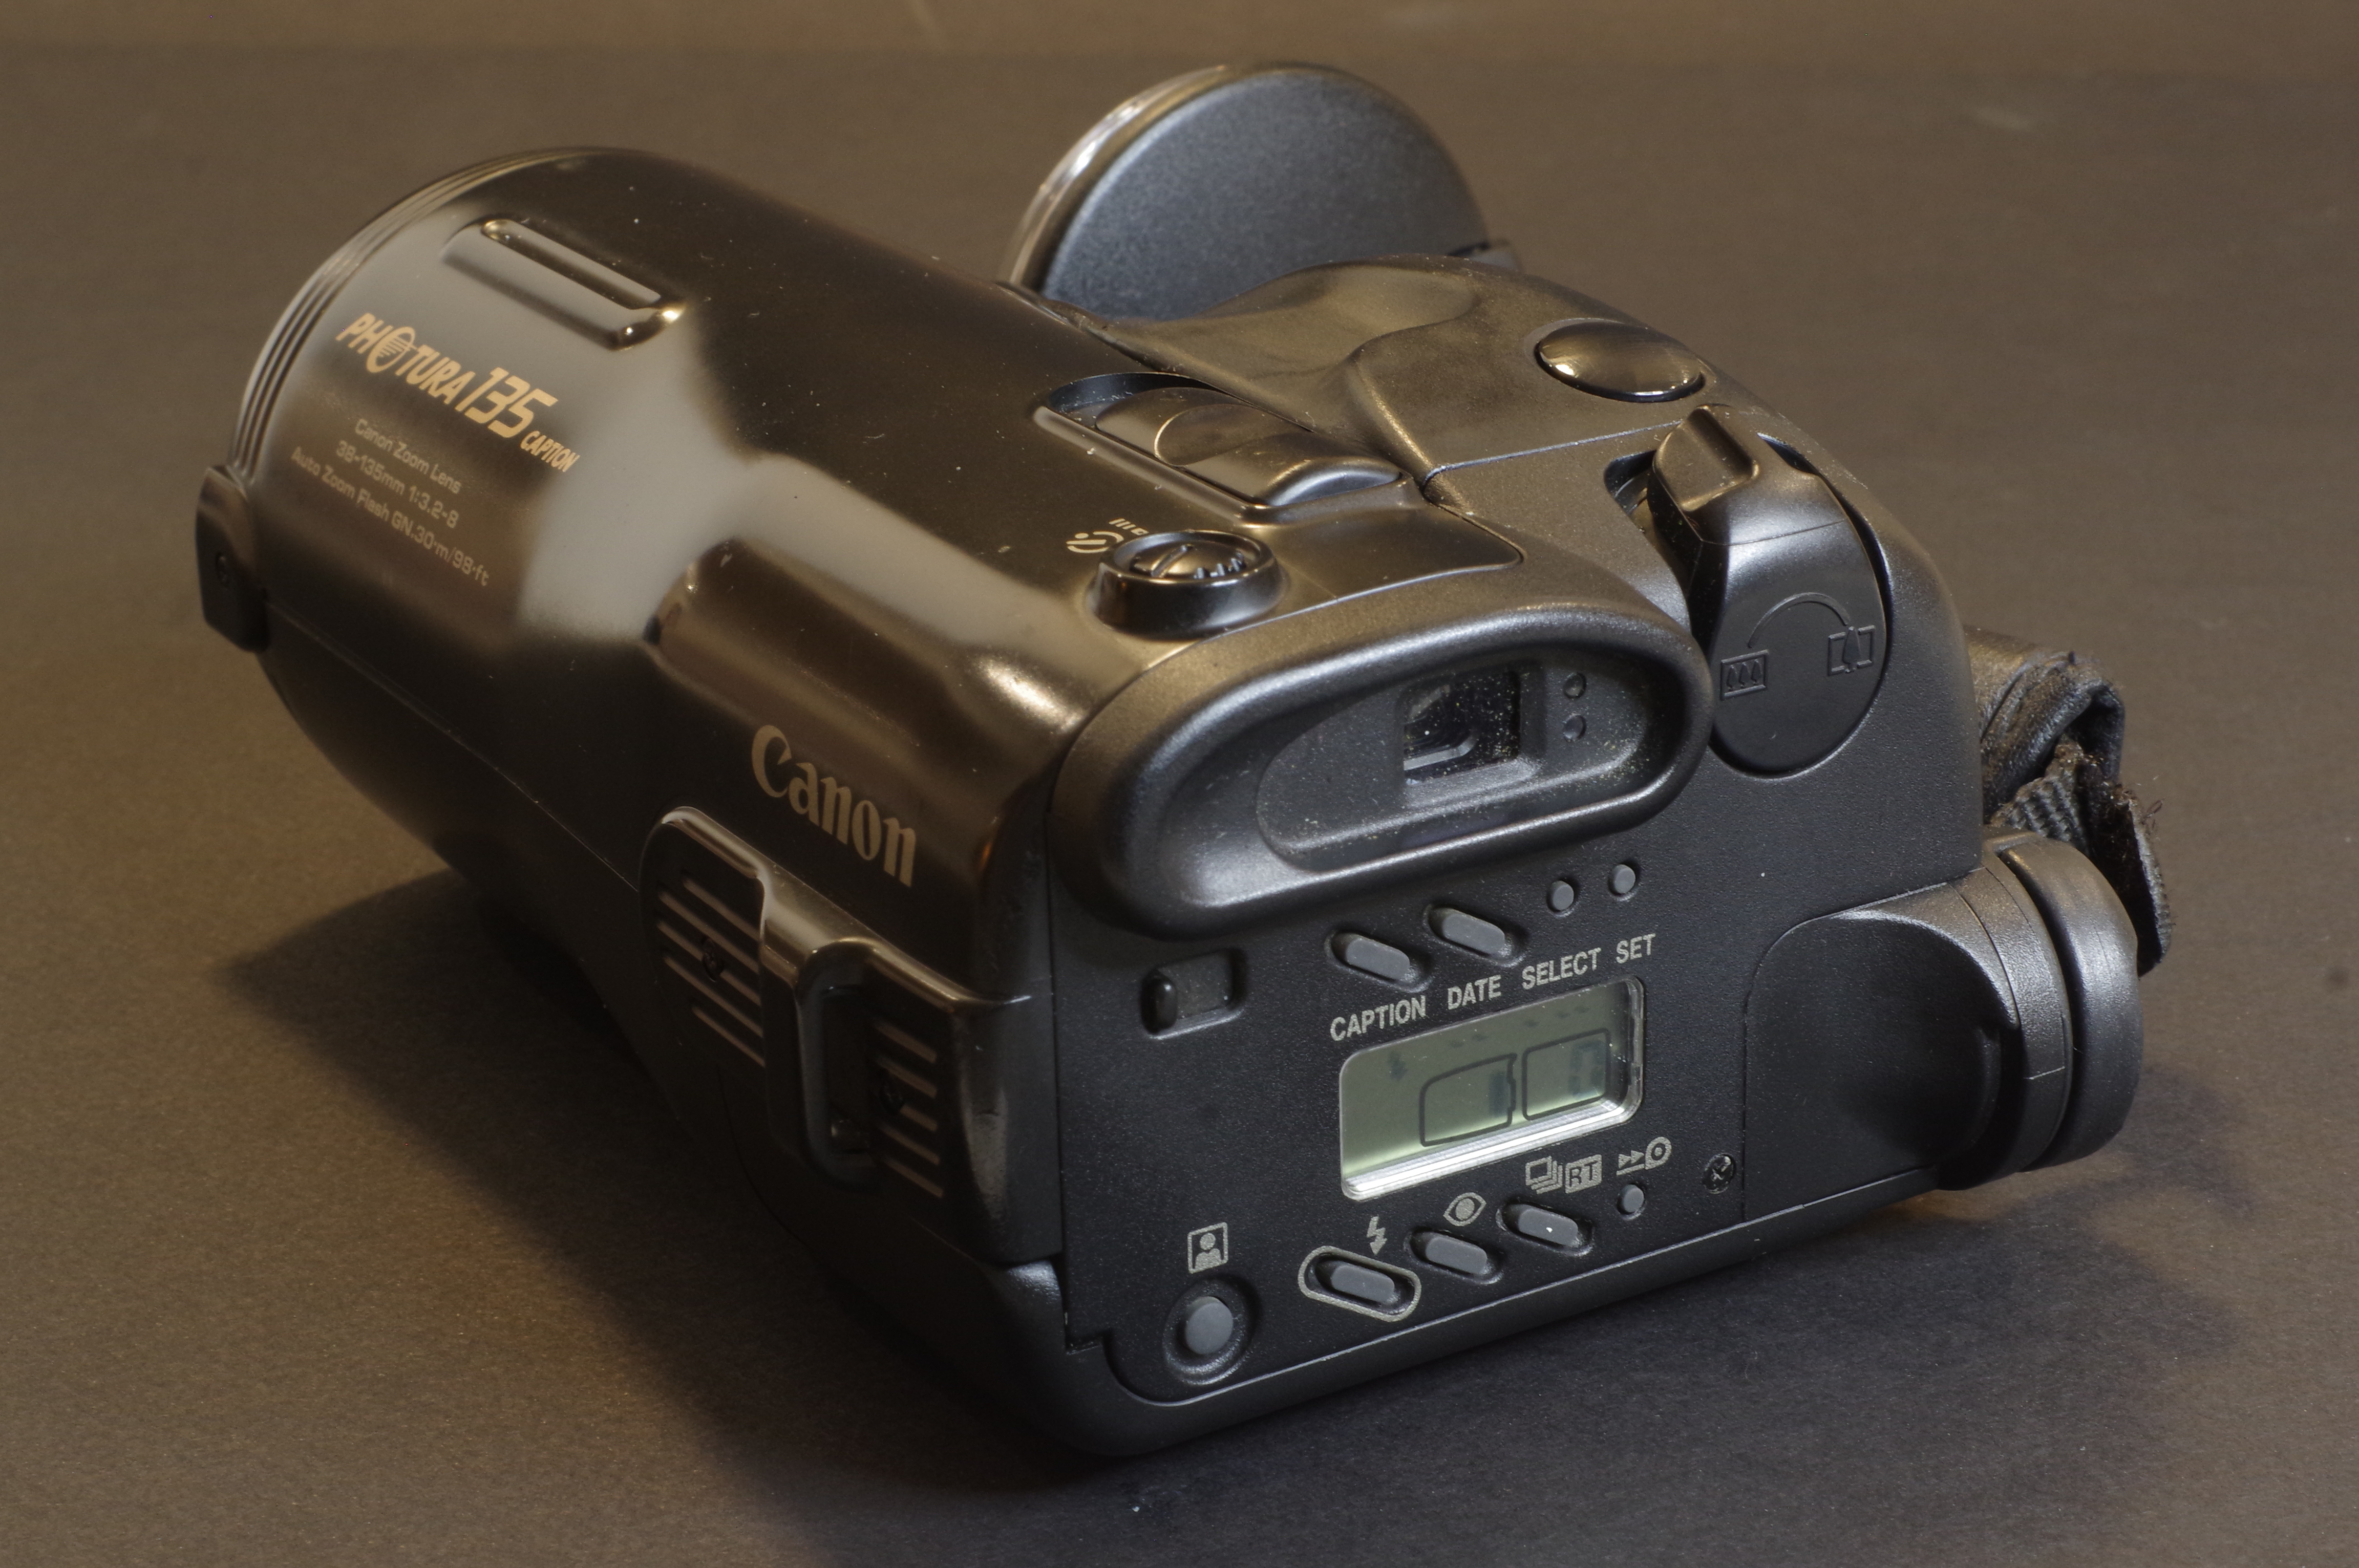
Canon Photura 135 – the specs are listed on the body of the camera
The Photura 135 is marginally longer than the 105, no doubt because of its longer zoom. I’m not sure that extending the longer focal length is a benefit, though, as we’re losing a bit on the wide angle side (38mm instead of 35mm) and a lot when it comes to luminosity – the largest aperture of the lens varies between 1/3.2 at 38mm and 1/8 at 135mm – which makes shooting with 400 ISO film almost mandatory.
The autofocus system seems to have been improved : the AF frame is visibly larger in the viewfinder, the button to force the focus to infinity has disappeared, and according to the documentation, it now relies on 5 infra red detection beams (!).
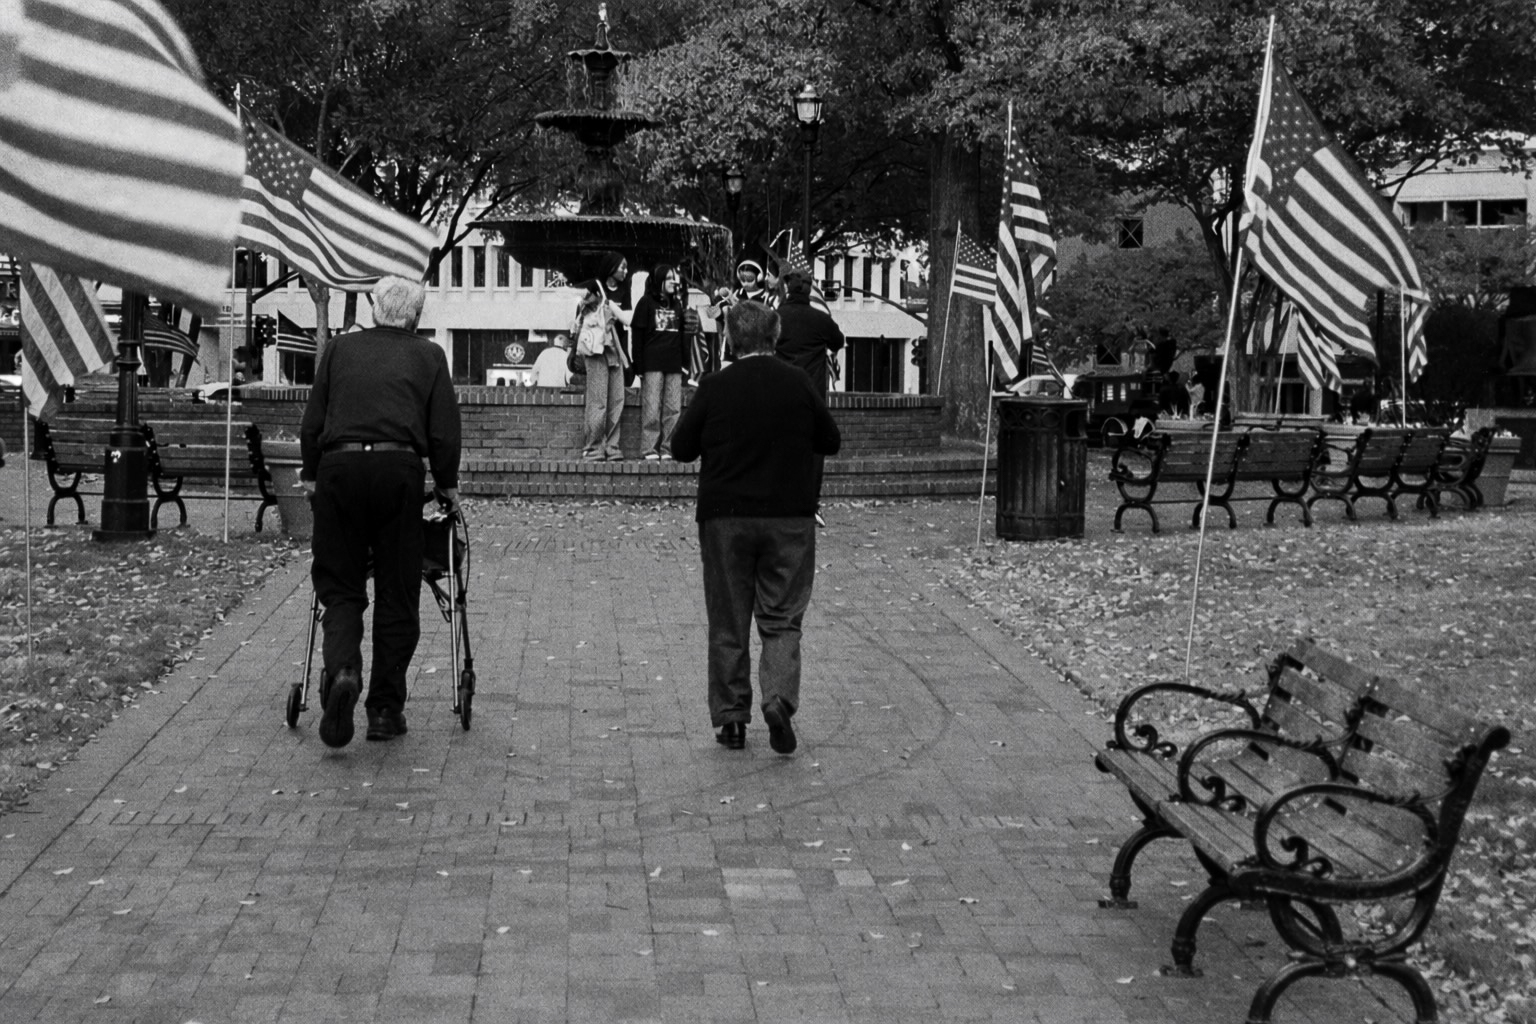
Marietta, Veterans Day 2025 – Canon Photura 135 – Ilford HP5 – I was facing the November sun and the camera nailed down the exposure – Clear improvement over the first gen. Photura
The user manual is not very clear but I assume that focus and exposure are pre-determined on a central area of the scene when the photographer presses the shutter release half way and then evaluated again on a larger area when the shutter release button is fully depressed. On the 135 models, a “real-time” feature has been added (the lag time of the shutter release is reduced to 0.018 sec.), and the user manual recommends to use it to memorize the focus point, in particular when composing an image vertically (in “portrait mode”). The real-time mode skips the second focus determination step and only relies on what the central autofocus sensor has detected during the focus “pre-determination”, which acts as a sort of selective AF lock.
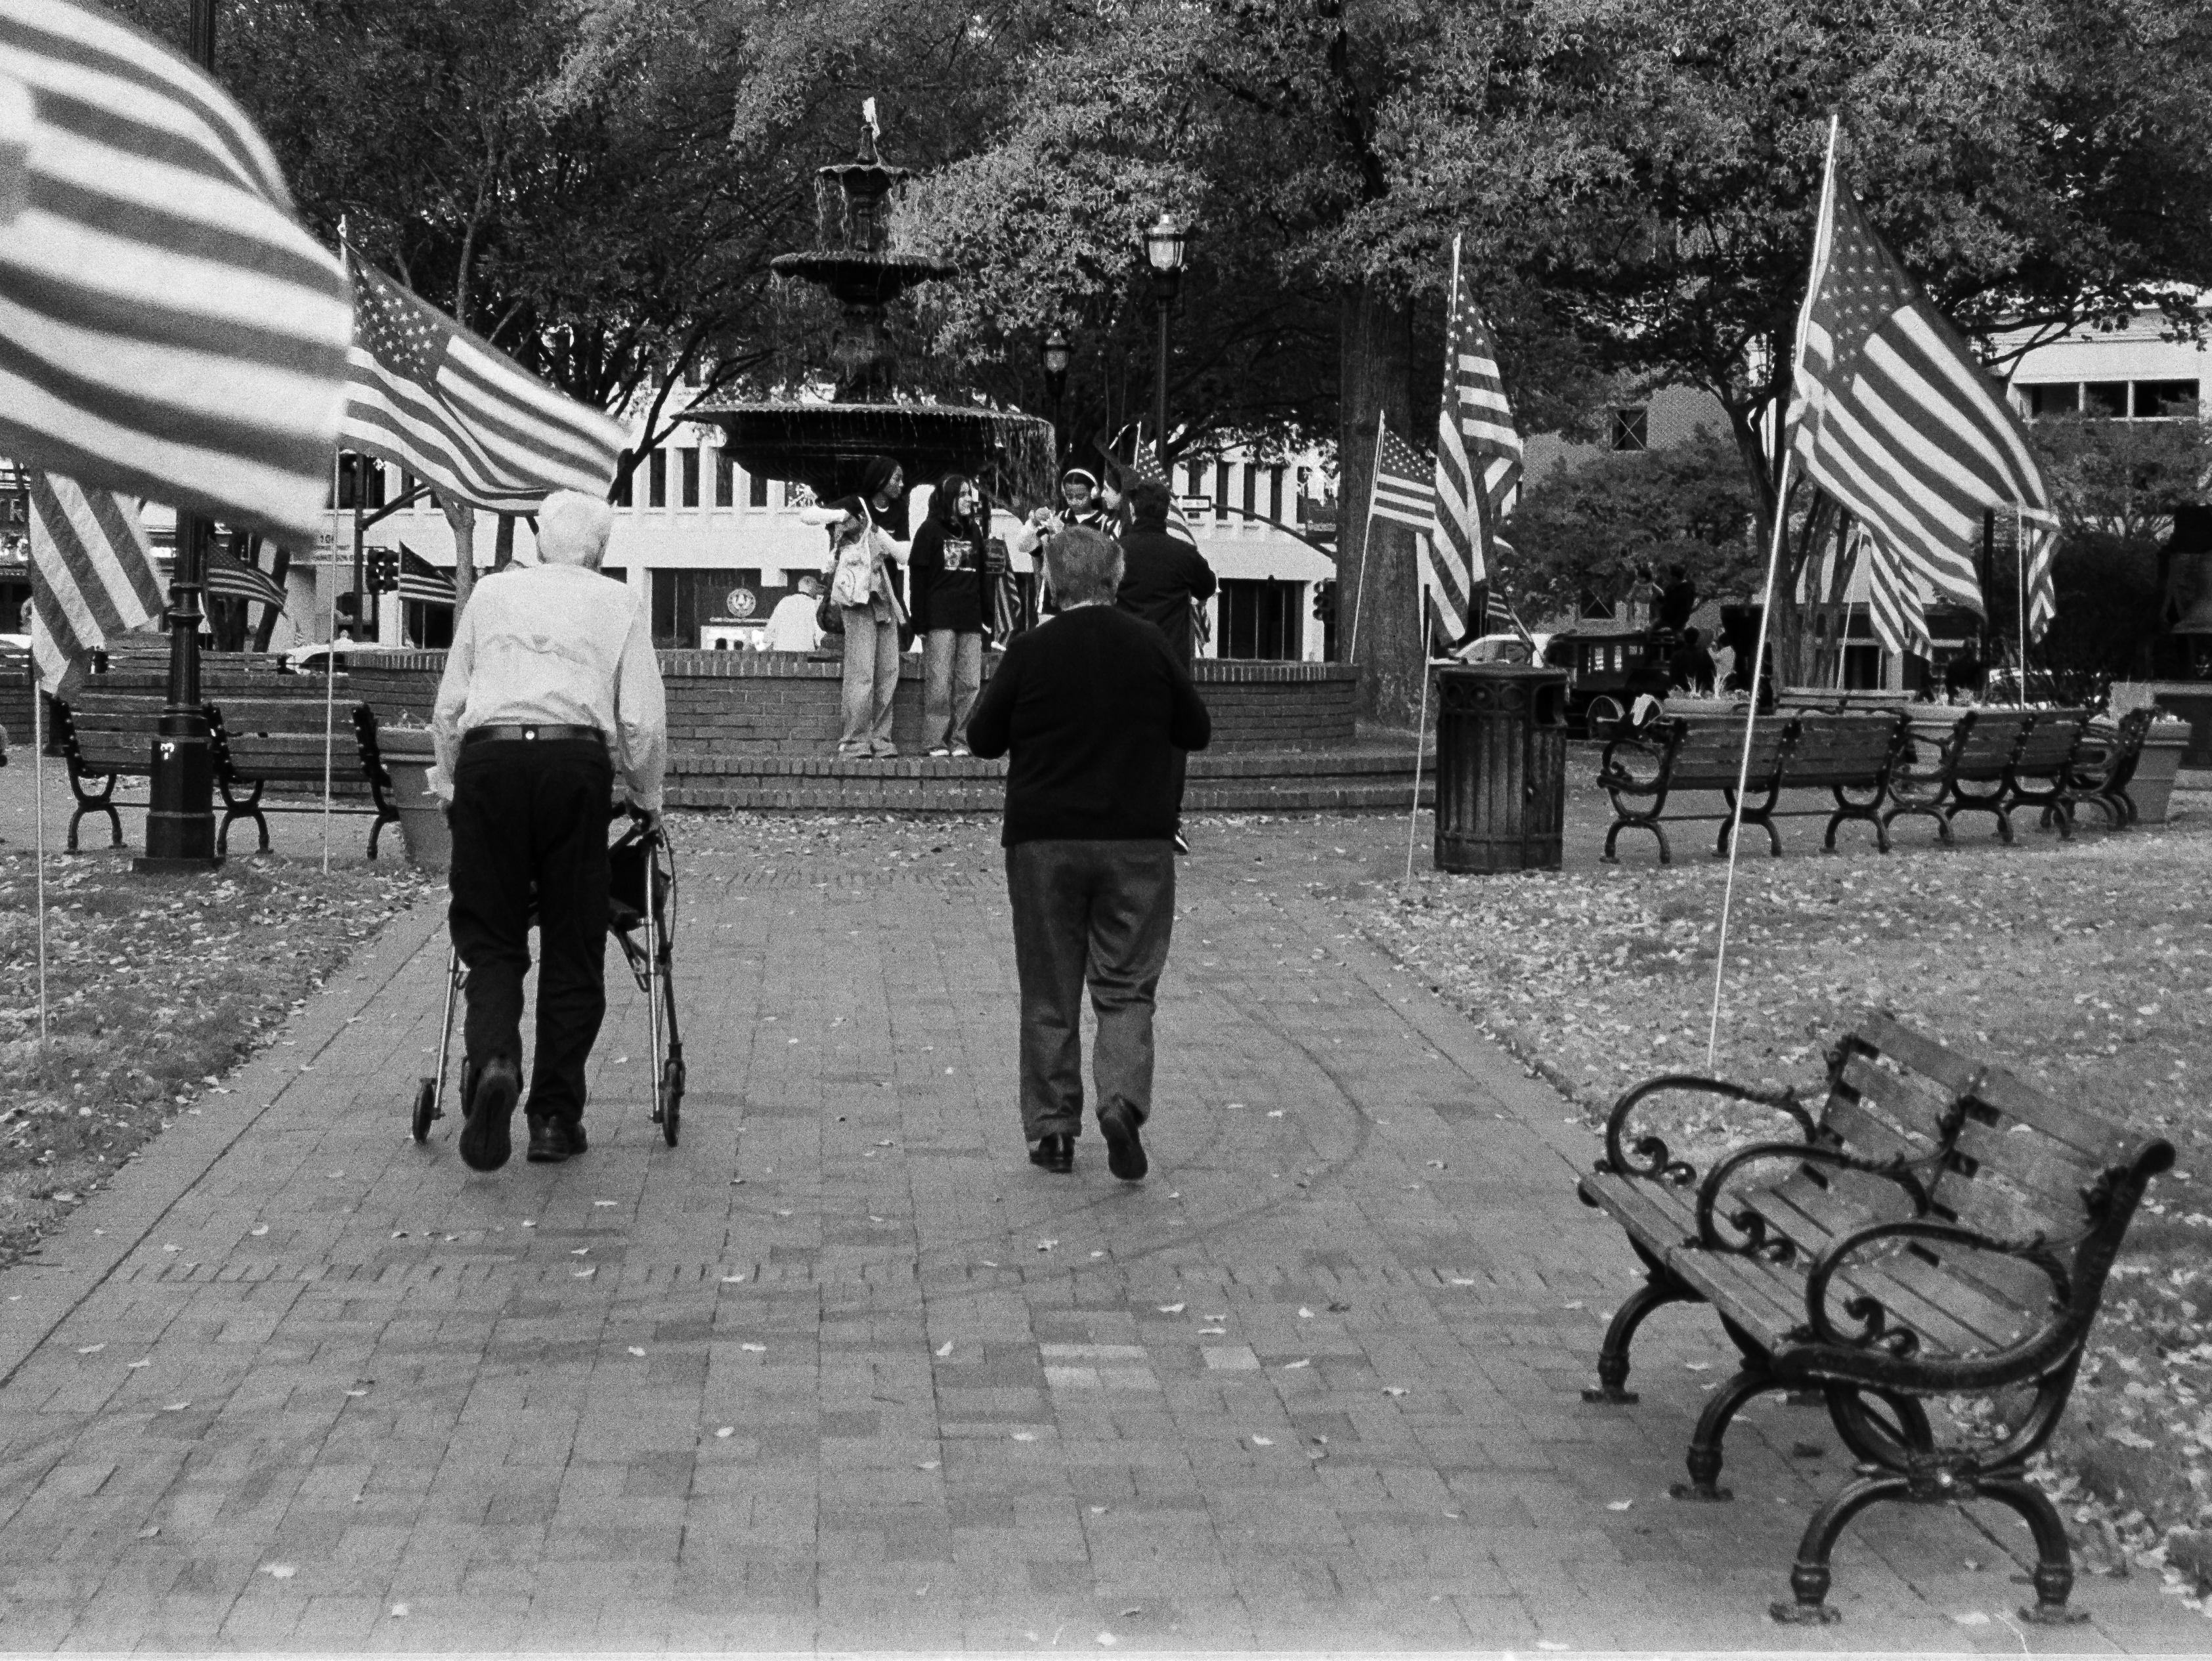
Marietta Town Square – Veterans Day – The tone of the shirt of the man on the left was changed in ChatGPT
The exposure determination also seems to have evolved positively with a three-zone evaluative system replacing the centered metering of the Photura 105. There is no exposure memorization and no magic +2EV button, but the evaluative metering of the “135” should perform better when the subject is backlit than the simpler system of the first Photura.
Canon Photura 135 Caption – Caption, Autozoom and Real Time buttons have been added.
Like the older Photura, the 135 Caption only operates under a single programmed auto-exposure mode, and is deprived of any “scene mode”. Being a camera from the nineteen nineties it does not offer any subject or face recognition capability. But like the Photura (and many Minolta cameras of the same vintage), it uses its power zoom to offer a sort of auto-framing capability, that ensures that in a series of shots, your human subject always occupies the same proportion of the image irrespective of its distance to the camera. I’m not sure I understand what the benefit is, but it seemed important enough to Canon’s engineers, who assigned a dedicated button to this function.
Lastly, the “Caption” version of the 135 gets a bigger self timer button, and the shutter can be fired remotely. The wireless remote controller and the extra strap that came with it originally must have been lost on my copy. Too bad.
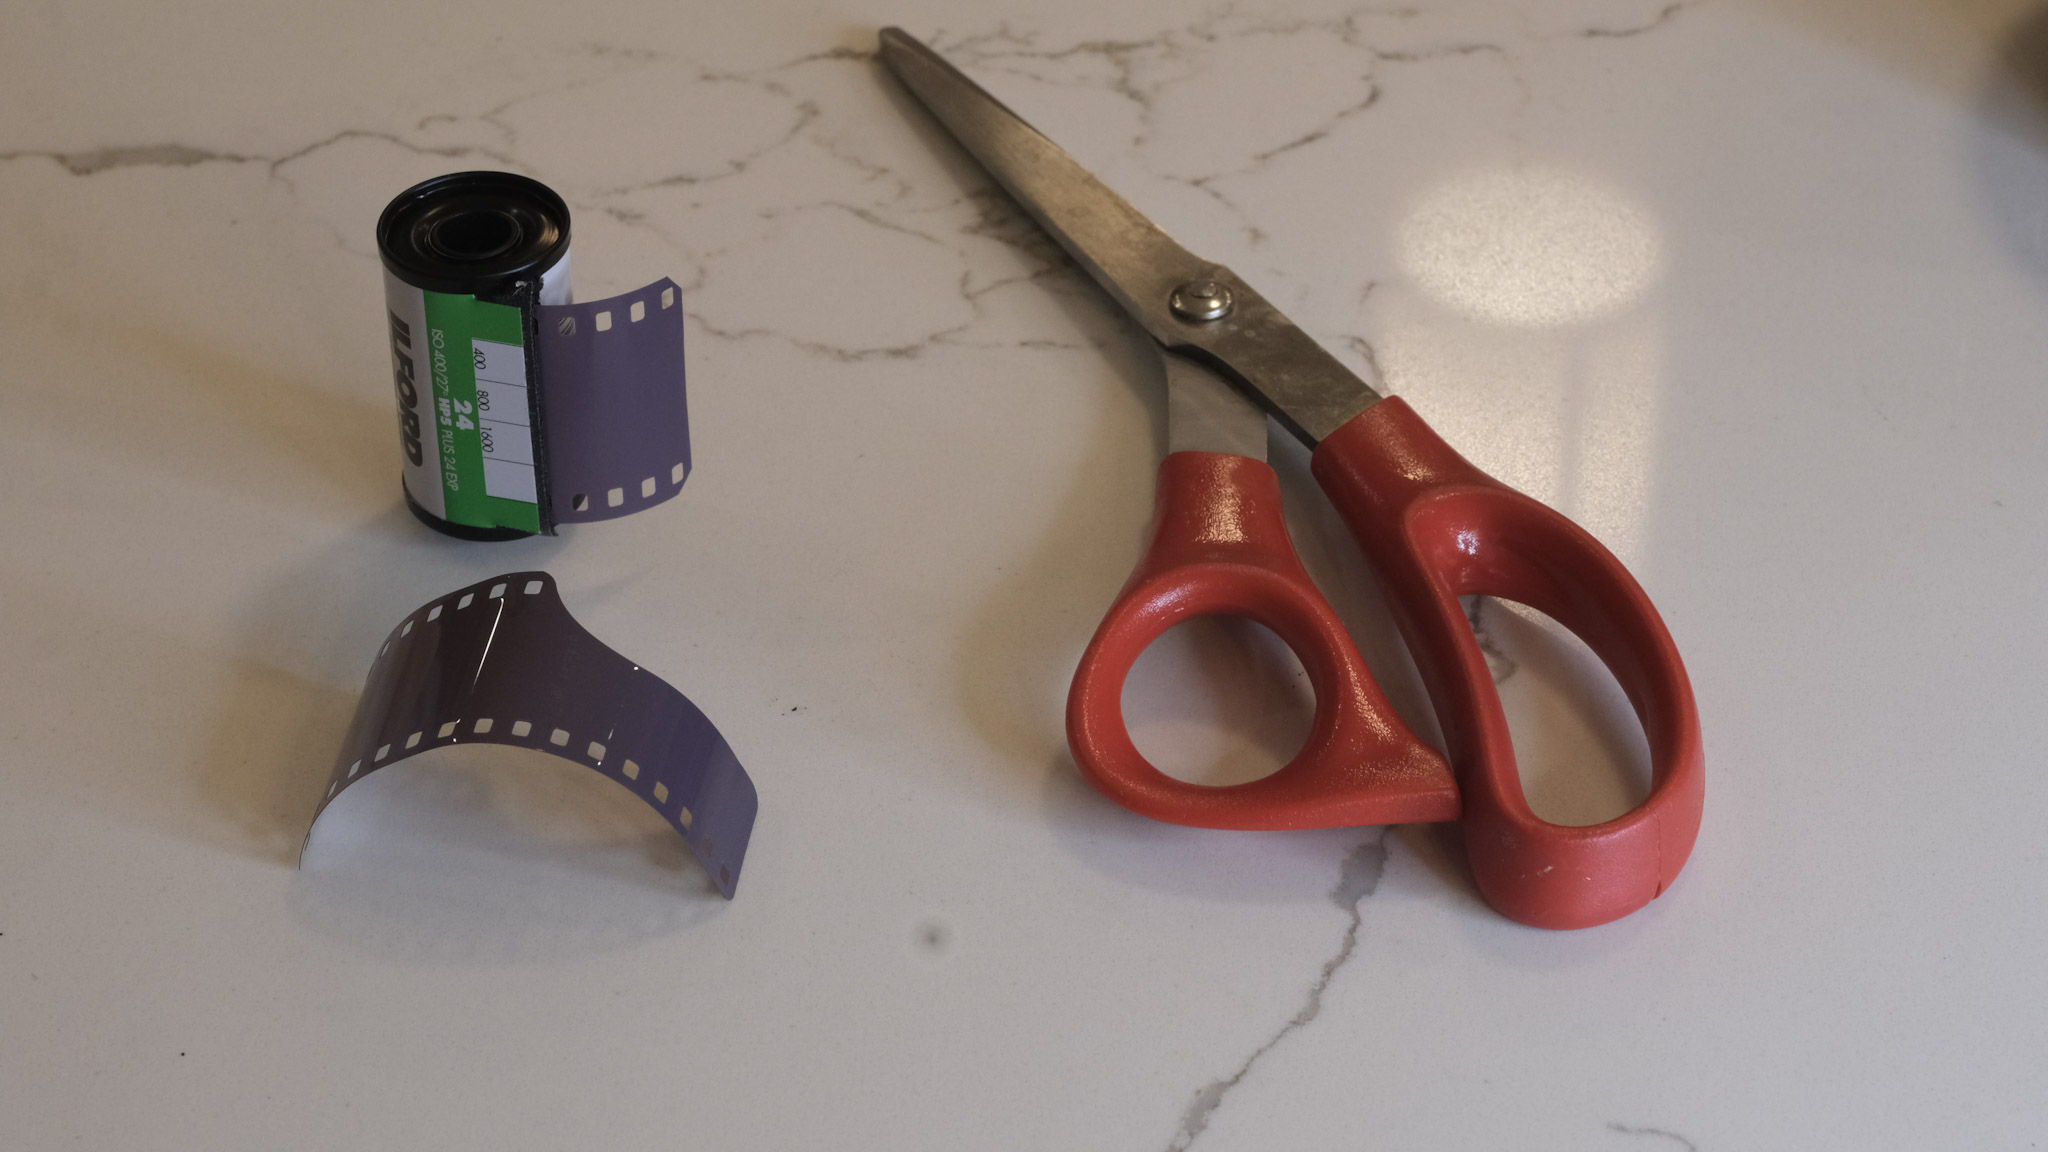
Canon Photura 135 – to load the camera, simply drop the film and pull the leader to the zone marked “film”.
Testing the Photura 135 Caption on Veterans Day in Downtown Marietta, GA
The square at the center of downtown Marietta is one of my favorite spots – Marietta is a big and modern city 15mi from Atlanta, but the square still has this unique “small town America” feeling. Even more so on Veterans Day.
I was impressed by the Photura 135. The first Photura (let’s call it the 105) was already a good camera, but the 135 is significantly improved – the autofocus is much more capable, and it’s really better at determining the exposure, even in tricky situations.
It’s not a Leica M for sure, but it can be used for street photography, with interesting results. Interior photography is still not its forte – the flash flattens the image – but when this camera was launched, no compact-zoom camera was good at that.
The biggest limitation of this camera is its zoom – or to be precise, its very narrow aperture, in particular at the long end. With a zoom opening at f/8 at the longest focal length, 400 ISO film really looks like a minimum, and at the end of my Marietta escapade, I wished I had loaded the camera with something faster than Ilford’s HP5 (on the Photura there is no way to override the DX coding and push film).
Would I bring this Photura 135 to my next travel destination? Yes, definitely. But I would also bring some 800 ISO film, just in case. The Photura 135 is not as easy to find as the first generation “Photura 105”, but if you’re interested in shooting with a bridge camera, I would recommend you make the effort of locating the “135” – it’s a case of version 2.0 fixing most of the issues of version 1.0.
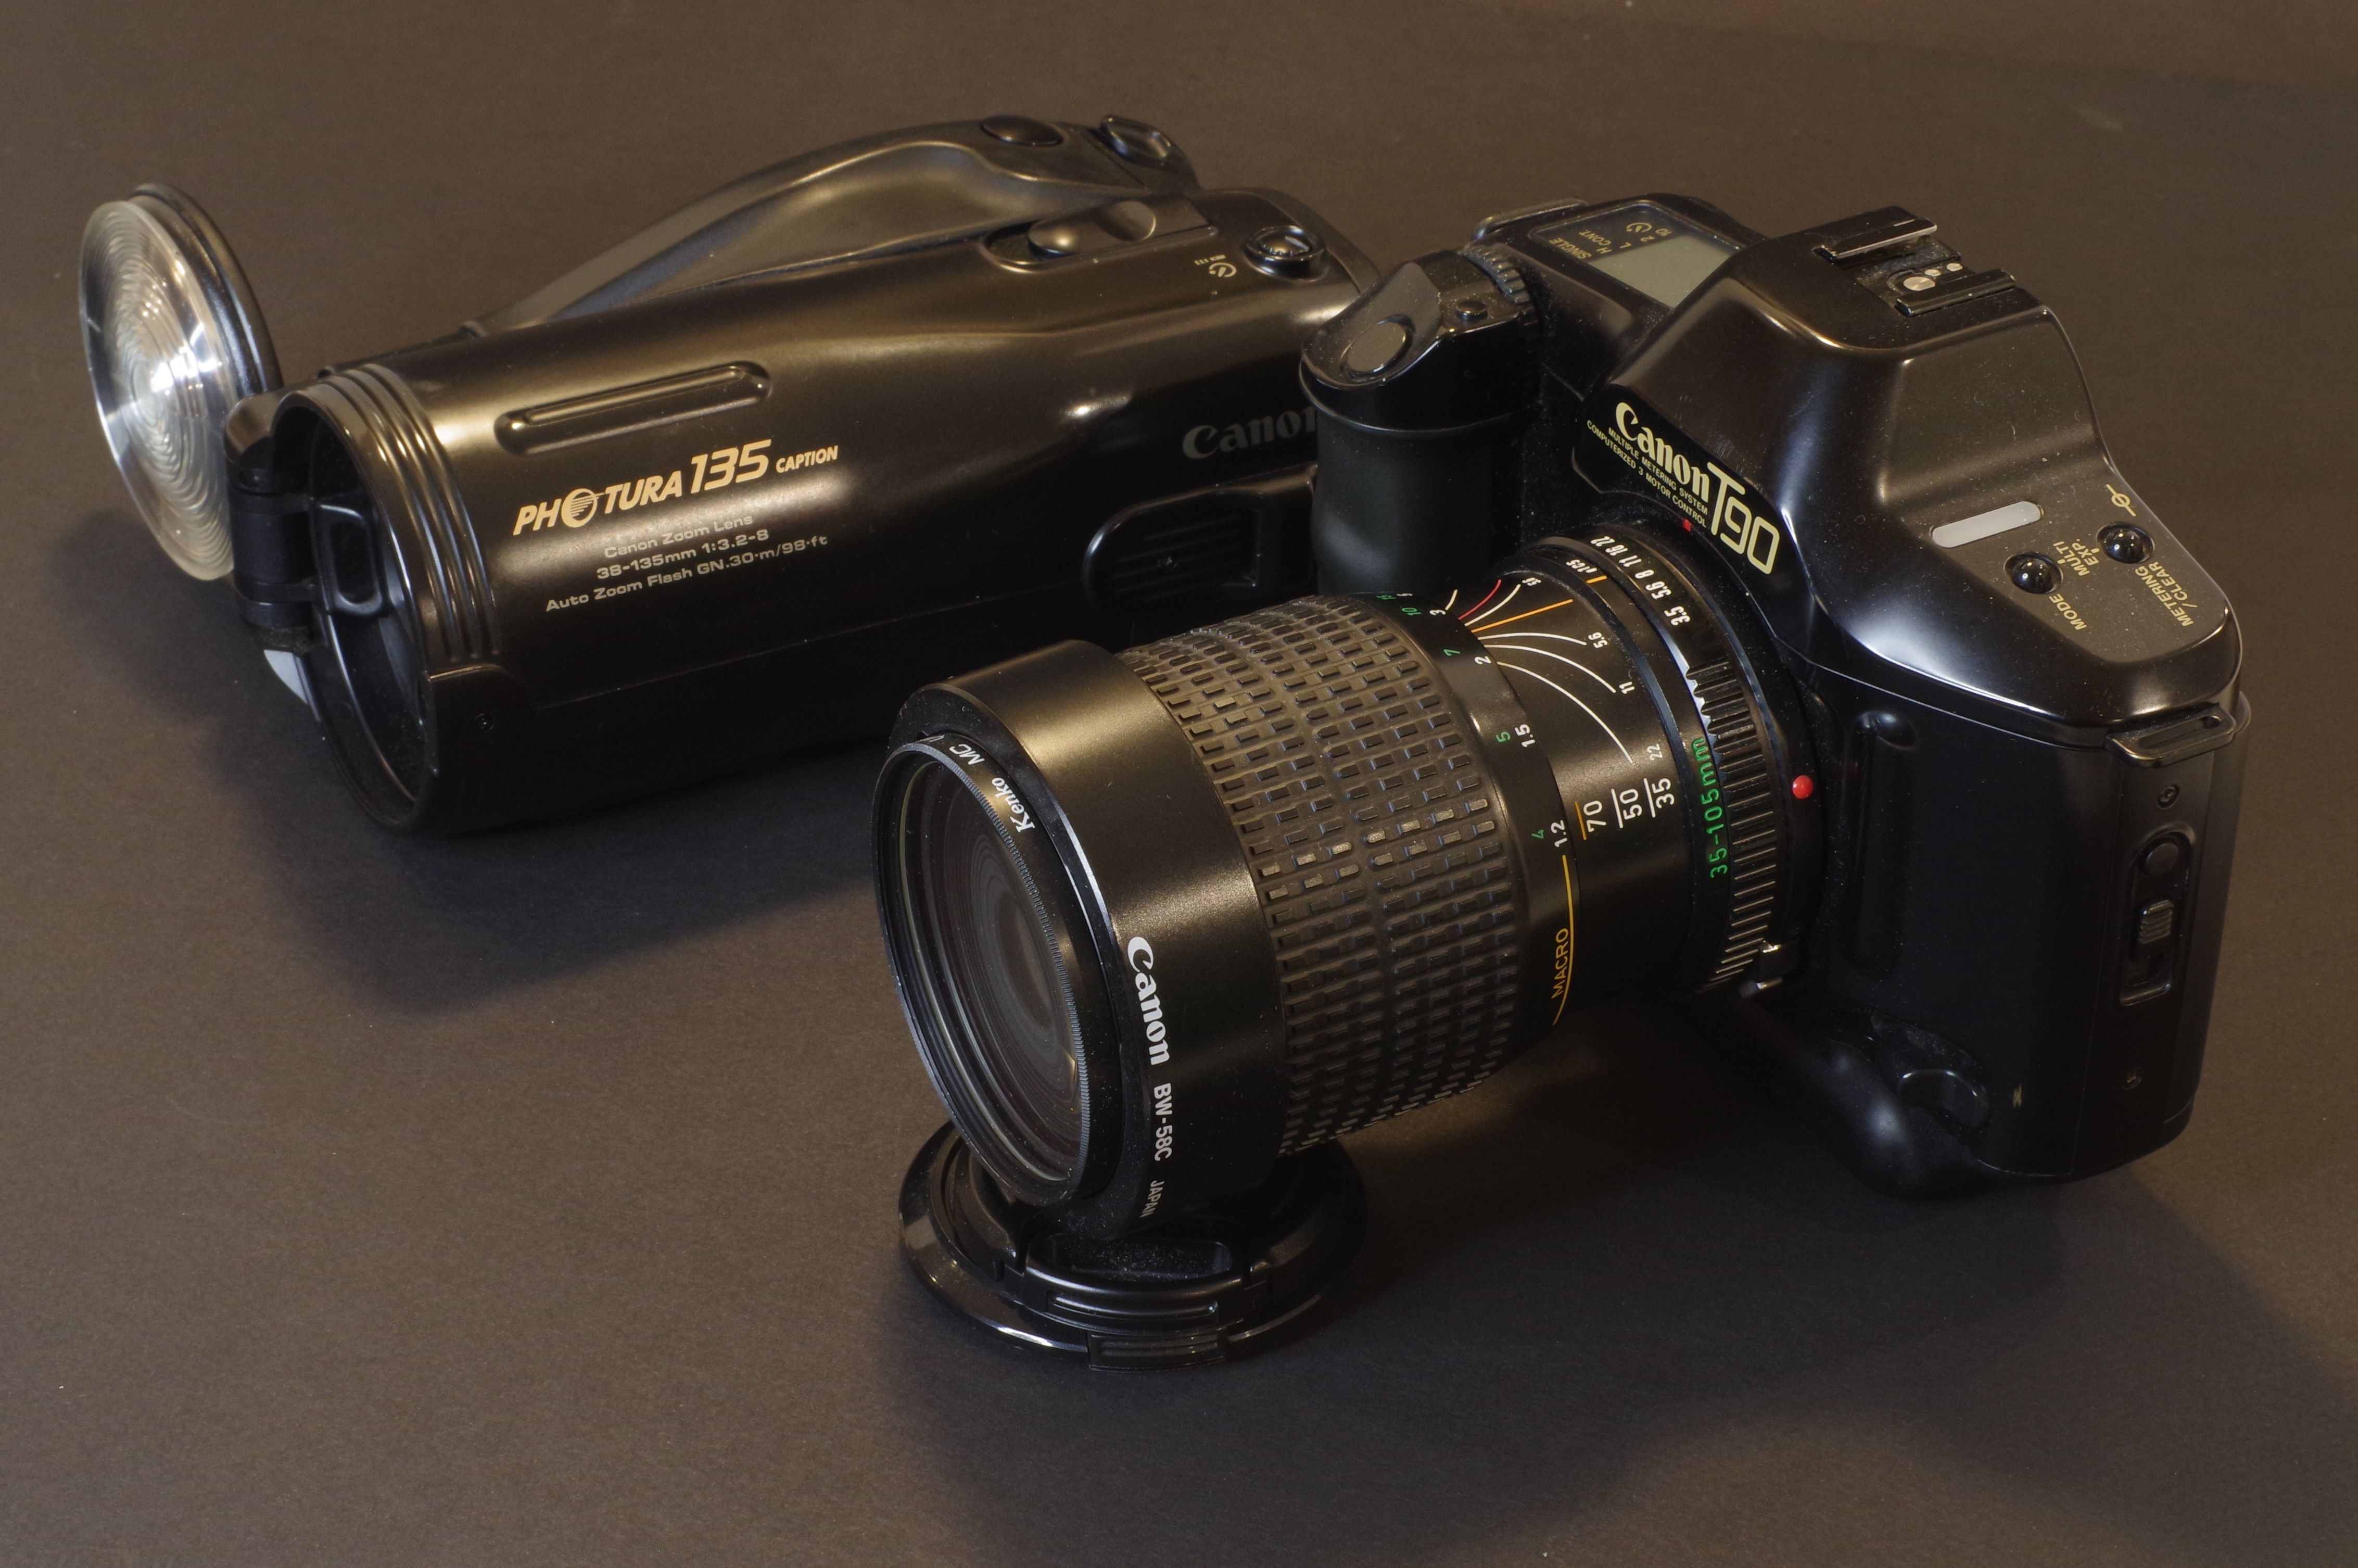
Canon Photura 135 and Canon T90 – a family reunion of sorts – the Photura is shaped like a tube and much easier to carry in your luggage than a more conventional camera
Marietta, Veterans Day 2025 – Canon Photura 135 – Ilford HP5 – S curve and micro contrast improved on ChatGPT
About asking ChatGPT to “Heal” my pictures – I submitted two of the pictures of this series to ChatGPT – for the first one (the man on the left with the walker) it simply changed the color of the shirt (it was bright white and too distracting). The picture of the two kids on the bench was taken at the end of the afternoon, at the long end of the zoom, and was a bit too soft (it lacked contrast and sharpness). I asked ChatGPT to increase the contrast of the image selectively, without touching the mid tones. It played on the two ends of the S curve and then increased the micro-contrast locally. And gave me a one page long explanation of what it had done and why. Everything it did I could have done with Photoshop if I had a Photoshop license, and was skilled enough to pull it off. I’m normally using Lightroom’s “Heal” functions, but in this case, I could not get the result I was expectingand I had to ask ChatGPT for help.
The originals:
Old gear, B&W film and AI – a match made in heaven? I’m sure we’ll have more opportunities to discuss the issue along the year.
If you’ve spent time on Pentax dedicated forums, you may have read that Pentax and Ricoh (the owner of the Pentax brand) follow a “blue ocean strategy” and want Pentax dSLRs to become “the Leica M of the dSLRs”.
I don’t know if those statements are coming directly from Ricoh or are just an invention of creative bloggers. But it aligns very well with what Ricoh have been doing with the GR series, and Pentax with the K-3 Mk III.
“Blue Ocean” means that instead of competing with sharks in an area rich in preys – so rich it’s tainted red by the blood of the victims, you retreat to a zone with fewer fish, but also fewer competing predators, and no blood. The Blue Ocean. As for becoming a Leica M equivalent, it obviously relates to a strategy where – by sticking to a technology that everybody else has abandoned, you build a niche for yourself and serve a small group of highly motivated (and wealthy) users with products which are without an equivalent anywhere else.
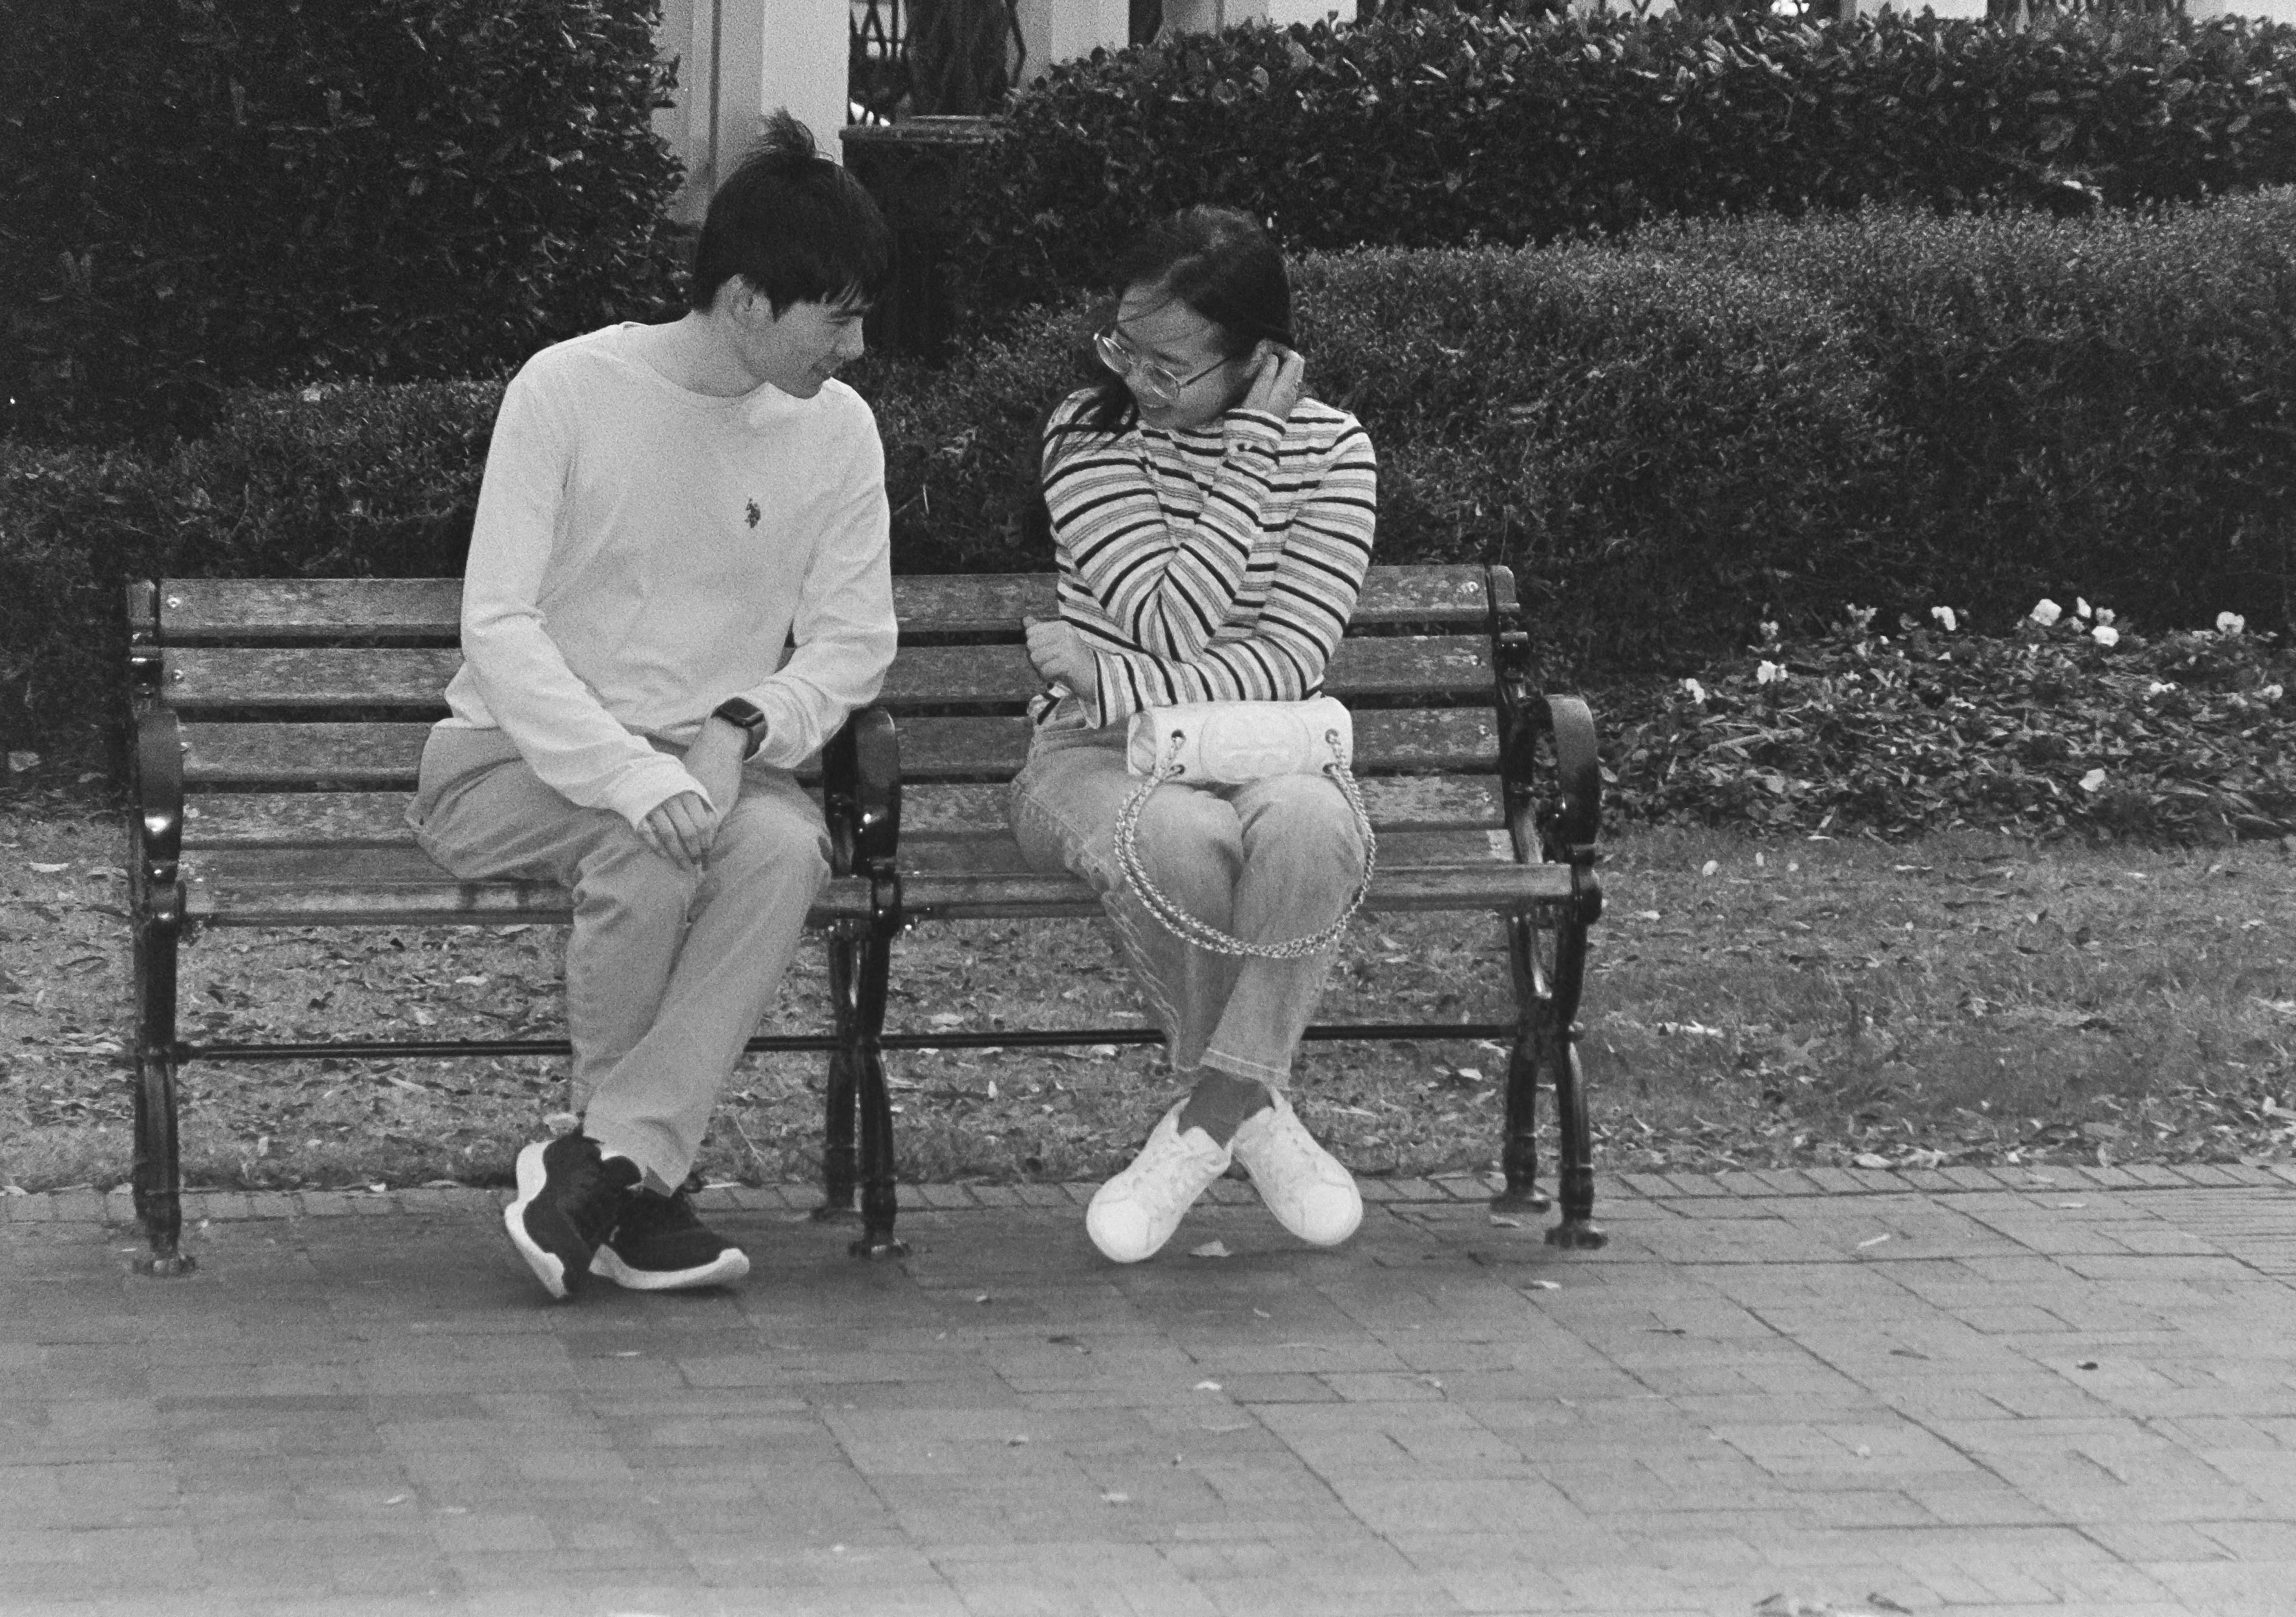
Pentax K-5 II – Sigma 8-16mm lens – bench in Atlanta, GA
You can see the Blue Ocean strategy at play in the way Ricoh declines its ultra compact GR camera into a series of extremely specialized products (GR IIIX with 40mm lens, GR IV monochrome, GR IV High Diffusion Filter, …). As for being the Leica M of dSLRs, consider the case of the Pentax K-3 Mk III: the last and arguably most elaborate APS-C dSLR launched by any camera manufacturer, it was proposed at a comparatively very high price, and was followed by an even more expensive variant equipped with a monochrome sensor – that’s taken directly from the Leica marketing playbook.
You can argue that Pentax did not have much success as an innovator in the recent years (the Q series and the K-01 did not meet their public), and that until recently they were selling cameras primarily on value.
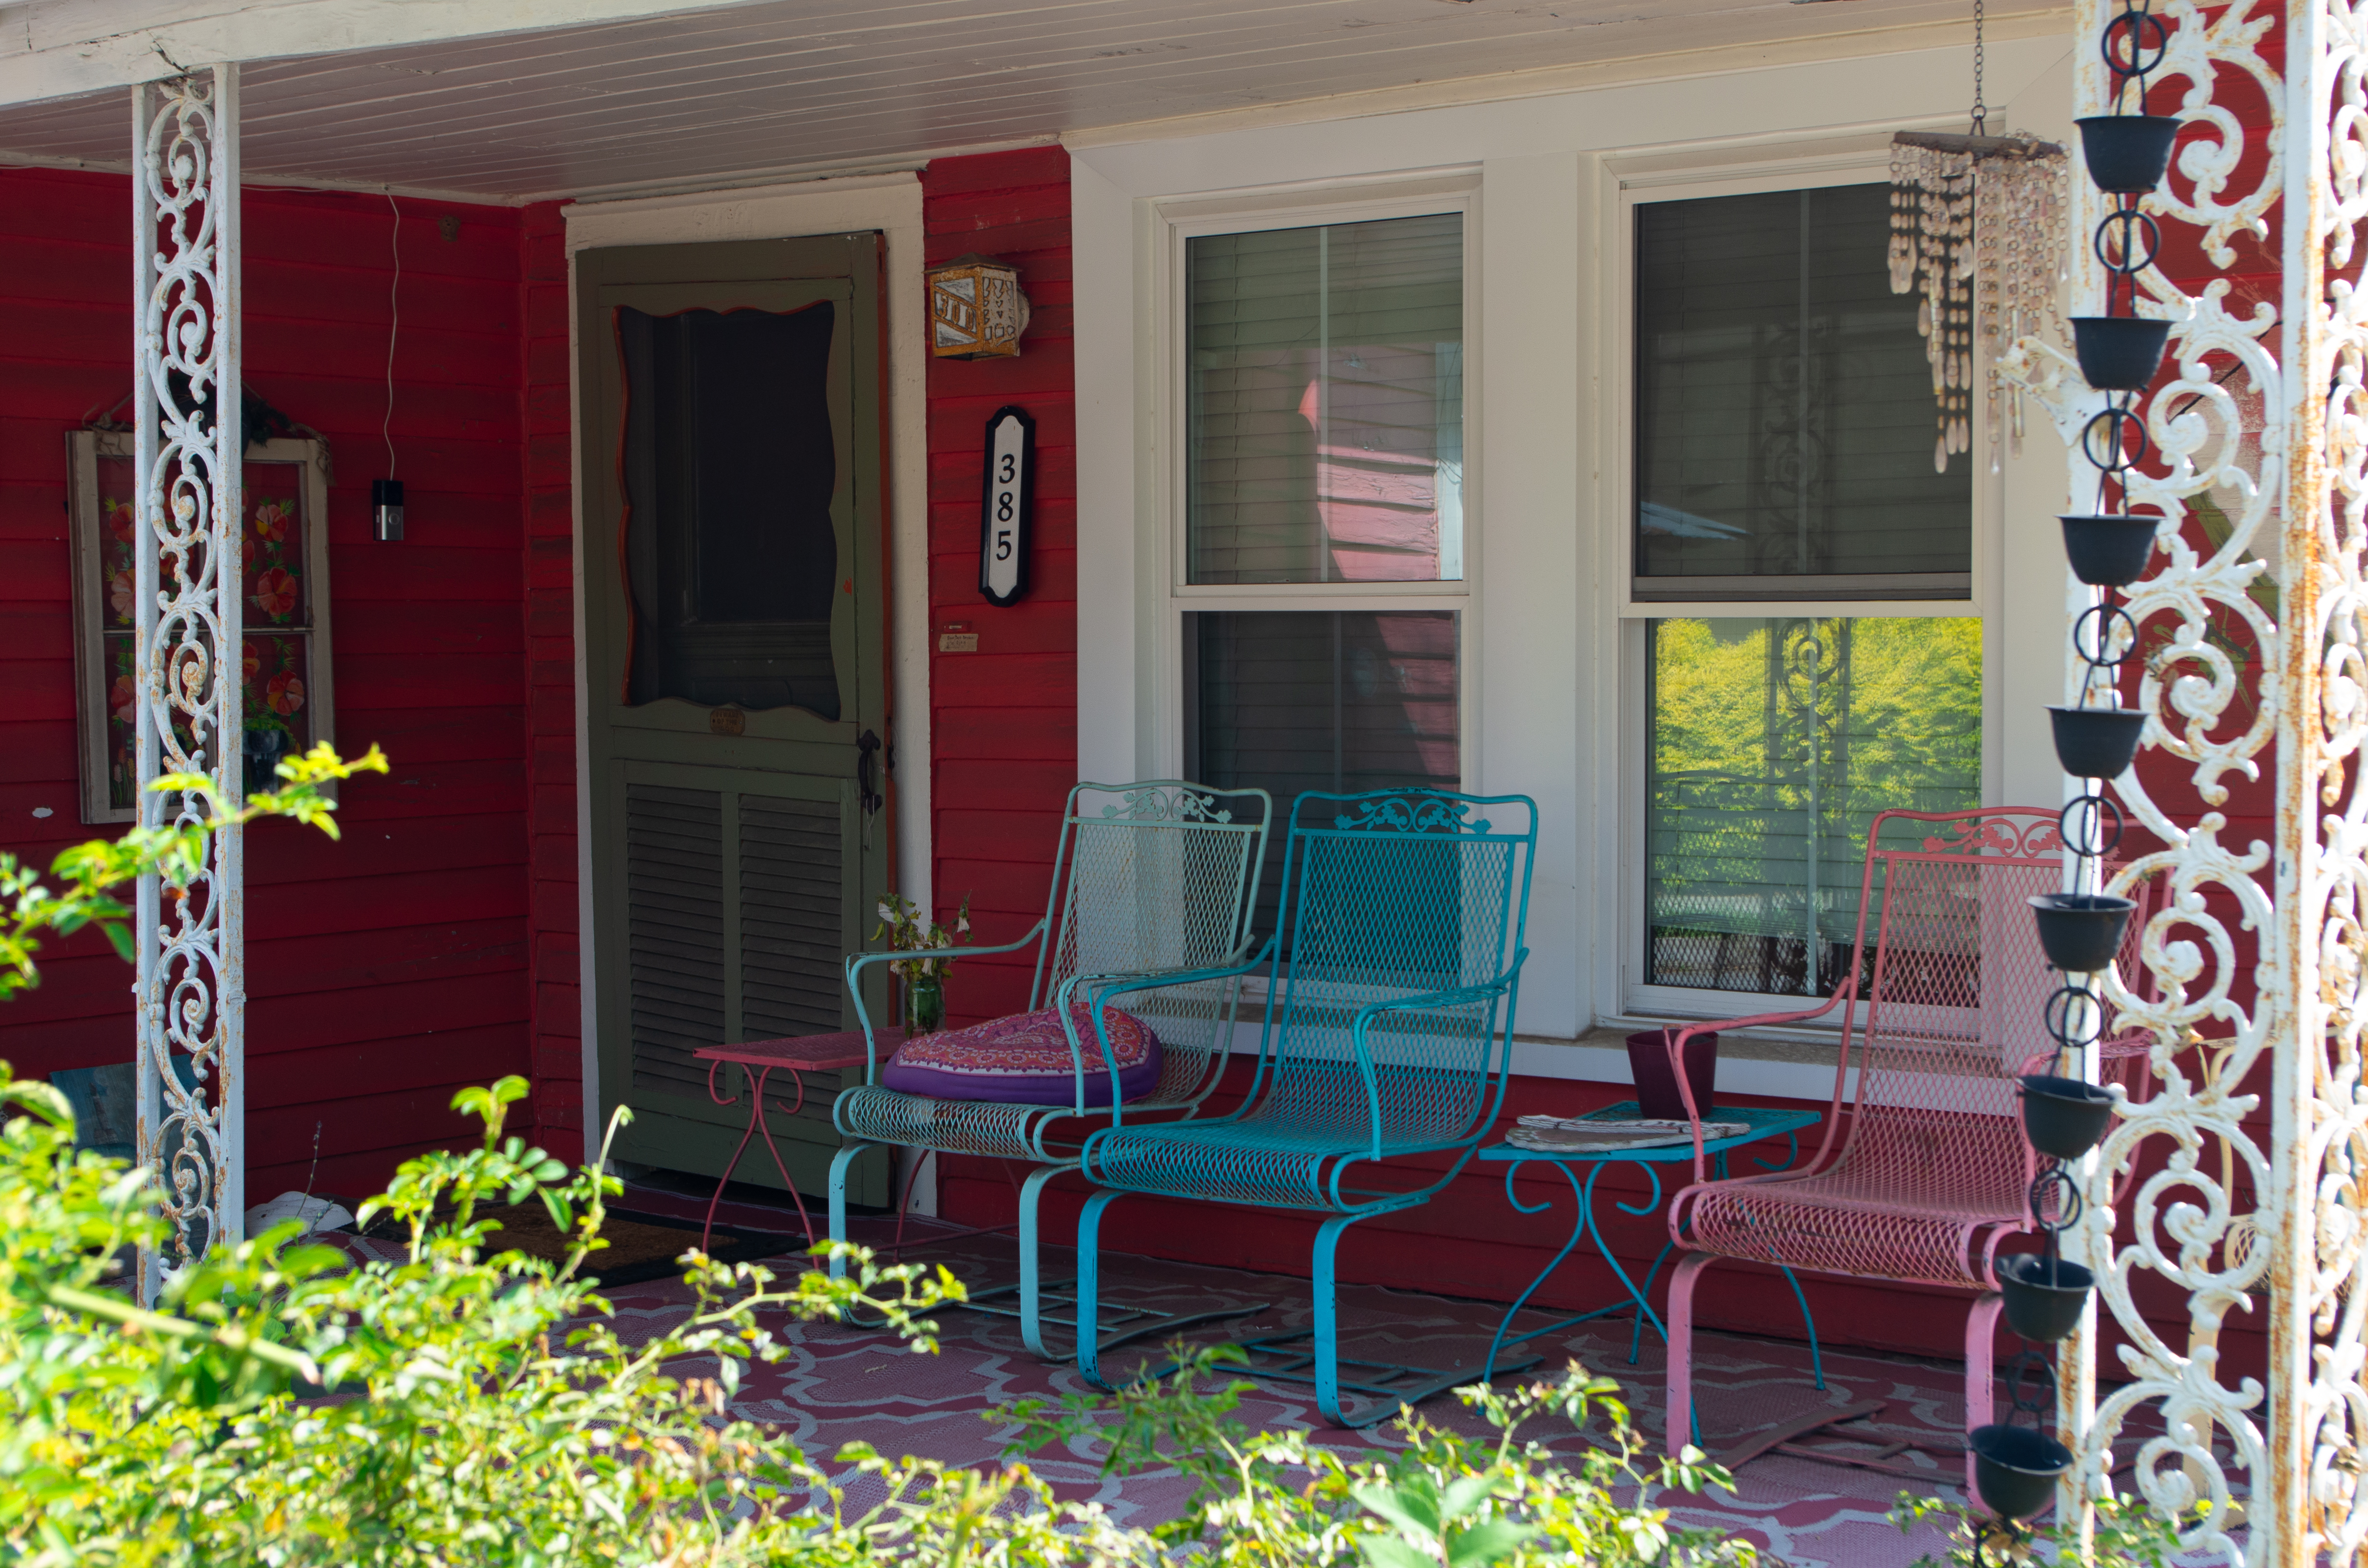
Pentax K-5 II – Pentax DA 18-55 lens – porch in Marietta, GA
The K-7, K-5 and the K-3 Mk I and Mk II are a good example: not rated as highly as Canon or Nikon’s best cameras when it came to autofocus or video performance (for instance), they produced images of high quality, and offered advantages unique in their category (in body image stabilization, full weather sealing) at a price point lower than their competition.
The pricing strategy started changing with the launch of the Pentax KP in 2017 and became obvious with the release of the K-3 Mk III – which clearly tried to be the best dSLR with an APS-C sensor – ever – but was at the same time more expensive than Canon and Nikon’s offerings.
As of today, you still have to spend almost $1800 for a new K-3 Mk III (that’s the 2025 Holiday promotion, it still lists officially at $2000) and up to $2200 for a K-3 Mk III Monochrome, which is much higher than Canon’s 90D at $1200, and Nikon’s only remaining new APS-C dSLR, the d7500 currently selling for $700.
It percolates on the cost of older Pentax dSLRs on the second hand market – the K-5 and the first two K-3 models could still be considered bargain buys not so long ago, but the K-3 Mk III has pulled the prices upwards. Being the most recent predecessors of the K-3 Mk III, the K-3 Mk II and the KP are logically the most impacted.
The introduction of tariffs on second hand cameras coming from Japan has made the matter worse by cutting the main source for cheap Pentax cameras: imported second hand Pentax dSLRs are subject to tariffs, factor that if you buy from a Japanese retailer.
Pentax K-5 II – Pentax DA 18-55 lens – Hood decoration (Chevrolet)
The recent Pentax cropped sensor dSLRs line up today: from the K-5 to the KP in a few words
The Pentax K-5, K-5 II and K-5 IIs: Available new between 2010 and 2013, the K-5 remains a very good value proposition – with a solid build, a long battery life, great ergonomics and a very good 16 MPIX sensor delivering very good images. Some details are dated: there is no WiFi, and live view and video capabilities are very limited, but it’s still a very good camera if you’re shooting exclusively still images. Nice copies of the K-5 can still be found between $200.00 and $250.00. The K-5 IIs is approx. $100 more expensive.
Pentax K-5 and its kit lens
The Pentax K-3 and K-3 II: – Sold between 2013 and 2017, the K-3 and the K-3 II are essentially a K-5 IIs with a 24 Mpix sensor. The K3 II gets a better autofocus system and an integrated GPS but the K-3 and the K-3 II keep the same fundamental qualities and limitations as the K-5. And they make you pay dearly for their 24 Mpix sensor (up to $650 for a K-3 Mk II).
The Pentax K-70 and KF – launched respectively in 2017 and 2022 – are more or less the same camera under a different name – they are the remote successors of cameras like the K-r tested last year in those pages, the last two representents of a long line of the mid-level Pentax dSLRs. They benefit from some “pro” features like weather sealing and in body image stabilization, they have the same 100% viewfinder and the same 24 Mpix sensor as the K-3 or the KP and offer WiFi and Bluetooth connectivity. The LCD display at the back is fully articulated. But their autofocus module is dated and limited, they’re not as solidly built as a K-3 or the KP (polycarbonate instead of a magnesium alloy), they are deprived of the K-5 and K-3’s top plate display and only have one SD card slot and a smaller battery.
Note that the entry-level or mid level Pentax dSLRs (starting with the K-30 up to the K-70s built before 2021) may all suffer from issues with the solenoid controlling the aperture – the most recent K-70s and the KF are using a different component and will be OK. The KF is still available new for approximately $650.00 in the US, and a nice second hand K-70 can be had for $400.
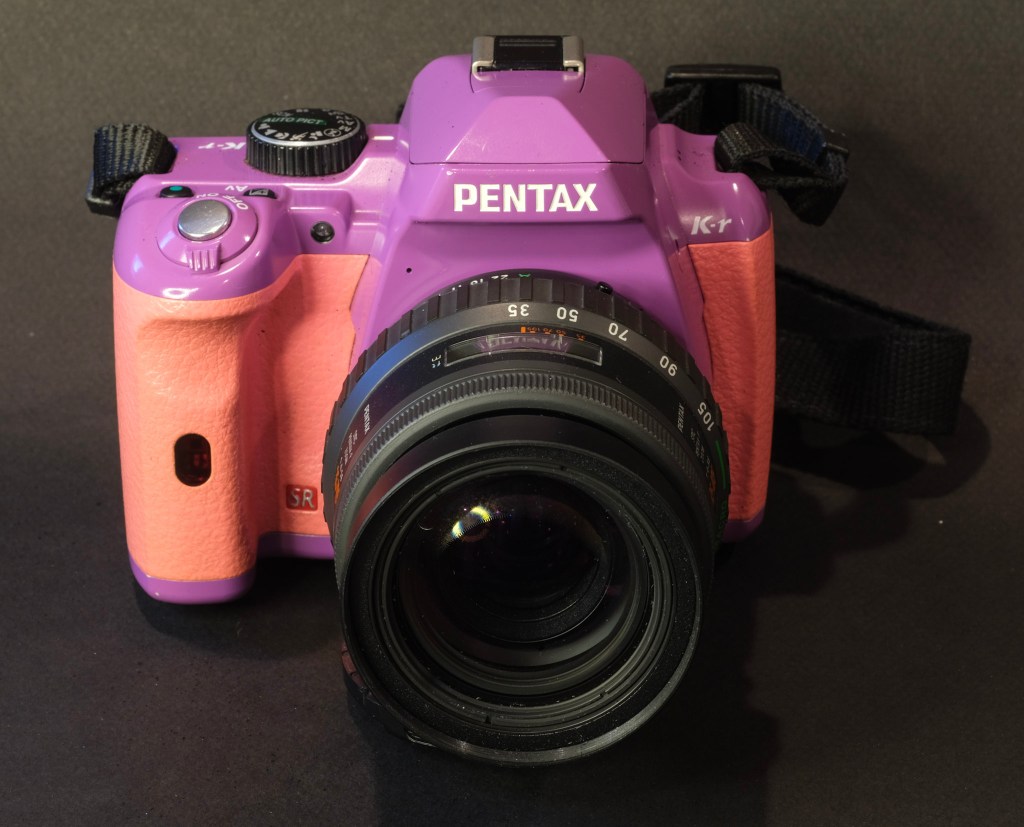
Pentax K-r – “SR” is for “Shake Reduction”. It’s a important differentiator – no other brand offers in body image stabilization (IBIS) on digital reflex cameras.
The Pentax KP was launched in 2017 as a replacement of the K-3 II, and discontinued in 2021. It introduced a new slim, retro-inspired body design with user replaceable hand grips – esthetically pleasant but with controversial ergonomics. It benefited from a new and improved image processing engine and from a tiltable rear display. It combined characteristics inherited from the K-3 II (24 mpix sensor, all metal construction, 27 point autofocus system) with characteristics typically seen on entry level cameras (only one SD card slot, small battery, no top plate LCD display). If you can live with those limitations and its ergonomics, it’s the closest you’ll get to the image quality of the K-3 Mk III, at a fraction of the price.
Like the K-3 Mk II, the KP has become expensive – the typical second hand price being in the $600 to $750 range.
The KP’s differentiator – a tillable rear display
I only know the Pentax K-3 Mk III from its specs sheet, and reviews I’ve read or watched here and there. Under a body that looks similar to the previous K-3s, it’s a very different camera, and now that the Nikon D500 has been discontinued, a credible candidate to the title of most elaborate APS-C dSLR.
With a new 26 MPIX BSI sensor, a new autofocus system, a top plate LCD display, a third control wheel, a touch screen and a joystick to select from 41 autofocus points – it’s a very significant step above the K-3 II and the KP. It has almost everything expected from a top of the line dSLR, and its specs sheet compares favorably with the best APS-C mirrorless cameras. The only glaring omission is the lack of an articulated or tiltable rear screen, which can be an issue when shooting with wide angle lenses or for macro-photography. Still available new from retailers, it can not be found second hand for less than $1300, more than twice as much as a more abundant Nikon D500.
Pentax K-5 II – Pentax DA 18-55 lens
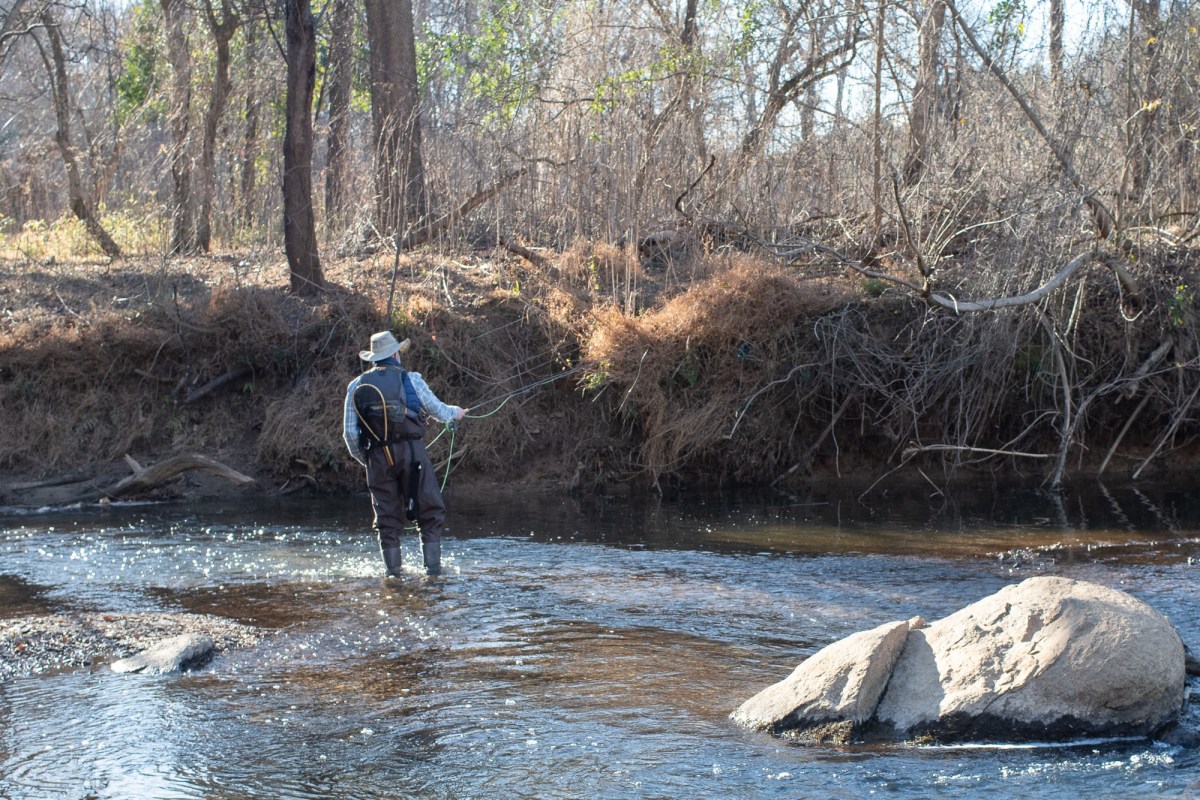
Pentax KP – Pentax DA 35mm f/2.8 macro lens. Sweetwater Creek, GA
When I was in high school, our physics teacher had tried to explain that sometimes lab instruments were too precise for the job at hand. My 15 year old brain had struggled with the concept. How could an instrument be too accurate, how could a knife be too sharp?
Precise and powerful tools are more demanding – they’ll perform well in the hands of skilled operators who know what they’re doing, but will yield inconsistent results and sometimes be dangerous in the hands of poorly trained users.
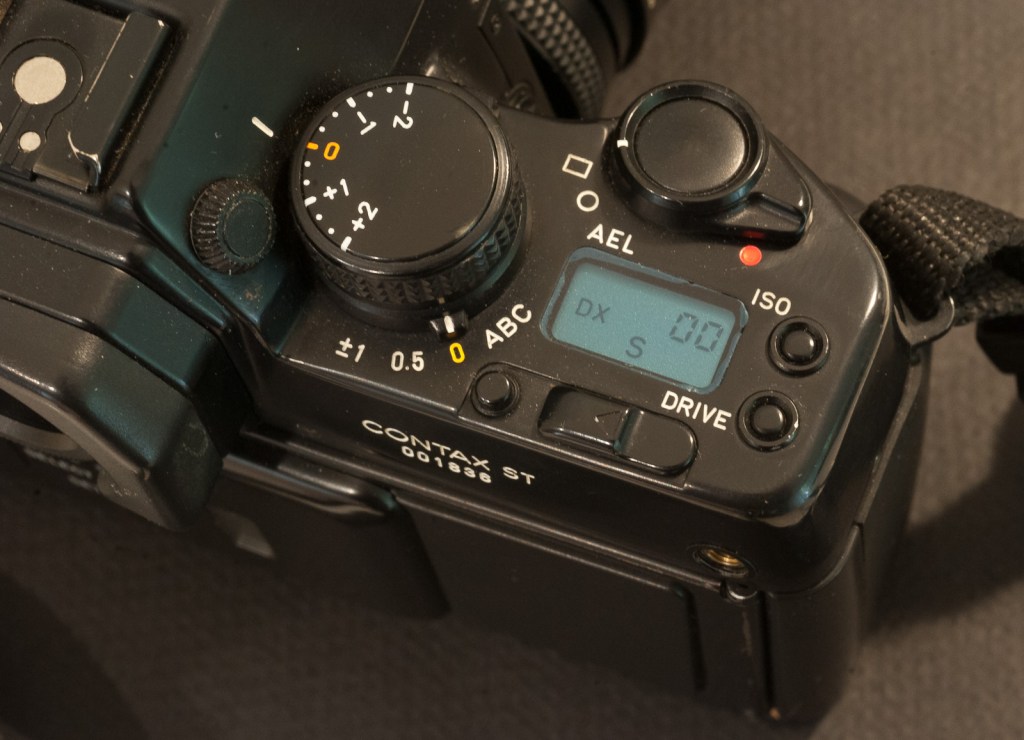
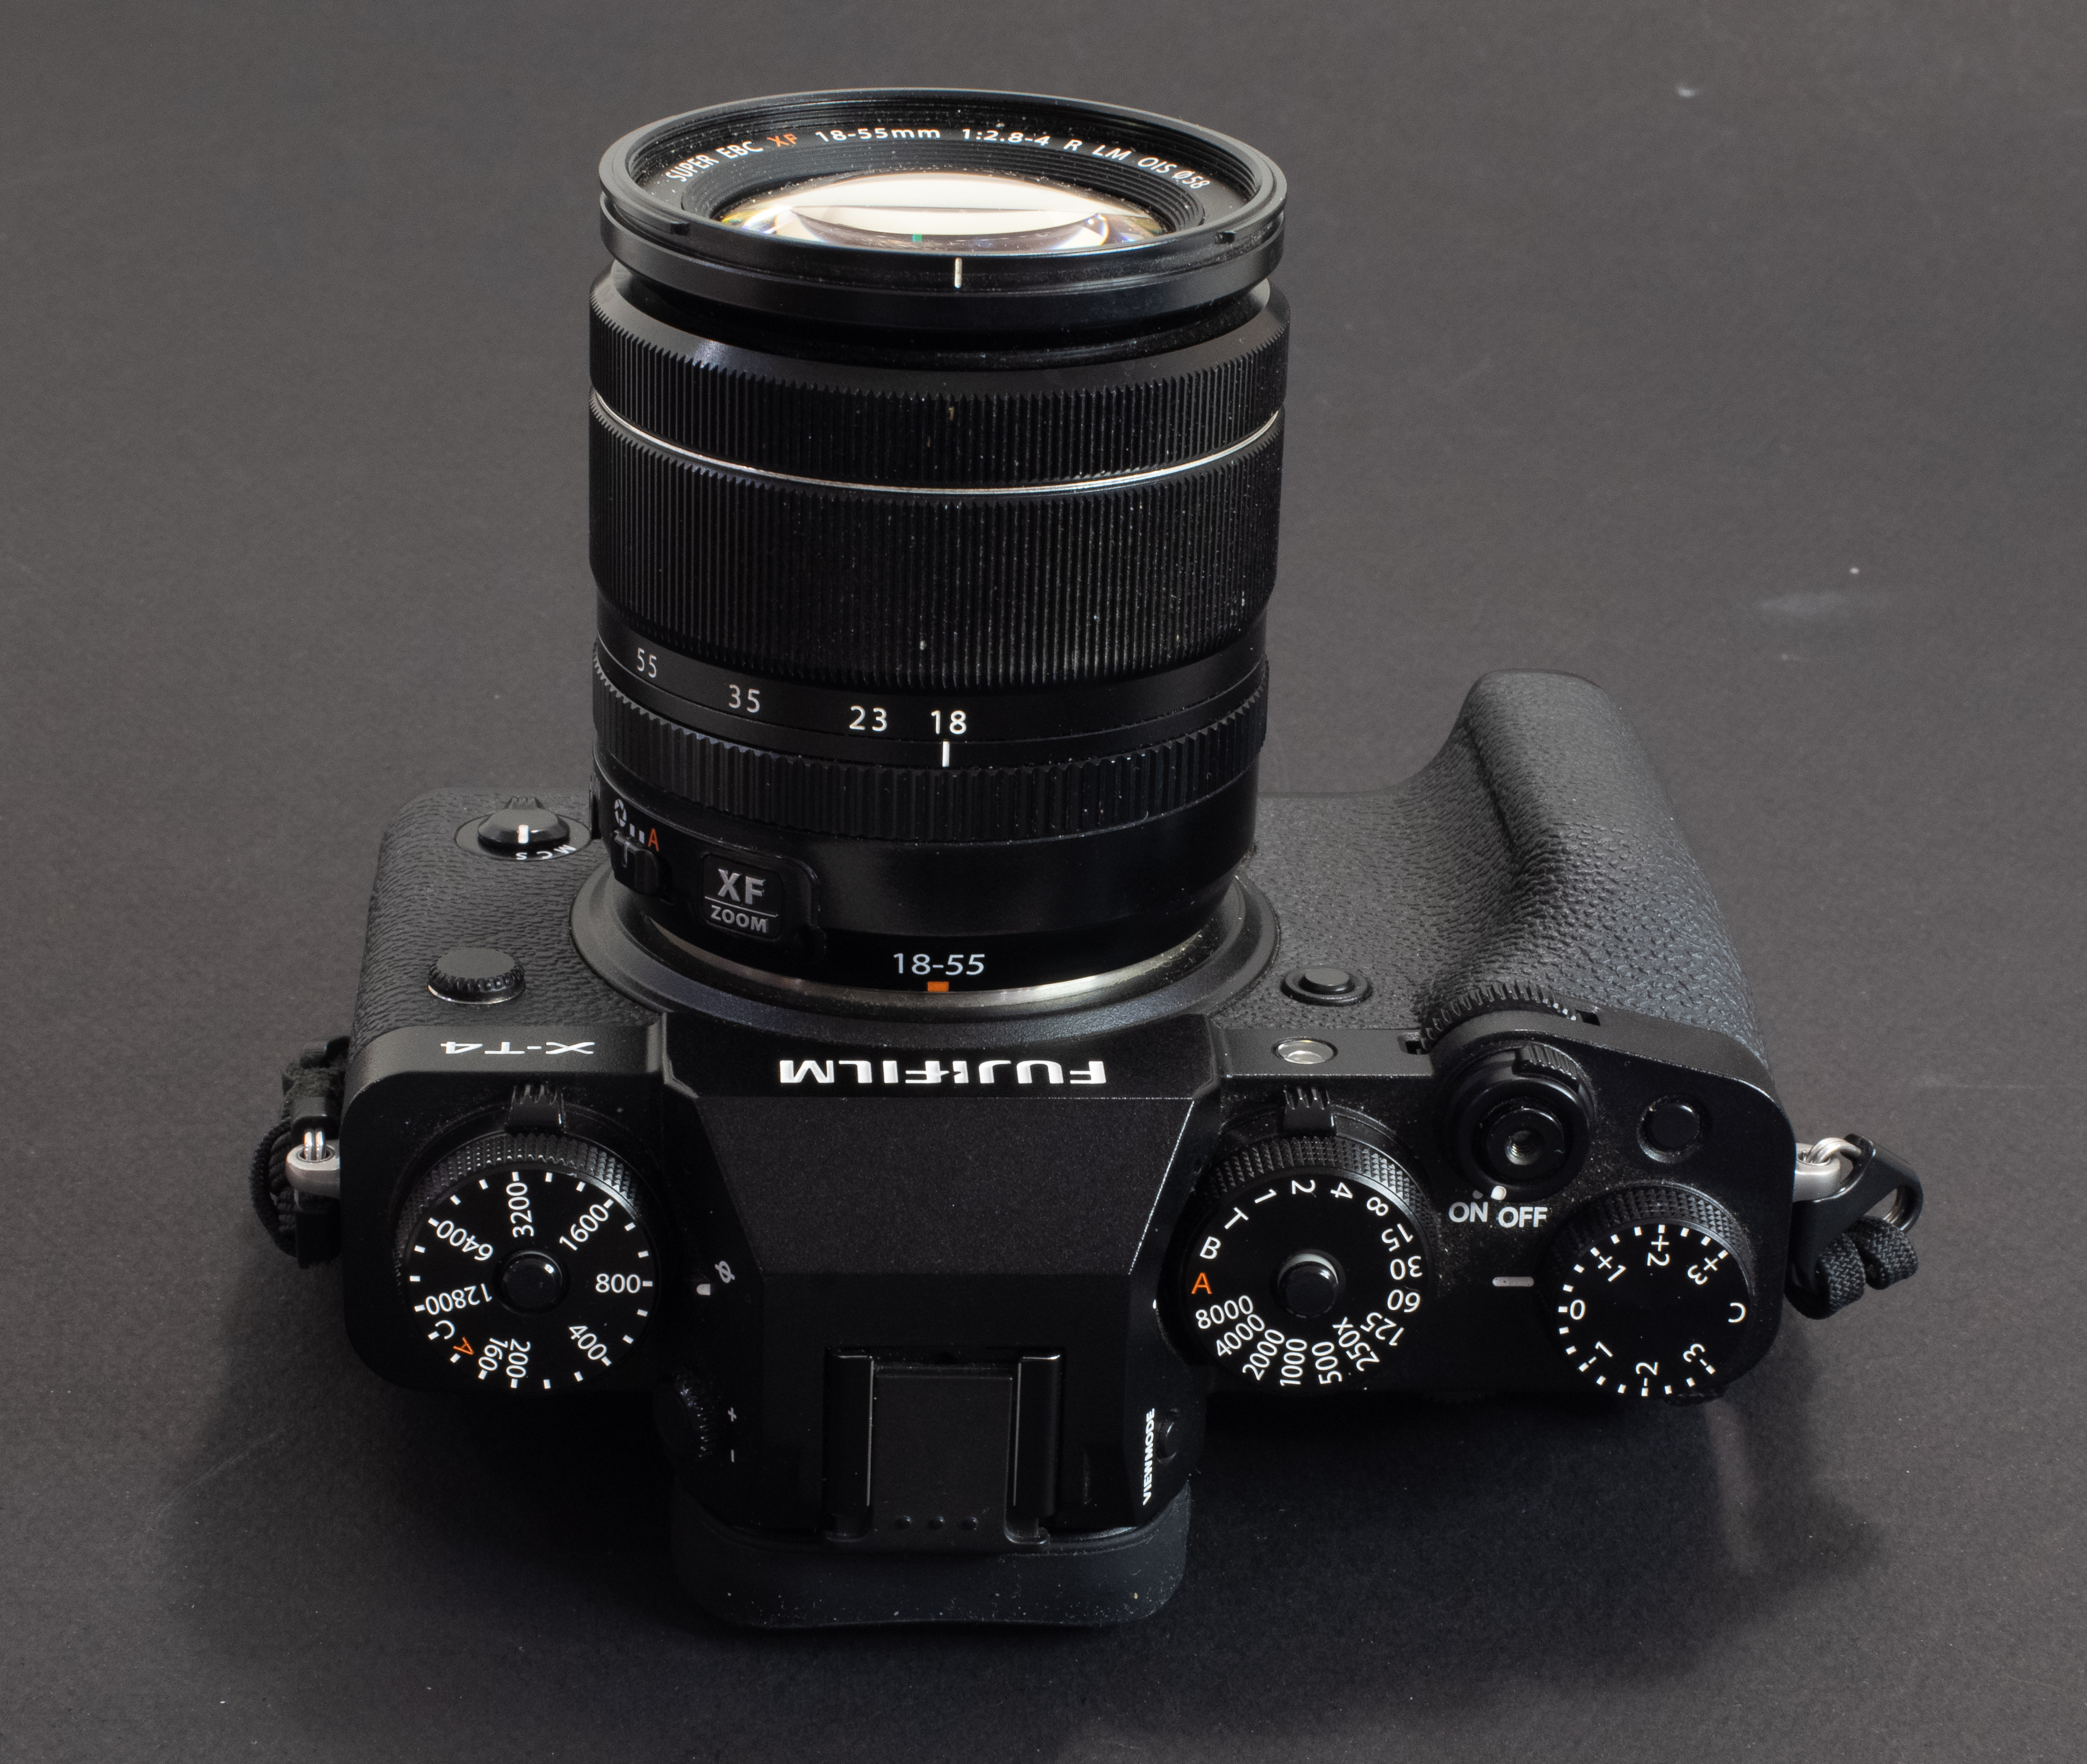
ISO on the left, shutter speed center and exposure compensation on the right – the typical Fujifilm User Interface.
Which brings me to the case of my Fujifilm X-T4. As a tool, it’s very sharp. It’s a highly configurable, 26 mpix APS-C camera, with a great electronic viewfinder and a plethora of dials – ISO, shutter speed, exposure compensation and even a real aperture ring on some lenses. It’s not a camera for beginners or for occasional photographers – there is no “scene”, “green” or “iAuto” mode that you would have found on compact cameras and entry level ILCs, and some useful settings (like choosing between Average, Spot or matrix exposure metering) are hidden deep in the menus.
The step well – Abhaneri, Rajasthan
There is a lot to say about the user interface of Fujifilm’s cameras. Some of their cameras are designed to operate like the first multi-automatic SLRs of the late seventies – with dials and rings that you have to set to “A” (or not) and no PASM mode selector – while other cameras are designed with a modal interface, but with no top plate LCD display and no dial, a bit like an entry level dSLR. The same is true for lenses – some have an aperture ring with markings, some have an aperture ring with no marking, and some have no aperture ring at all. And the camera operates differently depending on the type of lens mounted on it, and on the position of a switch on the barrel of the lens. It’s rather confusing. Honestly, I prefer the modal user interface of Nikon’s high end dSLRs, and I’m not a Fujifilm photographer because of the user interface of their cameras, but rather in spite of it.
The aperture can be controlled automatically (switch on “A”) or by rotating the unmarked aperture ring.
The UI quirks aside, Fujifilm “X” cameras have a lot going for them. They are renown for their beautiful “out of the box” JPEGs, for their best in class film emulation, and for offering the most comprehensive range of great lenses of any APS-C mirrorless system. Top of the line models are also very solidly built while still being compact, a benefit of sticking with cropped sensors. But professional reviewers often complain that their autofocus system is not as good as what Sony and Canon ILCs can deliver.
The X-T4 has a fully articulated LCD, in addition to an electronic viewfinder, of course.
Over the two years I’ve been using this X-T4, I’ve never been in a situation where the autofocus was lacking (I don’t shoot sports or wildlife), but I’ve struggled with the exposure – sometimes the UI got me confused, and some other times the matrix metering was not as evaluative as I would have like it to be. To the point that for casual or travel photography (when I don’t have to time to sweat on the settings), the camera is generally set to operate in Program mode, with the good old center weighted metering.
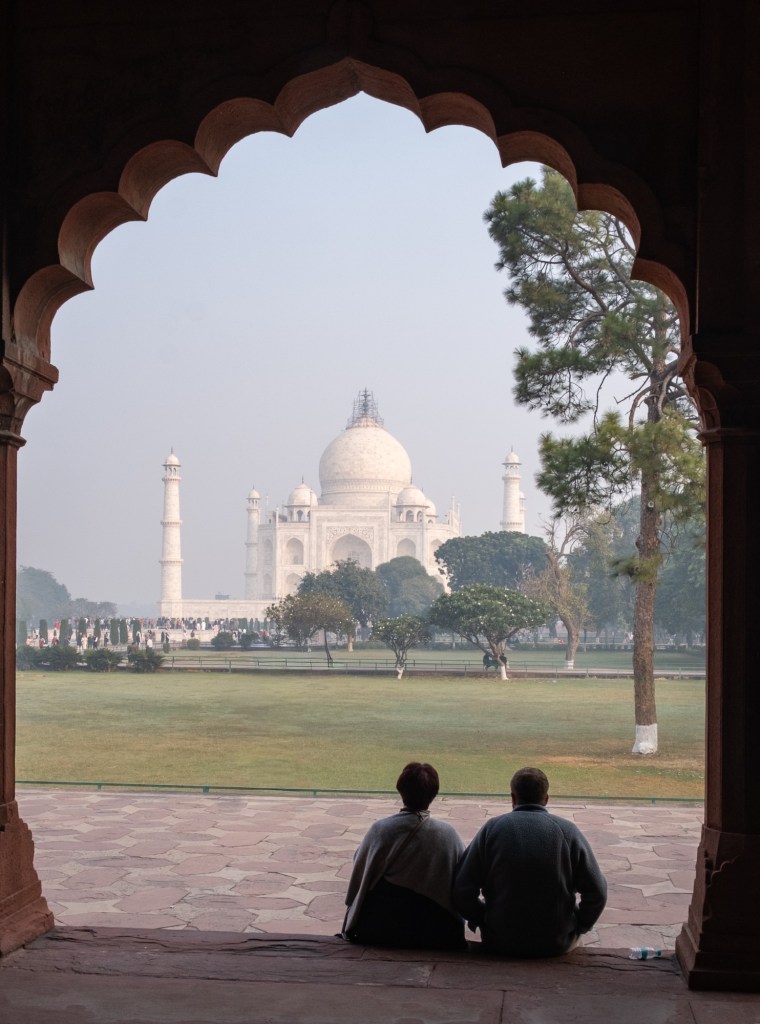
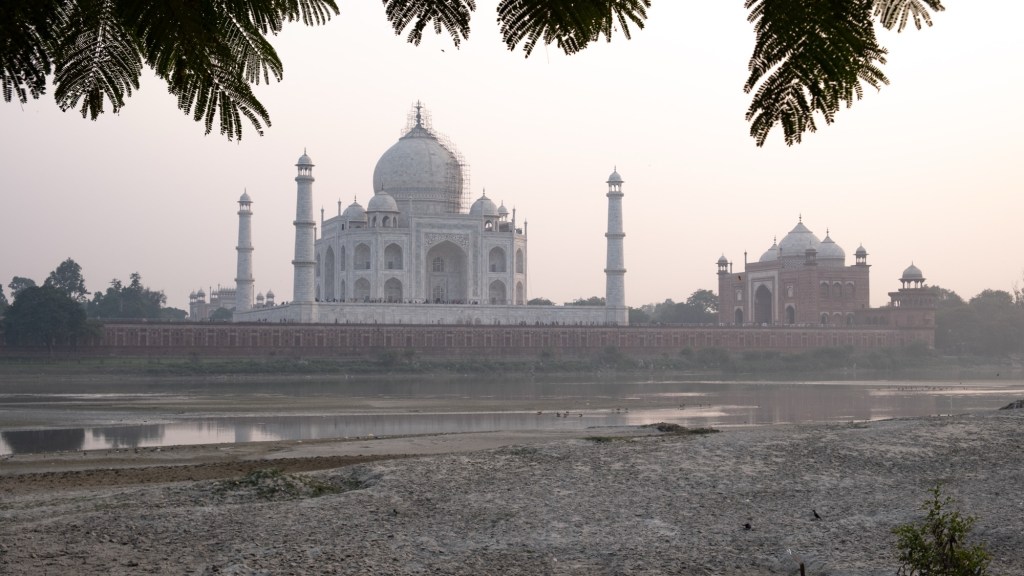
The Taj Mahal – Fujifilm X-T4 – Fujinon XF 18-55mm lens
That’s the problem with sharp tools – they need a skilled and well trained operator – and only lots of practice makes you a master of your domain (“Ubung macht den Meister” as they say in German). If you use it frequently enough and are willing to learn its idiosyncrasies, this X-T4 will reward you with impressive images, but an occasional or moderately motivated photographer may be better off with an easier to use camera.
The so called “Q” menu – where the most important settings can be modified.
Which is a cruel dilemma if like me you also like to play with old cameras – it’s tempting to shoot with the latest of your garage sale finds, but the time spent shooting with a curiosity is time not spent getting intimately familiar with your main, “serious”, camera. A case of too much equipment getting in the way of better pictures.
Two APS-C cameras – mirrorless cameras have grown in size, and this X-T4 is not really smaller than the Pentax K-5 next to it. It’s much lighter, though.
I’ve shot almost exclusively with the X-T4 over the last two months, and I’m definitely more comfortable with it by now. It’s time not to follow my own recommendation and to go back to the oldies. I have a few interesting finds in my pipeline.
In the meantime, I wish you a terrific 2026—may it bring you inspiring subjects, rewarding shoots, and many great images.
This series was shot in the North West of India (mainly in Rajasthan) a few weeks ago with a Fujifilm X-T4 and the excellent Fujinon XF 18-55mm f/2.8-4. Being larger, heavier and not shooting as wide as the 15-45 XC Power Zoom, the 18-55 is not as convenient when traveling, but it’s a class of its own when it comes to image quality.
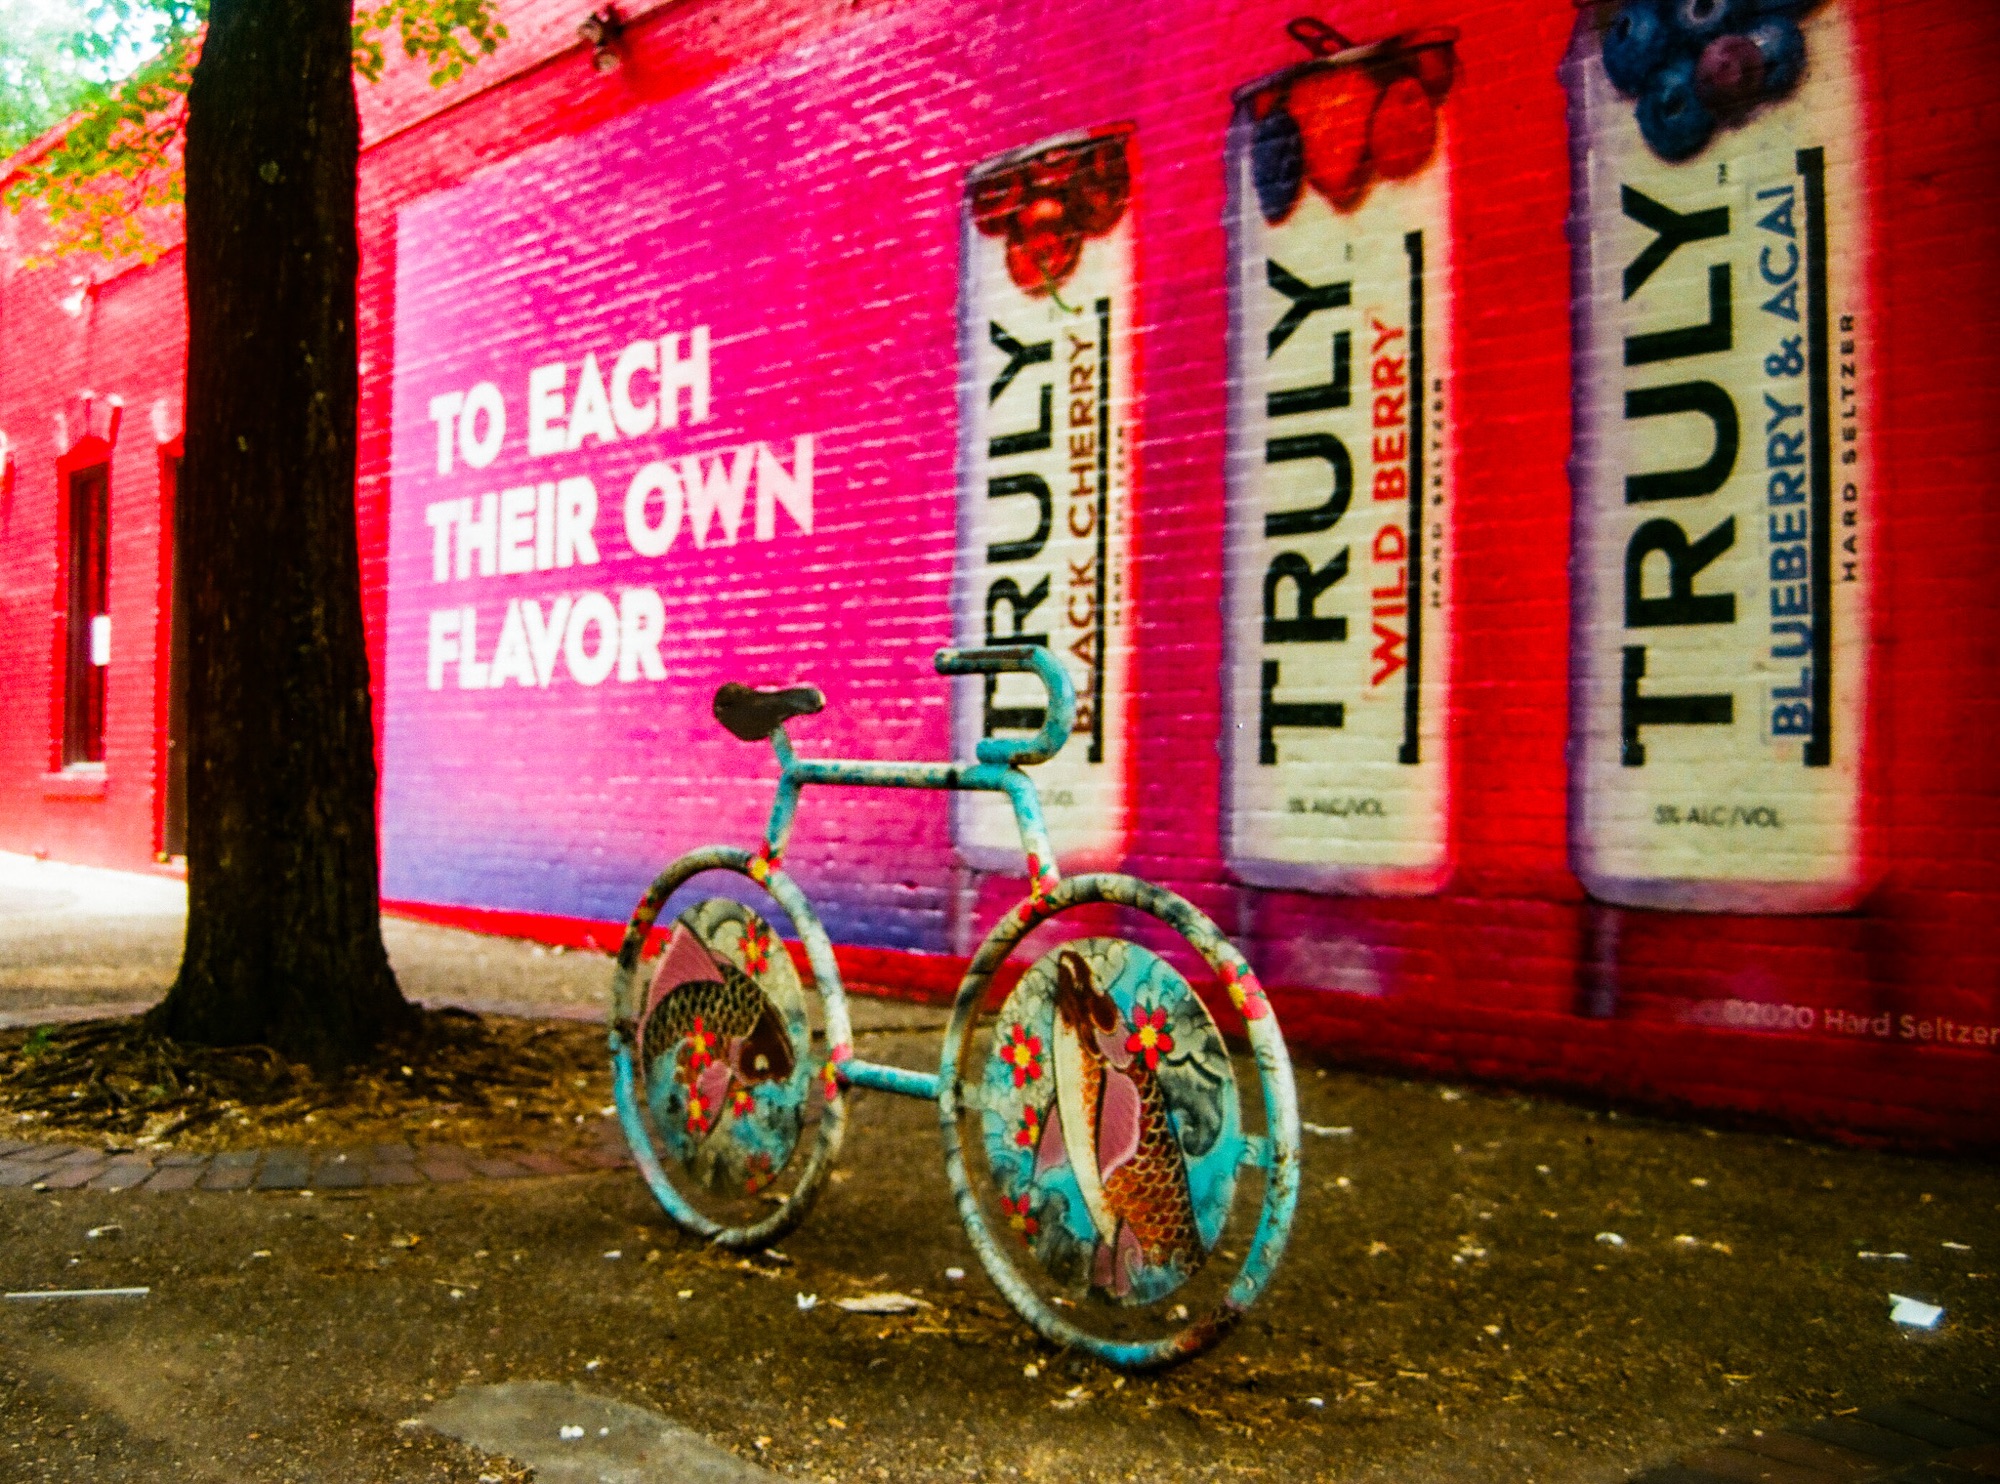
Just before Thanksgiving, I posted a picture taken a few years ago in Atlanta’s Little Five Points neighborhood with a Pentax P3, a film camera that suffered a terminal failure a few rolls of film later (an issue with the film advance mechanism like most of the P3s, of course). The lens – the Pentax A 35-70 f/3.5-4.5 – was so bad I got rid of it (my copy was faulty – the lens has a decent reputation otherwise). The image was not that great either but was made more interesting in post-processing with Lightroom, and in a few weeks, it has become my most appreciated image of the year in Flickr.
I even received a request to use it from a pro-bicycle user group…. Go figure.
I’ve been traveling recently, and will be on the road again during the holiday season. I’m not forgetting this blog, in fact I’m harvesting more images for later use, but it’s very likely that this post will be the last one before Christmas.
Happy Holidays to you and to your families.
Atlanta Little Five Points. Pentax P3/P30 – Pentax A 35-70mm f/3.5-4.5 – the wall has been repainted since, and is far less interesting…
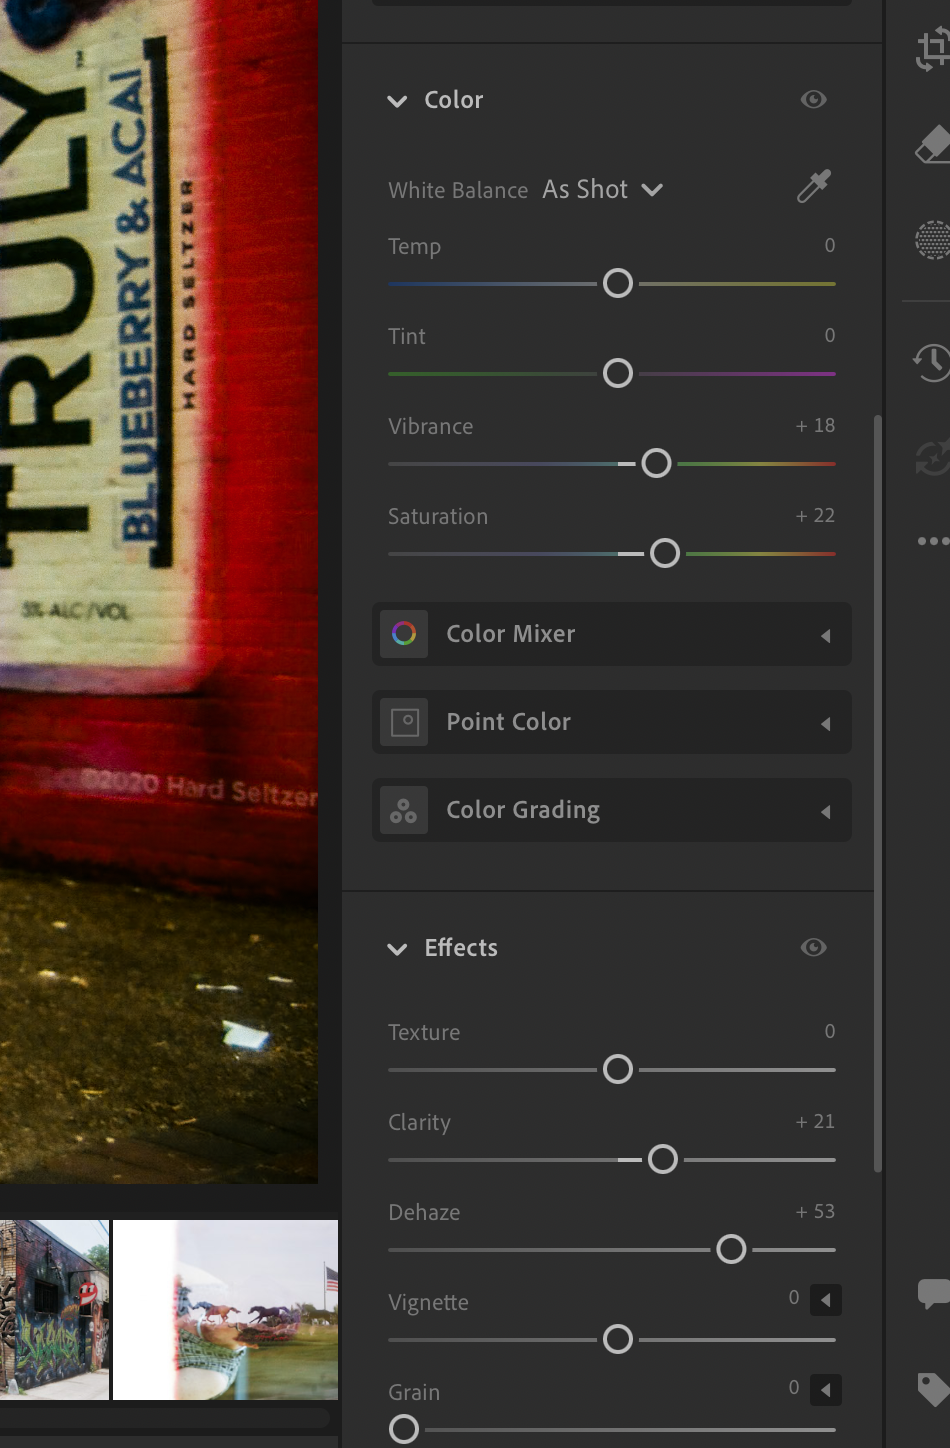
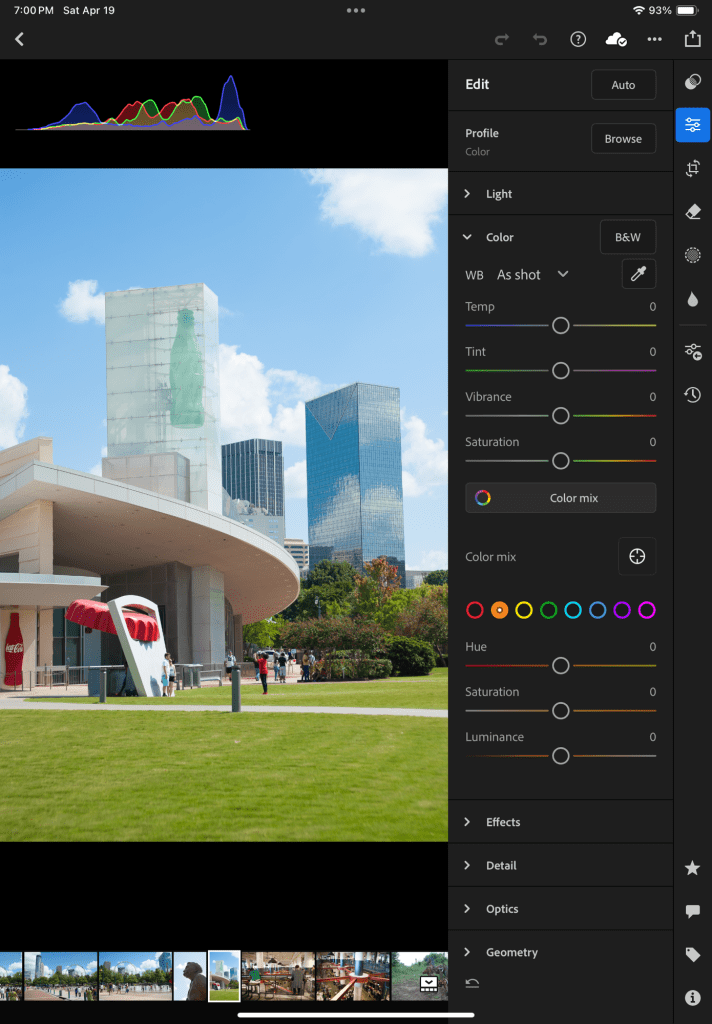
Trying to save a compromised image in Lightroom.
More of the same series….Same camera, same lens, same roll of film.
Another image from the same roll of film – Atlanta, Inman Park.
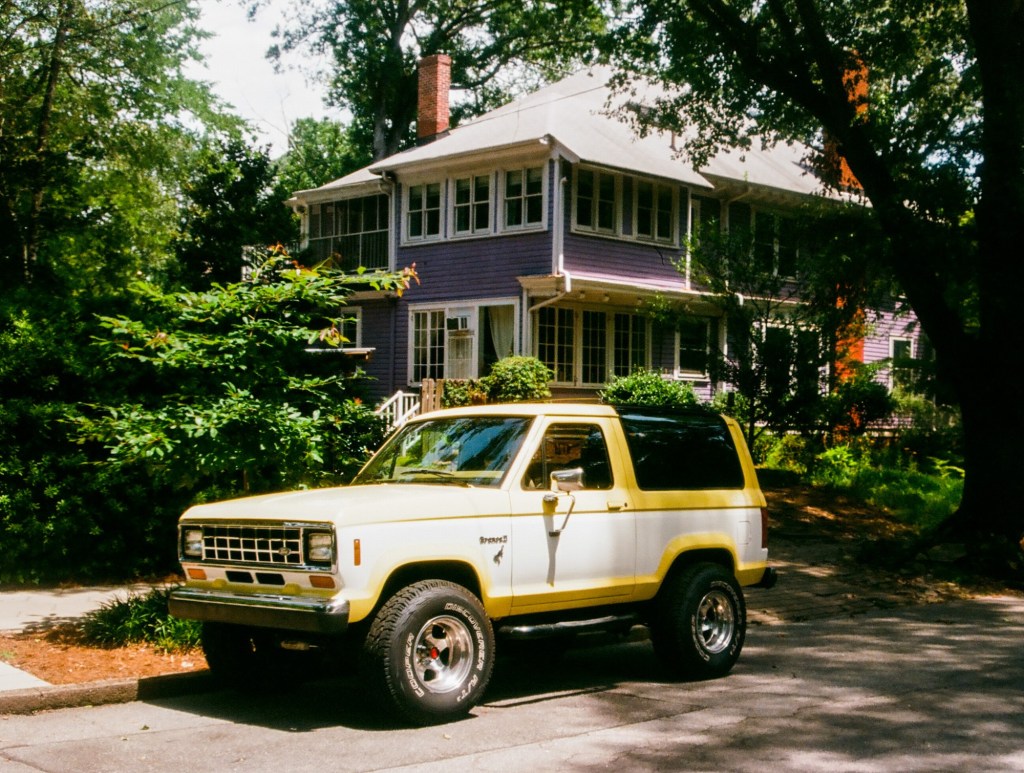
Ford Bronco II – Inman Park Neighborhood, Atlanta.
Flickr is a 20 year old photo hosting and sharing on-line service, functioning as a community for photographers. It is the home to approximately 110 million photographers, 55 million of them being regular users. I had been a Flickr early adopter back in the days, but had let my account go stale a long time ago (I felt that Flickr had lost their way after being acquired by a succession of poor suitors). The current owner of Flickr seems to have done a decent job at making it relevant again. I opened a new account in February and have been posting one or two images a day since then.
In the world of social media, Flickr is different:
Although Flickr offers free accounts, it only lets you post a maximum of 1,000 images for free, and I assume that most serious users pay for the so-called “Pro” subscription. The “Pro” subscribers are spared the ads that the “free” users have to endure.
Flickr offers very little for photographers who would like to directly monetize their images (or anything else for that matter) – Pro subscribers can include links to external (commercial) websites in the description of their images (the URL of their own storefront, for instance) but to a large extend Flickr is a commerce-free zone.
Lastly, even if there is a curated “Explore feed” (a gallery of photos which is regularly refreshed by an algorithm), Flickr subscribers are directed by default to their own “Activity feed”. The images which are proposed to you every day in your “activity feed” come exclusively from photographers you follow and groups you have subscribed to. As a Flickr user, you don’t feel you’re a captive audience; you have much more control on what reaches your “feed” than the average Facebook or Instagram user.
Financed to a large extent by the subscriptions of its “Pro” members, offering very few opportunities of monetization, and only marginally driven by algorithms, Flickr is a bad place for marketers, influencers, advertisers and click-bait hunters, which is pretty refreshing in the world of social media today.
I did not have a tele-photo lens I could mount on my Fujifilm mirrorless camera, so I brought an old Tamron Adaptall lens back in service, and mounted it on a Nikon D700. My highest view count on Flickr.US Grand Prix 2022, Austin, TX
How is Flickr measuring your audience: views and favorites
As a member of Flickr, you can not only look at the pictures posted by fellow photographers, but you are encouraged to also submit your own. Your contributions will be added to the “activity feed” of your followers, and, if you have submitted your image to a “group”, to the “activity feed” of all the members of that group. If they’re active on Flickr that day, there is a chance they will “view” the image you’ve posted.
Flickr do not encourage competition and won’t publish an official ranking of photographers, but, as a “Pro” member of Flickr, you are offered some statistics about your own audience, over a specific day, over a week, a month, or over the life of your account.
Flickr – the daily stats – here, the views
“Views” are a very flattering metric – is counted as a “view” any download of a specific image, irrespective of the time spent looking at it by the “viewer”.
Whether the image is closely examined by a fellow photographer interested in your creation process, or just browsed in one tenth of a second by a distracted scroller does not matter – “Views” are simply a reflection of the number of file downloads to the browser or the app of all end users.
The size of the image is not taken into consideration either: a thumbnail included in an email sent by Flickr to a distribution list will also count as a “View”, as long as the email has been opened.
In such an environment, a photographer with a large number of active followers will necessarily get more “Views” than another one with a smaller (or less engaged) follower population. And an image submitted to a multitude of groups will also have more chances to be “viewed” (that’s where an algorithm kicks in to prevent photographers from gaming the system by submitting a picture to hundreds of groups).
Flickr – the images with the most views
“Favorites”, on the other hand, counts the number of “Likes” a picture receives – it’s a humbling figure – an image can be viewed thousands of times (if submitted in enough active groups by a popular photographer), but only collect a few likes, or none at all.
I take pictures for pleasure, but I’m nonetheless interested in the feed-back of my peers – being able to see what clicks and what does not is one of the reasons to join a photographer community such as Flickr.
What makes an image “popular”? The subject and the groups to which the image is submitted are important, obviously, but does the equipment itself play a role? In other words, will my fellow photographers favor pictures taken with modern or expensive cameras, considering that they don’t know upfront what type of equipment was used? Is there a camera or a class of cameras that will harvest the most views and the most likes?
Ranked #1 in “Favorites” (tied with three other pictures) – Pinup, a French Bulldog Photo taken in 2005 with a Pentax *ist DS and its 18-55 kit lens.
Ranking by Views
I like to shoot with a bit of everything (like old cameras I buy on eBay or Shopgoodwill), but I have always had a recent “serious camera” for the important occasions, currently it’s a Fujifilm X-T4. Before the X-T4, I was shooting with a X-T1, and before that with a Nikon D80, which had replaced a Pentax *ist DS. I also shoot with a Nikon D700 from time to time (when I want to play with old Nikkor lenses), and with film cameras when I feel like it.
Now, the rankings…
Ranking by Views – the camera used to take my 10 most viewed pictures:
Image #1: shot with a Nikon D700
Image #2: shot with a Nikon D700
Image #3: shot with a Nikon D700
Image #4: shot with a Nikon D80
Image #5: shot with a Nikon D80
Image #6: shot with a Nikon D80
Image #7: shot with a Nikon D700
Image #8: shot with a Nikon D80
Image #9: shot with a Nikon D80
Image #10: shot with a Nikon D80
Surprising – it makes you wonder if I really needed to spend all that money upgrading to Fujifilm mirrorless cameras and lenses…
Views are a function of your number of followers, and to a certain extent to the groups you publish the picture to. If you publish an image to the “Nikon D700” or “Nikon D80″ group, you will reach more committed enthusiasts ready to look at images taken with the camera they love, than if you publish it to…”Industrial ruins of the Rust Belt” – and the view count will reflect that. Of course the subject matters – I had brought the D700 to a Formula One Grand Prix and to a trip to Istanbul, and I had spent a few weeks in Venice and Marrakech with the D80 – a glamorous sport and three exceptional cities are definitely attracting lots of viewers.
Ranked #1 (it was a tie) for favorites, and #3 for views – Venice, on Dec 25th 2010 – Shot with a Nikon D80 and a Sigma 18-125 lens.
Ranking by “Favorite” (top 10)
But the ranking of the number of “Favorites” shows a different … picture.
Images with the most favorites:
Tied for Rank #1, Image #1: shot with a Pentax *ist DS, Image #2: shot with a Nikon D80, Image #3: shot with a Nikon FE2 on color Film and Image #4: shot with a Holga on color film
then, tied for Rank #5, an image taken with a Canon Photura loaded with Ilford B&W film, another taken with an iPhone 15 Pro, an image shot with the Fujifilm X-T1, another by a Pentax K5 Mk2, a snapshot from a Nikon F3 loaded with B&W film, and last but not least a picture taken with the Fujifilm X-T4. All get the same number of “favorites”.
Film or digital, Nikon, Pentax or Fujifilm, recent or old, none of this seems to matter. A picture taken with a “Holga” ranks #1, while a photo taken by a very good “modern” dSLR (a Nikon D750 that I used for a few weeks) is #27. And the Nikon D700, which attracted so many viewers, could only convince very few of them to tag its images as “favorites” (its most favored image ranks at #63).
In a way, it is comforting. At least for an amateur photographer like me, gear does not matter that much. Or let’s say, the absolute performance of the camera – as measured in tests and discussed ad nauseam on Youtube or in specialized forums – is not that important.
I like it, but it ranked low in views and likes – Petra, Jordan – June 2018 – Fujifilm X-T1
If the camera does not really matter as far as the Flickr Views and Favorites are concerned, what does?
The subject? The user base of Flickr and the groups are so diverse that there is no specific subject that automatically brings views or favorites, like the videos of kittens on other social media platforms. No magic bullet to expect here.
Technically, and to a certain extent, the views and the favorites are dependent on how many people are scrolling their activity feed that day – you can have a superb picture and not garner many views or favorites, and because you’ve posted it on a slow day, or at the wrong time of day, or in groups with low or inconsistent attendance, it won’t have the viewers it deserves. You only learn with experience.
But then, assuming experienced Flickr users all have their personal little tricks to optimize their audience, what really makes the difference?
If you look at Flickr’s “Explore feed” and at what the photographers you follow are regularly posting in your “Activity Feed”, there are some really stunning images. Not necessarily perfect, technically. But different. Original, reflecting the vision and the personality of the photographer who created them. They make you stop, look at them, and say “wow!”
Invariably, these stunning images get lots of “Views” and lots of “Favorites”.
Because ultimately, it’s the eye and the heart of the photographer that make the difference.
Happy Thanksgiving.
Pictures taken with a modern camera get some love, too. Tied for #5 on the favorites ranking, this picture taken in Piedmont Park, Atlanta with a Fujifilm X-T4 and a 55-230mm lens.