Fujifilm – AX-5 to X-A5 with a stop at X-M1.

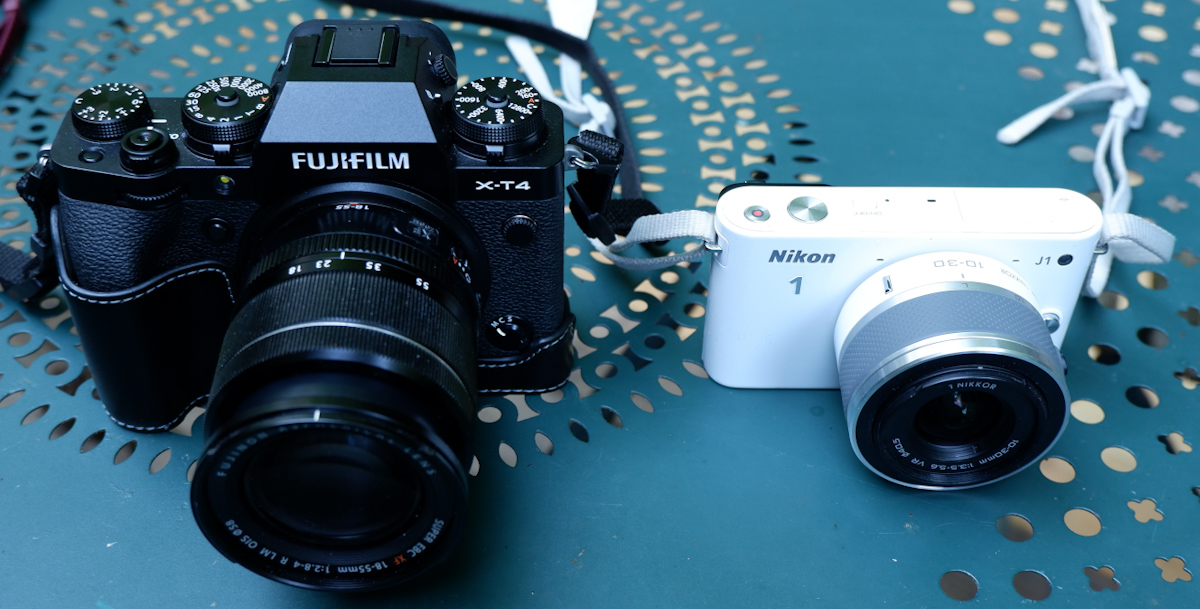
You have to love Fujifilm’s math. In the fall of 2024, they’ve released a new entry level APS-C mirrorless camera, the X-M5, which has been positively received by the pundits. In a way, it’s a combination of the characteristics of two defunct models, the X-M1 and the X-A5.

The X-M5 has been well received so far

I don’t own a X-M5 – and I don’t see why I would need to buy one at this juncture – but I’ve owned a X-M1 for a short while, and still use (and mostly like) the X-A5.

A quick review of the Fujifilm X-A5

In the days when the resolution of the sensors was low (12 or 16 Megapixel for an APS-C sized sensor), moire was a big issue, and camera makers had to place a low pass filter in front of the sensor of their cameras to mitigate the issue. But placing a low pass filter in front of the sensor limited the resolution of the images it produced even more. By developing their own Trans-X filter array as a substitute to the Bayer array that everybody else was using, Fujifilm was able to defeat moire without needing a low pass filter – boosting the real life resolution of their cameras. The X-Pro or the X-T1, for instance, were supposed to deliver images of the same quality as a full frame camera, because the performance of their sensor was not choked by a low pass filter.

It was a big thing 12 years ago. And as a result, Fujifilm’s Trans-X models could be sold at a premium.

Fujifilm X-A5 and XC 15-45mm power zoom. Equivalent to a 23-70mm on a 35mm camera.

In 2014, having launched the X-Pro, the X-100S and the X-T1, Fujifilm was ready to make Trans-X more accessible, and launched what could be described as a “premium entry level” model, the X-M1. Followed a few weeks later by its less fortunate little brother, the X-A1, where the Trans-X sensor had been replaced by a Bayer sensor. Premium vs Basic. Trans-X vs Bayer. Expensive vs cheap. As a premium entry level model, the X-M1 was not very successful, and the X-M line was abandoned rapidly. The X-A1, on the other hand, met its public, and was followed by a long line of models – the X-A2, X-A3, X-A10, X-A5 and finally the X-A7.

I’ve always liked small cameras, and I had bought a nice second hand X-M1. With a good lens and a static subject, image quality was extremely good (it shared its 16 Megapixel sensor with with X-Pro and the X-100S), but it was one of the Fujifilm cameras that had not transitioned to phase detection autofocus, and its contrast detection algorithm was slow and not very accurate – the camera’s keep rate on moving subjects was really bad, and I sold it rapidly (the same can be said of the original X-100 – I loved the images it produced, but far too many of them were out of focus).

The LCD display is articulated, and bright enough. Two control wheels on the right (the silver one is horizontal, the black one vertical). Not that common on entry level cameras.

The X-A line was probably the last to adopt Phase Detection autofocus in the Fujifilm line up, but when it did with the X-A5, it made all the difference. It’s a reactive and precise machine, and a joy to use.

Being a “A” model, it does not benefit from a Trans-X sensor, but with 24 Megapixels, its Bayer matrix sensor does not need a low pass filter and image quality is very similar to what you would get from a Trans-X camera like the X-H1 or the X-T3.

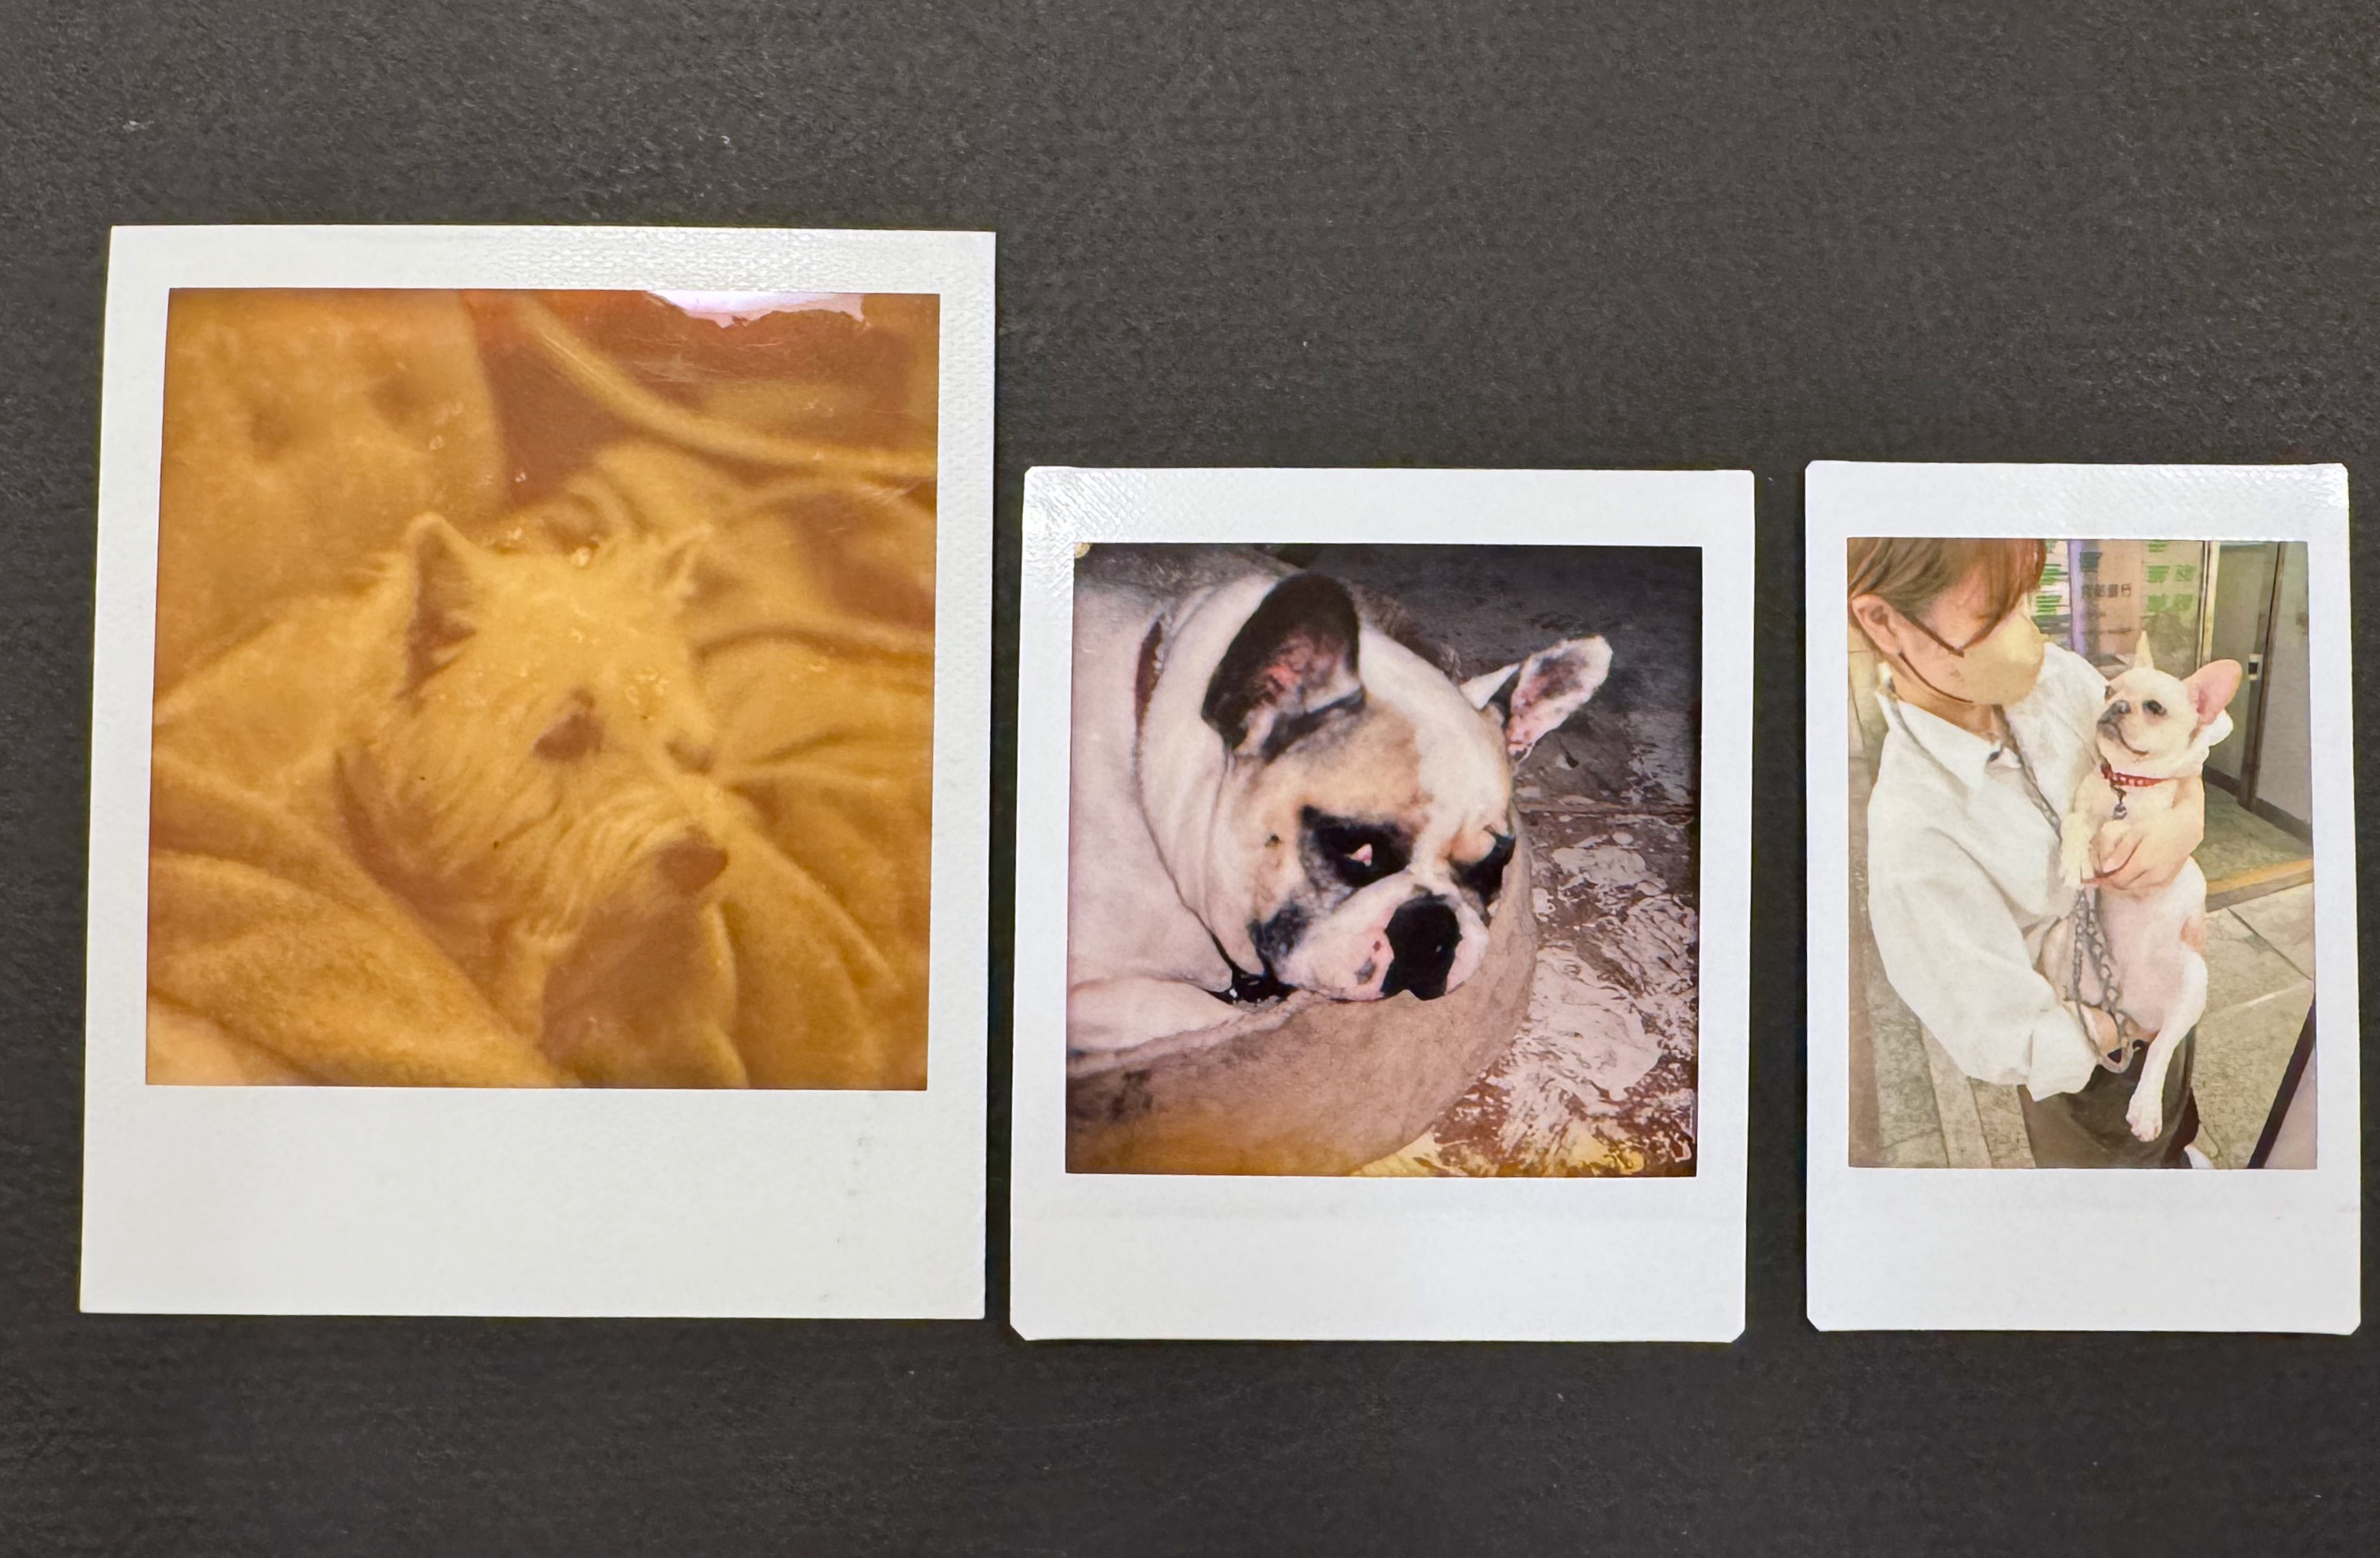
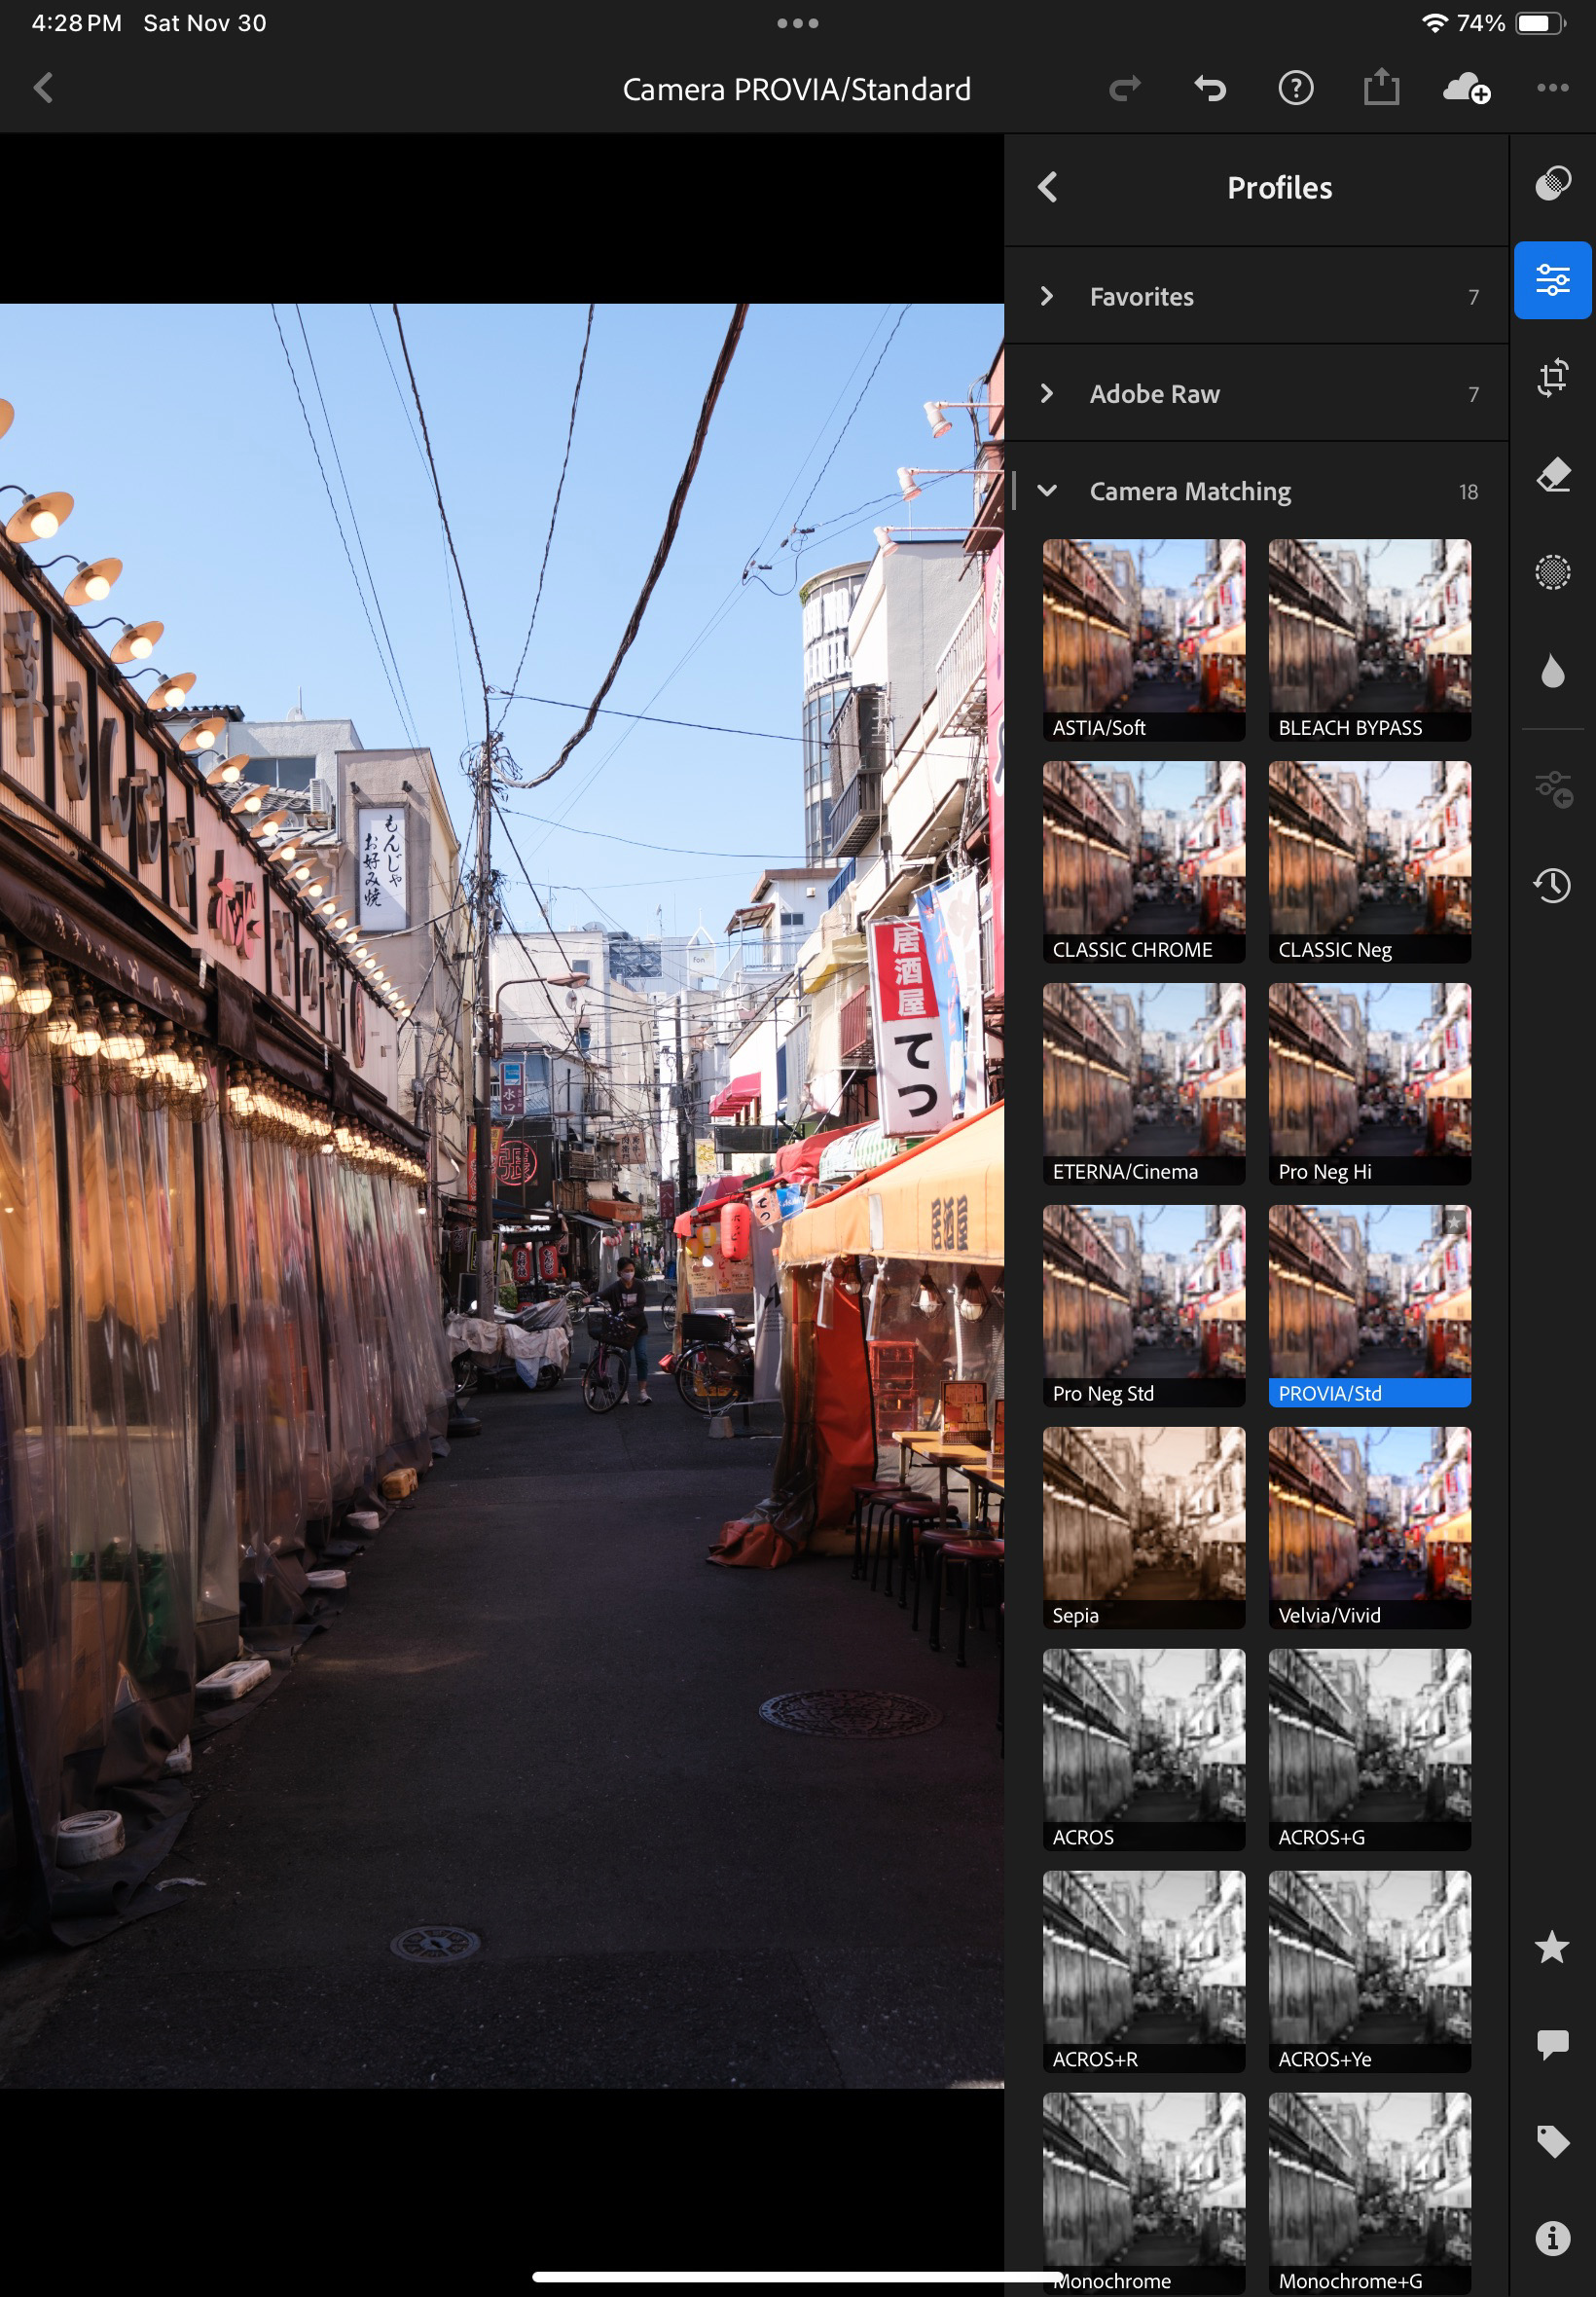
It’s an entry level model, but it’s not overly de-contented – and it’s built of good quality components (the rear display is articulated, and usable even under a bright sunshine). It’s a true Fujifilm camera, designed to produce Jpegs that can be used “out of the camera”, with all sorts of film simulations to personalize your images.

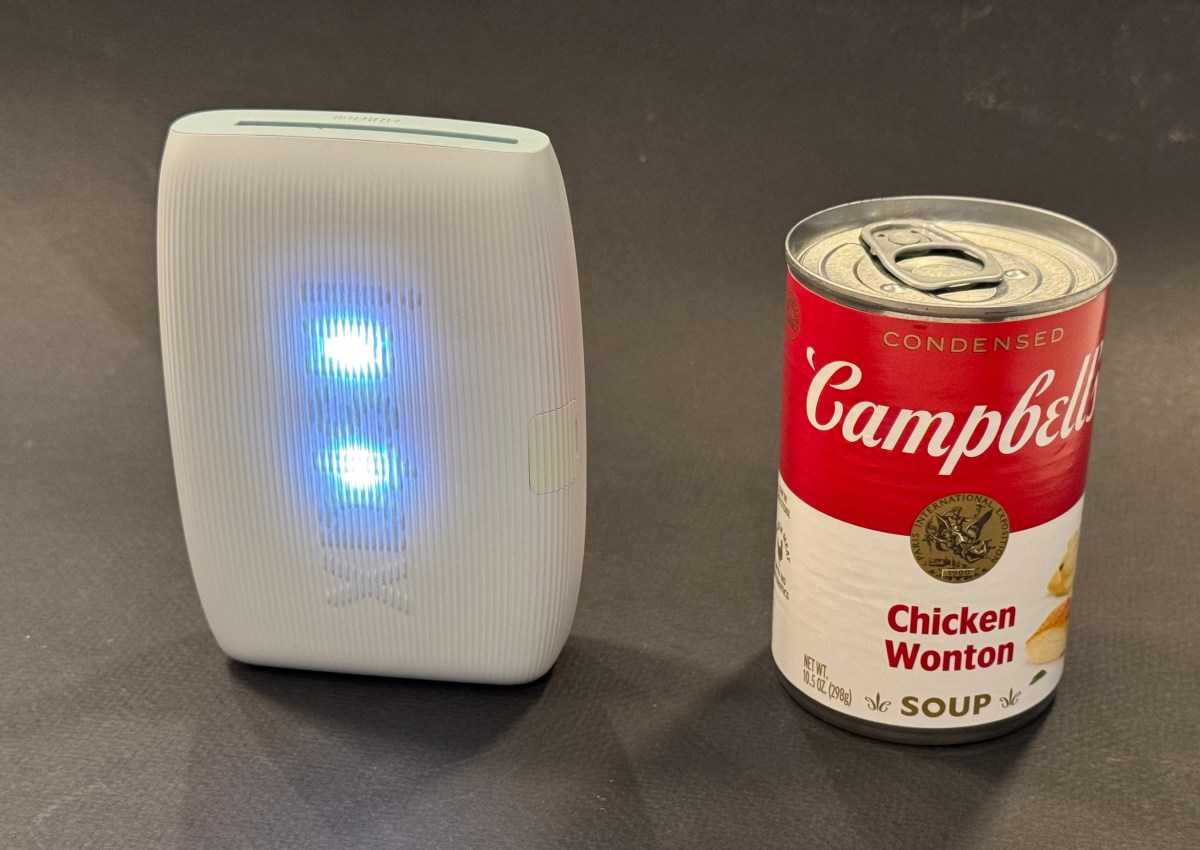
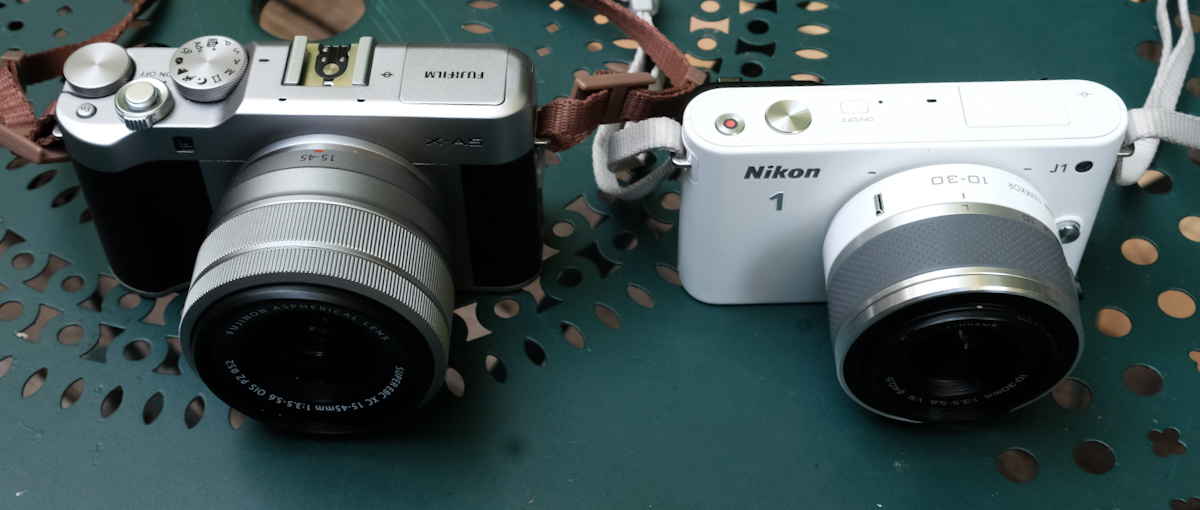
It comes with a 15-45mm collapsible Power Zoom, (the XC15-45mmF3.5-5.6 OIS PZ) which is very compact and produces images of good quality. I had used another copy of that zoom on a X-T1 a few years ago, and while the image quality was really good, I had been irritated by the “fly by wire” control of the focal length, at the same time too slow and over-reactive. I had also noticed it drained the battery of the camera rather rapidly. No such issue on the copy I’m using on the X-A5 (maybe the firmware of the lens has been refined, maybe shooting without a viewfinder forces the photographer to operate more slowly and masks the over-reactivity of the commands). In any case, its small size makes it a good fit for the X-A5. The body+lens combination is smaller than a Fujifilm X-100 – and than the most compact of the manual focus SLRs of the late seventies (Olympus OM-2 or Nikon FM).

Smaller than a “pancake” – a filter lens (fixed focus, F:8).

Without an electronic viewfinder but with a power zoom, the X-A5 is definitely in a different category than an X-T or X-H camera. Fewer controls are available (no AE or AF lock buttons, no joystick, for instance), but the touch screen is very usable, the Q menus easy to navigate, and the two control wheels let the photographer adjust all the important parameters (speed or aperture or exposure compensation) on the fly. Ultimately, it’s a trade-off: it’s a small and light camera, and even if it’s not as powerful as a “big” X-T or X-H with a constant aperture zoom, it will be far less of a pain to carry around, and it is my camera of choice for casual photography.

The most serious gripe I have is not directly at the camera, but at the inconsistency of the way the aperture is set on Fujifilm lenses. If you’ve started using Fujifilm cameras with the X-Pro or the X-T1 and fixed focal length lenses (or one of Fujifilm’s high-end constant aperture zooms), you’ve been used to setting the aperture on the aperture ring of the lens, like you would have done with a manual focus SLR in the seventies. But cheaper sliding aperture zooms have an aperture ring with no marking, and entry level zooms (like the one coming with the X-A5) have no aperture ring at all. Which means you must use the control wheel to set the aperture , and check the aperture value on the rear LCD display. At the top of that, the control wheels are not always located at the same place on the body of the camera. It depends on the model. It’s not an issue if you shoot exclusively with an X-A5, but confusing if you alternate between a “big” X-T (or X-H) and a “small” X-A5 body, or between expensive and cheaper lenses.

This tiny lens is available in Japan. It gives the “sixties Instamatic” look to your pictures.

When you’ve used a recent Fujifilm camera (anything they’ve launched in the last four years), you’ve most probably connected the camera to your smartphone using Fujifilm X-App, which takes advantage of Bluetooth and Wifi to make photo transfers, remote control and firmware upgrades with ease. That’s something that you will miss on the X-A5, which has to rely on the older and more cumbersome Cam Remote.

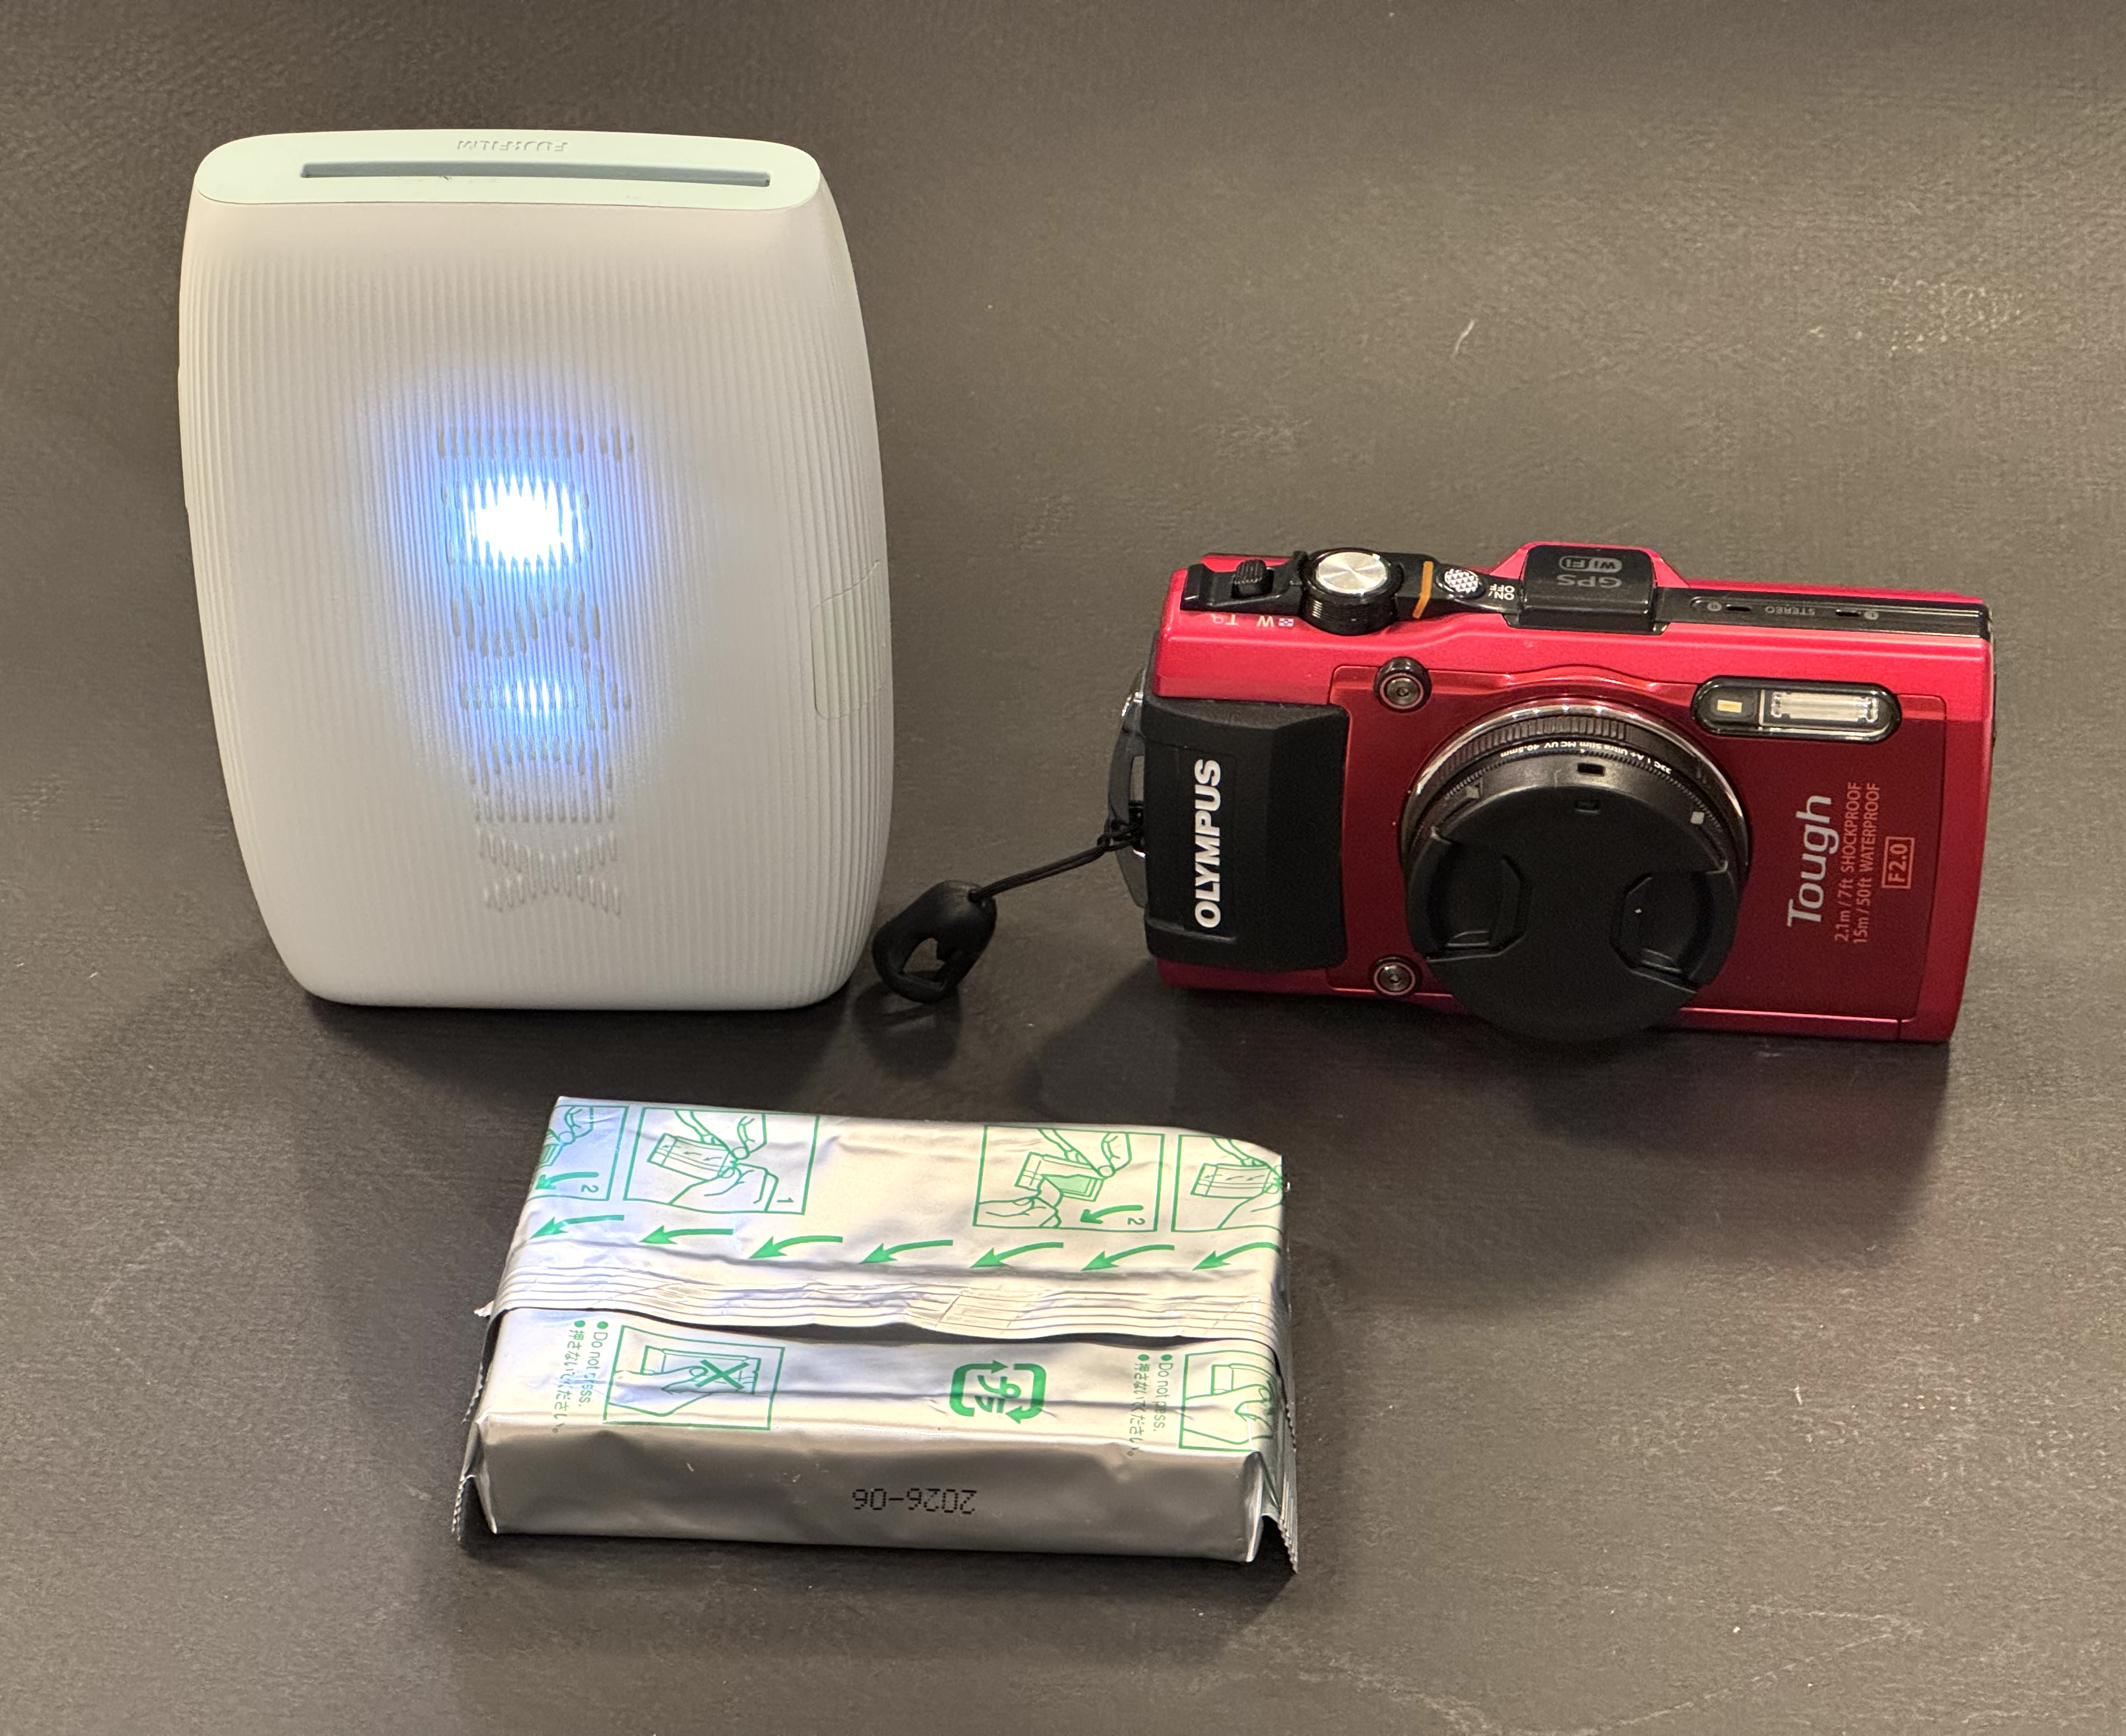
The X-A5 is a tad too big to be the camera I always carry with me – that would be role of the Olympus Tough TG-4 or the Fujifilm XQ2 if I was not so lazy and generally used my phone to take pictures – but it’s a good camera for casual sorties – like a walk in an old neighborhood or a week-end in an interesting city – when I don’t want to schlepp a bigger X-T and its heavier lens. Even with the 15-45 kit lens, you don’t lose much in terms of image quality. Overall, it’s a very pleasant camera, and a keeper.

The X-A5 was launched in 2018 and replaced with the X-A7 in 2020. It can be bought second hand for approx. $300.00 (body only), while nice copies can fetch up to $500.00 with the kit lens and OEM batteries and chargers.

What about the X-M5? It’s an M series camera, and as such it benefits from a Trans-X sensor, in this case the 26 Megapixel chip also seen on the X-T4. And its video section has been seriously beefed up, because that’s what the market is asking for at the moment. As Fujifilm’s entry level camera, it has been priced very aggressively, and if it’s as good (compared to its peers from other brands) as the X-A5 was six years ago, Fujifilm got themselves a winner.


Marietta – GA – Not bad for an entry level mirrorless camera (Fujifilm X-A5, XC15-45 Power Zoom)
Marietta, GA – Fujifilm X-A5 and XC15-45 Power Zoom.

APS-C – what does it mean? A long time ago, when film was still king, Kodak and the leading camera makers decided to launch a new film format, which was supposed to address some of the shortcomings of the well known 135 (aka 35mm) film format, save on silver halide, and bring more revenue. That format was named APS.

The film (and the cassette containing it) were smaller than the conventional 35mm film and cartridge. APS cameras offered the choice of three form factors: the default showed the same 3:2 proportions as the 35mm negatives or slides, but at a reduced 0.66 scale. It was named APS-C. A second form factor, APS-H, placed the images in a frame of 16:9 proportions and APS-P produced panoramic pictures.

When camera makers started designing dSLRs in the late nineteen nineties, the chip foundries could not manufacture full size sensors (sensors of the same size as a 35mm negative) at a remotely acceptable cost. Nikon and Canon had to adopt smaller sensors, which were roughly the size of the APS-C negatives. It became a sort of standard, and we still use “APS-C’ to designate an image sensor of 24x16mm. Approximately 10 years later, sufficient progress had been made in the chip foundries to make “full-frame” sensors commercially viable. Today, Canon, Nikon, Pentax and Sony sell interchangeable lens cameras of two sensor sizes, APS-C, and Full-Frame. Fujifilm is primarily selling cameras with APS-C sized sensors.


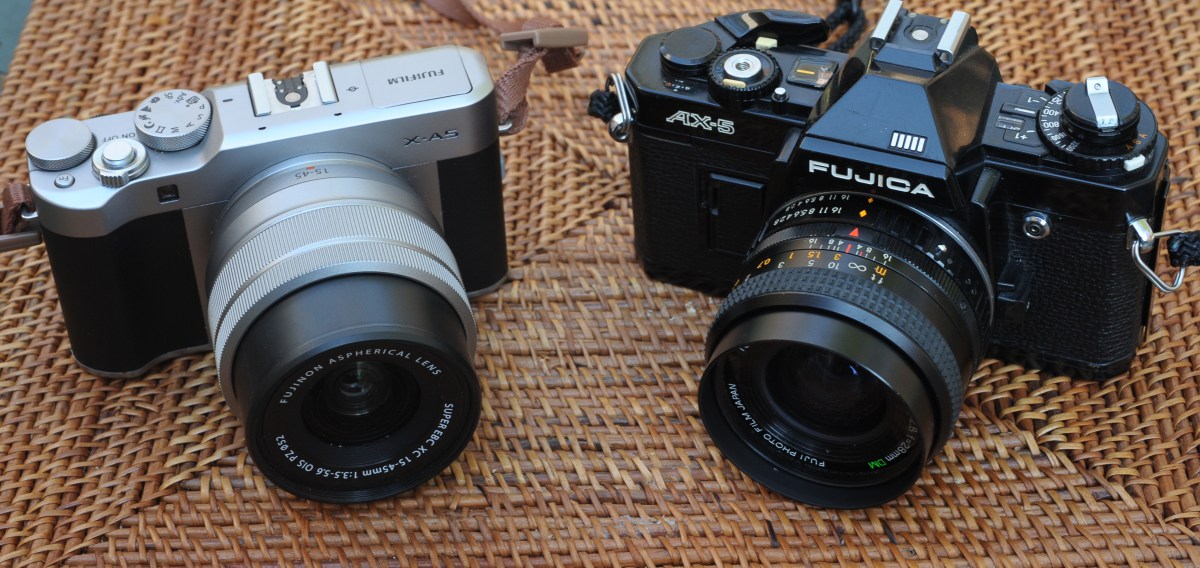
Fujica AX-5 and Fujifilm X-A5. Fujifilm have been in business for almost a century, and at some point sold their cameras under the Fujica brand. They later sold them as “Fuji” before settling on “Fujifilm”, right when the market started moving to digital. Go figure. But they’ve always had a fondness for the letter “X”. In the late seventies/early eighties, they had a whole range of SLRs named AX-something (AX-1, AX-3, AX-5, AX Multi…). They were not bad by the standards of the time, but certainly not as good or popular as their competitors from Canon, Minolta, Nikon and Pentax.

An APS-C digital camera smaller than a 35mm SLR (the Fujica AX-5) : not that frequent, unfortunately.

Mission Concepcion – San Antonio, TX. Fujifilm X-A5 and 15-45mm lens. There was some clutter at the left of the stairs. It was removed in post processing by Lightroom’s AI.

More pictures in CamerAgX’s Flickr gallery

One last look at 2024….

This blog is running on WordPress, and they provide basic statistics about this site’s traffic, that I’m sharing with you.

Approximately 52,000 of you visited Cameragx.com last year, for a total number of 69,000 page views. Those numbers have been fairly constant over the last few post-COVID years. Thank you.

As can be expected (since this blog is written in English), traffic is originating primarily from English speaking countries.

More interesting is to look at the most popular posts.

CamerAgX in 2024 – most popular pages

Pentax P30, Fuji STX-2, Yashica FX-3 Super 2000, all entry level, manual focus, single lens reflex cameras primarily used by learners, and less expensive than the Canon AE-1 that people new to film photography tend to buy as their first film camera.

A few years ago, there was more interest in Nikon cameras, and less in Pentax SLRs.

the same stats collected in January 2020

There seems to be a constant interest for all things Fujica, Fuji and Fujifilm – I happen to like to current crop of Fujifilm digital cameras, and a few of their SLRs from the seventies – I still believe that the ST-801 is an all time great. In-between, there are cameras like the bayonet mount SLRs from the late seventies (the AX series) which are not very well known, and for which CamerAgX is one of the rare sources of information. By the way, the index of all the cameras reviewed in those columns has been updated recently.

Recently, I’ve introduced more content related to digital cameras or to the digital workflow, but I’ll keep on reviewing film cameras in the future as well – with a focus on relatively unknown, still inexpensive, really compact cameras of the eighties and nineties.

Feel free to provide suggestions.

That being said, I wish you a Happy New Year, and plenty of success in your photographic endeavours.

X.T.


Tokyo – Tea at the Hamarikyu Gardens – Fujifilm X-T4
Tokyo – Tsukiji River – Fujifilm X-T4.
Tokyo – sake barrels at the Meiji Jingu – Fujifilm X-T4

Adobe Lightroom (s) – trying to make sense of it all

I started using Lightroom on a Mac in 2008, when “Photoshop Lightroom 2” was launched.

I upgraded regularly up to Lightroom 6, and kept on working with this version until I started progressively using Lightroom Mobile on iOS and iPadOS devices. At some point this year I came to the conclusion that I was not using Lightroom 6 and the old Mac anymore, that all my recent pictures were cataloged and processed on the iPad, and that it made sense to migrate my Lightroom 6 catalog to Adobe’s Creative Cloud.

Using the “Lightroom mobile app” on a iPad – I had not seen how fundamentally different the new cloud based Lightroom was from the old PC or Mac based versions. When some features were absent, I had just assumed it was due to limitations of the iPad or to restrictions imposed by Apple. It’s only when I started considering migrating my Lightroom 6 catalogs to the “new Lightroom” that I could see that Lightroom was at best an umbrella brand, and that there was little in common between the Classic and the (non-Classic) Lightroom.

San Juan, Puerto Rico – shot in 2008 – when I started using Lightroom.

Lightroom 6 and Lightroom Classic are conventional desktop and laptop based applications, that keep a local catalog of the images, and store them on directly attached hard drives and on network attached storage.

The new Lightroom (currently known as “Lightroom”) is a totally different animal. The storage of the images is taken care of by Adobe’s own Creative Cloud. The end users can upload, catalog and edit their images from a Web Interface running in their favorite Web Browser, or from a thin application layer running on smartphones or tablets (iPhone, iPad and Android devices), or on conventional laptops and desktop PCs or Macs. This application layer does not store the images permanently – it just downloads them from the cloud to a local cache when the photographer wants to work with them.

Now, let’s stop for a minute. Yes, you’ve read it right – Lightroom Classic (with the local catalog pointing to the local storage) and the new Lightroom thin app with its cloud storage can run simultaneously on a PC or a Mac. Depending on how you set them up, they will or will not keep their respective collections in sync. In sync, but separated and largely independent.

San Juan, Puerto Rico – Nikon D80 – April 2008

What I had not understood was that even if they look similar upon a cursory examination, Lightroom Classic and Lightroom (the new, cloud based Lightroom) are largely incompatible. Each lives in its own universe – they share pictures and edits transparently, and seem to cohabitate in perfect harmony – but they remain in separate worlds.

You fully realize how different the two products are the day you decide to abandon Lightroom Classic and its local storage, and start considering working exclusively with “Lightroom” in the cloud universe. Naturally, you will want to bring your catalog of Lightroom Classic images to the Creative Cloud, and that’s when you’ll start feeling the pain.

Because the migration of your Lightroom Classic catalogs is painful. In fact, there is no migration as such. When you export a collection to the cloud, Adobe retains your original image as transferred from the camera, but all the subsequent edits to that image will be aggregated in a single all encompassing step. Basically, you will get your original, and the final state of your image after all the edits have been applied. Adobe will also retain the metadata of the picture, the information you have added (title, comments, keywords, flags, stars) but not much else. The original folder structure on your local disks, the smart collections, the photo albums, the slide shows, even geo tagging information – won’t be transferred and will therefore be lost.

Near Pienza, Italy – Fujifilm X-T4 – July 2024, after I definitely switched to “Lightroom mobile app”

It may seem like a huge loss. But I’m an amateur and don’t make a living from my pictures. I’ve already printed the photo albums I needed to print, shared the slide shows I wanted to share, and won’t need to go back and rearrange them. As long as I can keep my pictures as they were when I was finished editing them, I’ll be fine. Having the ability to return to my images from any device, anywhere, without having to worry about storage devices, RAID arrays and off site backups, without even a laptop, has more value to me than the layout of a few photo albums.


Naming conventions….

Adobe has kept changing the names of its “Lightroom” products, and even today, they are not perfectly consistent.

The conventional PC/Mac version of Lightroom, with its local storage, its local catalog, and its very broad feature set, is known as “Lightroom Classic“. Abbreviation: “LrC”

The “new” Lightroom, combining cloud storage and a thin interface running on a browser, a smartphone, tablet, PC or Mac is simply known as “Lightroom“. Some people still call it “Lightroom Creative Cloud” or “Lightroom CC”. But it’s “Lightroom“, abbreviated as “Lr” in the dock of a Mac or a PC, and on the Home screen of a mobile device.

When it’s running on a smartphone or a tablet, “Lightroom” is designated officially as “Adobe Photoshop Lightroom mobile app“, but it’s still abbreviated as “Lr”. The Lightroom mobile app is free but its feature set is limited. In order to work with RAW files, store images in the Adobe Creative Cloud and play with the new generative AI features, you will need to subscribe to Premium features (and you will be using “Adobe Lightroom mobile app with premium features enabled“, abbreviated as “Lr”, of course).


More about the differences between Lightroom Classic and Lightroom when it comes to storage


Did you recognize them?

“The Fathers of Technology” : Charles Babbage, Nikola Tesla, Vannevar Bush, Alan Turing, Claude Shannon and Steve Jobs. Corner of Tremont Street and Frazier Ave – Chattanooga, TN

Fujifilm Instax Printer: the gift that keeps on giving

You “take” pictures, but how do you “give back” to the people you’ve just photographed? Here is a suggestion: print the pictures, and give the prints, on the spot, right after you’ve shot them. It’s a nice gift to family and friends with whom you’re sharing good moments, and to the people who have generously let you capture their image, and, maybe, a bit of their soul.

Very few people still create photo albums. Because nobody has prints. Composing a photo-album online takes time, effort and money, and it can be one to two weeks before you receive it. Printing a selection of images on a pocket printer is an easy way to create pocketable photo albums with no hassle; wherever, just when you feel like it, for not much money. Instant gratification.

No Campbell Soup for you – the mini Link 3 is about twice the size of a compact camera. It’s totally wireless and the battery is good for 100 prints between two charges.

There are many more ways to use those mini-prints: in Japan school girls insert their Instax prints in plastic cases that they use to accessorize their bags, and I create my own personalized luggage tags – you won’t confuse my suitcase with anybody else’s. Your imagination is the limit.

How does it work?

Fujifilm sell their instant film in 3 sizes: Instax Mini (the image is roughly the size of a business card), Instax Square (a bit larger, and square), and Instax Wide (twice the size of the Mini). They manufacture cameras for each of the three formats, as well as dedicated portable printers.

Comparing print sizes: Polaroid SX-70 vs Fujifilm Instax Square vs Fujifilm Instax mini.

Other makers of pocketable printers use different technologies (zero ink paper, generally) but with Fujifilm, it’s about silver halide, of course. Once a print is ejected from the printer, the image needs a few minutes to fully develop, but it’s part of the magic of instant film. Today we’ll focus on Fujifilm’s Instax Mini Link 3. It’s a pocketable, battery operated printer, that, when paired with a smartphone and loaded with a 10 print Instax Mini pack, will print business card size pictures. Of course, there’s an Instax Mini Link app to download and install on your smartphone.

Images can be printed directly from the photo gallery of the mobile device (with Fujifilm’s default settings), but the output will be better if you first bring the images in the Mini Link app, play with the contrast slider (I always boost it a notch), and print them from there.

The Mini Link app. For me “Simple Print” will do.

In my experience, the Mini Link transposes the colors and the exposure of the original picture accurately, and its prints are more defined and massively nicer than what you would get if you took a picture with a Fujifilm Instax camera. The Instax film is a much better performer than the very basic Fujifilm cameras designed to consume it, and the printer takes advantage of its potential. When you start from a good picture taken by a smartphone (or a dedicated camera), you’ll be happy with the prints.

The mini Link app and its basic settings.

I understand why people use instant cameras. There is a “fun”, almost magic component to it. But instant cameras are bulky, the quality of the prints generally poor, and if by pure luck you get an interesting picture, it will be unique, and the only way to share it will be to take a photo of it with a smartphone, and print the copies. From a totally dispassionate point of view, it’s a rather inefficient and wasteful way to use a pack of film.

No such issue with the Instax printer. You lose some of the magic – it’s not as “immediate” as pushing the shutter button on a Instax camera and the results are not as unpredictable – but you only print your good images after you’ve had an opportunity to crop them and tweak the exposure parameters on your smartphone. Your “keeper” rate will be very close to 100%, and you will print as many copies as your budget (and your patience) allow.

The image is being printed. It only takes a few seconds.

There is not much else to say about the Mini Link. It simply works. Prints are small and but good enough for the intended use – reminiscing of good times spent with loved ones, and instantly sharing a token of appreciation.

The mini print and one of the mini photo albums proposed by Fujifilm. This one is not particularly nice but came for free with an Instax camera.

The Mini Link 3 comes in three different colors (mine is “matcha green”) and sells for approximately $100. Prints cost a bit less than $1.00 each. I’m leaving mine permanently in my photo bag, and share the love whenever I can.


Hybrid Instax cameras: In addition to conventional “analog” Instax cameras and pocketable printers, Fujifilm also has a few hybrid Instax cameras in its lineup (Instax LiPlay, Instax Evo). Hybrids can be described as Instax printers, with a tiny 5 Megapixel sensor and a lens in the front, and a small color display at the back, packaged as a compact integrated device. The camera captures a digital image, that the photographer can evaluate on the color display, and decide to print, or not to print. Because the images are captured as digital files and saved on a micro-SD card, they can be edited, printed once or multiple times (in camera), and uploaded to a smartphone.

Zero Ink paper – if you over simplify, it’s not dissimilar to the thermal printer technology used to print receipts at the cash register or at the gas pump. But nicer, and more stable over time. The photo paper contains microscopic dye crystals that are initially colorless, and change color when they are heated. I had tested a Zero Ink (Zink) printer from Polaroid a long time ago. The prints aged well. Polaroid, Kodak and Canon are currently selling pockable printers integrating Zink technologies.


Fujifilm’s marketing campaign.

Lightroom for Mobile Premium: migrating images from Lightroom 6

In a previous post, I was debating whether it made sense for me to adopt Lightroom for Mobile and rebuild my workflow and photo cataloging process with it – and the answer was mostly Yes. I had concerns about the inability to perform bulk tagging over an album. I have not found a perfect solution – tags can be copied and pasted from one picture to another one, but as far as I can see, you have to paste the tags on every picture individually. Not ideal.

Step #1 : select the folder or the collection to migrate in Lightroom 6

The big unknown was whether I should also migrate my old Lightroom libraries to Adobe Cloud as well. I checked – I have 30,000 photos on my network storage (a mix of proprietary RAW files from Nikon, DNG files and JPEGs). But they only consume 300 GB on the NAS (that’s an average of 10MBytes per picture if you do the math), and it’s likely that nearly half of those images are duplicates (images were generally copied from the memory cards and saved as Nikon proprietary RAW files, then converted to Adobe’s DNG format and saved again). And I tend to keep every image, good or bad, when most pictures should have been culled a long time ago. So, maybe less than 100 GB of keepers. Adobe Cloud storage fees will not send me to the poor house.

Step 2 – select the pictures and right click to export them (here as jpegs).

Originally, I thought I would simply be copying my old Lightroom 6 catalog file to the Adobe Cloud, and that Adobe would do the rest. It’s simply not the case.

Firstly, not everything is migrated: the history of the edits, the folder structure, the books, slideshows, and smart collections and a few other things don’t make the trip to the cloud (I assume they remain available on Lightroom Classic if you keep licensing it after the migration to Lightroom, but I could not validate this statement for the reason exposed in my second point). For all practical purposes, it looks like Adobe Lightroom Classic and Lightroom (in the Cloud) are two significantly different products – and that a lot is lost during the migration.

Secondly, Lightroom catalogs and files can’t be uploaded to the cloud by Lightroom 6. The migration to Adobe’s cloud can only be performed from a recent version of Lightroom Classic, and upgrading from LR6 to LR Classic is a necessary first step. You can get a 7 day trial version of Classic, so it’s not directly about money. The problem is that Classic only runs on a recent PC or Mac (Windows 10 or better, MacOS 13.1 or better) – and my Mac is an antique by their standards – it won’t run LR Classic. There are other constraints I did not even explore like finding more local storage for the Lightroom cache (with Lightroom, images are stored permanently and at full size in the cloud and replicated to a cache on the PC or the Mac only when they are needed), because I was not going to upgrade to a new Mac just to be able to migrate my Lightroom catalogs.

Thirdly, if it sounds clear as mud to you, you’ll be comforted in knowing you’re not alone – from Adobe’s Community Support:

From Adobe’s Community Support

So, considering all of the above, I decided NOT to migrate my Lightroom catalog to Adobe’s cloud. Instead I’ll export already developed JPEGS from Lightroom 6 to Lightroom Mobile, collection by collection.

Step #2 (continued)

I don’t think I’ll miss much. Because so much is lost during the catalog migration, just exporting the Jpegs is going to be almost as good. I’ve been using Lightroom Mobile for a while now, and anything I’ve shot in the last 24 months and that I may need to edit again has already been uploaded to Adobe’s cloud. Anything older than two years was culled and processed in Lightroom 6 a few days after it was shot, and it’s unlikely I’ll need to go back to the original RAW or DNG files and process them again. Keeping the good pictures as JPEGs in Lightroom Mobile makes me laptop free, with images always accessible, easy to consume and share. And if I ever need to re-process a 15 year old RAW file, my Lightroom Folders and Albums are mimicking the folder structure I have on the NAS, and finding the image I need will be easy.

Step #3 – in Lightroom Mobile, create a folder and and album, and press the Add Image icon (bottom right)
Step #3 (continued) – Add photos from Files (because they’re saved on an external volume)
Step 3 (continued) – Select the folder where the photos to be imported are located.
Step #3 (continued) – Select the images to import
Done.

One thing I took great care of testing was how the metadata associated with each picture was migrated to Lightroom Mobile.

I exported the images as JPEGs, and they reflect the last changes made to the image in Lightroom 6 – if the original image was cropped, its sliders moved left and right, I won’t know it because the log of the edits is not incorporated in the JPEG that Lightroom generates. In other words, the images will be exported in their most recent state without their history, and no roll back of the settings will be possible.

On the other hand, anything else is incorporated into the JPEG image – the metadata recorded originally by the camera or the film scanner, of course, but also the title, captions, keywords and even the flags and the stars added by the photographer and associated with the image in Lightroom’s catalog.

Importing the JPEGs to Lightroom Mobile (or Web) is a breeze – connect the media containing the files to the iPad or to a desktop/laptop (using the Web version on Lightroom in that case), create a folder and an album in Lightroom, and upload the pictures.

The Metadata is preserved during the transfer
Including the keywords

Experience has taught me that no technical solution is perfect, or eternal. I’ve seen Apple iPhoto and Aperture being abandoned, Lightroom migrating from a perpetual license to a subscription model, and multiple online image storing and sharing services fall into irrelevance or disappear.

At this moment, Lightroom for Mobile with Premium features meets my needs, and I expect it will remain the case in the next few years. Eventually with an upgrade to 1TB of storage. The product is already mature, and it allows me to be laptop free – at least when it comes to photography. I expect Adobe to keep on working on their product. They’ve already started adding AI powered features to make photo editing or masking easier. I simply hope they will also find the time to address some of the little issues that irritate me.

In the rolling grasslands East of Calgary, Alberta – Fujifilm X-100 – June 2016.

More about the migration from Lightroom Classic (with local storage) to Lightroom (with cloud storage).

From the horse’s mouth: https://helpx.adobe.com/lightroom-cc/using/migrate-to-lightroom-cc.html

Portsall harbour – the picture was shot on film in 2002 and preserved through multiple migrations (film to scan to CD to iPhoto to Aperture to Lightroom 2 to 6, then to Lightroom Mobile)

Lightroom for Mobile Premium – is a laptop-free workflow really a possibility?

The times when an amateur photographer could wait for a week or two before receiving a set of prints are long gone. With everybody around us shooting with smartphones, we need to publish the pictures taken with our “serious” cameras very rapidly, in a matter of hours if not minutes, if we don’t want our pictures to be yesterday’s news. And since we’re also taking a lot of pictures with our own smartphones, we need a tool that can manage seamlessly our “serious” and our “smartphone” photos and publish them together.

The “photo” app of mobile devices have limitations (editing, cataloging, noise removal and RAW processing are weak); apps and (sometimes services) offered by camera companies are even weaker. Very often, only lower res version of images can be uploaded through a WiFi connection, and sometimes they’re down sampled so drastically they become hardly usable. As for the proprietary cloud offerings of the camera makers, they still have to make a mark. There is real opportunity for a company specialized in image processing tools to shine.

Lightroom for Mobile on an iPad. Some albums are “virtual” and created by default by Lightroom, the rest are “yours”.

Then comes Adobe with Lightroom. Adobe’s Lightroom is primarily a non destructive photo editing tool, with strong cataloging and integration capabilities. In its current iteration, it’s a combination of features made available by software deployed locally on a device running Windows, MacOS, iPadOS, iOS or Android, and of services provided over an Internet connection, with everything tied by a common user interface.

Adobe makes a free version of Lightroom available on IOS, iPadOS and Android, but it’s very limited (no RAW processing, not many image editing options, no online storage, no AI tool) – you can question its real purpose beyond maintaining a presence in the app stores.

Lightroom applies Profiles to images – Adobe has its set of universal defaults, augmented by the profiles dedicated to a specific camera (here, a Fujifilm X-T4)

Enabling the Premium features – at $5.00 per month on the iPad – addresses those limitations. Lightroom for Mobile Premium processes RAW files, gives access to Adobe’s cloud where it includes 100 GB of storage, and to some AI goodies. That’s what I’m going to review. iOS (iPhone) or an Android versions of Lightroom are generally similar but not 100% identical.

Lightroom for Mobile offers more than Apple’s Photos app. Here, the S curve.

How does it work?

Because of the way the memory of the iPad is managed and protected, Lightroom can only work (edit, catalog, sync to cloud) with images you have imported in the memory space dedicated to the application. You can import images from Apple’s Photo app (it’s seamless) but if you have paid for Lightroom’s premium features, it’s likely that you expect more than what the camera of the iPad can deliver, and better than the low res jpegs that the photo import app of the manufacturer of your camera: you will import images (jpegs, HEIC or RAW) from a storage volume (generally the memory card of your camera), thanks to a reader that you will attach to the usb port of your tablet.
The images remain in a local cache as long as you are working on them. Lightroom takes care of controlling the size of the cache (images are sync’d to Adobe’s cloud as soon as a solid Internet connection is available).

One of the issues with Lightroom on iOS or iPadOS: metadata can’t be added in bulk – each image has to be reviewed individually.

From there on, Lightroom for Mobile with Premium features  ( what a mouthful) behaves more or less like the “full-size” version of Lightroom.

Let’s review what’s great and not so great with Lightroom for Mobile.

What’s great about Lightroom for Mobile

  • Seamless integration with an PC or a Mac running Adobe Lightroom Classic with a large enough Adobe Cloud storage subscription (same images, same edits, same albums, same cloud storage). They can be used in parallel and complement each other.  
  • Seamless integration with Apple’s Photo app, with the iPad file store, and generally iPad apps. And the integration works both ways (imports Photo images in Lightroom, export Lightroom pictures to Apple Photos). You can really create a Lightroom album composed of images taken with the camera of the iPhone and of images imported from a conventional camera.
  • Lightroom also augments the basic capabilities of smartphone or tablet apps; Lightroom can take control over the device’s camera and shoot directly in RAW.
  • Images can be exported out of Lightroom in different formats. As a result, the base promise of Lightroom Mobile: import images from a camera at full resolution, tag, edit and publish them (more or less easily) on many media, apps and social networks – is fulfilled with minimum hassle.
  • Lightroom does not consume too much memory space on iPad (it manages a local cache intelligently)
  • it offers enough to support a Raw or a JPEG/HEIC workflow, at least for an amateur taking a few dozens pictures a day.
  • because it’s a combination of Software as a Service and mobile app, updates are frequent and the product is regularly improved. 
  • Generative AI options are included in the subscription. They’re not perfect but they help – no need for Photoshop most of the time.
Edited images can be exported in different formats and different levels of resolution.

What’s not so great:

  • The confusion about versions, product capabilities , subscriptions: the definition of the different Lightroom products changed multiple times over the years, the offerings are still different depending on the platform, there are incompatibilities between versions, the bundles are inflexible and force you to subscribe to Photoshop. At the moment, “Lightroom” designates the version running on Mobile and in Web browsers, as well as on PCs or Macs, with the images stored in the Adobe Cloud. “Lightroom Classic” is the PC and Mac only version, and depending on the application settings, your images will be stored locally or in Adobe’s Cloud.
  • Lightroom for iPadOS is not totally similar to Lightroom Classic for Windows or MacOS – important features are missing (metadata batch update, side by side comparison of  images, ordering printed photos albums, to name a few);
  • The iPad version is also missing features compared to the Android version (updating the metadata of multiple images at the same time, for instance). But the opposite is also true (iPad has features that Android tablets don’t have). 
  • Beyond 100 GB the cloud storage upgrade options are available by increments to 1TB for roughly $10.00 /month.
  • If you don’t want to pay for more Adobe’s Cloud storage, you will need to pay instead for a license combining Lightroom, Lightroom Classic and Photoshop for $9.99 / month, and keep the storage local (* on Dec 17th 2024, Adobe have announced they would stop offering this option to new users). Lightroom Classic will run on a laptop/desktop, and the images will reside in local drives (directly attached hard disks or NAS). But that will require you to own a laptop or a desktop, configure redundant storage (mirrored or in RAID arrays) and subscribe to an off site backup plan. Also, integration with Lightroom for Mobile will not be so seamless anymore, and will require some planning before off site expeditions, since the cloud storage is limited to 20GB.
  • If money is no (or less of an) object, you will opt for the combined Lightroom+Lightroom Classic+Photoshop license, which comes with 1TB of storage, for $19.99 / month. Additional storage will cost you roughly $10.00 per additional TB. It’s the most flexible but also the most expensive solution.
Edited images can also be “Shared” with other applications residing on the iPad. “Share” plays the role of Connectors on Lightroom Classic.

Conclusion

So, is a laptop-free Lightroom workflow a possibility? At this moment,  for an amateur like me, Lightroom Mobile, despite irritating limitations, will be good enough most of the time, and has unique capabilities: it’s the only practical way to work on the pictures taken with my “serious” camera, catalog them and share them while on the go, without having to carry a laptop. I just need my phone or my tablet and a USB-C card reader. But – as this review is being written – there are still important features missing in the mobile version, that would require the full Adobe Photographer subscription and a full featured PC when I’m back home.

Premium comes with AI.
I want to remove the baseball cap of the person sitting just behind the shrubs on the lower left of the picture.
Generative AI removes it. No need for Photoshop: you just designate the object to remove with your fingers.
The result is not perfect and the bricks are not perfectly aligned – but it took me less than 2min. to remove the cap, just pointing it with my finger, in Lightroom Mobile.

I work in IT and have witnessed the migration to cloud computing – I tend to trust cloud technologies and Software as Service offerings, and my preference is to rely totally on Adobe’s cloud services instead of having to manage hardware, storage and backups at home. Provided the cost is acceptable. I still have a very old laptop running an old (pre subscription) version of Lightroom, and a NAS with an Amazon Glacier backup. Moving my Lightroom catalog and 15 years worth of pictures to Adobe’s Cloud is tempting, I just have to understand how it could be done, what I would be losing in the migration, and validate that Adobe’s storage cost is not going to send me on a path of financial ruin.

one last word… what are HEIC image files? 

HEIC: images created following the High Efficiency Image Format (HEIF) – (Cf Wikipedia‘s description). Widely seen as a replacement for the JPEG format, HEIC reached the mainstream when Apple made it the default image format of the iPhone. Most modern operating systems now support HEIC. HEIC images are 50% smaller than equivalent JPEGs, and support up to 16 bit color depth. Mid 2024, the top of the line cameras from Canon, Fujifilm, Nikon and Sony all support 10 bit HEIC.

More about Lightroom for Mobile

the Olympus Tough TG series – when you don’t want to risk ruining a $1000 smartphone

Nice smartphones are expensive and they control so much of our lives – the access to our bank accounts, our virtual credit cards, our boarding passes, our text messages, our emails, our Facebook, Instagram or TikTok posts, our watch, sometimes, that we can’t afford to break or lose them.

Olympus TG-4 – the commands are simple – it’s a compact, not a “pro” camera


And for those situations when we don’t want to put our precious phones in danger, a few camera companies still offer ruggedized, waterproof, shock resistant compact point and shoot digital cameras. Kodak, Fujifilm, Panasonic all have one risk-all camera in their catalog, but the Tough TG series of Olympus (now doing business as OM System) is the undisputed favorite of the specialized journalists and bloggers, who can’t stop singing its praise.

Olympus TG-4 – images can be saved simultaneously as RAW and JPEGs.


Originally launched in 2012 as the Tough TG-1, the camera has been regularly upgraded along the years. The TG-2 introduced a better water resistance, the TG-3 a 16 megapixel sensor and WiFi connectivity, and the TG-4 the ability to save RAW images. The TG-5 adopted a new 12 megapixel sensor (and a more elaborate image processing engine) for better results in low light, and finally abandoned Olympus’ proprietary connector for a standard USB plug. The TG-C adopted an USB-C connector. And to a large extent, the current TG-7 is just a TG-6 where the glorious Olympus name has been replaced with « OM System ».

(a few weeks after this blog entry was published, I found a very nice (and cheap) TG-5 – click here to read the TG-4 / TG-5 comparison).

The Tough TG-4 equipped with a few accessories (wide angle lens adapter, lens cap from JJC, attachment for floating strap OM System


All Tough TGs share the same look, and a very luminous f/2 to f/4.9, 25 to 100mm (equivalent) zoom, which reduces the need for high ISO in low lights, and help contain the noise of the sensor. It’s a very small 1/2.3 inch sensor by the way, smaller than the sensor of the main camera of an iPhone Pro, and the biggest performance limiting factor of the camera.

Down a cliff – ready for the next adventure

The Tough TG is well built, with a particular care given to protection against water ingress. In addition to the modes and scenes you would expect on a compact digital camera, it is equipped with functions befitting its calling as a camera for adventurers : GPS, compass and manometer.

A learners camera for snorkeling. Scuba divers will need a waterproof housing and strobe lights.

It has no viewfinder, but the fixed LCD display is well defined and luminous enough to allow the photographer to get a feel for what’s in the frame in bright sun light.

What is it for?

As a waterproof / shockproof camera, it fits the bill. It will shine in all adventures, all water sports, from family beach outing to canyoning, rafting, sailing or snorkeling. On its own, it’s too limited for scuba diving (it can’t go deeper than 15m), but OM System can sell you a waterproof housing and a strobe light if you want to go deeper.


Is it also a good everyday camera? Definitely, if there’s enough light. It’s very reactive, it nails the exposure and the white balance almost all the time, and the jpegs are very nice, natural with just enough clarity, vibrance and sharpness to make them pleasant to look at. They don’t look over processed and artificial like the images shot with a smartphone, or mushy because of overly aggressive noise cancellation. In the shade, image quality suffers from visible digital noise and working on RAW files does not seem to improve the situation much. And in poorly lit interiors, you have to use the integrated flash, and the less said about it, the better. A smartphone will deliver much nicer pictures in the same situation, without the need for a flash.

On the beach – it will resist a drop in the sand or a long swim in the ocean


Is it a substitute to high end compact cameras like Sony Rx100? No – except in really bad weather or aggressive environments. Its sensor is too small, and it lacks some of the the controls an enthusiast photographer expects (you can’t select the shutter speed, for instance) – but I would pick a Tough TG over any small sensor compact digital camera, be it a Canon, a Panasonic or a Sony: it’s a very coherent package, solidly built, which will deliver the best images you can get in really difficult environments, and good enough pictures the rest of the time.

The camera I reviewed is a TG-4. The conclusions would be similar for the TG-3, which is almost identical. The TG-5, 6 and 7 benefit from a 12 megapixel sensor and a more recent image processing engine and are said to deliver better images in low light scenes. There is not much difference between the three more recent models. All three are significantly more expensive than a TG-4, and I was not sure a TG-5 or a TG-6 was worth the extra cost. With the benefit of the experience, I’m happy with the TG-4, which does what I expected it to do and I don’t feel the need for more.

Because it’s been on the market for so long, the price you have to pay for a nice TG will vary widely. On market places like eBay, you will find a Tough TG-1 for little more than $100.00, and a TG-3 or 4 will sell typically for less than $200.00. TG-5 and TG-6 are second hand purchases whose price is ultimately defined in relation to the cost of a new TG-7, which is currently listed at $550 by OM-System.

All pictures taken in the island of La Guadeloupe, in the Caribbean. The water is incredibly clean and transparent.

The compact digital camera – in demand but not available

Compact cameras – digital cameras with fixed lenses that could fit in pocket – are in high demand, but unavailable. Fujifilm can’t meet the demand for its most recent X100, Canon’s G7x is always out of stock, the Panasonic LX 100 Model II is no longer available.

Fujifilm XQ2 (left) and Z1000EXR – the 12 Mpix XQ2 produces much better images than the 16Mpix Z1000.

Cameras manufacturers have retreated almost completely from the compact digital camera market (the “point and shoot” of yore), and very few are still offering “premium” or “niche” compact cameras. The smartphone is king, the historical camera makers seem to believe they can’t compete with the thousands of software engineers working for Apple and Google, and are leaving them all the space.

But as good as they are, the smartphones are still limited by their ergonomics (you need two hands, one to hold the phone, one to tap, pinch, swipe or whatever), their absence of long telephoto lens and viewfinder, and their relative frailness. They offer very little in terms of direct controls – they’re extremely capable, but you have to trust them. At the top of that, they’re expensive. And we depend so much on them that we don’t want to risk them on the beach or while rock climbing.

Nelson’s Dockyard – Antigua – shot with a Fujifilm QX2

There is still room for small but good quality cameras, with good ergonomics an a complete set of controls.

The camera companies are primarily focused on the full frame, interchangeable lens camera market, but full frame ILCs are not really pocketable. Their little brothers with APS-C sensors are smaller, but not by much. Even the Fujifilm X100 is still too large to fit in a coat pocket.

So, what’s left? In the cheap point and shoot camera segment, only a few cameras proudly wearing famous brand names such as Kodak or Minolta. I’ve read relatively good reviews of the Kodak Pixpro cameras, but they’re very basic and you can’t expect too much from their tiny sensor.

Olympus (now OM-System) is still leading the fray when it comes to rugged, waterproof cameras – the Tough TG, currently in its 7th iteration – has discouraged all competition.

Fujifilm XQ2 with the WP-XQ1 waterproof case.

It leaves us with the premium category – with the cameras from Canon, Panasonic and Leica largely unobtainable, and Sony’s RX100 series in a state of virtual monopoly.

Older versions of the cameras listed above can be found on the second hand market, but you have to understand what you’re losing by going for a five or ten year old camera:

  • Video capabilities – most of the progress in recent years has been in that area, 
  • Easier Bluetooth and WiFi connectivity, with a better integration with smartphone apps,
  • Reactivity (autofocus), 
  • Quality of the JPEGs (“out of the box”) thanks to better processing engines – you won’t need to process RAW files as frequently
Fujifilm z1000 (left) and iPhone 15 Pro (right). Today a standard sized iPhone can be bigger than a dedicated camera.

More conventional P&S such as the Canon Powershoot S90 or S120; the Sony HX and WX series, Nikon’s Coolpix 9000 series are somehow cheaper, but they’re also more limited: the last models were launched in pre-COVID days, and they have tiny sensors and relatively slow zooms – which makes the use of a flash a necessity in low light.

You could also look for a compact film camera. At the top of the heap the Contax T series reigns supreme (but these cameras are now extremely expensive), followed by a group of still expensive models from Nikon (35ti, 28ti), Leica (Minilux), Ricoh (the GR1), Konica (the Big Mini) and others from Minolta or Olympus. 

But those cameras are now twenty five year old at best – and some of their components didn’t age well (electronics in general and LCDs in particular). Most of those models have at least one big flaw that makes buying them at today’s prices a risky proposition (and even if it works today, will the camera work tomorrow?). The cost of film is also an issue (we’re currently trending towards a total cost of $1.00 per scanned image).

Olympus Tough TG-4 – generations differ by their sensors and processing engines, but the fundamentals of the camera have not changed since the TG-1.

What am I shooting with when I don’t use my smartphone, and can’t bring a mirrorless camera? I have a bit of everything in my bag. I tested (but did not keep) a Nikon J1 and I kept but don’t use a tiny Fujifilm z1000EXR – they’re cute but the quality of the images they were delivering was sub-par. I still use a very compact Fujifilm XQ2 – a sort of semi-premium homage to Sony’s RX100, and an Olympus Tough TG-4. They’re pocketable, produce images which are not as nice as what a recent iPhone can deliver but look more natural, and are a pleasure to use.  I found an original Fujifilm waterproof case for the XQ2, and even with the case, it remains reasonably compact, if not pocketable. As for the Olympus, I’m waiting impatiently for my next trip to the beach to test it in its element – but it has already earned his stripes as a carry-along camera for my hikes in the nearby parks.

Chattahoochee National Recreation Area – Olympus TG-4
Chattahoochee National Recreation Area – the bamboo forest – Olympus TG-4

Js and Vs – Nikon’s first attempt at mirrorless

The J1 was the first member of the Nikon 1 family of cameras, a very compact 10 Megapixel camera with a small 1 inch sensor, interchangeable lenses but no viewfinder, and very few of the physical controls that expert photographers expect. Its sibling the V1 had an electronic viewfinder, but for the rest was more or less identical to the J1.

The Nikon One project was largely managed as an independent initiative – there were little technical commonalities between the Nikon One cameras and the point and shoot Coolpix, on the one hand, and the conventional dSLRs, on the other hand. It was also an opportunity for Nikon to test the image sensors of a new manufacturer (Aptina, instead of Sony) and to validate some technologies that would be integrated in the Z6 and Z7 full frame mirrorless cameras at a later stage.

I had bought a V1 when it was launched, and had been deeply disappointed by the image quality – the V1 did not cut it for me.

The controls: an intermediate step between a point and shoot and a dSLR.

When the J1 was new, the reviews were rather positive – photographers loved that it was a very reactive camera with a quick autofocus and a better than average build quality. Only the high ISO/low light performance was a disappointment – and the subsequent iterations (J2, J3, J4, V2 and V3) never really addressed the problem. Until Nikon switched to a sensor provided by Sony (for the final model of the series, the J5 of 2015) – image quality (too aggressive noise cancellation, so-so colors, limited dynamic range) remained markedly inferior to what you could get with a micro 4/3rd or an APS-C camera – and partially explains why – as a whole – the Nikon 1 series was deemed a failure on the marketplace.

Compared to a modern APS-C mirrorless camera – playing in a different ball park entirely.

If image quality (in low light in particular) was already disappointing in 2010, it’s obviously very far from what a good smartphone can deliver today. Shooting in RAW and post-processing in Lightroom really improves the results, but even in RAW I was not convinced by the results – some images are good (well lit subjects at relatively close range), but most of them lack punch.

The J1 at its best – well lit subject, at relatively close range

A J1 still has two major advantages over a phone: the long tele range, and the ergonomics.

Conceptually, the J models were point and shoot compact cameras with interchangeable lenses. The standard zoom was a 10-30mm affair (equivalent to a 28-80 on a full frame camera), but longer range zooms (a 30-110 and an extra-long 70-300 – equivalent to 80-300 and 190-800 respectively) were available, and if it was not enough, an adapter was available to mount a Nikon F telephoto lens. Some wildlife photographers were big fans of the Nikon 1 series, because it gave them a very long range with a reactive autofocus in a very light and compact setup.

An old inn in Vinings, GA – they built small at that time – Nikon J1

As for ergonomics, I would say that anything is better than a smartphone. Smartphones need to be operated with two hands (one to hold the phone, one to play with the controls on the screen), and pinch to zoom is not as easy or direct as rotating a ring on a lens. Even if it’s shaped like a bar of soap, the J1 is still easier to hold than a phone, and has more physical controls.

What about the colors? The J series cameras were available in a wide variety of colors, with coordinated lenses. White, Black and Silver were always available, but each iteration also benefited from not so common colors (Dark Red and Light Pink for the J1, Orange and  Dark Pink for the J2, Beige and Wine Red for the J3, Tangerine for the J4). Only the final model (which is also technically the best, by far) bowed to convention, and was only available in an “all black” pro attire, or with a “retro-look” silver with black leatherette.

Processed in Lightroom – the RAW files of the J1 respond well to post processing

The J1s are apparently reliable, but the lenses are not. The lenses (all models except for the 6.7-13mm and the 70-300 zooms) rely on very small plastic cogs to open the diaphragm to the requested aperture, and those little cogs may become brittle over time, then break and make the lens unusable. If you buy a lens, ensure that it has been tested by the vendor – you can be sure that “untested” just means “not working or for parts”.

A Nikon J1 is still a pleasant camera to shoot with, provided it’s outdoors and under a nice weather. It’s very reactive and much more usable than micro 3/4rds or APC-C cameras of the same vintage, which were still relying exclusively on contrast detection for autofocus. It’s just a tad too big to fit in a pocket, but with its small size and its funky colors, it does not scare people like more serious looking cameras tend to do nowadays.

The dollar tree – RAW file processed in Lightroom – Nikon J1 – 10-30 lens
The same dollar tree – shot a few months earlier with an iPhone 15 Pro. The contrast and the resolution are much better.
A Nikon 1 next to the smallest mirrorless ILC from Fujifilm (here the X-A5). The X-A5 is larger but produces much nicer pictures, out of the camera.

The J series are fun and cute cameras, let down but insufficient image quality – the J5 apart – and by unreliable lenses. A J1 in working order can be had for far less than $100 with a standard zoom, and a body only J5 can not be found at less than $200. Non standard lenses (tested, and in good working order) are more expensive ($100 to $400 depending on the model).

Well lit, close up – another good picture – at least technically.

Photos taken in Vinings and in the Coalmont OHV Park (TN) where dollars grow on trees.

/

Looking for my next “serious” digital camera

It’s not that I’m competitive, or that I carve for attention. But when I travel with my better half, she also takes pictures, and good ones at that. She has no interest at all in the technicalities of photography, but she has a good eye. And with an iPhone, that’s enough to get very good pictures, most of the time.
Within a few minutes of the picture being shot, it’s posted on one or two social networks, “liked” and commented.
Now, imagine yourself shooting with a 10 year old dSLR, in RAW, of course. You won’t get usable pictures until you’re back home, and find the time to fire up your laptop and launch Lightroom. By the time you’re done, your pictures will be yesterday’s news. Or most probably, last week’s.

The manufacturers of conventional cameras have understood that, and are slowly addressing the problem. The newest digital cameras are much better at uploading the freshly shot images to a smartphone, and they’ve improved their jpeg rendering enough that shooting RAW is not an absolute necessity, and that Jpegs are usable straight out of camera most of the time.

High level, I was happy with my Fujifilm X-T1, but I was ready for something a bit more recent, with a better viewfinder than my X-T1’s. I was still missing the large top of the plate display of the enthusiast oriented dSLRs, and I wanted a better integration with smartphone apps.

So I purchased a very nice Fujifilm X-H1 on eBay, The X-H1 was Fuji’s flagship camera in 2018 – with a 24 Megapixel sensor and – a first for Fujifilm – in body image stabilization. The fit and finish was splendid, the viewfinder much better than the X-T1’s, and the images were stunning – straight out of the camera. But I was extremely disappointed by the battery life of the camera. In the real life, not even 100 pictures per battery charge. I admit I’ve been spoiled with Nikon dSLR and their 1000 shots per charge, but 100 was definitely too little – imagine the logistical nightmare if travelling for a few days in a place without easy access to electricity – having to carry something like six batteries, two chargers, a few power banks to feed the chargers … No way.

So, maybe a dSLR was the solution after all. I still love shooting with a reflex camera – the optical viewfinder of a full frame is a pure delight for the eyes – and over the years I have accumulated a large number of Nikon F lenses. And I feel at home with a Nikon. Every command at the right place. I found a well used Nikon D750 at MPB, and started using it. The battery life was what I expected from a Nikon dSLR, and it was a pleasure to shoot with. But…. there was a long list of “buts”.

It’s not that the camera is large or heavy (in fact, the D750 and its descendant the D780 are the smallest and lightest full frame dSLRs from Nikon, on par with Canon’s smallest and lightest, the EOS 6D), but the lenses are big and ponderous. The more recent, the larger and the heavier. As for my old cherished lenses, they may be smaller and lighter, but they’re a bit overwhelmed by the 24 Megapixel sensor.

You may consider that Fujifilm’s “film simulations” are just brilliant marketing, and that Nikon’s Picture Control does more or less the same (preparing JPEGS usable straight out of the camera). But in reality, Picture Controls are not as easy to use (and not as good) as Fuji’s simulated film, and – in my opinion – the D750 still gives you better results if you shoot RAW and massage your pictures to taste in Lightroom.

Lastly, the D750 is still tied to Nikon’s ancient WMU (Wireless Mobile Unit) mobile app, and the less said about it, the better. This camera was launched in 2014, and it shows.

So, now what? I sold the X-T1, I sold the X-H1, I sold the D750, and finally purchased a lightly used Fujifilm X-T4 and a wide angle zoom. The X-T4 is still small for a modern mirrorless camera, the viewfinder is beautiful, the fit and finish impressive, and the battery life is correct (I did not feel the need to buy a second battery yet, and you can charge it directly from a USB source).

Admittedly, there is no top plate display, but almost all of the exposure parameters are controlled by dials on the top plate. If you buy a Fujifilm lens of the XF series, aperture is controlled by a ring around the lens, which is very intuitive if you’ve worked with film cameras in the pre-autofocus days. Zooms with a sliding aperture (like the 18-55 f/2.8-4) have an unmarked aperture ring, but the recent constant aperture zooms and the fixed focal lenses have easy to read aperture markings.

Because the camera is built around an APS-C image sensor, its lenses are much smaller than optics designed for a full frame camera.

Out of camera, the JPEGs are very good, and there are many film simulations to play with. Lastly, the smartphone app (Xapp) is a significant improvement over the old Camera Remote.

I’m just at the beginning of my new digital journey. I need to test all those film simulations, and I have to create a new workflow, laptop free and Lightroom Classic free. A workflow only relying on iOS devices (iPhone, iPad) and on the mobile version of Lightroom.

Pictures shot in Marietta, GA – Fujifilm XT-4 – default settings