Catalog, Print or Delete? What to do with your pictures after you’ve shared them on social media?

I’m afraid most people rush to share the pictures they take, attaching them to emails, text messages, or publishing them on various forms of social media. Images – or more precisely the interest of their family, friends and followers for those images – tend to be ephemeral. Shot, shared, forgotten.

If you visit these blog pages, I’ll assume that you’re interested in photography. And I will bet that when you shoot pictures, they’re important to you, and you take time to reference and archive them. If you still shoot film, you probably store the negatives and slides in binders with their contact sheet, and if you shoot digital, you certainly rely – at a minimum, on Apple or Google’s photo management services – or, more likely, use more specialized software to catalog, process and archive your images.

Of course, beyond the few Gigabytes of free storage you get with your smartphone (5 GB with Apple, 15 GB with Google), you need to pay a monthly suscription fee – $3.00 /month for 200 GB with Apple, $2.00 for 100 GB with Google. It’s not much to store 10,000 to 20,000 images (assuming 10 Mbytes /image) – but I’m surprised by the number of people I know who go regularly through their Photo apps and delete images they like (and might be happy to look at again five years from now) just for the sake of saving two or three dollars a month.

Sunset at the beach. Near St Anne, Guadeloupe

And when, for an happy event (wedding, graduation, big life milestone …) they’re being asked to send a few of their images to contribute to a family slide show or to a shared photo-album, they can’t find any – or so few.

At the risk of being provocative, I’ll say that in photography, Archival and Retrieval are at least as important as taking the pictures in the first place. So, what are the options?

The Photo Management Service provided by the OS vendor of your phone, tablet or personal computer.

We’re talking of Apple Photos, Google Photos, and Microsoft… Photos, of course. The “App” is the front end of a set of cloud based services, that provide photo storage, editing, cataloging and sharing capabilities, increasingly with the help of AI.

Apple Photos on iPad – search for “sunrise” – “sunset” returns almost identical results

Even without being passionate about photography, it’s easy to accumulate a few tens of thousands of pictures in a few years. The challenge is to organize them, and to retrieve the one you need without having to spend hours browsing galleries.

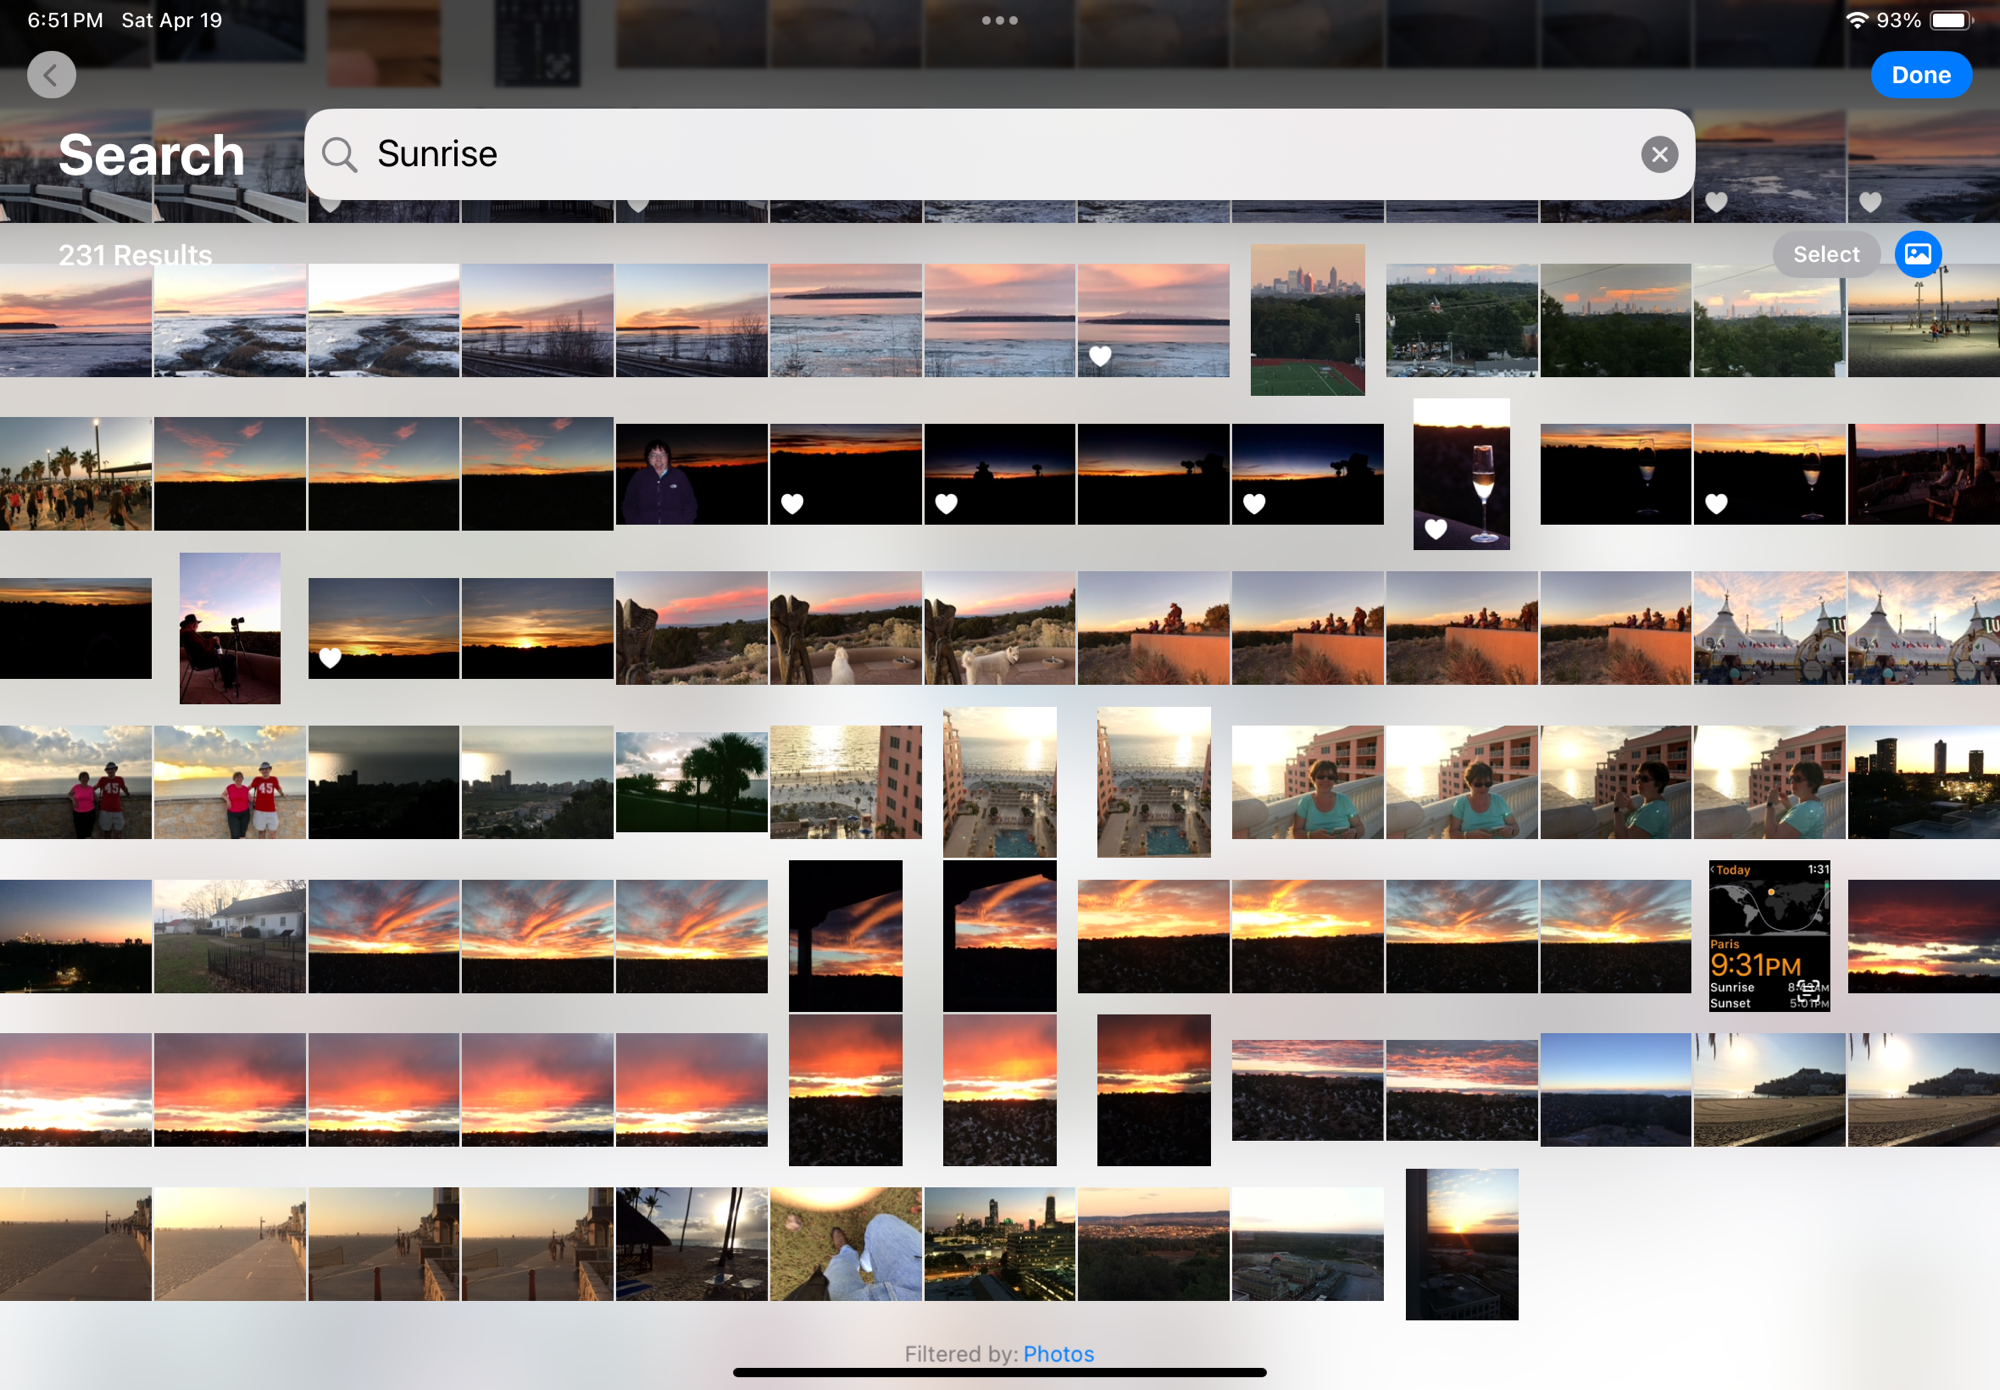
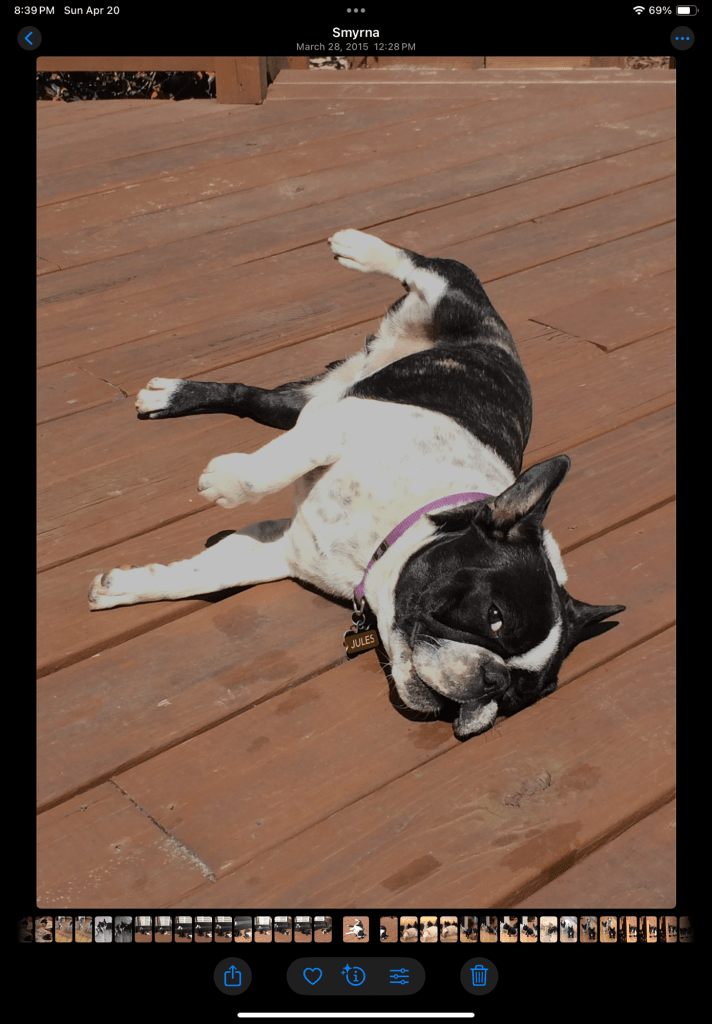
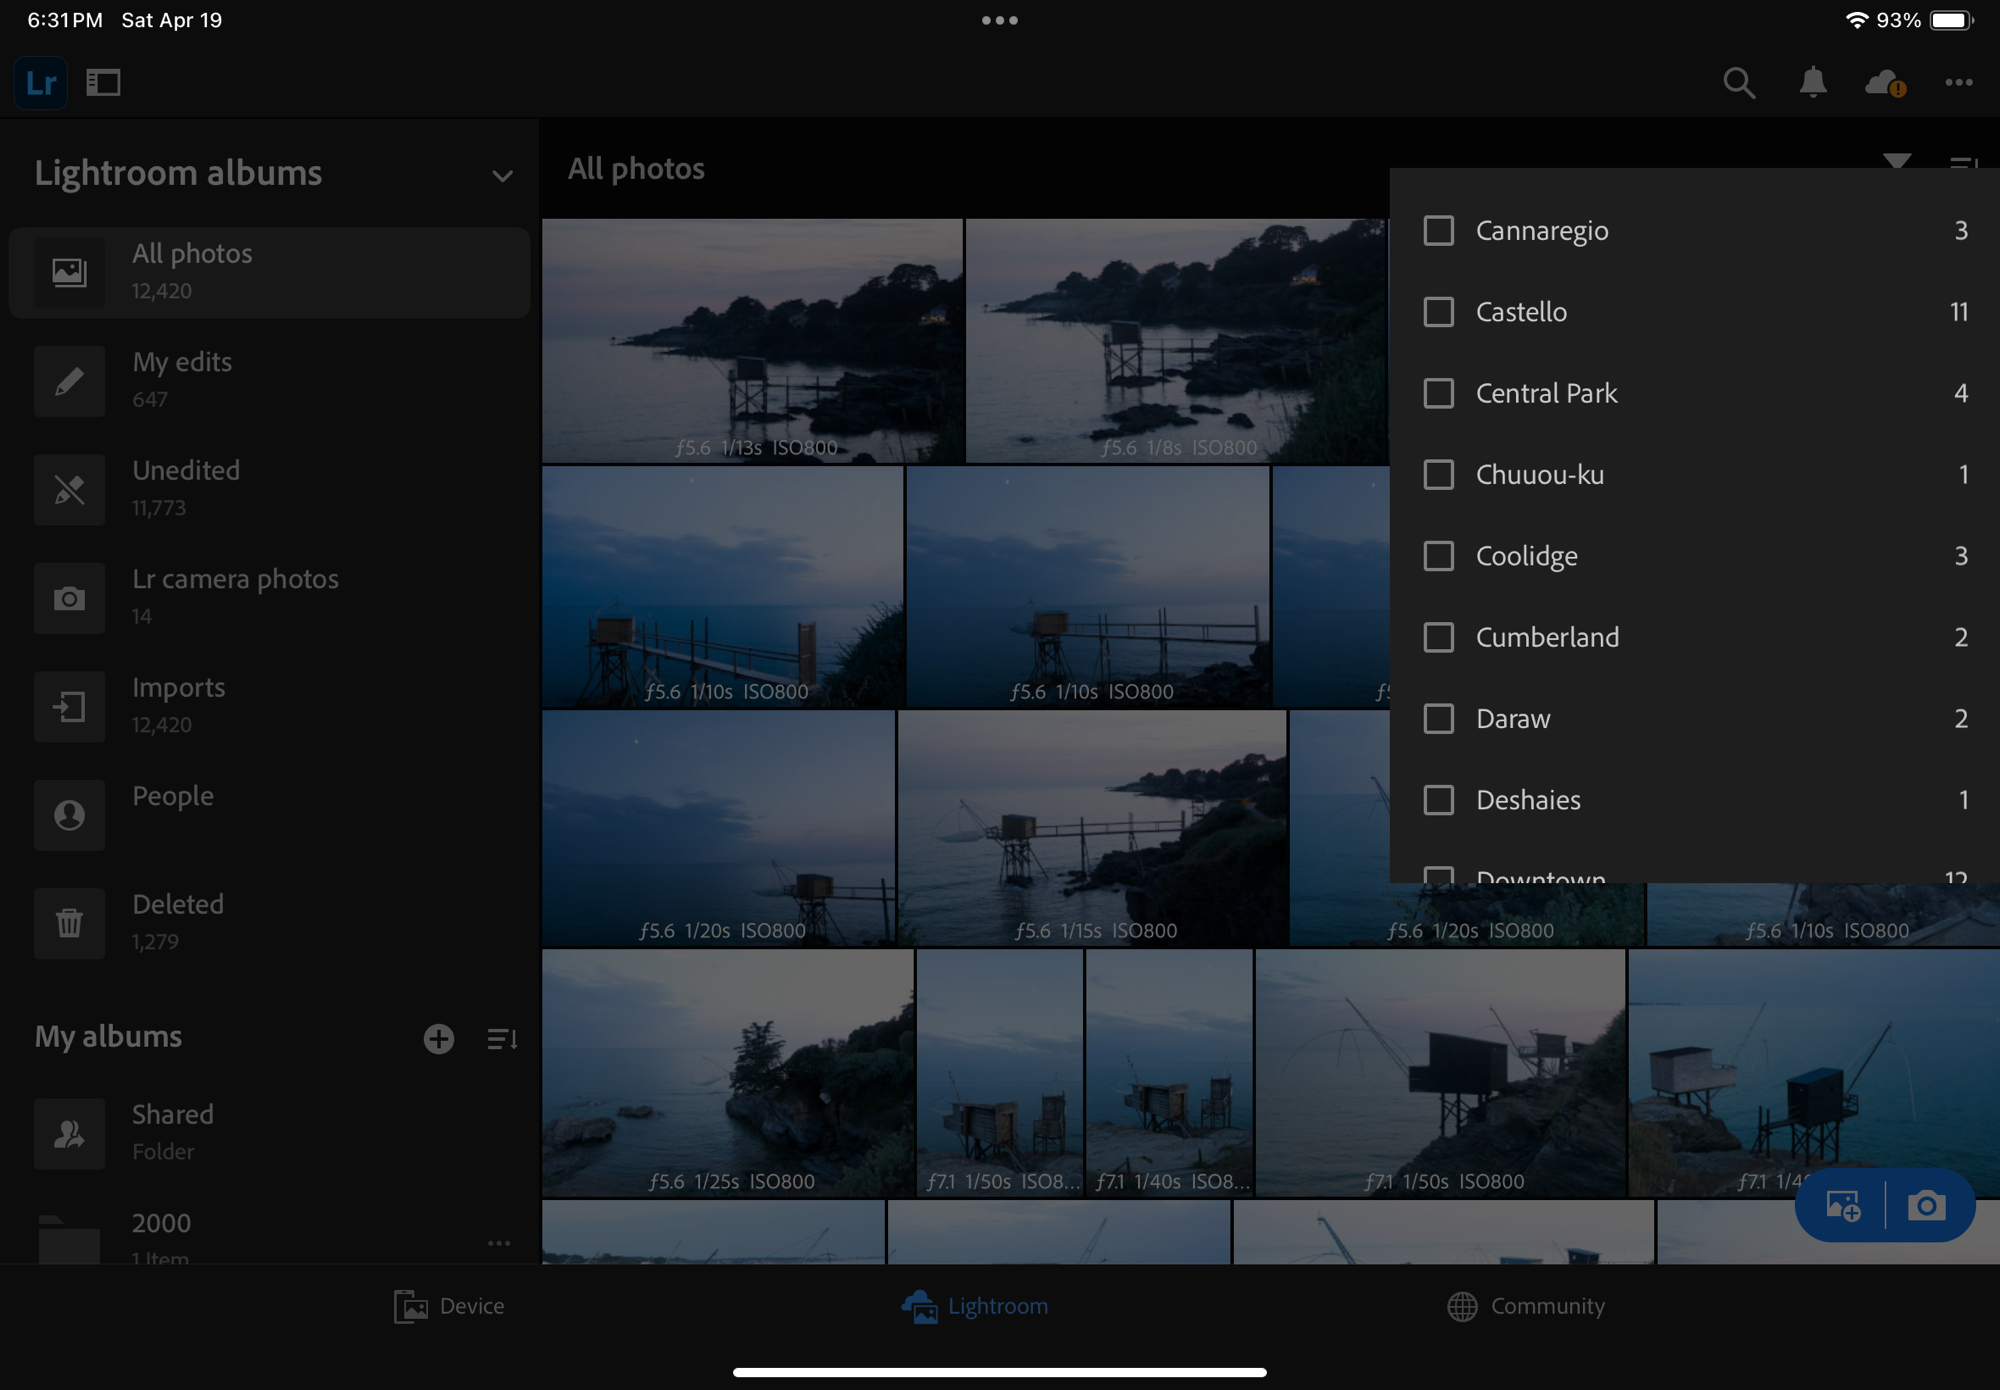
The photo management apps try and organize your photo library by date (easy), by theme, by trip, but what’s particularly impressive are the search capabilities – the app is using information it reads in the images (like the name tag of a dog), combining that with what it knows for sure (like the date and the GPS coordinates stored in the picture file) and what it has learned about you and your entourage to help you retrieve images. Without requiring you have entered captions or keywords to identify your subject. If Jules is a dog, it will answer questions such as “Jules in Chattanooga in 2014”. It even works with objects: “My Jeep in Destin” returns pictures of my Jeep in Destin, FL, “pictures of a ball pen” returns… ball pens, and searching for the word “dawn” will return all the pictures taken at sunrise (and sunset – the search algorithm is not perfect).

Searching for “Jules in Smyrna” – Apple Photos has read the name tag of the dog.

If the picture has been taken with a smartphone, it will be managed “natively” by the app. If it has been taken with a dedicated camera, the image will first need to be imported – most cameras vendors provide their own app that will transfer selected images from the camera to the Photo app of the device over a WiFi connection.

For Apple and Google, what matters the most is their ability to retain their client in their eco-system in the long run, from phone to phone to phone (they call that the stickiness). Once you’ve stored 10,000 photos in their Photo app, you’ve put yourself in a very sticky situation, and you will think twice before switching to the other side. Of course, transferring your images from Apple to Google or Google to Apple is always possible, but it won’t be immediate or straightforward and you may lose some information in the process (some metadata, and proprietary features like Apple’s Live Photos and RAW files, for instance).

Tarpon Bay, FL
Sunset, Tarpon Bay, FL

Photo cataloging / photo editing tools from specialized software vendors

If Apple or Google’s photo apps don’t give you enough, or if you don’t want your images to be stored in a cloud, or you don’t want to pay a monthly subscription fee and would rather buy conventional perpetual licenses, there is certainly a specialized photo management software that meets your needs.

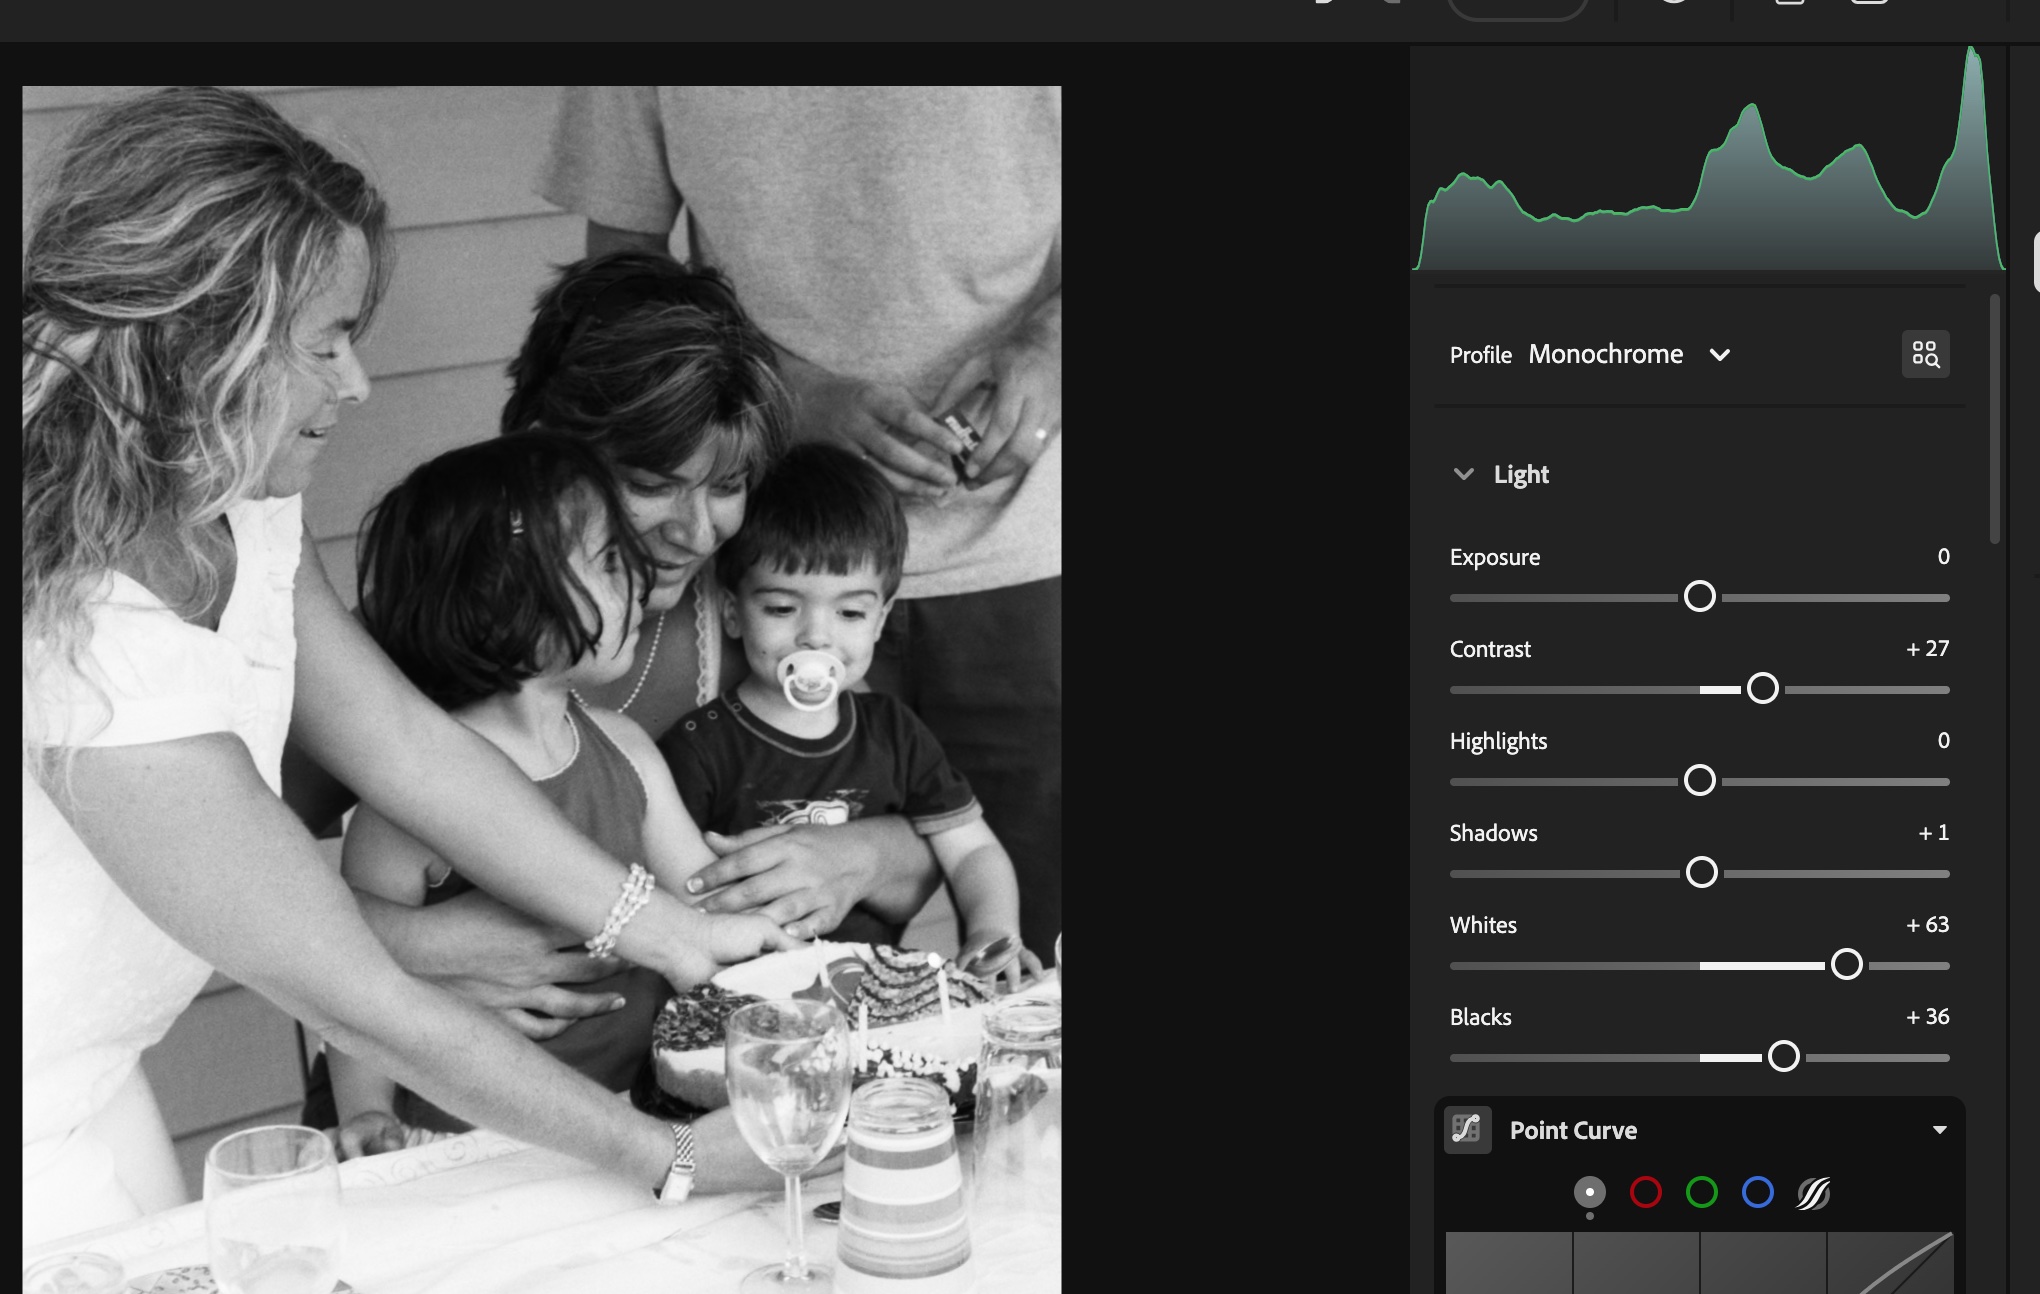
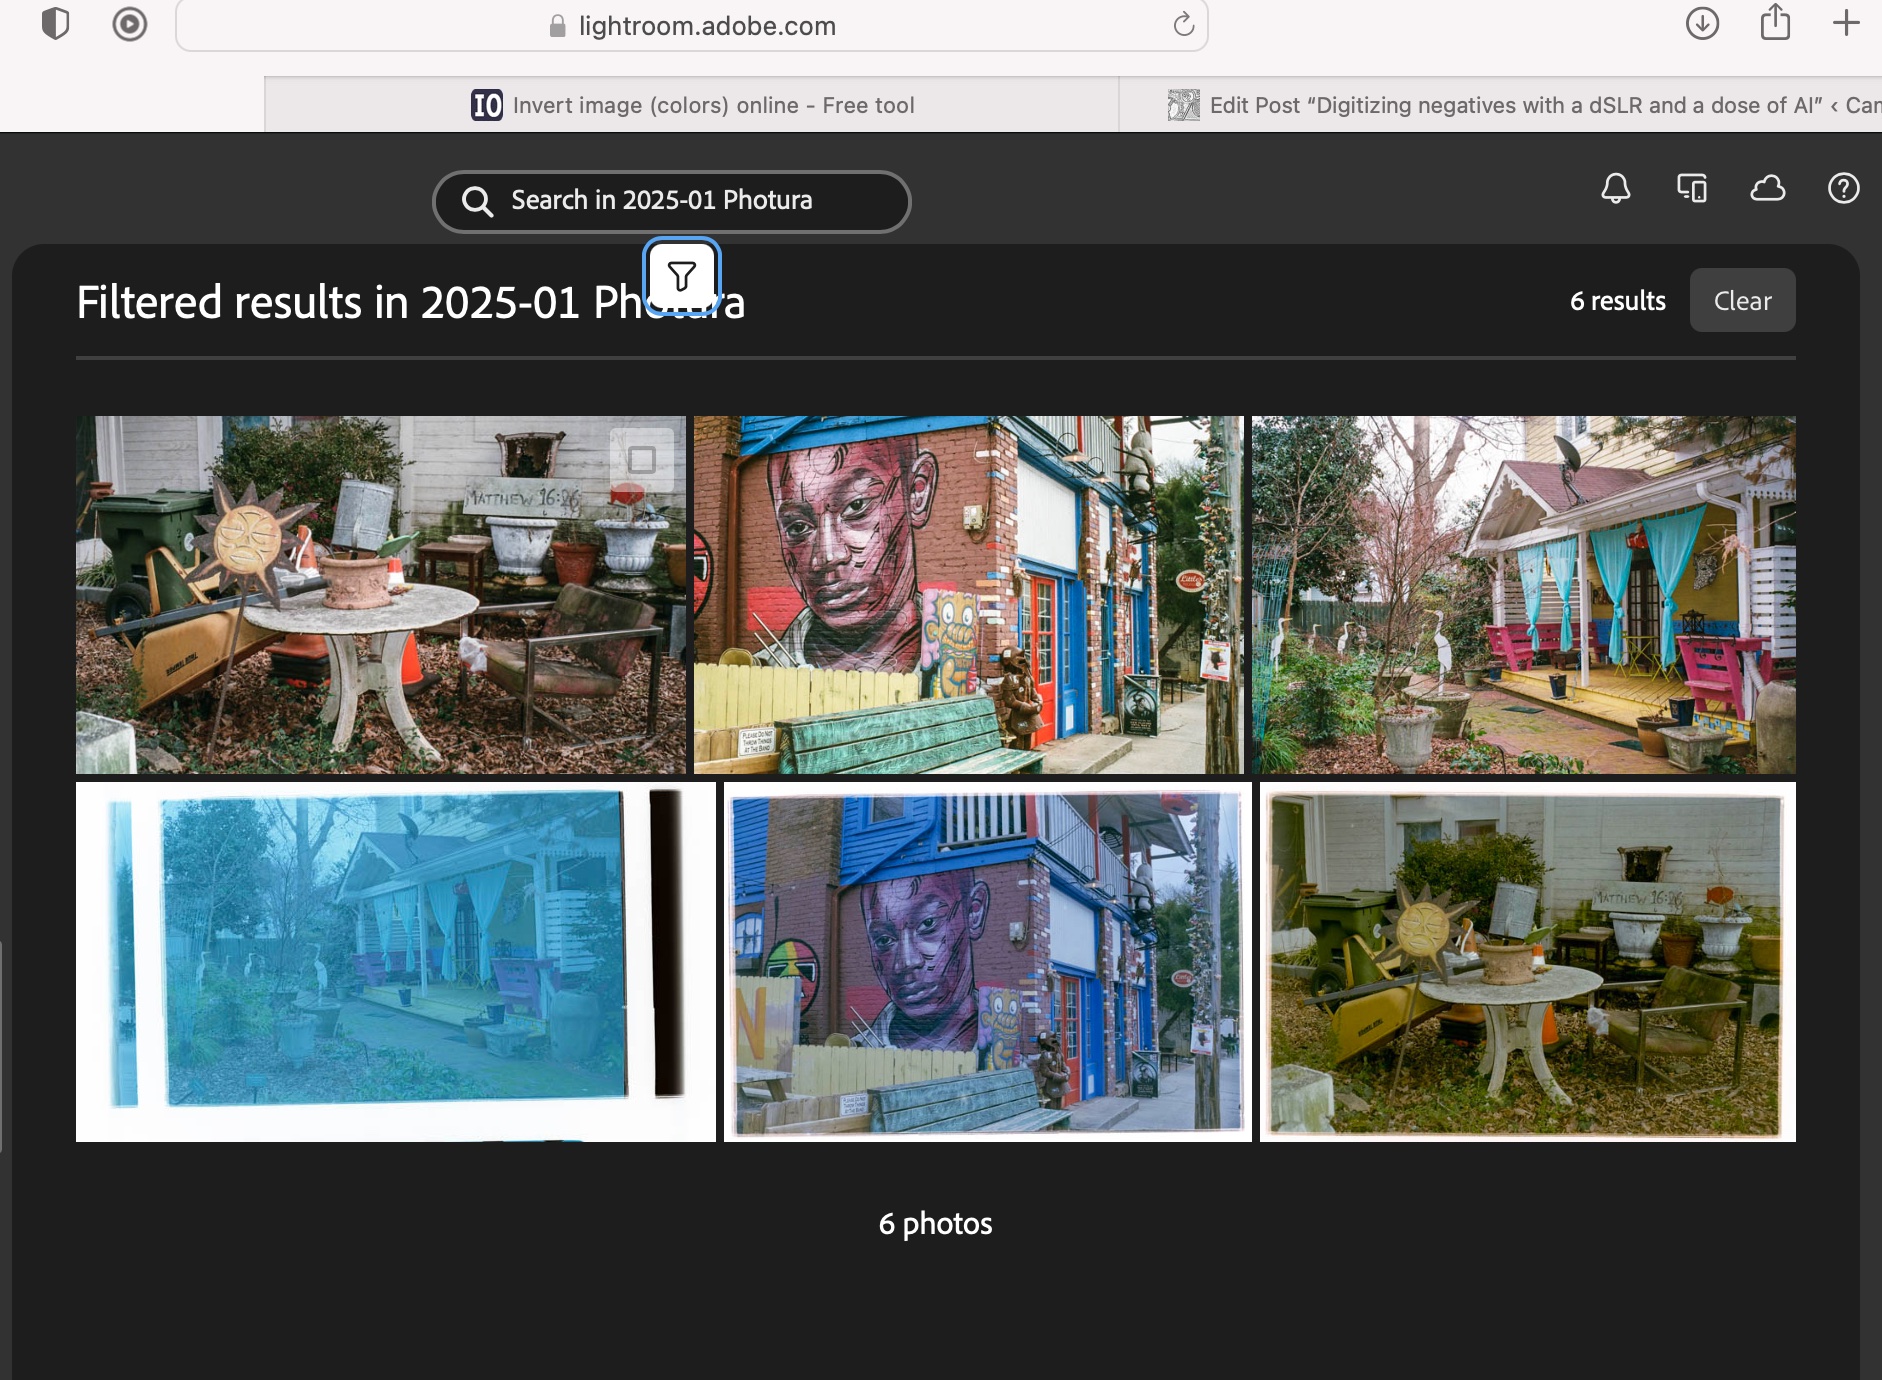
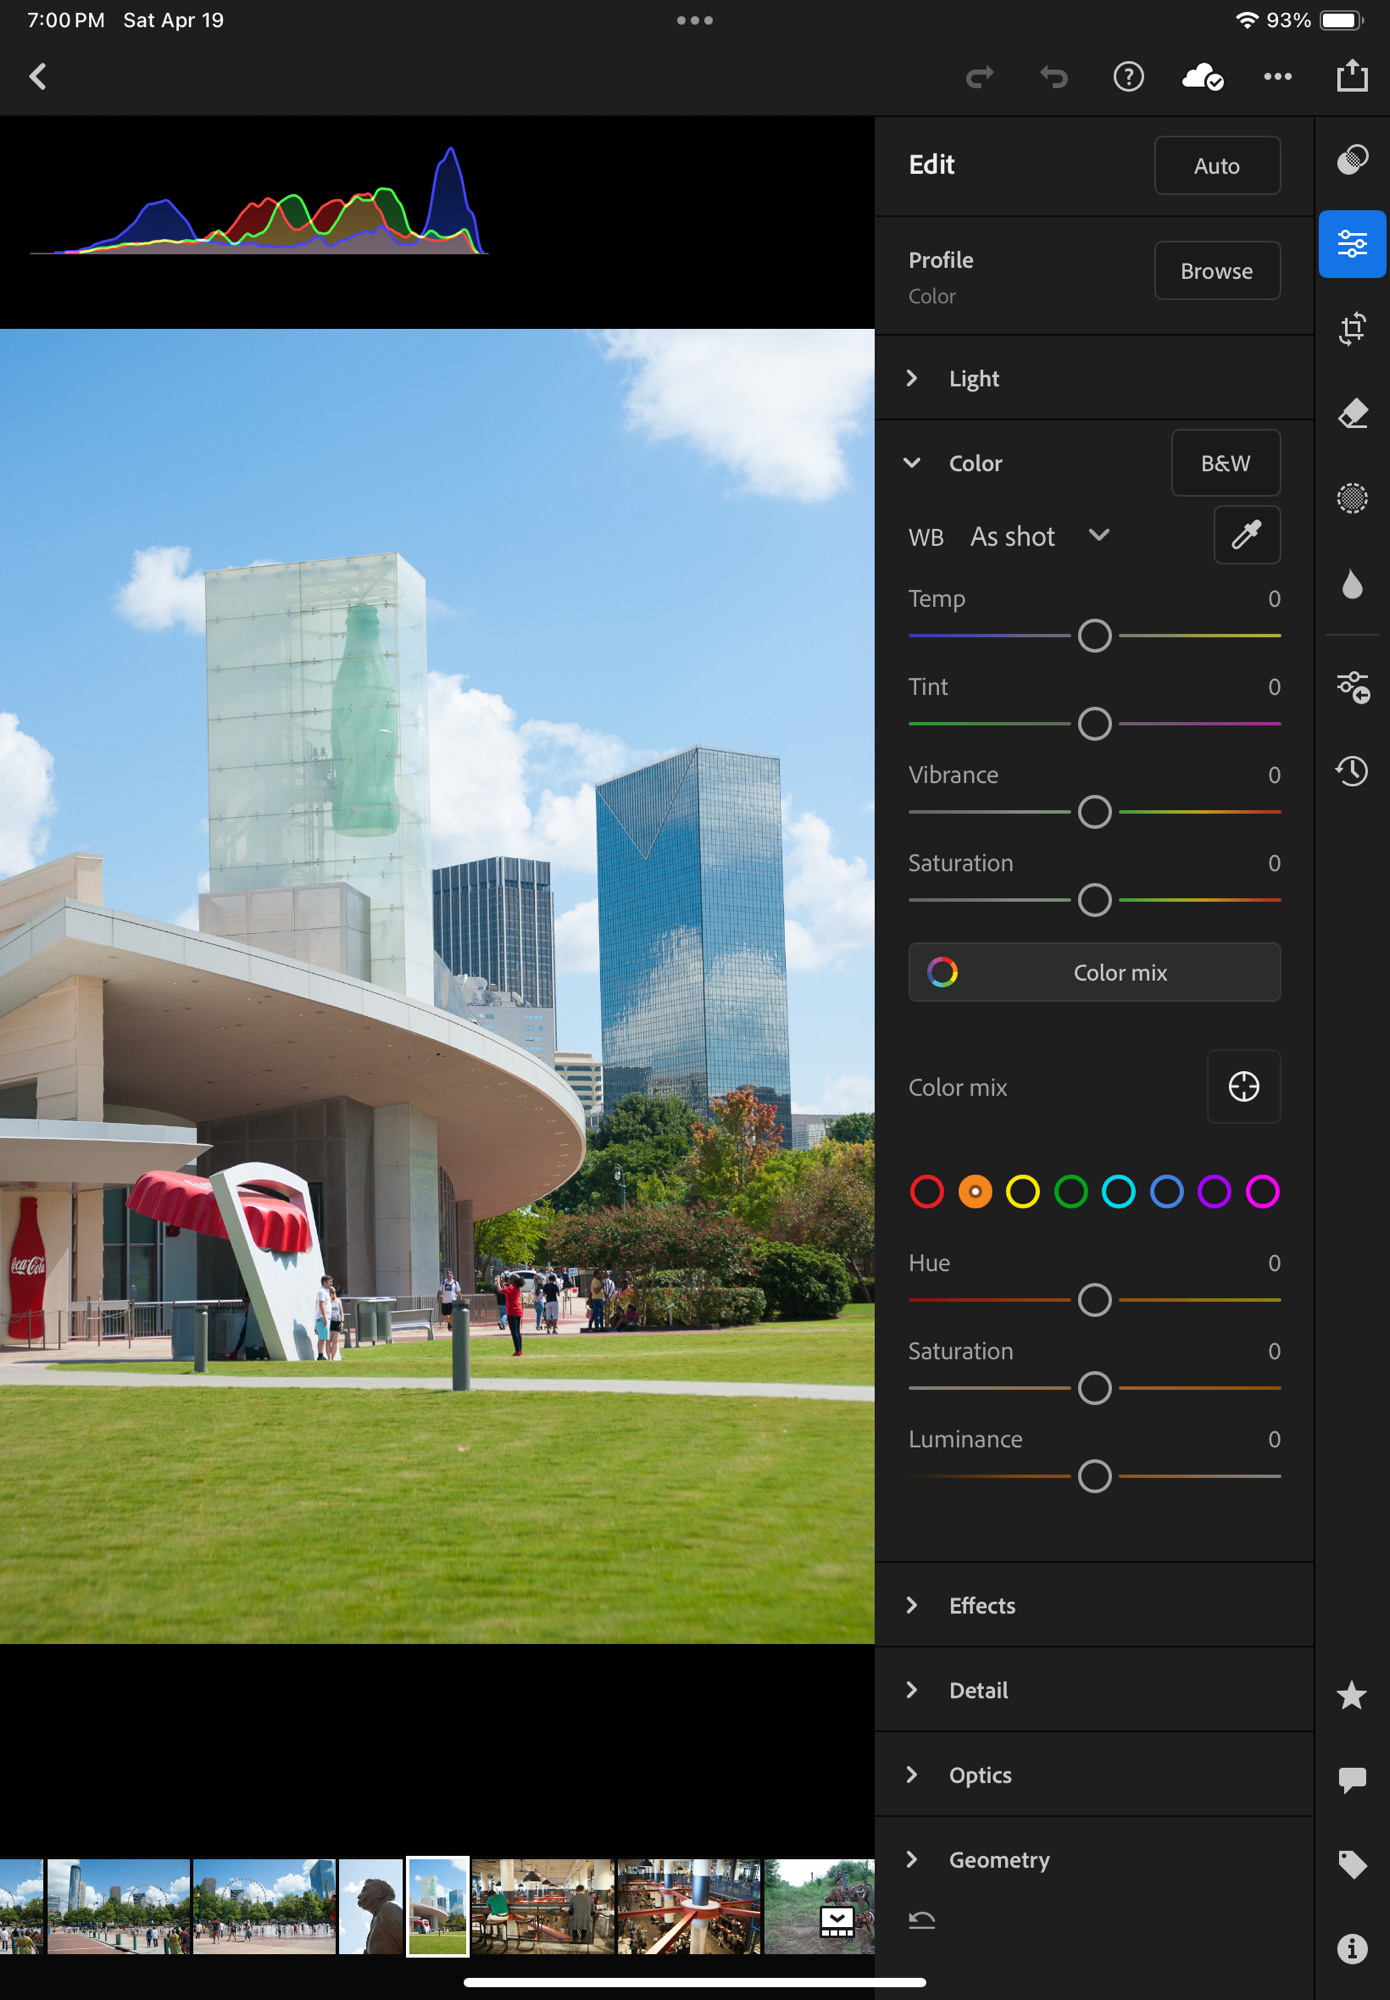
Generally speaking, dedicated photo management software will offer more options for tagging the pictures, and more powerful photo editing tools, but, if the example of Adobe is representative of the industry, will not be as good as Apple and Google at automatically organizing and easily retrieving your images: they still rely predominantly on captions and keywords to identify an image.

Specialized photo management tools offer more image editing options

If you opt for local storage, you will have to invest in physical storage (directly attached drives or NAS) and you will need to protect your images with a good backup system (preferably off site, if you want it to protect your images from disasters). And off site backup plans have a cost.

… but the search is still heavily based on keywords and captions that have to be entered when the image is uploaded.

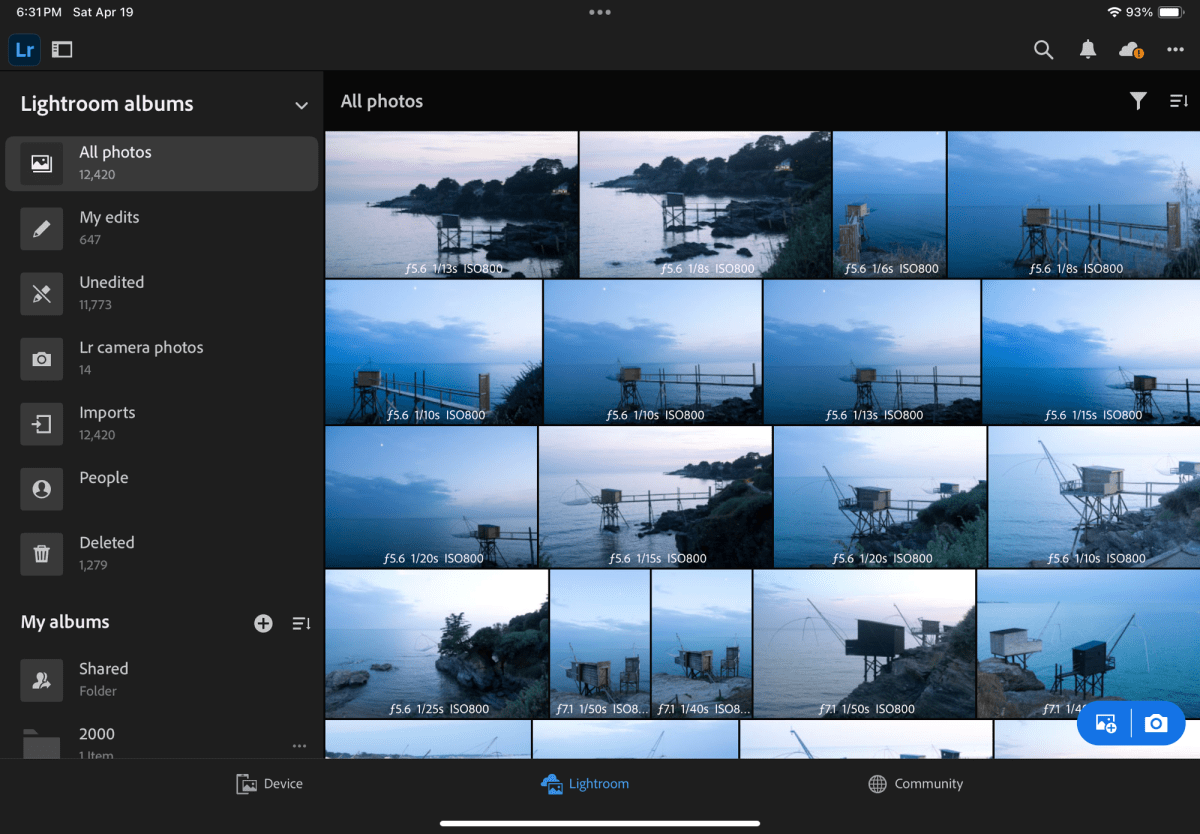
Cloud storage options are very broad – going from general purpose storage services like iDrive or Dropbox to more specialized offerings like Adobe’s Lightroom “Photography Plan” – but once you’ve exhausted the limited time promotional offers, the prices are relatively similar – around $10.00 /month for 2TB for most of them. iDrive seems to be the cheapest, Dropbox is in the same ballpark as Apple and Google ($9.99 /mo for up to 2TB). As of this morning, Adobe’s “Photography Plan” includes 1TB of storage for $11.99 /month, but in all fairness the cost also includes the Lightroom Mobile, Web and Classic subscription fees, so it’s not that bad of a deal.

What are the alternatives? Placing prints in a photo album?

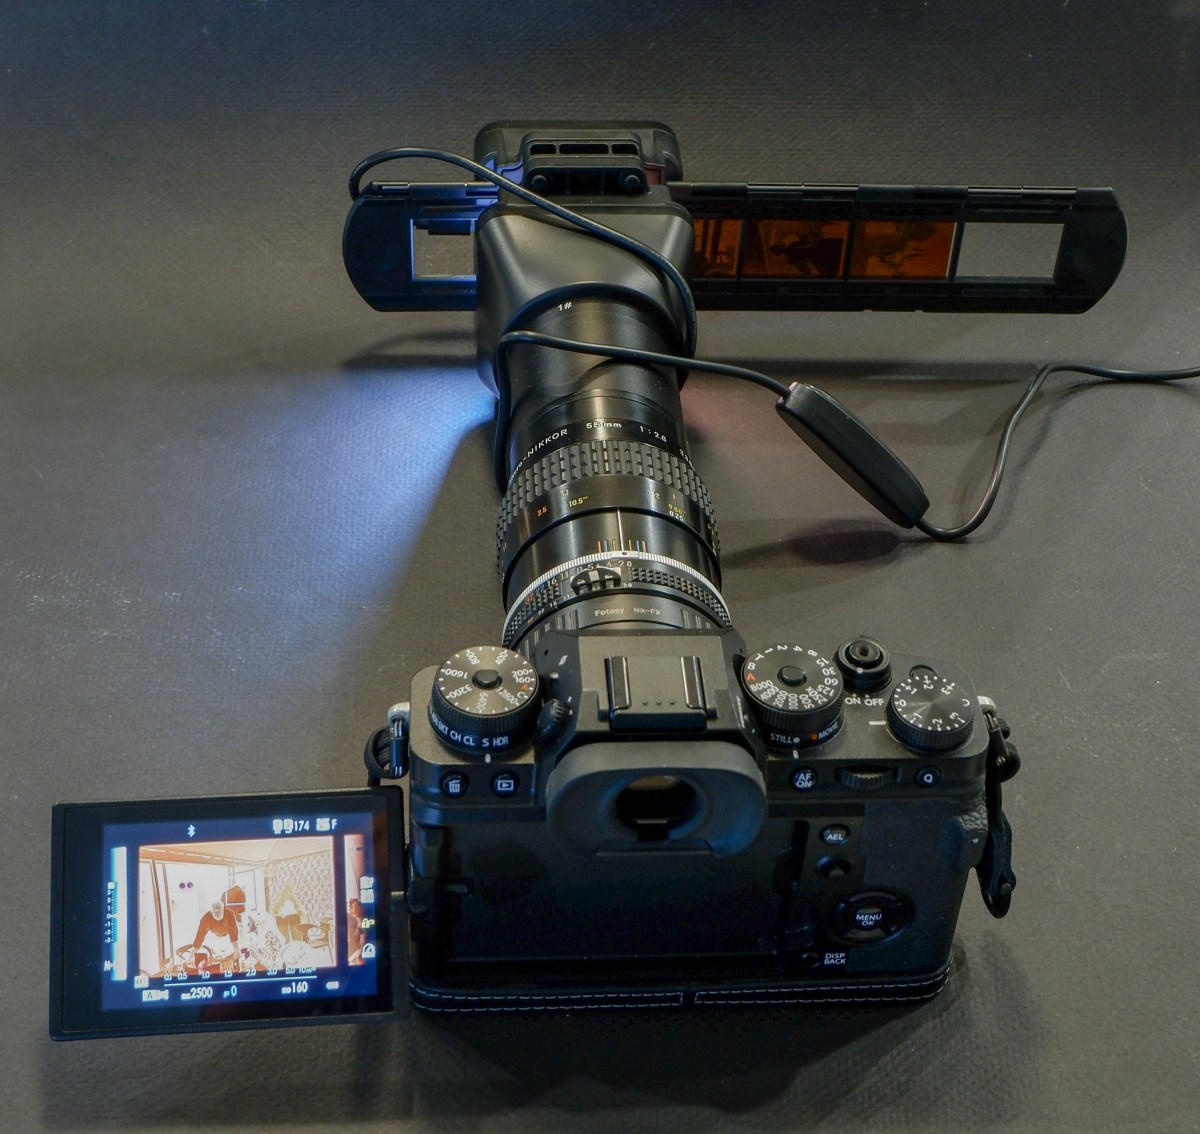
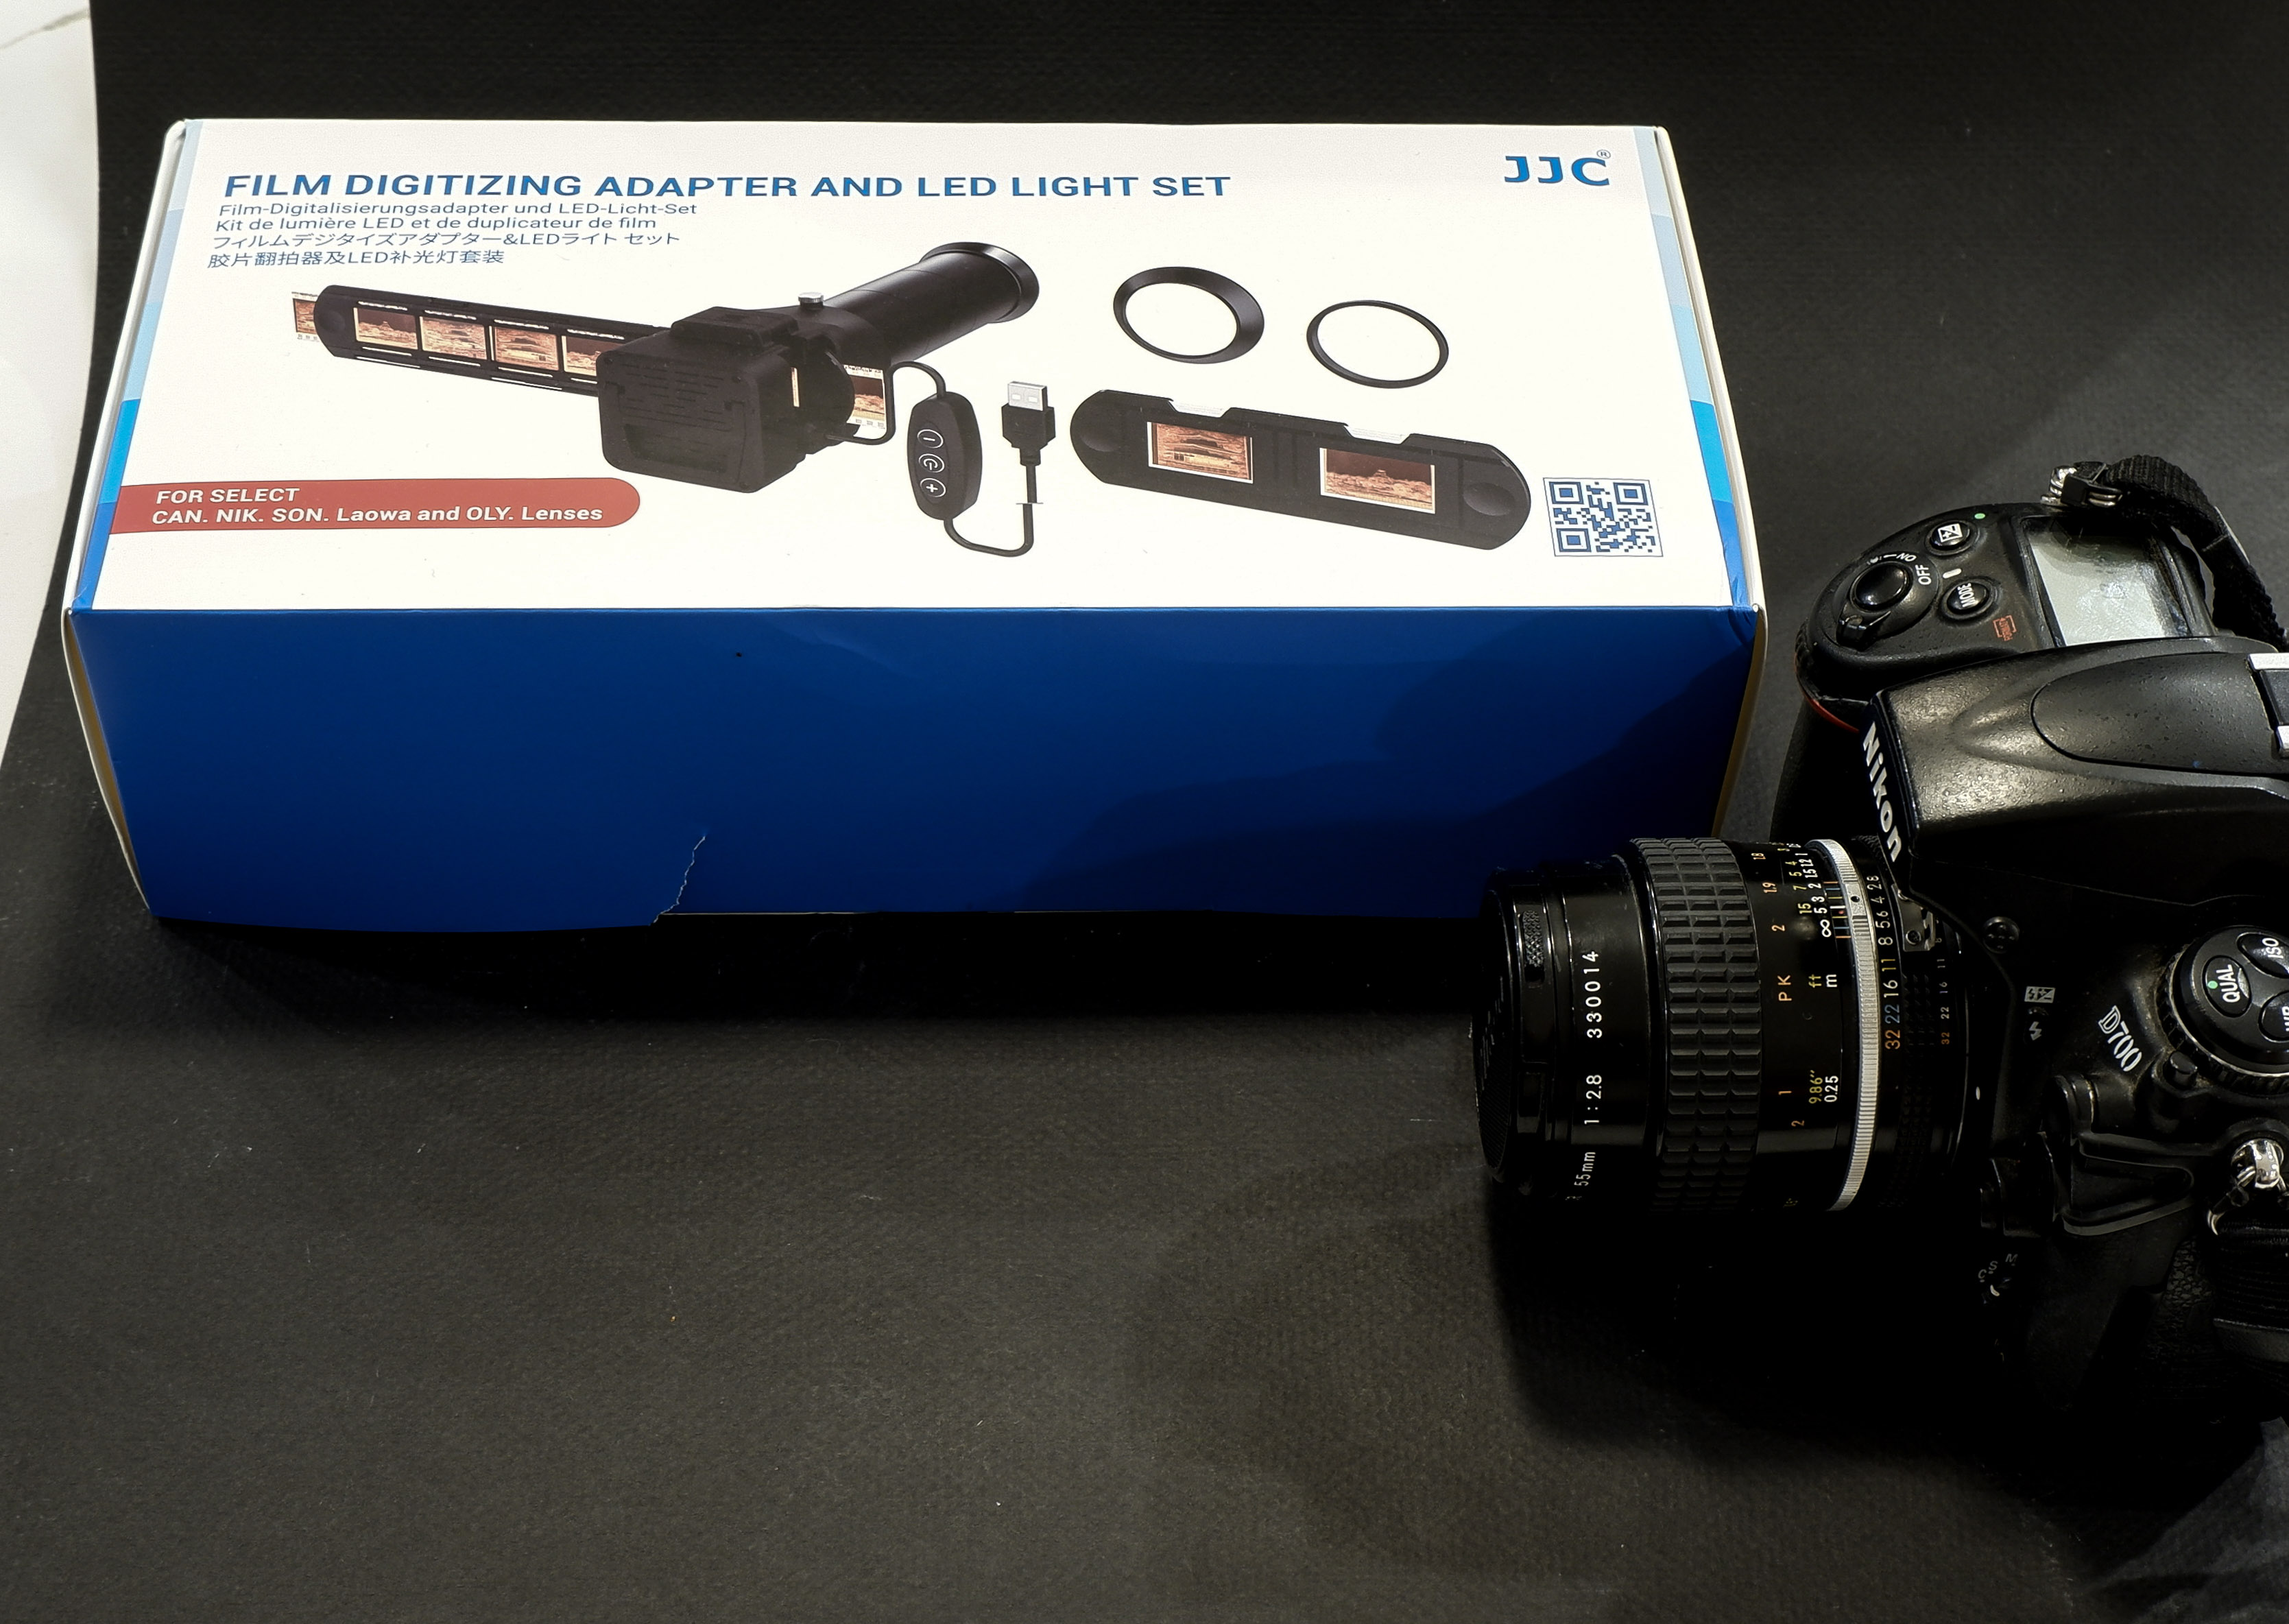
A physical photo album is not a substitute for an electronic catalog, but it’s a mostly forgotten way to keep the images you love together, and return to them when you feel like it. You can even scan the prints if you can’t find the negatives or the original digital files (I’ve done it, shame on me), so it’s also a form of backup.

I lost the negatives a long time ago – but I had a photo album and scanned the print

The ability to create photo books used to be integrated in the photo cataloging apps: the option existed in Apple’s iPhoto – you picked the images, worked the layout and (of course) paid a hefty fee, and Apple would send you a printed photo album with a little Apple logo on the back. I’ve not used a recent version of Adobe Lightroom Classic but I believe the option to create photo books still exists (in conjunction with the Blurb photo book printing service). It does not exist on the “non-classic” versions of Lightroom.

Photo albums of all types and sizes (printed by Mixbook, ifolor, Apple, and self printed Fujifilm Instax)

Maybe the combination of Lightroom Classic and Blurb is still the reference to beat – but I’ve not been impressed with the alternatives – I tested Mixbook – and while the quality of the printed books was satisfactory, I found the solution difficult to use and also very expensive.

If you need multiple copies of a photo album, creating a photo book with one of those services makes sense, although it will cost you, but if you only need one copy, it may be simpler, faster and cheaper to print the pictures at home, and place them in a good old (physical) photo album.

Fujifilm’s Instax film is available in three sizes, so are the Instax Printers.

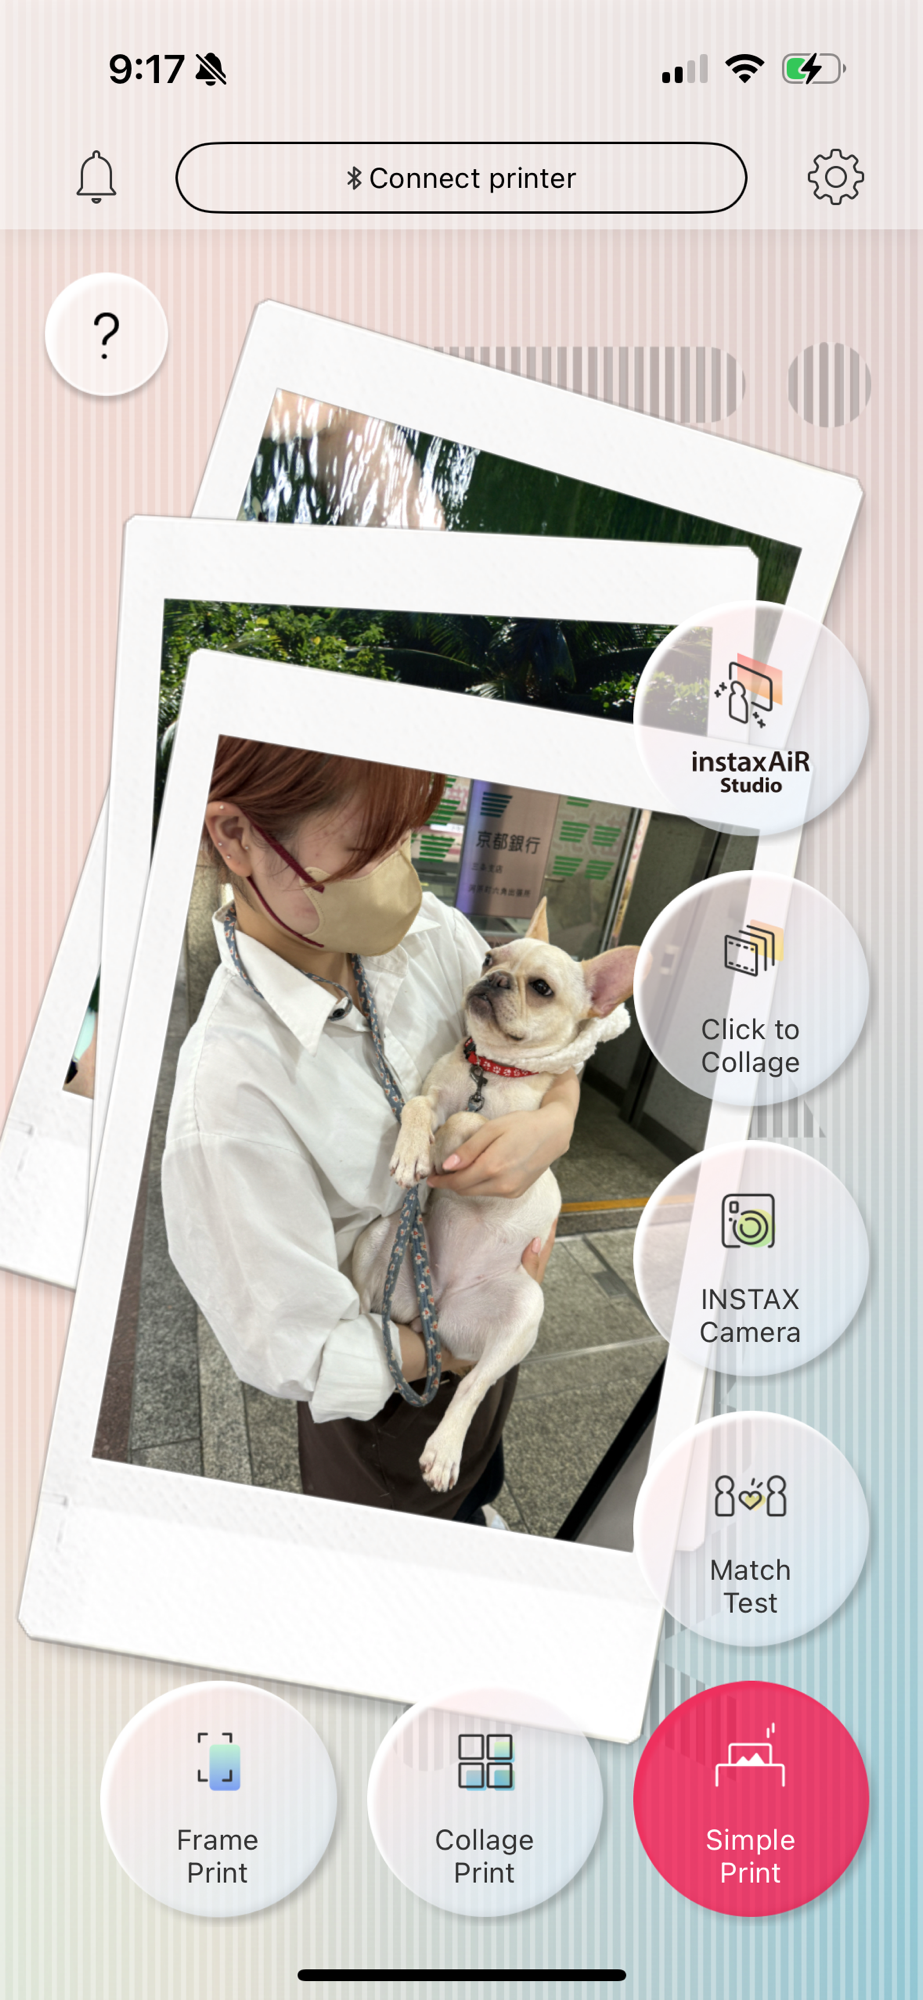
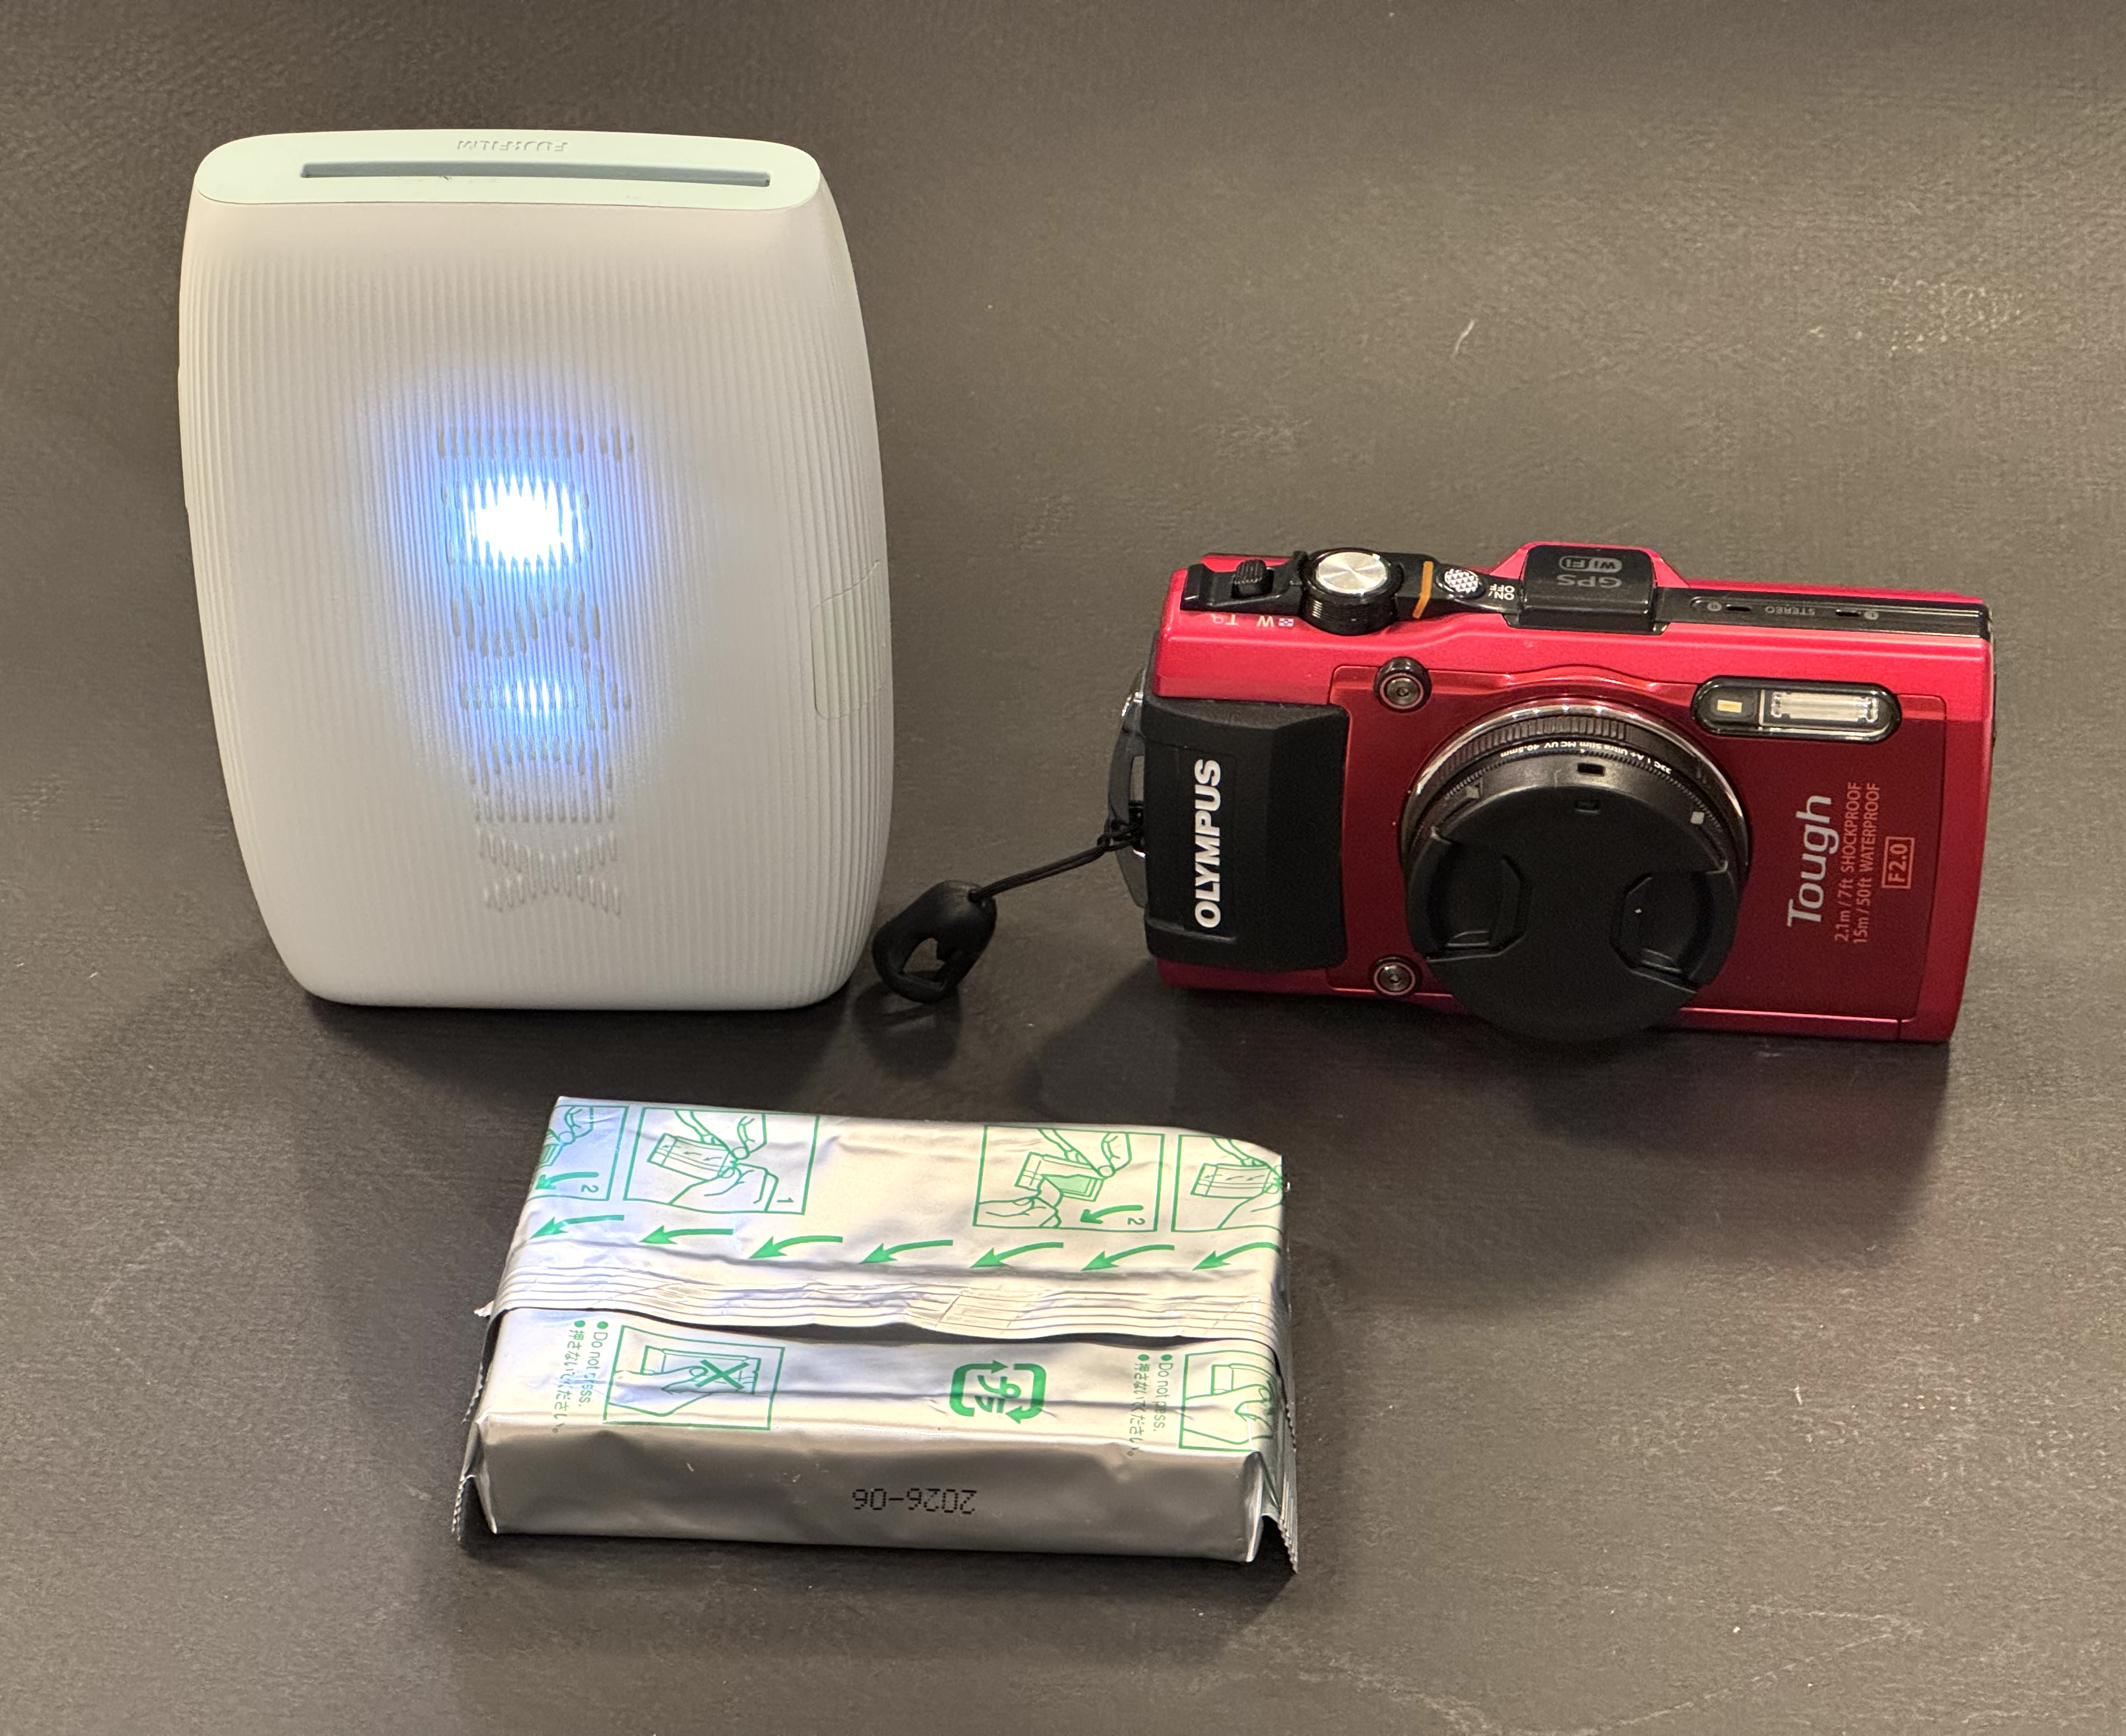
Last by not least, Canon, Fujifilm, HP, Kodak and Polaroid (in alphabetical order) all propose easy to use ultra-portable printers, that will let you print images from a smartphone or a tablet – and place them in small photo albums that they can also provide. Fujifilm and Polaroid printers use instant film packs, Canon, HP and Kodak use a technology named “zero ink” (a sophisticated thermal paper). In my personal experience, assembling a mini photo album of 20 pictures is quick, easy, and ultimately cheaper than configuring a photo book from Blurb, Mixbook and dozens of their competitors.

More about Lightroom Mobile and Instant Film printers:


More sunsets

Lake Lanier, July the 4th
Belem, Portugal
Paris, Place de la Concorde

Developing and digitizing B&W film without a darkroom

A few weeks ago I tested the JJC Negative Scanning Kit – my goal was primarily to digitize my stash of negatives, so that I could upload and reference them in Lightroom.

B&W and negative color film – the differences

I was pleasantly surprised by the quality of the scans – but I came to the conclusion that until I spent money in Lightroom Classic (or Photoshop) and a good plug-in, converting the color negative into a usable image was going to be labor intensive and yield inconsistent results. Since I had the equipment in place, I also tried my luck at converting B&W negatives instead.

Kodak Plus X Negative – July 2010. As scanned last week with the JJC Digitizer. Kodak Plus X was a conventional B&W film.

Black and White film can be of two types – conventional B&W film (also defined as “Crystal Gelatine” or “Silver Halide”) is made of silver crystal salts (the silver halide) suspended in gelatine. To cut a long story short, during the development process, the silver halides are reduced into silver metal – and the developed film still contains silver.

Image processing in Lightroom

Negative Color film works a bit differently. In this type of film, it’s a mix of silver halide and dye couplers that is suspended in gelatine; during the development process, the developer reacts with the dye couplers and the silver halide to produce visible dyes, while the silver is totally eliminated from the developed film (the labs catch that silver in the exhausted fixer and reclaim it).

The digitized negative after some work in Lightroom. For an amateur, conventional B&W film is easier to work with than chromogenic film.

Because minilabs were ubiquitous and only equipped to process negative color film, it made sense for Kodak and Ilford to propose B&W film engineered to be processed like negative color film – the chromogenic B&W film. Kodak had the BWCN400, Ilford the XP2. Besides the convenience of relying on local minilabs for processing, I also liked the exposure latitude of the BWCN400 and the smooth look of its images, and it was my B&W go-to film for years. Until Kodak stopped manufacturing it 10 years ago (Ilford still have the XP2 in their catalog).

Digitizing B&W film with the JJC Film Digitizing Adapter

The JJC Film Digitizing Adapter is a sort of clone of Nikon’s ES2 kit – both are designed to be placed in front of a macro lens attached to a digital interchangeable lens camera (m43, APS and Full Frame cameras are supported by the JJC system).

Chromogenic film is not as difficult to digitize as color negative film (you don’t have to take care of the color channels), but it still presents challenges, and some work on the S-Curve is needed because all the information contained in the film is concentrated in a relatively narrow band in the middle of the histogram. I will not be posting any self-made scan of my chromogenic pictures yet, because I’m not happy with the results – too crappy to be shared.

On the other hand, conventional Silver Halide film is much more analog in its behavior, and once the negative is inverted – I was using the same free online service as before (https://invert.imageonline.co), almost no adjustment is needed in a photo editor and the image is ready to be published.

Since conventional B&W film is easy to develop, even at home and without a dark room (we’ll come to it in the next paragraph), a darkroom-free process becomes a distinct possibility – develop the film in daylight, digitize with a JJC or ES-2 kit, adjust to taste in Lightroom and share to the destination of your choice.

Developing film in full daylight

Amateurs typically develop 35mm film in Developing Tanks – it starts in a darkroom, where the film is removed from its cassette and placed on the reel and the reel in the tank, then the tank’s lid is closed and the rest of the film processing (develop, stop, fix, rinse) can take place in full daylight.

What a stainless steel tank and the reel look like – nicer than more modern plastic tanks.

Companies like Paterson will also sell you “changing bags”, where you will first place your empty developing tank, its reel, a pair of scissors and your 35mm film cassette. When everything is in place in the bag, you insert your hands in the bag through the sleeves, and attempt to load your exposed film on the reel, separate it from the cassette, place the spiral in the tank, and close the tank, without seeing what your hands are doing. Not easy at the beginning, but with some practice, it becomes a second nature.

Paterson Changing Bag

Our good friends of Lomography have just released a “daylight developing tank” that should make the process easier. In full daylight, place the film cassette in the tank, close the tank, and simply turn the crank to load the film on the reel. When the film is totally loaded on the reel, press a button to cut the film and separate it from the cassette, open the tank, remove the cassette, close the tank again, and start the normal development process.

I just ordered one. I’ll let you know how it goes.


More on the subject:

Digitizing negatives with the JJC adapter/

Film Processing (wikipedia)

Film Developers (wikipedia)

Paterson Developing Tanks over the years


Charleston, SC- July 2009. Developed and scanned by a pro-lab (at Costco, most probably).
Magnolia Plantation and Gardens – Charleston, SC

Digitizing negatives with the JJC Adapter

If you ask a lab to develop your film (I’m using https://oldschoolphotolab.com/), they will scan it for a modest extra fee ($6.00 per film). And if you send them already developed film strips, they will charge you anything between $1.00 and $4.50 per frame, depending on the quantity and on the desired output quality. The scans are made on Fuji or Noritsu machines, and the result is top notch – you just have to be prepared to wait – typically for two weeks – before you can access the files on Dropbox.

But there may be situations when you can’t wait, or you don’t want or are not permitted to send the negatives through the postal service at the other end of the country. There are also cases when the sheer volume of images to scan (and the expected low keep rate of the scanned images) makes using a specialized lab financially impractical.

JJC Kit in its box, Nikon D700 ready for action

You can invest in your own scanner – or – taking advantage of the high resolution sensors of modern digital interchangeable lens cameras (dSLRs or mirrorless), shoot the negative frames (or the positive slides) with your camera, and simply upload the resulting files to Lightroom for a final edit.

Nikon were the first to package the necessary hardware in a single product (the Nikon ES-2 adapter, tested in The Casual Photophile: solving scanning with the nikon ES-2 film digitizing kit ). The Nikon kit is dedicated to Nikon cameras and lenses (and only a very limited list of Nikon Macro lenses are supported).

The JJC FDA-S1 Digitizing Kit

JJC have developed a clone of the ES-2, and have opened it to more lenses (they have added support for Canon, Sony, Laowa and Olympus lenses). Regular visitors of CamerAgX may know that when I’m shooting digital, it’s primarily with Fujifilm X cameras (X-T4 and X-A5) but I also have an old Nikon D700 and a much older 55mm Micro-Nikkor AI lens on a shelf, and that’s the gear I used to test the JJC “Film Digitizing Adapter Set”, Ref: FDA-S1.

The kit is composed of 8 adapter rings, a slide mount holder, a negative film strip holder and (the unique selling proposition as far as I’m concerned), a USB powered light box. The whole set is well packaged, seems to be made of good quality materials (metal and plastic), and everything works as expected.

First attempt: Scanning with the Nikon D700 and the Nikon Micro Nikkor 55mm f/2.8 AI

The Micro Nikkor 55mm AI is only offering a 1/2 repro ratio when shooting macro. As a result, the image of the negative is only using the central area of the frame of the D700. Not good. It’s made worse by the small resolution of the D700’s sensor – 12 Mpix – over here, we’re only using 3 Million pixels. The scans look blurred and lack detail.

As shot with the D700 – the Micro Nikkor 55mm lens is not a good fit for the JJC adapter

Second attempt: Scanning with an APS-C camera (the Fujifilm X-T4) and Nikon Micro Nikkor 55mm f/2.8 AI

One of the benefits of “mirrorless” cameras is that they can accept all sort of lens adapters. I happen to have a Fotasy adapter which will attach the Nikon AI lens to my Fujifilm X-T4. And the articulated display fo the mirrorless camera is much more comfortable to use than the optical viewfinder of the Nikon D700 for this type of work.

In action – Fujifilm X-T4, Fotasy Adapter, Nikon Micro-Nikkor 55mm, JJC kit

The “scan” fills the frame and is much more detailed.

Much better with the Fujifilm X-T4 – the “cropped sensor” is a good fit for the 1/2 repro ratio of the 55mm Micro-Nikkor AI.

Inverting the scanned image

If you were starting from a negative, you have to convert it to a positive image. I tried this free online service (invert.imageonline.co). Better equipped pros will use Photoshop or Lightroom Plug-Ins.

Inverting the image with imageonline.co

Final touch in Lightroom Mobile

Depending on the pictures, it’s more or less labor intensive. It involves playing with the white balance, the different exposure sliders, and the color channels.

As imported in Lightroom from imageonline.co
Playing with the sliders in Lightroom with this picture I could not approach the colors of the lab’s scan.

Let’s compare a JJC scan with a pro medium resolution scan

The default resolution of scans performed by the Old School Photo Lab is 2048×3072, delivered as JPEG files. Higher resolution scans can be ordered at an extra cost (resolution: 4492×6774) and they can be delivered as TIFF files.

I’m generally happy with their standard resolution scans (I’ll call them medium res as some labs offer lower res scans as an option) and would only request High Resolution for exceptional pictures I’d like to print in a large format.

Shot with Kodak Ultramax on a Canon Photura, processed and scanned by the Old School Photo Lab

I just received the negatives of a film roll I shot with the Canon Photura a few weeks ago (the scans are made available online as soon as the film is processed, and the negatives returned to you one week later). Let’s compare a scan from a professional lab with an image captured on an APS-C camera with the JJC kit.

Scanned on a Fujifilm X-T4, inverted by imageonline.co and adjusted in Lightroom Mobile.

With the JJC kit and my amateur workflow, getting “good enough” results is easy and fairly quick. The DIY scans are very detailed but the colors still a bit off. Getting something as good as a scan on a Noritsu machine requires precision – the focus on the camera has to be perfect, the color balance has to be exact – but with practice and dedication I’m sure it’s possible to get “pretty close”. At the moment, I’m “pretty close” on some pictures, and totally off on others. Practice makes the master, and I lack practice, for sure.

Conclusion

I did not invest a lot in this test (the FDA-S1 kit cost me less than $100.00), I used an undocumented and unsupported setup, I relied on a free online service to invert the scanned negatives, and I edited the pictures with Lightroom Mobile. Enough to give me a feel for the practicality of the solution, but not enough to get the best possible results. I don’t think using an APS-C camera is an issue (the 26 Mpix of the X-T4’s sensor are more than enough to render a 35mm negative), but photographers who digitize their negatives “seriously” use the personal computer version of Lightroom (Lightroom Classic), with a plug in provided by Negative Lab Pro.

Scans from the lab (top row) vs DIY scans (lower row – the image on the bottom left has not been processed yet).

As a conclusion

The great thing about the JJC Digitizing kit is that it’s an all inclusive hardware solution, which is flexible enough to be used on cameras and lenses not explicitly supported. The USB powered lightbox is a significant plus, which is missing from the Nikon ES-2 kit.

The two main benefits of a scanning workflow starting with the JJC kit are speed – you can scan hundreds of pictures in an hour – and resolution. The biggest limitation is what comes after – inverting the negative and playing with the contrast slider, the color channels and the S curve to make the image usable. In order to get the best possible results at scale, using Lightroom Classic on a PC or a Mac, with a dedicated plug-in is probably the way to go, but it’s a spend I can’t justify – I’m just an amateur photographer, not a pro.

I’ll use the JJC Digitizing adapter as a quick way to reference hundreds or thousands of negatives, and, to share the ones that matter to them with family and friends, on the messaging apps of their smartphones. If I need a high quality scan of one of those pictures, I will still rely on a pro lab.

My most satisfying DIY scan so far.

(*) More about the different versions of Lightroom (Classic, Mobile, Mobile with Premium Features)

Why shoot film in 2017?

Last week-end, I tried a Nikon N90S that had just been delivered by UPS. The N90S does not feel very different from a conventional Nikon dSLR such as a D90 or a D7200. And instinctively, I started using it the same way I generally use a digital camera. Auto-everything, just compose the picture, press the shutter release, check the picture the LCD, adjust the exposure or the focus, and shoot again. Except that the N90s is a film camera. There was no LCD to check the picture. I won’t know if the camera nailed it until the film comes back from the lab. It could be weeks from now. And I started wondering why I had brought this camera, that wants to be used like a modern dSLR, but does not offer the convenience of digital.

It does not seem logical to shoot film:

– it’s expensive

– film is low ISO only (typically 100 to 800 ISO)

– there is a limited choice of film, and it’s difficult to find

– Film is not flexible – if you’ve loaded your camera with Kodak’s TRI-X, you’ll have 36 contrasty and grainy Black and White pictures. No magic switch or menu option will transform it into an Ektar or a Velvia on the fly.

– it takes days or weeks to get to see your pictures

– and most images are consumed on a smartphone or a computer monitor, or printed on a inkjet or giclee printer. Unless you enlarge your negatives in a dark room and only hang the prints on a wall, the images will have to be digitized at some point. So why go through the pain of using film, if you always end up processing digital images.

Most of the reasons given by the apologists of film are false pretenses:

Holga 120 CFN -Kodak color film.

Google “why shoot film” or check the Web sites of photo labs. You will often find the same reasons for shooting film. Most of them don’t resist  a close examination:

– “Film forces you to be picky because each image shot has a cost” – true, but nothing prevents you from being picky with a digital camera,

– “Film forces you to think and operate with method” – there is no possibility to check the picture immediately after it’s taken and adjust the parameters accordingly – trial and error does not work – you have to think hard and get it right. Again it’s true, but nothing prevents you from operating slowly and deliberately with a digital camera,

– “With a film camera, you’re not tempted to lose time looking  at your images on the LCD, you can focus on the subject and the next opportunity”.  True. But on a digital camera it’s simply a matter of discipline. Most digital cameras can be set not to display the image immediately after it has been shot, and nothing forces you to push the “play” button. (my digital cameras are set NOT to display the image which has been taken – but it came back to bite me a few times – when the images were not correctly exposed, and I only found about it when it was too late).

Venice – Bridge on the Rio de Palazzo o de Canonica – Shot with Nikon FE2. Scanned by a minilab. Jan. 2012

Some are true, but up to a point only…

You read frequently that in spite of all the film simulation modes (in camera or in Lightroom post processing), there is still something unique in the way film looks. Maybe. I’m not denying that some images originally shot on film look different. But I don’t know for sure if it’s the film, or something else. Because unless you use an enlarger and develop your prints in your own dark room, it’s likely that your workflow – and the processing chain of the lab who scan your film roll – are relying on digital technologies at some point. Minilabs and industrial labs have been printing from scans for years (even before consumers switched from film to digital), and that special film look you like so much may just be a product of the scanning software controlling the lab’s Fuji Frontier (or its Noritsu).

“Using film gives you access to cheap full frame and medium format equipment”  – True, you can get the “full frame” 35mm or  the medium format experience for less than $100. But the cost difference is not as high as it used to be (you can get a very  good second hand Full Frame dSLRs for $700), and digital medium format cameras, while still very expensive, will become more accessible when new cameras such as Fujifim’s GFX reach the second hand market and start pushing the price of older cameras downwards.

“Film can be stored for hundreds of years – and digital images are fragile”. True,  CDs and DVD may degrade over time, hard drives fail, and cloud storage only lives as long as the company offering the service stays in business. Digital imaging is based on short lived standards – will electronic devices of Y2050 still read today’s jPEGS, DNG and RAW files, will they mount the drives, the disks, the USB keys we store images on? . All those concerns are valid. Keeping digital images on the long run  will require work (moving images from an obsolete support or from a retiring on-line service to more current media, convert image files from old formats to newer formats). But it’s an archival issue, and archival of film also requires work – a shoebox can only get you so far.

Garden near Charleston, SC. Nikon FM, Nikkor 24mm AF.

What’s left? 

There still are plenty of reasons, good or bad, to shoot film…

– snobism,

– a desire to be  different,

– the refusal to fall for the latest and greatest electronic gimmickry,

– the love of film as a medium,

– the love of old cameras (mechanical devices made of aluminum, steel and brass) – there is no other way to use old cameras than to shoot film,

– love of old lenses,

– a preference for the way you had to work with those old film cameras (because you learned that way and you don’t mind showing your age…)

– the thrill of risking wasting a photoshoot  with cameras that are getting old and unreliable (not for me – I mostly use Nikons…),

– the unpredictability of results with old and inaccurate cameras and expired  film (basically, you let chance and mother nature be creative on your behalf)

– a search for authenticity and simplicity. Digital photography can be overwhelming (so many options, so many filters, so many plug-ins, so many ways to modify or improve the images, in the camera or on a computer, before and after shooting). Film is simpler. You load the film, your arm the shutter, you set the aperture and the shutter speed, you adjust the focus. You compose. You press the shutter release. And you’re done.


Panic in the sky – accidental double exposure on Olympus OM-2000. You would never get this image with a digital camera.

SaveSave

SaveSave

SaveSaveSaveSave

SaveSave

SaveSave

SaveSave

Scanning 35mm film – is high-res scanning worth its cost?

Most photo labs propose scans in 3 resolutions: 1000×1500, 2000×3000, 4500×6700. The scans  are saved as jPEGs, with some labs also offering to save 4500×6700 scans as TIFF files.

In theory, those resolutions correspond to an image of 1.5 Million points (1.5 MP), 6 MP, and 30 MP respectively. In general,

  • 1000×1500 scans – when available – are virtually free (they’re included in the processing costs by some labs such as thedarkroom.com )
  • 2000×3000 scans cost roughly $5 for a full roll (in addition to the processing costs), or .50 per individual image scanned
  • 4400×6700 scans cost roughly $11 to $12 per full roll (in addition to the processing costs), or 3.00 per individual scan
  • 4400×6700 (TIFF) are the most expensive at $21 per full roll (oldschoolphotolab.com)

Storage constitutes an indirect cost – which doesn’t hurt until you run out of disk space, and have to upgrade your PC, your home NAS  or you online backup plan. But if storing 36 images at 1.5 Mbytes will not break your storage budget, 36 high res TIFF images represent almost 3 Gbytes. The exact size of a JPEG file is difficult to predict (JPEG is a lossy compression format), but in general, the file size of each type of scan falls within those brackets:

  • 1000x 1500 – JPEG -1.5 to 2 Mbytes
  • 2000 x 3000 – JPEG – 3 to 4 Mbytes
  • 4492 x 6776 -JPEG – 12 to 16 Mbytes
  • 4492 x 6776 (TIFF) – 80 MBytes / image

Scan_2000x3000_Piedmont
Atlanta Piedmont Park – Shot with Canon A-1 – Canon FD 35-105 f/3.5 – Fujicolor 400. Scanned at a resolution of  2000 x 3000 – the pictures of this roll are not really better than when scanned at 1000 x 1500 – probably a limitation of the lens (a 35-105 zoom of the seventies)

The tests

I wanted to have a few pictures I had taken a long time ago scanned, and I asked the lab to scan some images in 2000 x 3000, and some in 4400 x 6700. The pictures had been taken with a Minolta 7xi and the famous Angenieux 28-70 f/2.6 zoom, on Fuji Reala film (the 100 ISO “professional” color film Fujifilm were selling at that time). The pictures had originally been enlarged on photographic paper, and I expected the scans to be good.

I also had a series of images taken recently with a zoom from the early seventies, that had been scanned by the lab at 1000×1500, that I asked the lab to rescan at 2000 x 3000.

Once the jPEGs were ready, I downloaded them in iPhone and iPad photo galleries, in Photoshop and Lightroom on a laptop, and on WordPress, in order to compare the perceived quality. A reminder of the resolution of a few devices compared to print.

  • iPhone 5 S Retina photo gallery : 1136x 640 (720,000 points) at 326ppi
  • 9.7 in iPad Retina Photo gallery:  2048 x 1536 (3,000,000 points)  at 266 ppi
  • Print 8 x 10: 2400 x 3000 points or 7.2 million points at 300ppi
  • the pictures of this blog are generally saved for the “Large” format proposed by WordPress, at 1024 x 680, corresponding to 600,000 points.

Paris – The Seine – scanned at 2000 x 3000. Minolta 7xi – Angenieux Zoom 28-70 – Fuji Reala film (1992). No visible difference in quality with the 4492 x 6700 scan (look at the details of the Eiffel tower compared to the glass house of the Grand Palais in the image below)

Conclusion

  • Scan at 1000×1500 or 2000×3000 ?
    • on an iPhone, on a 4×6 print, or in a blog supporting 1024 x 680 images (such as this one), there is no visible difference between 1500 x 1000 and 3000 x 2000 scans.
    • For all larger screen or print formats (9.7′ iPad Retina, laptop, 8×11 print, blogs offering to view images at native resolution)  the difference between a scan at 1.5 Million points and a scan at 7 Million points is very visible, unless the original is very poor (low lens resolution, very grainy film, subject slightly out of focus, operator shake at slow shutter speeds). It’s even more visible if you crop the image, even slightly.
  • Scan at 2000×3000 or 4400×6700 ?
    • on an iPhone, iPad 9.7′ Retina or on a 8×11 print – the difference is not really visible.
    • Above that (13 x 20 prints, for instance), the theoretical difference in resolution does not  necessarily translate into a difference in print quality: a 13 x 20 print  represents 24 million points at 300 ppi and the 6 million of points of a 2000×3000 scan should theoretically be overwhelmed, but practically the resolution of the film and of the lens play their part, as the technical limitations of the photographer (focus, shake) do. Large prints are often framed and hung on a wall, and you don’t look at a picture on a wall the same way you look at a 8 x 10 print you hold in your hand. And all technical considerations taken apart, with some subjects, images scanned at 2000×3000 may look as good as images taken at 4492×6770 – it depends on the contrast and quantity of fine details in the subject.

Scanning at 2000×3000 is a good compromise for 35mm film, and my choice when I have film processed. It works fine with any support I use day to day (iDevice, laptop, 8 x 11 prints), is not too expensive and generally produces a visible difference with the 1000×1500 scans.

If I wanted to print a really great picture, an image compelling from an artistic point of view and almost perfect technically (fine grain film, sharp lens, subject in focus, no shake), I would have it scanned at the 4492 x6776 resolution, and saved as TIFF. It would give me no guarantee that the print would be great (there are so many variables), but it would give me the best chances of success.


Scan_4492x6770_Paris-22
Paris – Scan 4492 x 6770 – Shot from the Pont Neuf -Minolta 7xi – Angenieux zoom 28-70 F/2.6 – Fuji Reala (July 1992)

Having film processed and scanned in 2017

You’re shooting film. Assuming you don’t have access to a dark room for film processing, and don’t want to invest time and money in your own scanning equipment, you will have to rely on photo processors to develop and scan your film. Most labs propose the choice between 2 or 3 scan qualities. What should you order?

Our perception of the “minimum acceptable quality” has changed over time:

  • In the old pre-smartphone days (12 years ago), the conventional wisdom was that an image was displayed on a monitor at 72 dpi, and that most amateurs seldom printed anything larger than 5 x 7. A 1500 x 2100 scan was good enough.
  • we now visualize and share most of our images on high pixel density screens (the “Retina displays” of Apple’s products, but also the 4k or 5k screens of recent monitors and TV sets, for instance) which have 3 to 4 times the pixel density of the displays and monitors we used 10 years ago.
  • far fewer of our images are printed (I don’t know anybody who still asks systematically for 4×6 prints) – we only print the best of our pictures, and when we do it, we tend to print LARGE  (coffee table books, 11 x 14 posters). A 2400 x 3600 scan constitutes the new normal.

Resolution of the scan of 24×36 film needed for a print or to fill a screen:

In theory, it’s pure math. Photoshop will prepare images for printing at 300 or 600 dots per inch (DPI). If you want to fill a 10×8 page at 300 dpi, you’ll need an image dimension of W=300 x 8 and L= 300 x 10 that is 2400 x 3000.

Photo processors generally offer scans in three levels of resolution:

  • low res image: 1200 x 1800 – good for 6×4 prints at 300 dpi at best, a standard laptop screen at 100 ppi, or an iPhone with Retina screen (at 366 points per inch). An image size significantly below 1200 x 1800 will only be good for proofs or vignettes.
  • medium  resolution image : (2048 x 3072 ) : good for 7 x 10 prints or a Macbook Retina or iPad Pro display at 250 points per inch.
  • high resolution image: ( 4492 x 6777): 15 x 22 print or a large 5 k monitor (24in or more).

Let’s compare two images taken in the Atlanta High Museum of Art with the same type of film and the same camera, and scanned at different resolutions:

Ferrari 250 GT Tour de France. Original Scan: 3088 x 2048 (Costco)

BMW Gina Concept (2008) - Original Scan 1544 x 1024 (the Darkroom)
BMW Gina Concept (2008) – Dream Cars Exhibit. Atlanta (Kodak CN400) – Original Scan 1544 x 1024 (the Darkroom)

The lower resolution picture is visibly less detailed (look at the hardwood floor, look at the grain in the shadows). A resolution of 1024 x 1544 is very limited, even for a WordPress blog.

However, the image size alone is not enough to determine the quality of a scanning service.

First, an image with  1200 x 1800 pixels has not always been scanned with a scanner resolution of 1270 Dots per Inch (36mm = 1.42in; 1800 pixels for 1.42 in = 1270 dpi) – it could have been scanned at a lower resolution and enhanced with interpolation.

Secondly, even with the same scanning equipment and the same resolution, images can be massively different, depending on the settings of the scanner and the skill of the operator: as an example, let’s use two pictures taken on the same type of color film and processed and scanned by two different Wolf Camera in-store labs in Atlanta:

Rialto Bridge, Venice. Original scan: 1800 x 1215 (Wolf Minilab)
Rialto Bridge, Venice. Original scan: 1800 x 1215 (Wolf Camera In Store Lab, 2012)

The second picture looks much more grainy than the first one, even if the JPG files delivered by the minilab contain the same number of pixels in both cases.

Canon A1 - 35-105 zoom - Fujicolor film
Atlanta – Piedmont Park – Original scan: 1818 x 1228 (Wolf Camera In Store Lab, Dec. 2016)

I had noticed the same phenomenon with Costco a few years ago – in the same store, you could get very different results from one day to another one, depending on the experience and skills of the operator on duty that day.

The labs, the services, and the cost

Almost nobody operates in-store minilabs anymore. Pharmacy chains or large retailers that used to process film in-store are now contracting the work to a few centralized labs.  They target the amateurs using disposable cameras and 35mm color film.

The enthusiast photographer crowd will be better served by a few large mail to order processing labs such as The Dark Room, The Old School Photo Lab , or North Coast Photo Services (NCPS).  They offer a wider range of services and also process color slide and “true” black and white film (such as Kodak’s Tri-X Pan or Ilford’s HP5), in many formats.

I’ve been using The DarkRoom and the Old School Photo Lab a few times. Their prices are roughly in the same ballpark. They develop and scan a 135 film cartridge for $11.00 (the base price includes postage, and The Dark Room provides low resolution scans for free). Medium and High resolution scans are available at extra cost ($4 to $5 extra for 2048 x 3084 scans, $ 9 for  4492 x 6774 scans). The scans are posted on a Web Gallery (no need to wait for a CD to come back through the Postal Service) and can be downloaded to a PC or a Mac as jPEGs (TIFFs are available at extra cost). A free app is also made available to visualize the images on a smartphone.

The differentiator between those services is what happens to the film after it’s been processed:

  • Pharmacy chains and big retailers typically DON’T return the processed film to the customer (one can assume it is destroyed after scanning). They generally simply return a CD.
  • Services like The Darkroom or Old School Photo Lab return the processed negatives, with or without a CD, but may charge extra fees to cover the shipping cost (The Darkroom) or the cost of the CD itself (Old School).

Other vendors package their offer differently but the prices are roughly in the same ballpark.

A general issue with all those services is the lead time. You seldom get your scans on line in less than 10 calendar days (135 film, negative color film). Speciality items (slide film, black and white, medium format) may take a few days longer.  But we don’t have much choice anymore, do we?

As a conclusion, if your pictures are important to you,  learn to know your lab

  •  if they publish a mission statement, read it,
  • if they describe their process and how their staff is trained, pay attention.
  • and before you send a large order, test them with a single roll of film – you don’t want to discover after it’s too late that they scanned your negatives at the lowest resolution before destroying them.


London: The O2
London: The O2 – Nikon F3 – Nikkor 24mm F:2.8 AF –