[The Web standards are constantly evolving, and backwards compatibility does not seem to sit very high in the list of priorities. One day, you find out that your good old laptop can’t render Adobe.com or Apple.com pages anymore, or that modern browsers are making a mess of your old blog entries. Because it had become unreadable I moved the content of this old blog post to my current “Isola” theme in WordPress and I’m republishing it. I did not alter the text – just added comments between brackets when necessary.]
When your good friends learn that you still shoot film, and write about it, they understand they have a unique opportunity to get rid of all the – let’s be polite – worthless photo equipment they don’t use anymore and you end up with Kodak Brownies or Instamatics by the bucketload. And if your brother in law is really facetious, he brings you a brand new Holga from one of his trips in China, and since it’s a Christmas present and everybody in the family is intrigued, you buy film and start using it.

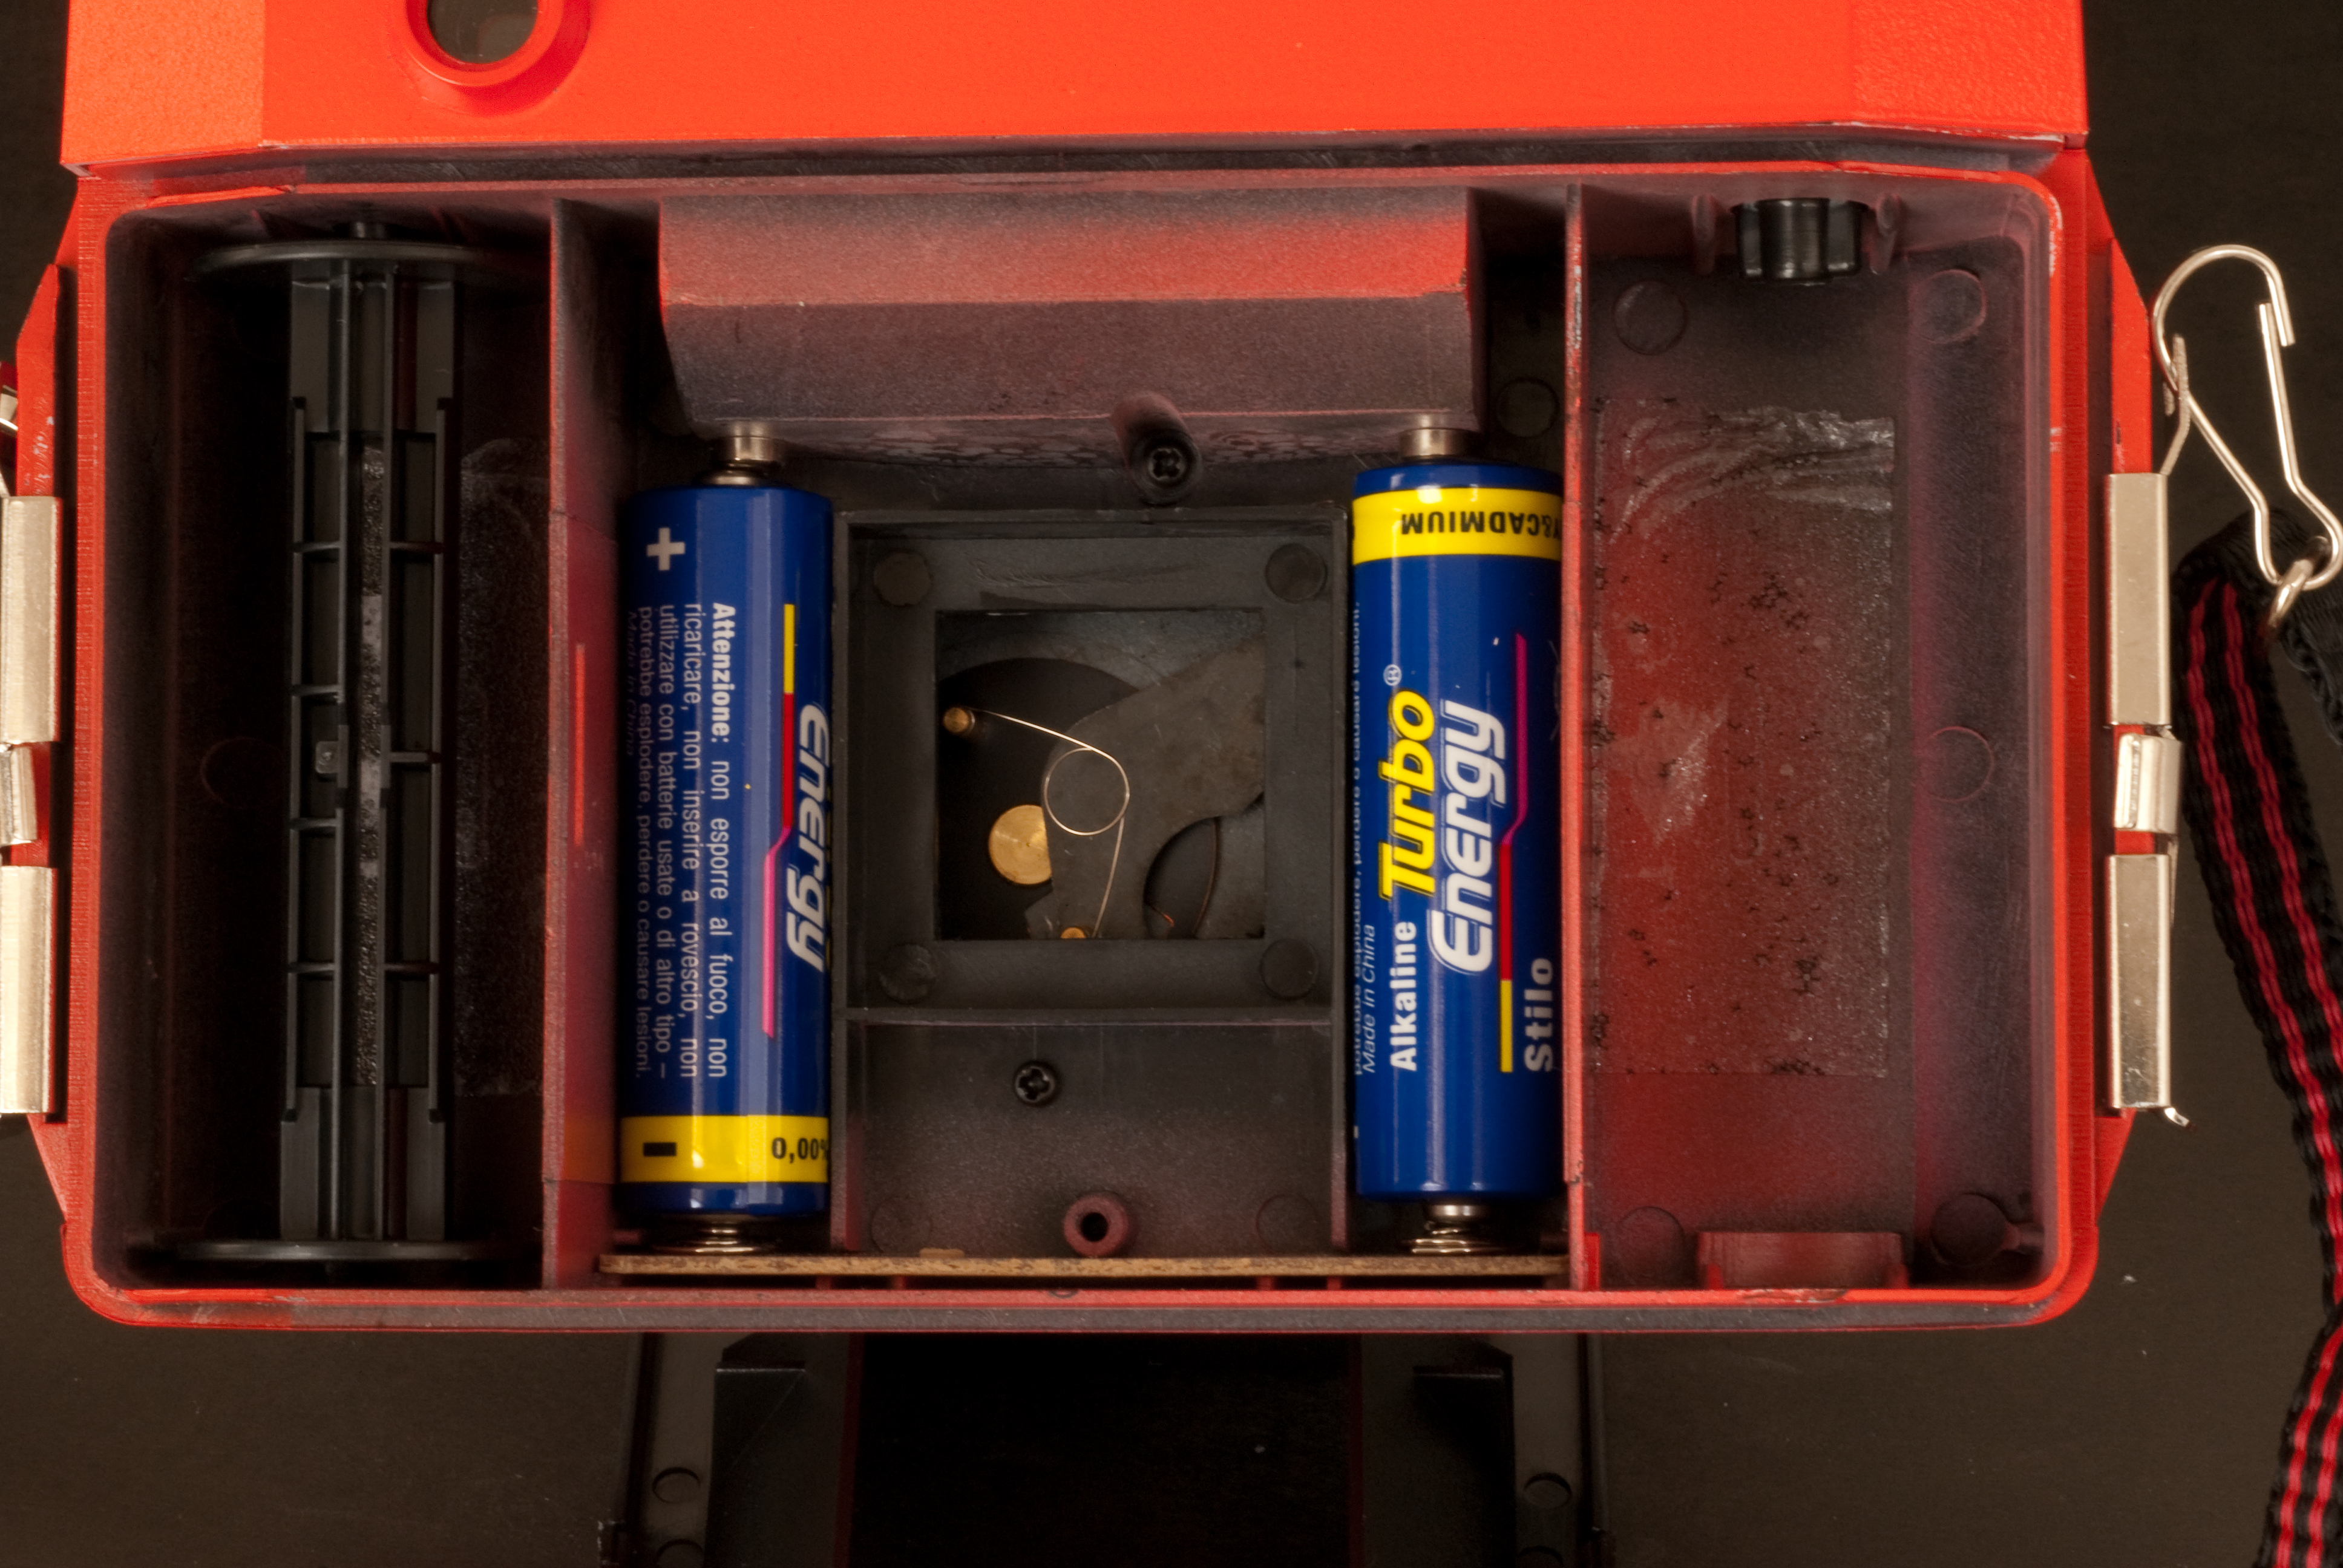
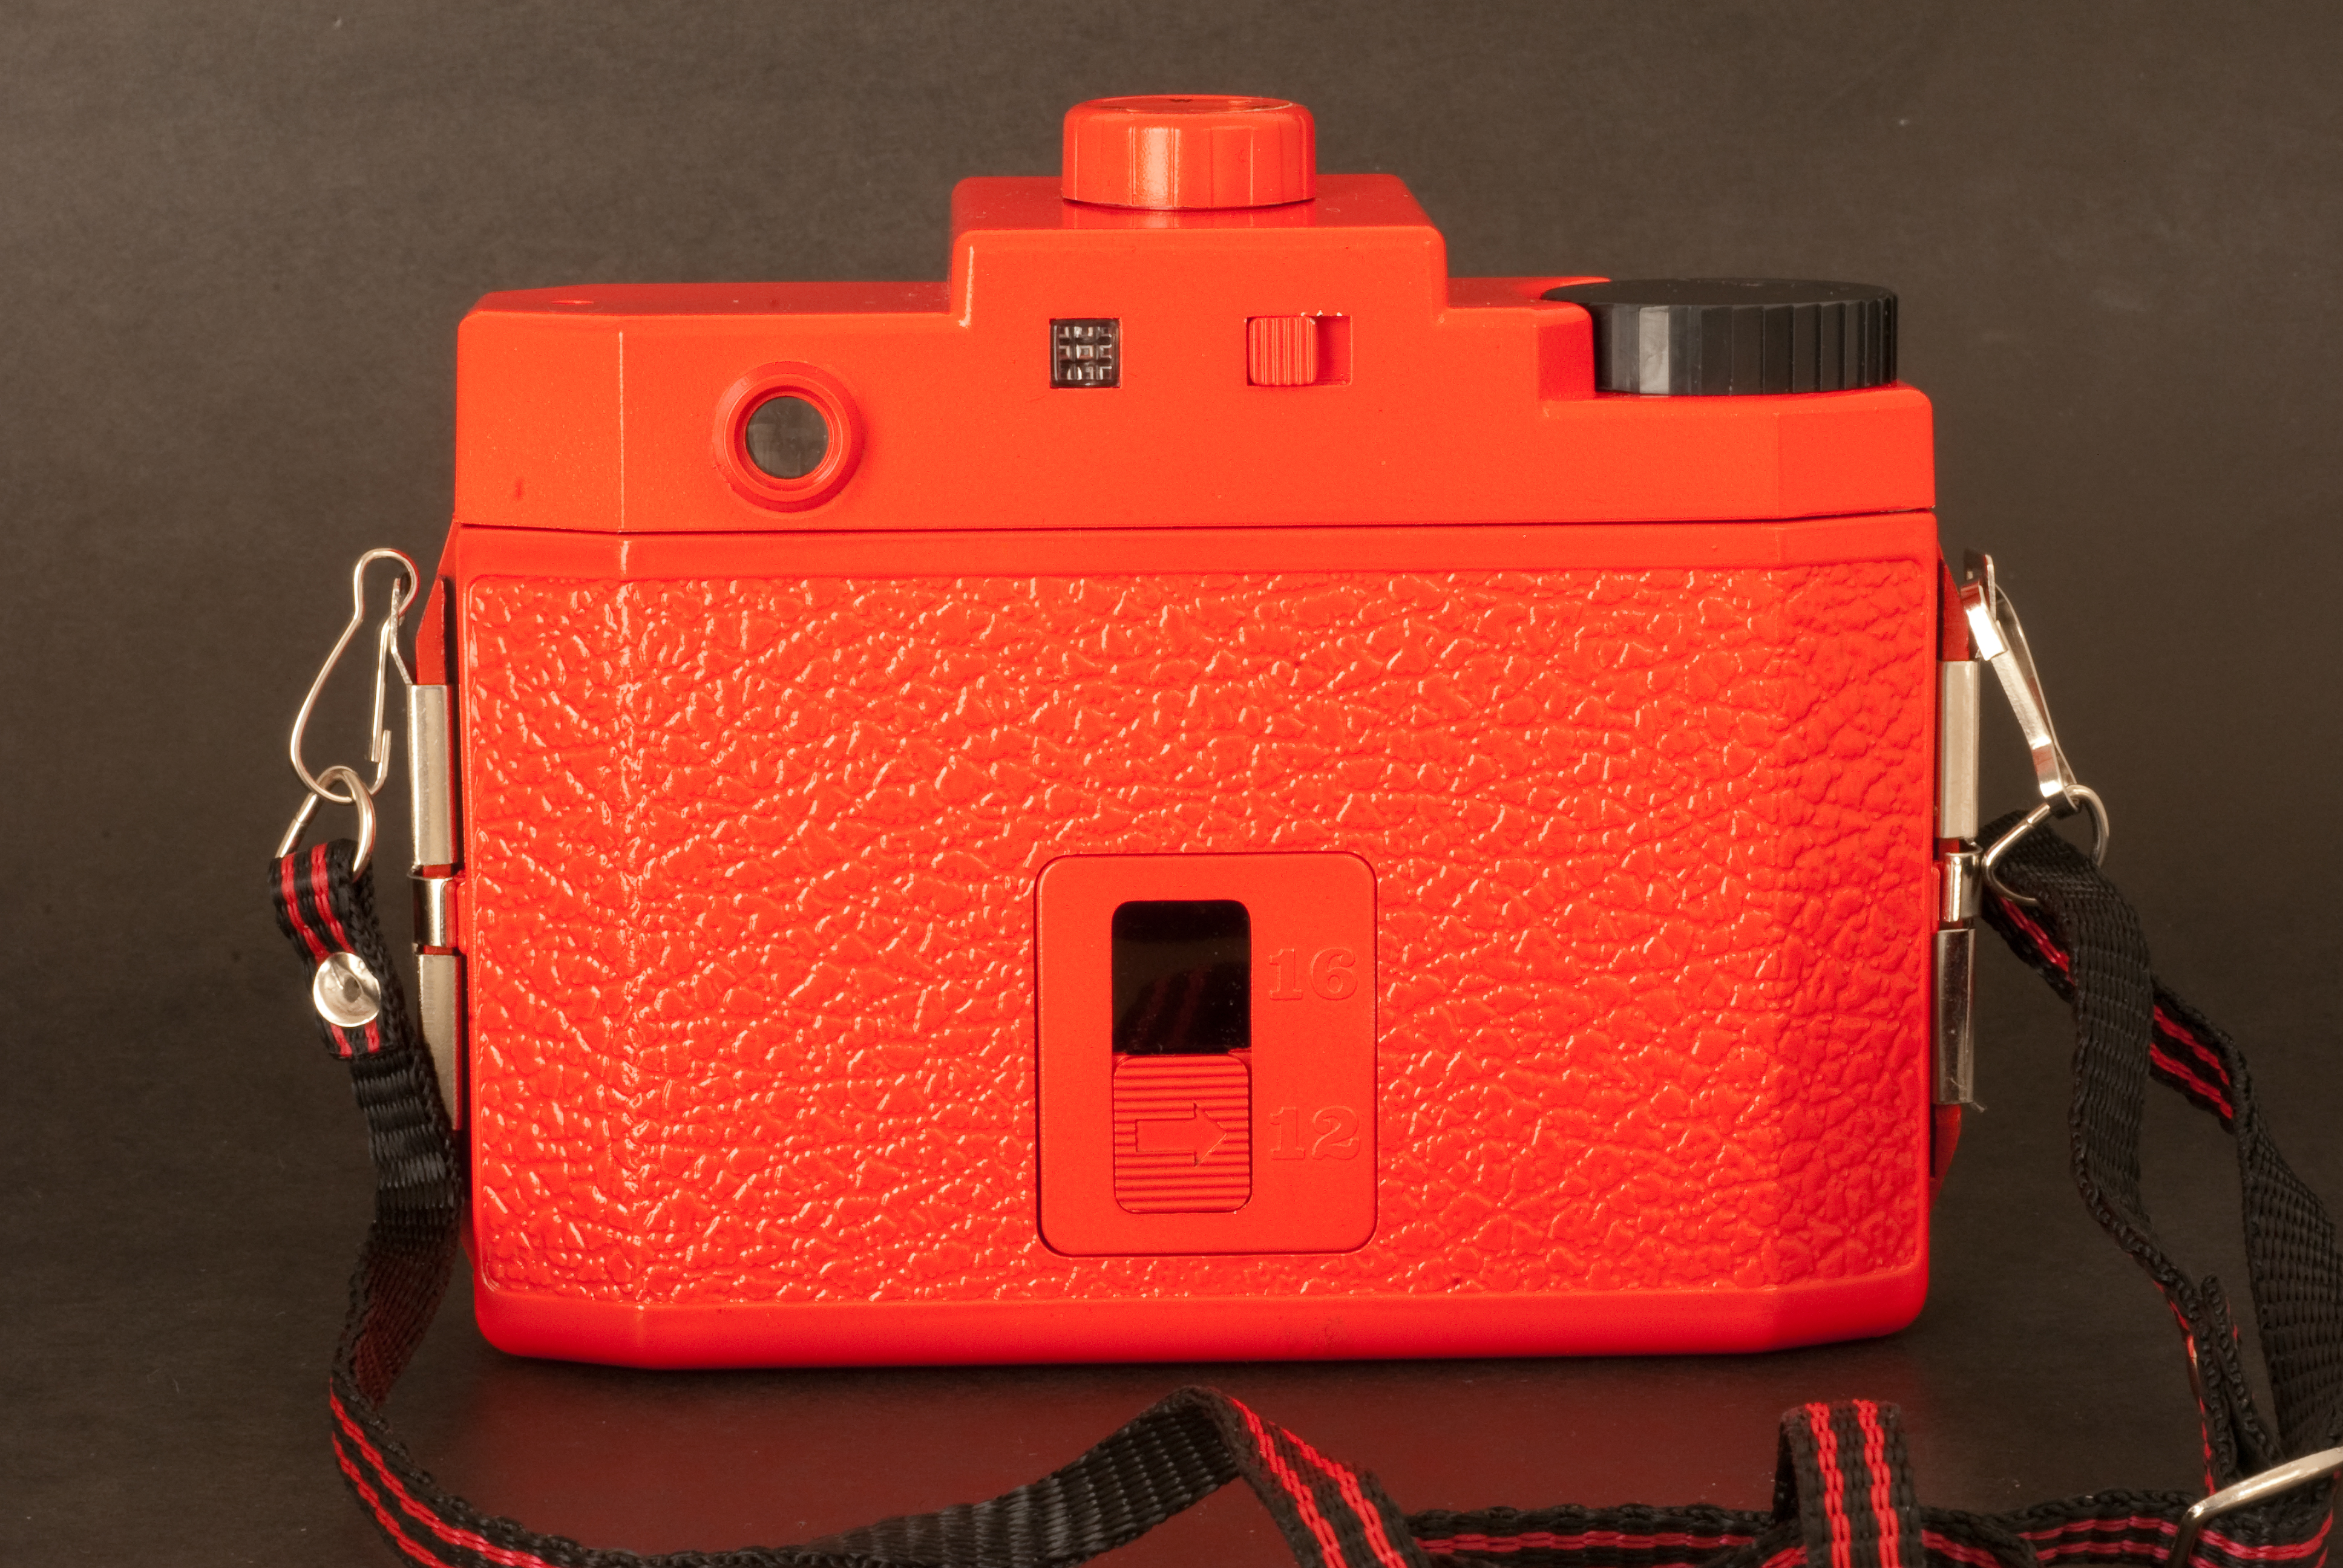
That particular camera comes in a big orange box with the rest of the “Starter Kit”. Reading the user manual, you get confirmation that the camera is “extremely low tech, and will eventually wear out”. Major design flaws are presented as unique features – the dreaded manual mentions “leaks of light, unvoluntary multiple exposures, loose connection between the film and the take up spool” among the desirable characteristics of the product. Looking for some comfort, you check a little square format book at the bottom of the box. It’s a nice paperback of 192 pages, showing 300 images taken with Holga cameras. Not something Leica or Nikon would be proud of, but interesting pictures nonetheless.
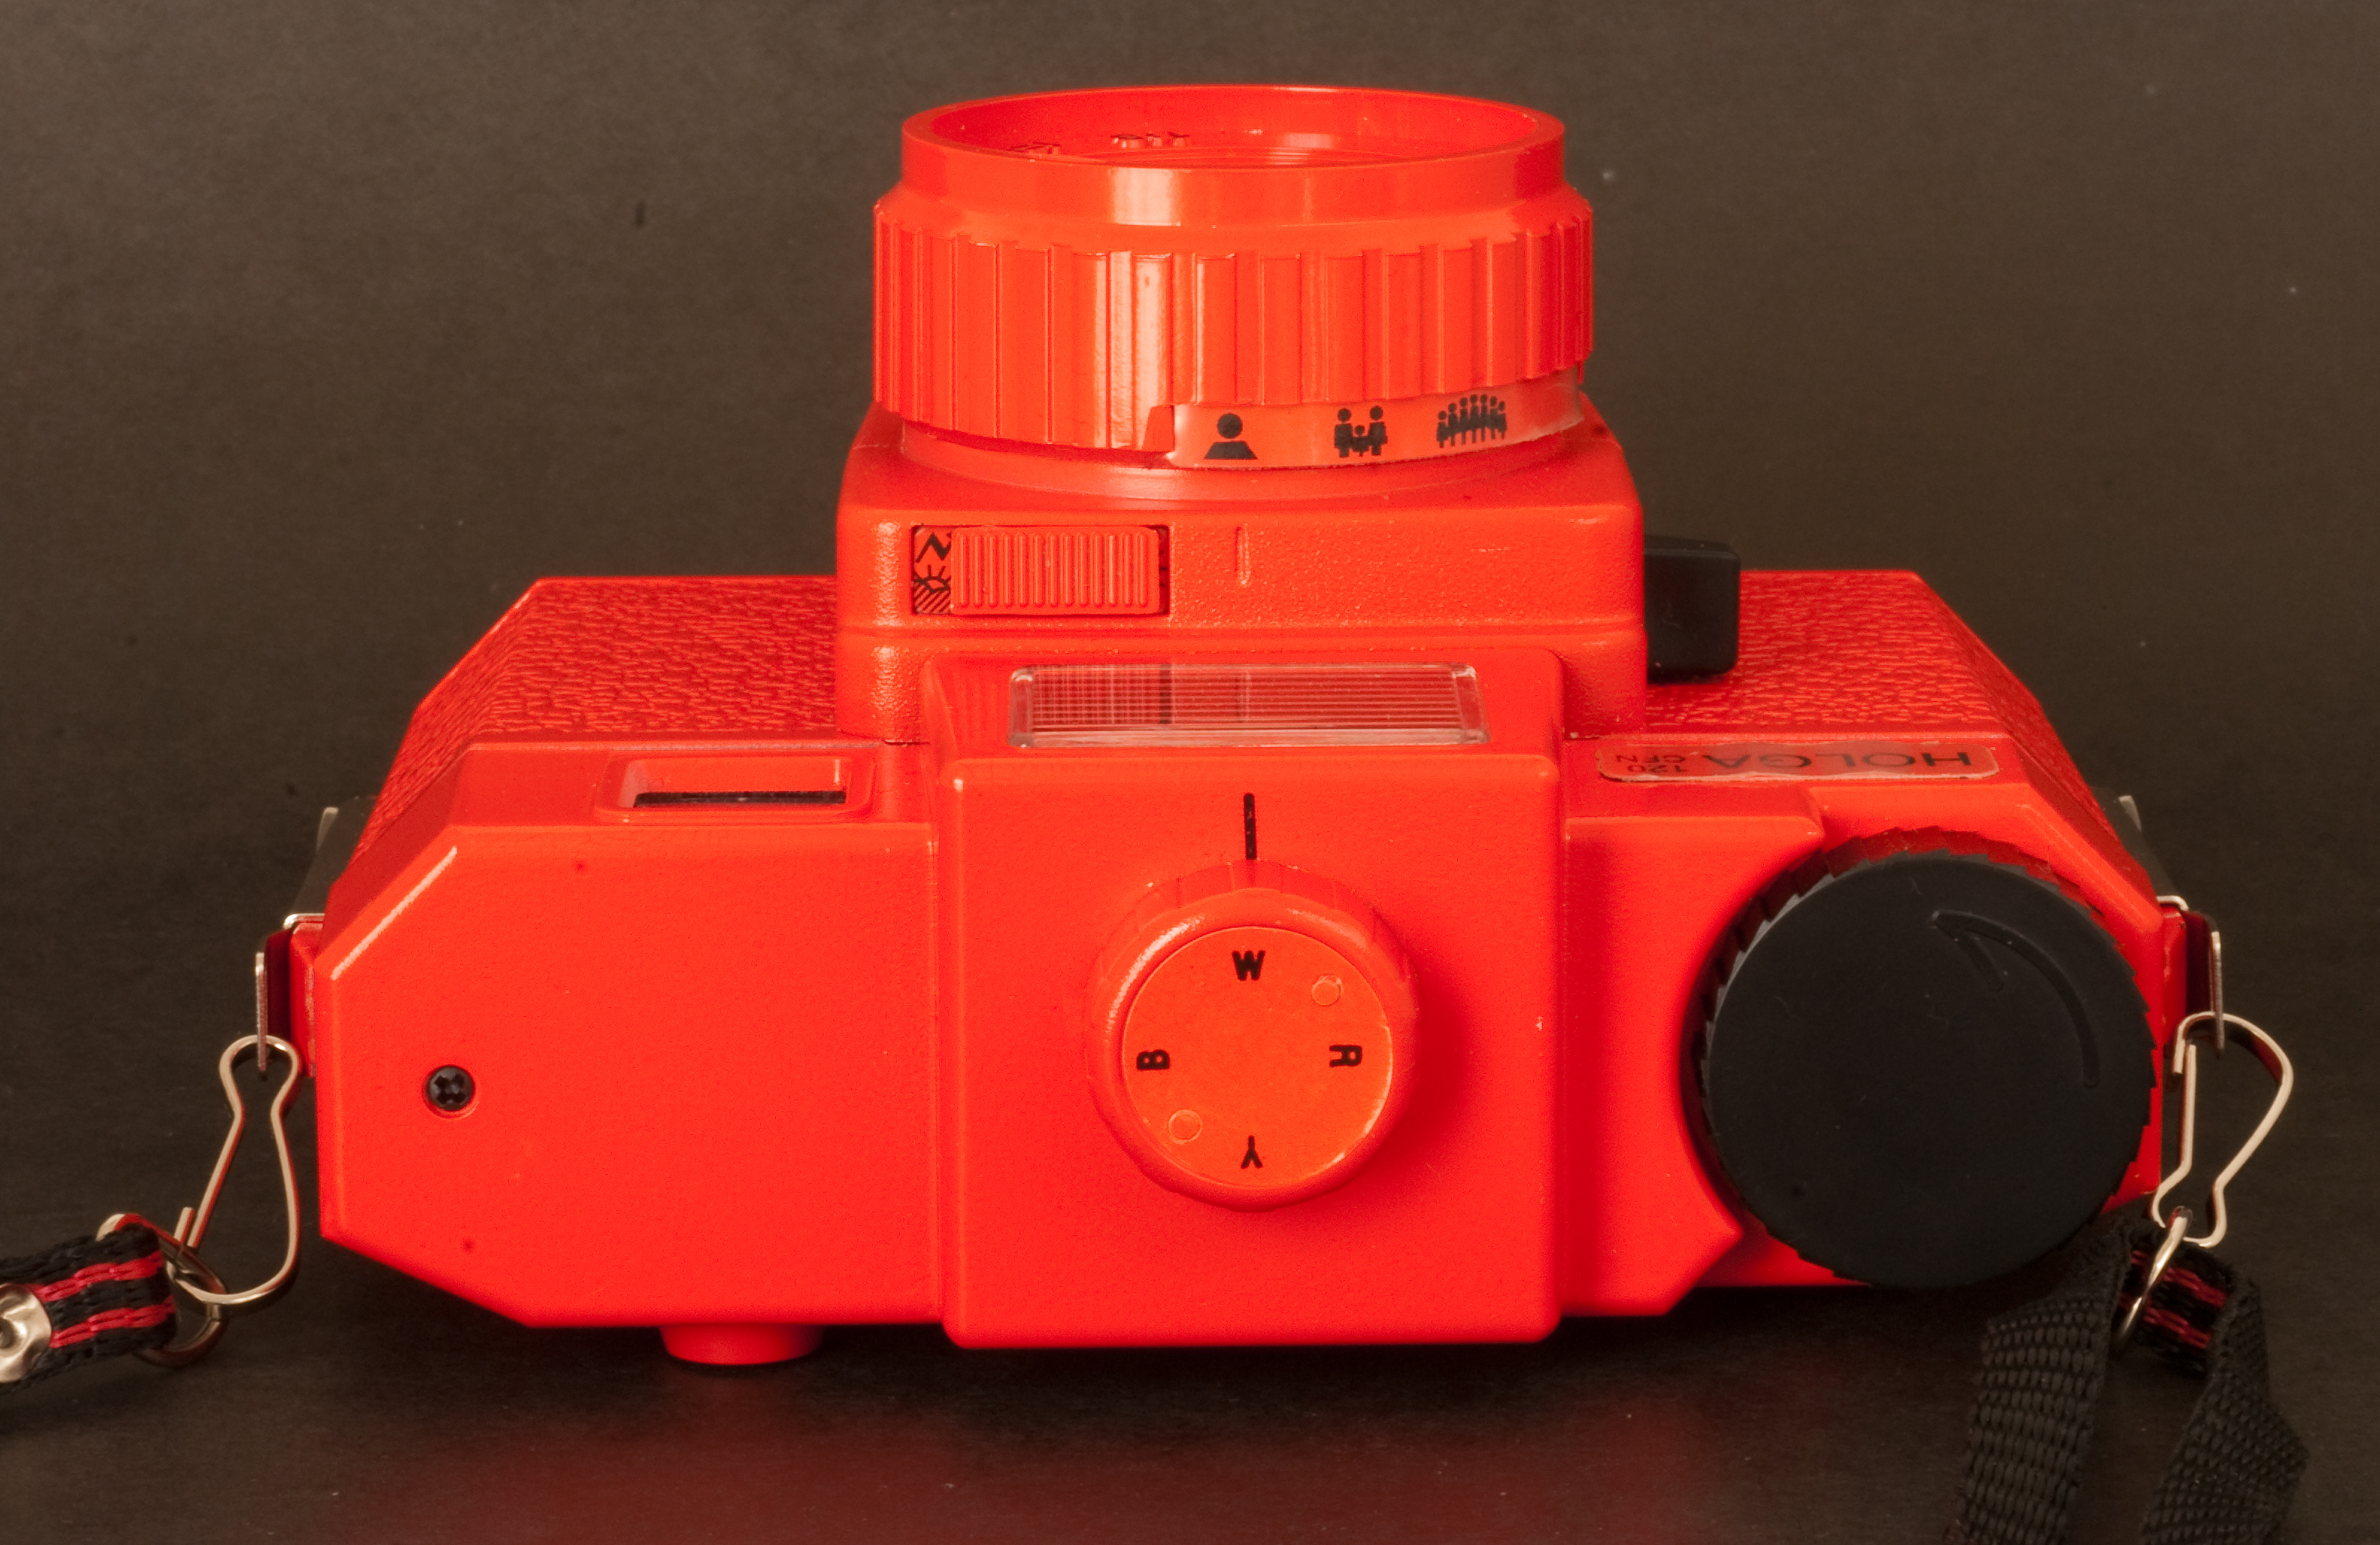
The camera’s design is very basic. It accepts 120 format roll film, has a plastic wide angle lens (60mm, F:8 or F:11) with 4 possible focus settings, and a shutter which offers a unique and unspecified speed. The camera comes with 2 user interchangeable back plates, one will give you 6×6 cm negatives with some vignetting, the other one 6×4.5cm negatives, probably with less vignetting (I don’t know, I only shot with the 6×6 plate). The “CFN” Holgas also come with an electronic flash, equipped with a turret of 4 filters (Red, Blue, Yellow and transparent) for special effects.
Shooting with Holga
The Holga 120 CFN needs 120 film – of course – and since Holgas are supposed to be enjoyed for their shortcomings, color film should be preferred (the plastic lens is prone to chromatic aberrations which would not be visible with black and white film).
Finding color film in 120 rolls proved very difficult. If 35mm film is still easy to find (even in supermarkets or in the little stores attached to many hotels), the same can not be said for 120 roll film. Only stores dedicated to professional photographers still have a few references. I bought a few rolls of Kodak’s Portra 400 NC film. Loading the camera is a difficult task, but in all honesty I’m not used to roll film and I would also have suffered with a more high end camera. [this blog entry was originally written in 2010 – 35mm film is not that easy to find anymore]
In the street, the camera attracts lost of attention. People notice the bright red color (Holgas are also available in black, kaki and in a unique blue and yellow combination), and are intrigued by the cheap aspect of the camera. It looks like a toy, and people are surprised to see an adult using it.
The camera has very few controls and is easy to use, with a decent viewfinder and relatively smooth commands, and provides a user experience very similar the “boxes” that Kodak used to sell before the launch of the Instamatic cameras.
The result?
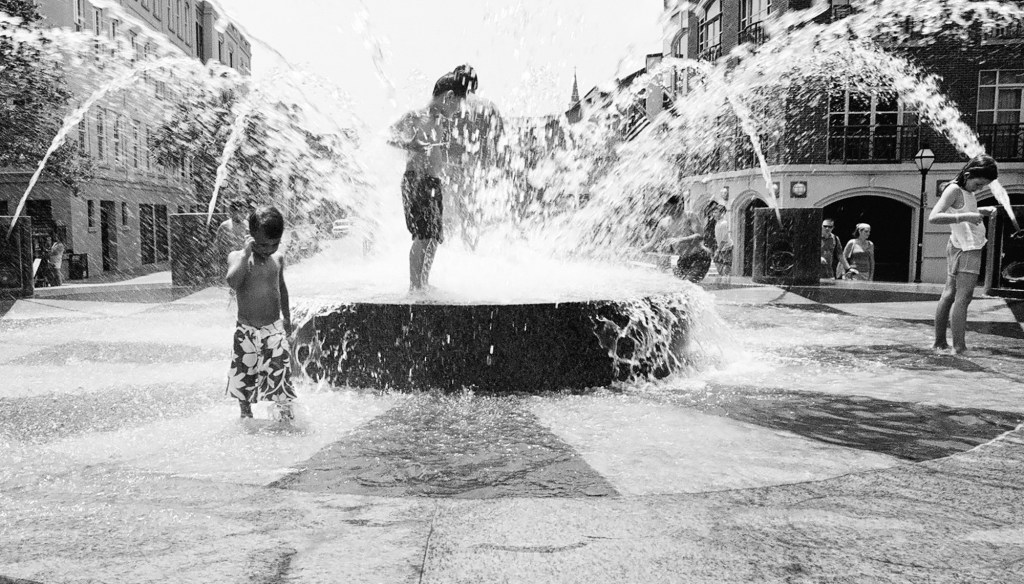
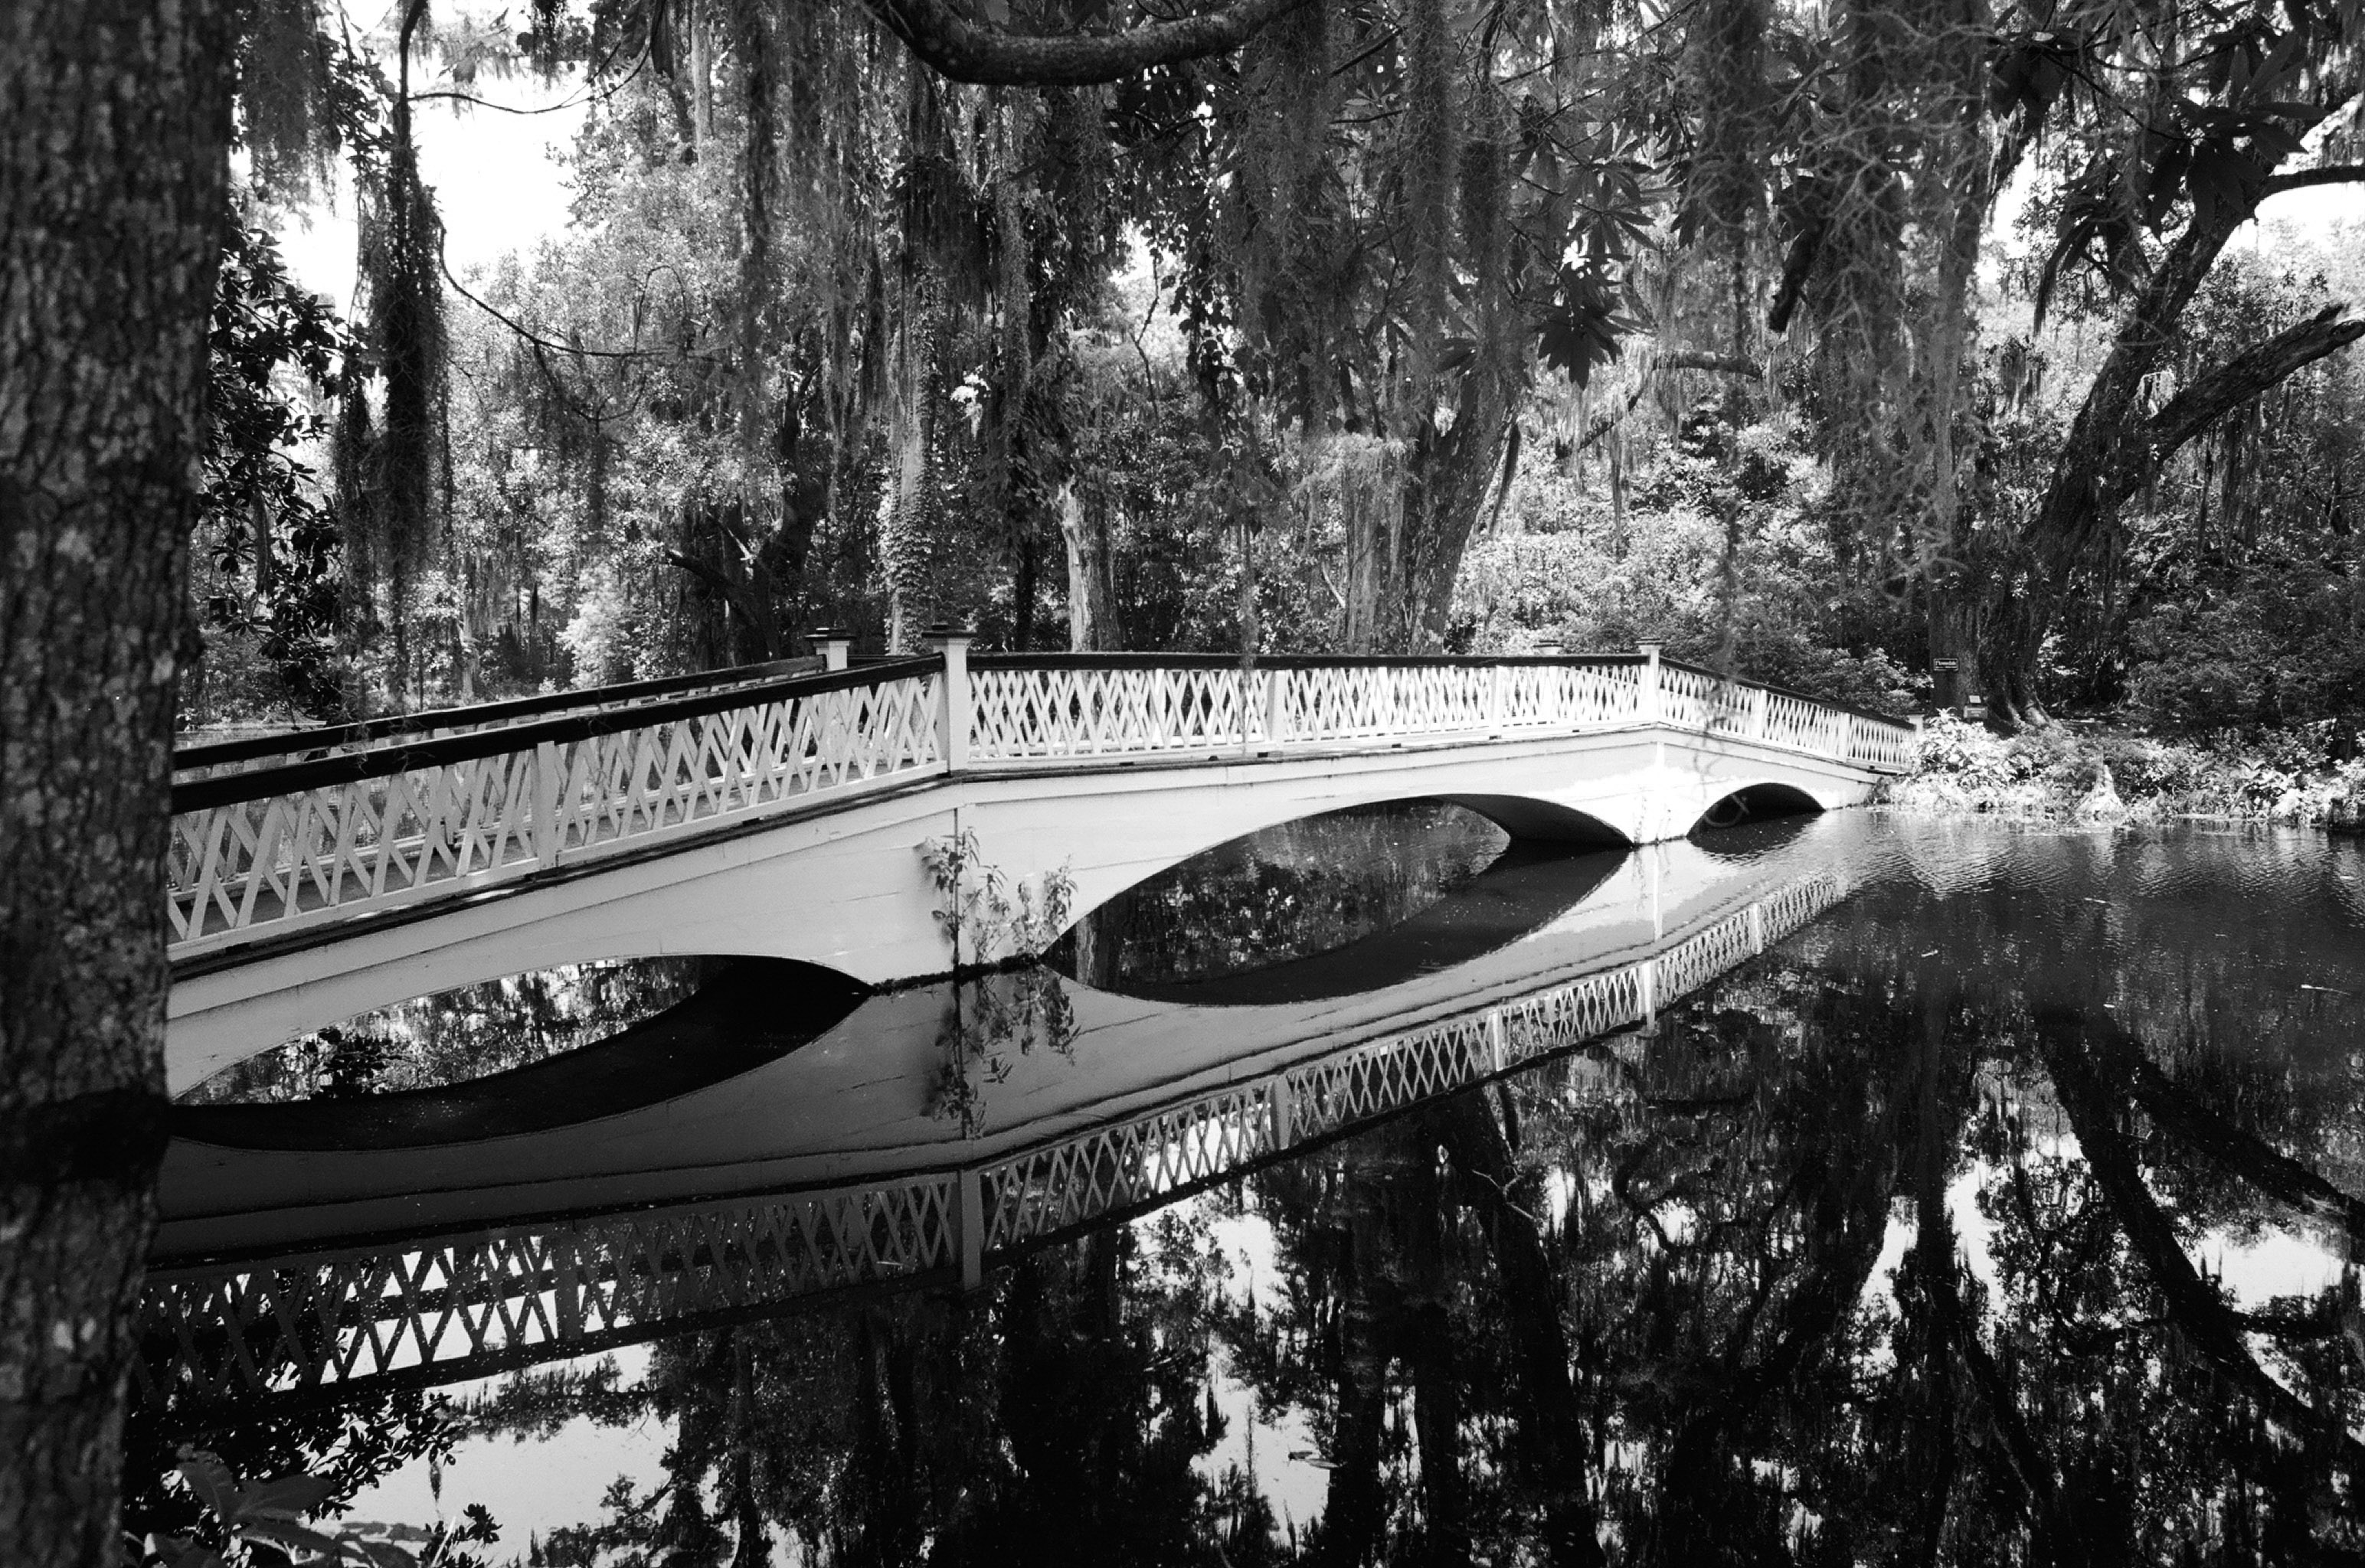
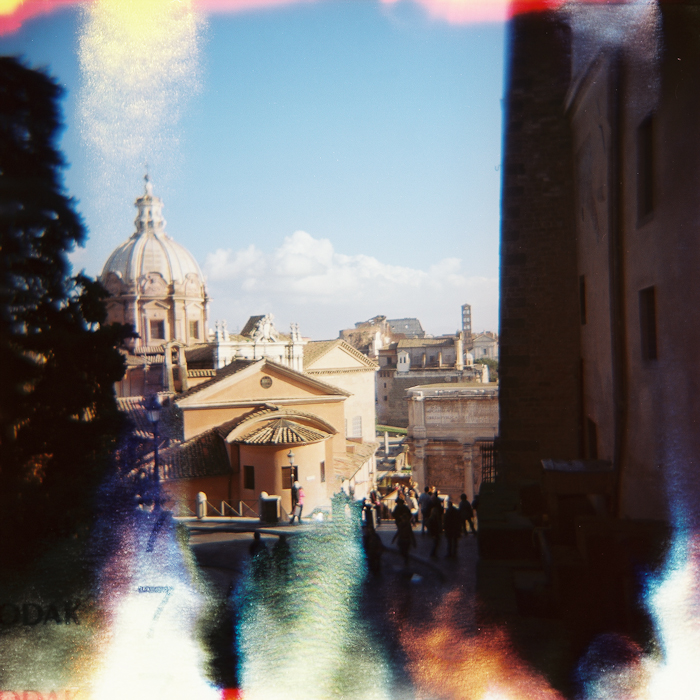
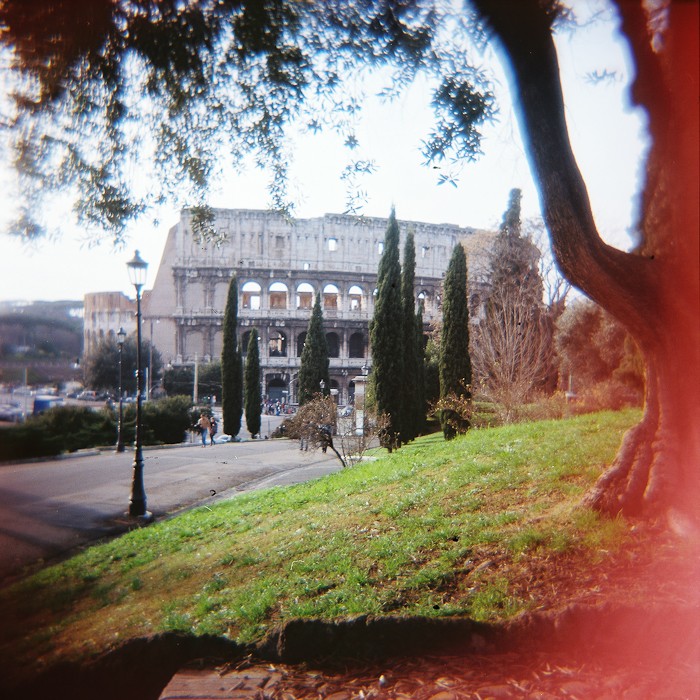
Having the rolls processed proved as difficult as buying the film in the first place. Costco and the proximity drugstores don’t process anything larger than 35mm film, and the rolls had be sent to a professional lab (some of them charge up to $20.00 per roll). When you receive the pictures, you discover the “Holga paradox”: you’re not attracted to the almost “normal” images, but by the most severely flawed. The pictures with the fewer technical faults are just bad (with vignetting and all sorts of aberrations), while some of the images plagued with the worst of the problems (involuntary multiple exposures, light leaks) have a surrealist quality that the most creative of the photographers would struggle to get from a digital picture processed in Photoshop.
Holga, what for?
“Normal” photographers are supposed to spend thousands of dollars in the equipment which will help them produce pictures as perfect as possible from a technical point of view – in focus, sharp, with the right exposure, no vignetting, no distortion, and no chromatic aberration.

Deviations from the norm of the technically perfect picture are supposed to be voluntary, in order to convey an emotion or a message. They’re not supposed to have been brought randomly by a poorly designed camera.
Holgas don’t follow the rule. They’re not “normal”, and they’re not what “normal” photographers would be looking for. Their results are totally unpredictable. When nothing went really wrong, the results are dull. It’s only when they are massively flawed that the pictures start being surprising and interesting.
Using a Holga reminded me of the “Exquisite Corpse” creativity method used by the Surrealist movement at the beginning of the XXth century. With a Holga you will rely on chance to create something new and different. Using the bright red Holga, I started believing that chance could be an artist on its own right. And you end up loving that little camera for that very reason.
More about Holgas
A few decades ago, photographers in Austria discovered the “Lomos” (copies of Cosina point and shoot cameras made in the USSR), and liked the – flawed – pictures made by those very imperfect little cameras so much that they launched the “lomography” movement. They started distributing the “Lomos” in Austria and Germany, and progressively added other cameras from Eastern Europe and China to their catalog. Lomos and Holgas are now widely distributed, and can also be purchased directly from the Lomography web site, where a red Holga 120 CFN can be found for $75. That’s a lot of money for such a low tech object. Bargain hunters can also find Holgas on eBay, for far less.
[The production of the Holga ceased in November 2015, but Freestyle Photo still have a few of them available – only in black, unfortunatelly. Lomography are proposing a camera, the Diana F, that seems to follow the same recipe as the original Holga, and is available in multiple colors.]


Holga links
The Holga group on Flickr
[I had also tested an instant film back with the same Holga camera – https://cameragx.com/2016/10/02/fujifilm-and-the-instant-film-bonanza/]