A few weeks ago I tested the JJC Negative Scanning Kit – my goal was primarily to digitize my stash of negatives, so that I could upload and reference them in Lightroom.
B&W and negative color film – the differences
I was pleasantly surprised by the quality of the scans – but I came to the conclusion that until I spent money in Lightroom Classic (or Photoshop) and a good plug-in, converting the color negative into a usable image was going to be labor intensive and yield inconsistent results. Since I had the equipment in place, I also tried my luck at converting B&W negatives instead.
Black and White film can be of two types – conventional B&W film (also defined as “Crystal Gelatine” or “Silver Halide”) is made of silver crystal salts (the silver halide) suspended in gelatine. To cut a long story short, during the development process, the silver halides are reduced into silver metal – and the developed film still contains silver.
Negative Color film works a bit differently. In this type of film, it’s a mix of silver halide and dye couplers that is suspended in gelatine; during the development process, the developer reacts with the dye couplers and the silver halide to produce visible dyes, while the silver is totally eliminated from the developed film (the labs catch that silver in the exhausted fixer and reclaim it).

Because minilabs were ubiquitous and only equipped to process negative color film, it made sense for Kodak and Ilford to propose B&W film engineered to be processed like negative color film – the chromogenic B&W film. Kodak had the BWCN400, Ilford the XP2. Besides the convenience of relying on local minilabs for processing, I also liked the exposure latitude of the BWCN400 and the smooth look of its images, and it was my B&W go-to film for years. Until Kodak stopped manufacturing it 10 years ago (Ilford still have the XP2 in their catalog).
Digitizing B&W film with the JJC Film Digitizing Adapter
The JJC Film Digitizing Adapter is a sort of clone of Nikon’s ES2 kit – both are designed to be placed in front of a macro lens attached to a digital interchangeable lens camera (m43, APS and Full Frame cameras are supported by the JJC system).
Chromogenic film is not as difficult to digitize as color negative film (you don’t have to take care of the color channels), but it still presents challenges, and some work on the S-Curve is needed because all the information contained in the film is concentrated in a relatively narrow band in the middle of the histogram. I will not be posting any self-made scan of my chromogenic pictures yet, because I’m not happy with the results – too crappy to be shared.
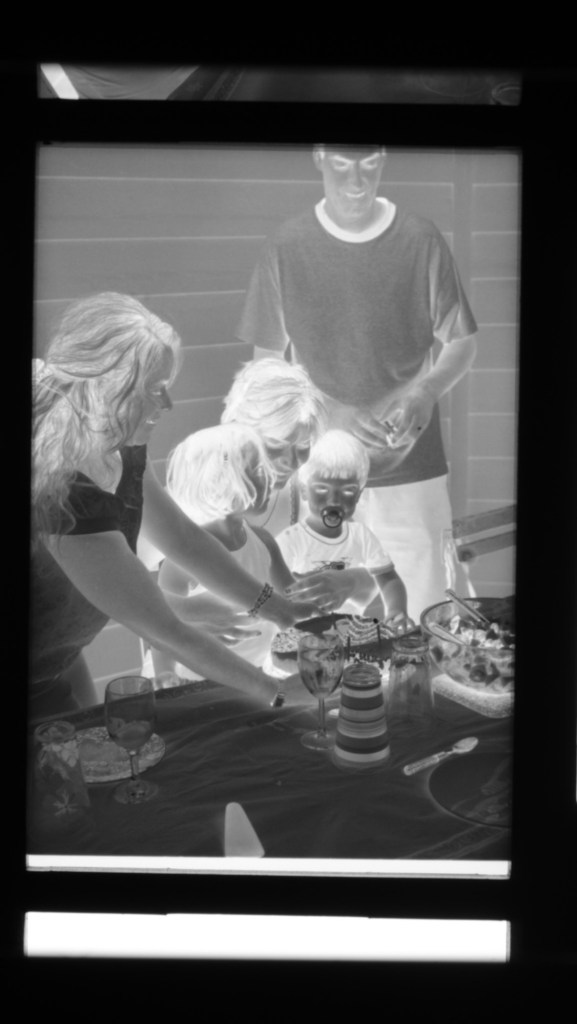
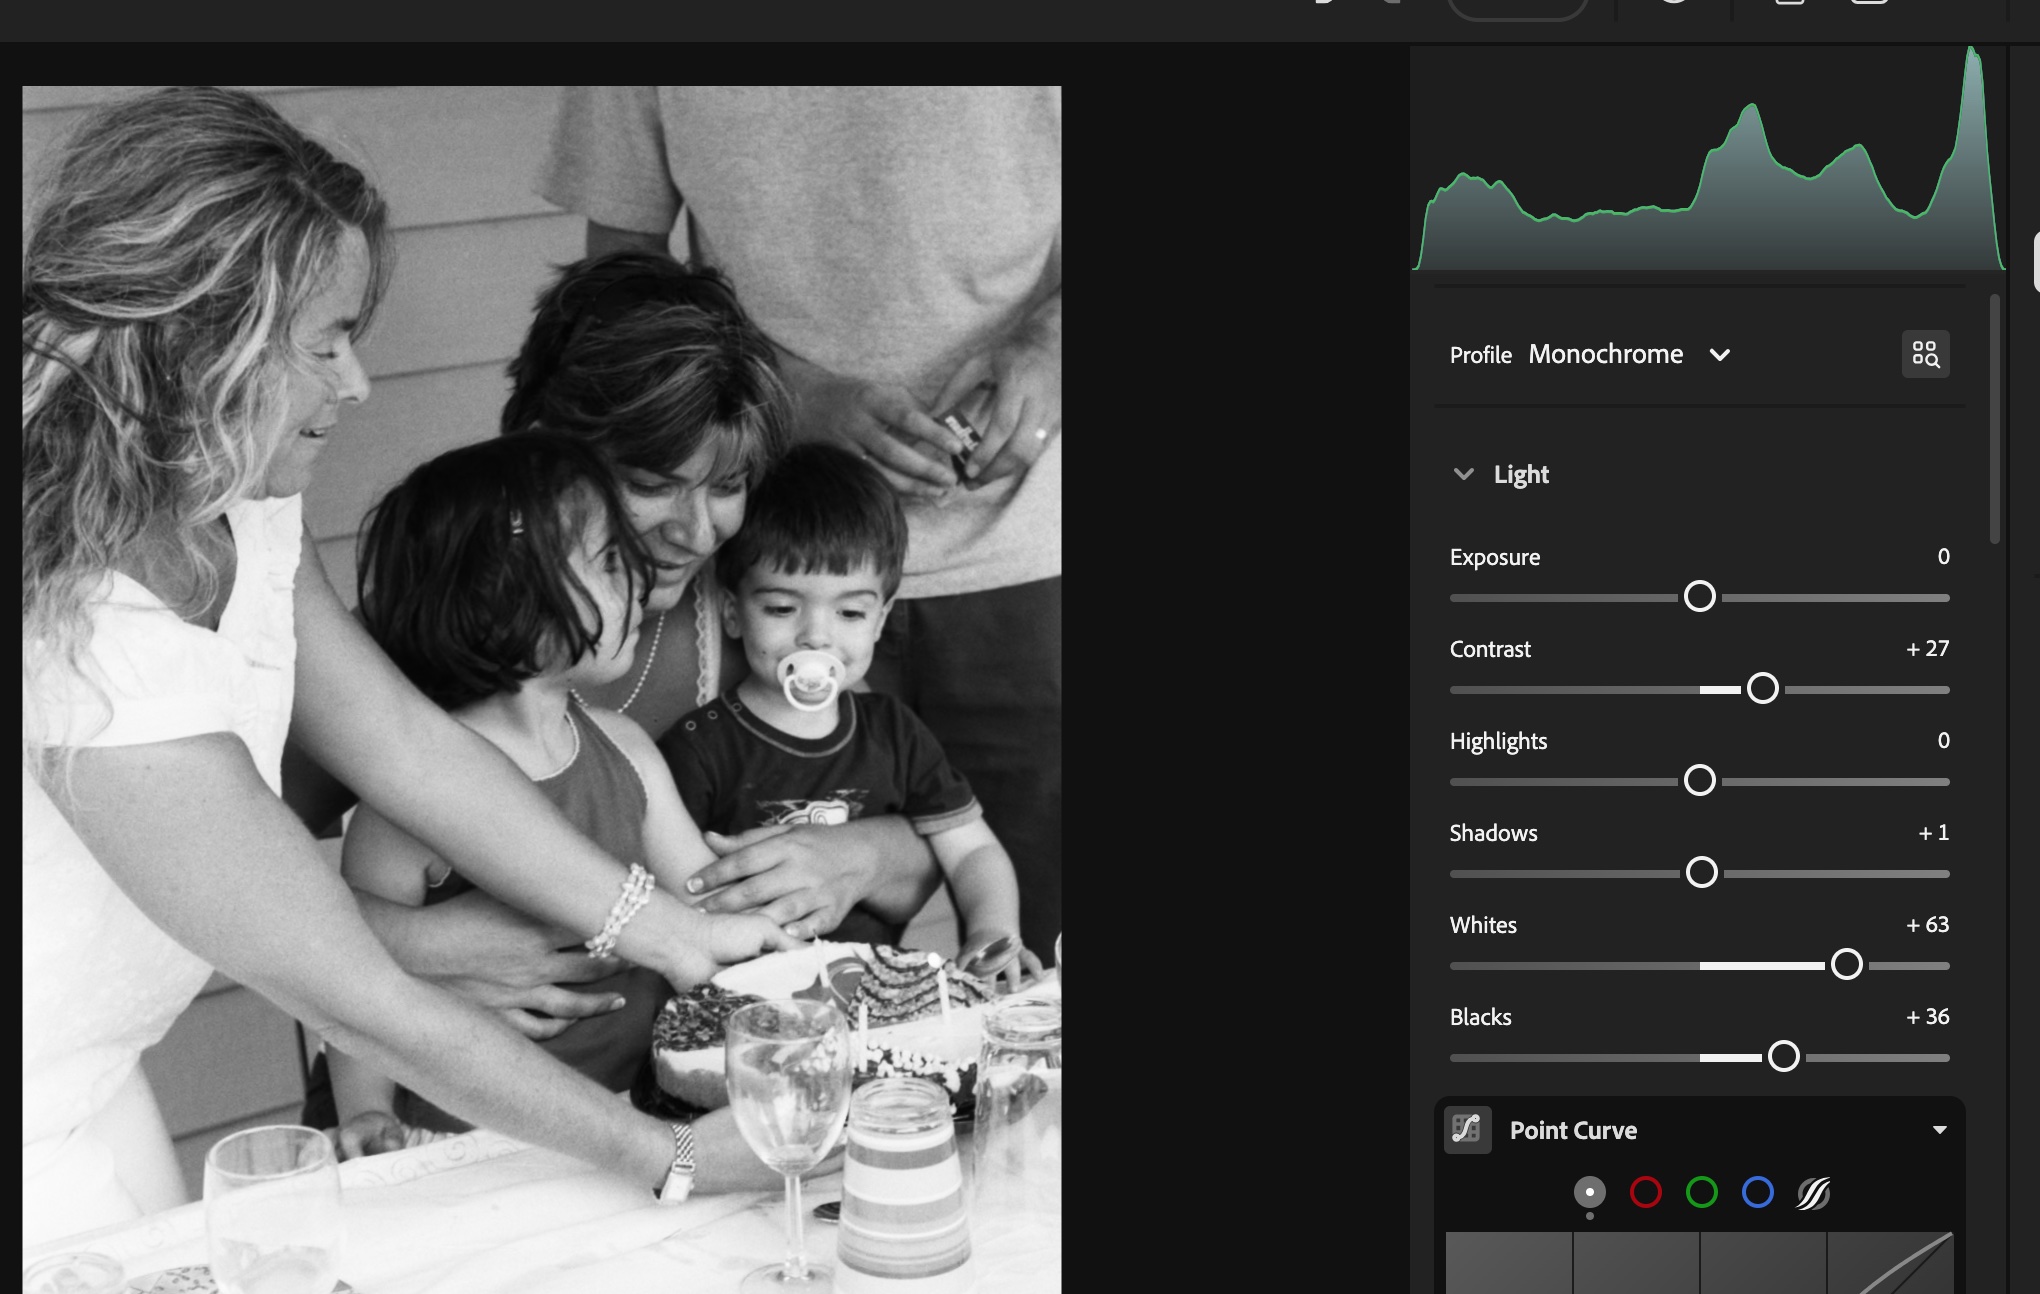
On the other hand, conventional Silver Halide film is much more analog in its behavior, and once the negative is inverted – I was using the same free online service as before (https://invert.imageonline.co), almost no adjustment is needed in a photo editor and the image is ready to be published.
Since conventional B&W film is easy to develop, even at home and without a dark room (we’ll come to it in the next paragraph), a darkroom-free process becomes a distinct possibility – develop the film in daylight, digitize with a JJC or ES-2 kit, adjust to taste in Lightroom and share to the destination of your choice.
Developing film in full daylight
Amateurs typically develop 35mm film in Developing Tanks – it starts in a darkroom, where the film is removed from its cassette and placed on the reel and the reel in the tank, then the tank’s lid is closed and the rest of the film processing (develop, stop, fix, rinse) can take place in full daylight.

Companies like Paterson will also sell you “changing bags”, where you will first place your empty developing tank, its reel, a pair of scissors and your 35mm film cassette. When everything is in place in the bag, you insert your hands in the bag through the sleeves, and attempt to load your exposed film on the reel, separate it from the cassette, place the spiral in the tank, and close the tank, without seeing what your hands are doing. Not easy at the beginning, but with some practice, it becomes a second nature.

Our good friends of Lomography have just released a “daylight developing tank” that should make the process easier. In full daylight, place the film cassette in the tank, close the tank, and simply turn the crank to load the film on the reel. When the film is totally loaded on the reel, press a button to cut the film and separate it from the cassette, open the tank, remove the cassette, close the tank again, and start the normal development process.
I just ordered one. I’ll let you know how it goes.
More on the subject:
Digitizing negatives with the JJC adapter/
Paterson Developing Tanks over the years