If you ask a lab to develop your film (I’m using https://oldschoolphotolab.com/), they will scan it for a modest extra fee ($6.00 per film). And if you send them already developed film strips, they will charge you anything between $1.00 and $4.50 per frame, depending on the quantity and on the desired output quality. The scans are made on Fuji or Noritsu machines, and the result is top notch – you just have to be prepared to wait – typically for two weeks – before you can access the files on Dropbox.
But there may be situations when you can’t wait, or you don’t want or are not permitted to send the negatives through the postal service at the other end of the country. There are also cases when the sheer volume of images to scan (and the expected low keep rate of the scanned images) makes using a specialized lab financially impractical.
You can invest in your own scanner – or – taking advantage of the high resolution sensors of modern digital interchangeable lens cameras (dSLRs or mirrorless), shoot the negative frames (or the positive slides) with your camera, and simply upload the resulting files to Lightroom for a final edit.
Nikon were the first to package the necessary hardware in a single product (the Nikon ES-2 adapter, tested in The Casual Photophile: solving scanning with the nikon ES-2 film digitizing kit ). The Nikon kit is dedicated to Nikon cameras and lenses (and only a very limited list of Nikon Macro lenses are supported).
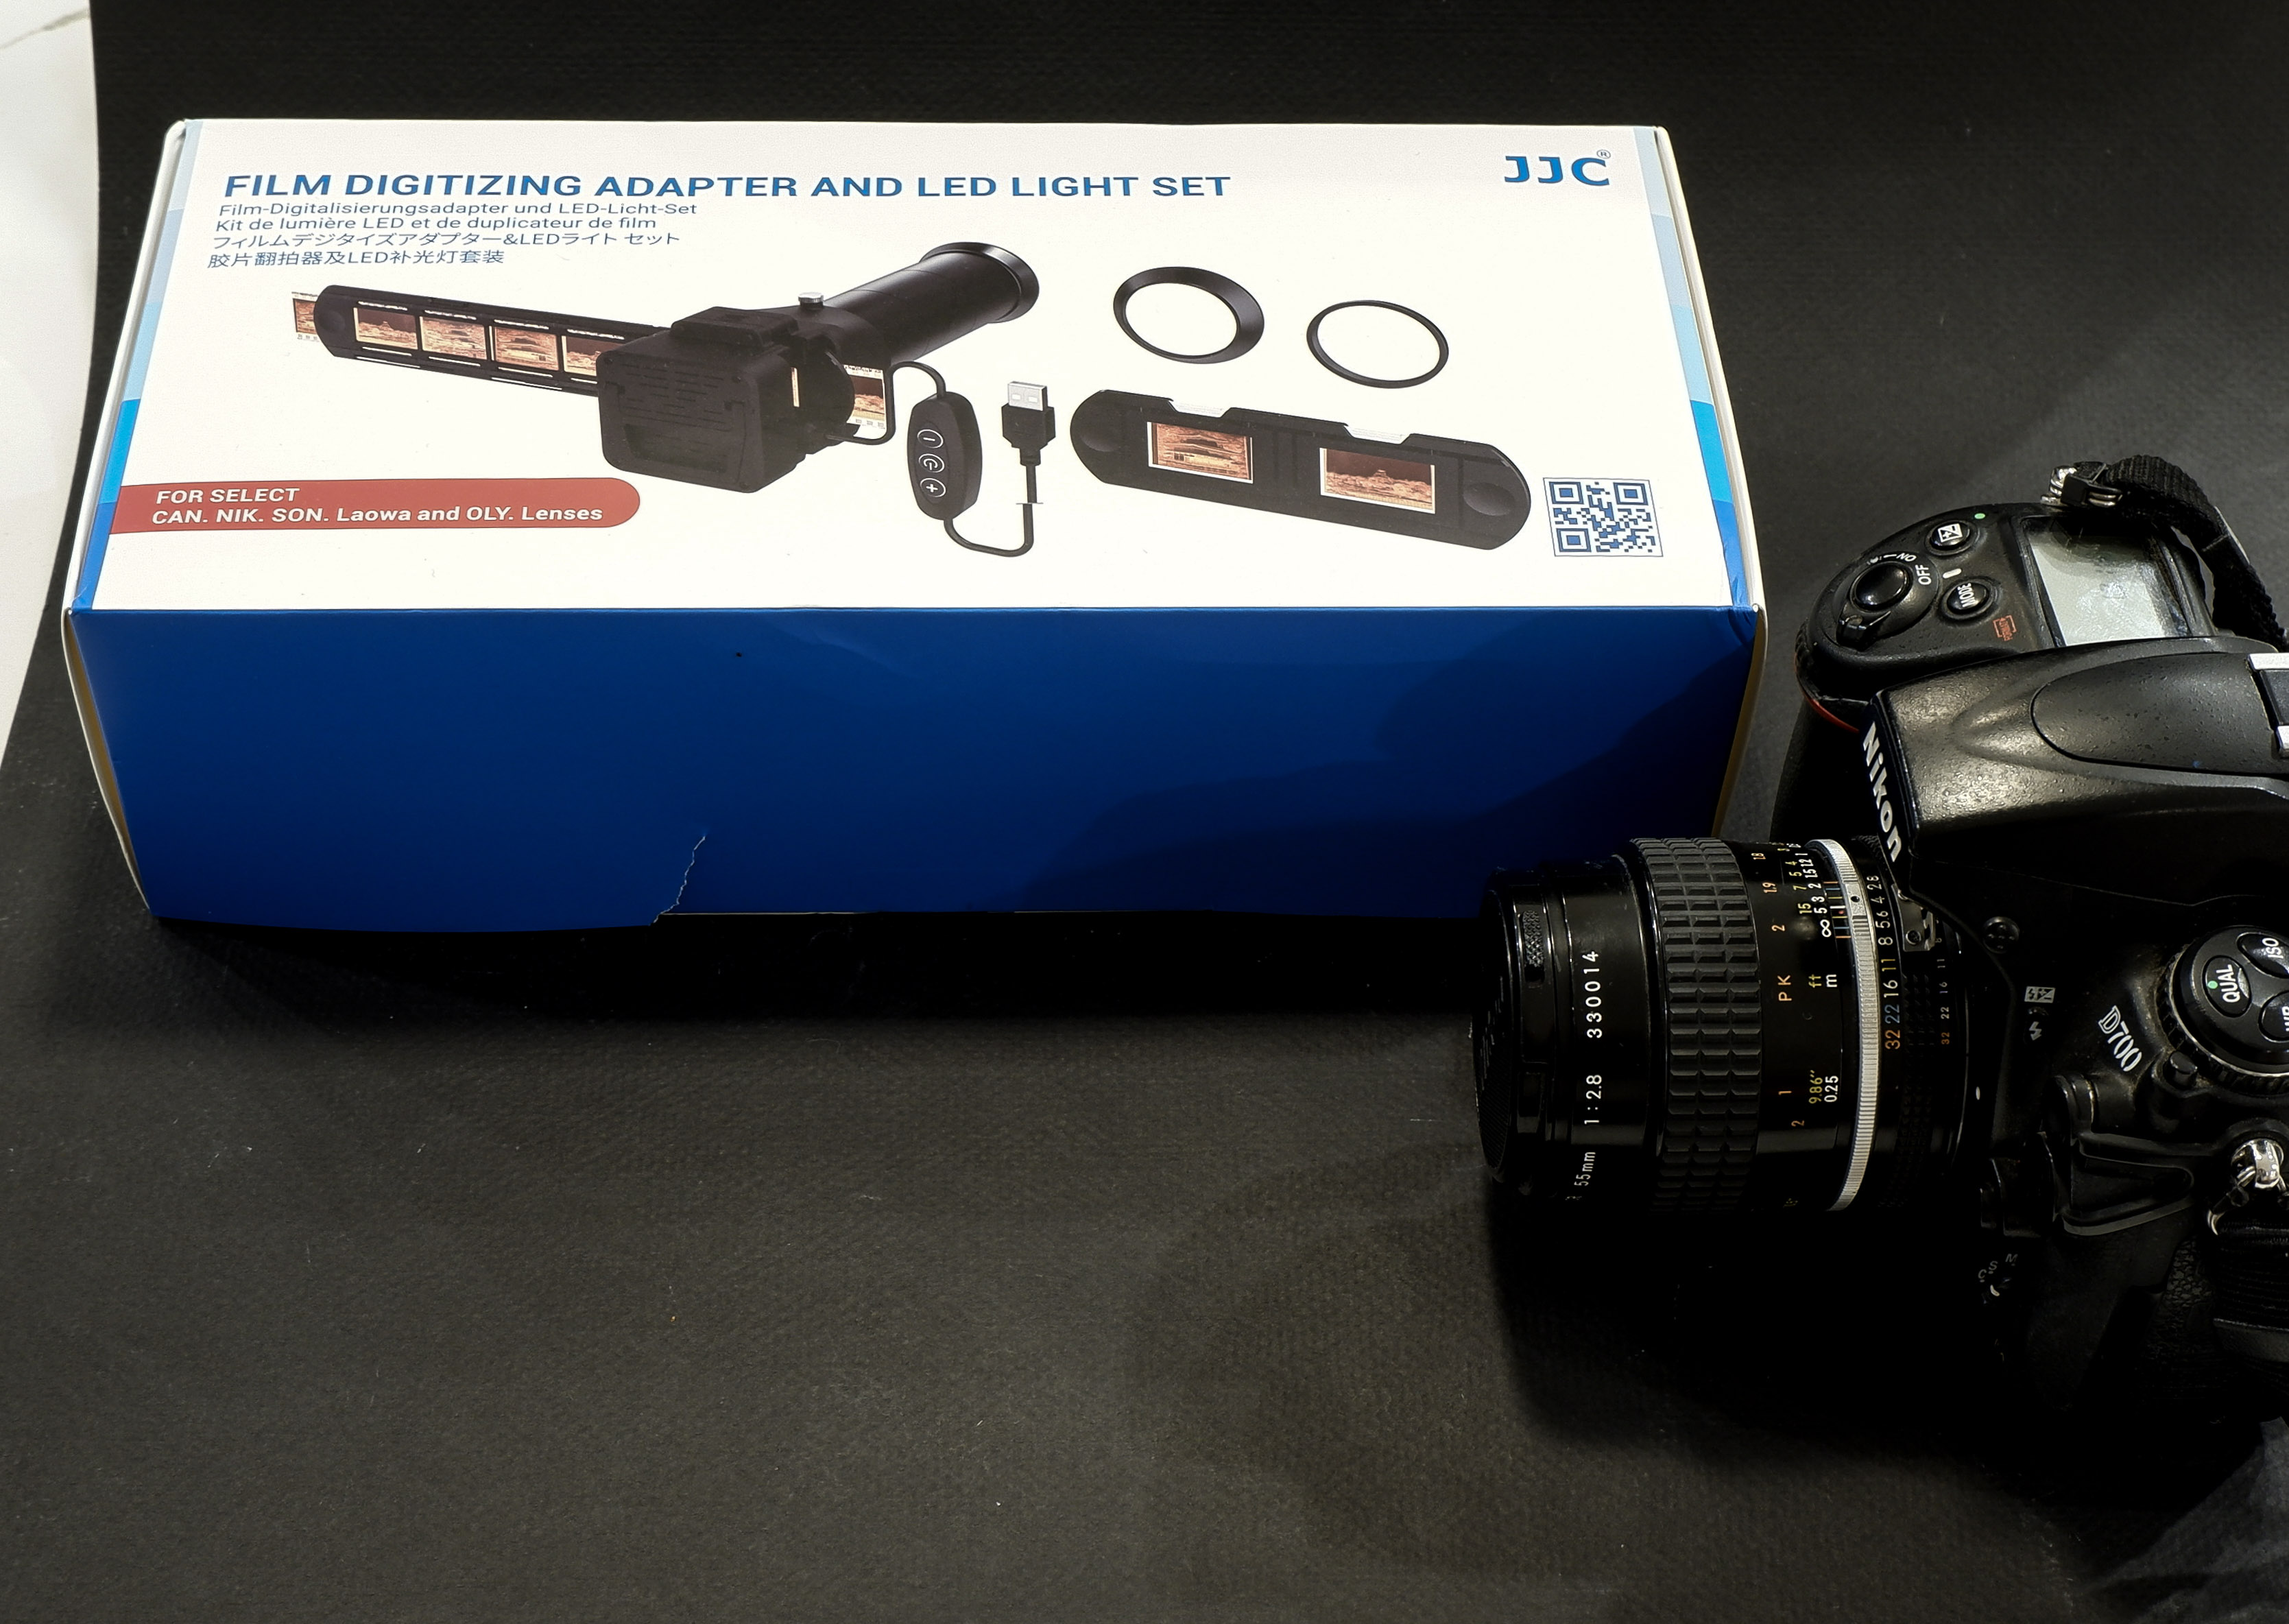
JJC have developed a clone of the ES-2, and have opened it to more lenses (they have added support for Canon, Sony, Laowa and Olympus lenses). Regular visitors of CamerAgX may know that when I’m shooting digital, it’s primarily with Fujifilm X cameras (X-T4 and X-A5) but I also have an old Nikon D700 and a much older 55mm Micro-Nikkor AI lens on a shelf, and that’s the gear I used to test the JJC “Film Digitizing Adapter Set”, Ref: FDA-S1.
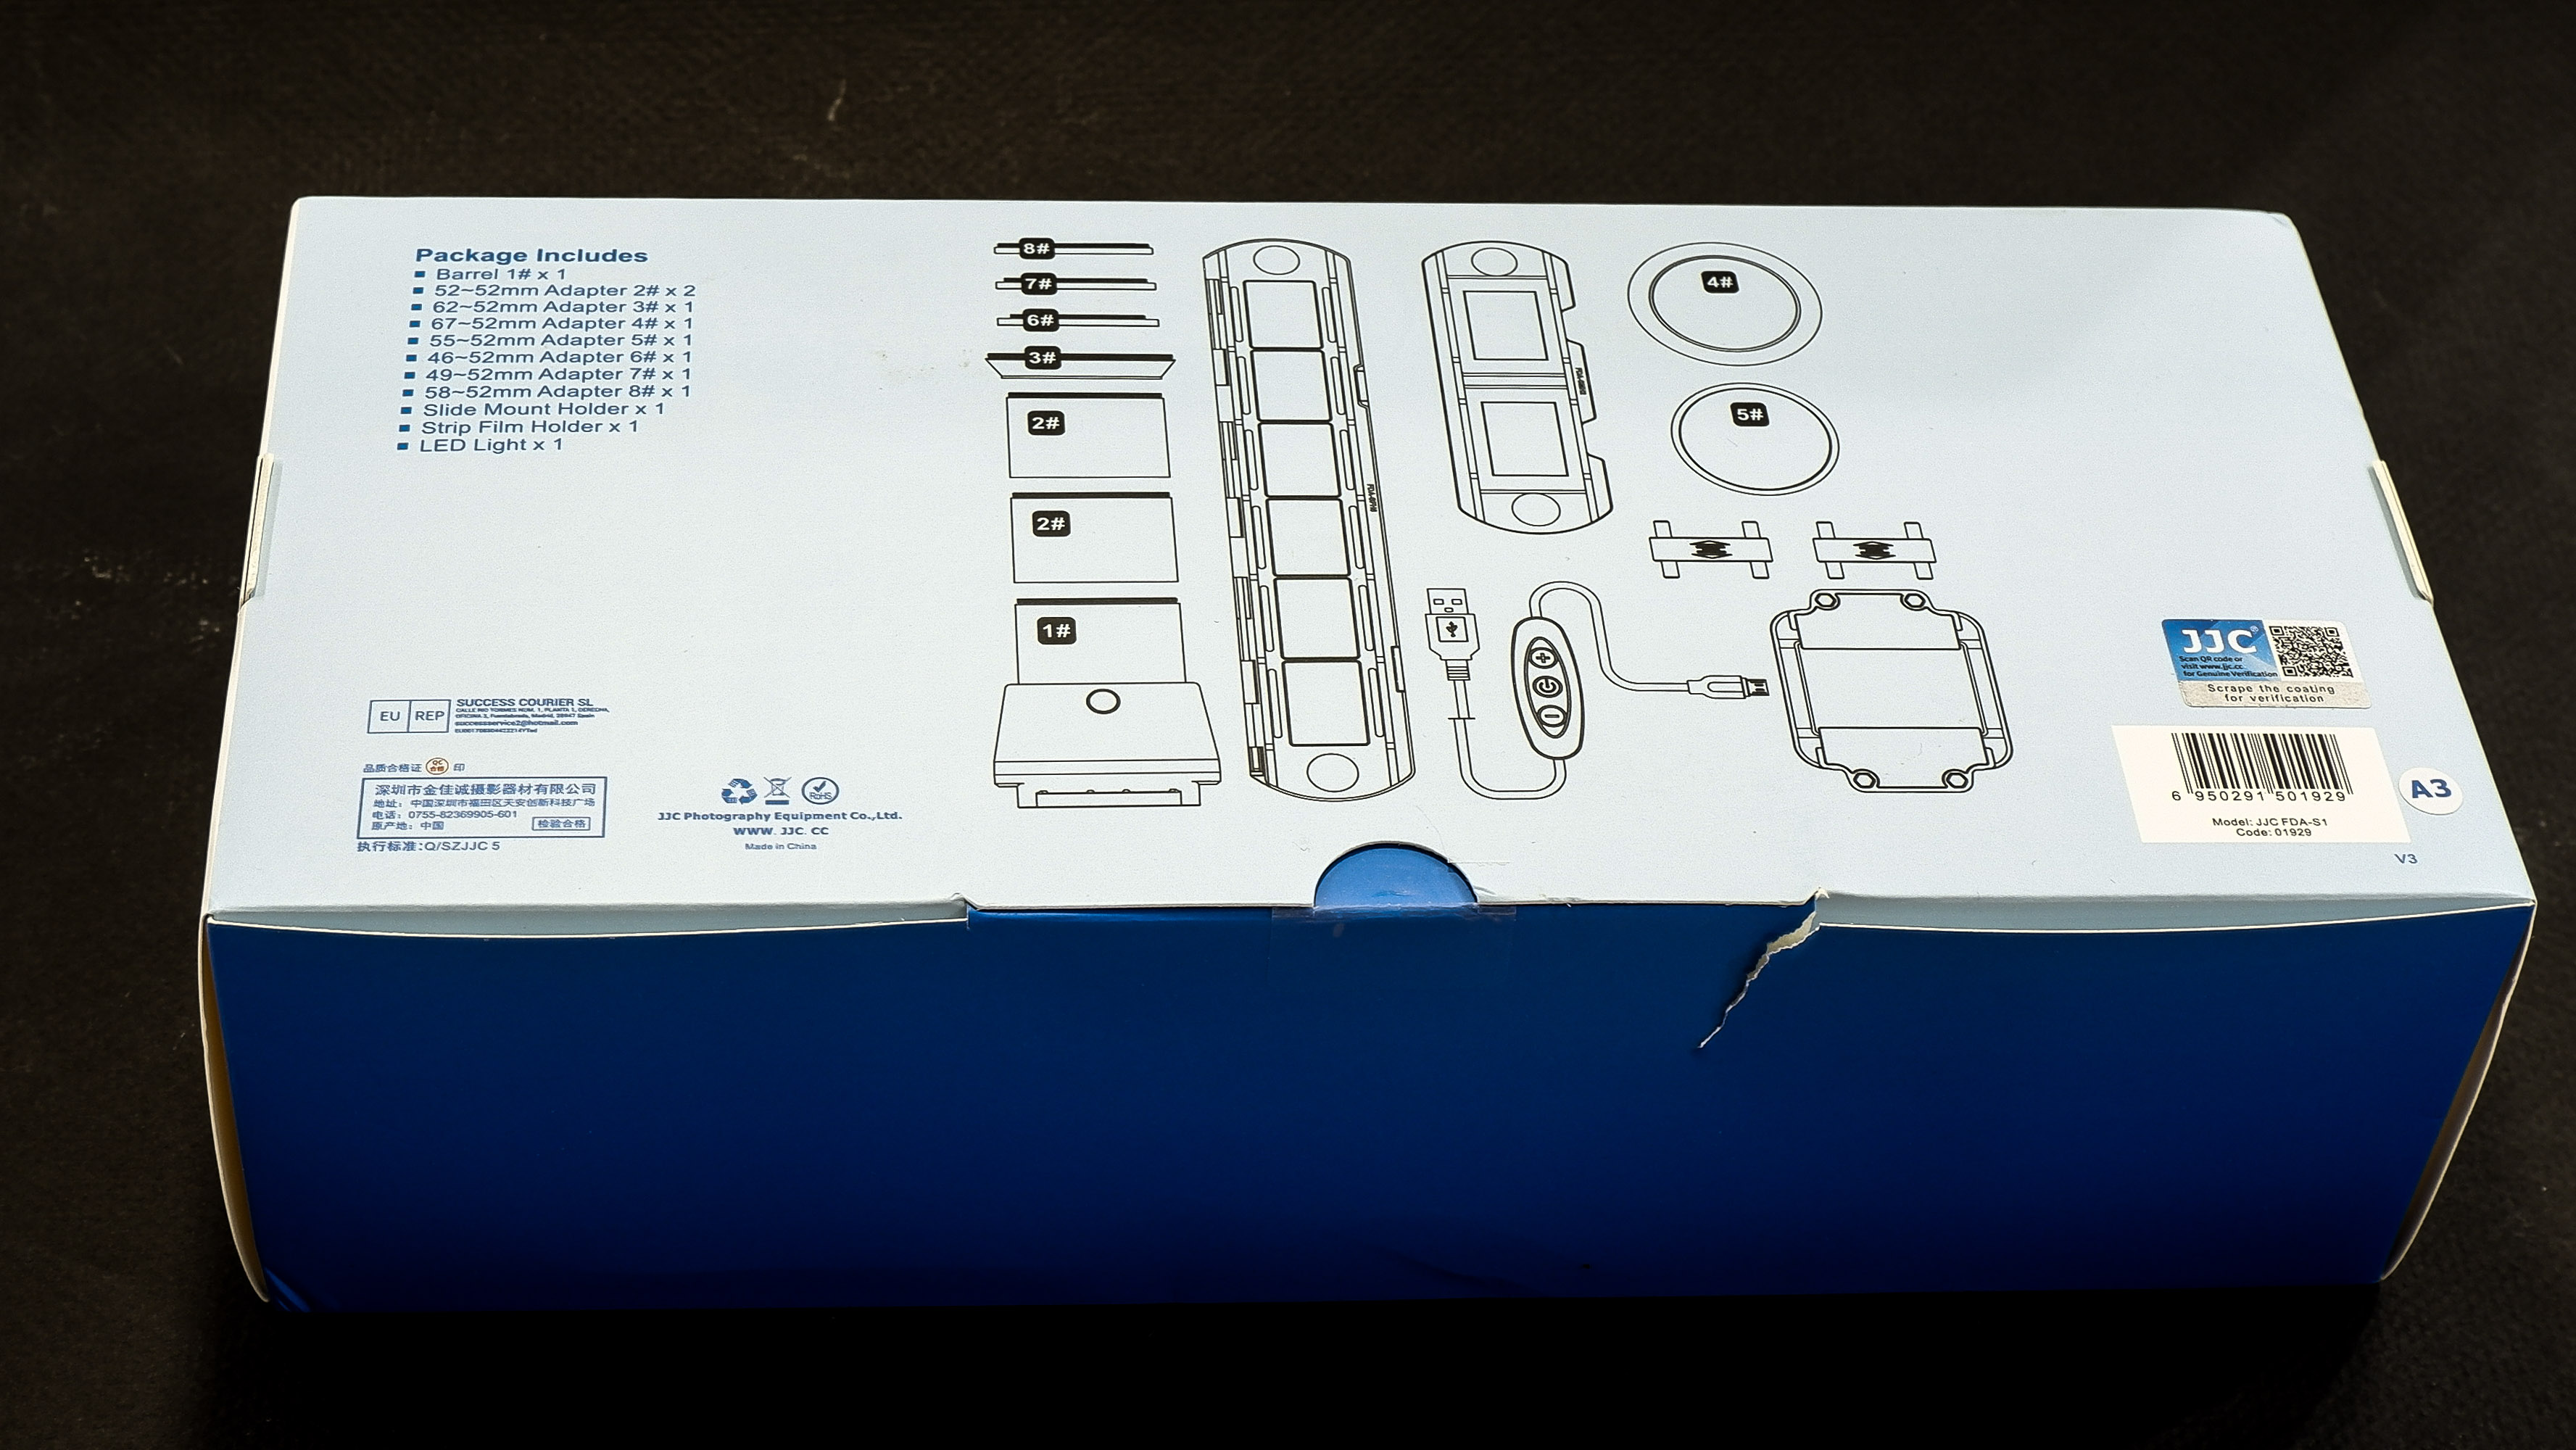
The kit is composed of 8 adapter rings, a slide mount holder, a negative film strip holder and (the unique selling proposition as far as I’m concerned), a USB powered light box. The whole set is well packaged, seems to be made of good quality materials (metal and plastic), and everything works as expected.
First attempt: Scanning with the Nikon D700 and the Nikon Micro Nikkor 55mm f/2.8 AI
The Micro Nikkor 55mm AI is only offering a 1/2 repro ratio when shooting macro. As a result, the image of the negative is only using the central area of the frame of the D700. Not good. It’s made worse by the small resolution of the D700’s sensor – 12 Mpix – over here, we’re only using 3 Million pixels. The scans look blurred and lack detail.

Second attempt: Scanning with an APS-C camera (the Fujifilm X-T4) and Nikon Micro Nikkor 55mm f/2.8 AI
One of the benefits of “mirrorless” cameras is that they can accept all sort of lens adapters. I happen to have a Fotasy adapter which will attach the Nikon AI lens to my Fujifilm X-T4. And the articulated display fo the mirrorless camera is much more comfortable to use than the optical viewfinder of the Nikon D700 for this type of work.

The “scan” fills the frame and is much more detailed.

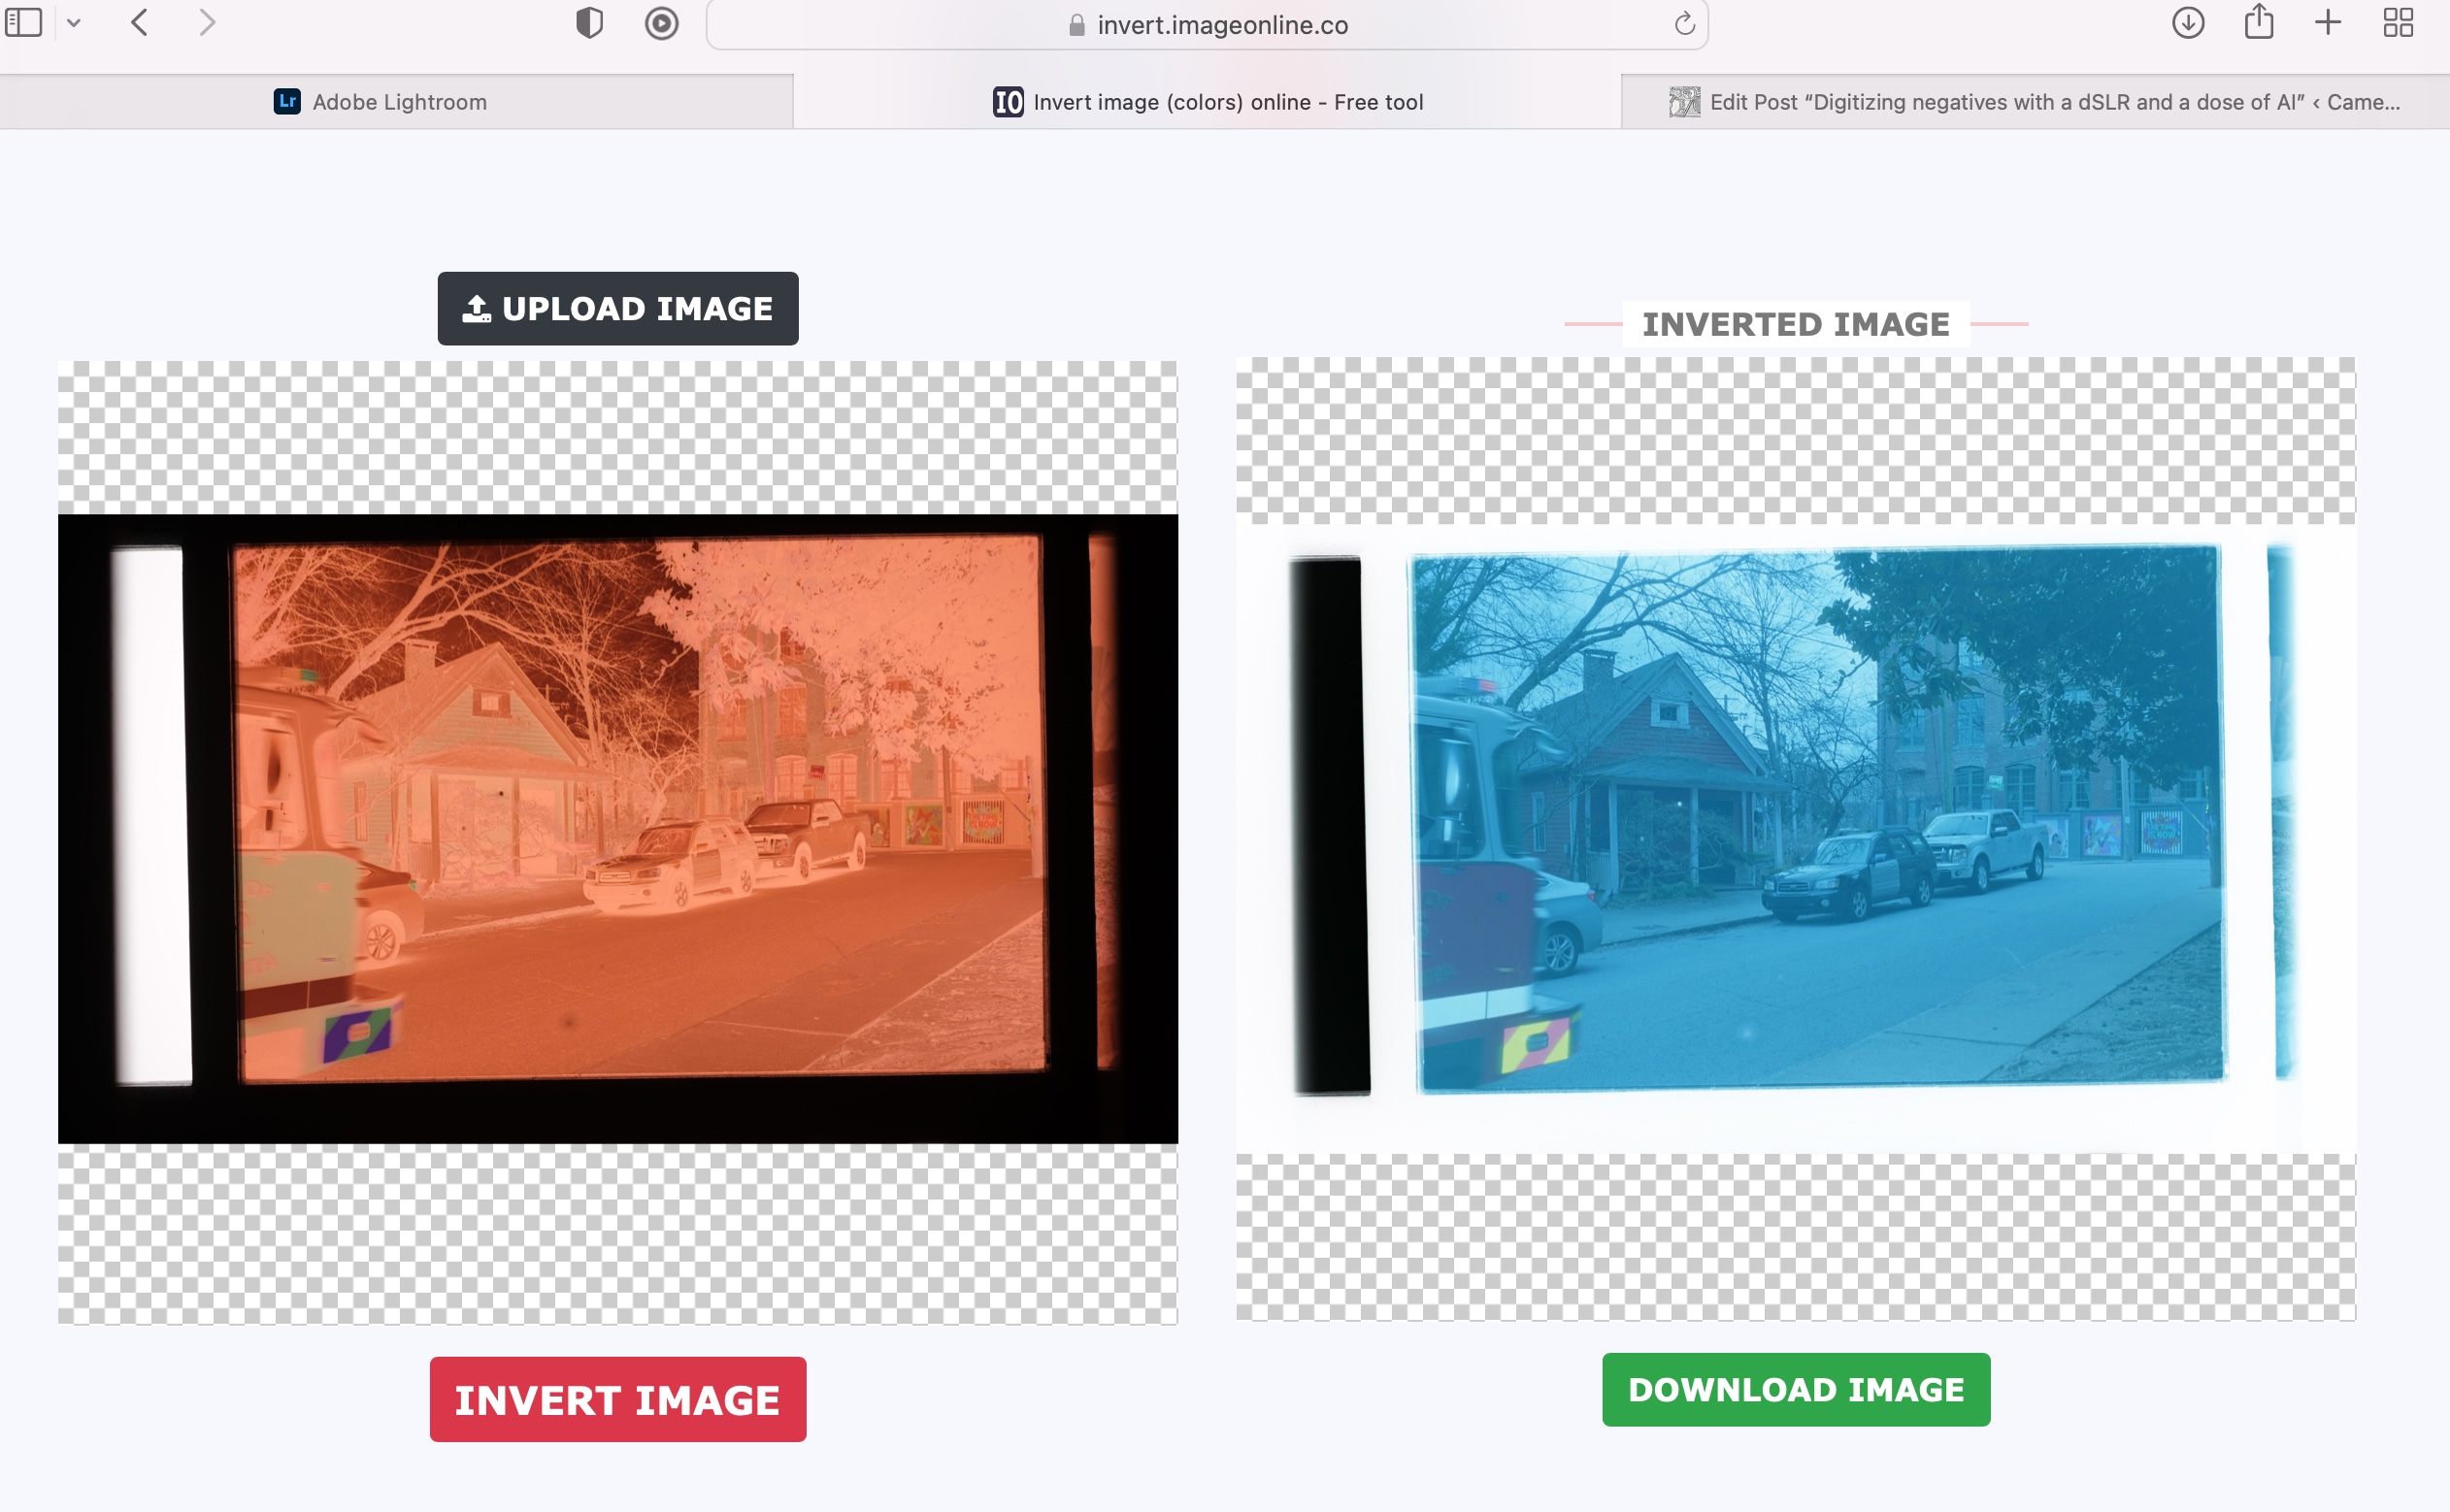
Inverting the scanned image
If you were starting from a negative, you have to convert it to a positive image. I tried this free online service (invert.imageonline.co). Better equipped pros will use Photoshop or Lightroom Plug-Ins.
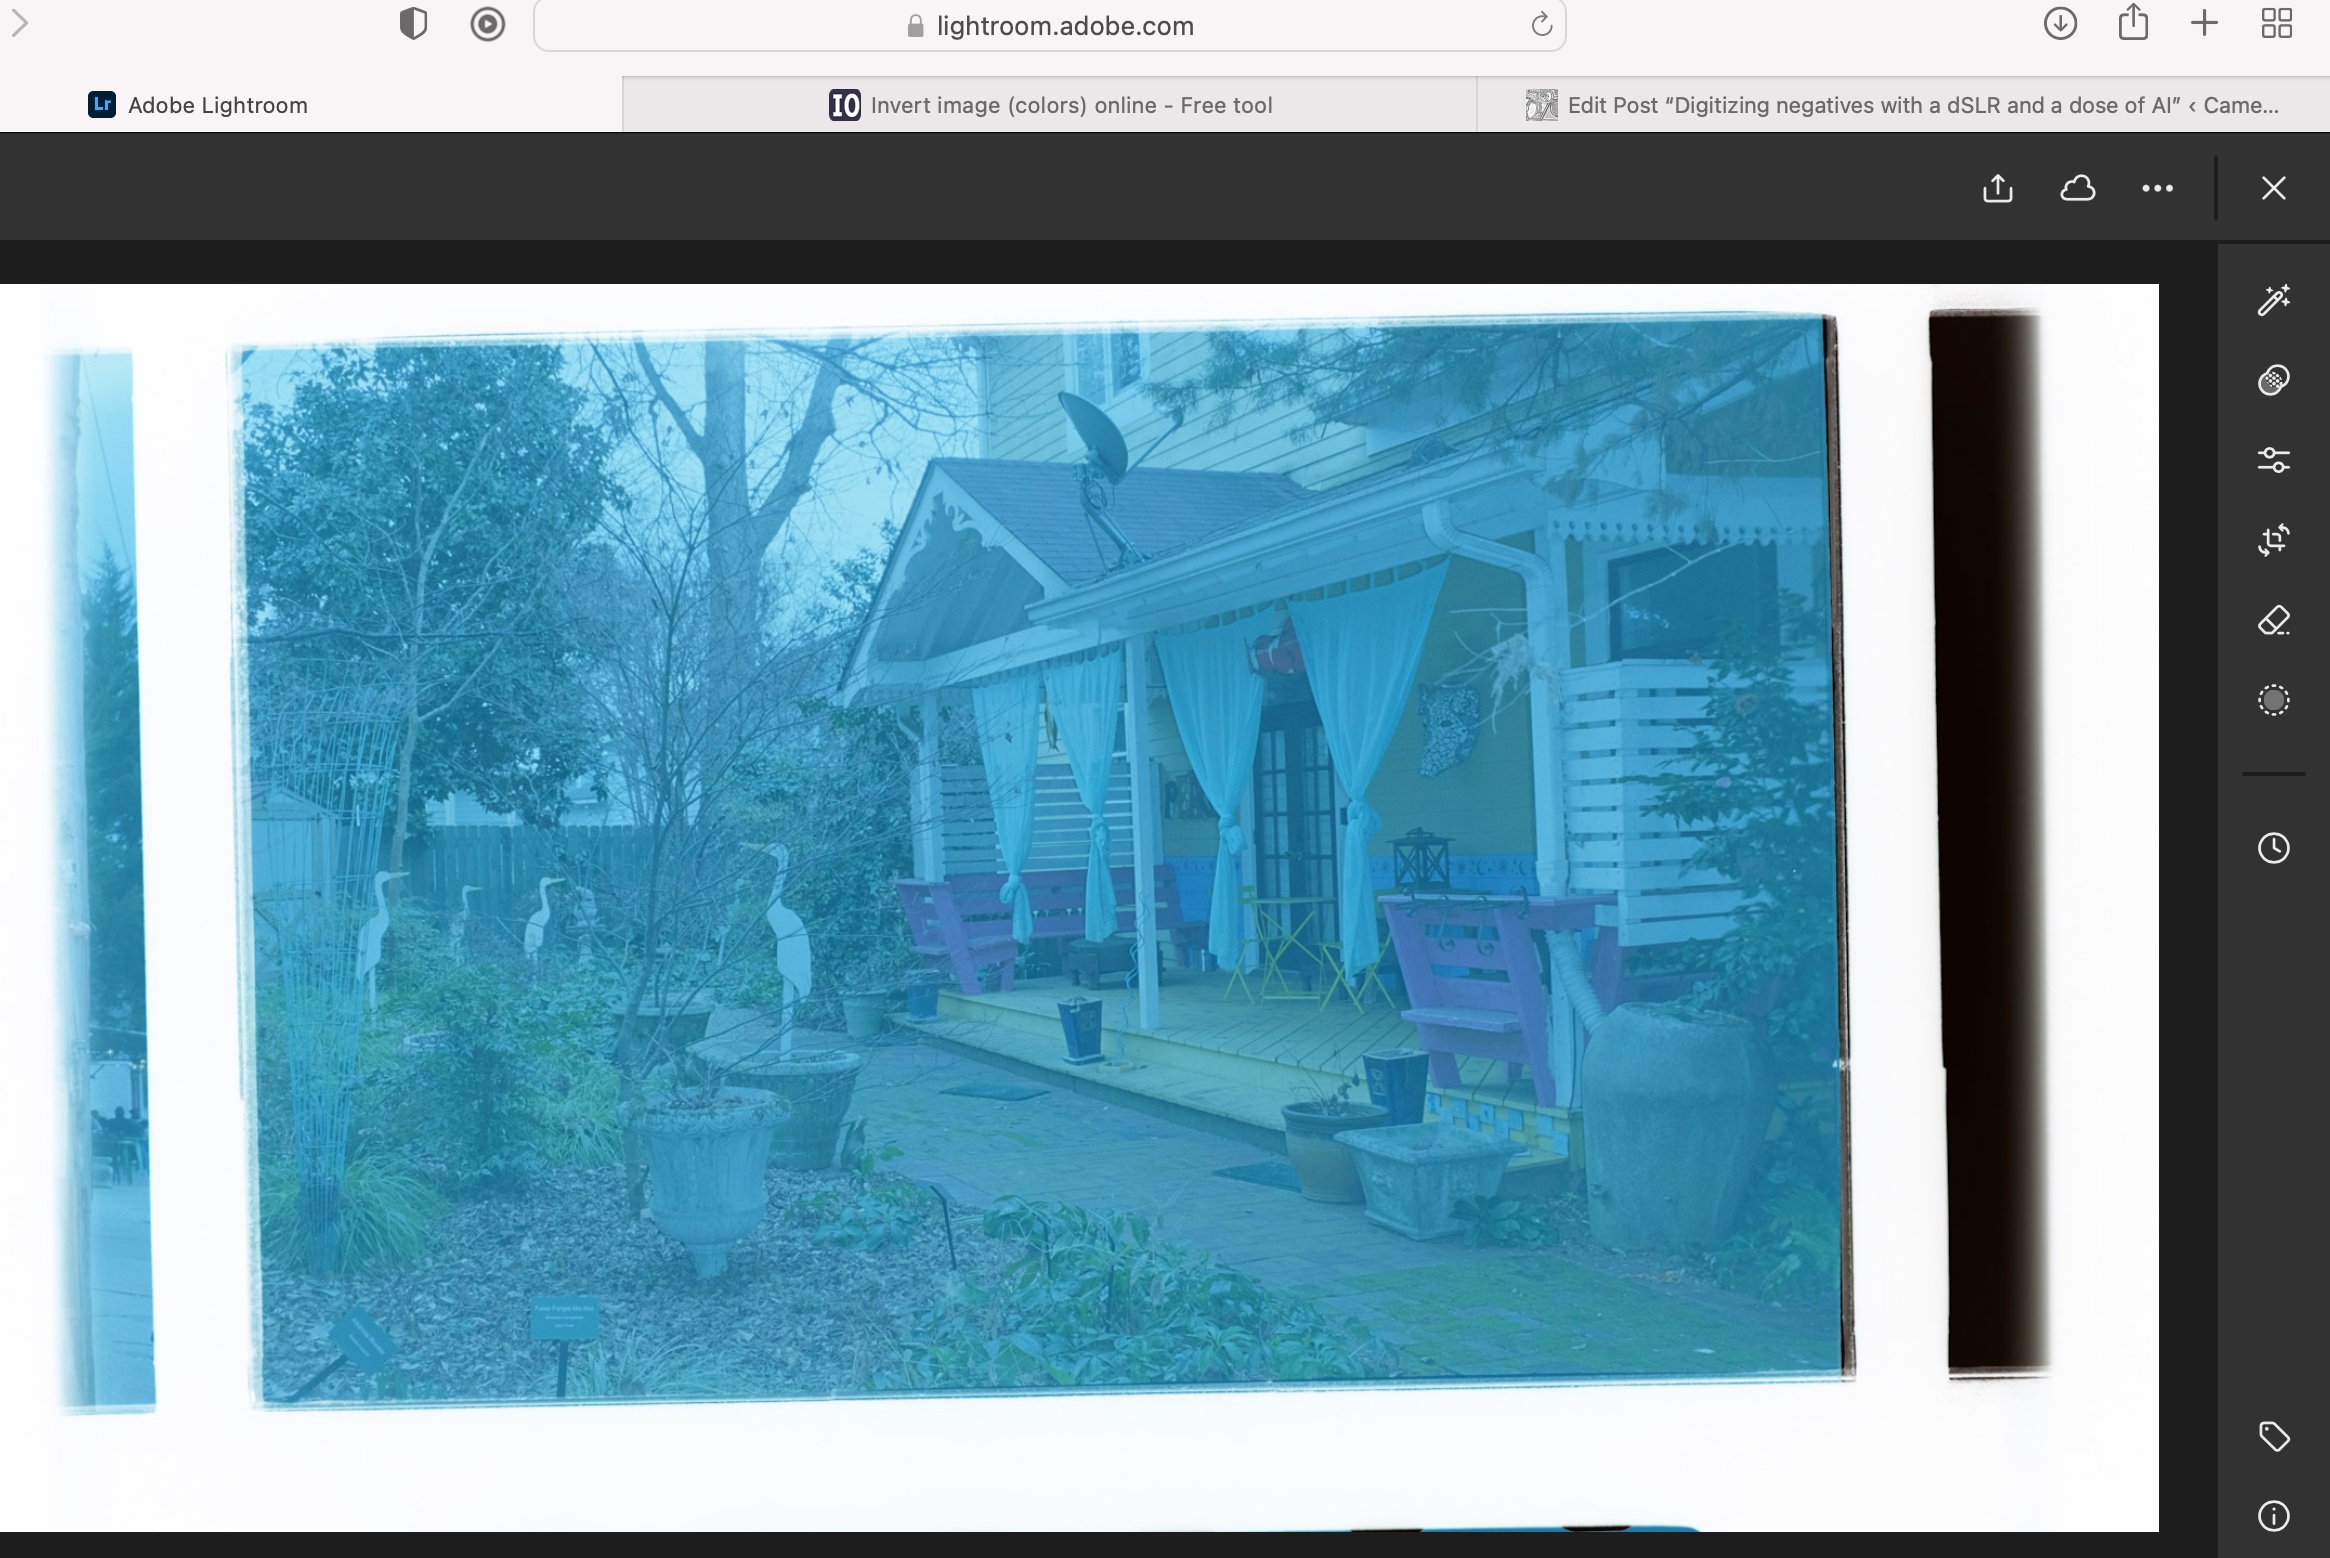
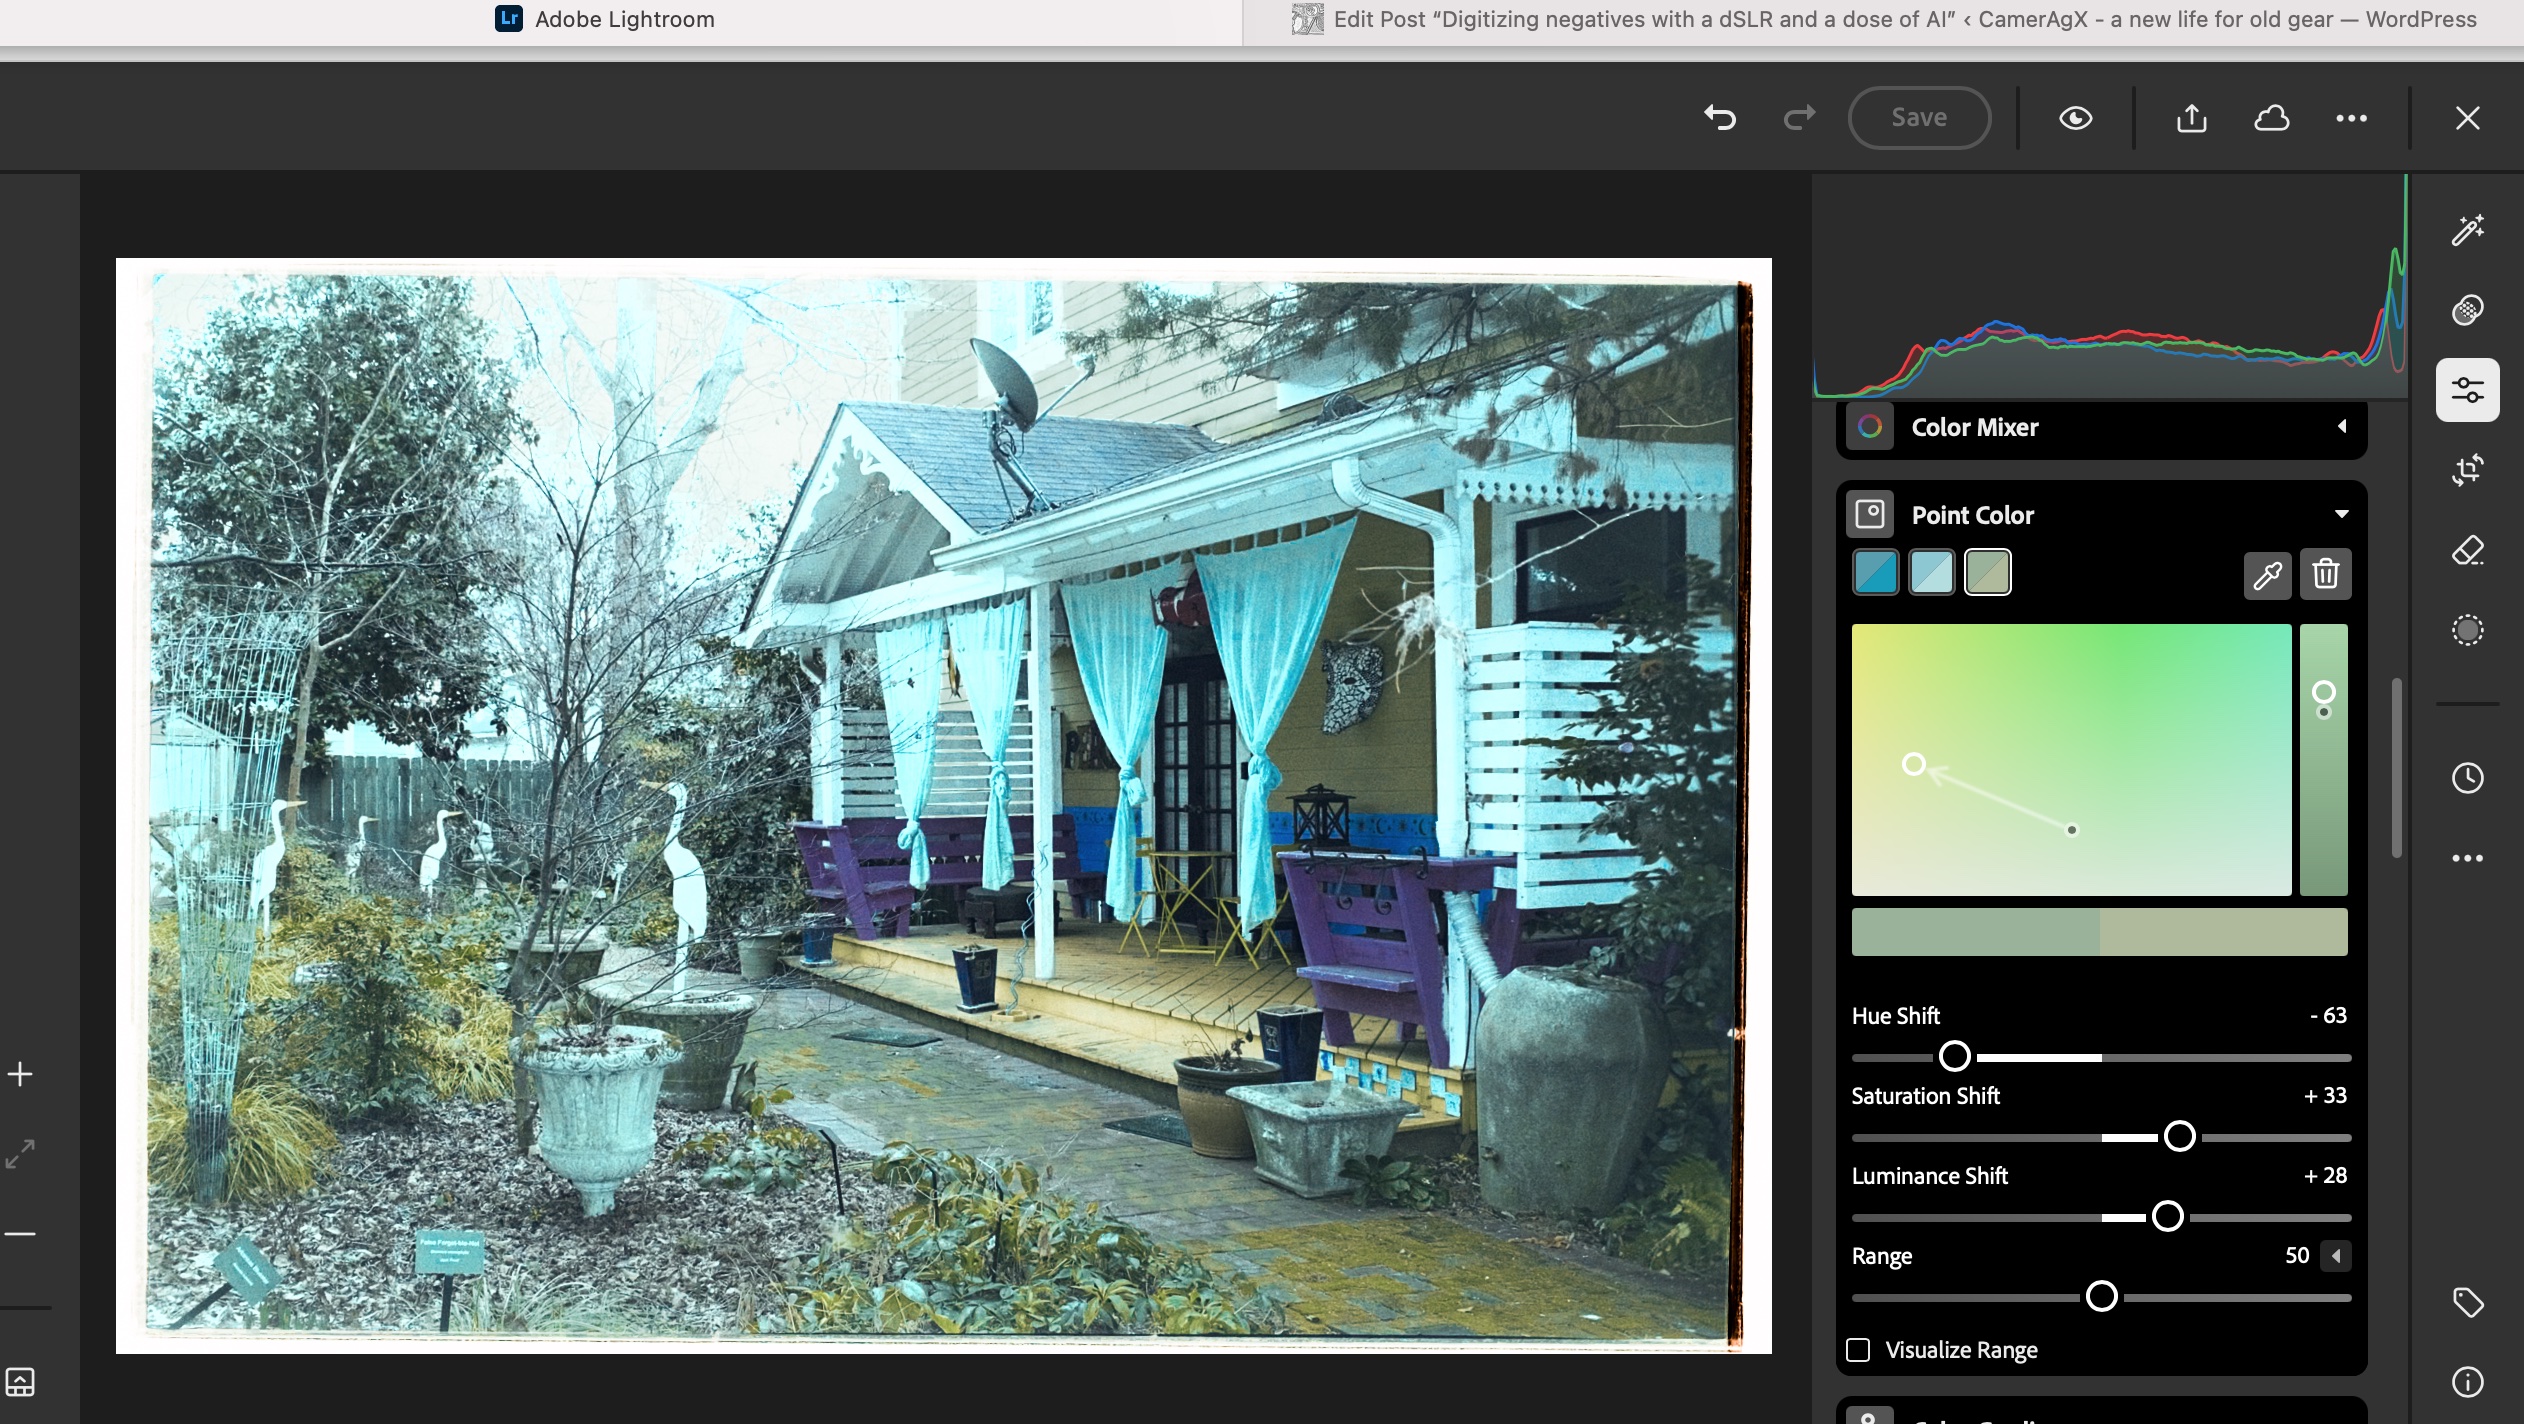
Final touch in Lightroom Mobile
Depending on the pictures, it’s more or less labor intensive. It involves playing with the white balance, the different exposure sliders, and the color channels.
Let’s compare a JJC scan with a pro medium resolution scan
The default resolution of scans performed by the Old School Photo Lab is 2048×3072, delivered as JPEG files. Higher resolution scans can be ordered at an extra cost (resolution: 4492×6774) and they can be delivered as TIFF files.
I’m generally happy with their standard resolution scans (I’ll call them medium res as some labs offer lower res scans as an option) and would only request High Resolution for exceptional pictures I’d like to print in a large format.
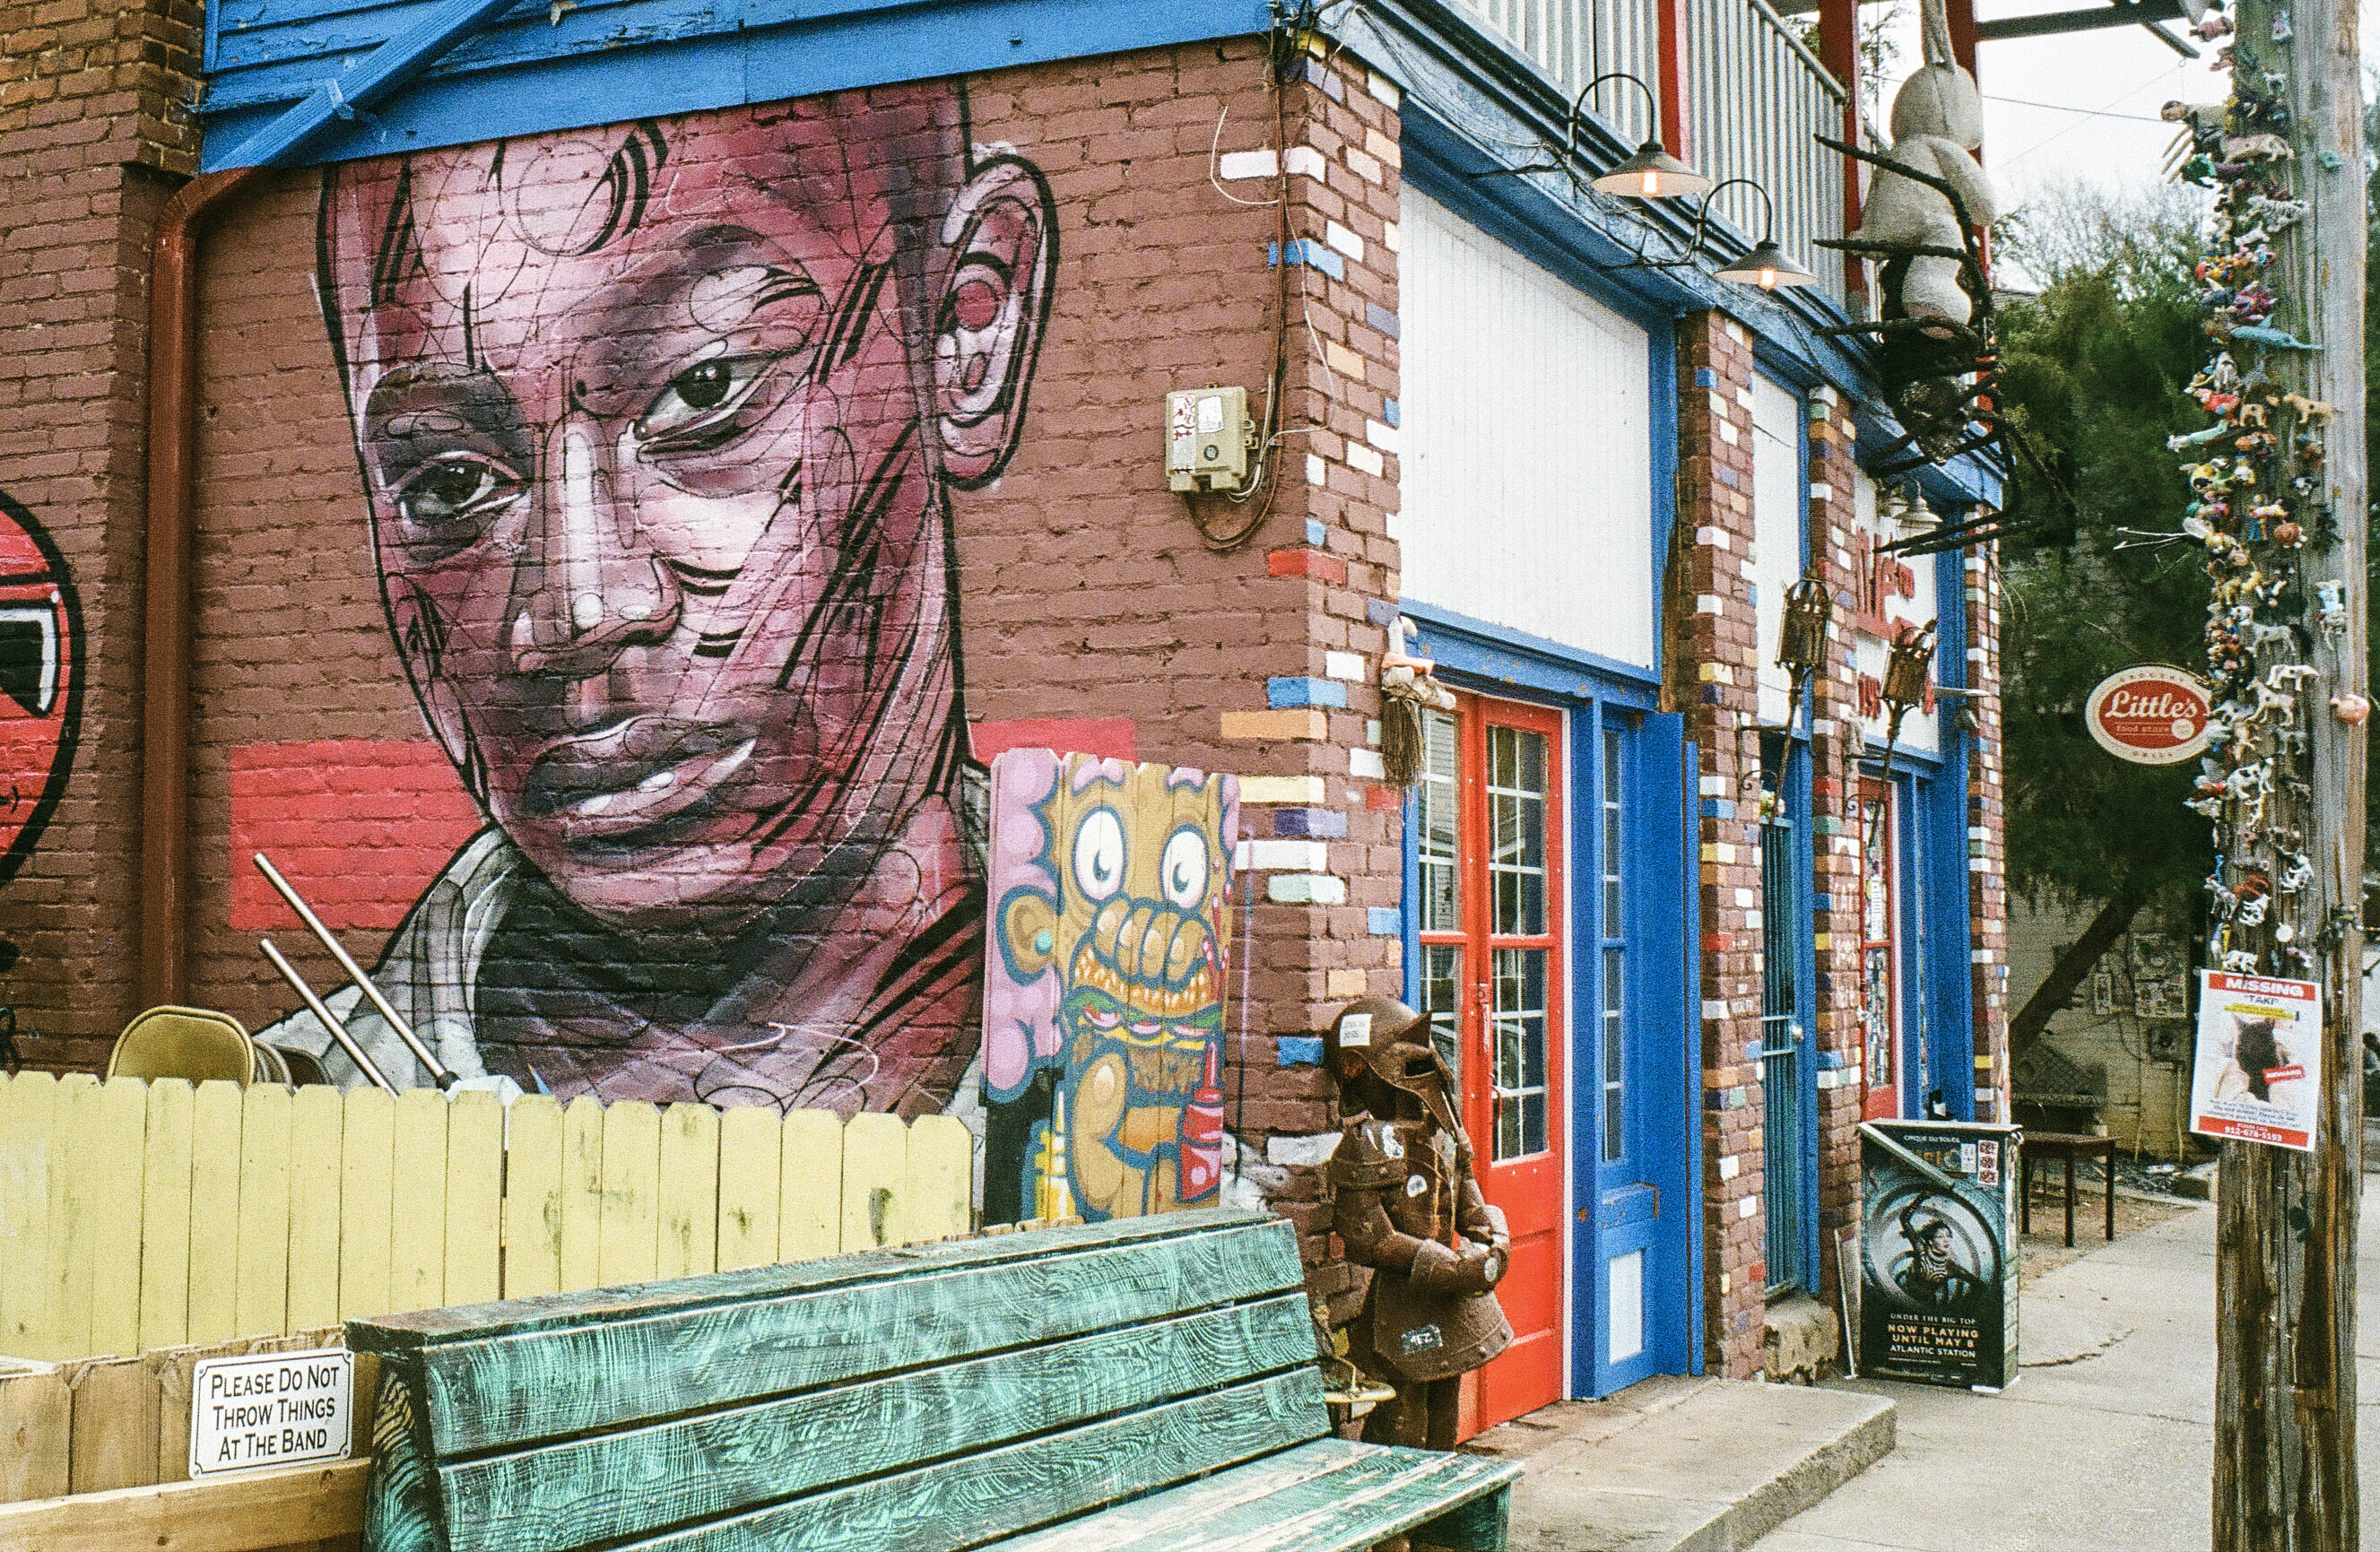
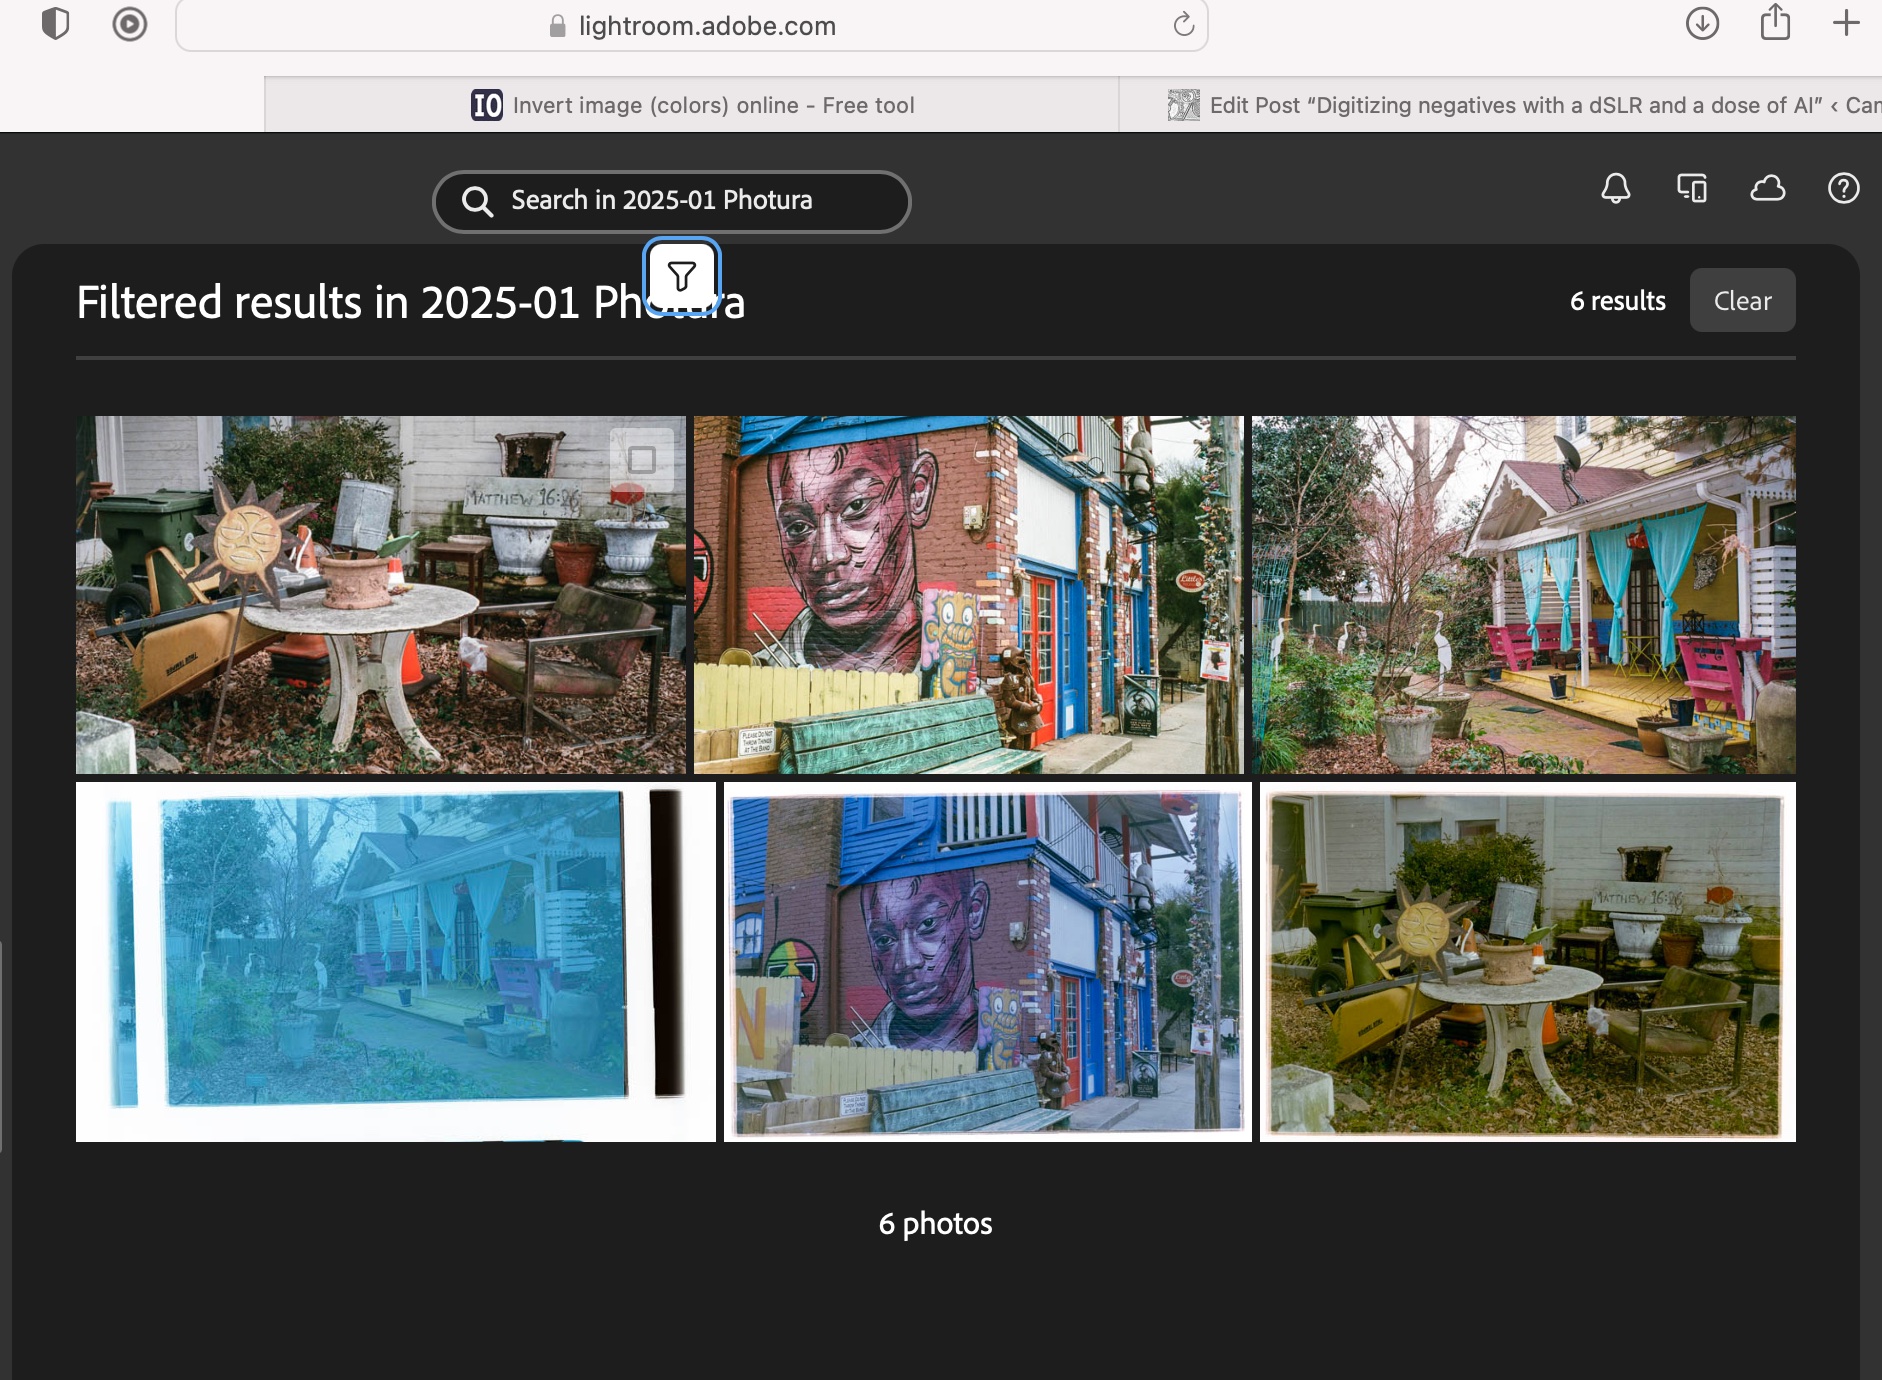
I just received the negatives of a film roll I shot with the Canon Photura a few weeks ago (the scans are made available online as soon as the film is processed, and the negatives returned to you one week later). Let’s compare a scan from a professional lab with an image captured on an APS-C camera with the JJC kit.
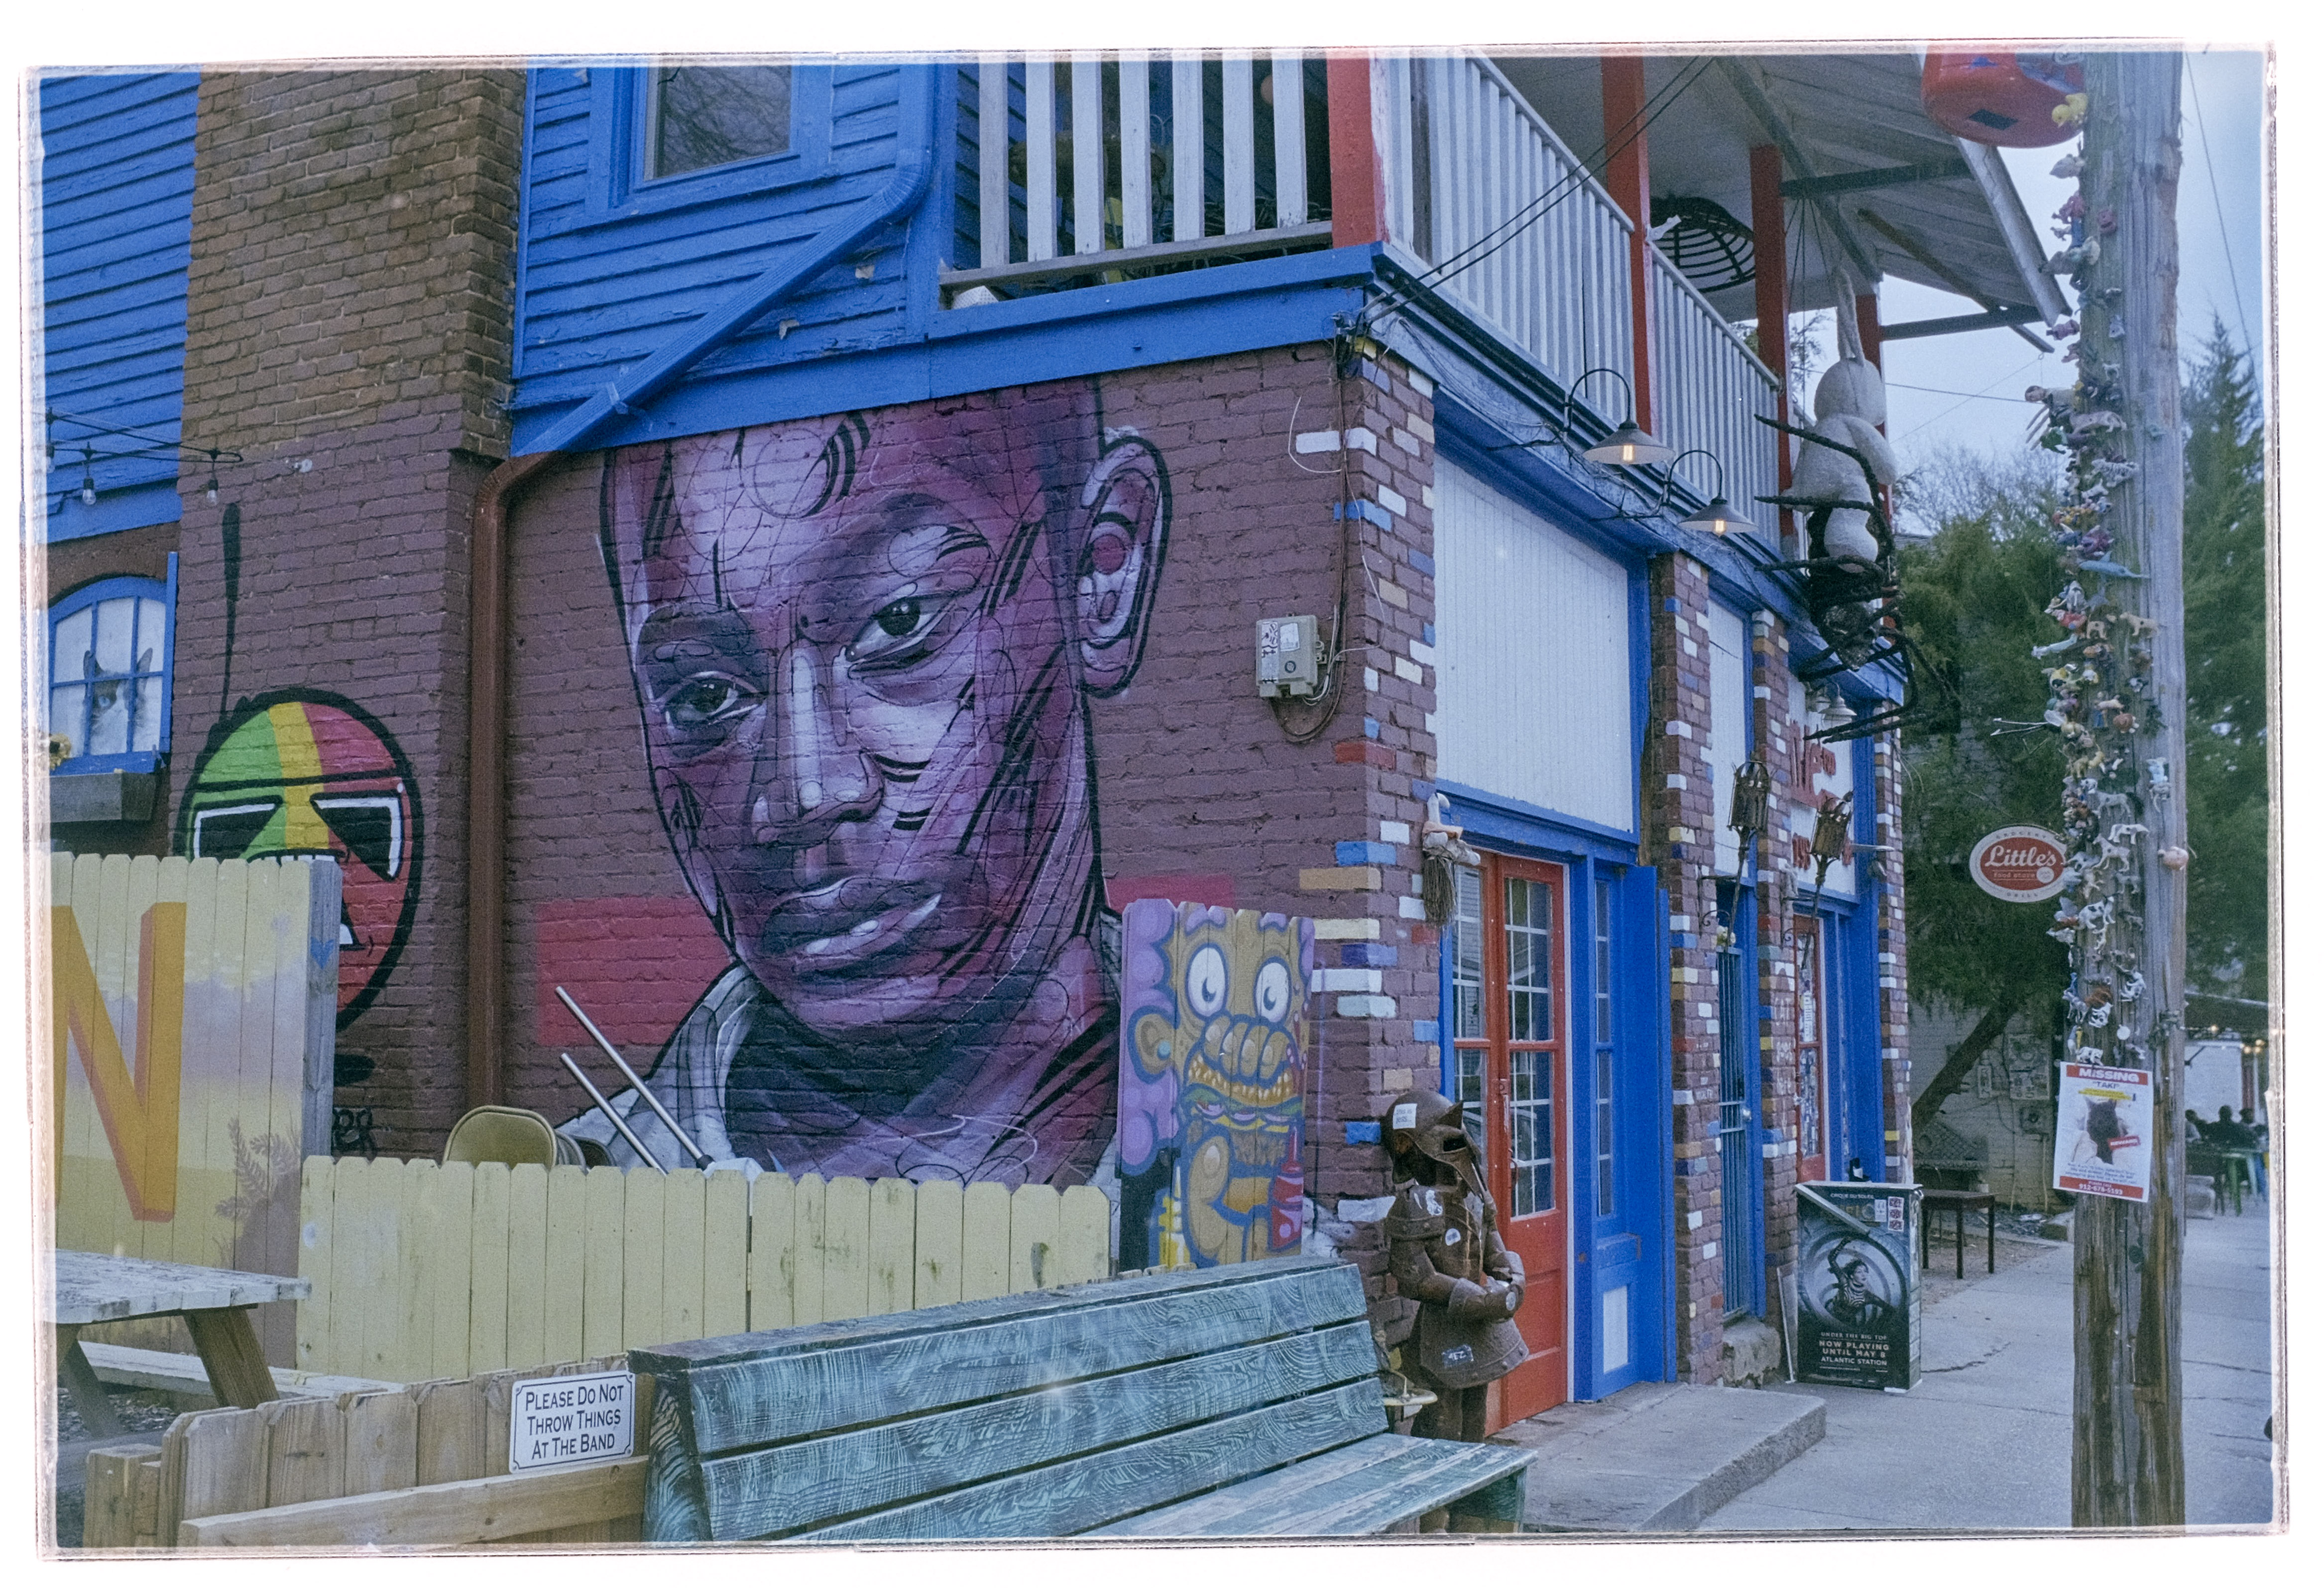
With the JJC kit and my amateur workflow, getting “good enough” results is easy and fairly quick. The DIY scans are very detailed but the colors still a bit off. Getting something as good as a scan on a Noritsu machine requires precision – the focus on the camera has to be perfect, the color balance has to be exact – but with practice and dedication I’m sure it’s possible to get “pretty close”. At the moment, I’m “pretty close” on some pictures, and totally off on others. Practice makes the master, and I lack practice, for sure.
Conclusion
I did not invest a lot in this test (the FDA-S1 kit cost me less than $100.00), I used an undocumented and unsupported setup, I relied on a free online service to invert the scanned negatives, and I edited the pictures with Lightroom Mobile. Enough to give me a feel for the practicality of the solution, but not enough to get the best possible results. I don’t think using an APS-C camera is an issue (the 26 Mpix of the X-T4’s sensor are more than enough to render a 35mm negative), but photographers who digitize their negatives “seriously” use the personal computer version of Lightroom (Lightroom Classic), with a plug in provided by Negative Lab Pro.
As a conclusion
The great thing about the JJC Digitizing kit is that it’s an all inclusive hardware solution, which is flexible enough to be used on cameras and lenses not explicitly supported. The USB powered lightbox is a significant plus, which is missing from the Nikon ES-2 kit.
The two main benefits of a scanning workflow starting with the JJC kit are speed – you can scan hundreds of pictures in an hour – and resolution. The biggest limitation is what comes after – inverting the negative and playing with the contrast slider, the color channels and the S curve to make the image usable. In order to get the best possible results at scale, using Lightroom Classic on a PC or a Mac, with a dedicated plug-in is probably the way to go, but it’s a spend I can’t justify – I’m just an amateur photographer, not a pro.
I’ll use the JJC Digitizing adapter as a quick way to reference hundreds or thousands of negatives, and, to share the ones that matter to them with family and friends, on the messaging apps of their smartphones. If I need a high quality scan of one of those pictures, I will still rely on a pro lab.
(*) More about the different versions of Lightroom (Classic, Mobile, Mobile with Premium Features)

I have been using the Nikon version with the Nikon 60 f/2.8 macro lens to scan slides on my D780 body, and getting very good results. I have been wondering about the JJC version.
Informative review.
Thanks